In the past few years I have started doing a lot of woodworking and it has quickly become a huge passion of mine! Over time I have accumulated a lot of scrap wood from all of the building projects I have completed. What’s a girl to do with all that scrap wood?
Well, this past summer my husband, Brandon, and I wanted to improve our backyard. I thought a planter stand with some height would look nice and also add some more privacy from our neighbors (since we live in a townhouse). For the design, I wanted to use up as much small scrap wood as possible. I’ve always loved the look of chevron wood tables and what better way to use up a lot of scrap wood than to do a chevron style wood design? And that’s what I did!
While determining the best way to build the planter stand, I came across the build plans for a planter box from Shanty-2-chic and I absolutely loved the design of the planter frame. I used their build plans and modified them with different size wood (based on what I had in my scrap pile), putting the planter shelf higher up, skipping the landscaping fabric, and of course adding the chevron style front.
Here is a step by step on how I made the chevron style front:
![]()
![]()
First, I gathered all of my scrap 1×4 wood pieces that were at least half the length of my bottom base board (a scrap 1/4″ birch plywood cut to the size of the front of the planter stand). I cut each scrap 1×4 at a 45 degree angle with my miter saw. Half of the 1x4s I cut the angle on the opposite side. Also, as you can see in the 2nd photo below, I cut two at a time to speed up the process!
![]()
![]()
Once the pattern looked good, I attached my 1×4 boards to the base plywood with wood glue and brad nails. As you can see in the photos below, I added several brad nails because I wanted to make it really secure and because I went a little brad nail gun happy haha. It was my first time using my new Ryobi Airstrike Cordless Brad Nailer and it was fun to use what can I say!
![]()
![]()
The excess wood was trimmed off the base plywood using a circular saw and a straight edge guide (that we made previously).
![]()
![]()
![]()
![]()
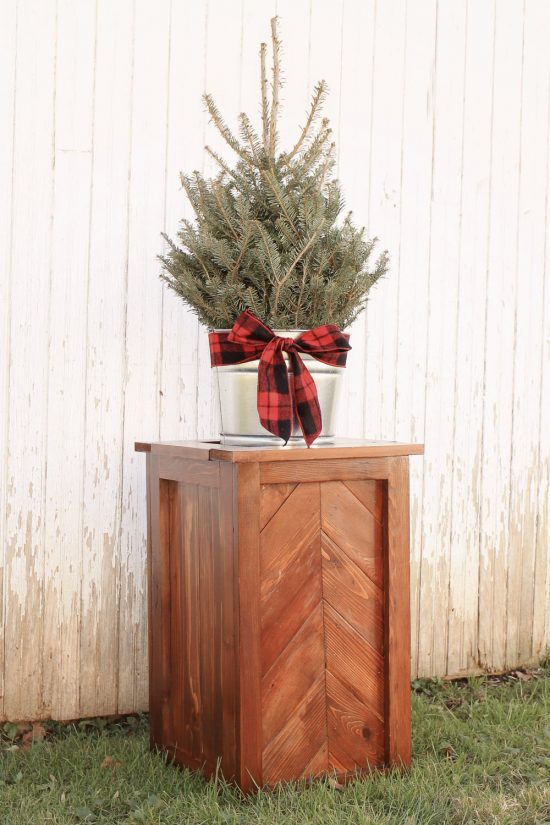
Ta da!
![]()
![]()
Finally, I followed the build plans from Shanty-2-Chic and stained and sealed the wood. I love how it turned out! It was perfect for creating a beautiful floral display this past summer. And now for the holidays, I’ve replaced the flowers with a Christmas tree, giving us some rustic, seasonal decor for the backyard!
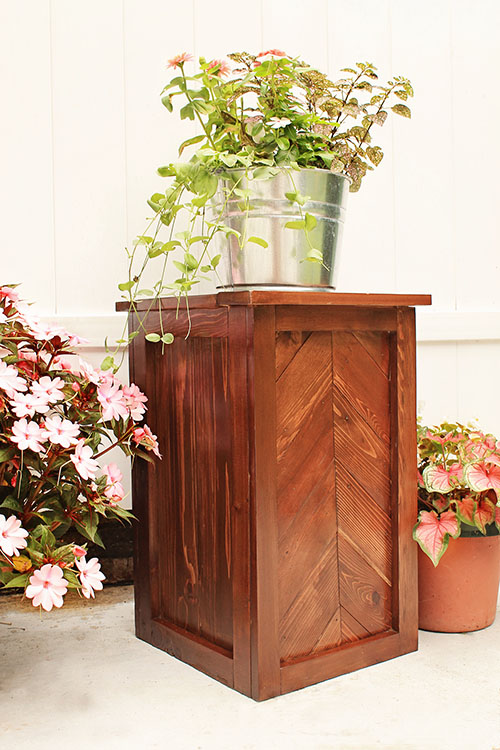
I really enjoy looking at it every time I’m hanging in our backyard or looking out the back door! What do you think? What would you add to the planter stand for your backyard or porch?! Join me on Instagram and Pinterest for my latest projects, fun updates, and sneak peeks!