
Christmas wreaths are a classic piece of holiday decor and I’ve always enjoyed putting one on my front door for the holidays! I love the fresh scent of pine whenever I open the door. In the past, I’ve always just bought a Christmas wreath, but this year I really wanted to make one. It was definitely not as easy as I thought it would be…I think one reason why is because I didn’t use the classic Christmas tree pine branches for the base of the wreath. Instead, I used the type that is really flimsy (not sure what the official species name is), but it’s what grows everywhere around here, so it was easy to find outside!
Here is a step by step tutorial on how I made this cute little DIY rustic Christmas wreath:
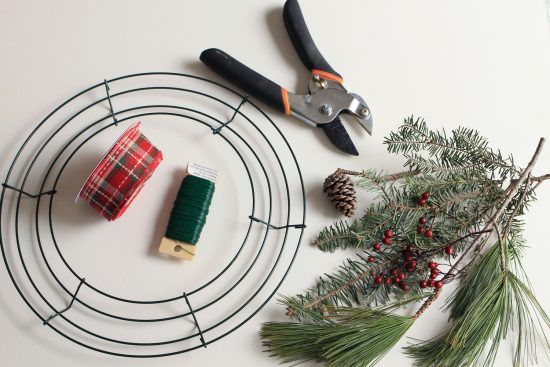
1. Gather your supplies: Wire wreath frame & green floral wire (any craft store will carry these), garden clippers, wire clippers (not pictured), and whatever you want to decorate your wreath with such as pine branches, berries, pine cones, ribbon, etc. You can really add anything to the wreath to make it festive, from ornaments to tinsel and more. To keep it rustic and natural though, I chose to just use pieces found outdoors. The best part about this project is that it cost less than $5 to make! All I had to buy was the wreath form and wire, I had the other supplies on hand, and the decor for the wreath I found outside.
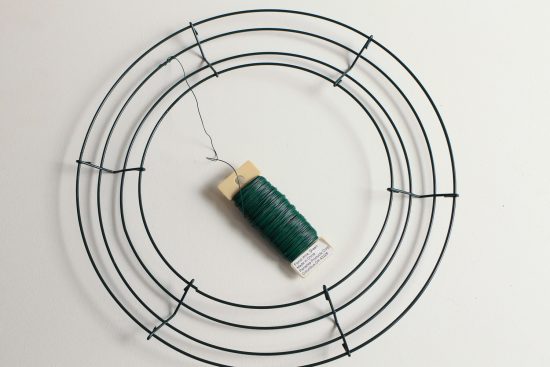
2. Start by wrapping the floral wire around the wreath frame to secure it.
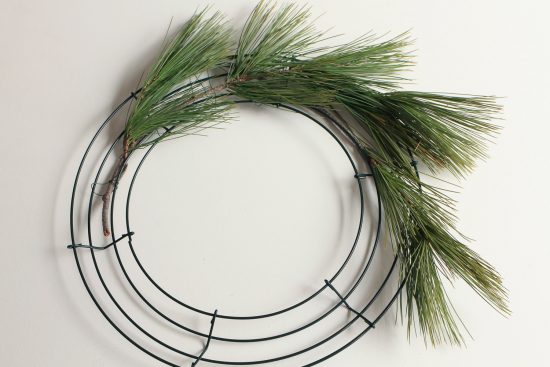
3. Add the pine branches one at a time and wrap around them with the floral wire. Then, add the next branch covering the stems of the first one. Definitely make sure the pine branches aren’t too long, use the garden clippers to trim them if needed (in the photos below I ended up trimming the branches because as you can see the stems were too long). Also, you don’t have to cut the floral wire, you can just keep wrapping it around each branch. However, in some spots I found I needed to use individual pieces of the floral wire to better secure the branches on the frame.

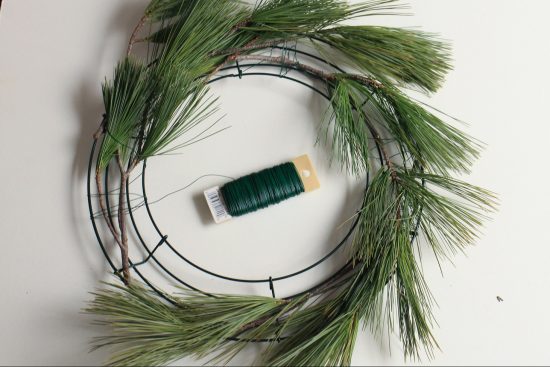
4. Repeat the last step until the wreath frame is full enough with branches. Next, add your berries/pine cones and other decor with the floral wire. I used pieces of the floral wire for this part instead of continuously wrapping the wire around. I don’t have a photo of this part since I was so into the wreath making process at this point and my work space was a mess!
5. Once the wreath is complete, display it somewhere special!

I think my first handmade wreath turned out cute! But, I definitely have room for improvement! I’m planning on trying again in the spring with fresh greenery and flowers! For now, I am enjoying my rustic Christmas wreath on our front door!

This is the last post I’ll be sharing until the New Year! I’ve really enjoyed the beginning of this blogging journey so far! Join me on Instagram and Pinterest for my latest projects, fun updates, and more! I am excited to share more in 2016, get ready for some woodworking projects soon!