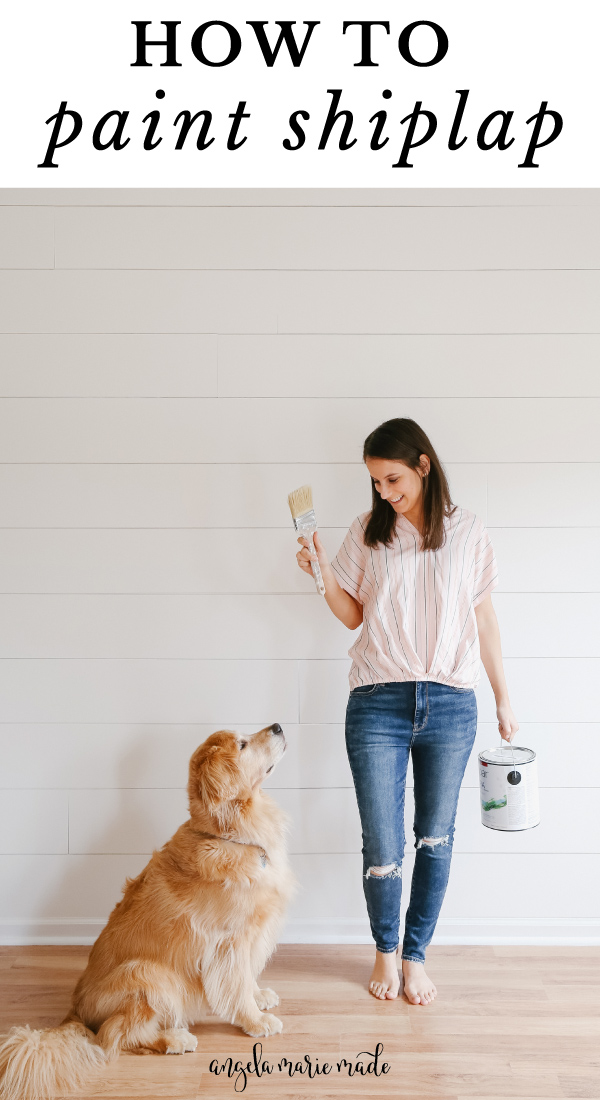
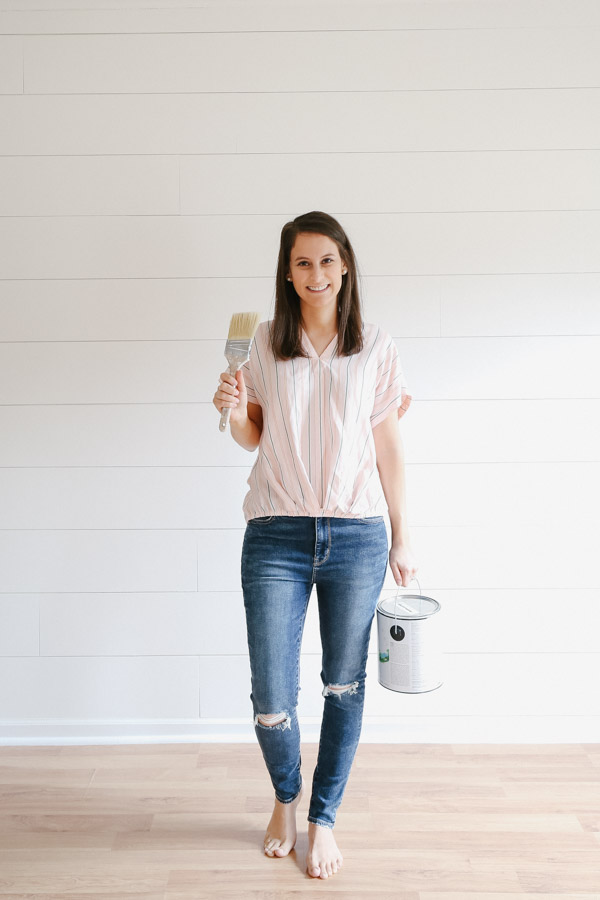
Learn the best way how to paint shiplap, favorite shiplap paint colors, and my best tips for painting shiplap!
I love adding painted shiplap to a room and today I’m sharing an in-depth tutorial on how to paint shiplap!
Previously, I shared how to install shiplap walls when I added two shiplap accent walls to our previous living room at our old house.
I’ve also shared how to install vertical shiplap walls wainscoting, a DIY shiplap ceiling, and a vertical shiplap wall from floor to ceiling!
I love adding painted shiplap on furniture and doors too like our DIY IKEA Billy bookcase hack with shiplap, double barn doors with shiplap, and faux barn door with shiplap.
Well, I missed having a shiplap wall so much in our second house that I knew I needed to add one in our home! Shiplap is a great way to add character or a focal point to a room.
Over the weekend, Brandon and I added a large, accent wall to one of our living room walls and I just love it! Its instantly transformed the room and added that extra cozy, welcoming factor.
I briefly went over the shiplap painting process in my shiplap installation post. But, I feel like there are a lot of details I can share more about on how to paint shiplap that would be helpful now that this is the 9th time I’ve installed a form of shiplap!
I do recommend reading over the how to install shiplap post first if you are planning to add painted shiplap walls, so this tutorial will make the most sense!
Types of shiplap
This how to paint shiplap tutorial can be applied to any type of shiplap, including faux shiplap or real wood shiplap boards. Also, it can be used for painting shiplap walls, vertical shiplap, shiplap accent features, shiplap doors, furniture with shiplap, etc.
Note, this post contains some affiliate links. I may earn a commission if you shop those links (at no cost to you). Thank you for supporting my small business. For more info see my disclosures here.
How to Paint Shiplap Walls
Materials:
- Paintable Caulk
- Spackle (I use this lightweight spackle) or wood filler
- Sandpaper
- Electric Sander (optional)
- Paint (see step #1)
- Primer (depends on shiplap material – see step #6)
- High Quality Paintbrush
- Paint Roller and Roller Frame
- Paint Roller Extension Pole
- Paint Roller Tray
- Drop cloth (optional)
- Painter’s Scraper Tool (optional)
How to Paint Shiplap Video Tutorial:
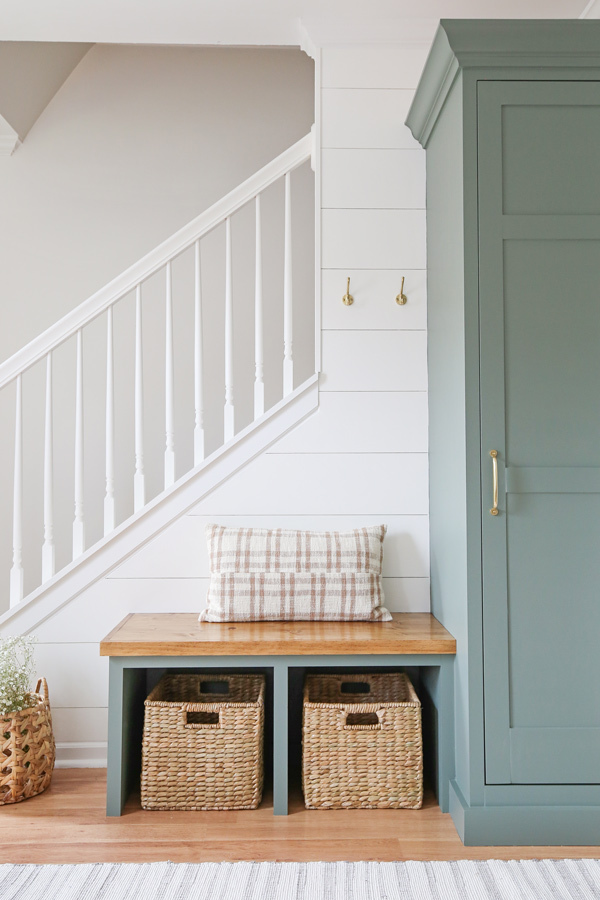
You can see this painting shiplap tutorial in action in my entryway makeover video where I used the below painting method on our DIY shiplap entryway wall.
Subscribe to my YouTube Channel here!
1. Pick your shiplap paint color and sheen
When it comes to picking paint colors, I feel like I could write a huge post just about this topic! But, I am sharing tips for picking a color, the shiplap paint color we used, and a list of my favorite go to shiplap paint colors below.
Tips for picking shiplap paint colors
- Pick what ever color paint you love for your shiplap wall, just make sure to get a sample first and test out the paint color!
- You can do white paint or even a super dark paint color, both look equally as great on a shiplap wall or shiplap accent feature!
- Consider a contrasting shiplap paint color compared to furniture or walls next to the shiplap. For example, a white shiplap wall with a dark green built in cabinet.
Shiplap paint color I chose for our shiplap living room
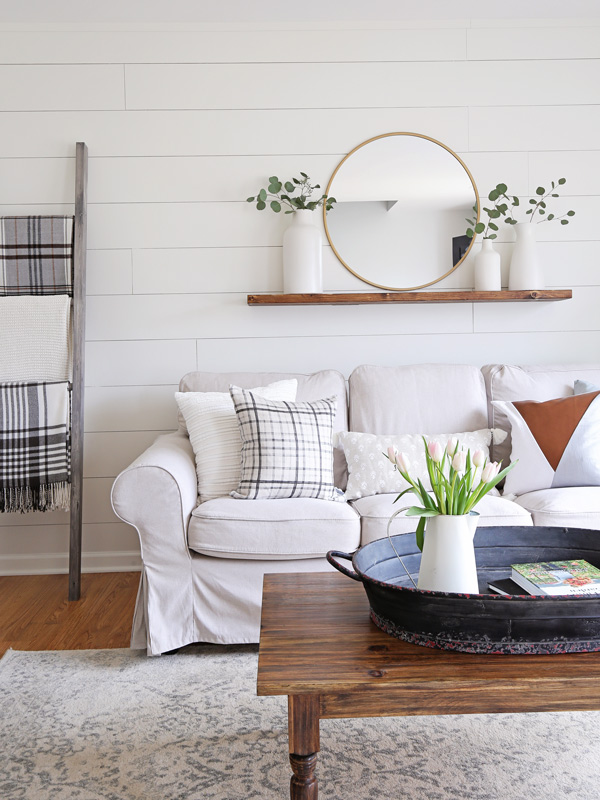
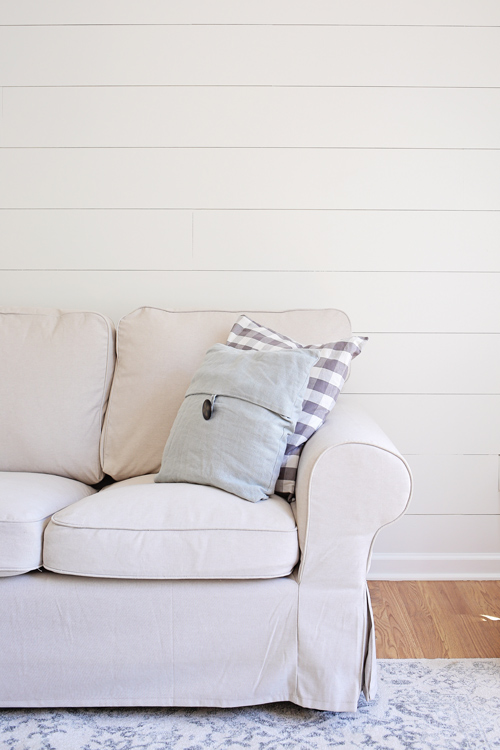
In this tutorial, the paint color I used for our shiplap living room wall is Simply White by Benjamin Moore in eggshell and I love how it turned out! It’s a brighter, fresh white, but not a cold white.
In my modern rustic living room makeover (from our first home), I used White Dove by Benjamin Moore and that was a deeper, warmer white which also looked great on the shiplap (pic below)!
These are my top two favorite white shiplap paint colors and I think they look great in many different spaces!
But, here are all of my current favorite colors…
7 Favorite Shiplap Paint Colors
- Simply White by Benjamin Moore
- White Dove by Benjamin Moore
- Alabaster by Sherwin Williams
- Mindful Gray by Sherwin Williams
- Blue Note by Benjamin Moore
- Tricorn Black by Sherwin Williams
- Swiss Coffee by Benjamin Moore
As I said before, we used Simply White by Benjamin Moore in this how to paint shiplap tutorial as well as our shiplap entryway wall. And we used White Dove by Benjamin Moore for the DIY shiplap walls in our modern rustic living room.
Alabaster by Sherwin Williams is another great white shiplap color and works really well in spaces with no natural light like our DIY shiplap ceiling.
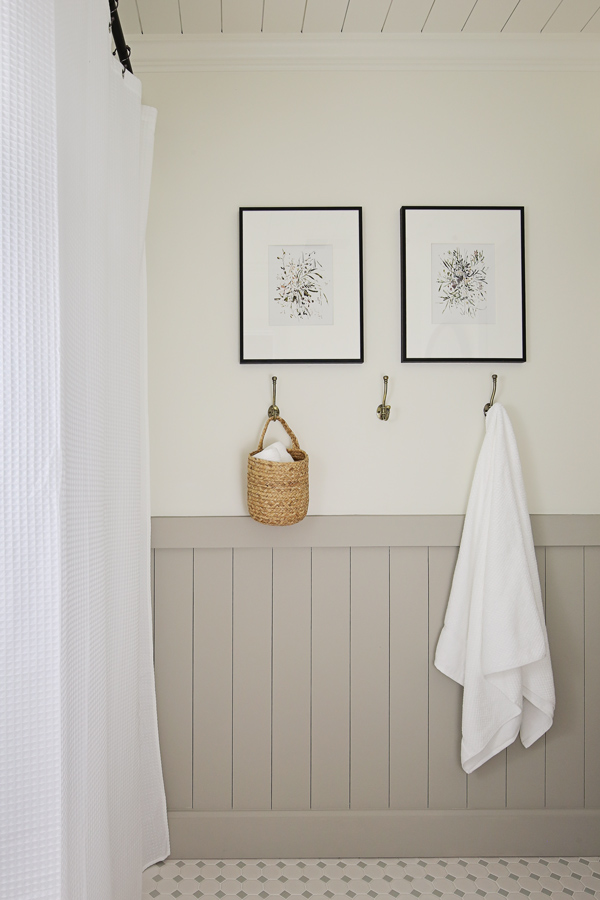
I used Mindful Gray by Sherwin Williams on our DIY vertical shiplap in our guest bathroom makeover. It’s the perfect warm gray and greige color.
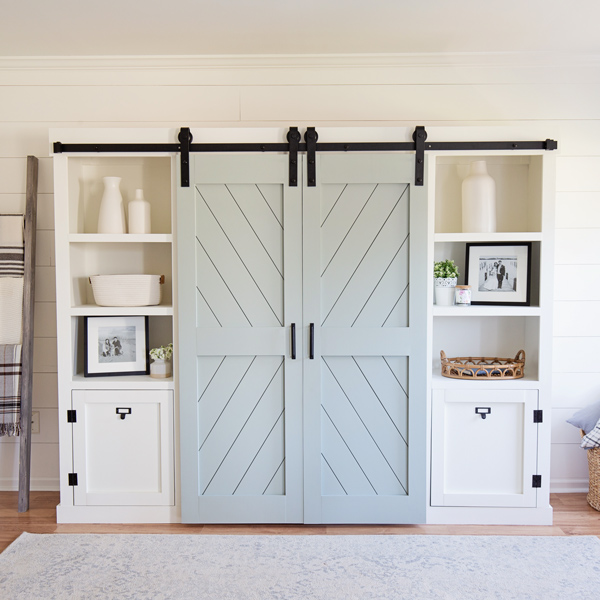
Blue Note by Benjamin Moore is a beautiful, dark navy color. You can see it on our DIY BILLY bookcase hack with shiplap.
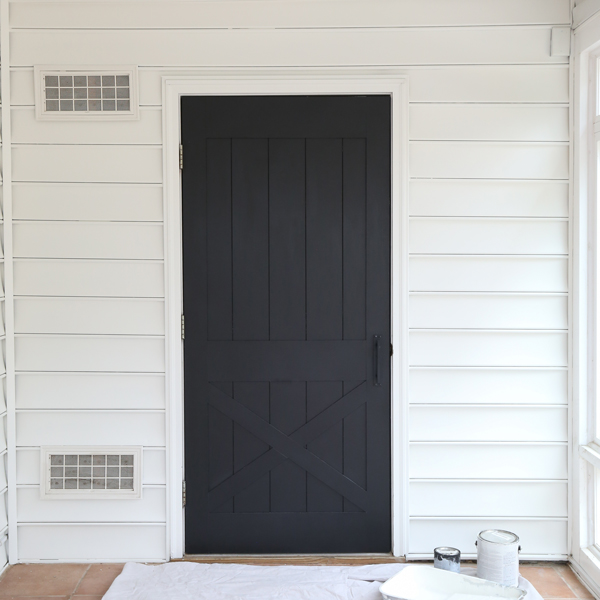
Tricorn black is the perfect black paint color and not a harsh black but a go to black that looks amazing on doors, furniture, and walls too! We used it on the shiplap of our faux barn door.
Shiplap Paint Sheen
As far as what sheen of paint to use for painting shiplap, I prefer a matte or eggshell sheen as they are not as shiny as satin and semi-gloss. I opted for eggshell so the wall is still easily wipeable if needed.
The more shine there is, the more wipeable a paint will be.
2. Prep your shiplap boards before installation
For the best results, When it comes to painting any kind of wood or staining wood, the key to a beautiful finish is in the preparation of the surface which is sanding the wood!
Many types of real shiplap boards come pre-sanded and pre-primed, so that will save you the time in this step as you won’t have to sand or prime!
The real shiplap we used for our DIY shiplap ceiling was pre-primed and ready to paint shiplap.
If you are using the faux shiplap installation method with 1/4″ sheets of plywood that I used for this shiplap wall, then the plywood I used was pre-sanded and pre-primed on the surface.
However, along the sides of the plywood strips, where the saw cut it, it was rough! These rough sides need to be sanded.
You can use 120 or 150 grit sandpaper or sanding block and hand sand the edges or use an electric sander or palm sander to sand the wood and make the edges more smooth. I love using my corner sander to make this step go quickly!
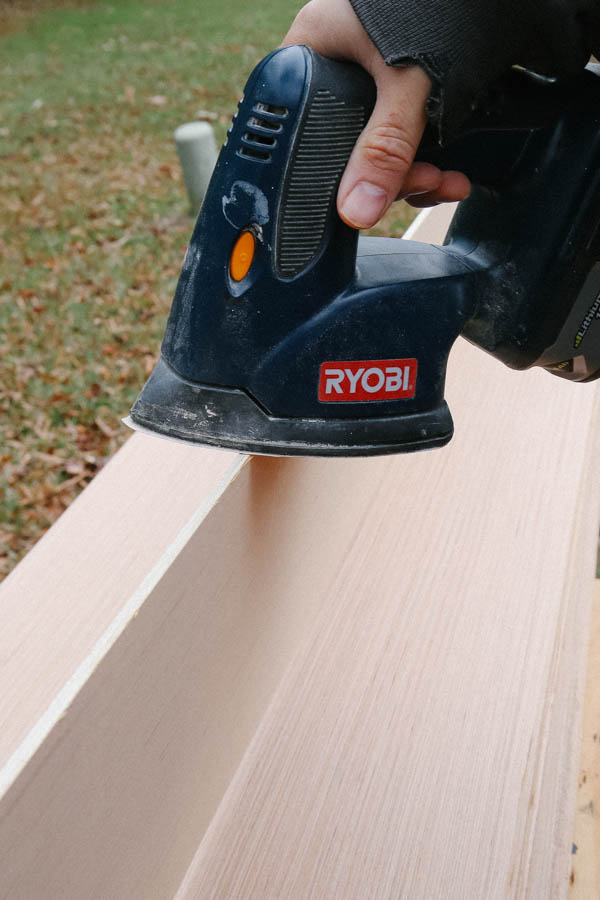
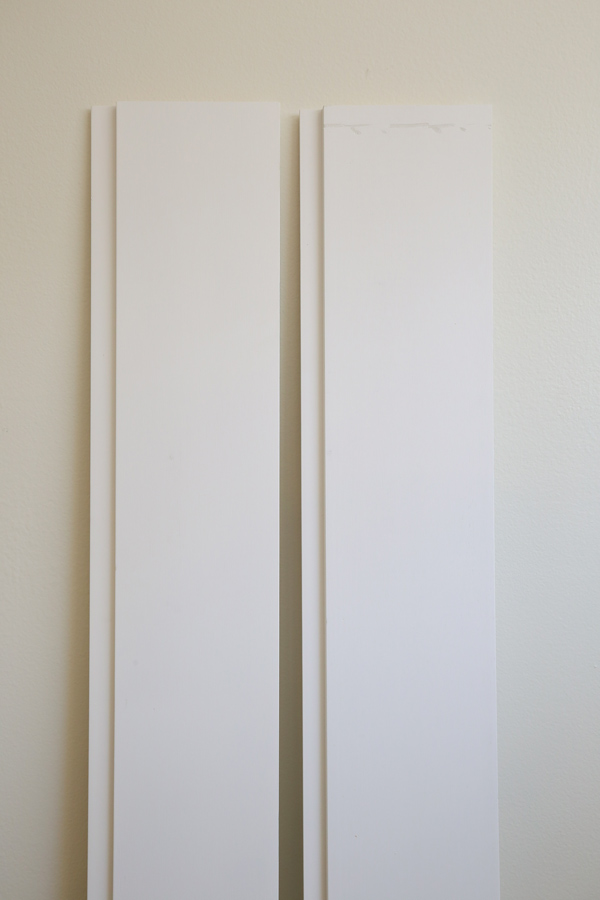
If you are using a type of plywood or shiplap board that is not pre-sanded on the surface (like these v-groove shiplap style boards), I recommend using an electric sander with 80 grit sandpaper, followed by 120 grit, then 220 grit.
You can see more details on how to sand wood in my how to sand wood tutorial.
Also, if your wood is not pre-primed and it is raw wood, you should prime it before painting (discussed in step #6 & #7).
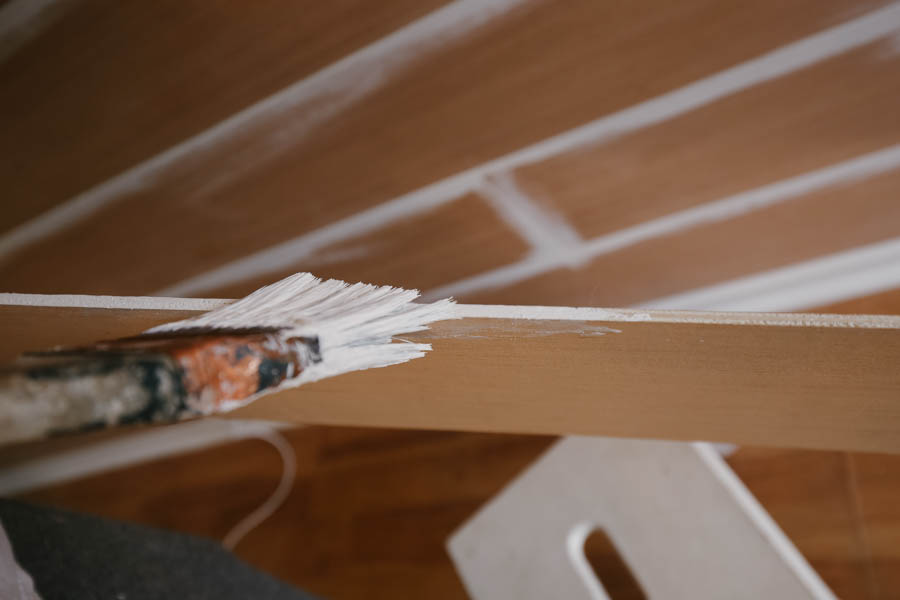
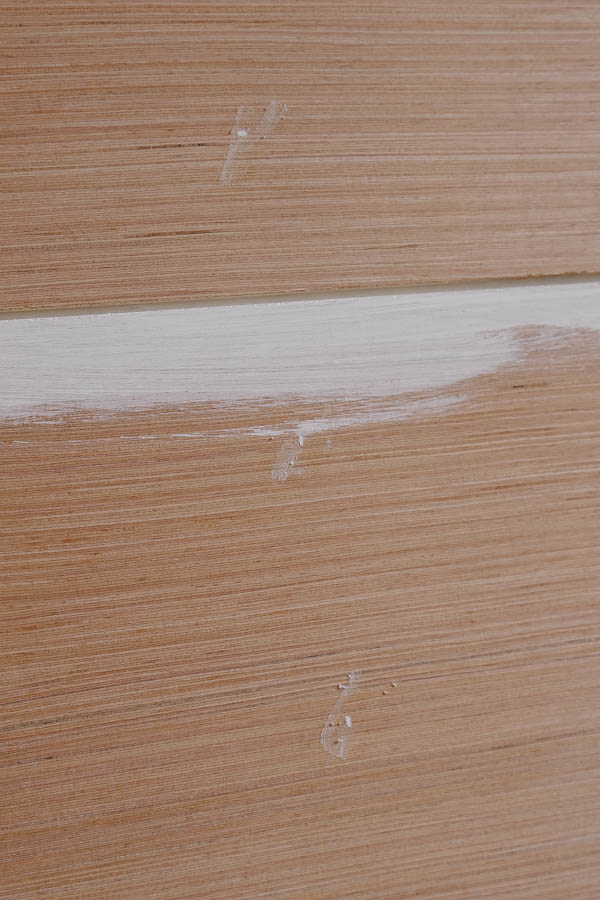
3. Paint shiplap board cracks during installation
The shiplap crack or shiplap gap should be painted as you install the shiplap. This is the best way to paint shiplap.
Tip: Once you begin painting, if you want to protect your floors, use a drop cloth or old sheet.
How to paint shiplap cracks
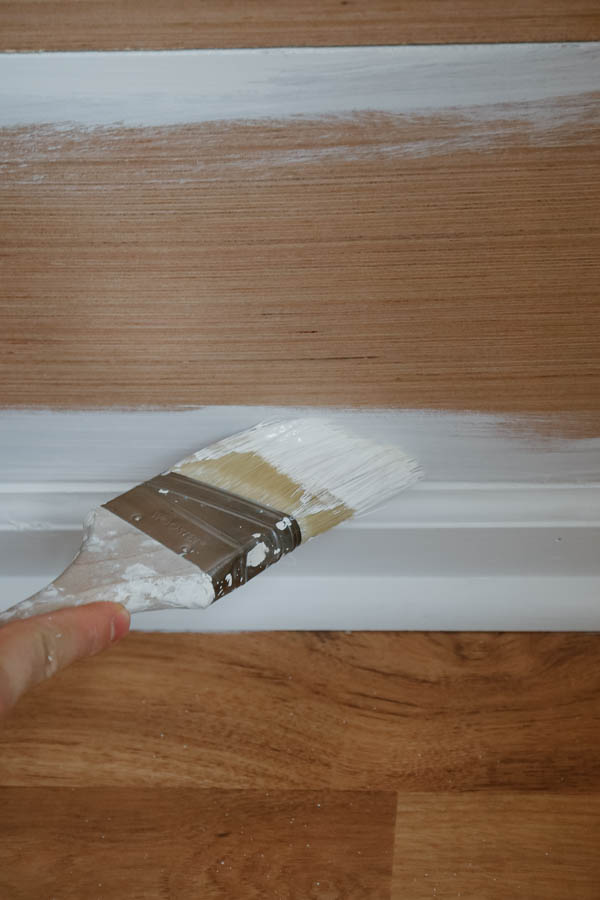
As you begin installing your shiplap boards to your wall, use a paint brush and paint the shiplap cracks or gap lines as you go. Do this whether you are using real shiplap boards (with the tongue and groove edges) or the faux shiplap boards with plywood.
It’s very difficult and more time consuming to try and paint between the 1/8″ shiplap grooves after they are installed on the wall, trust me I’ve tried! And it looks funny if there is a different color paint between the boards too!
Tip: If you don’t want to paint the gaps as you go or if you forget, it’s ok! Use an angled paint brush to paint them!

Also, I like to paint one of the side edges too of the shiplap boards as I go so the board transitions aren’t as obvious.
Another tip is that once you start to get to the top of the wall, you can start painting the bottom of your shiplap board edge before installing on the wall.
I definitely forgot to do this on a few boards, but it really looks nice and less shadowy since these boards are at eye level.
You can see this all in action in my entryway makeover with DIY shiplap video where we installed and painted a shiplap accent wall just like this one!
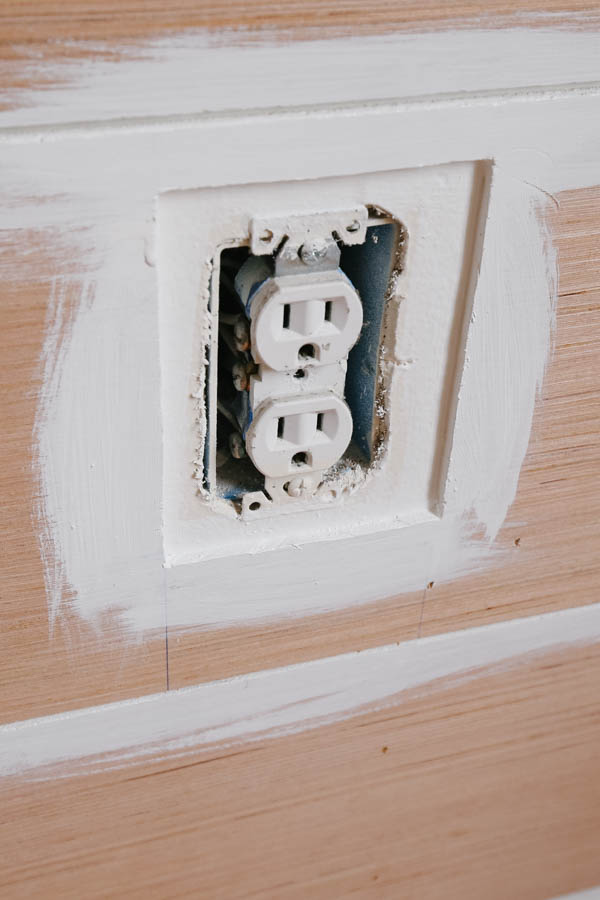
4. Paint around wall outlets
If you have any outlets on your wall, remove the outlet covers.
Then, paint around the outlet with your brush. Be careful to not get any paint on the actual electric outlet.
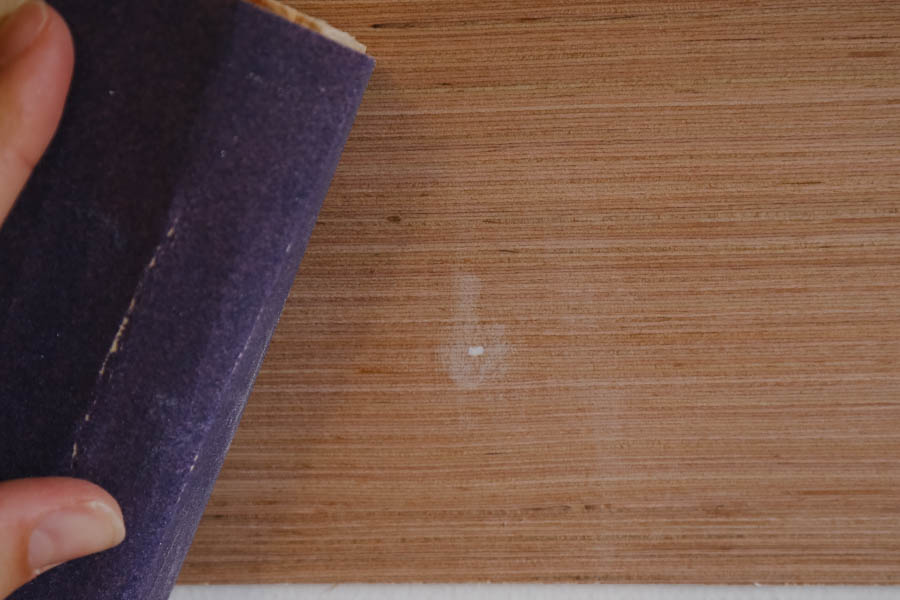
5. Fill and sand nail holes
Fill all the nail holes in with a lightweight spackle or wood filler. I used this lightweight spackle.
Next, sand each nail hole so that the surface is smooth and no excess spackle remains.
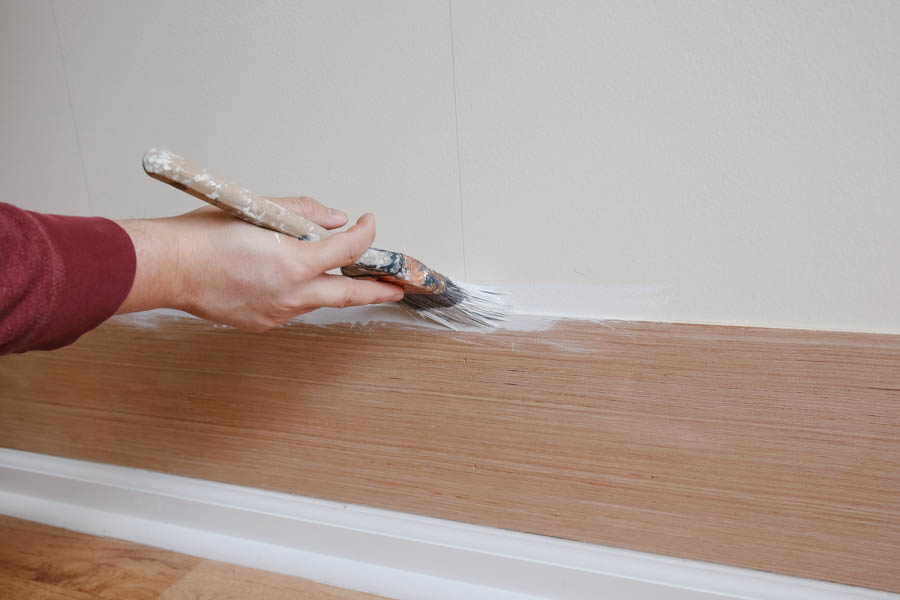
6. Finish shiplap wall edges with caulk, primer and or paint
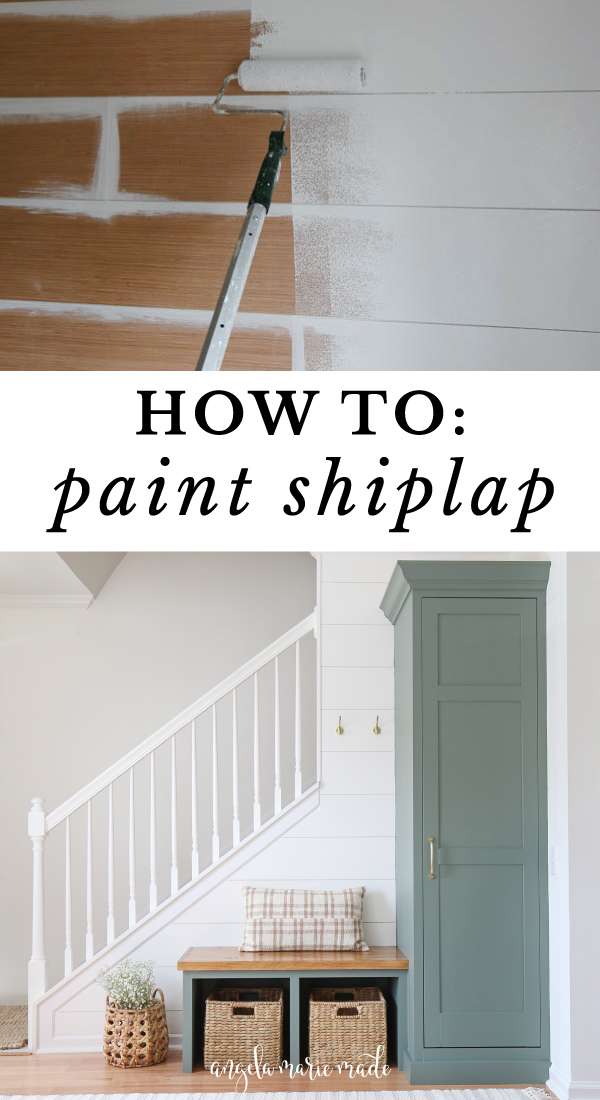
Once your shiplap wall is installed and nail holes filled/sanded, it’s going to look something like this…

Before you get to the best part (rolling), there are two more important steps!
The edges of the shiplap wall need to be caulked (with paintable caulk) wherever there is molding and then they need to be “cut in” with the paint brush.
For my wall, we caulked the gaps along the inside wall corners (where we installed quarter round molding), the floor molding, and the top crown molding.
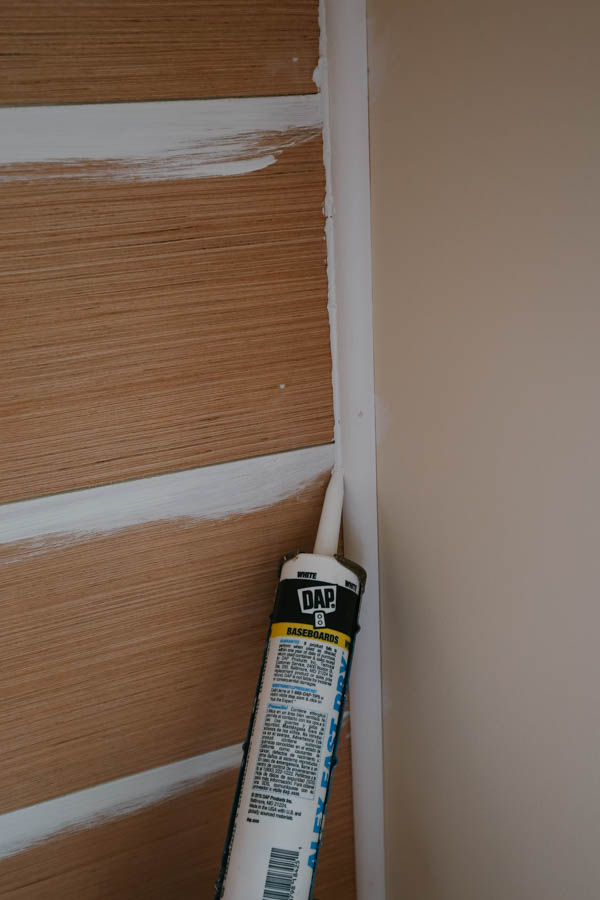
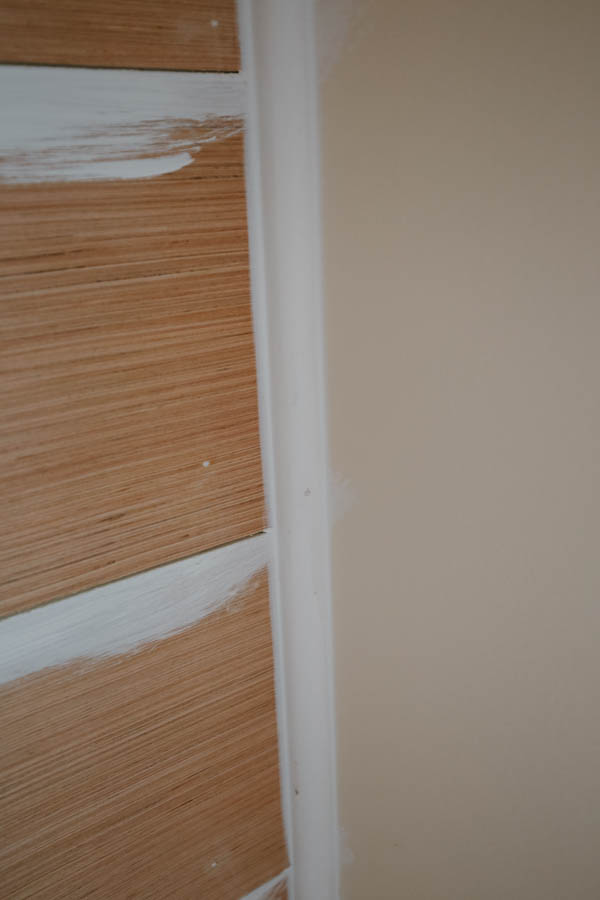
Then, cut in your wall edges (top, bottom, sides) with your paint brush since your roller will not be able to get into these tight spots.
Tip: If you are unable to do neat paint cuts, then use painter’s tape along the edges for a clean paint cut!
After this first paint cut dries, repeat with a second coat of paint.
Also, if you are going to be painting your surrounding walls and all trim after this (like we are), then you don’t need to be super neat with your cuts or use painter’s tape.
**Note, if you removed your baseboard molding (or any other molding), then you don’t need to cut in the bottom area as your molding will cover up the bottom edges.
When to use primer for painting shiplap
If you are using bare, raw wood that is not pre-primed, make sure to do your paint brush edge cuts with primer first, then the paint cuts.
If your shiplap is pre-primed like in our DIY shiplap ceiling or in this tutorial where I used ready to paint plywood, it does not need primer.
Further, even if a paint has primer in it, the bare wood should still be primed for the best coverage, especially if the wood has a lot of knots.
You can see all of the primer steps in action in my entryway makeover with DIY shiplap video where I used bare plywood for faux shiplap that needed priming.
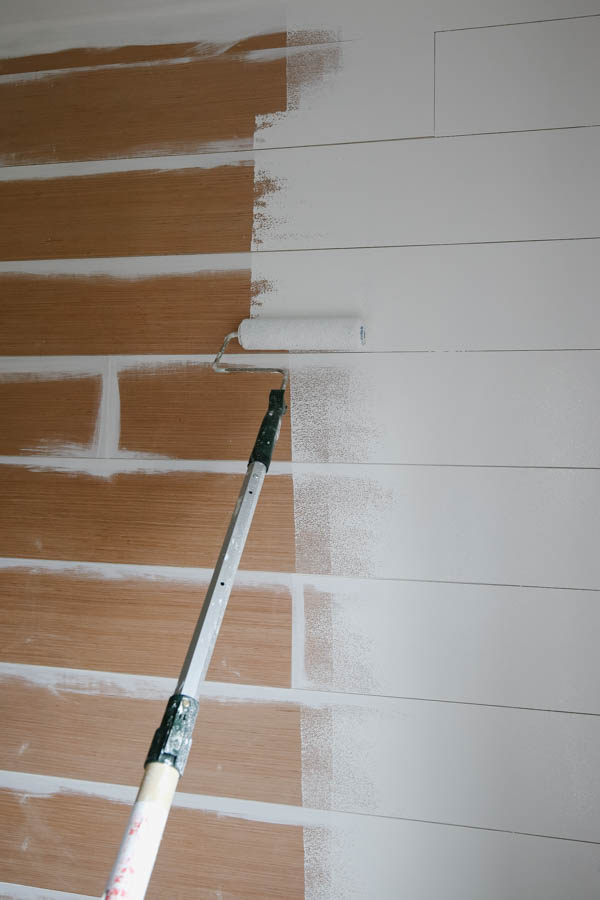
6. Roll your shiplap wall
Finally, the exciting part of painting shiplap, rolling! Here is how to paint shiplap with a roller:
For large walls, it’s best to use a larger woven 3/8″ nap paint roller (9″ length is standard) that is meant for walls and ceilings and is shed resistant. For smaller projects, use a smaller roller such as a 4″ paint roller.
Go ahead and roll your shiplap wall with a paint roller attached to a paint roller frame and extension pole and your paint in a paint tray.
Allow the first coat to dry, then roll a second coat.
*Note, if you are using raw wood that is not pre-primed, make sure to roll with primer first, allow it to dry, and then roll on the two coats of paint.
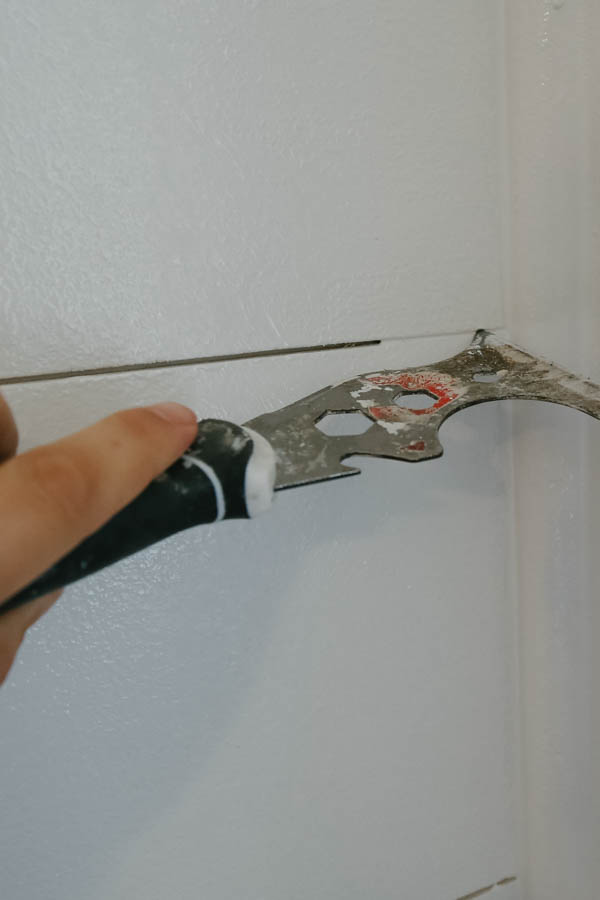
Also, after rolling each coat of paint, if there are any gaps with paint filling them, clear out the excess paint with a painter’s scraper tool.
And that’s it!
We love the final result! I’m just so happy to have a shiplap wall again!

Shiplap living room
Here are my two past living rooms with painted shiplap walls! The first photo is our first home with DIY shiplap accent walls in our rustic modern living room, painted White Dove by Benjamin Moore.
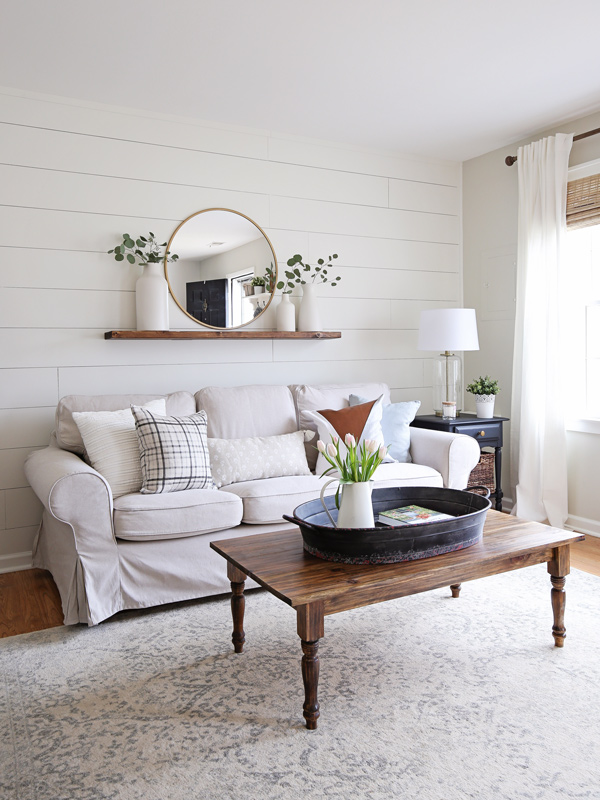
Here is the shiplap wall I used in this painting tutorial in the living room of our second home, painted Simply White by Benjamin Moore. Also, we painted our shiplap DIY double barn doors Oyster Bay by Sherwin Williams.
Frequently Asked Questions
How to paint primed shiplap boards?
If your shiplap boards are already primed, make sure all shiplap edges are caulked and nail holes are filled with spackle or wood filler.
Start painting by cutting in any edges or hard reach areas with a paint brush and paint. Then, apply two coats of paint with a paint roller.
Do you paint shiplap before or after installing it?
It’s easier and quicker to paint shiplap after installing it because the final boards are installed. If you painted shiplap boards first, there would be excess material you are painting and the paint finish would get scuffed up and would need touch ups.
Paint can take up to 30 days to fully cure and is subject to marks, dings, and scratches from being handled during the installation, so it’s best to paint after installing it to avoid spending extra time on the project.
Can you paint shiplap after installing it?
Yes, the best way to paint shiplap is to paint shiplap after installing it for the easiest and quickest paint application and to avoid scuffing up your paint job during installation.
Do you paint shiplap with brush or roller?
It’s best to paint shiplap with a brush for the shiplap cracks and paint cuts along the edges and hard to reach areas. Then, use a roller to paint the shiplap and achieve a uniform, smooth paint finish that doesn’t show brush strokes.
What kind of paint do you use on shiplap?
Any type of paint may be used on shiplap. But, a water based, latex paint is the best type of paint to use on shiplap since it provides great coverage and is affordable, easy to find, and available in any color.
How do I get a smooth paint finish on shiplap?
To achieve a smooth finish on shiplap make sure your shiplap boards are sanded well or pre-sanded. Then, use a shed resistant, woven paint roller for smooth surfaces.
***
I hope this detailed tutorial on how to paint shiplap walls, how to paint shiplap cracks, and shiplap paint colors has been helpful and you feel like you can tackle any painted shiplap project now!
If you want to see other shiplap DIY projects, you can check them out here:
- Shiplap ceiling DIY
- IKEA Billy bookcase hack with shiplap and a dark paint color!
- Faux barn door with shiplap
- DIY vertical shiplap in our bathroom makeover
- Entryway makeover with a shiplap accent wall
- DIY dog bed with shiplap
- Shiplap DIY double barn doors
- DIY faux shiplap accent walls in our rustic modern living room makeover
- Vertical shiplap wall from floor to ceiling with real shiplap boards
Follow along on Instagram or Facebook for my latest projects and for future updates on our living room makeover! Though it may look like my new living room is looking just like my old living room, there are going to be some big differences!

Judy hiday
Monday 27th of November 2023
We installed shiplap in a hallway where there are huge windows and there’s light hits it. The first people sprayed it and then back rolled it, and it looked terrible. He could tell every little mark so we had someone come in and sand it all and re-spray it and now you can see all the spray marks were they stopped and started white would be your recommendation next. I’m wondering if I shouldn’t try to brush it on would that be better, when they rolled it, they rolled it sideways. I’m wondering if they should’ve rolled it up and down please help we spent lots of money trying to get this right and it still looks terrible.
Angela Marie Made
Sunday 10th of December 2023
Direct light can show all of the painting imperfections. I would use a lighter/whiter color and make sure to use a high quality paint like Benjamin Moore and use a low sheen like matte, no shinier than eggshell. Then roll it completely with two coats and a high quality roller.
Linda Hansen
Sunday 6th of June 2021
You have me so inspired to take on so many of your projects! Question on the painting of the shiplap walls- you say to cut in the edges and then let it dry and put on a second coat. Then roll the walls twice. Do you mean to cut in the edges, and let that completely dry before painting the walls? I've never painted walls that way, does letting the cut in edges dry first prevent show through of the overlapping edges when the walls get painted? (which I always seem to get when I cut in and then paint while it's still wet) And should I let the second coat dry before rolling the walls? Just wondering so I do it correctly! By the way, you have the best and clearest instructions for ship lapping walls!
Angela Marie Made
Monday 7th of June 2021
That's awesome, thank you so much! When I talk about cutting in the edges, I mean the edges of the ship lap boards as you install them. This is to prevent overlapping edes showing through like you said and also so that the wall is the same color as the ship lap. Once the ship lap is installed and you have painted all the edges then go ahead and roll the ship lap wall and wait for the 1st coat to dry completely before putting on the second coat. I hope this was helpful!
Aaron
Wednesday 18th of November 2020
I can't even read the article for all of the ads and widgets and crap.
John
Thursday 5th of November 2020
Do you have any experience in using a power paint sprayer for such shiplap (either before installing on the wall or after)?
Angela Marie Made
Monday 9th of November 2020
No, we have always used a brush/roller.
Leah
Monday 21st of September 2020
Hi. I'm renovating our barn into a second living space. I want to white shiplap 3 of the 4 interior walls and do the 4th wall as an accent/multi-stained rustic wood look. I am using 2x8x16 tongue and groove wood. I like the look of whole pieces of white shiplap not staggered cuts. If the wall is 30 feet long, how do you suggest I cut the pieces? Do you caulk the cuts to make it appear as a whole pieces?
Do I do the same cuts on the accent wall to make it look cohesive or do I do the staggered look on that wall?
Also, what color do you recommend? The barn does not have a lot of natural light.
Thank you!!!
Angela Marie Made
Monday 21st of September 2020
Hi Leah, this sounds like an awesome project, I'm a little jealous :) LOVE the idea of an accent wall with a stained look combined with the white shiplap. I would try and make the cuts so that you can utilize as much of the wood as possible, the white paint will help to cover the gaps. I would use a lightweight spackle or wood filler to cover the gaps and once it is primed and painted it will look like they are all one piece. As far as the accent wall I think it would be a good idea to stagger the pieces to make it stand out but it is totally a personal preference. If you tried to use wood filler to cover the gaps the stain will not cover it as well compared to paint. Check out my post on my 10 favorite stain colors: https://angelamariemade.com/favorite-wood-stain-colors/. Since there is not a lot of natural light, a lighter color like Honey Maple or Special Walnut may look really good but definitely test them out and also different combinations to see what you think looks best.