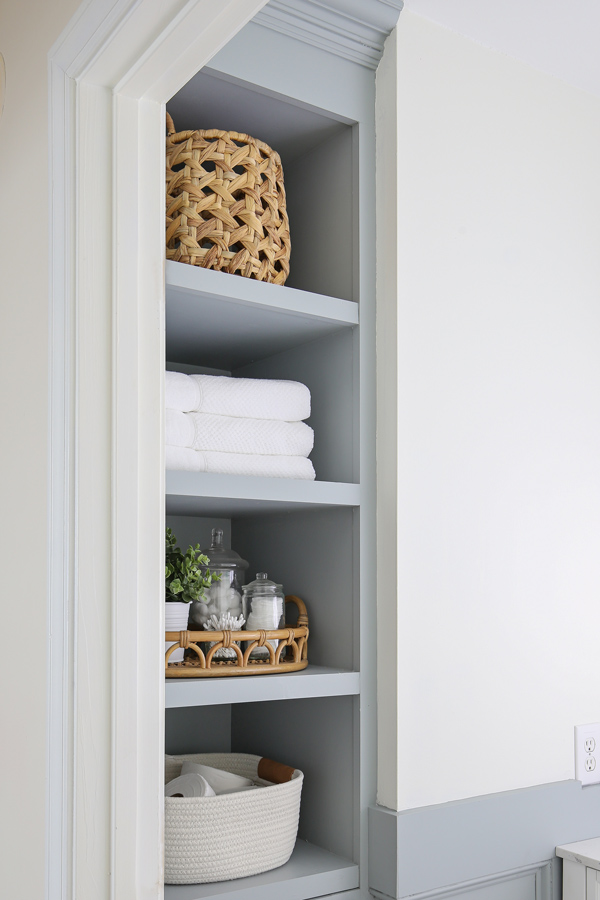
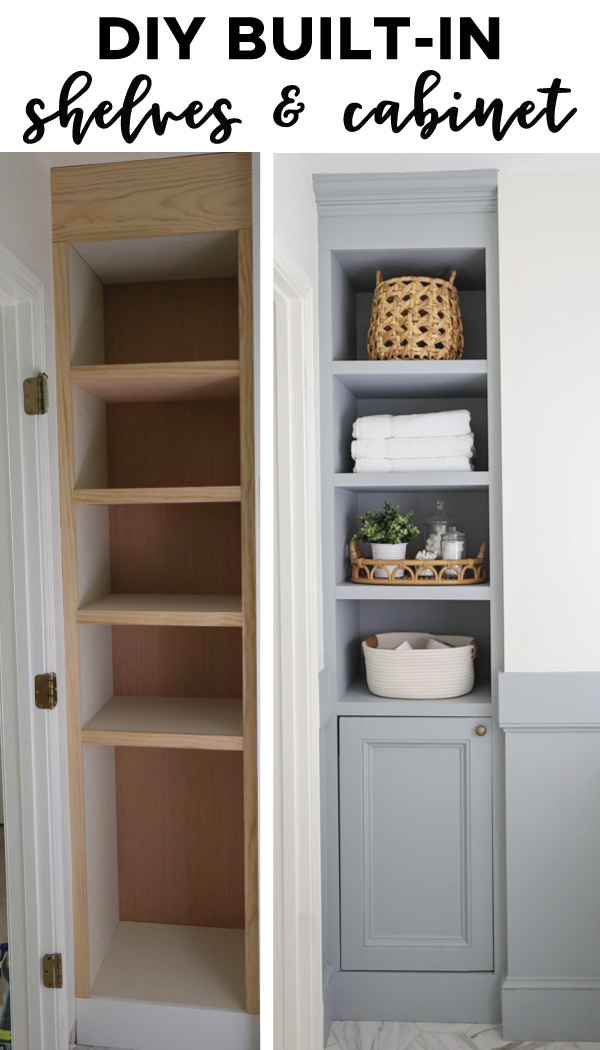
In our current bathroom makeover, I decided to add DIY built in bathroom shelves and a cabinet to add some much needed extra storage!
We previously had a recessed nook with ugly wire shelving and it was a great spot for built in bathroom wall storage but it needed to be transformed into a focal feature instead of an eye sore!
Here is a before and after look!

BEFORE PHOTO:
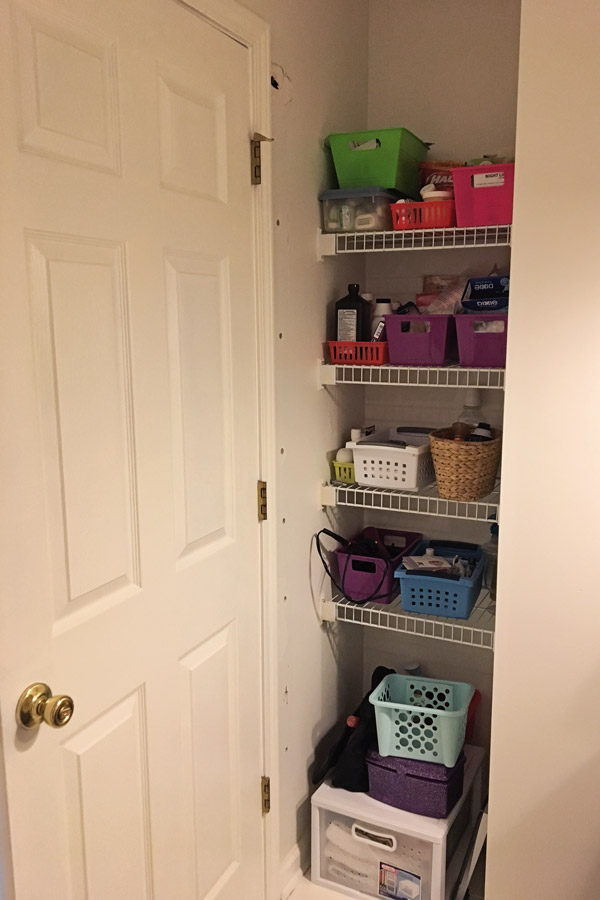
BEFORE PHOTO
Just a little update here, I’m still renovating our master bathroom. Originally it was part of the One Room Challenge which I shared about here. But, we ended up having to hire out our drywall repair which set us back a few weeks. So, I officially did not complete the One Room Challenge. I’m bummed as I’ve always met the challenge deadline in the past, however this is a really big renovation and we want to make sure it’s completed correctly!
Anyways, back to the built in! Below I’m sharing how to build a built in cabinet and shelves. This will be custom to your space, so I won’t be including measurements or exact quantities of supplies, but I will show you how to actually build it!
Also, to keep this project more simple, you can just do all built in shelves and omit the cabinet door. I really wanted some totally hidden storage though, so I added the cabinet door.
If you’re interested in a larger built in cabinet or a built in cabinet in a corner (with only two walls), check out my DIY built in cabinet and door tutorial from our entryway and our DIY built in cabinets for the kitchen!
Or if you want to build just a wall cabinet with a door, check out my how to build a wall cabinet and door tutorial!
Note, this post contains some affiliate links. For more info see my disclosures here.
How to Build Built In Bathroom Shelves and Cabinet
Materials Needed:
- 8ft x 4ft @ 1/2″ thick plywood
- 8ft x 4ft @ 3/4″ thick plywood
- 8ft x 4ft @ 1/4″ thick plywood
- 1×8 (for top of built in)
- 1×6 (for base of built in)
- Crown Molding (for top of built in)
- 1×2s (for trimming out most of built in)
- 1×3 (for cabinet door frame)
- 3/4″ Wood Screws
- 2 1/2″ or 3″ Drywall screws (or wood screws)
- 1″ and 1 1/4″ Kreg screws
- 1″ and 1 1/4″ brad nails
- Inset Door Hinges (I used these hinges)
- Cabinet Knob
- Magnetic Door Catch
- Primer and Paint (I used Boothbay Gray by Benjamin Moore)
Tools Needed:
- Kreg Jig
- Miter saw
- Circular Saw
- Drill
- Brad nailer
- Clamps
- Tape Measure
- Studfinder
Note: You will need to have a recessed wall area, corner wall, or area between two walls for a built in. Measure this space to determine how much material you will need after reviewing the tutorial below.
DECOR SOURCES:

1. Build the Frame of the Built In
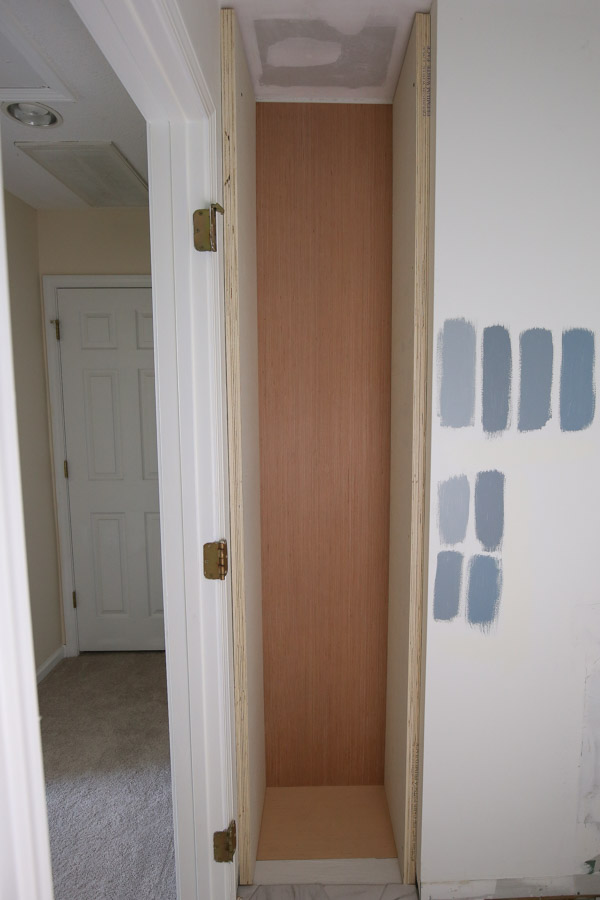
If the back wall where your built in is being installed is in good shape, you won’t need a back board. But, our back wall was in rough shape, so I ripped a 1/4″ plywood board to fit along the back of my built in. I went ahead and used a brad nailer to nail it against the back wall first.
To build the frame of the built in, use a circular saw or have your home improvement store rip (cut) the 3/4″ plywood to the width of your built in by 8 ft tall. Keep in mind that there will be another 3/4″ thick trim wood added to this as well as the width of your crown molding.
So, you want the sides of your built in frame to be 1.5″ thick so it will look nice once trimmed out with 1x2s. You can use 1×2 wood or strips of the 3/4″ plywood and attach with 1 1/4″ brad nails along the front and back edge of the 3/4″ plywood side built in pieces. Also, you are going to need to drill through these side pieces into the wall studs, so make sure to add a 1×2 or 3/4″ plywood strip along the side pieces so it will be located over a stud.
Attach the side pieces to the wall making sure to drill through the wall stud so that the built in will be secured to the wall. Use 2 1/2″ or 3″ screws countersunk beneath the plywood surface (for easy filling in later).
2. Attach the bottom and top shelf
Use a circular saw the cut two pieces of 1/2″ thick plywood for your bottom and top shelves. Make sure to measure the width and length openings where these two shelves will be installed as they may differ slightly in size since most walls are not straight (mine definitely are not).
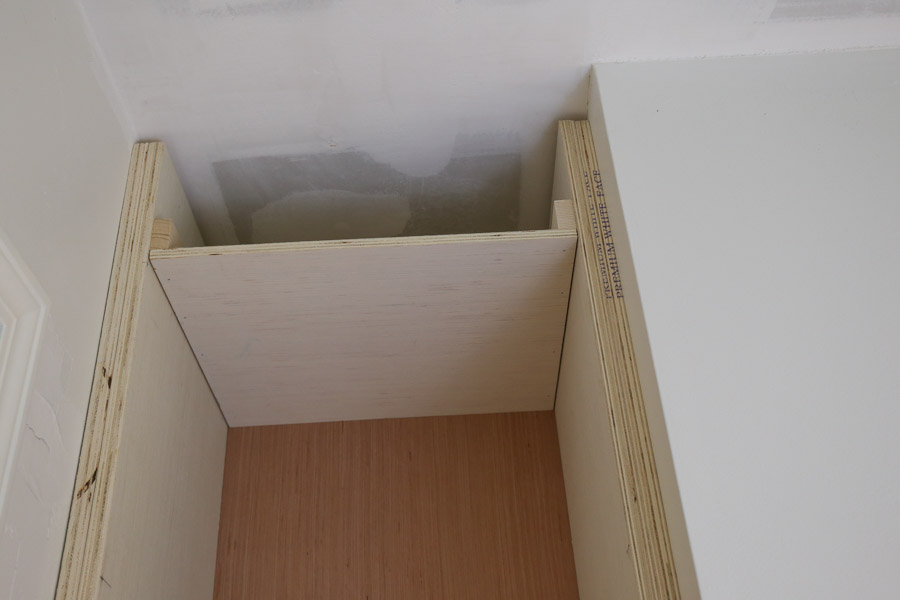
Attach the top shelf to the built in sides so that the bottom edge of the shelf is 7 1/4″ down from the ceiling. This will allow a 1×8 board to cover the edges when the built in gets trimmed out. You can either use pocket holes with Kreg screws or a 1×2 with brad nails for attaching on this part.
Since I didn’t want pocket holes to show for this part, I used a 1×2 nailed (with 1 1/4″ brad nails) into the built in sides as a shelf support. Then, I nailed my top shelf into the bottom of these support braces.
Repeat the same process for the bottom shelf, except make sure that the top edge of the bottom shelf is 5 1/2″ up from the floor and that the 1×2 support braces are below the shelf this time. This will allow a 1×6 board to cover the edges when the built in gets trimmed out.

3. Attach the remaining shelves for the DIY built in shelves
Determine how many shelves you want and the spacing you want between each of them. Once the shelves are trimmed out, they will be 1 1/2″ thick each so make sure to account for this. Then, mark on the built in sides where each shelf will go and measure the opening of that area to determine the width and length of your shelf.
Once you have the measurements for your shelves, cut a 1/2″ thick piece of plywood AND a 1/4″ thick piece of plywood to size for each shelf.
Then, use a Kreg Jig and add two pocket holes to each side of the 1/2″ plywood shelves. Make sure to set your Kreg Jig settings for 1/2″ thick wood.
Tip: See my how to use a Kreg Jig post for an easy, step by step tutorial and video tutorial on how to use the Kreg Jig!
Use 1″ Kreg screws to attach the 1/2″ plywood shelves to the built in sides.
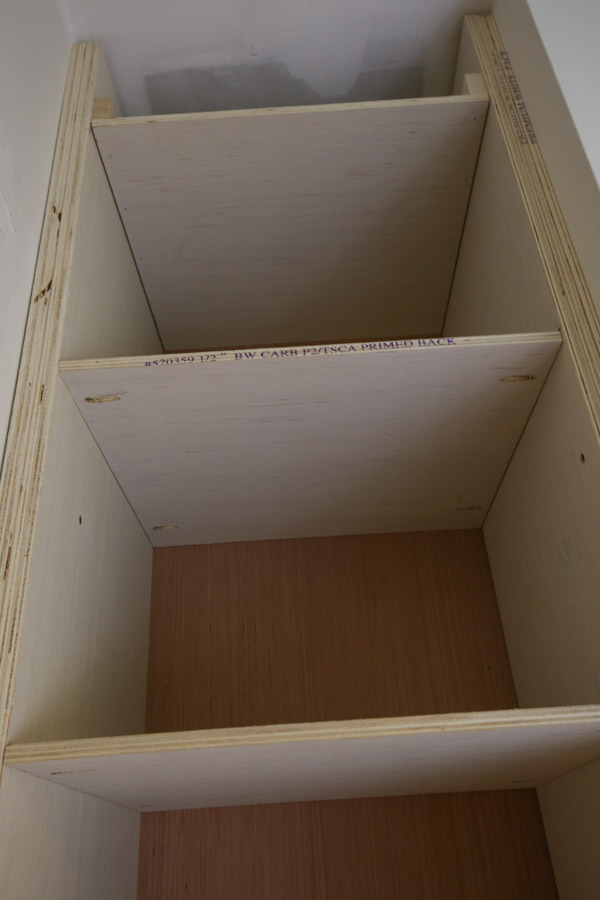

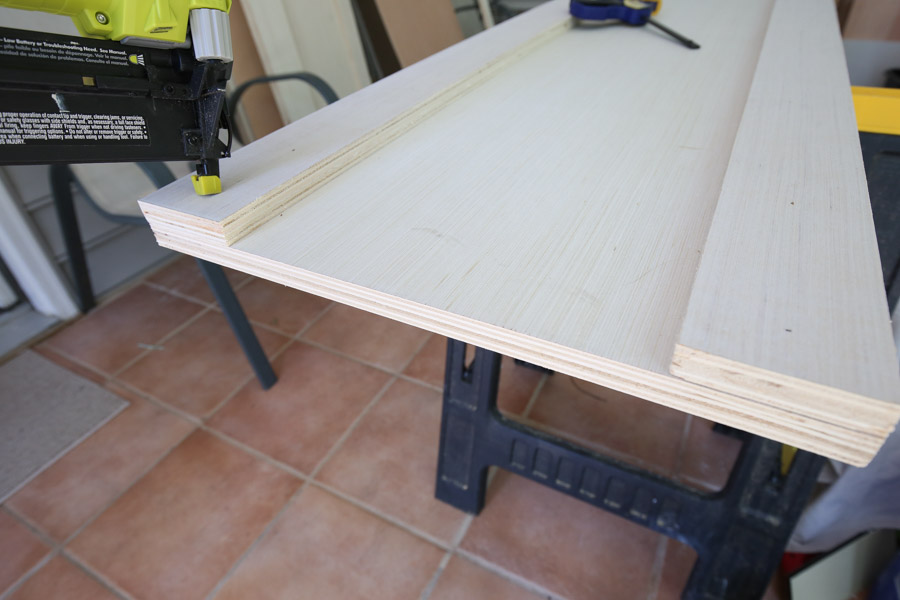
Next, use a miter saw and cut two 1x2s for each shelf to the depth of your built in. Attach these to the bottom of each shelf with brad nails (except for the bottom/top shelves).
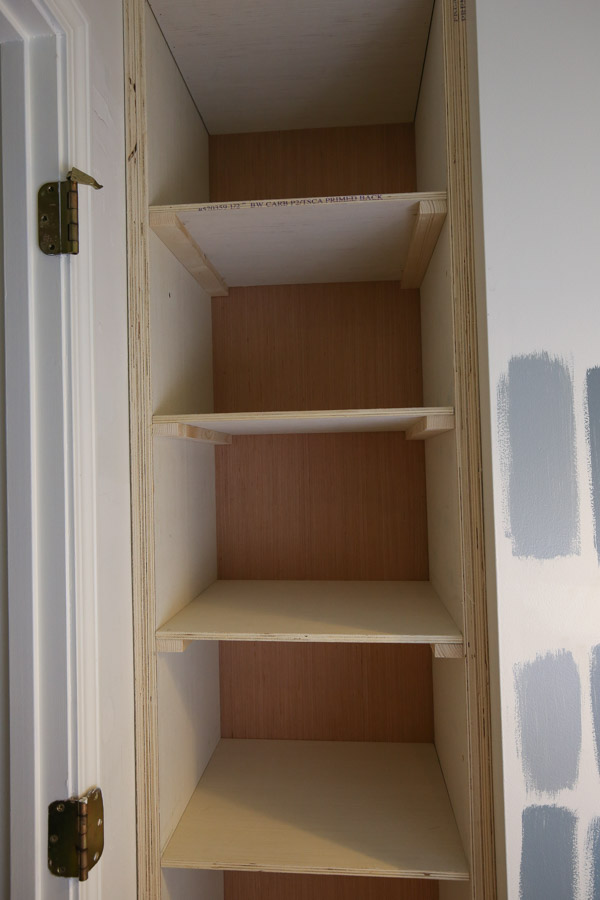
Finally, attach the 1/4″ plywood shelves to the bottom of the 1x2s with brad nails to complete the bottom of each shelf. Note, I did not add the 1/4″ plywood and 1x2s to the second shelf from the bottom since this is going to be on the inside of my cabinet.
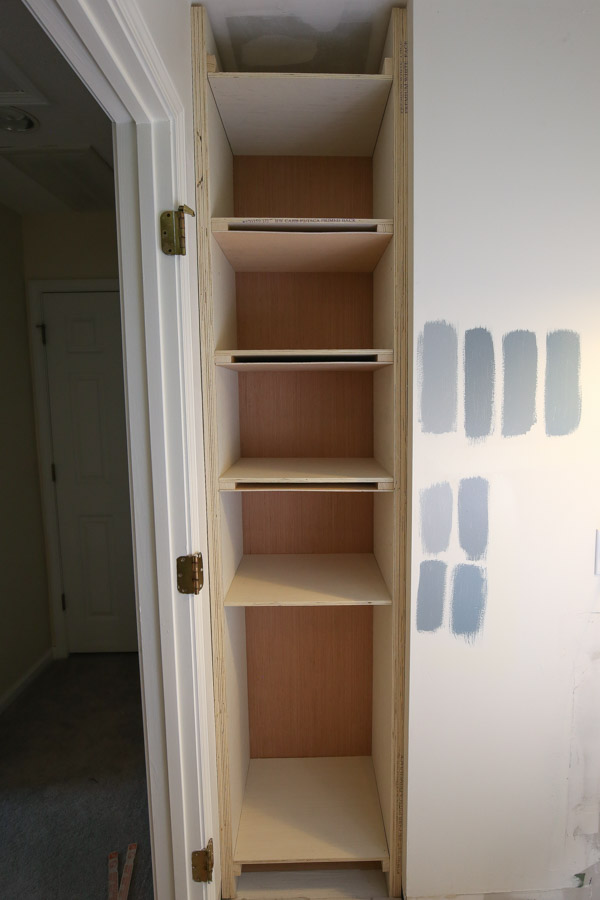
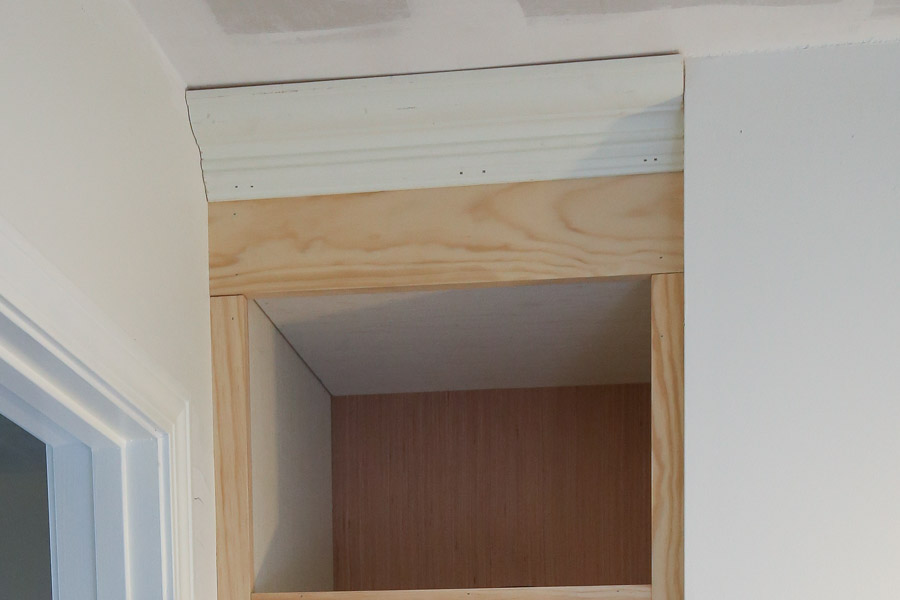
4. Trim out the frame of the DIY Built In Bathroom Shelves and Cabinet
Yay time for trim! Use 1 1/4″ brad nails and add a 1×8 cut to size to trim out the top of your built in and add a 1×6 cut to size to trim out the bottom of your built in. Then, for the sides and shelves, use 1x2s cut to size to trim out the remaining parts of your built in!

Lastly, if desired, add a piece of crown molding to the top of your built in to jazz it up some more!
Another easier alternative to crown molding is to add a 1×4 board instead like we did for our DIY built in cabinets for our kitchen.
5. Caulk, fill holes, prime, and paint built in
It’s time to finish your DIY built in bathroom shelves and cabinet. Caulk all the seams and gaps. Fill visible nail holes with lightweight spackle. Then, prime and paint the built in. I used Boothbay Gray by Benjamin Moore in eggshell.
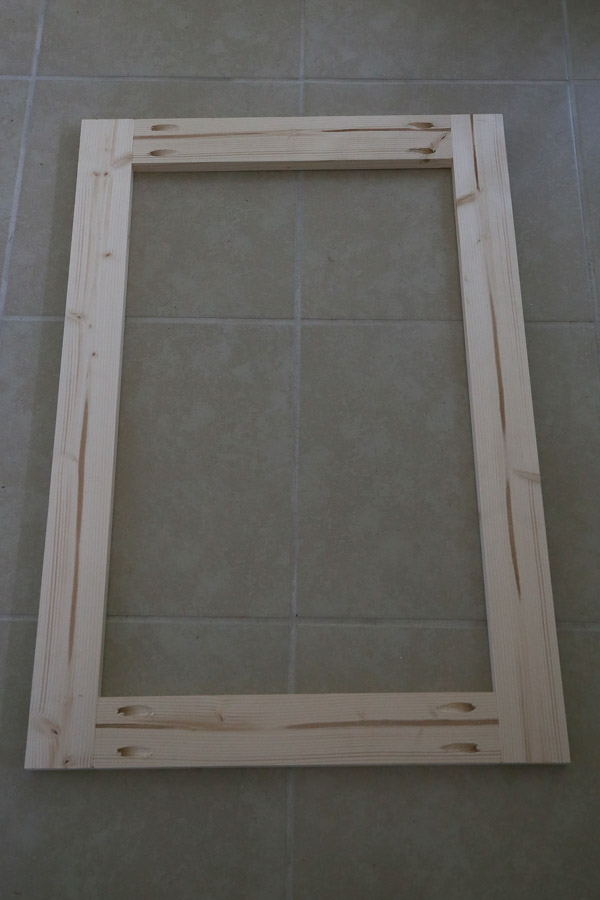
6. Build and attach cabinet door (optional)
If you want to add a cabinet door like I did instead of doing all shelves in the built in, go ahead and build a cabinet door. I have directions below but also check out how I built our entryway DIY built in cabinet and door for another option!
Measure the length and width opening for your door then subtract 1/4″ from the length and width to get the measurement of your door (there will be a 1/8″ gap on all sides of the door once installed).
Use a 1×3 to build the frame of your door. I attached my 1x3s together with 1 1/4″ Kreg screws and pocket holes.
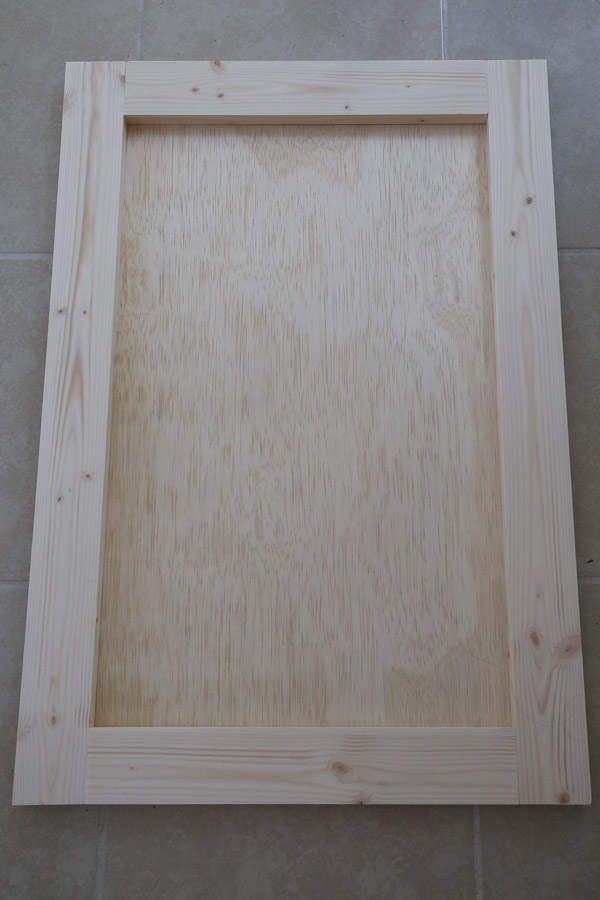
Then, add a 1/4″ plywood board cut to size for your door backing. I attached it with 1″ screws from the back.
Lastly, to make the door a little more custom and to match our wainscoting, I added this base cap molding along the inside of the cabinet frame.
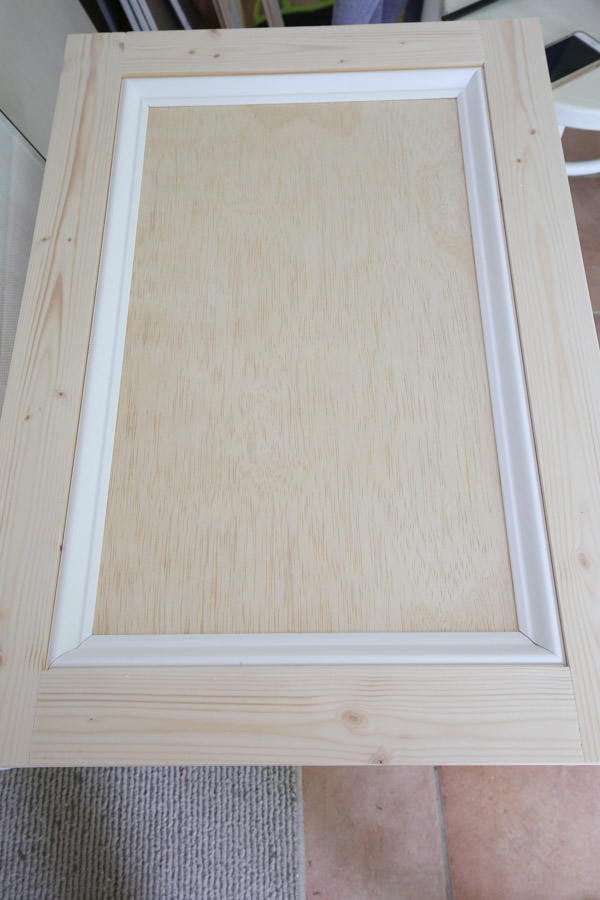
I finished my door with caulk and then filled the nail holes, primed, and painted it. Finally, I installed the door with these inset hinges and followed the directions that came with the hinges.
I will say that our door opening was not square and it made hanging this door a big challenge! Especially since it’s an inset door.
An easier door style option is to do an overlay door like we did for our kitchen DIY built in cabinets.
Also, I added a magnetic door catch to the inside of the door so it stopped in the correct spot. But, since our door is installed a bit crooked due to the opening not being square, I plan on ordering a custom overlay door to replace it with and using overlay hinges to make it look better! Something to consider if you want an easier door installation!
Update: After using inset European hinges on our DIY bathroom vanity with doors, DIY wall cabinet, and DIY built in cabinet for our entryway, I would recommend using them instead because they can be adjusted for a better door fit once installed!
And that’s it! I love how our DIY built in bathroom shelves and cabinet turned out overall though!

Stay tuned, the final bathroom reveal is coming soon, I am so eager to get this space finished! Follow along on my latest projects and sneak peaks on Instagram and Pinterest!
SAVE FOR LATER AND PIN IT HERE:
Bec
Thursday 9th of March 2023
Hi, I have a similar space and am going to give this a go, thanks for the instructions and photos. just wondering if you replaced the door (the actual door, not the cupboard doors) after you took the ‘after’ photo? is it ever an issue that the cupboard is so close to the door? thanks again!
Maureen V
Saturday 8th of October 2022
Great job! I have built-in shelving in my bathroom that is great for storage. I noticed the space when the contractor put the finishing touches on the shower wall and had the contractor put in the shelves and door. Unfortunately, I don't have the machinery you do (nor the talent).
Mindy Greenspan
Thursday 24th of March 2022
What is the width of the shelves that you built in?
Reece H
Saturday 21st of August 2021
I’m interesting in building something like this in my house! I was wondering what the width of the opening was before you started building the shelves? Thanks!
Angela Marie Made
Monday 23rd of August 2021
That's awesome to hear! The width of the opening was 21" before adding anything.
millicent macchione
Sunday 10th of January 2021
This was a wonderful explanation of a built-in.
Angela Marie Made
Tuesday 12th of January 2021
Thank you very much!