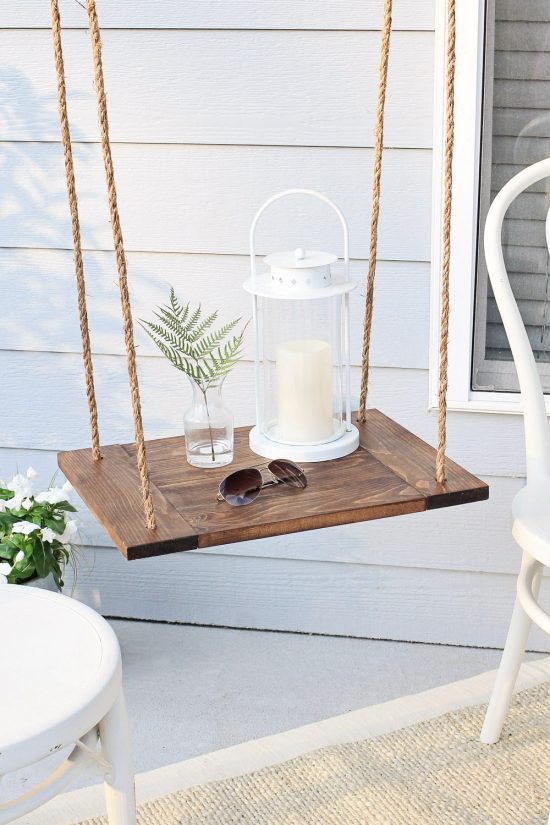
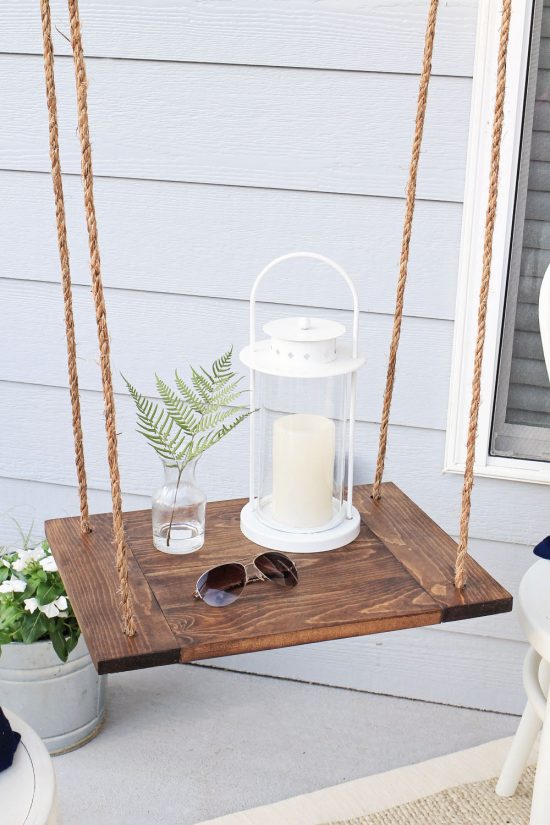
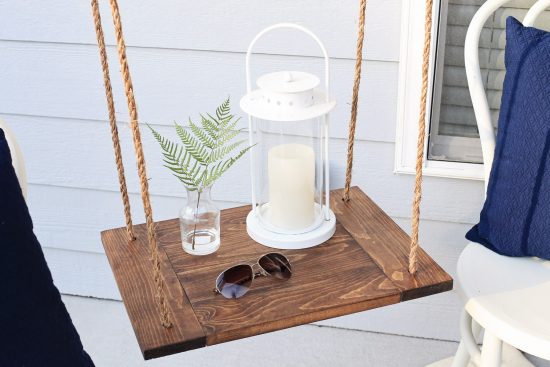
Today I am excited to share a very fun DIY project, it was a totally last minute idea that I put together pretty fast: a DIY hanging table for the patio! Or should I call it a floating table?! Either way its been a simple, yet really functional addition to our small patio.
Brandon and I didn’t have a table for our patio and it was kind of annoying whenever we’d be having drinks or reading out on the patio because we had nowhere to place our drinks, book, phones, etc. We really needed a table, but space was super limited because our patio is very small and our chairs take up a lot of room, plus Chance, our pup, likes to lay down on the patio too while we are out there. I decided a hanging table would be a fun and useful addition!
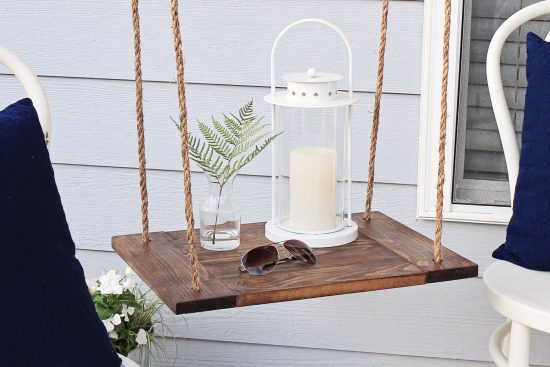
When designing our DIY hanging table, I wanted it to have a farmhouse style look to it, so I added some breadboard ends. But, if you want to keep this project really simple you can just do four pieces of wood together at longer lengths instead of adding the breadboard ends.
Note, this post contains some affiliate links. For more information see my disclosures here.
In case you are wondering, the total project cost for this DIY Hanging Table was just about $17 in material! And the final size is approx. 19″ x 14″.
How to make a DIY Hanging Table:
1. Gather your supplies and tools:
- 3/8″ thick sisal rope
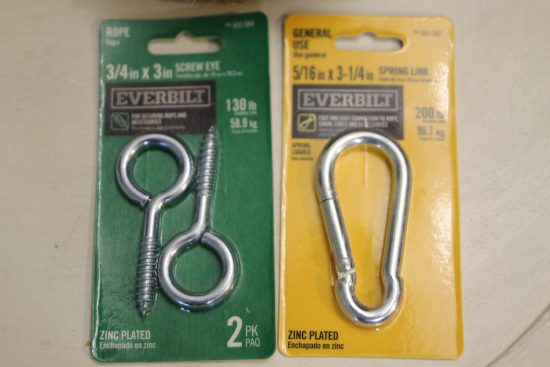
- Two Screw Eyes
- Two Spring Links
- One 1×4 @ 8ft
- Kreg Jig
- 1 1/4″ Kreg Screws
- Wood Glue
- Drill
- Miter Saw (or have your home improvement store make the cuts)
Here is a photo of the screw eyes and spring links that I used. I made sure my hardware and rope all had a weight capacity of at least 100 lbs (to be on the safe side)!
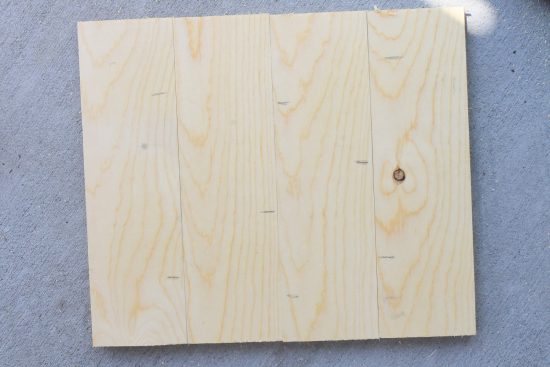
2. Cut four 12″ wood pieces from your 1×4.
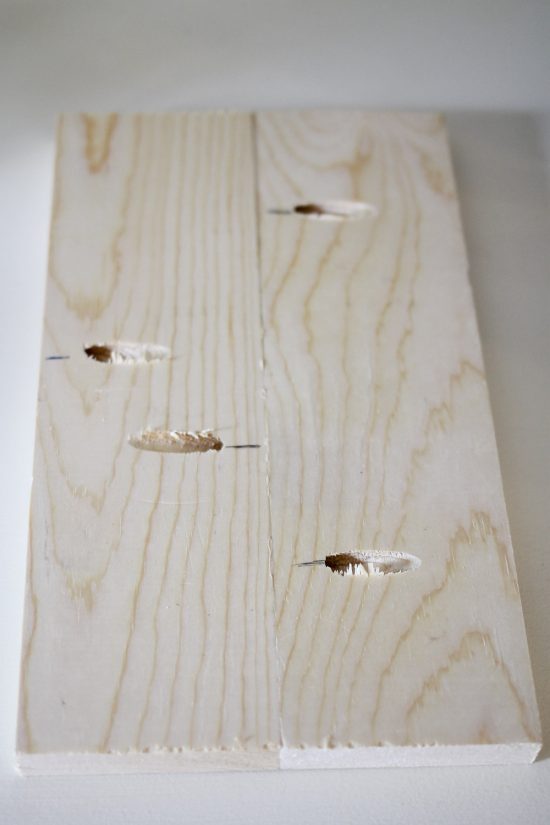
3. Lay out your four 12″ pieces side by side and mark (on the pieces you want to be the backside) where your pocket holes will go. I wanted this table to be really sturdy so I did several pocket holes. After marking where to add pocket holes, drill your pocket holes using a Kreg Jig.
*Tip: See my how to use a Kreg Jig post for an easy, step by step tutorial and video tutorial on how to use the Kreg Jig!
4. Next, attach your four wood pieces with kreg screws and wood glue. It’s easiest to attach one piece at a time using clamps.
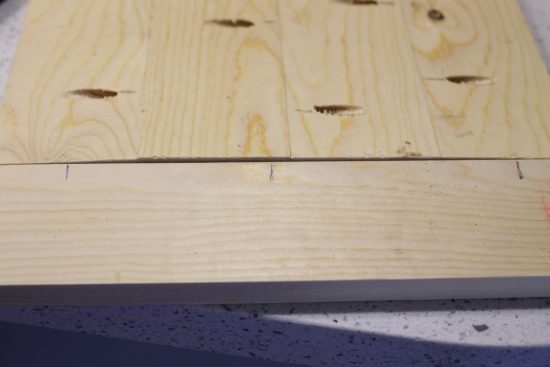
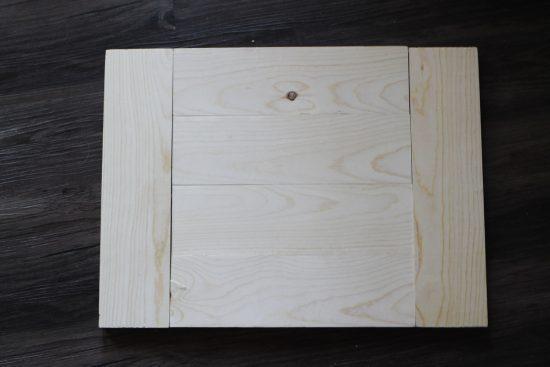
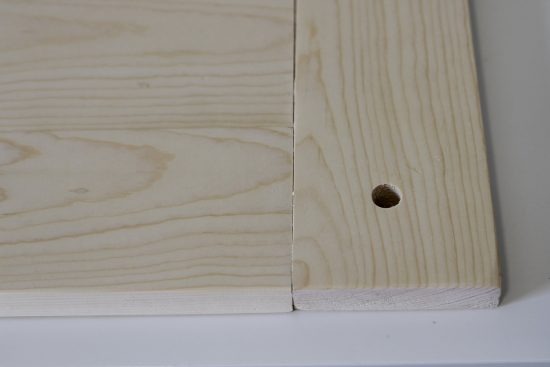
5. After attaching all four pieces, measure the exact length of the four attached pieces. It should be around 14″ long. Then, cut your two breadboard end pieces and mark on the back of them where your pocket holes will go. Drill your pocket holes and attach your two breadboard ends to the four pieces with pocket holes and Kreg screws. After everything is attached, your table build is complete!
Tip: If you want your breadboard ends to line up perfectly to the center boards with no gaps you can use a circular saw and trim a tiny bit off the attached center boards to create a perfectly straight edge. I was going for a rustic look, so the minor gaps didn’t bother me!

📩 Want to Save This?
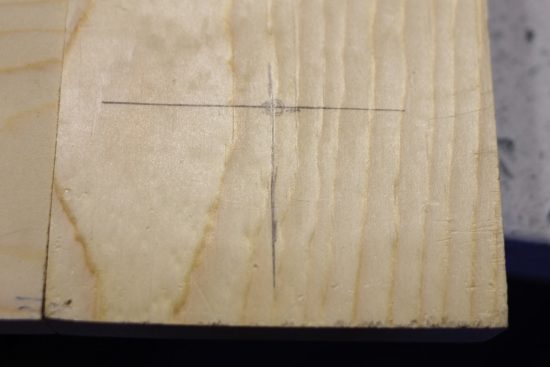
6. Mark 1.5″ in from the side corners of the table. Then, drill a hole on all four corners for your rope. I used a 1/2″ drill bit so that my rope would fit easily.
7. Sand and stain (or paint) your table. I used Minwax Provincial. I also used a polyurethane top coat to finish it off.
8. Determine how low you want your table to hang from the ceiling or wherever you are going to hang it from and then measure that distance to determine how much rope you will need. Once you know the amount of rope you will need, add an extra foot to that measurement so you have some extra rope to work with when hanging. Then, cut your two pieces of rope to the final measurement needed.
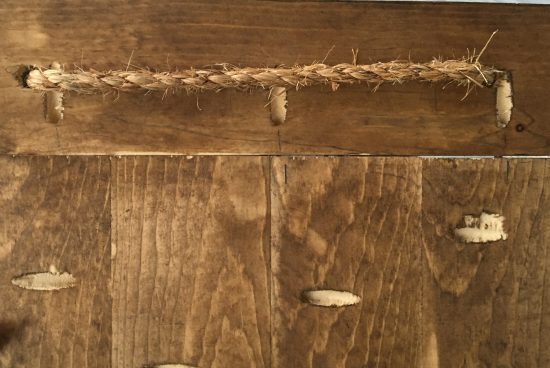
9. Insert each piece of rope into the holes from the bottom of the table. Adding a small piece of masking tape or duct tape on the rope ends makes it easier to insert the rope through the holes to avoid rope fraying. After inserting your rope through the holes, your rope should like this photo from the bottom view of the table:
10. On each rope piece, tie the two ends together in a knot around the spring hooks, leaving extra room at the end of the rope. Then, attach your screw eyes into the ceiling. Next, attach your spring links to the screw eyes. At this point you may need to adjust your rope knot in order to get the table hanging level and at the exact height you want it. Once you have the table hanging where you want, add another knot with the extra hanging rope and then cut any excess rope off.

All finished! Sit back and enjoy your new DIY Hanging Table!
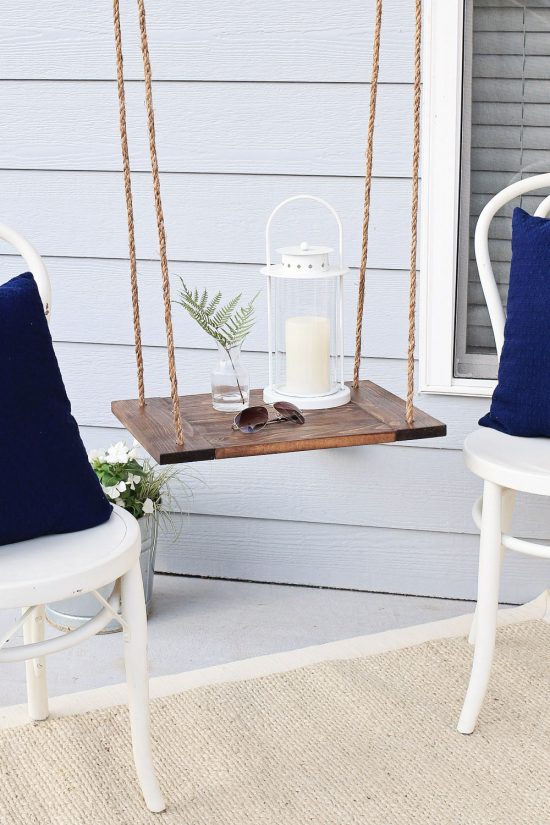
What do you think of my DIY hanging table?! It can also be used indoors and it works really well for adding function to small spaces! Be sure to follow along on Instagram and Pinterest for my latest projects, fun updates, and sneak peeks!
Amy
Saturday 10th of April 2021
What type of wood did you use? Pine or oak?
Angela Marie Made
Tuesday 13th of April 2021
Pine
Michelle Leslie
Thursday 5th of October 2017
That looks so cool and it's such a cute idea for any space. Something like this would be just perfect in our guest bathroom to store extra towels and what nots. Thanks so much for the tut
Angela
Thursday 5th of October 2017
Thank you so much Michelle!!!