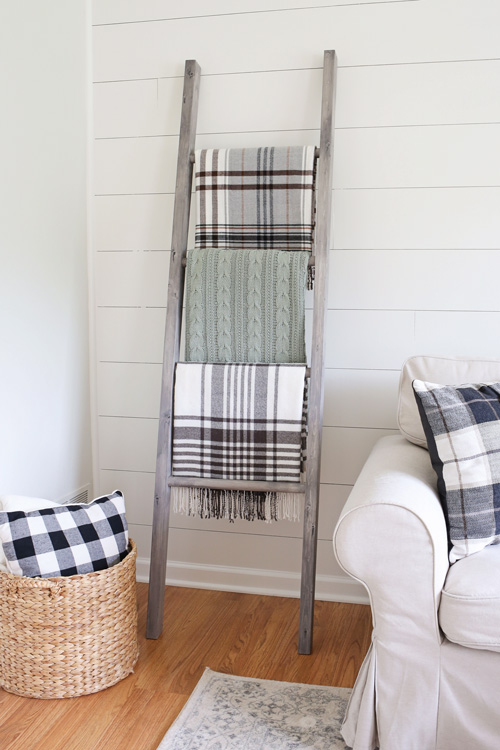
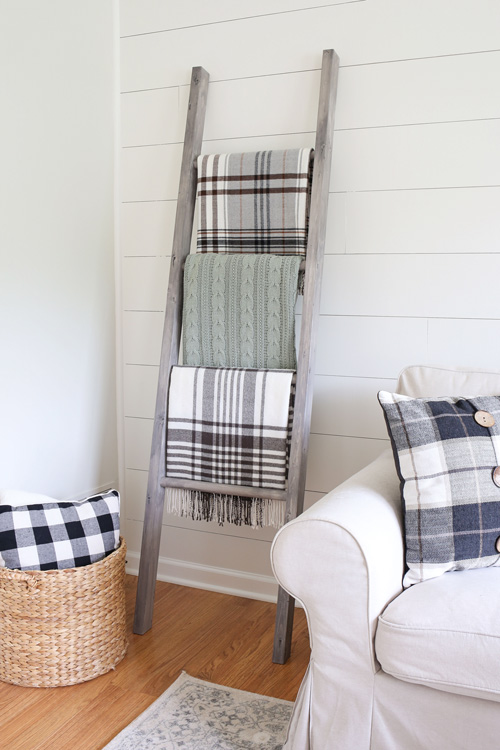
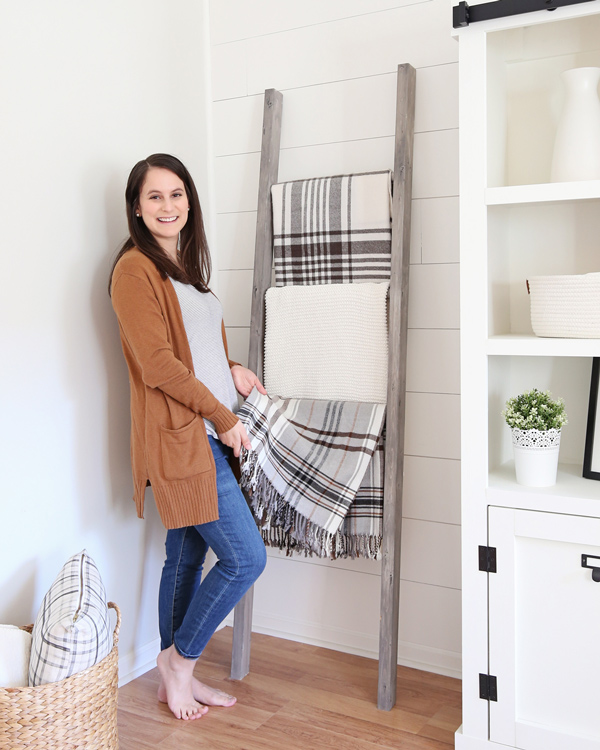
Blanket ladders are totally adorable! I love the concept of them and how cute, cozy, and functional they are for a space.
I’ve wanted a blanket ladder for awhile, not sure why it took me so long to make one because they are one of the most simplest building projects I’ve ever done!
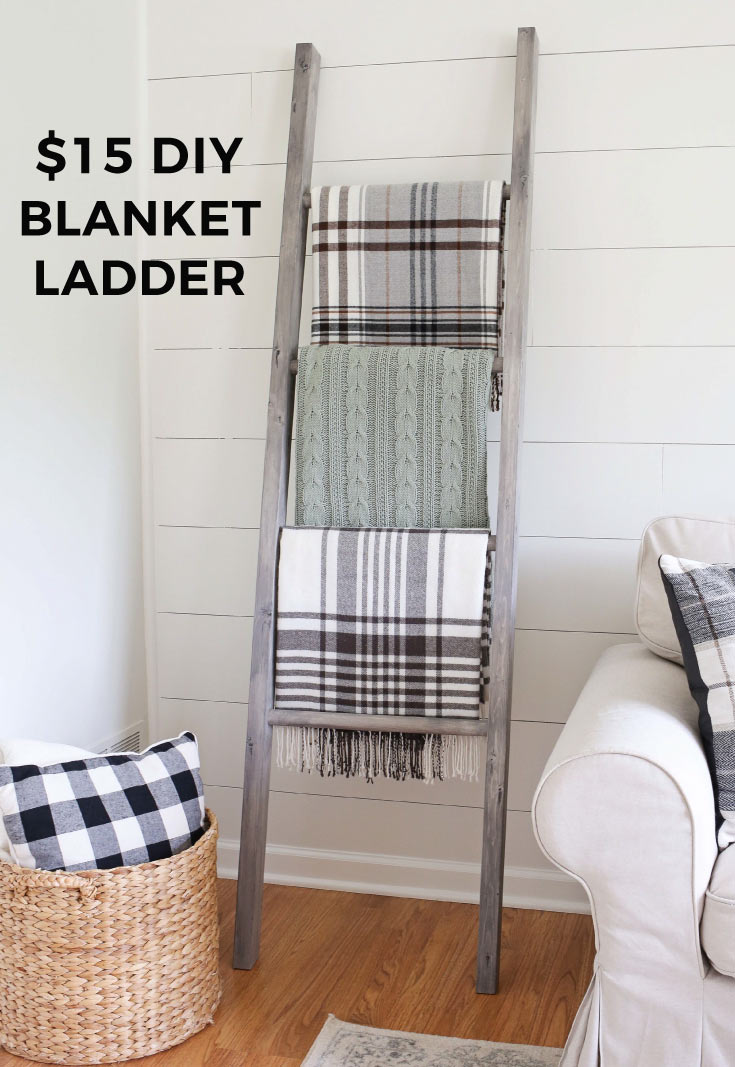
Today, I’m excited to share how we easily and quickly built this DIY blanket ladder for less than $15 in lumber!
The detailed how-to steps, photos, and video on how to make a blanket ladder are below.
Also, get the printable build plans here.
Note, this post contains some affiliate links. For more info see my disclosures here.
How to make a blanket ladder:
Materials Needed:
- (2) 2×3 @ 8ft
- 1 1/4″ round wood dowels @ 6.5 ft (I used two of these dowels)
- Wood Glue
- 1 1/4″ spade drill bit
- Masking tape or Painter’s tape
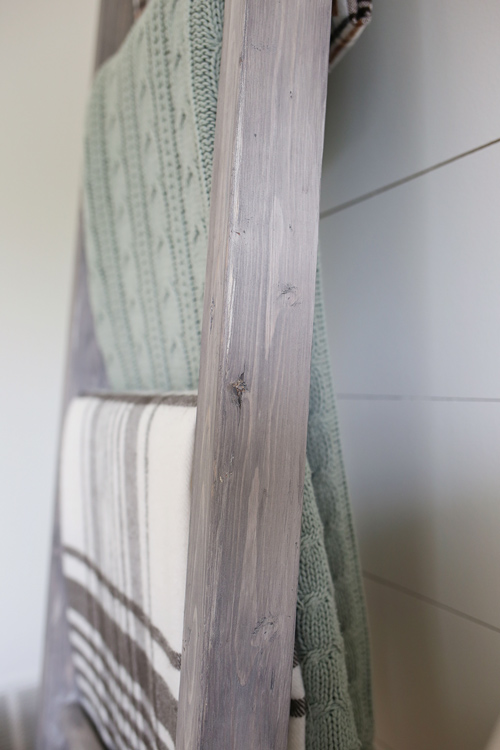
- Stain (I used Barnwood Gray from my Weathered Wood Recipes)
Tools Needed:
- Drill
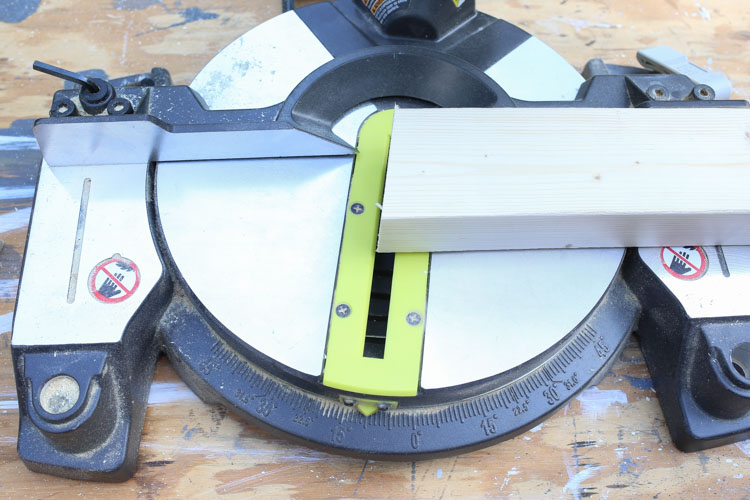
- Miter saw (or have your home improvement store make the cuts)
- Mallet hammer or hammer
- Measuring tape
- Speed square (optional)
![]()
![]()
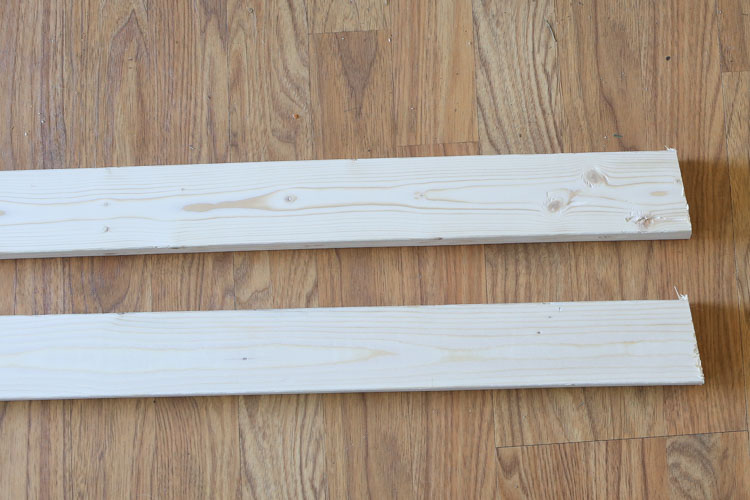
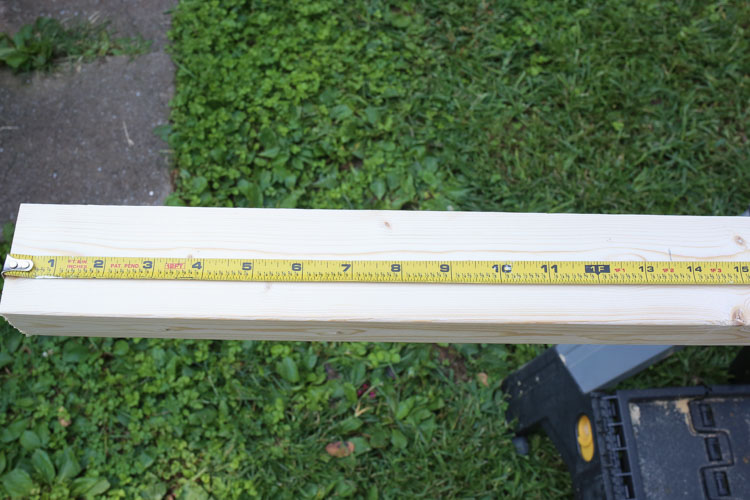
1. Make the lumber cuts for the DIY blanket ladder
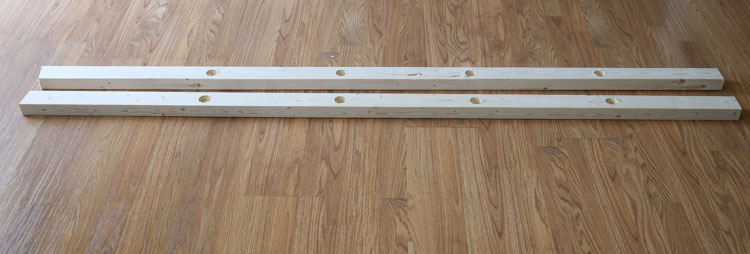
From your 2×3 lumber, cut two pieces at 76 inches long each.
I chose to cut the bottoms of each piece at a 10 degree angle so the blanket ladder would sit and lean better on the ground. But, you can do them both at a regular 90 degree angle too.
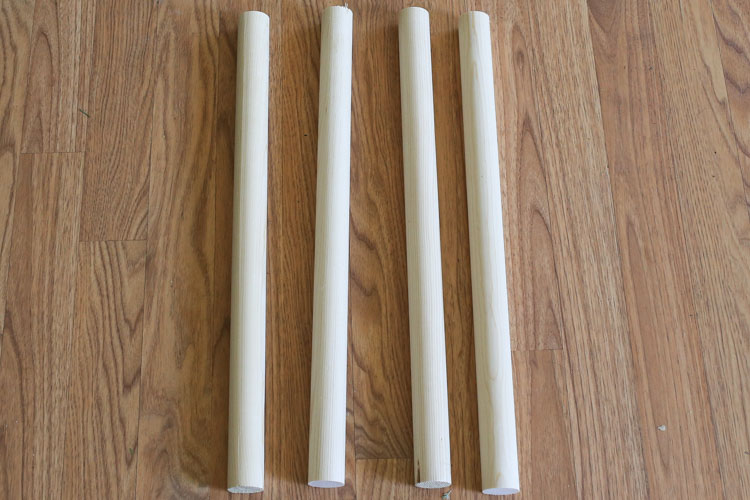
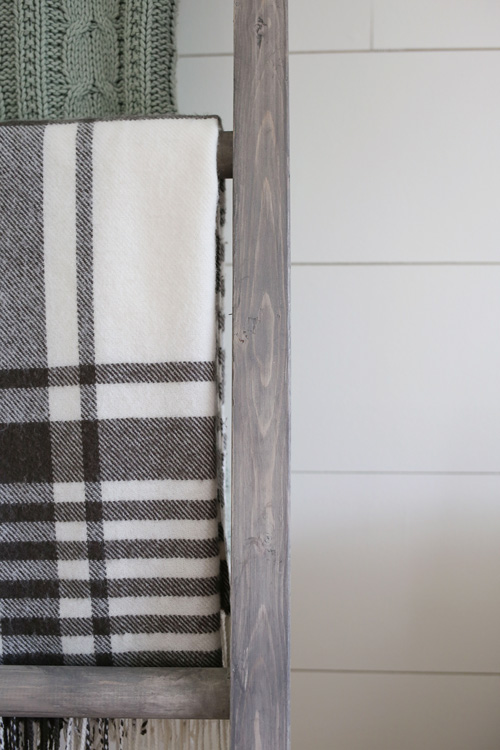
Cut your round wood dowel rods into four 18.5 inch long pieces.
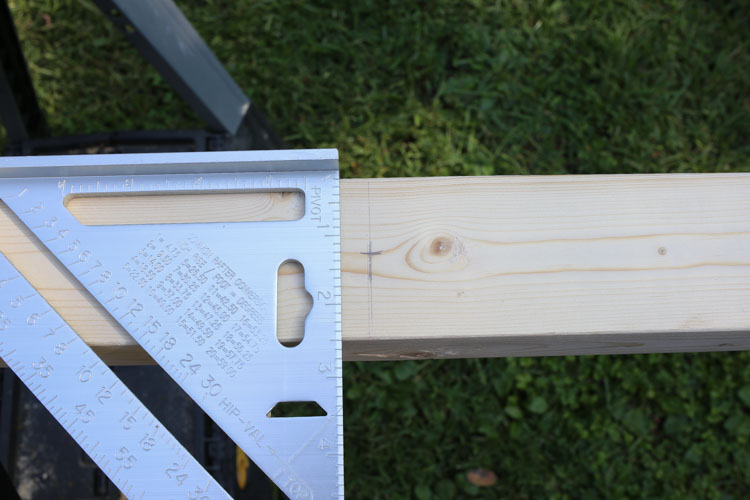
2. Mark drill holes on the blanket ladder
Now it’s time to mark where the holes will go on the two side pieces.
Measure 13 5/8 inches down from the top of one of the 2×3 side pieces and mark a line. Then, measure 1 1/4 inches in from the side of the 2×3 piece to create a center point mark for your first hole. I used a square tool to help with this part.
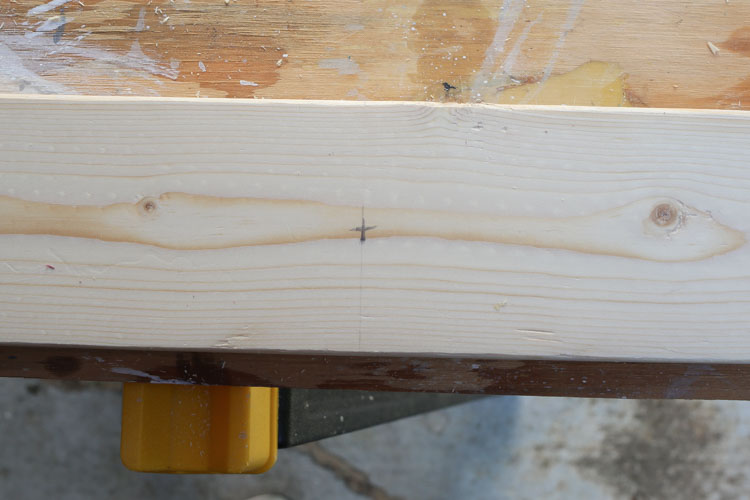
From that first hole mark, measure 14 1/4 inches down and mark a line. Then, again measure 1 1/4 inches from the side to create a center point mark for where the second hole will be drilled. Continue this process two more times till all 4 holes are marked. The pole holes will be equally spaced 13 inches apart from each other once drilled.
Repeat on the second blanket ladder side piece so the holes are marked at the exact same measurements on each side piece.
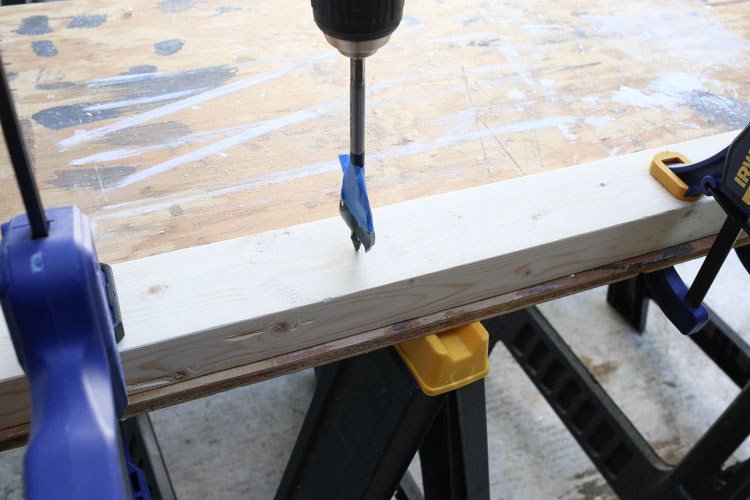
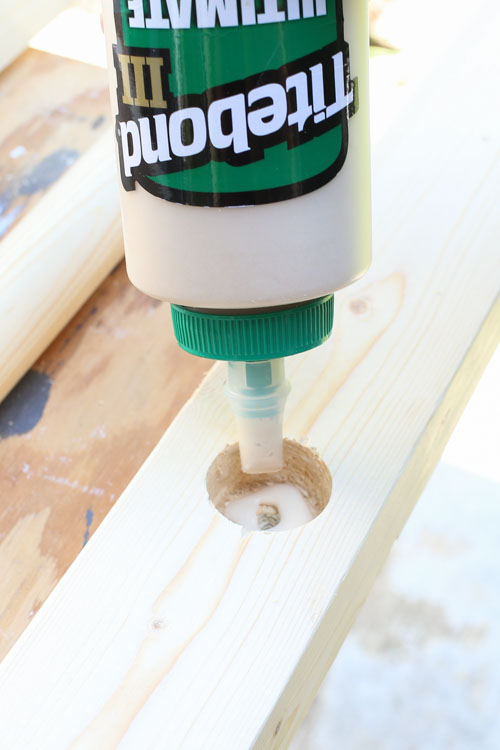
3. Drill the DIY blanket ladder holes
Place a piece of painter’s tape or masking tape 3/4″ from the bottom of the wide part of the spade drill bit. This is to ensure you drill the holes at the correct depth.
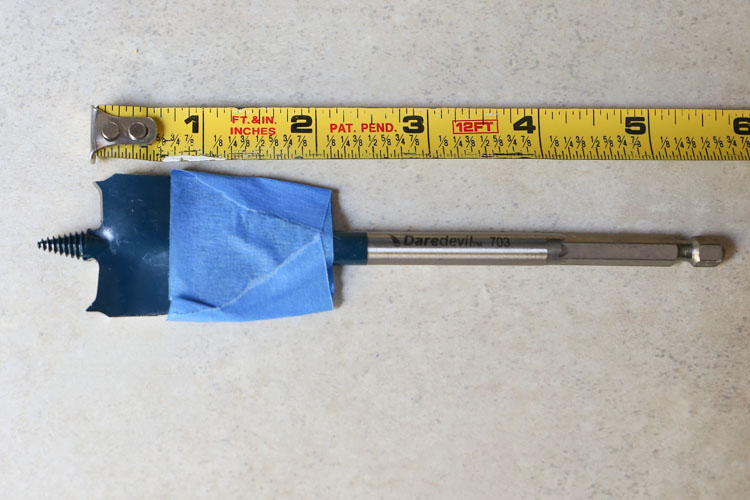
Line up the center point of the spade drill bit with your hole mark and drill the hole until the blue tape is at the same level as the surface of the wood.
Note, if you’ve never used a spade bit before, it helps to practice drilling a hole first on a scrap piece of wood. Also, it helps to clamp your 2×3 down to secure it from moving while drilling the holes.
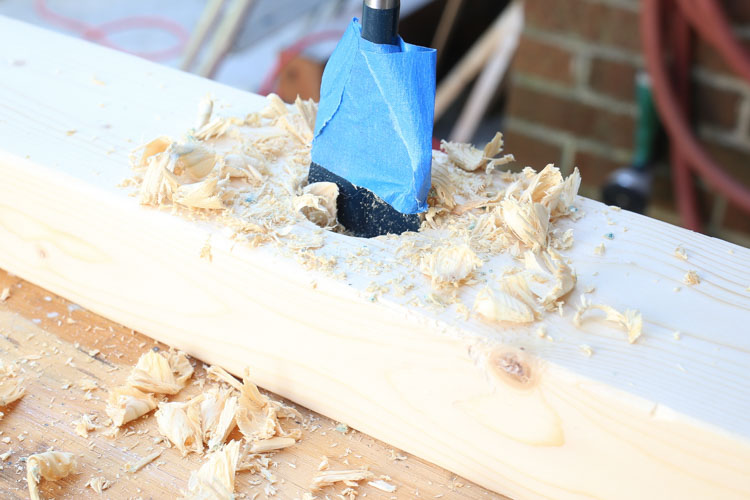
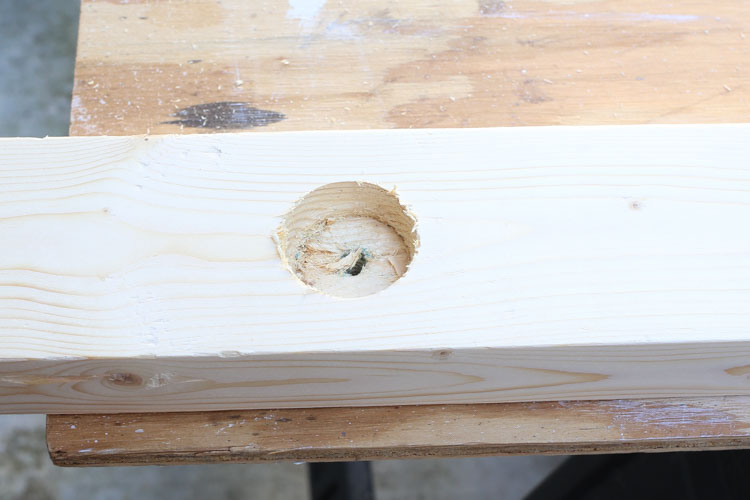
Repeat until the remaining 7 holes have been drilled.
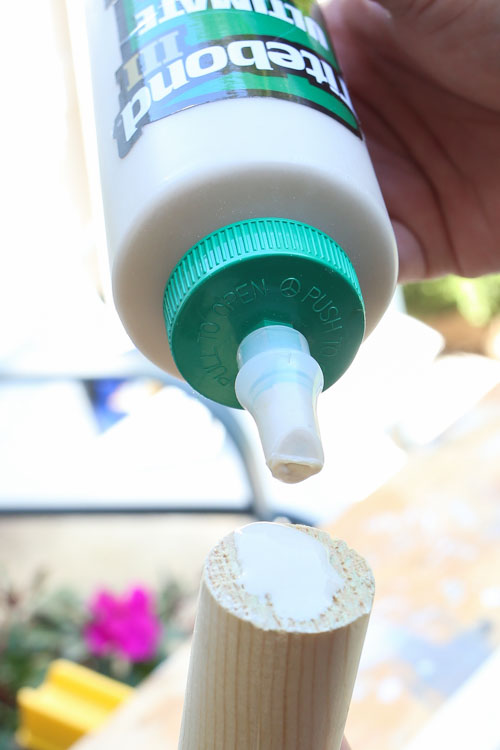
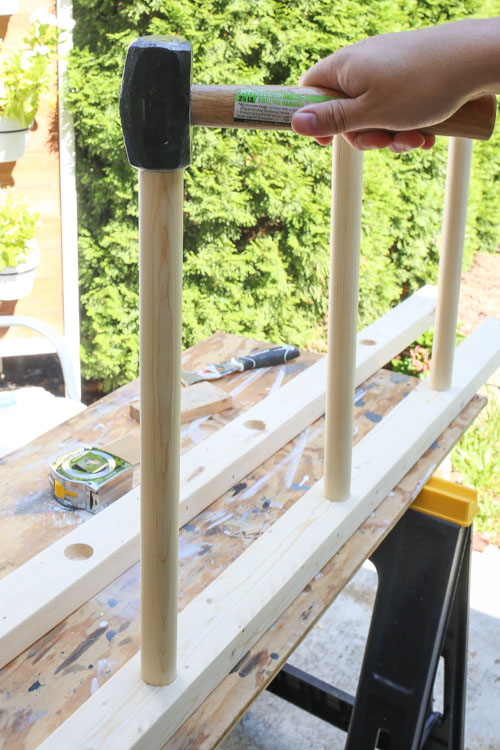
4. Attach wood poles to blanket ladder sides
Lay out one of the blanket ladder side pieces. Apply wood glue to the bottom of one wood pole, as well as inside of one of the side piece holes and insert wood pole into the hole.
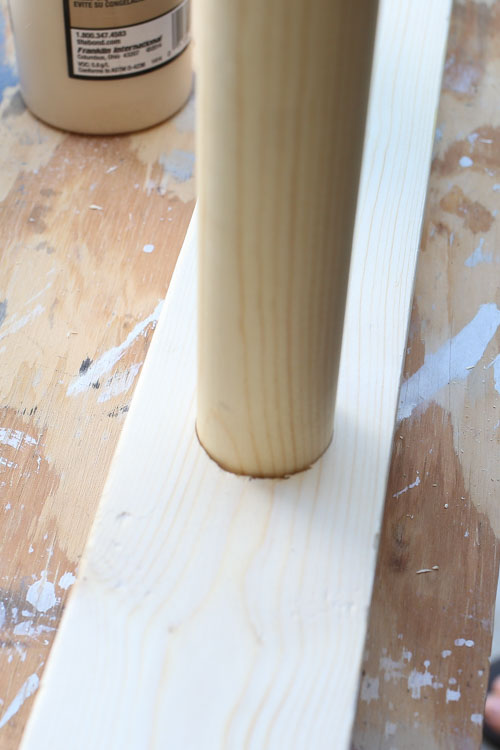
Repeat for the other three holes on the one side piece.
📩 Want to Save This?
Next, tap the wood poles down into the holes with a mallet hammer or hammer gently to ensure they are all the way inserted into the depth of the drilled holes.
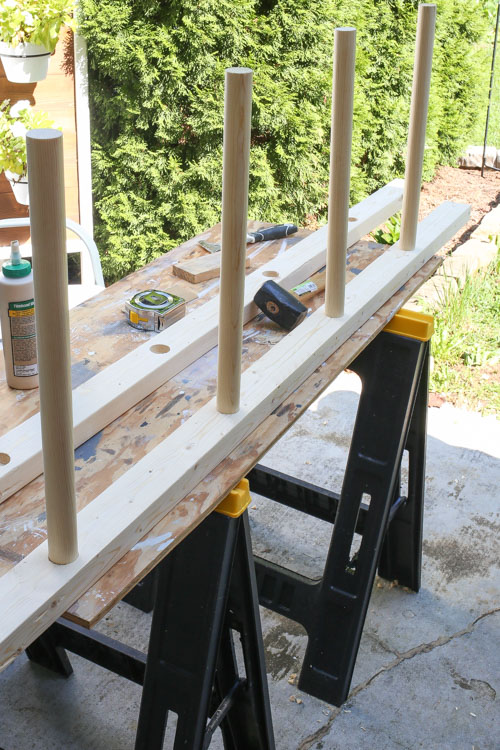
Finally, attach the second side piece of the DIY blanket ladder with wood glue again and tap again with a hammer.
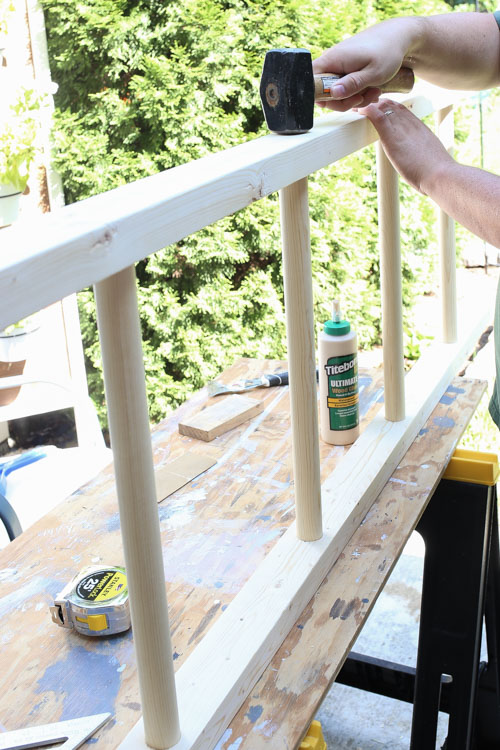
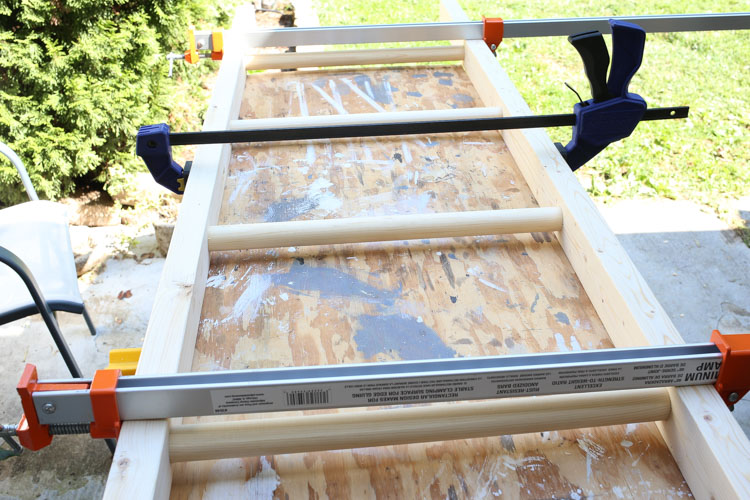
Allow the wood glue to dry with the blanket ladder laying flat. I used some clamps to help hold everything in place securely while the wood glue dried.
5. Apply a finish to your blanket ladder
All finished, pretty simple for how to make a blanket ladder?! With a lovely result of course! Finish the blanket ladder DIY with a stain or weathered finish…
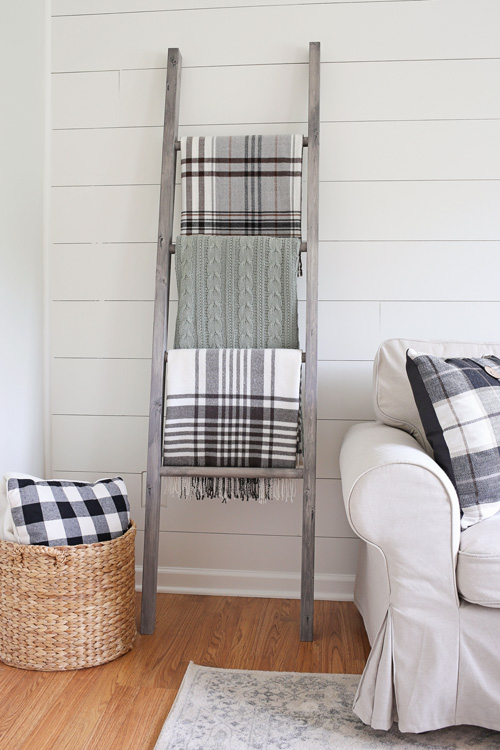
I applied a weathered, barnwood, gray finish, which I love. The tutorial on how to create this Barnwood Gray weathered wood finish is included in Weathered Wood Recipes, which you can learn more about here!

Hope these easy DIY blanket ladder plans are helpful! You could also use this build as a DIY quilt ladder!
Clearly, I love how my blankets look on display lol…
Follow along on Instagram, YouTube and Facebook for sneak peaks and my latest projects!
Want to save for later?! Pin it here:
See a FULL step by step video here:
Subscribe to my YouTube Channel here!

Susan Miller
Saturday 18th of June 2022
I made the blanket ladder today and it is beautiful! Thanks for the awesome instructions.
Angela Marie Made
Monday 20th of June 2022
So happy to hear that!
Lindsey
Sunday 6th of February 2022
Making this! Did you clear coat the over the stain to prevent any bleeding onto the blankets?
Angela Marie Made
Monday 7th of February 2022
Great! Nope that shouldn't happen as long as you let the stain dry fully for a day or two! But you can if would like to :)
Linda Hansen
Thursday 2nd of December 2021
I am finally making this ladder after having the materials for over a year! I am having so much trouble drilling the holes though. We even went and bought better bits, thinking ours were dull. Still having trouble. The drill gets stuck and won't spin. We have tried a few different drills, and still having trouble drilling the hole. Any advice??
Susan Miller
Sunday 19th of June 2022
@Linda Hansen, it’s a little late to answer but I just made a ladder yesterday and had the same issue. Turns out my drill had two settings; one for speed and one for power. I changed it to the power setting, and it worked like a champ. It’s a little slide bar on top of the drill.
Lora Davis
Friday 18th of September 2020
I used this tutorial to make a 3 step ladder for behind my 1/2 bath toilet and hung a wire basket with a paper towel holder. Handy now next to the sink as we aren’t using cloth hand towels during covid. Love this ladder. I might make one to hang blankets eventually!
Angela Marie Made
Monday 21st of September 2020
That is such a cute idea! I love how you used this tutorial to make it work for your own space.
Nic
Monday 31st of August 2020
Such a great tutorial! Can't wait to try it out!
Angela Marie Made
Tuesday 1st of September 2020
That's great to hear. Thank you!