If you have a not so pretty ceiling or want to add more character to a room in a subtle way, a shiplap ceiling DIY project is a great solution!
We added a shiplap ceiling to our half bathroom this past weekend and today I’m sharing the process of how we did our shiplap ceiling installation.
This is my second shiplap project, I previously shared how to install shiplap accent walls for our living room. This shiplap project tutorial is very similar in that I am using plywood boards again, so it’s actually a faux shiplap ceiling because it’s much more affordable (only cost me $15) compared to buying real shiplap boards or tongue and groove boards.
The biggest differences with this tutorial is that the shiplap is installed on the ceiling (instead of the wall) and the space is much smaller (only 25 square feet).
This shiplap ceiling update is part of our half bathroom renovation that I’m completing for the One Room Challenge. It’s currently week 3 of the project. Here is a recap of what has happened with this space the past two weeks:
- ORC Week 1 – Half Bathroom Design Plan and Before Photos
- ORC Week 2 – DIY Panel Door, Demo, and Flooring
Note, this post contains some affiliate links. For more info see my disclosures here.
How to Install a Shiplap Ceiling DIY:
Materials Needed:
- Studfinder
- 4ft x 8ft Plywood Sheets, (1/4″ thick or thinner)
- 1 1/4″ brad nails
- Lightweight Spackle
- Sandpaper
- Paint (we used Sherwin Williams Alabaster in Satin)
- Paintbrush and Roller
- Ceiling Trim or Molding
Tools Needed:
- Miter Saw
- Brad Nailer
- Corner Sander or sanding block
- Circular Saw (or have your home improvement store make the cuts)
- Dremel tool or jigsaw (if needed)
Tip: It’s much easier to do this DIY shiplap ceiling installation with two people!
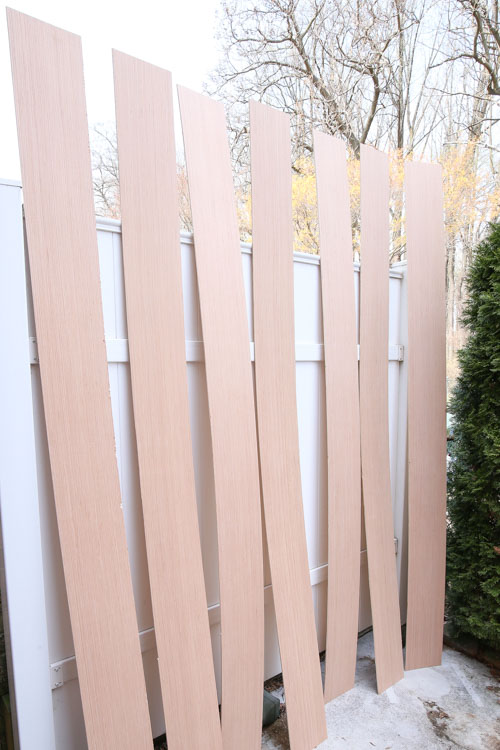
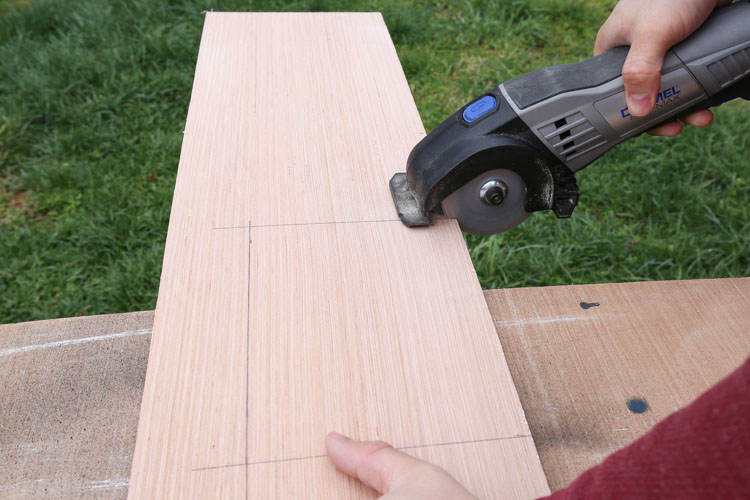
1. Rip plywood board(s) into plank size boards
Measure the length and width of your ceiling to determine how many 4×8 sheets of plywood you need. Then, use a circular saw or table saw and rip (cut) the plywood into 8″ wide planks. Also, your home improvement store can make these cuts for you too, making this step easier!
We used our circular saw and a straight edge guide that we made to make our cuts.
After the cuts are made, sand along the edges with a corner sander or sanding block.
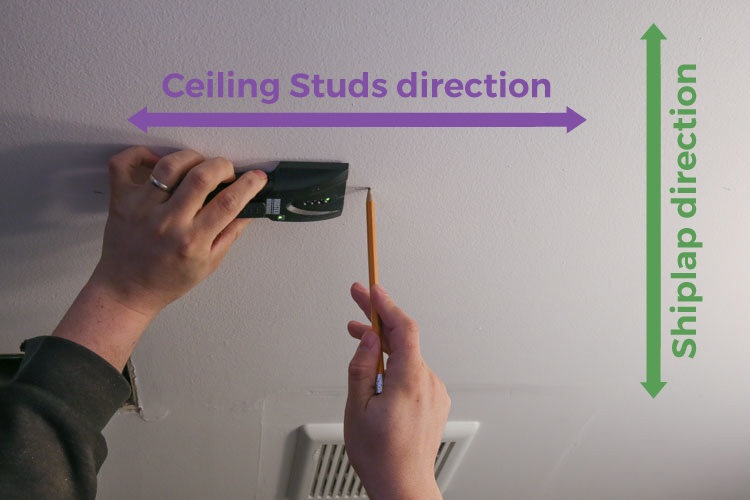
2. Locate and Mark Studs on Ceiling
Use a studfinder and mark where the studs are on the ceiling. It’s important to note which direction the studs are running on the ceiling as this will determine which direction will be best to apply the shiplap boards. In order for each shiplap board to be secured into the studs (instead of just drywall), the shiplap will need to be installed perpendicular to the ceiling studs direction (see below photo).
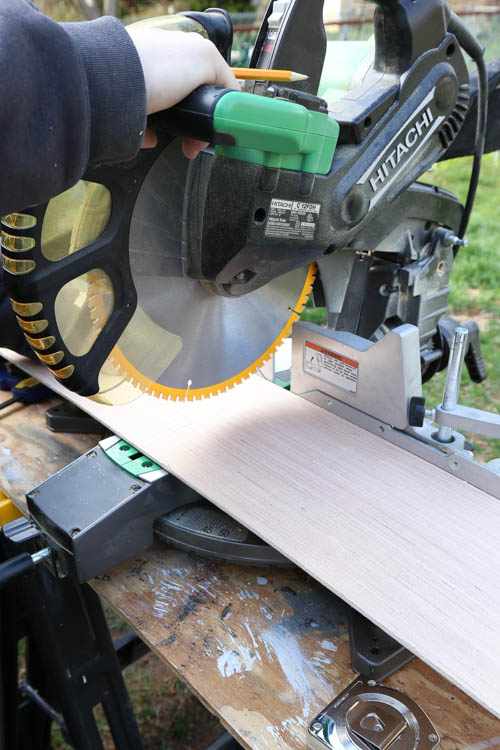
3. Measure ceiling length and cut shiplap boards
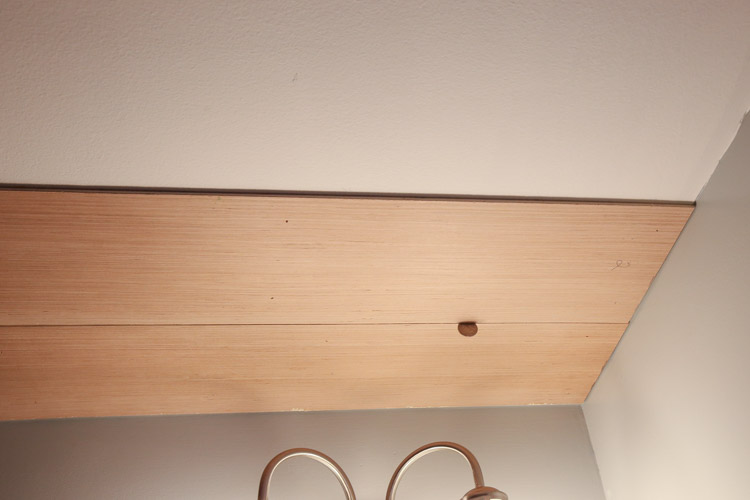
Measure the length of the ceiling and cut your shiplap boards to that length less 1/2″ using a miter saw. Once the shiplap boards are installed, there should be a 1/8″ – 1/4″ gap between the edges of the board and the ceiling edge to allow for any expansion or contraction of the wood. This gap can be covered up by trim. Also, check the ceiling length at a few different places as it may be a little bit different at one end vs. the other other (at least ours was)!
Also, if your ceiling is more than 8 ft, you can proceed to step #4 below.
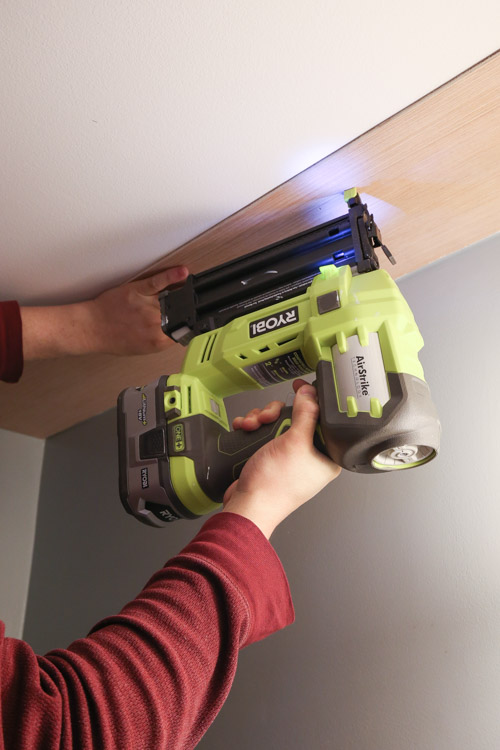
4. Attach the first shiplap board to the ceiling
Hold your first board up against the ceiling and attach it with 1 1/4″ brad nails and a brad nailer. Make sure to nail into the ceiling studs, in addition to the drywall where needed. It helps to have a second person holding the board up in place on one side, while the other person nails the board into the ceiling on the other side.
5. Attach second shiplap board to ceiling
For the second board, if your ceiling is less than 8ft (like my ceiling in this tutorial), the second board will be installed next to the first board. But, if your ceiling is more than 8 ft, you will need to do alternating plank cuts and installation like I did in my living room shiplap accent wall post (see step #5 of this post for more details).
📩 Want to Save This?
Before attaching the second board, use a paint brush and paint the gap area between the boards. This really helps save time and effort with painting instead of trying to get in between the board gaps when you paint the entire ceiling. I forgot to do this step so that’s why it’s missing in the photos!
Use quarters (or nickels) as spacers between each board to leave a small gap which provides that shiplap look. This is why it really helps to have two people doing this so at least one quarter can be held in place at each end until the second board is nailed into place.
6. Install remaining shiplap boards to ceiling
Continue the above step for the remaining boards until your shiplap ceiling DIY is complete! For ceiling vents or any other special cuts, see step #7.
Once you get to your final board, you will most likely need to rip (cut) your board width to size. Measure how wide your board needs to be for the final row and rip it to size with a circular saw, table saw, Dremel, or jig saw.
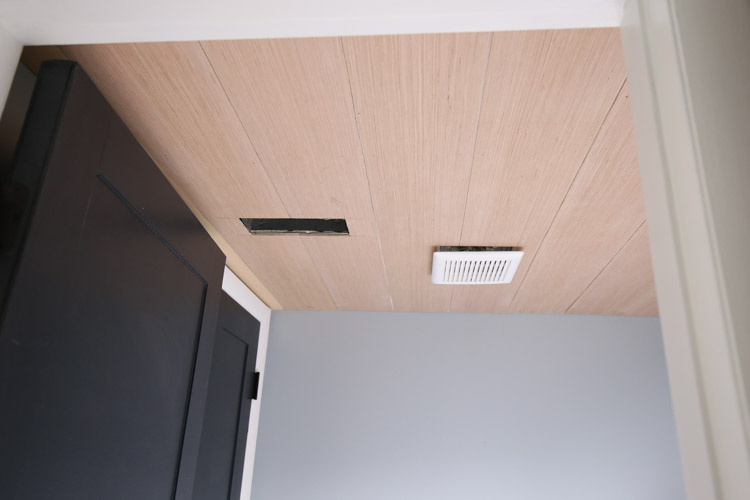
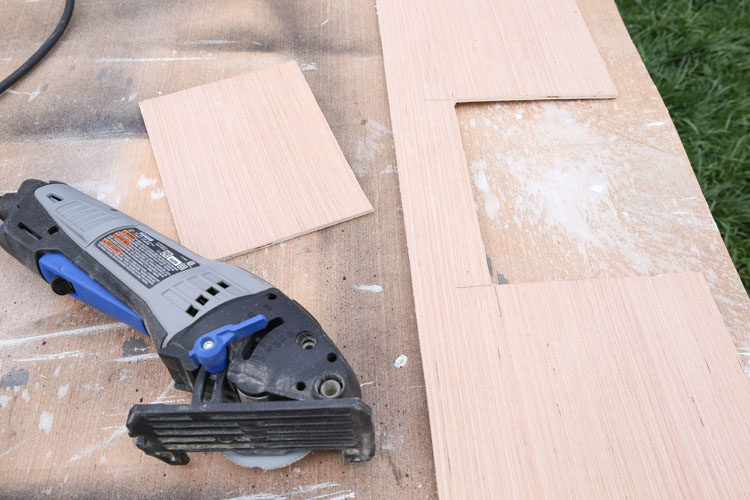
7. Make special cuts for ceiling vents
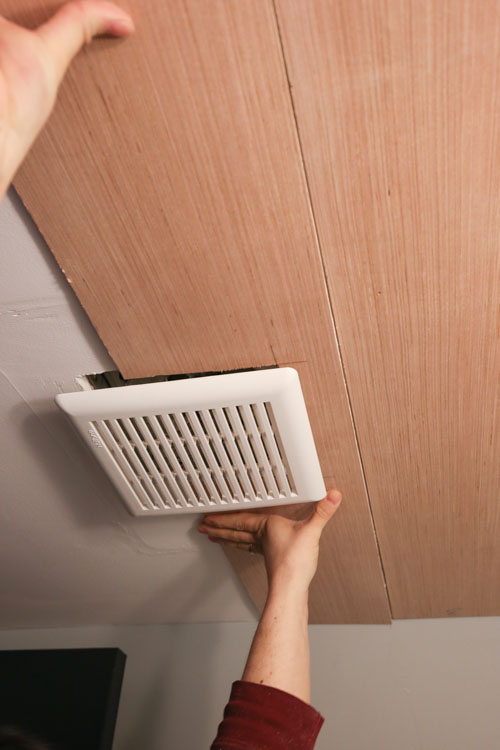
Our ceiling unfortunately has two vents. The shiplap plank that overlaps the vents needs to have a custom size opening cut out. Hold your board up and mark where the opening needs to be cut out of the board. Also, measure and mark your cutouts based on the duct opening size.
Use a Dremel tool or jigsaw to cut the opening out of the shiplap.
Then, carefully slide the board into place around the ceiling vent and nail into place.
8. Spackle, sand, and paint the shiplap ceiling
Fill all the nail holes on your shiplap boards with a lightweight spackle, let dry, then lightly sand the spackle.
Next, paint the shiplap boards with a roller. We used Sherwin Williams Alabaster in Satin, although I kind of wish I did eggshell instead!
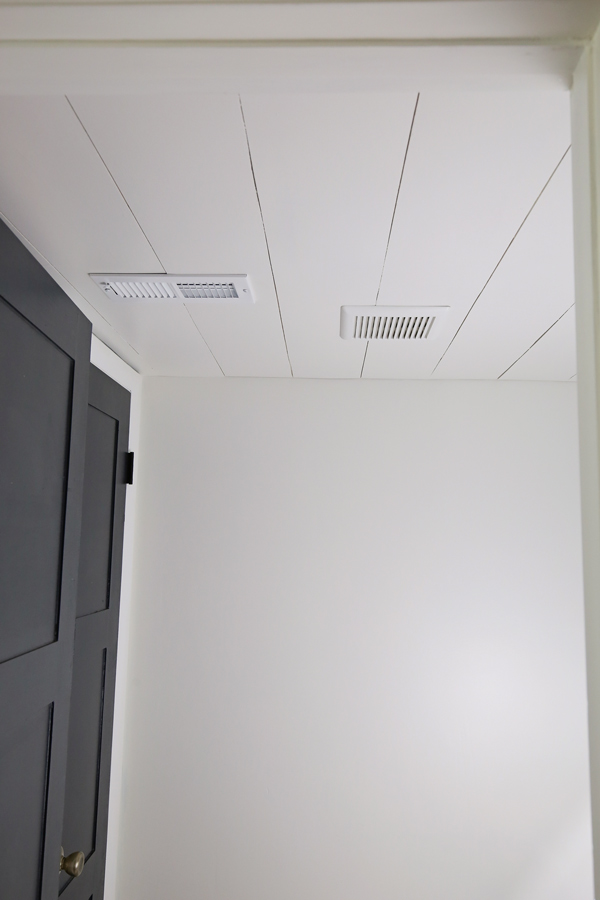
9. Add ceiling trim or molding
The final step is to add ceiling trim or molding, which we will be doing soon and I will update this post with some final photos. But, in the meantime here is an almost finished project photo compared to our before photo! What a difference than before right?!
What do you think of our shiplap ceiling DIY?! I’m so happy to complete a project this week after a rough start to projects last week ha! I still need to add ceiling trim and finish painting all the walls, but it’s feels great to make some progress :).
Follow along on Instagram and Facebook for my latest projects and to stay up to date on our half bathroom renovation! Also, check out the other ORC participants rooms here and see how their rooms are progressing!