Today I’m sharing how to build this wood, DIY end table!
And it only costs about $16 in lumber to make!
Although this DIY side table can be used for any space, I came up with the idea for it based on our need for a small table next to the glider in our nursery. I knew I wanted a round end table so that it would fit well in the corner space.
I kind of came up with the build plans for the side table as I went, but I knew that I wanted a mix of classic and modern for the look of it.

How to Build a DIY End Table:
Materials:
- (1) 18″ round panel board
- (2) 2×2 @ 8ft (I used furring boards to save $)
- (1) 1×3 @ 6ft
- 1″ brad nails
- 1 1/4″ and 2″ and 2 1/2″ Kreg screws
- Wood glue
- Wood filler
- Wood stain (or paint)
Tools:
- Kreg Jig
- Miter saw
- Drill
- Brad nailer
- Clamps
- Tape Measure
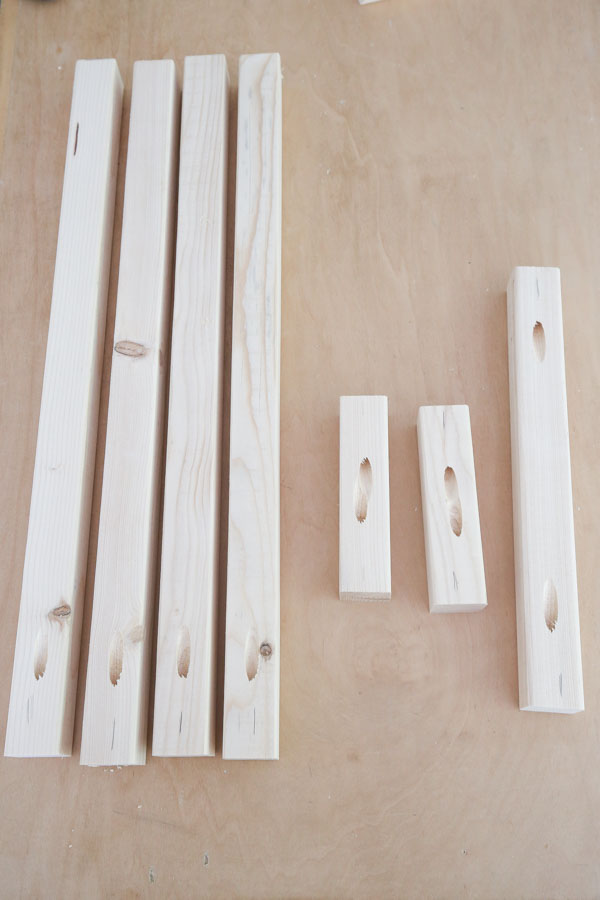
1. Make initial lumber cuts and add pocket holes for table legs
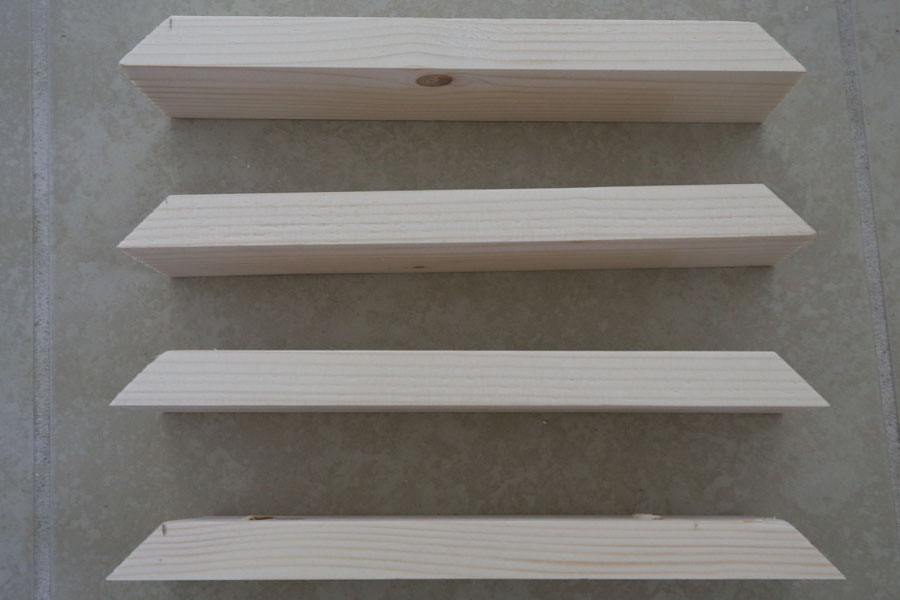
Use a miter saw and make the following cuts from the 2x2s:
- (4) 2×2 @ 23″ (for the table legs)
- (1) 2×2 @ 13″
- (2) 2×2 @ 5 3/4″
Note, there will be more lumber cuts for the aprons in step #3.
Then, add pocket holes with the Kreg Jig to each end of the 13″ and 5 3/4″ boards. Set the Kreg Jig for 1 1/2″ thick wood.
For the 5 3/4″ boards boards, the two pocket holes almost look like one big hole even though they are just holes on each side.
Also, add pocket holes to just one end of the four boards at 23″.
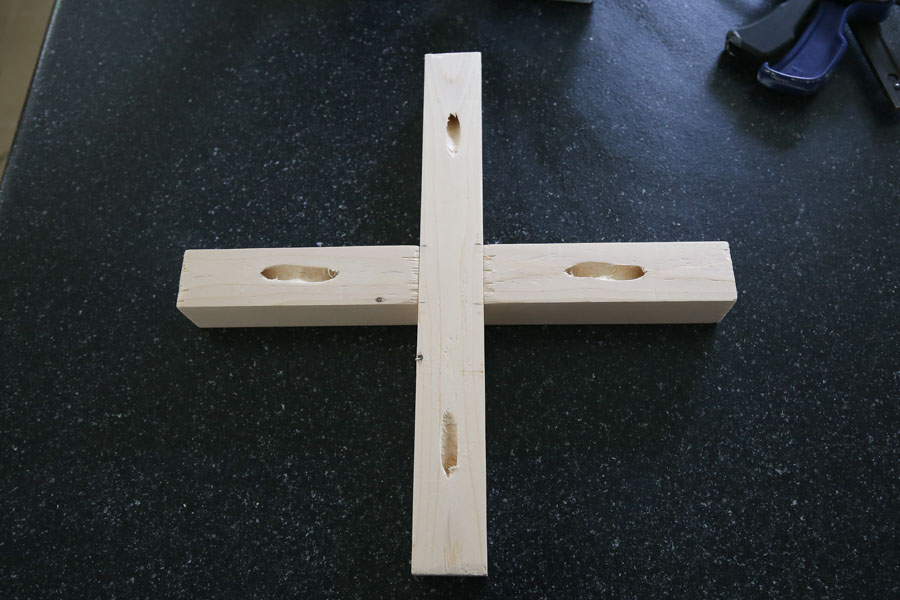
2. Assemble the DIY end table legs and base
Mark 5 3/4″ and 7 1/4″ on the 13″ board. This is the center point of the board where the two short board pieces will attach to in order to create the X frame of the table base.
Attach each 5 3/4″ board to the center of the 13″ board with 2 1/2″ Kreg screws and wood glue.
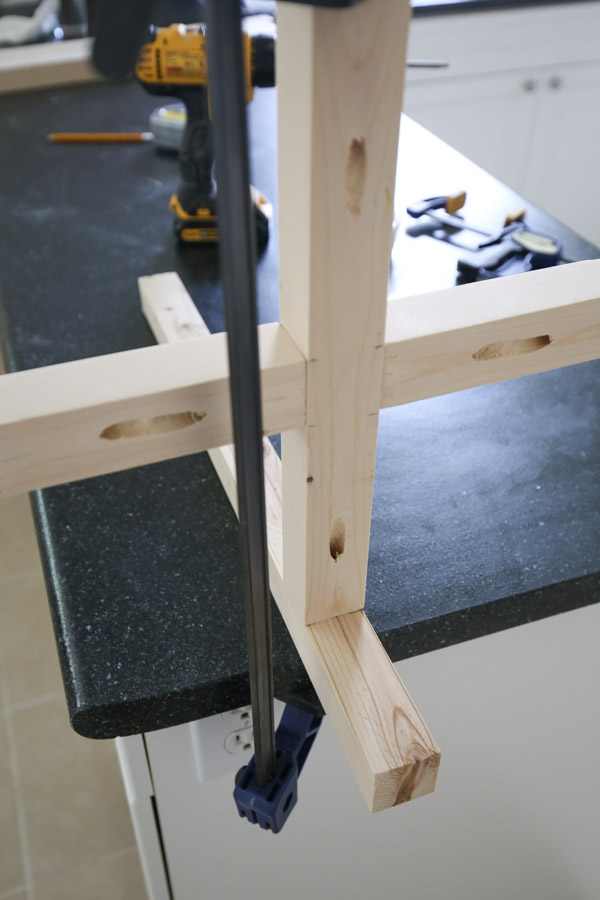
Next, attach the X frame piece to each 23″ table leg board, making sure it’s attached 4″ up from the bottom of table leg. Attach with a drill and 2 1/2″ Kreg screws and wood glue.
If you have trouble getting your Kreg drill bit in the hole, you can try a shorter Kreg drill bit too!
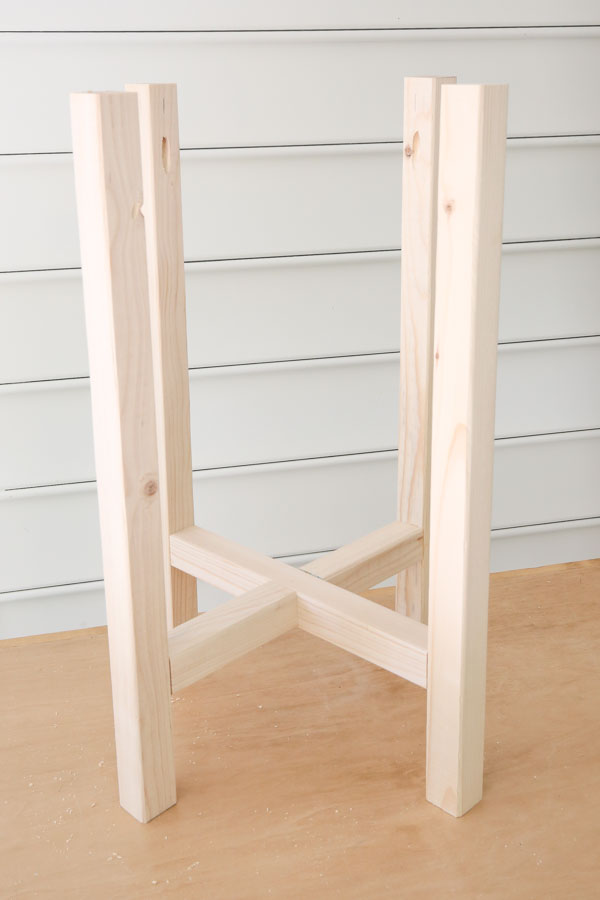
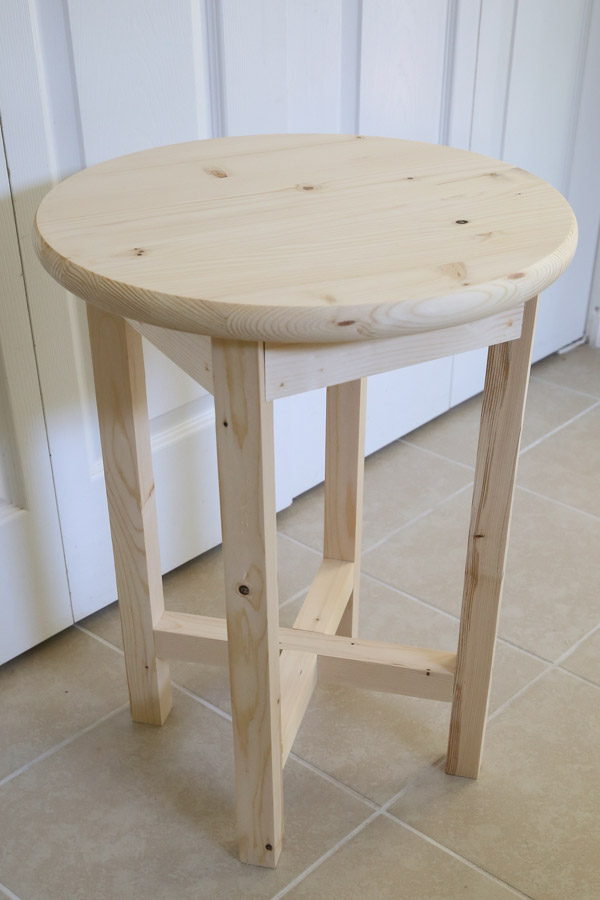
Once all four table legs are attached to the X frame, your DIY end table base will look like this:
3. Cut wood to size and add pocket holes for DIY end table aprons
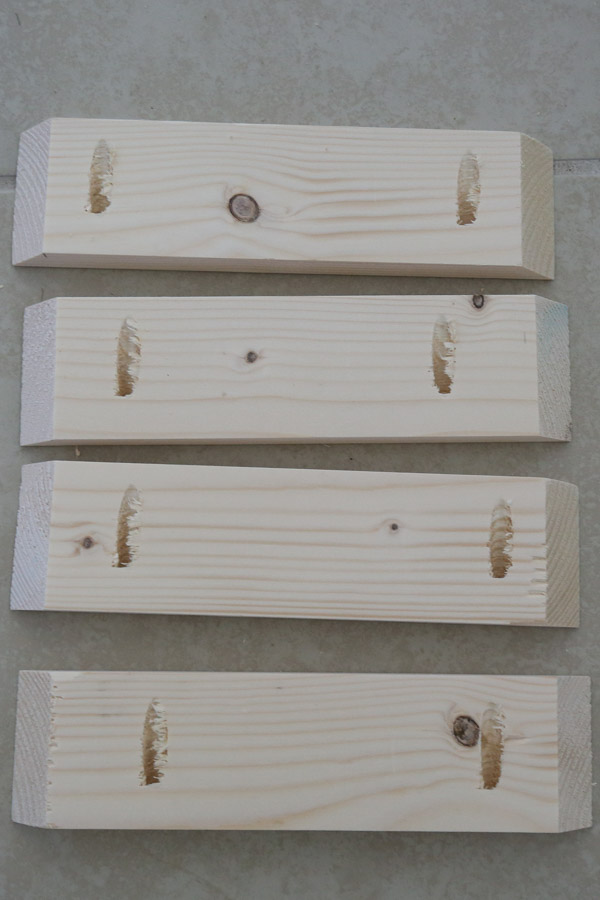
Use a miter saw and make the following 45 degree bevel cuts from the 1×3:
- (4) 1×3 @ 8 1/4″ from short point to short point of the 45 degree bevel cut
📩 Want to Save This?
Then, add two pocket holes to one edge of each of the four boards. Make sure to set the Kreg Jig to 3/4″ thick wood.
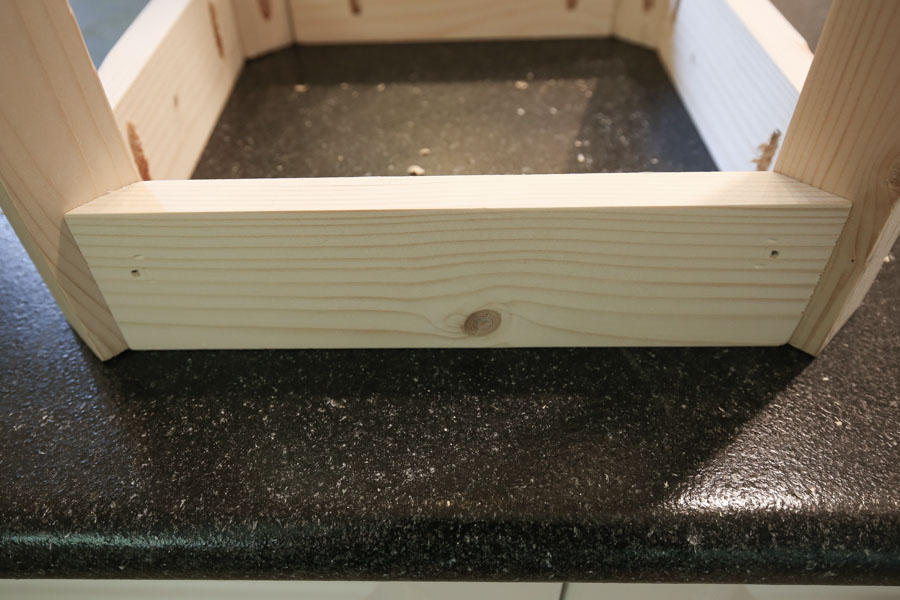
4. Attach DIY side table aprons to table base
Now it’s time to attach the table aprons. Make sure all pocket holes are facing the top of the table base where they will go into the table top board. Line the inside corners of the boards up.
Use a brad nailer and attach with 1″ brad nails and wood glue.
These nails are just to hold things in place as both the base and apron boards will all securely be attached to the table top board with Kreg screws.
I found it easiest to assemble the aprons this way since we are working with angles and framing lumber and things don’t always line up perfectly!
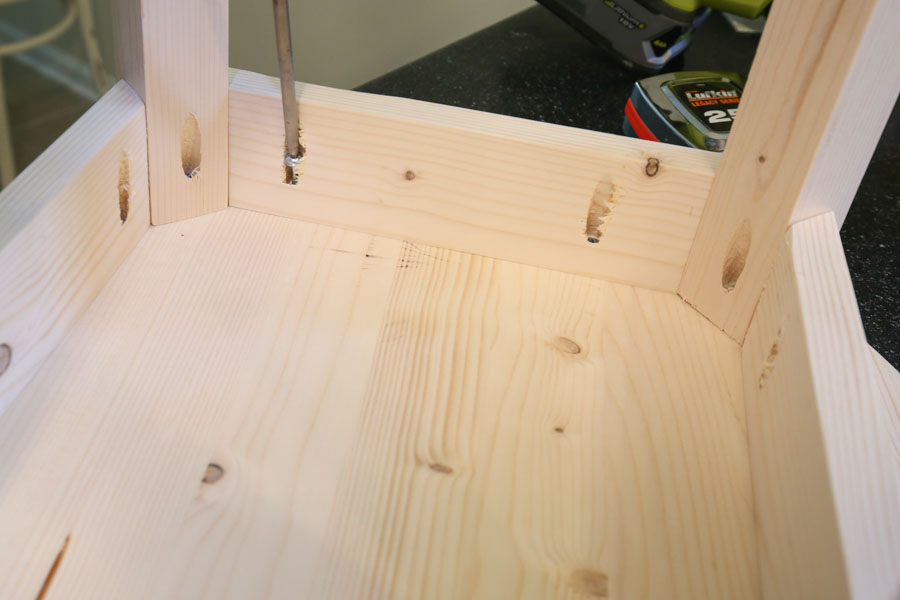
5. Attach end table aprons and base to table top board
Center the table base on the round board before attaching. There should be a 1″ overhang from the table edge to the 2×2 legs.
Use a drill and Kreg screws to attach the table base and aprons to the bottom of the round, table top board.
Make sure to use 1 1/4″ Kreg screws into the aprons and 2” Kreg screws into the table leg pocket holes. I messed this up at first and used 2 1/2” screws into the legs by accident and it went through the table top. But you want to use 2” screws because we are attaching thicker wood to thinner wood!
Also, I know it’s a lot of Kreg screws being used for both the table legs and aprons, but it seemed like the most secure way to attach everything together so the table was super stable!
Now your DIY end table build is complete!
6. Stain or paint DIY end table
Finish off your DIY side table with stain or paint. Make sure to fill the nail holes with wood filler.
I used Provincial by Minwax for my wood stain color. You can also add a top coat for protection if you prefer! I plan on adding some poly to mine soon.
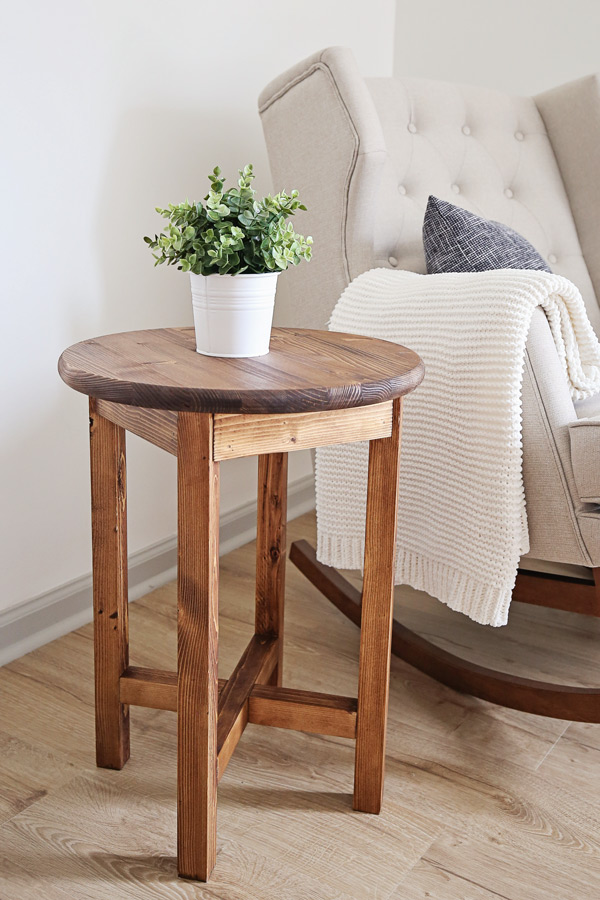
This DIY end table was a really easy, quick, inexpensive build and it adds the perfect amount of table surface next to our glider! I can’t wait to add a rug under it and I think it will be a nice spot for a sound machine as well!
Time for the next nursery project! Follow along for my latest nursery projects and sneak peaks on Instagram and Pinterest!
Want to save for later? Pin it here:

Antonia
Thursday 30th of June 2022
Hi there, I'm thinking of tackling this project! I know you used a kreg jig. Which one do you have/ recommend for a budding woodworker/ diyer?
Angela Marie Made
Tuesday 5th of July 2022
I have the 720 model currently and I love it! If you're not ready to invest in that one though I would recommend the Kreg Jig mini (the 320 model)!
Marvin's Tiny Wood Shop
Friday 6th of September 2019
Hi Angela - That's a nice little item. I have been making rectangular tables, but I might just make a few of these. Probably cost me only the screws and glue. I get free pine at Lowes. May be a while, I am backed up with a kitchen Island top with laminated Pine, Walnut, Hickory and red Cedar. Also need to start on live edge dining table (walnut) for a returning customer. You certainly have great ideas, but we can't make everything we would like - not enough years to make everything. Right now, I'm going to make a couple of ball point pens as a closing gift for a real estate buyer. Thank you for your emails.
Angela Marie Made
Saturday 7th of September 2019
Thank you Marvin! That all sounds great, lots of great builds to work on!