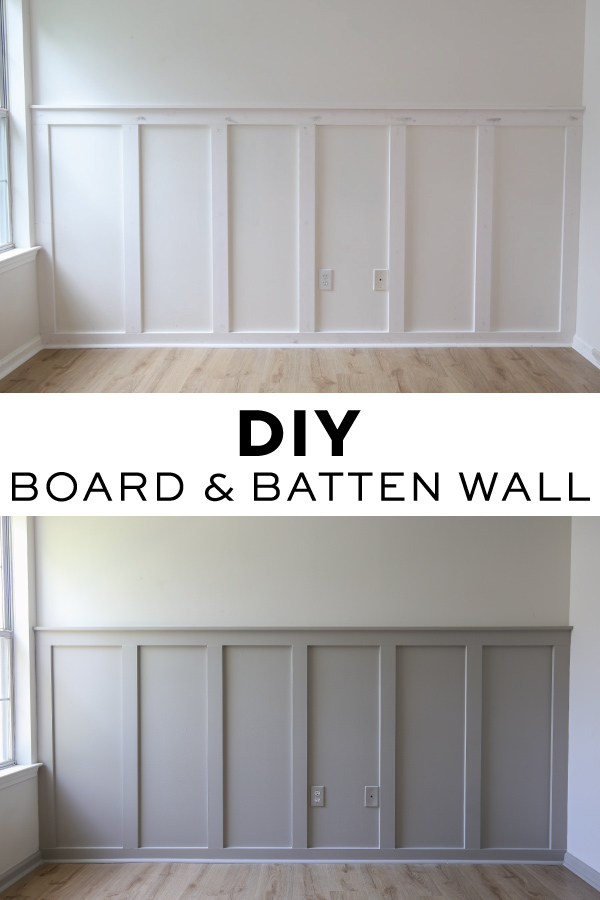
This past weekend we installed a classic, DIY board and batten wall in our soon to be nursery! It was a really easy and affordable project that didn’t take much time at all!
We decided to do a board and batten accent wall and make it a very classic board and batten wainscoting style since we plan on adding wallpaper above it and making the wall a statement feature!
A few years ago, we did a bit fancier style of DIY board and batten in our bathroom on all the walls, which I love, but this tutorial is even simpler since it involves a few less pieces of molding and boards! The step by step tutorial and a video is below!
This project cost us only $84 total to complete a 10ft. wall. That price includes the boards, caulk, and 1 gallon of paint. We already had the other materials on hand (roller, Liquid Nails, and spackle).
Also, for another style option, check out my tutorial on floor to ceiling board and batten with crown molding! And check out our full room DIY board and batten where I share 5 tips for installing board and batten around an entire room!
Note, this post contains some affiliate links. For more info see my disclosures here.
DIY Board and Batten Wall:
Materials Needed:
- 1×4 @ 8ft or 12ft (We used these pre-primed MDF boards)***
- 1×2 @ 8ft or 12ft (We used this pre-primed MDF board)
- 1 1/4″ and 2″ brad nails
- Construction adhesive (we used Liquid Nails)
- Paintable Caulk
- Lightweight Spackle
- Paint (We used Mindful Gray by Sherwin Williams in eggshell)
- Paint roller and tray
- Primer (if boards aren’t pre-primed)
Tools Needed:
- Miter saw
- Brad nailer
- Level
- Dremel, jigsaw, or wood chisel (optional, only if needed)
- Measuring tape
- Stud finder
- Utility Knife
- Prybar and Hammer (to remove old baseboard)
***Note, the amount of boards you will need depends on the measurement of your wall(s). Also, wood boards may be used instead of MDF, especially for rooms with a high water exposure. I used wood boards for my board and batten bathroom. MDF can be a less expensive alternative to wood though.
*See a full step by step video of this board and batten tutorial here and at the bottom of this post, along with a printable material list!*
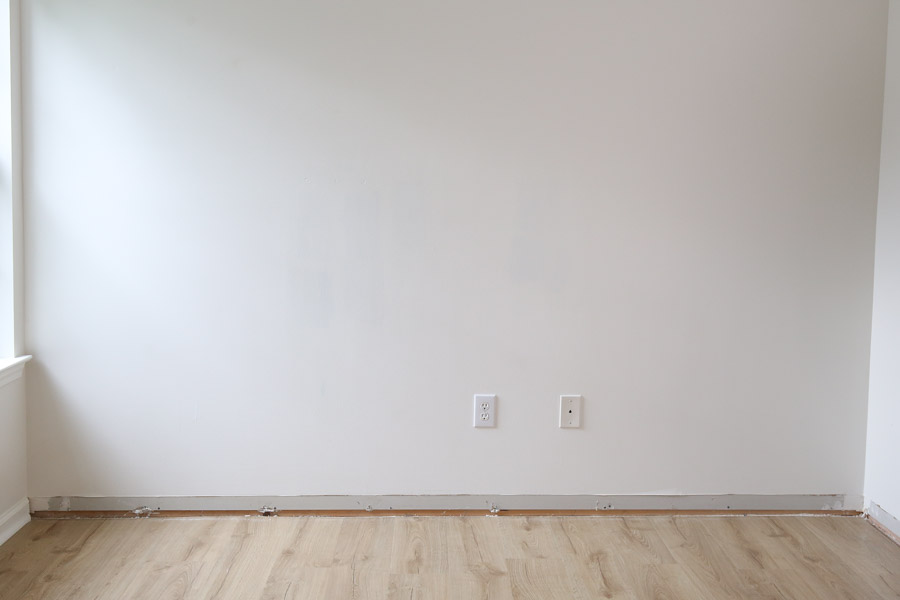
1. Remove existing baseboards from wall
To remove the existing baseboard, score the top and corner caulk lines with a utility knife. Then, use a prybar and hammer to remove the baseboard from the wall.

A Note About Baseboards for Board and Batten:
For our board and batten wall, we removed and replaced the existing baseboard (which was less than 1/4″ thick at the top) so that the battens (vertical boards) would line up perfectly and not have any weird overhang.
If you have baseboards like us that are thinner than the molding being used, you can technically cut the battens with a mitered angle at the bottom if you don’t want to remove the original baseboard.
But, it doesn’t look as nice or professional in my opinion as baseboards that are the same thickness as the vertical batten boards. That’s why we replaced our baseboard with the same style boards as the rest of the board and batten pieces.
Also, we used a 1×4 board (which measures 3.5″ tall) to match the existing height of the baseboard still in place on the other walls, for a seamless look! It’s totally up to you on what you prefer to do though for the baseboard!
And a Quick Note About Wall Texture:
Our walls have a slight texture to them, but it’s really not noticeable unless you get up close.
If you have a really textured wall though (that’s super noticeable) and want to make the wall totally smooth for your board and batten spacing, then I would attach a 1/8″ panel board (such as hardboard or plywood) cut to size on the wall. They come in 4×8 foot sheets and the home improvement store can cut them for you too.
Check out my floor to ceiling DIY board and batten accent wall tutorial to see how we covered our walls with panel boards due to damaged drywall.
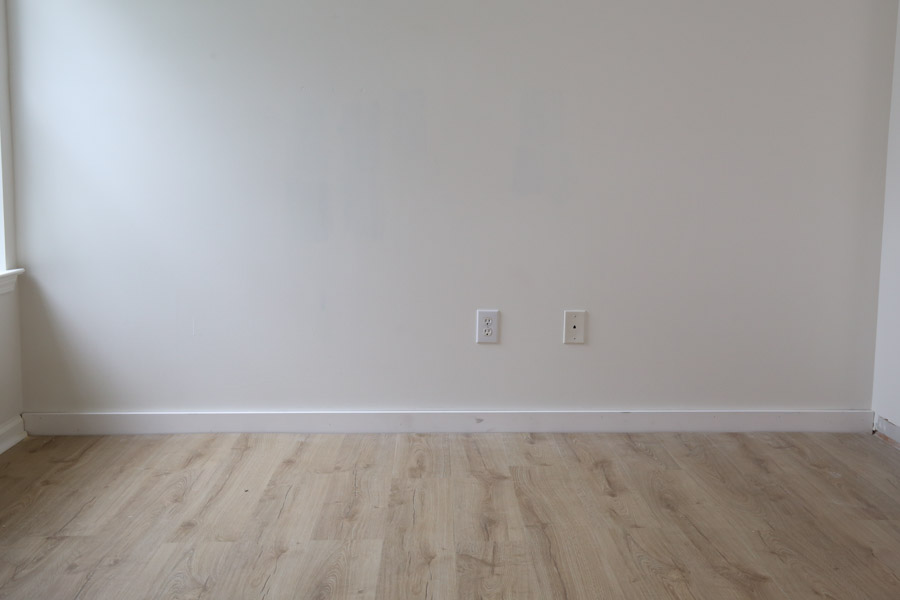
2. Install new baseboard
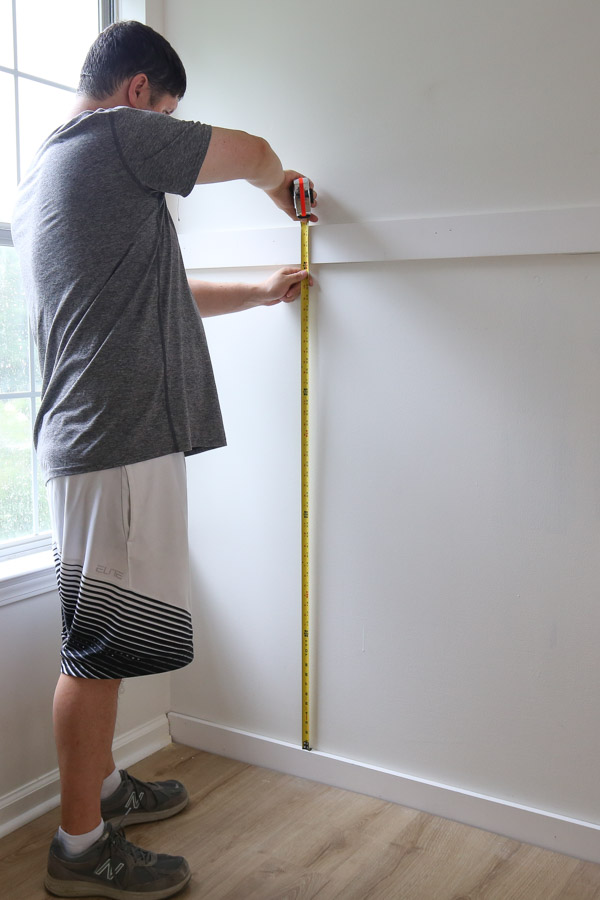
Measure the length of your wall and cut the 1×4 to size using a miter saw.
Our wall was about 10ft long, so we bought the 12ft long pre-primed board and had Lowe’s cut the board to just a bit longer than 10ft so it would fit in our car. Then, we made the final exact cut with our miter saw at home.
If your wall is longer than 10 ft. you can just use multiple boards and fill the seams between boards with wood filler, spackle, or caulk.
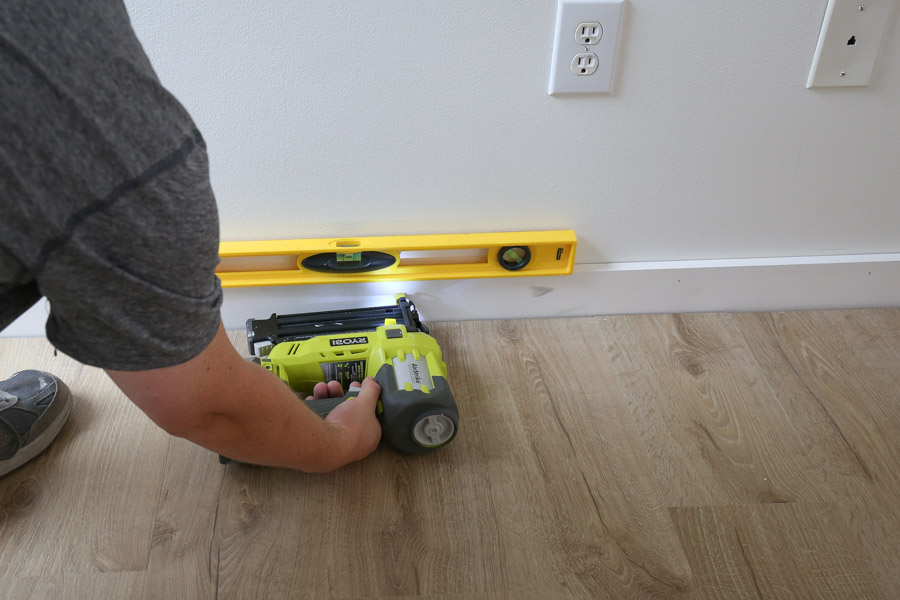
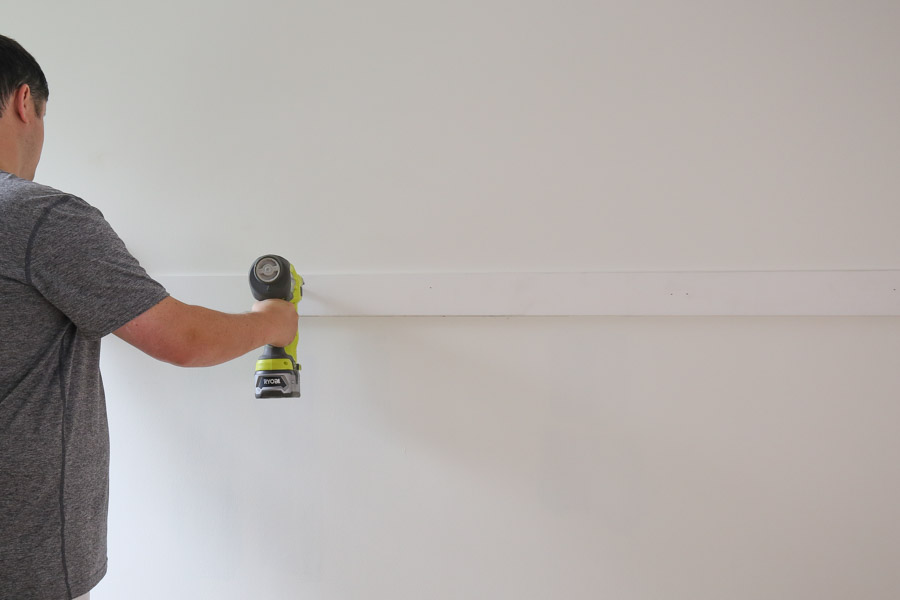
Install the baseboard along the bottom of the wall with a brad nailer and 2″ brad nails going into the wall studs (use a studfinder to find the wall studs).
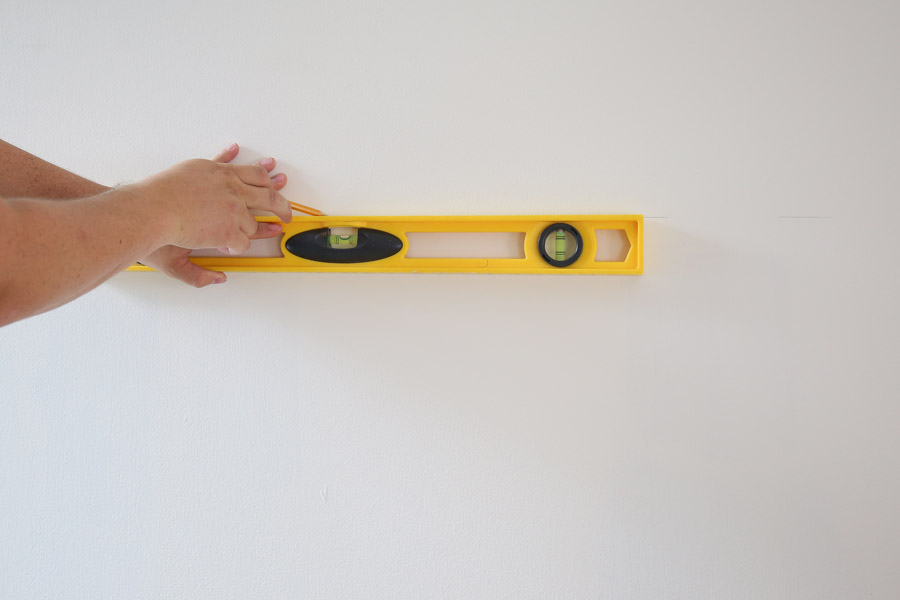
Use a level too for installation to ensure the baseboard is level when installed.
Also, if you are just doing one accent wall like us, cut the adjacent wall molding corners (if needed) with a Dremel, jig saw, or wood chisel and hammer in order to fit the new board.
You can also use these tools to cut around any wall objects, like wall outlets, if needed. Check out my board and batten bathroom DIY tutorial for photos and details on how to cut around outlets, pipes, light switches, etc!
3. Attach middle board to wall
Determine how high up you want your DIY board and batten wall to be.
We wanted to do a little higher than halfway up the wall at 55″ high once the board and batten accent wall was complete. So, that meant our middle 1×4 board should be installed with the bottom of it 48″ above the top of the baseboard.
Use a level and mark 48″ up from the top of the baseboard on each side of the wall. Then, cut a 1×4 board to size for the length of the wall and install it at those marks with 2″ brad nails into the wall studs.
📩 Want to Save This?
4. Determine batten (vertical board) spacing
Determine what you want the spacing to be for your DIY board and batten. Common spacing includes anywhere between 12″ – 20″.
For this tutorial, I did 16.5″ between each board. And for our DIY board and batten bathroom (which was a much smaller room) I did 12″ spacing which was a good spacing for the small scale of the room. For our floor to ceiling DIY board and batten accent wall in our living room, which was a very large wall, I used 26″ spacing.
If you’re doing a board and batten accent wall and want to have a batten board starting and ending on both corners of the wall, here is how I figured out my exact batten spacing:
I knew I wanted around 16-18 inches of spacing between each board so it would like right visually. So, to figure out the math and see about how many battens that would be, I took our total wall length of 123.5″ and divided by 17″, which equaled roughly 7 boards.
To get the exact spacing, I then did the following math:
7 batten boards x 3.5″ (actual width of 1×4 boards) = 24.5″
123.5″ (length of wall) – 24.5″ = 99″
99″ / 6 (the # of spaces between 7 boards) = 16.5″
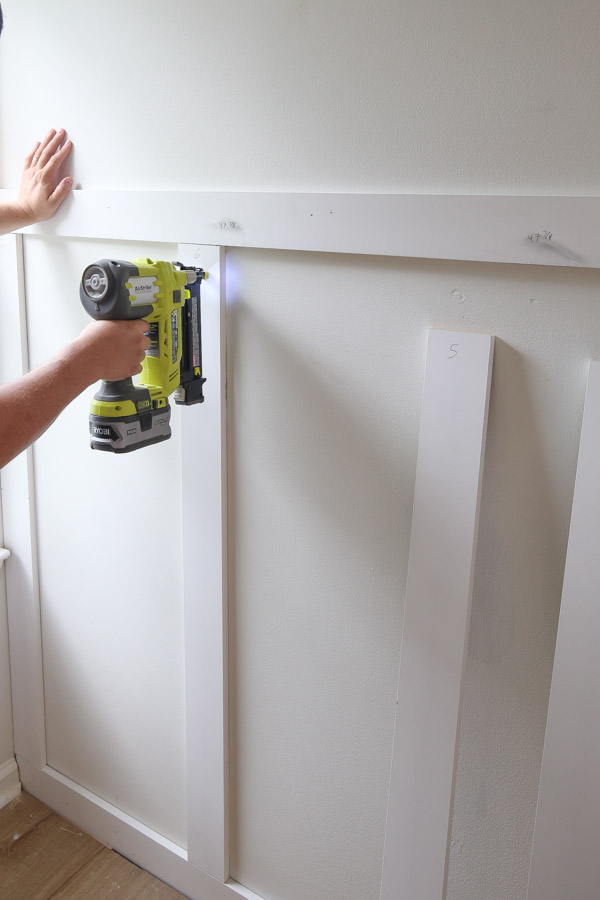
5. Attach battens (vertical boards) to the wall
Mark on the wall exactly where your battens need to go based on the spacing you determined in step #4.
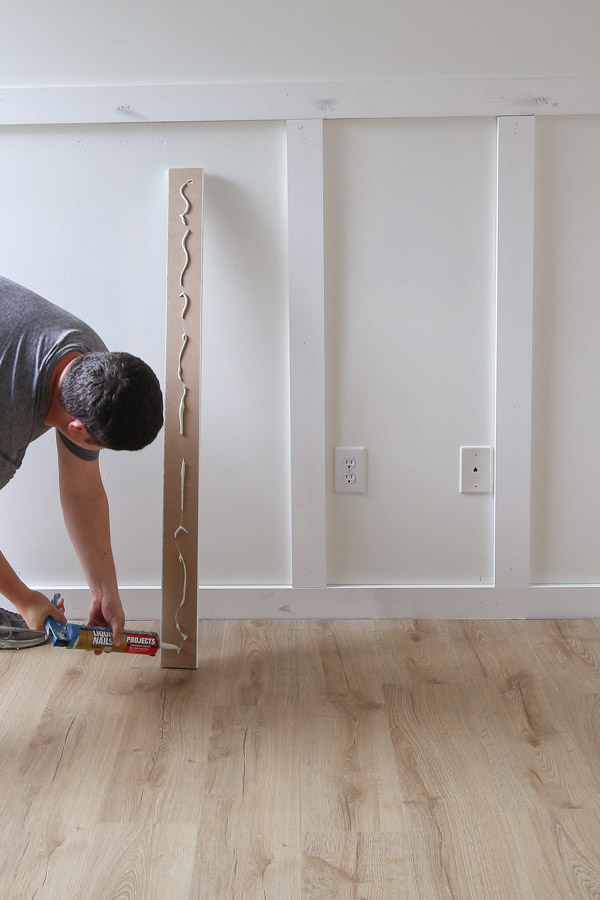
Then, measure the exact height needed for each batten based on where they will be attached to the wall. Because most walls aren’t perfectly straight, the measurements may be slightly different for each. Cut each 1×4 batten to size using a miter saw.
Use construction adhesive (we used Liquid Nails) and 1 1/4″ brad nails to attach the battens to the wall.
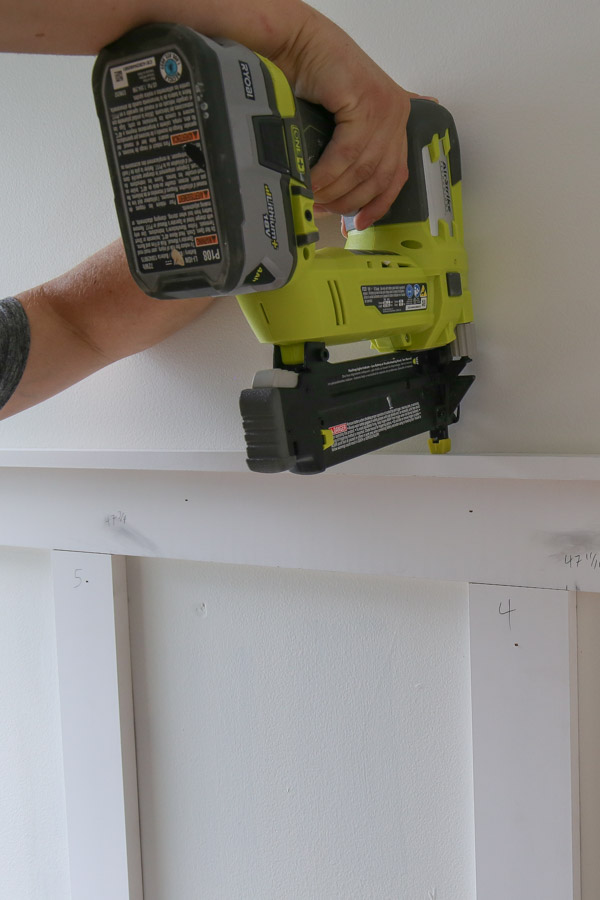
6. Add the top board to board and batten wall
Cut your 1×2 board to size (this will be the top board) and install it on top of the middle 1×4 board with 1 1/4″ brad nails and some construction adhesive to create a top ledge.
Also, we added our original shoe molding (quarter round) back to the baseboard to match our other side wall molding and cover flooring gaps.

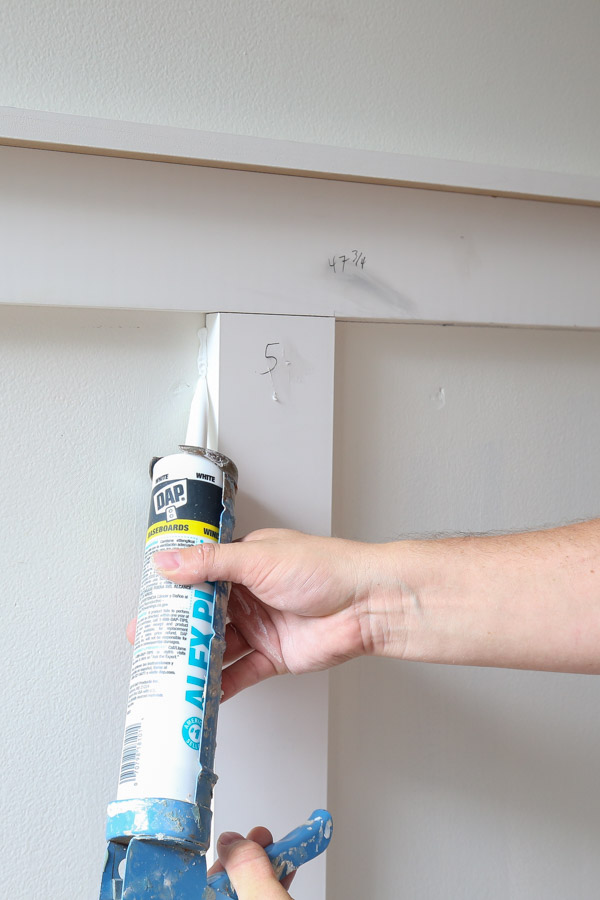
7. Fill holes, caulk, and paint DIY board and batten
Fill all nail holes with a lightweight spackle, allow it to dry, then lightly hand sand any excess if needed.
Next, caulk all seams and corners with a paintable caulk.
Finally, paint your DIY board and batten wall! If you didn’t use pre-primed boards, make sure to prime first. We used Sherwin Williams Mindful Gray in eggshell for our paint color.
Note, for step by step details on how to paint an accent wall, see our DIY painted accent wall tutorial!
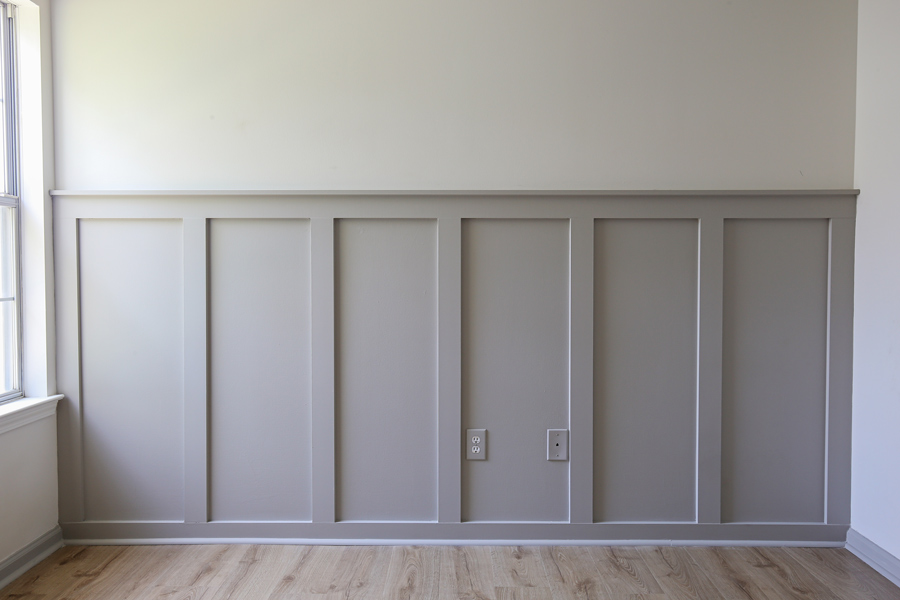
And here is the final reveal with the board and batten accent wall all painted!
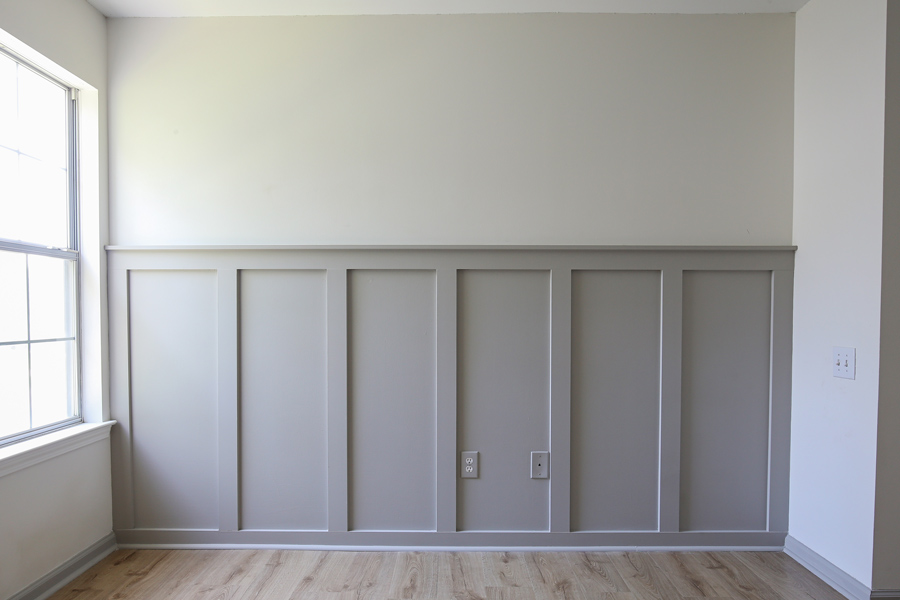
Overall, I just love how our DIY board and batten wall turned out! Especially, with the gray paint color instead of white paint to mix things up!
It’s really a simple, affordable project that can totally transform a room and add character! Next up we will be adding wallpaper above it which I’m super excited about doing!
If you create a board and batten wall, please share it with me on social media @angelamariemade!
See the final nursery reveal here! And see our 5 tips for full room DIY board and batten!
Follow along on Instagram, Facebook and Pinterest for my latest projects, fun updates, and sneak peeks, including all of our upcoming nursery projects!
Learn how to easily install a DIY board and batten wall in any room! This budget friendly and simple DIY board and batten accent wall will add instant character to your home! 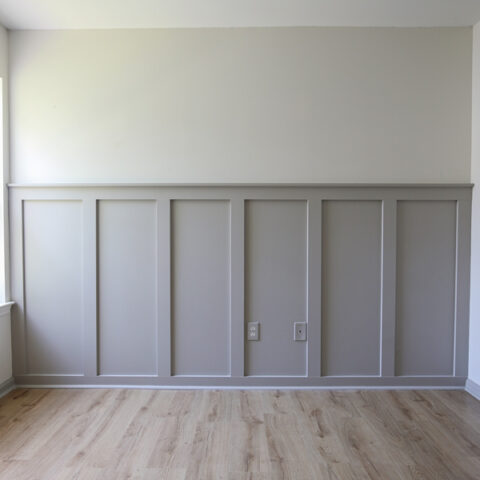
Easy DIY Board and Batten Wall
Materials
Tools
Instructions
Inge
Sunday 22nd of September 2024
This looks so great! What kind of paint do you use that works for both the wall itself and the wood/mdf on top?
Angela Marie Made
Thursday 26th of September 2024
I just used regular latex wall paint!
Jennifer
Saturday 27th of July 2024
Hello,
We followed this tutorial and everything was great except you can see the texture of the caulk (probably because my husband isn’t a pro at it) and he bought paintable caulk but the white caulk is totally showing through the dark paint. It looks awful, help!
Angela Marie Made
Wednesday 31st of July 2024
Did you use paintable caulk? That might be the cause! You could try removing the caulk and redoing it with a high quality paintable caulk!
Mike Davis
Thursday 28th of March 2024
I'm concerned about the glued board will not sit flat on to the wallboard. The nails will only penetrate wallboard, not studs. Should I be concerned?
Also...we are doing one accent wall that is 27' long. We want 3"W x 8'H vertical boards. What would you recommend as the spacing?
Nice work! Mike
Angela Marie Made
Wednesday 3rd of April 2024
As for the spacing, it really depends on the look you want! Common spacing is usually between 12″ – 20″.
Angela Marie Made
Wednesday 3rd of April 2024
As long as you use the construction adhesive and nails, it's okay to not hit a wall stud! If your wall isn't straight and the boards aren't sitting flush, you can use wood shims behind the boards to help fix this! You can see this in action in the video tutorials I have for board and batten!
Kristi
Monday 25th of September 2023
How tall are your ceilings?? Ours are 9ft. Wondering if we should raise the middle horizontal board a little higher than 55 inches. Thanks!
Angela Marie Made
Wednesday 11th of October 2023
The ceiling was 8ft!
Alicia
Saturday 25th of March 2023
So I am doing an accent wall behind my headboard in bedroom in a darker color. The thing I am worried about is that the door to the bathroom is on the same wall. Do you think it will look funny with a white door and frame surrounded by a bolder colored grayish-blue board and batten wall? I am also worried that the door trim will be a tiny bit thinner than the batten boards. I wasn’t going to do the paneling board behind because that will only make it thicker.