Learn how to make cute, wooden DIY plant markers with a Cricut to customize the plant labels!
I’m super excited to share the cutest, wooden DIY plant markers today! These garden makers are adorable and would look great in any garden or plant pot.
The best part about them is that they are totally customizable! I used my Cricut Maker to create the exact DIY plant labels I needed to go on the plant markers! I’m sharing the step by step tutorial below!
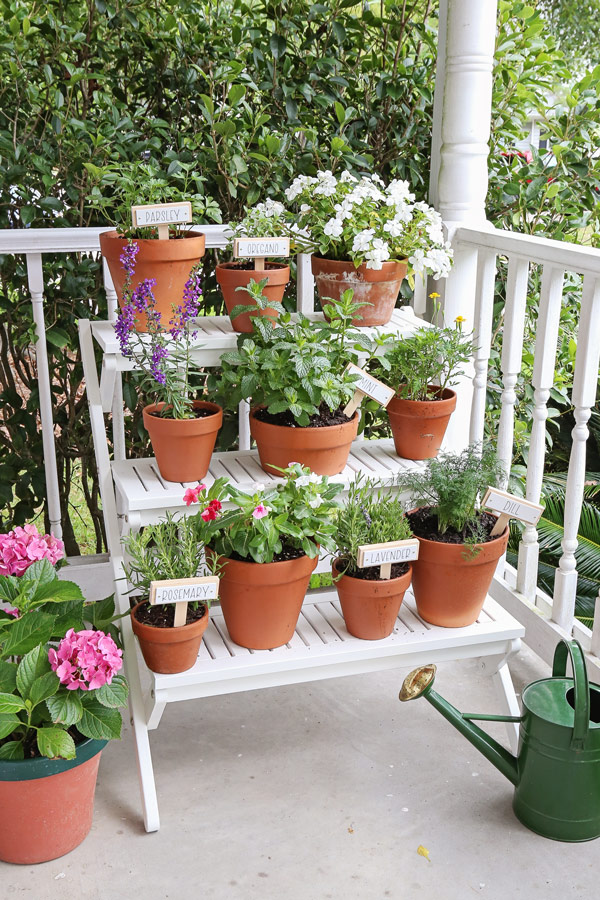
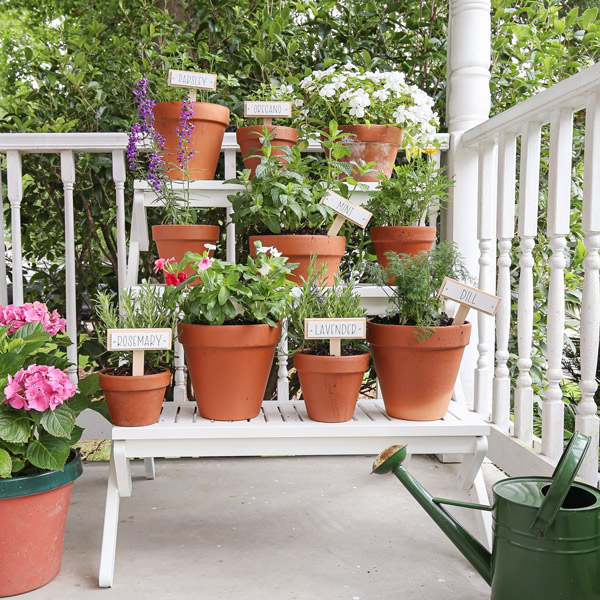
I wanted to create a cute setup to display potted herbs with plant markers. I came across a tiered plant stand, which I gave a little makeover too. You can see all of the details on the makeover in my plant stand makeover video.
*Note: This post is sponsored by Cricut. As always, all words and opinions are my own. This post contains affiliate links. For more information see my disclosures here.*
For these plant markers, I used Cricut’s Premium Vinyl, which is ideal for outdoor projects. It’s really easy to work with and looks beautiful too once cut!
How to Make Wooden DIY Plant Markers:
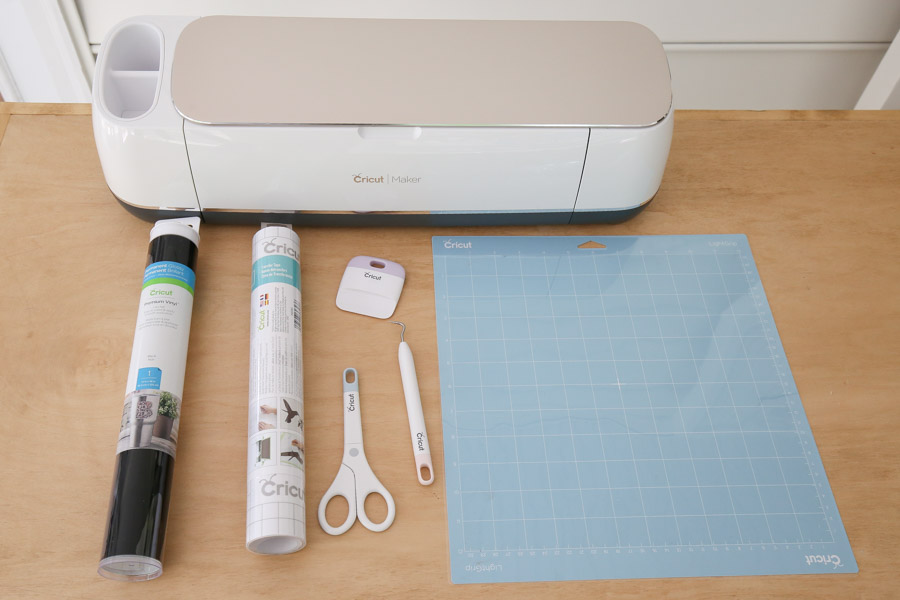
Materials
- Cricut machine (I used a Cricut Maker)
- Premium Vinyl
- StandardGrip or LightGrip Cutting Mat
- Fine Point Blade
- Transfer tape
- Scraper & Weeding Tools
- Waterproof wood glue
- White outdoor spray paint
- 1/2″ x 2″ x 3ft pine board (I used these boards)**
- Wood paint sticks
- Wood plant stakes
- 5/8″ brass plated nails
- 220 grit sandpaper (optional)
**Note, the number of boards you will need depends on how many markers you want to make. I made six, 4 1/2″ wide markers using one 3ft. wood board.
1. Cut wood to size
Begin by using a miter saw and cut the paint sticks to 4″ wide and the 1/2″ thick wood board to 4 1/2″ wide.

2. Make the plant markers
Spray paint the cut paint sticks with outdoor, white spray paint using several, light coats.
After the first few coats, the grain may rise on the wood. If this happens just lightly hand sand the wood surface smooth with some 220 grit sandpaper, then continue with applying the spray paint coats.
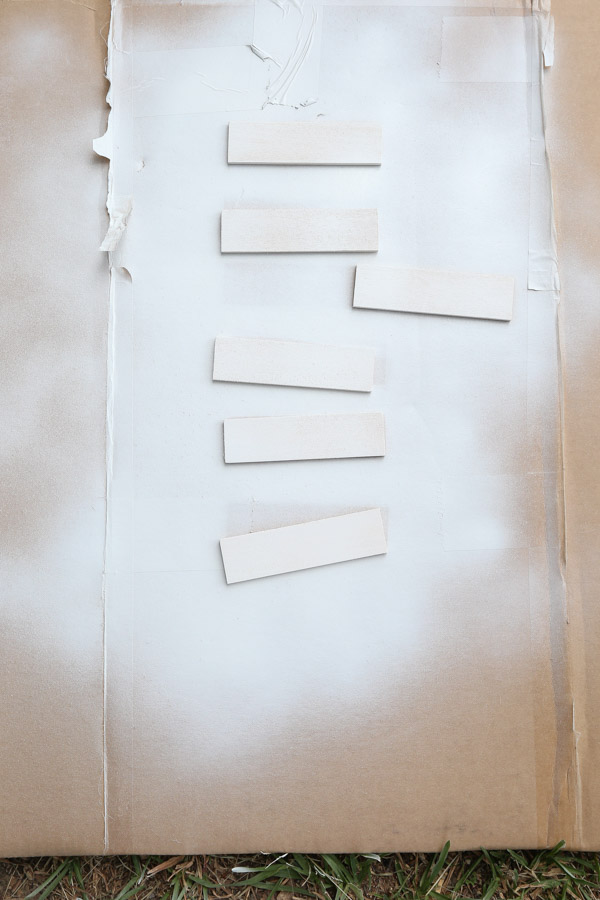
Let the spray paint dry and cure for a few hours.
Mark and drill holes on each side of the 4″ white paint sticks, 1/2″ down from the top edge and 1/4″ in from the side. Use a 1/16″ drill bit for the holes.

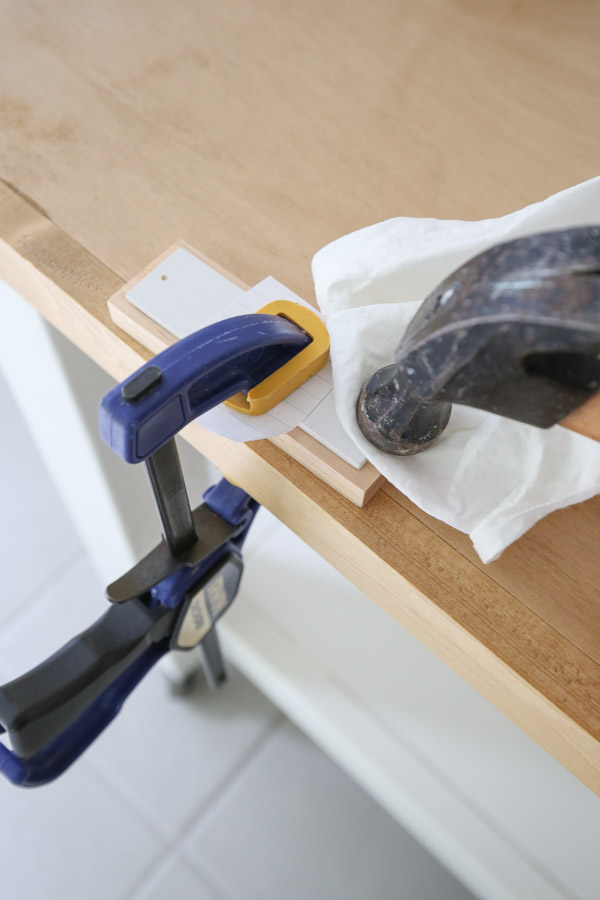
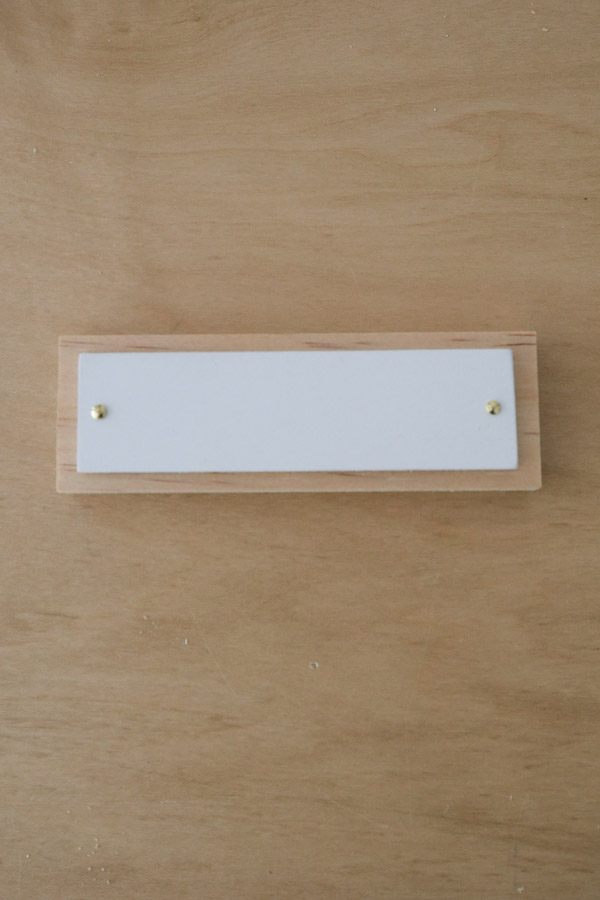
Next, use a small clamp if needed with some paper under it to avoid scuffs on the paint, and clamp a 4″ white, paint stick centered in place on the 4 1/2″ wood board with a little bit of waterproof wood glue between the two boards. At this point I drilled through my holes again so the nails would go easier into both boards.
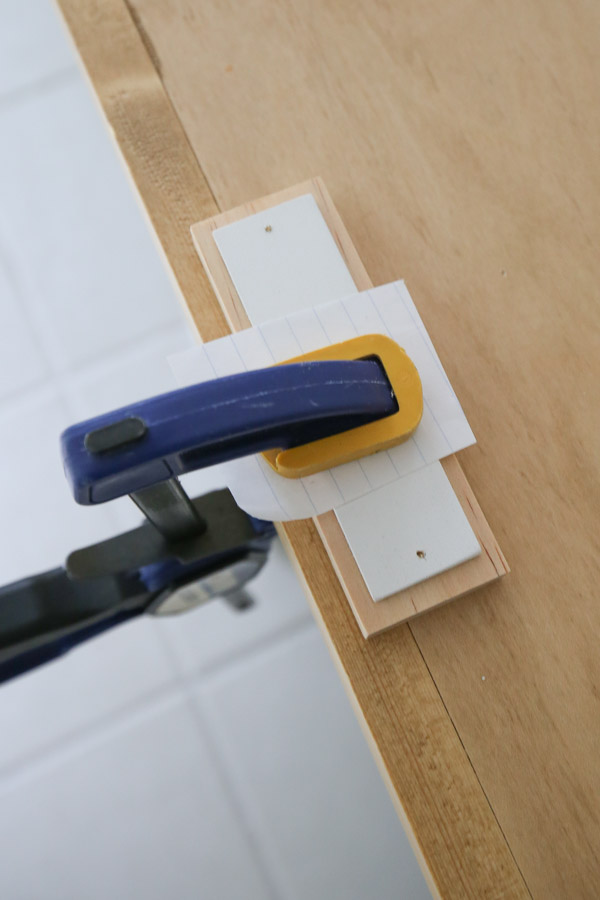
Use a hammer and add a 5/8″ brass nail into each hole. I used a clean cloth over my nail while hammering to avoid any scuffs or damage to the white paint stick from the hammer.
Continue this process for the number of DIY plant markers that you need.
3. Create the plant labels in Cricut Design Space
In Cricut Design Space, type out all of the plant labels that you need and select your desired font. I had so much fun looking at all of the fun font options that Cricut has available in Cricut Access. Fonts can totally make the design and final look of things!
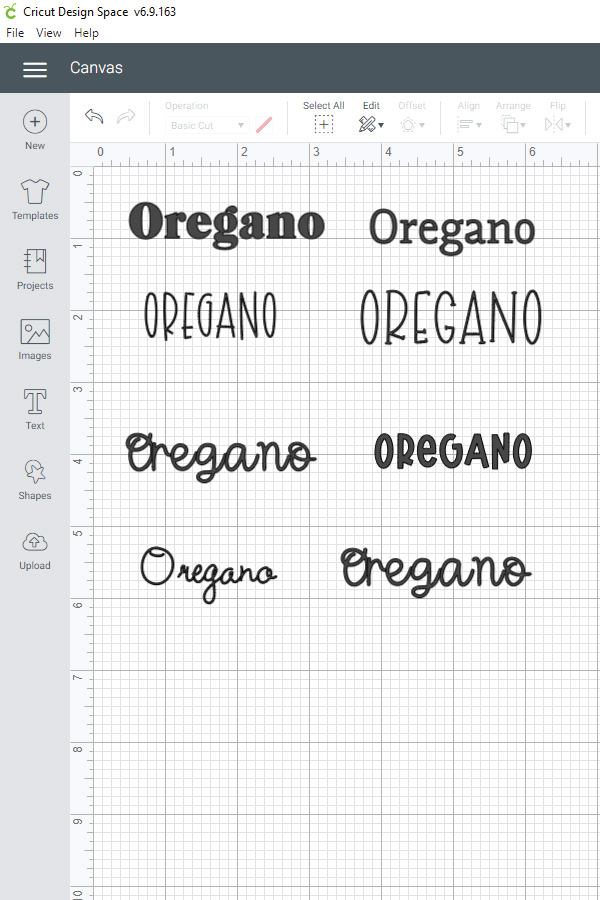
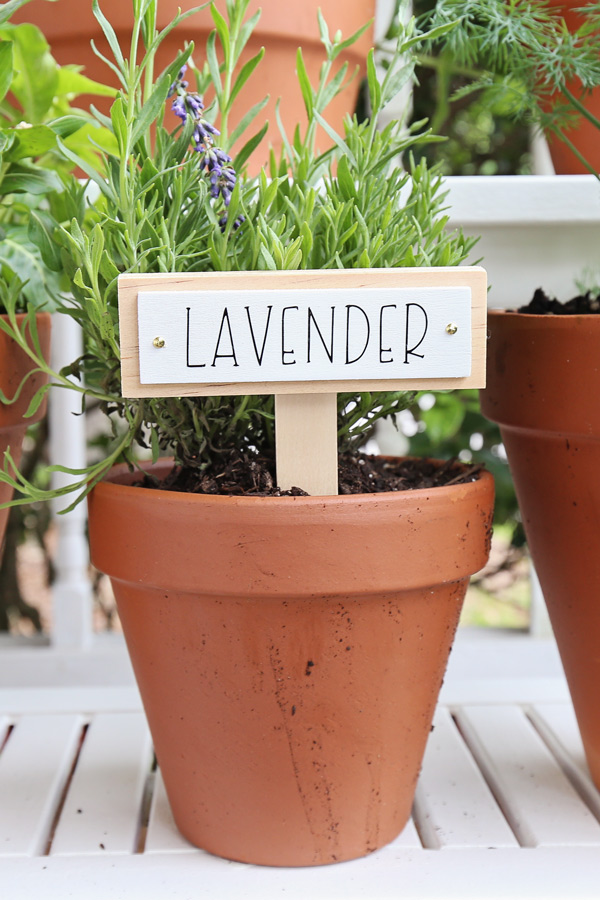
I ended up using the font Dtc Spring Charm, I love the whimsy, handwritten nature of it and it’s seriously perfect for these DIY garden markers!
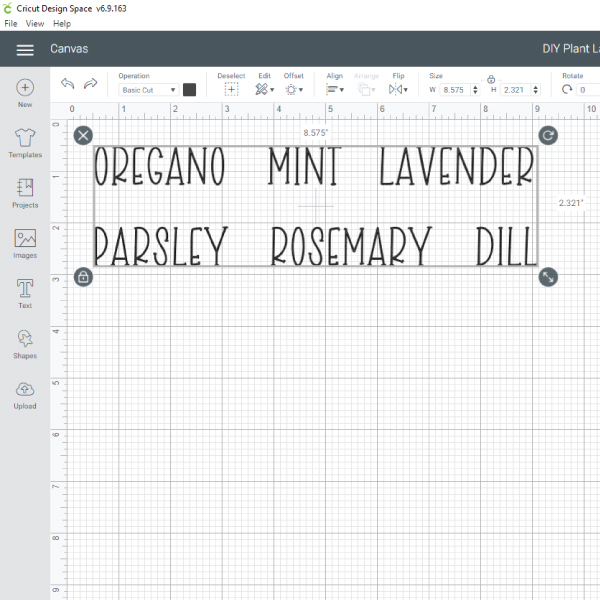
Size each label to 3/4″ tall. Make sure that all of the labels widths are less than 3 3/4″ so they will fit on the markers between the nails. If any are longer than that, you can either reduce the height some or the spacing between the letters.
Make sure all of the labels are in the 12″ x 12″ (or 12″ x 24″) cutting area. Then select all of them (press Control A on PC or Command A on Mac) and click “Attach” in the lower right hand corner of Cricut Design Space so that the Cricut will cut the labels exactly how you see them on the screen.
Now we are ready to cut!
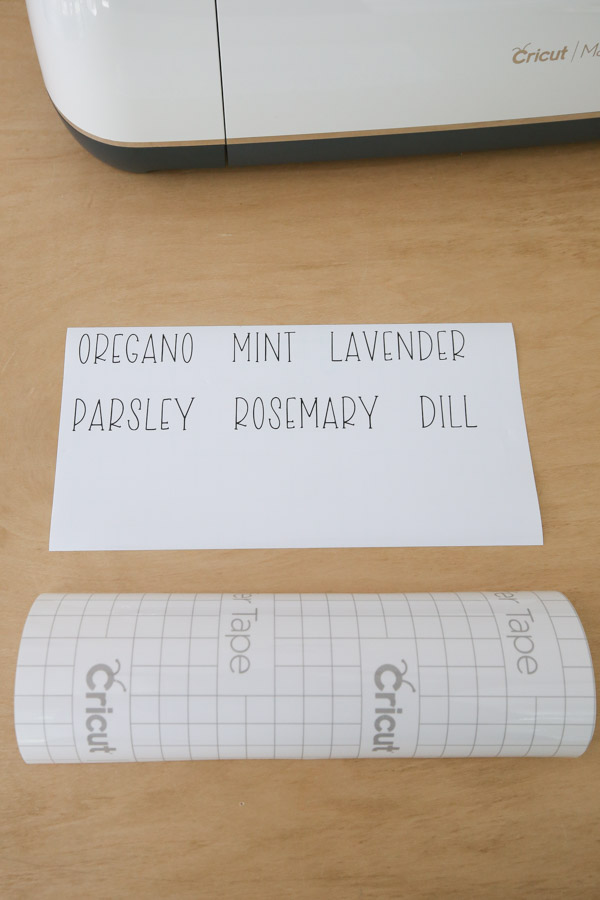
4. Send the labels to your Cricut and cut them with vinyl
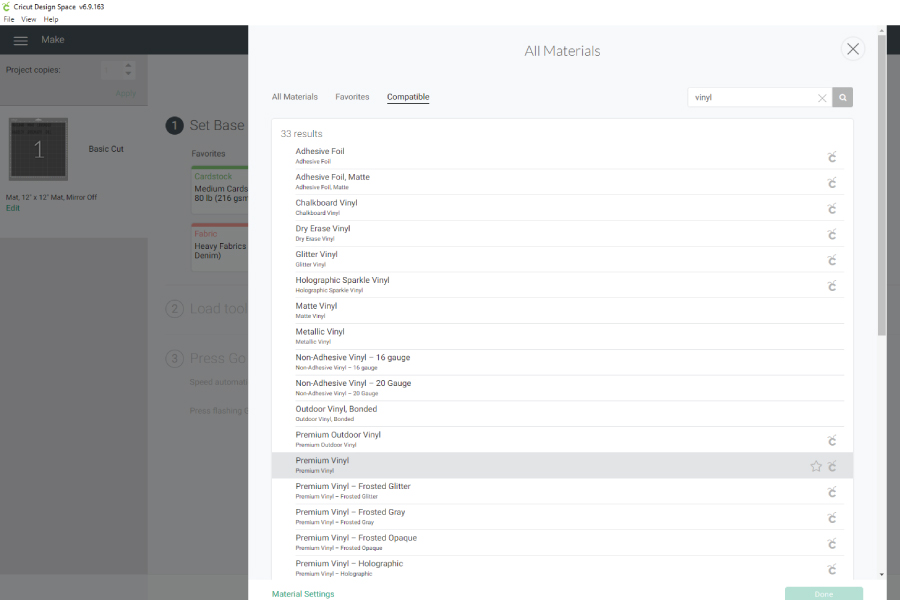
Attach the premium vinyl to a 12″ StandardGrip or LightGrip cutting mat (or 24″ mat if needed) and load it into your Cricut machine.
In Cricut Design Space, click the green “Make It” button, make sure everything looks good, then select “Continue”, and choose “Premium Vinyl” for the material under the browse more options.
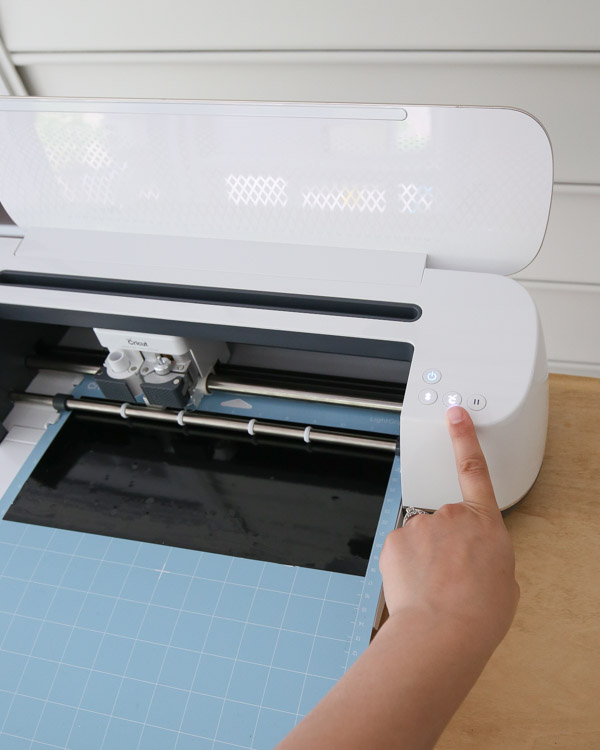
Press the flashing go C button on your Cricut to start cutting!
📩 Want to Save This?
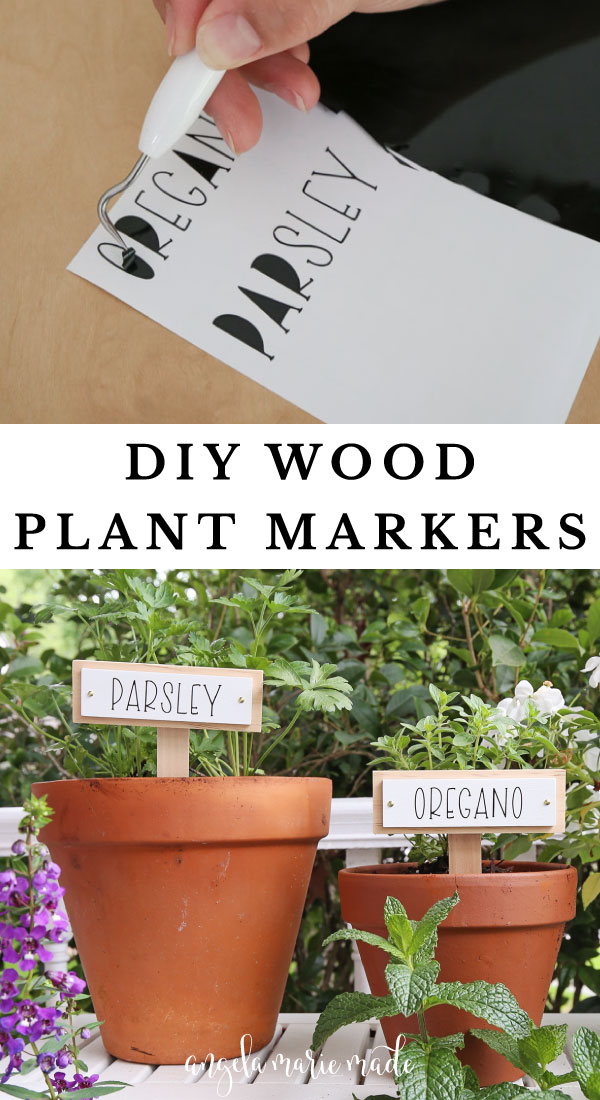
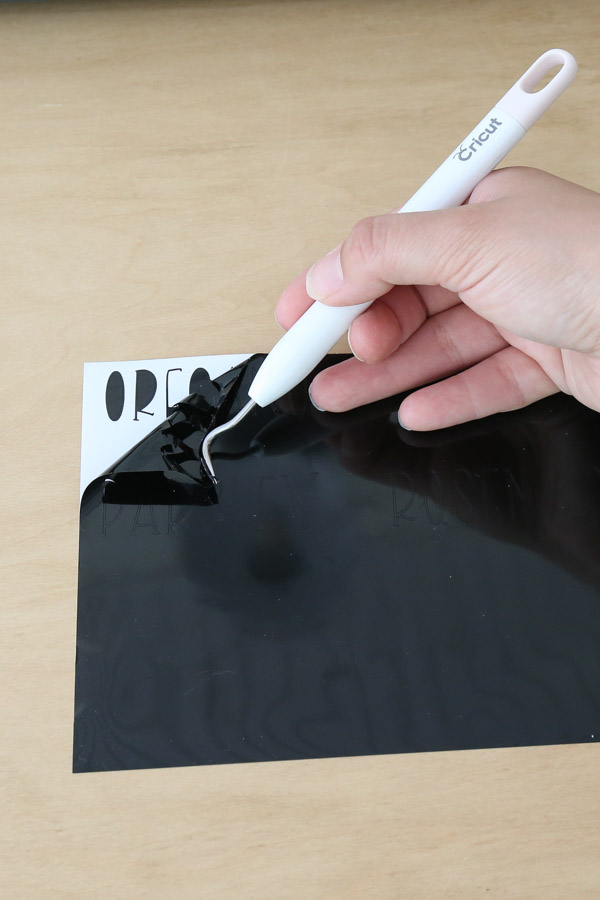
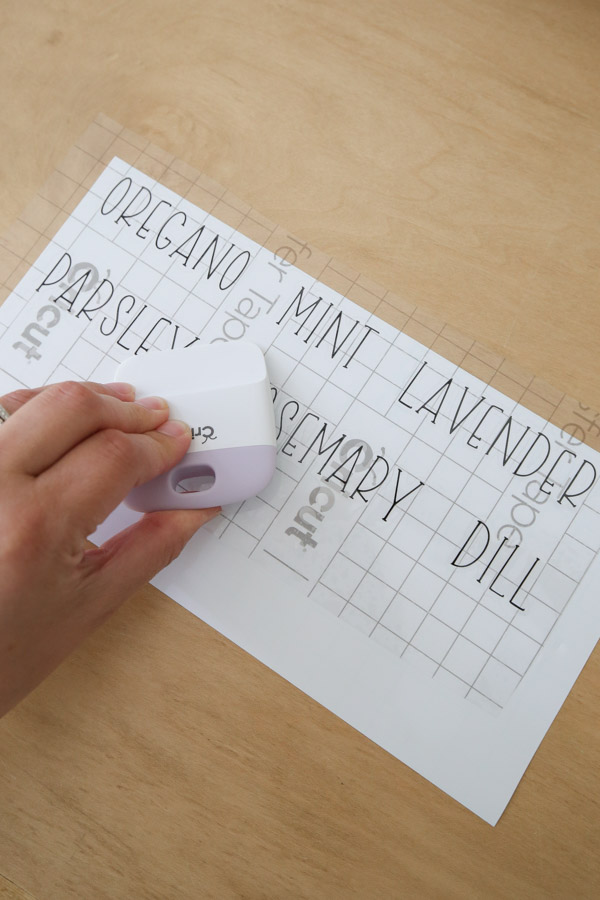
5. Weed the Cricut labels
For weeding the vinyl, I like to remove my vinyl sheet from the mat first. Then, use a weeding tool and scissors to weed the excess vinyl away.
My Cricut did an awesome job of cutting these small labels with an intricate font. However, because the font is so intricate and thin, I had to be very careful and slow during weeding. I found it easiest to focus on one or two labels at a time rather than all of them at the same time.

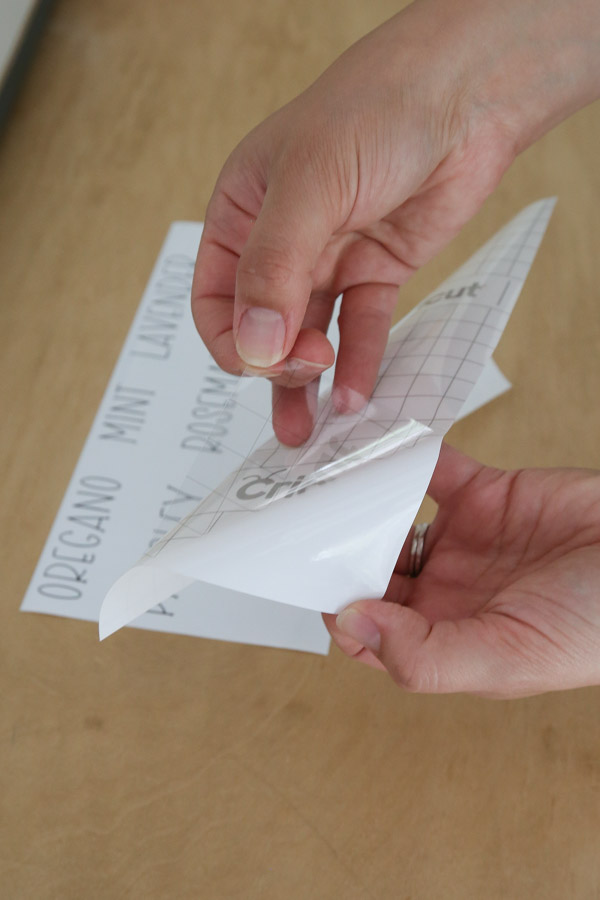
6. Apply transfer tape to the DIY plant labels
Cut a piece of transfer tape to size.
Peel the transfer tape off of the backing paper.
Carefully place the transfer tape over the vinyl labels. A few tips to help with this process are:
- use masking tape if needed and tape the corners of the labels sheet down so it doesn’t move
- hold the transfer tape in a U shape while applying it to the vinyl plant labels
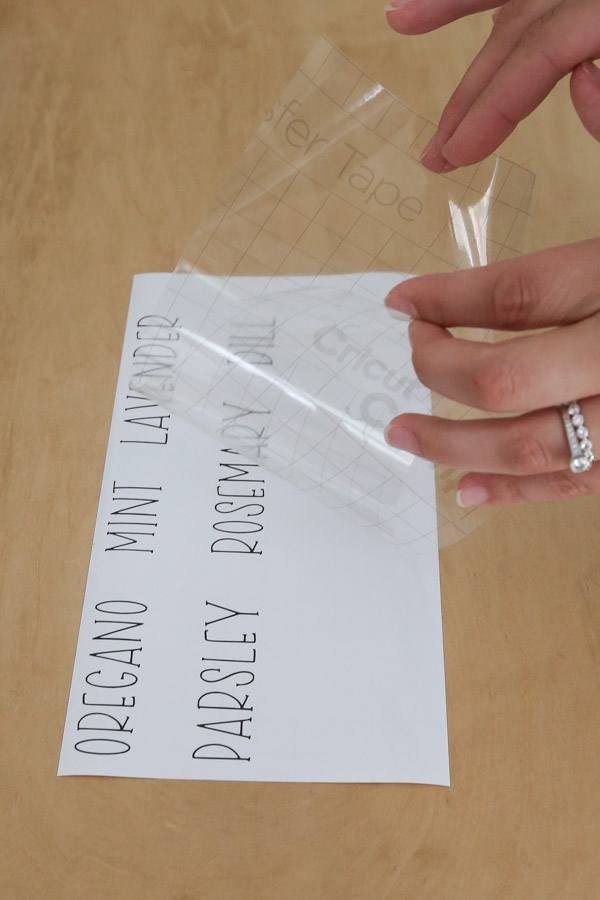
After sticking the transfer tape down, use a scraper tool and rub the tape down over the labels firmly. You can also press down with your fingers to help.
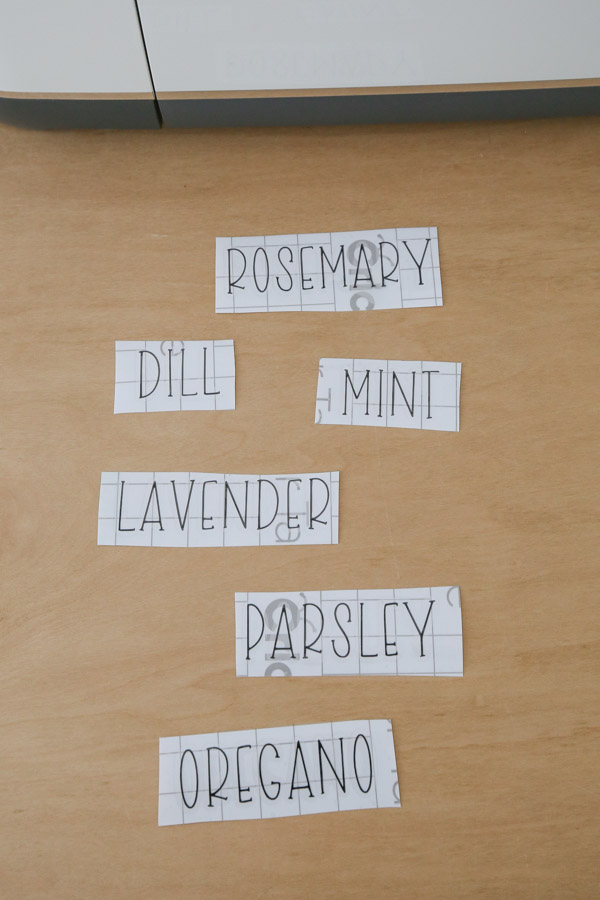
Cut each label out individually with scissors.
7. Apply the labels to the wood DIY plant markers
Turn one of the labels over and carefully pull back the label from the transfer tape at a 45 degree angle. Make sure the vinyl is adhered to the transfer tape. If it isn’t rub them together again with your fingers or scraper tool.
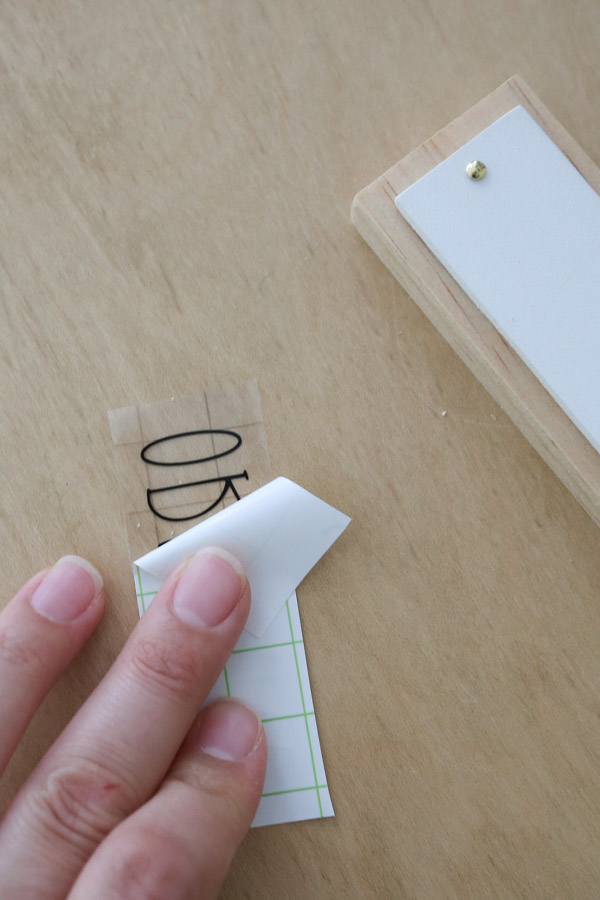
Stick the label on the wooden plant markers in a centered position. I did my best just to eye the centered position for each. With this handwritten style font I couldn’t even tell if I didn’t center it perfectly!
Use the scraper tool again and rub over the transfer tape to transfer the vinyl label onto the plant marker.
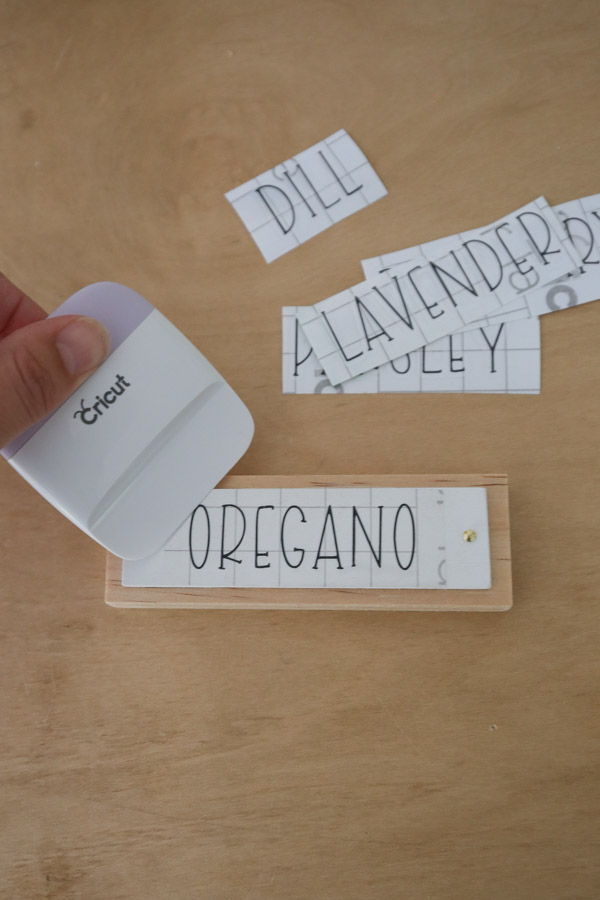
Then, slowly peel back the transfer tape at a 45 degree angle to see your vinyl label on the garden marker!

Continue this process for each of your plant markers and Cricut labels.
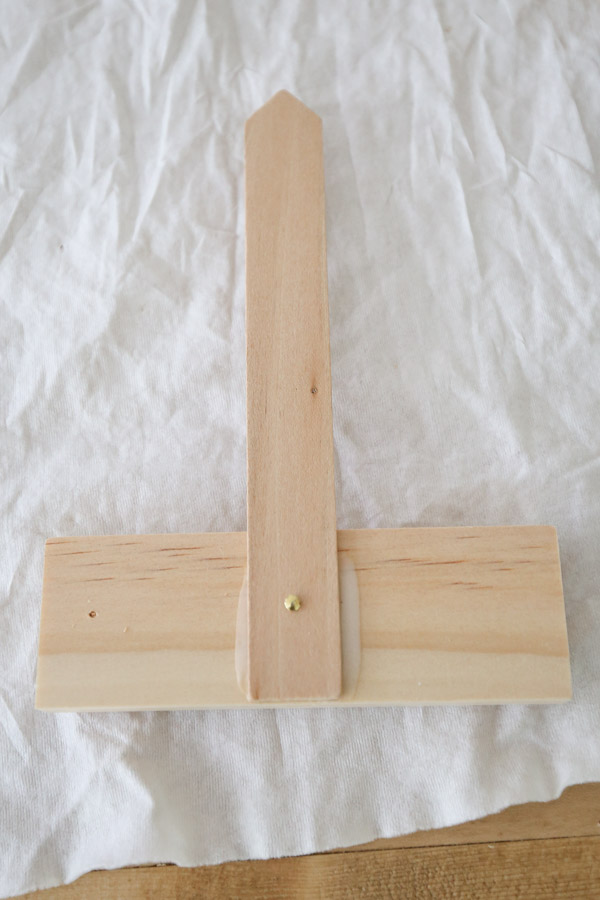
8. Attach the wood plant stake to the DIY garden markers
Finally, attach a wood stake on the back of each plant marker using waterproof wood glue and a nail. I placed my clean cloth down under the front of the planter marker (to protect it), clamped the stake in place, pre-drilled a hole for the nail, and nailed into place. Wipe the excess wood glue away as well.
Note, I left the bottom wood board and stakes unfinished because I didn’t want any treated wood going into my herbs and plants! Plus I think the raw, natural wood looks great with the white!
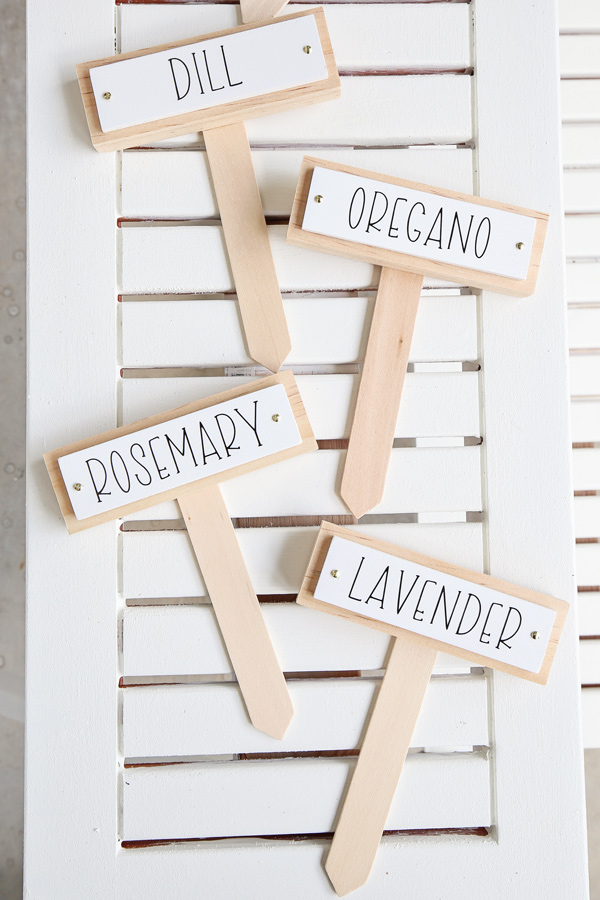
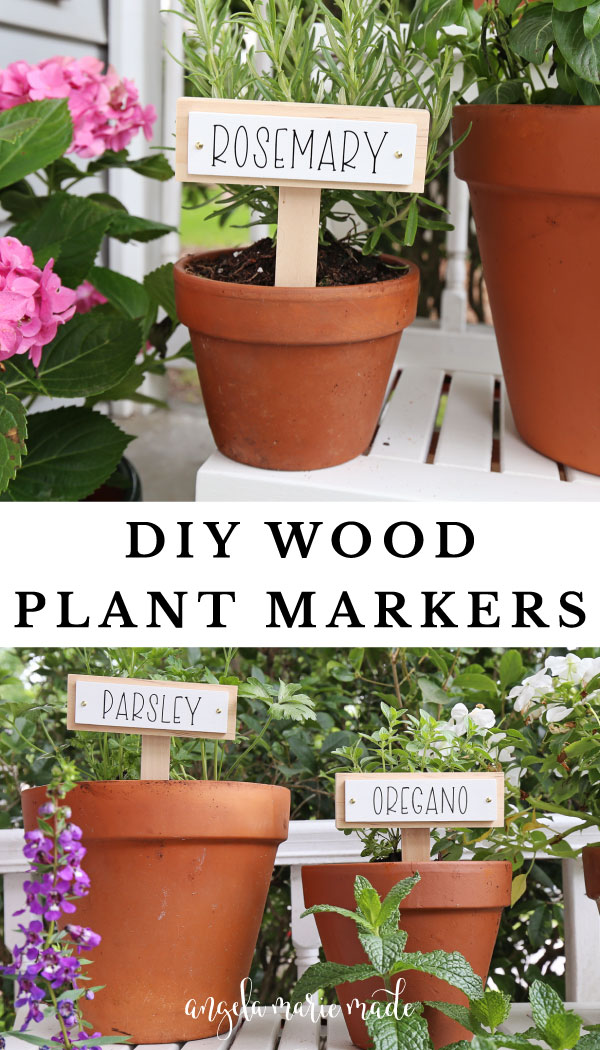
How cute did these DIY plant markers turn out?!

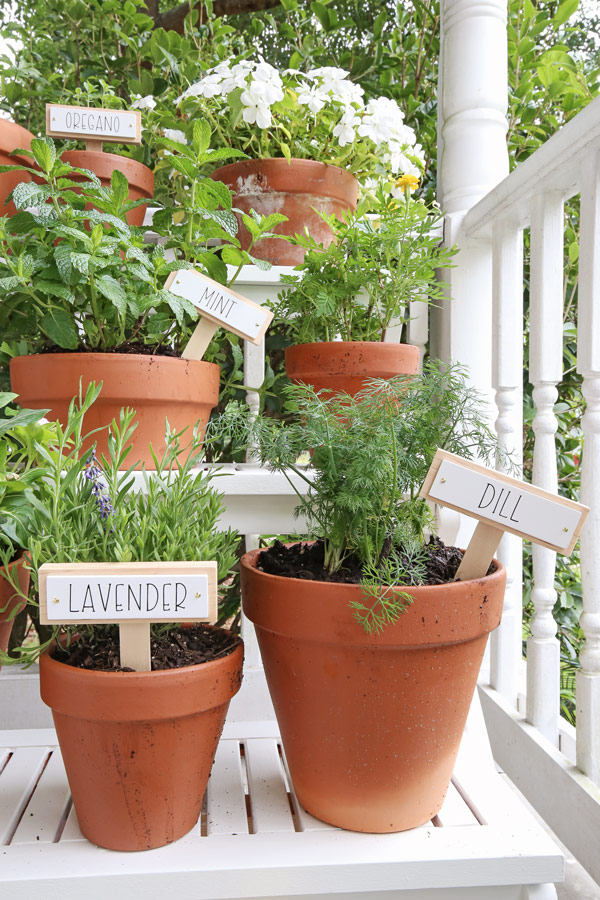
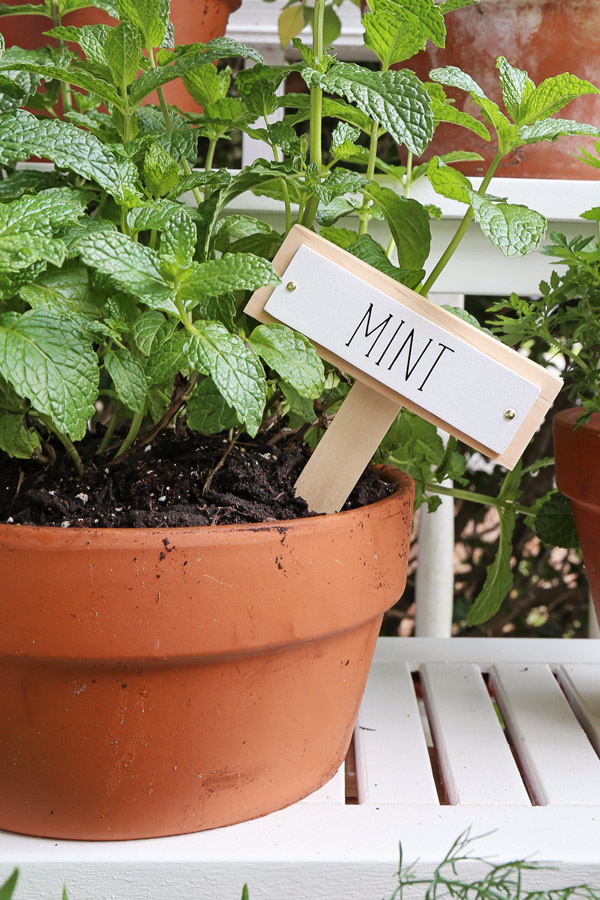
I think they look super cute on our made over tiered plant stand too!
Now I don’t need to worry about forgetting which plant is which! Let me know what you think or if you have any questions!!

Follow along for my latest projects and sneak peaks on Instagram, YouTube, TikTok, and Facebook!
Want to save for later?! Pin it here: