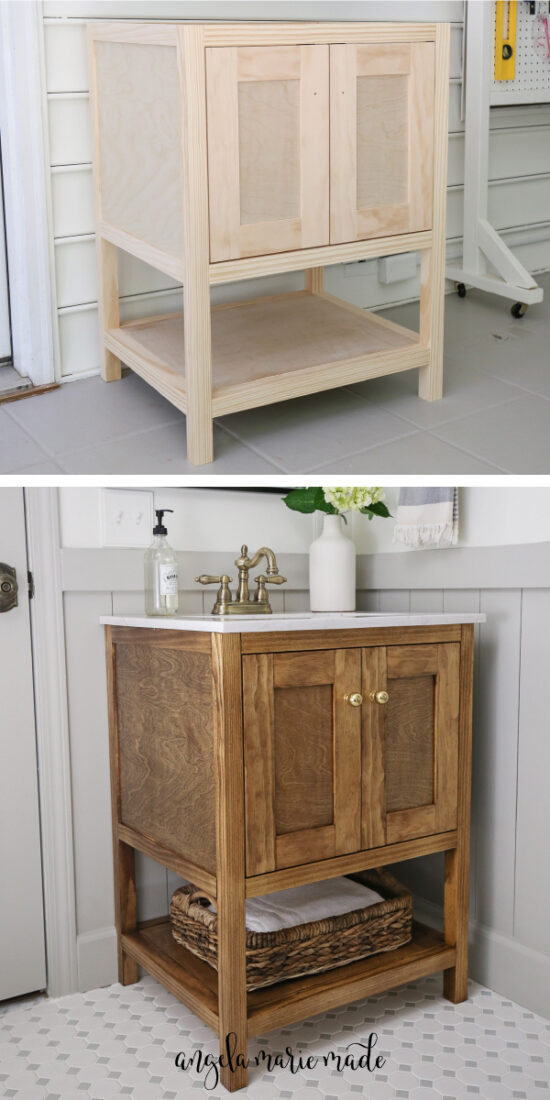
Learn how to build a wood DIY bathroom vanity with doors that’s budget friendly and beautiful!
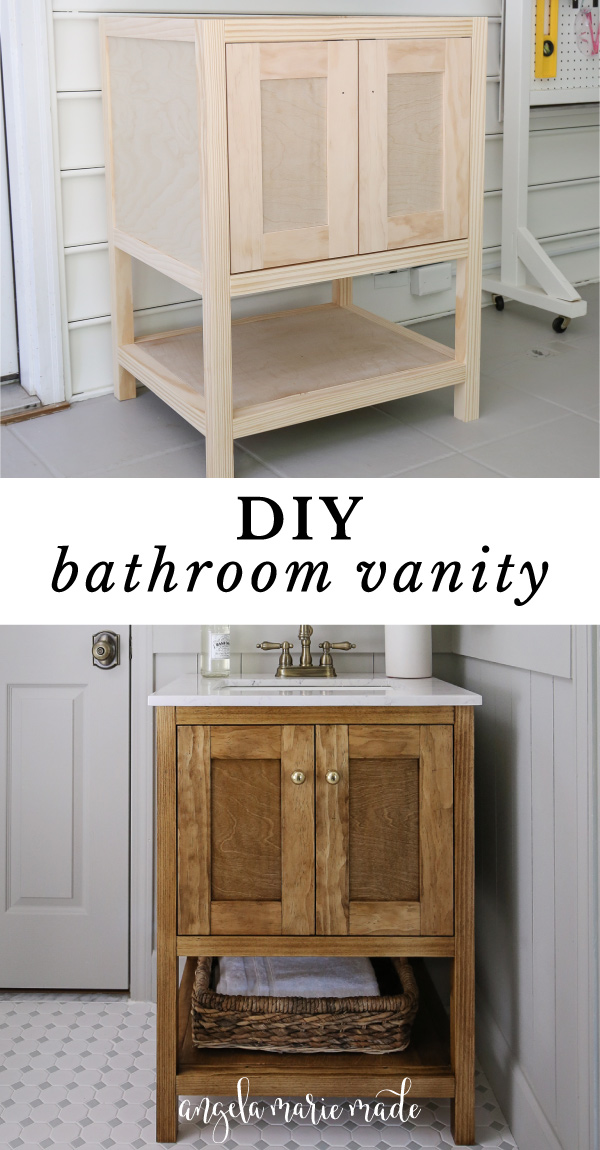
Last week I shared our bathroom makeover reveal and our DIY small bathroom vanity was a beautiful focal feature of the space!
We used premium pine wood and plywood for the build and it only cost about $100 in lumber even with the higher cost of lumber these days. That’s major savings compared to buying a real wood bathroom vanity with this style!
And if you’re interested in an even less expensive wood vanity option, check out my DIY bathroom vanity with a faux drawer door front that only cost $65!
I may be biased, but I think our new vanity looks like an expensive, custom vanity that you would get from Pottery Barn or Restoration Hardware 🙂 Except that it’s just a small fraction of the cost and you can have the satisfaction that you actually built it yourself!
Pin it here:
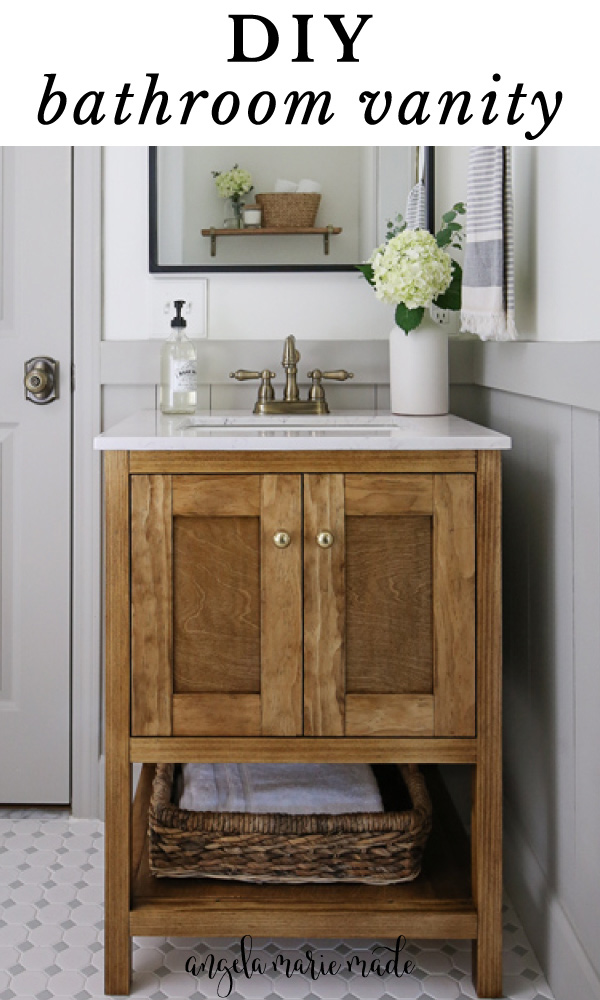
I also love the sink top and faucet that we paired it with, more details on all of this and the printable plans are below!
Side note, for this vanity, depending on how low your plumbing is coming out of the wall, you may need to use a flexible p-trap or cut a small hole in the inside vanity shelf for the plumbing, see step #10 for more details!
Note, this post contains some affiliate links. I may earn a commission if you shop those links (at no cost to you). Thank you for supporting my small business. For more info see my disclosures here.
Bathroom Vanity Dimensions & Vanity Sink Top:
I built this DIY bathroom vanity to go with a 25″ x 22″ vanity sink top (similar vanity top here) and this faucet and these round cabinet knobs.
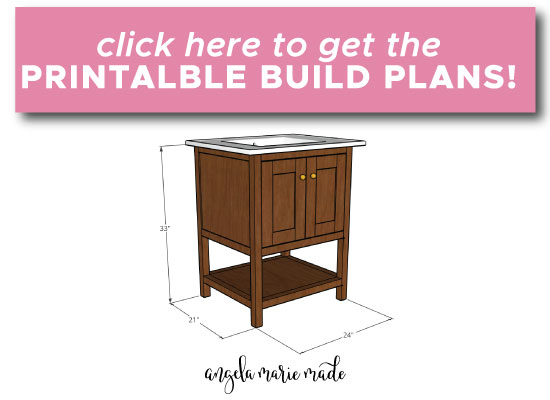
The final dimensions of the bathroom vanity are 33″ tall x 21″ deep x 24″ wide. You can adjust the measurements as necessary if you’d like to use a different size sink!
How to Build a DIY Bathroom Vanity with Doors:
Materials
- (1) 4ft x 8ft @ 1/2″ thick plywood*
- (3) 2×2 @ 8ft** (we used premium 2x2s)
- (2) 1×2 @ 8ft
- (1) 1×3 @ 8ft
- (1) 2×3 @ 8ft
- 1/4″ scrap wood or wood shims
- 1″ wood screws
- 1″ and 1 1/4″ and 2 1/2″ Kreg screws
- Wood Glue
- Wood stain & polyurethane or paint
- (4) Door hinges for inset doors (I used these hinges)
- (2) Cabinet knobs/pulls (I used these knobs)
- (2) Magnetic Door Catches
- 25″ x 22″ vanity sink top (we used this sink top, similar here)
Tools
- Kreg Jig
- Miter saw
- Circular Saw or Table saw
- Kreg Concealed Door Hinge Jig (optional)
- Drill
- Self Centering drill bit (optional)
- Clamps
- Kreg right angle clamp (optional)
- Tape Measure
*I prefer to use this formaldehyde free plywood that is also pre-sanded!
How to Build a Bathroom Vanity Video Tutorial:
Subscribe to my YouTube Channel here!
1. Make initial lumber cuts for the bathroom vanity
Click here for the printable DIY bathroom vanity plans which include the cut list and step by step building steps with easy to follow diagrams!
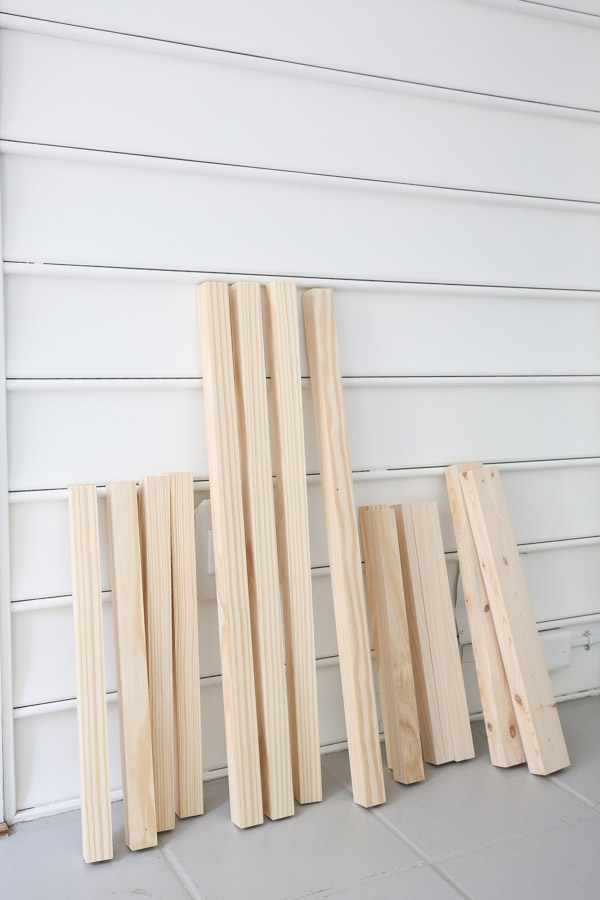
Begin by making the initial lumber cuts. Note, there will be additional, custom cuts in steps #6 and #7 for the 1×3 and plywood.
Use a table saw or circular saw and straight edge guide to make the plywood cuts.
Make the following cuts from the 4ft x 8ft plywood:
- (2) boards @ 18″ x 16″ (for the vanity sides)
Use a miter saw and make the following cuts from the 2×2s:
- (4) 2×2 @ 33″ (for vanity legs)
- (4) 2×2 @ 21″ (for the front & back)
- (2) 2×2 @ 18″ (for the sides of the lower shelf)
Make the following cuts from the 2×3:
- (2) 2×3 @ 21″ (for the vanity back)
Make the following cuts from the 1×2:
- (4) 1×2 @ 18″ (for vanity sides)
- (2) 1×2 @ 14 1/2″ (for the insides of the vanity doors)
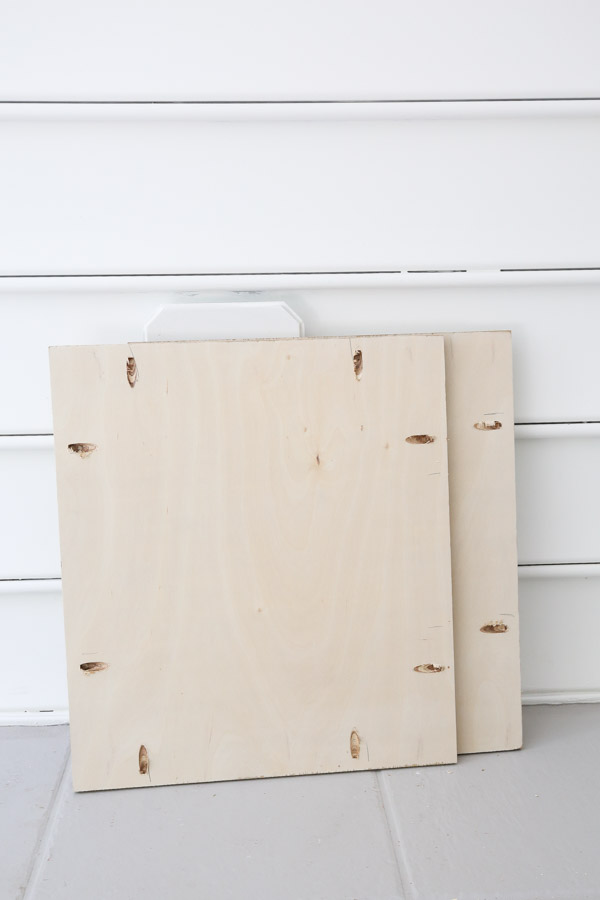
2. Add pocket holes to the boards
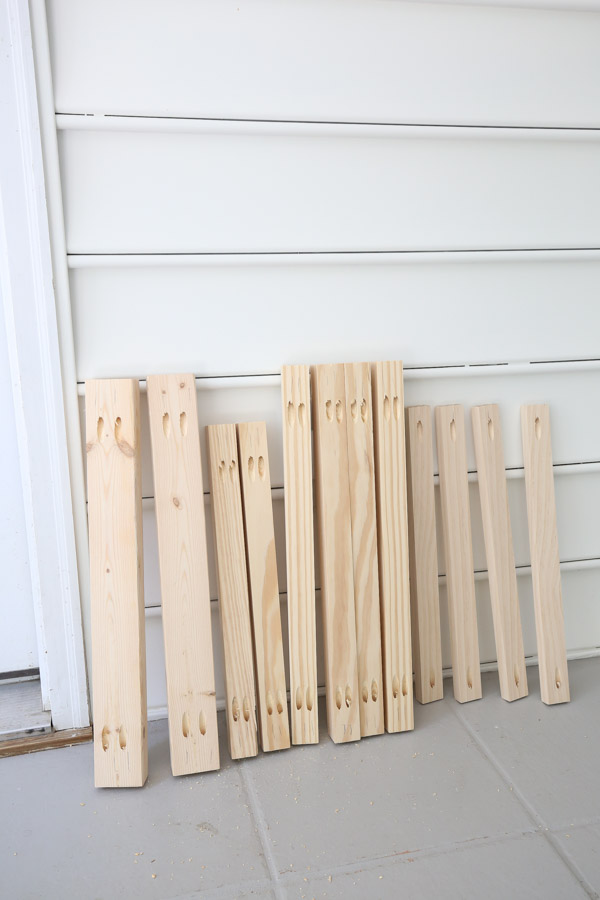
Add pocket holes to all sides of the two plywood boards @ 18″ x 16″. Make sure the Kreg Jig is set for 1/2″ thick wood.
Then, adjust the Kreg Jig for 1 1/2″ thick wood and add pocket holes to both sides of the following 2x2s and 2x3s:
- (4) 2×2 @ 21″ (for the front & back)
- (2) 2×2 @ 18″ (for the sides of the lower shelf)
- (2) 2×3 @ 21″ (for the vanity back)
Next, adjust the Kreg Jig for 3/4″ wood and add pocket holes to both sides of the (4) 1×2 @ 18″.
3. Build the two sides frames of the DIY bathroom vanity
Attach a 1×2 @ 18″ to one of the plywood board sides at 18″. Make sure that the back of the plywood is flush with the back of the 1×2. We used 1/4″ scrap wood to help with this part by placing it under the plywood.
Use 1″ Kreg screws and wood glue to attach the boards together.
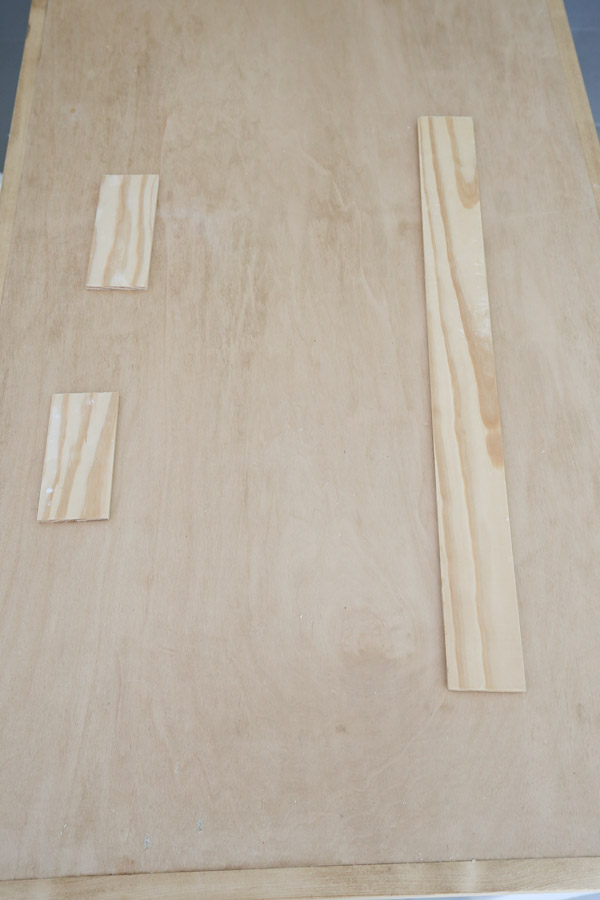
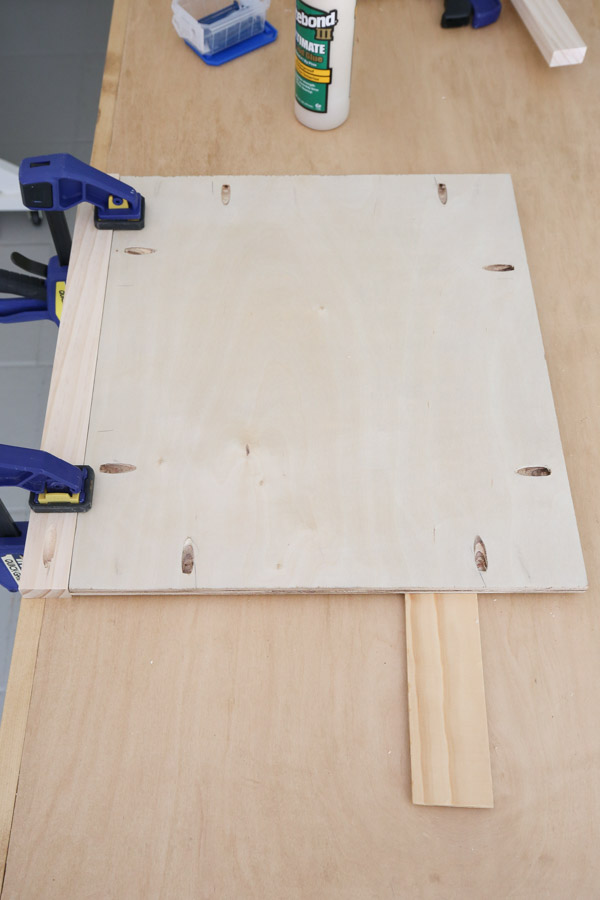
Attach another 1×2 @ 18″ to the opposite end of the plywood the same way.
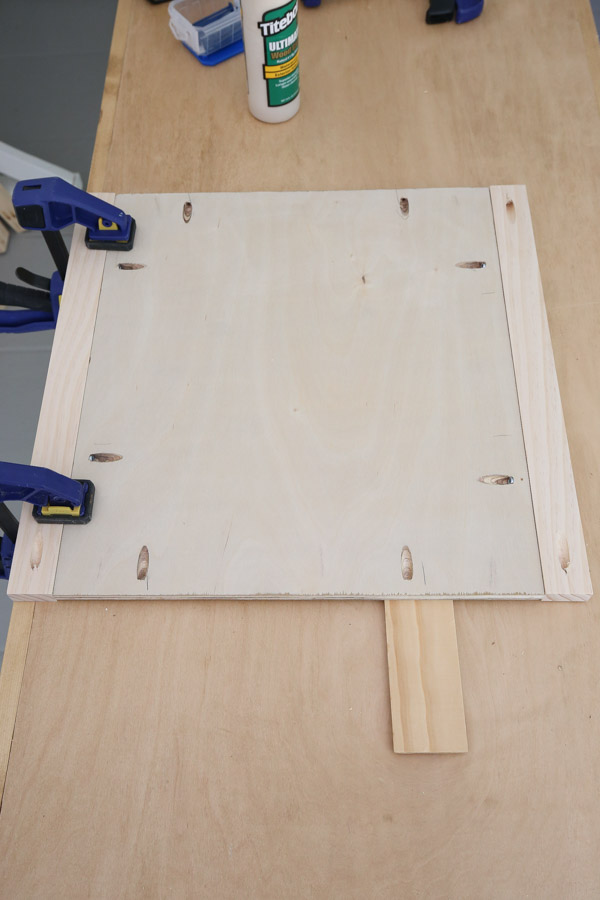
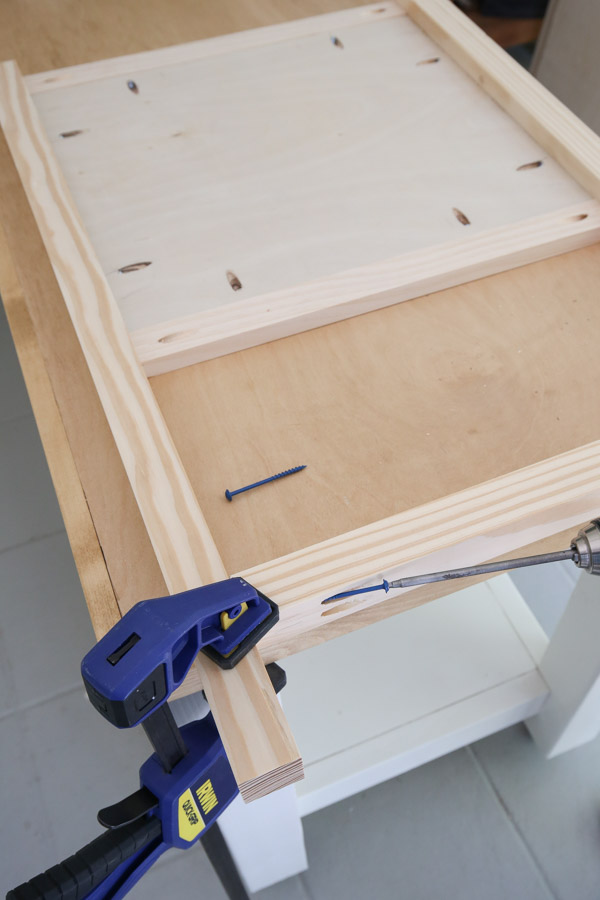
Next, attach one of the vanity legs (a 2×2 @ 33″) on the shorter 16″ side of the plywood board and to the two 1x2s as shown in the photo below. Use 1″ Kreg screws on the plywood board pocket holes and 1 1/4″ screws on the 1×2 pocket holes. Also, use some wood glue as well.
Tip: It helps to place the 1/4″ scrap wood under the plywood when attaching the 2×2 legs to it so that the 1/4″ indent on the front side is even!
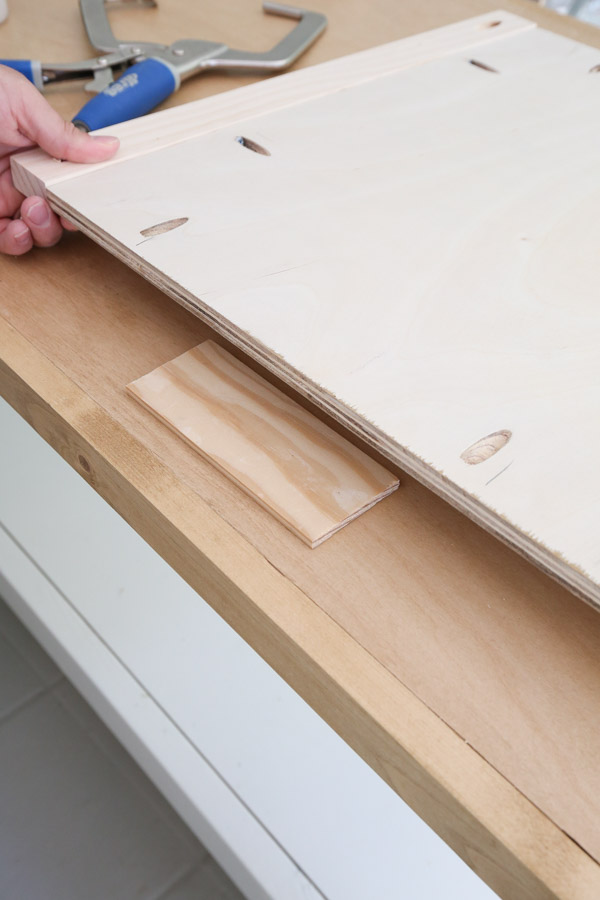
Our Kreg right angle clamp helped with this step too!
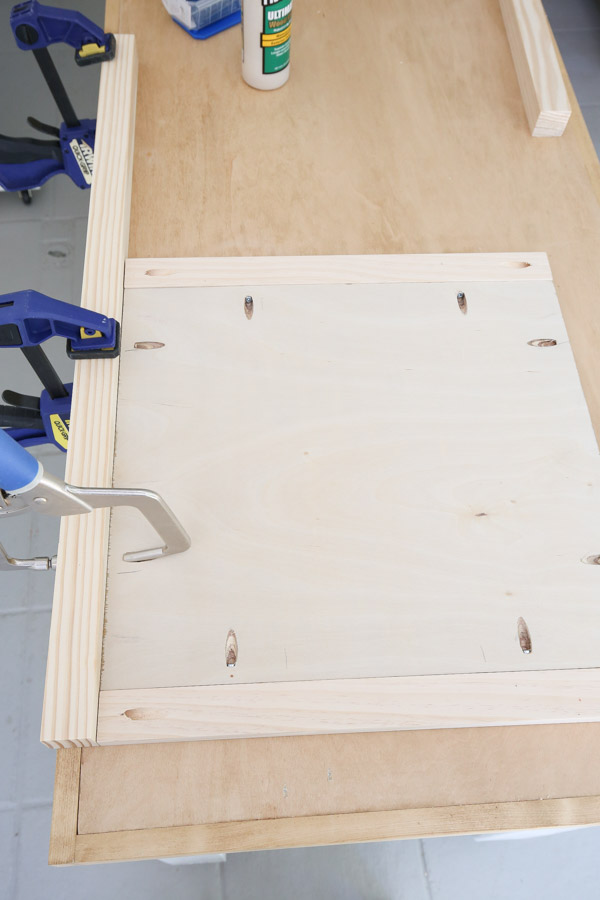
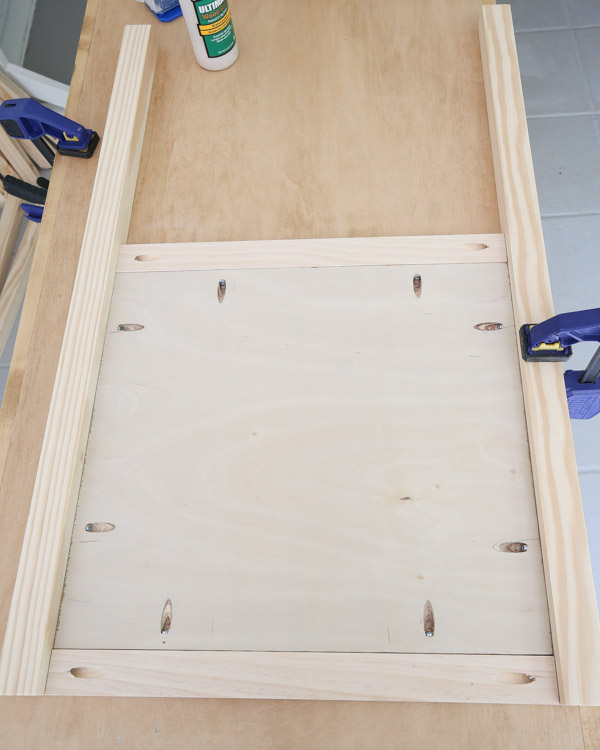
Add a second vanity leg to the opposite side the same way.
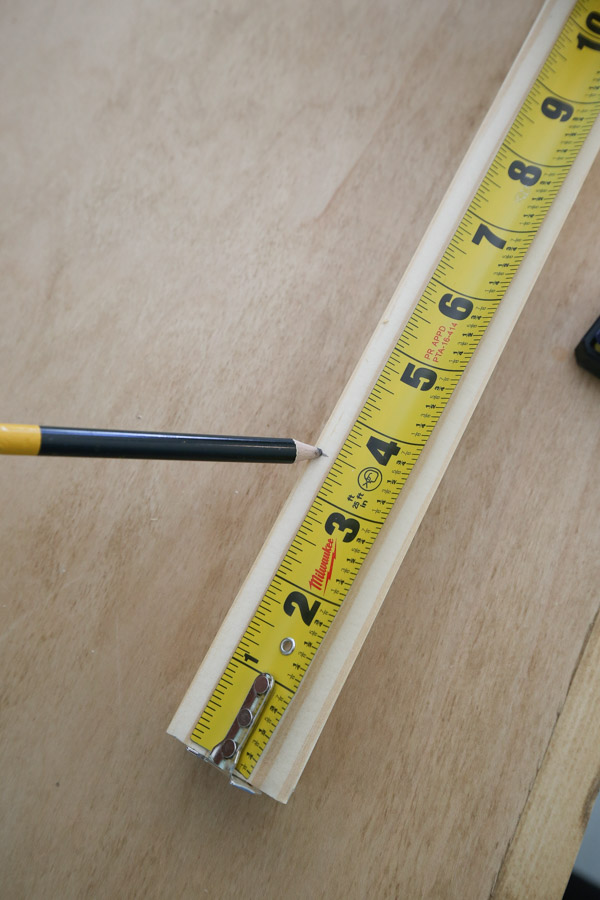
Finally, mark 3 1/2″ up from the bottom of the two 2×2 legs @ 33″ and attach a 2×2 @ 18″ (for the lower shelf frame) to the legs at this mark with 2 1/2″ Kreg screws.
Make sure the Kreg holes face the underneath side as shown here so they will be hidden when the vanity is standing.
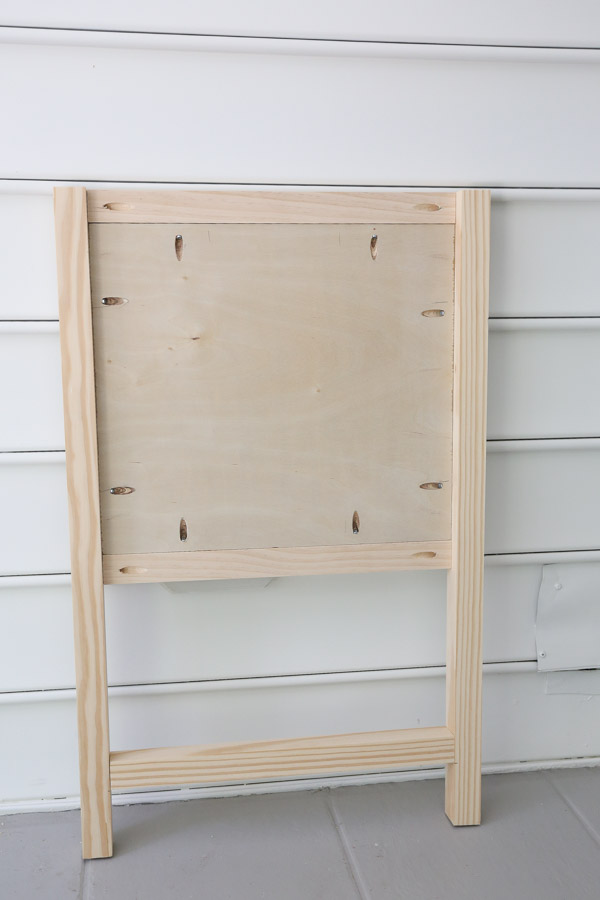
Repeat all of these steps to create a second side frame for the DIY bathroom vanity!
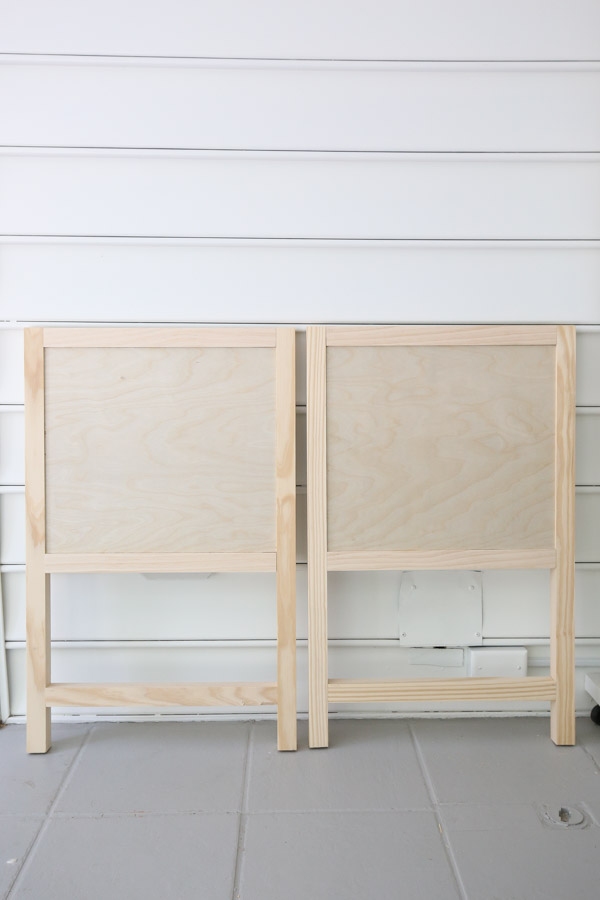
4. Attach the sides of the vanity together to create the back of the bathroom vanity
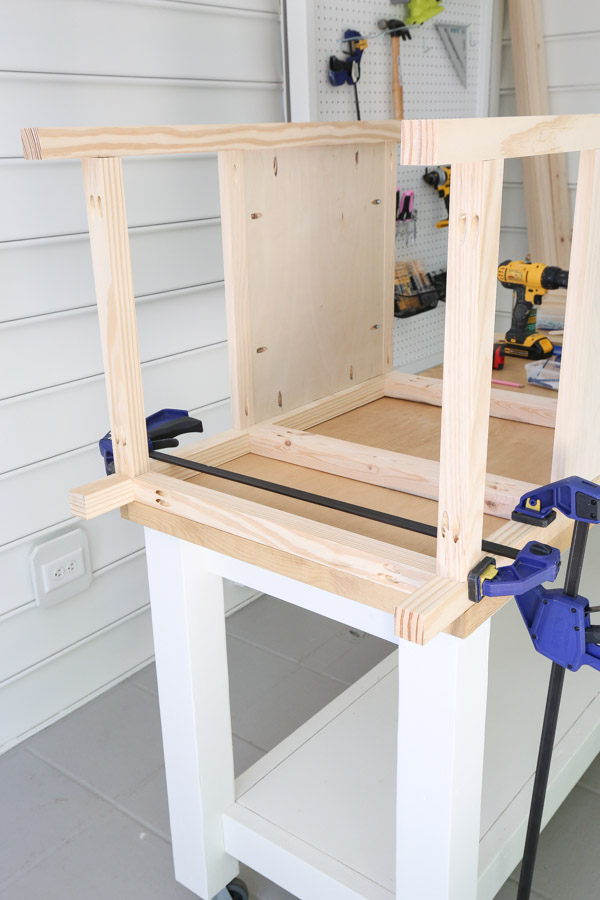
Begin to attach the side frames of the vanity together with the two 2×3 boards @ 21″. Attach one at the top of the vanity and one adjacent to the 1×2 bottoms, which are 14″ up from the bottom of the legs. Attach with wood glue and 2 1/2″ Kreg screws.
Also, clamps definitely help with this step as well.
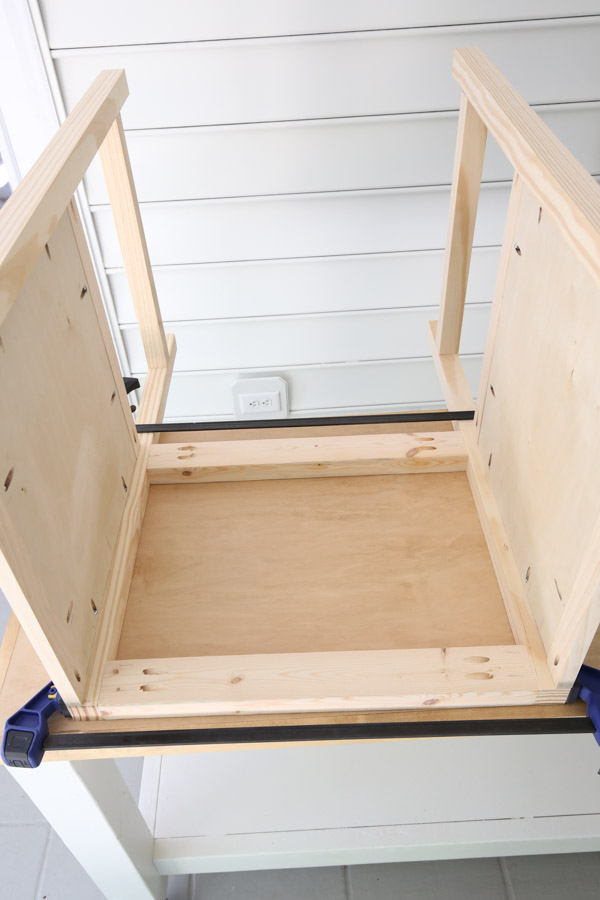
Note, the back of the vanity will remain open so that the plumbing can easily come through!
Next, attach the lower shelf frame 2×2 @ 21″ to the back of the vanity 3 1/2″ up from the bottom of the vanity legs. Use 2 1/2″ Kreg screws and again make sure that the pocket holes face the underneath side!
5. Attach the front boards to the bathroom vanity build
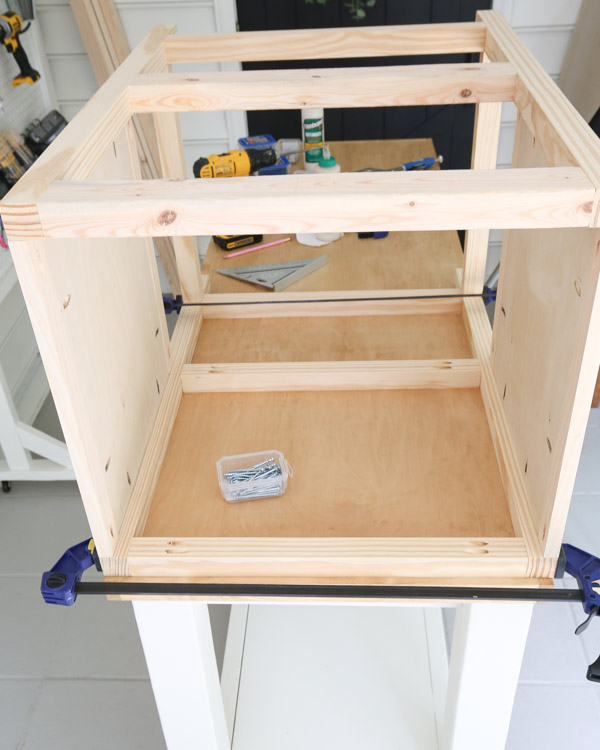
Attach the three remaining 2x2s @ 21″ to the vanity sides to create the vanity front. Use 2 1/2″ Kreg screws and wood glue.
Attach one 2×2 at the top, one in the middle (14″ up from the bottom of the legs), and one towards the bottom (3 1/2″ up from the bottom of the legs).
For the top and middle 2x2s, make sure the pocket holes face the inside of the vanity. And for the bottom 2×2, make sure the pocket holes face the underneath side.
You can see all of this in action in the DIY bathroom vanity video!
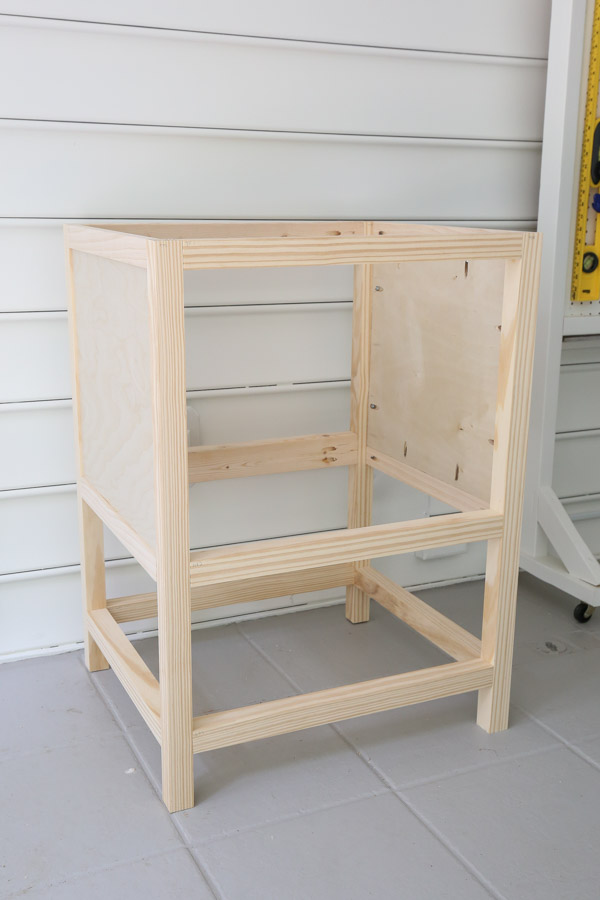
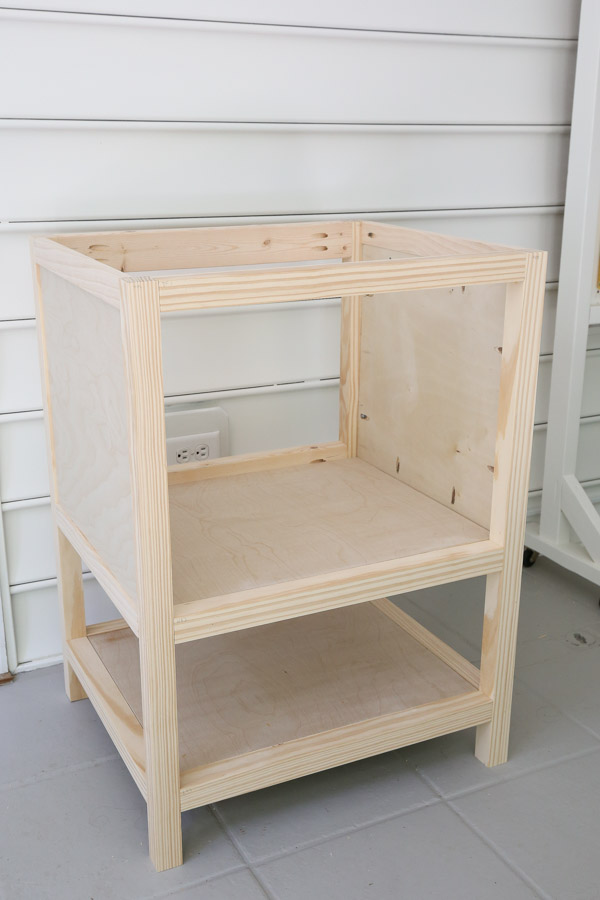
Now the frame of the vanity is complete and we can move on to adding the two shelves!
6. Attach the two plywood shelves to the vanity
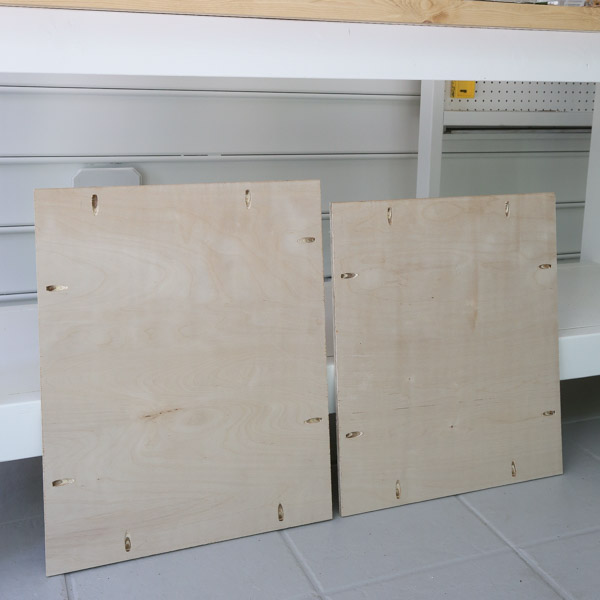
Measure the openings of the vanity where the middle and lower shelves will go and cut two plywood boards to size to create the shelves.
The measurements should be 18″ x 21″ for the bottom shelf and 18″ x 22 1/2″ for the middle shelf. It’s important to measure the opening on your own build in case there are any slight variations in the actual measurements that should be accounted for!
Add pocket holes to all sides of the plywood shelves (make sure to set the Kreg Jig to 1/2″ thick wood).
First, attach the 18″ x 22 1/2″ middle shelf to the vanity using wood glue and 1″ Kreg screws.
We attached our middle shelf 15″ up from the bottom so it would be flush with the top of the 1x2s and 2x2s framing it out. We clamped a scrap board to help hold the plywood in place where we wanted it.
Tip: Be very careful drilling these 1″ screws into the 1x2s and 2x2s. Due to the thinner plywood, the screws can pop out some if they are drilled in too hard. We had to back ours out slightly. I only ever have this happen with 1/2″ thick plywood when the screws are drilled right in at the ends of the thicker boards. If you attach the plywood below the 1×2 and 2×2 edges a little bit it doesn’t happen.
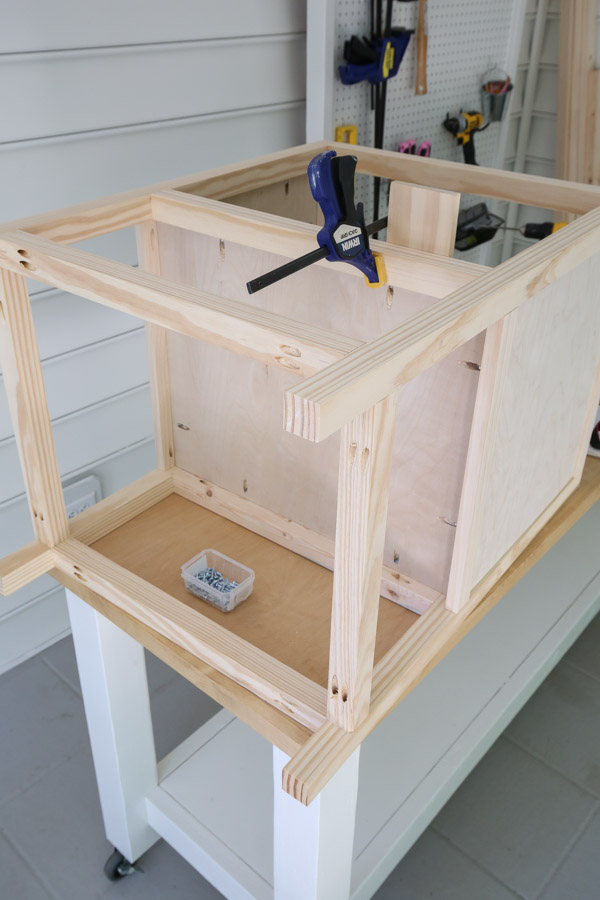
Attach the second shelf @ 18″ x 21″ to the bottom 2x2s so that the plywood is flush with the top edge of the 2x2s as shown here.
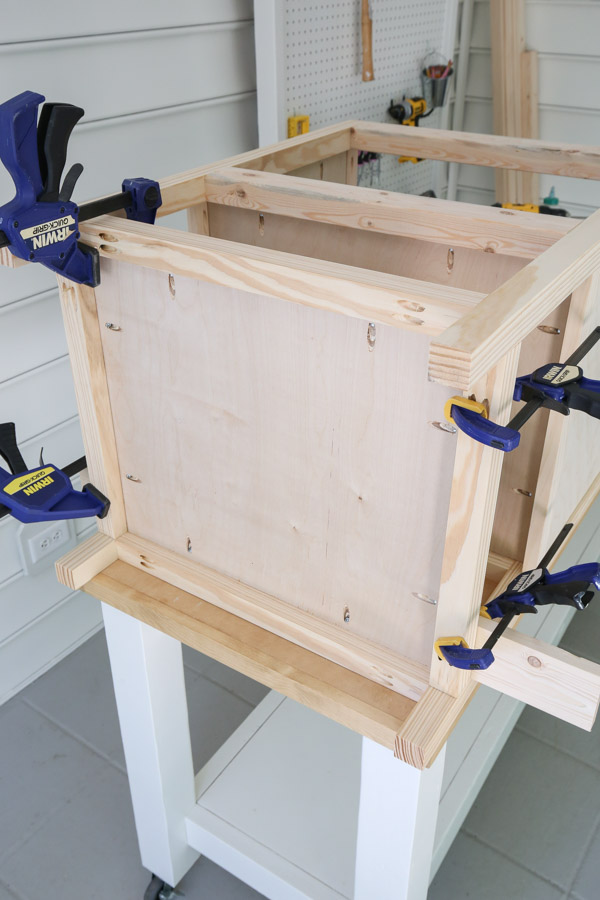
Now it’s time to add the two doors!
7. Construct the DIY small bathroom vanity doors
Inset doors can be tricky, this is our 4th time doing them, but after some trial and error I think we figured out one of the better ways to do them using European hinges for inset doors!
Note, check out my DIY cabinet door construction techniques for other ways to make DIY cabinet doors, including a very beginner friendly method!
First, measure the exact height and width opening of the vanity for the doors. The opening should be 21″ wide x 16″ tall, but there may be a slight variation depending on your actual build.
You want the doors to have a 1/16″ or an 1/8″ gap around them. We decided to do an 1/8″ gap around our doors so we’d have a little extra room to work with.
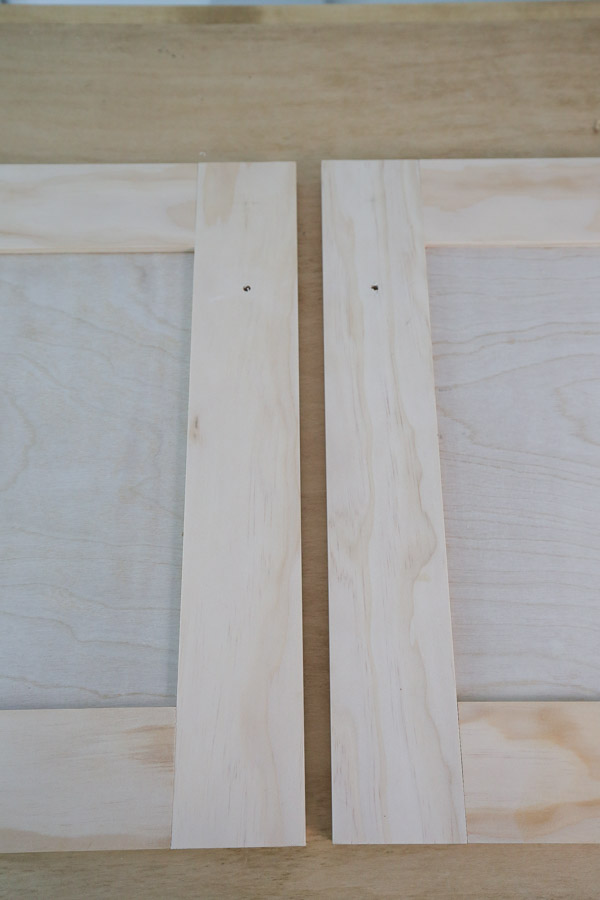
Construct the two doors using 1/2″ plywood framed out with 1x3s. The door cuts should be as follows based on the 21″ wide x 16″ tall opening with an 1/8″ gap all around the doors (but again measurements may vary slightly on your actual build) –
For the 1×3 door frames:
- (4) 1×3 @ 15 3/4″
- (4) 1×3 @ 5 3/8″
And for the 1/2″ thick plywood centers:
- (2) boards @ 10 3/4″ x 5 3/8″
After cutting the 1x3s to size, add pocket holes to the shorter (4) 1×3 @ 5 3/8″ for the insides of the door frame. Make sure the Kreg Jig is set for 3/4″ thick wood.
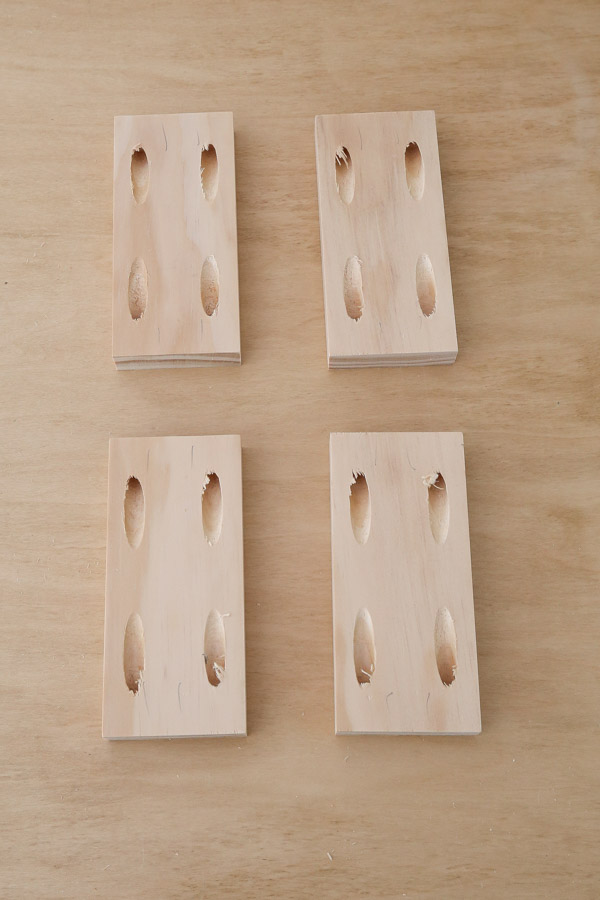
Then, add pocket holes to all sides of the two plywood boards @ 10 3/4″ x 5 3/8″. Make sure the Kreg Jig is set for 1/2″ thick wood.
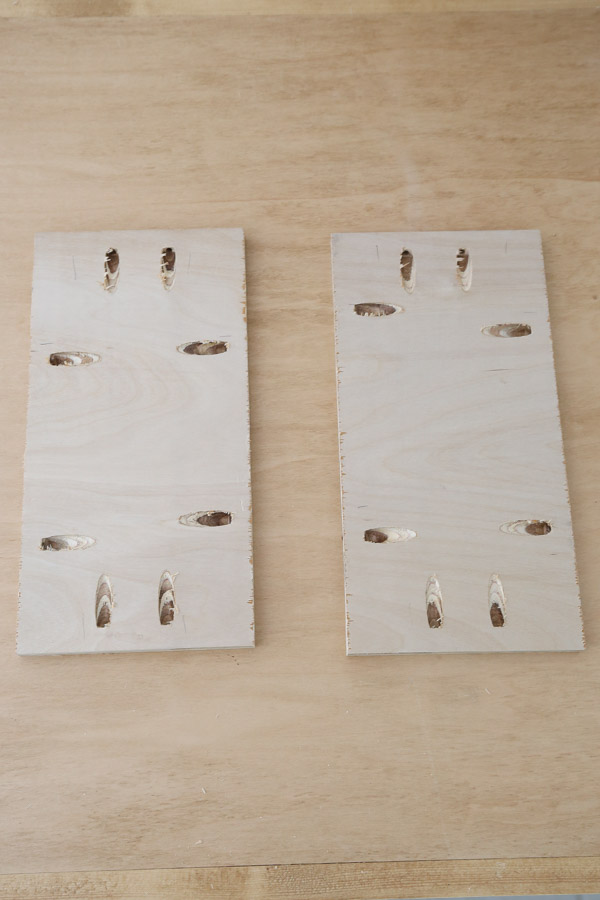
Begin constructing one of the doors by attaching two of the shorter 1x3s @ 5 3/8″ to the shorter 5 3/8″ sides of one of the plywood boards with 1″ Kreg screws. Use 1/4″ scrap wood again under the plywood to help during this step.
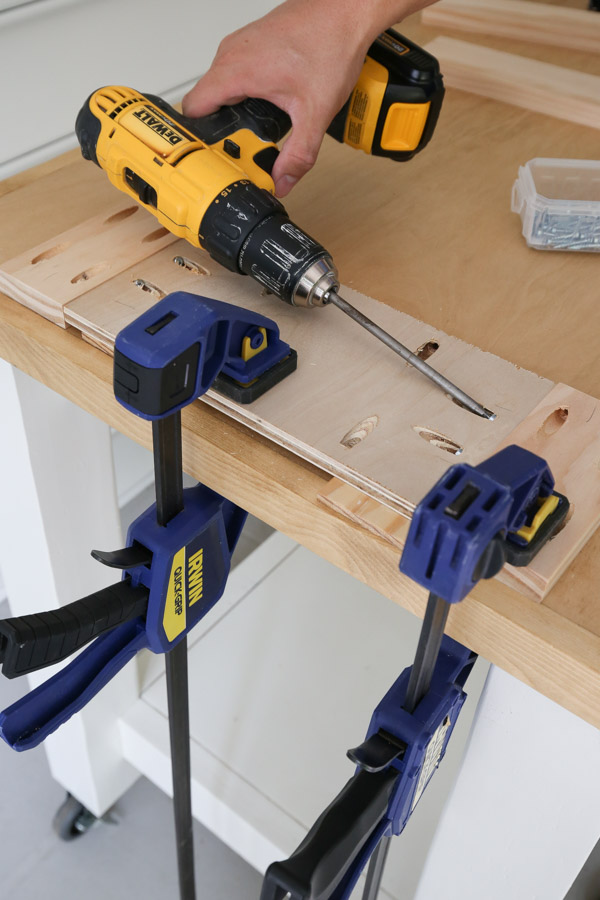
Attach two of the longer 1x3s @ 15 3/4″ to the longer sides of the plywood and the two short 1x3s with Kreg screws. Use 1 1/4″ Kreg screws in the 1×3 pocket holes and 1″ Kreg screws into the plywood pocket holes.
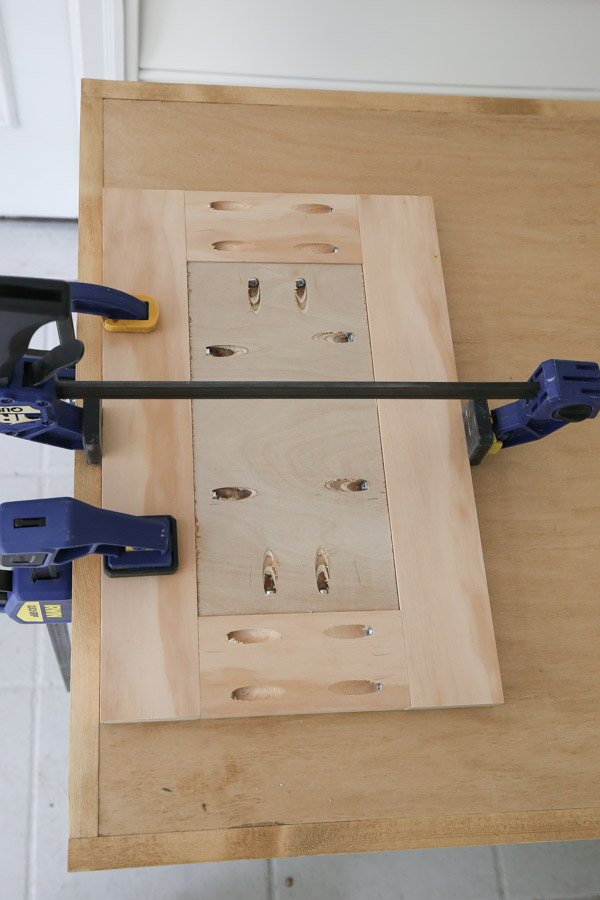
Repeat these steps again to create a second door.
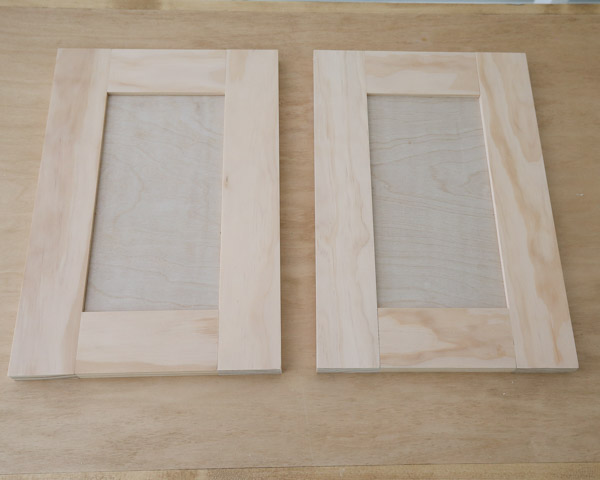
At this point it’s easiest to drill the holes for the cabinet knobs or pulls. I drilled our knob holes 1 1/4″ in from the 1×3 side and 3 3/4″ down from the top.
8. Install the doors on the vanity
Attach a 1×2 @ 14 1/2″ on each each side of the vanity insides by the door openings with 1″ wood screws. This provides a flush surface with our 2×2 frame for attaching the door hinges.
Then, attach the doors to the vanity with inset door hinges.
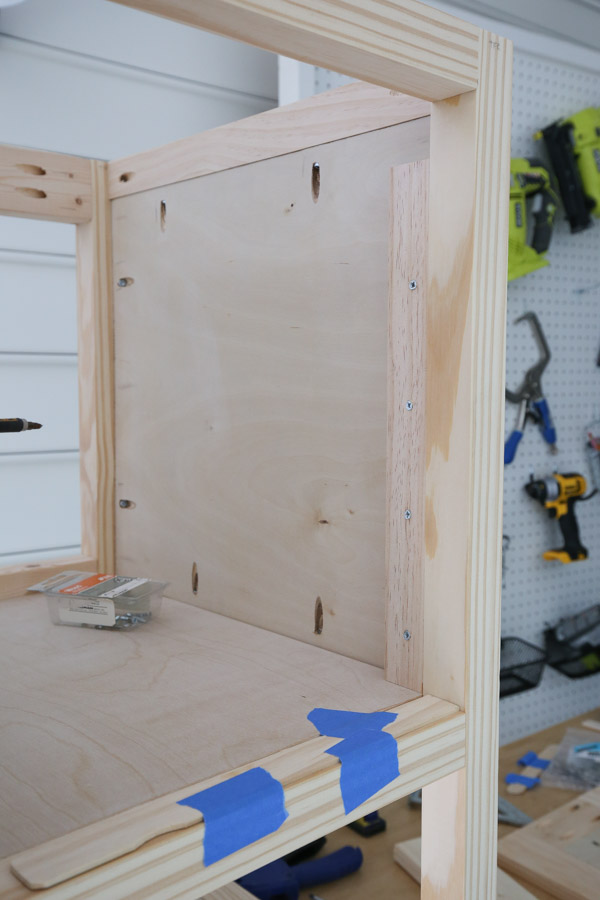
**For installing the doors, make sure to follow the directions that came with the the inset door hinges you are using.**
We decided to use European hinges for inset doors for the first time. European hinges are nice because the doors can be adjusted up/down, left/right, and in/out after installation to get the perfect gaps and placement!
However, there are other types of inset cabinet hinges, check out my DIY bathroom vanity with a faux drawer door where I used a different inset door hinge. And check out my DIY cabinet door construction techniques for more details.
Here is how we installed the door hinges for our specific European hinges for inset doors:
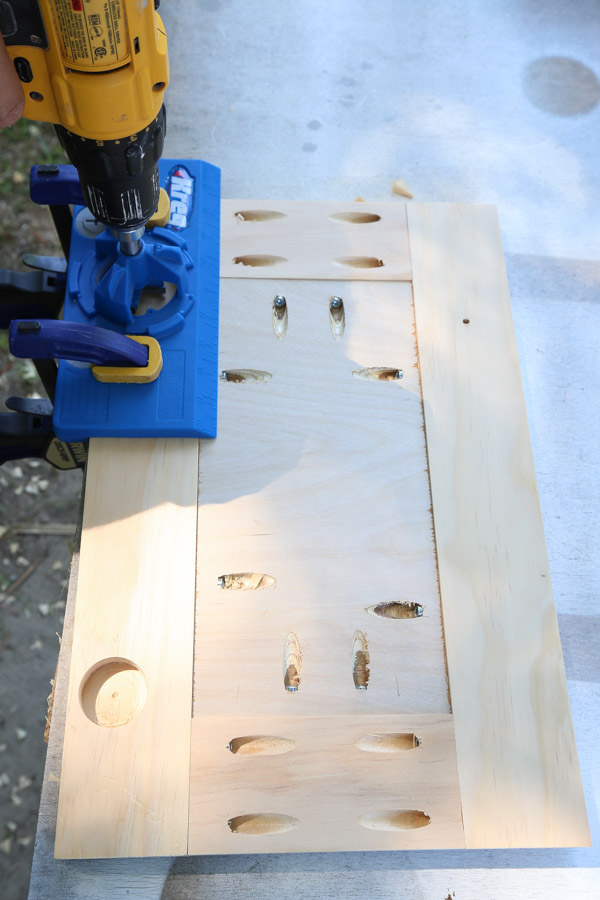
Drill holes for the door hinges on the door frames. We used this Kreg Concealed Door Hinge Jig for the first time to get the perfect holes for our hinges. We set the setting on the jig to 6mm (with a 1/2″ depth) for our door hinges.
Update: After using these same hinges again for our entryway DIY built in cabinet and door and our DIY wall cabinet, we realized we should have set the depth to 4mm after reading through the directions again. But it works both ways! So just make sure to read your hinge instructions!
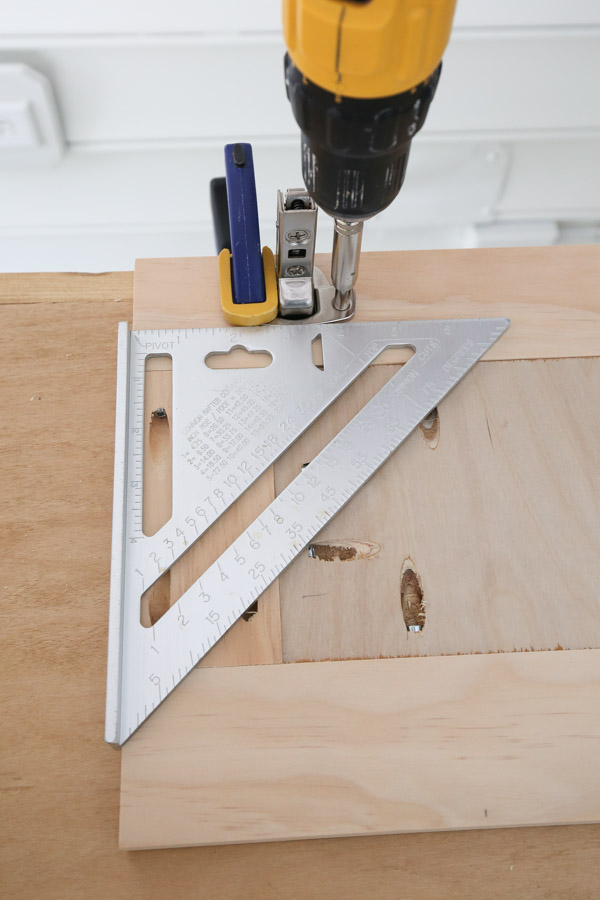
To attach the door hinges to the door, use a square to help keep the hinge in place properly. Then pre-drill holes for the screws and add the screws. We used a special, self centering drill bit to get perfectly centered pre-drilled holes.
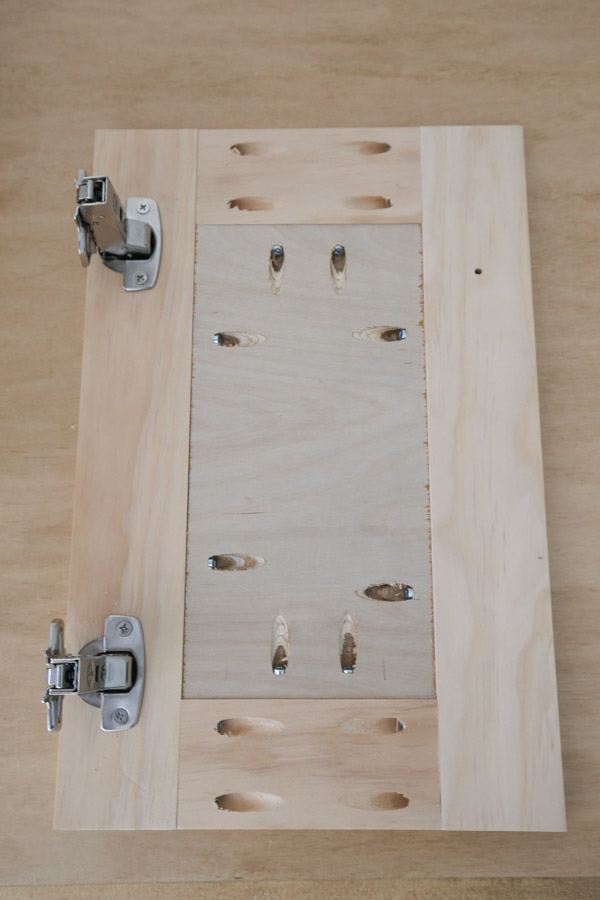
After attaching the hinges to both of our doors, we lined them up in place on our vanity. We used paint sticks taped in place with painter’s tape under the bottom of the doors to account for the bottom gap needed. We didn’t bother doing this on the sides since we could adjust the gaps once the hinges were installed.
Also, we clamped a scrap board to the front to help keep the door in place while screwing the hinges into the 1x2s @ 14 1/2″ on the inside of the vanity exactly where we needed them to be.
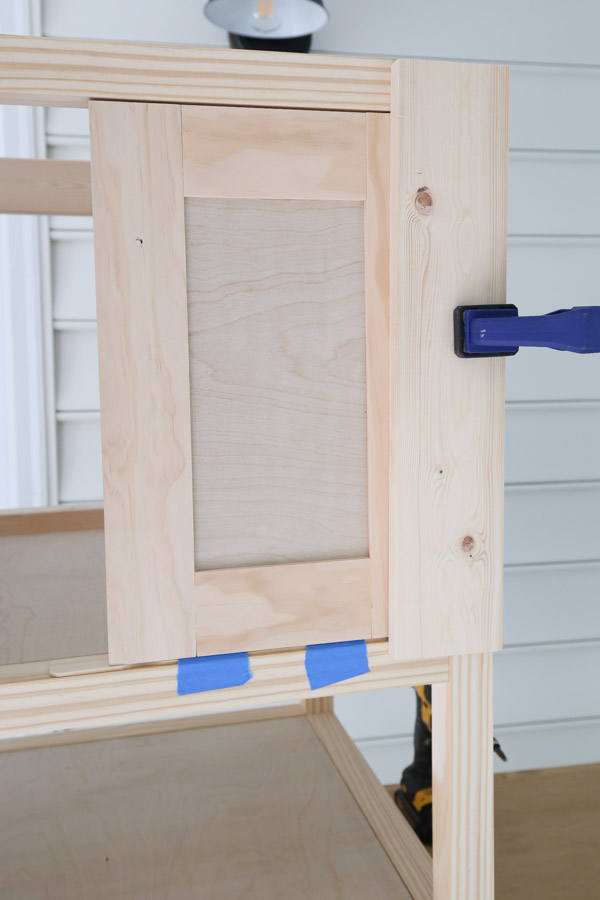
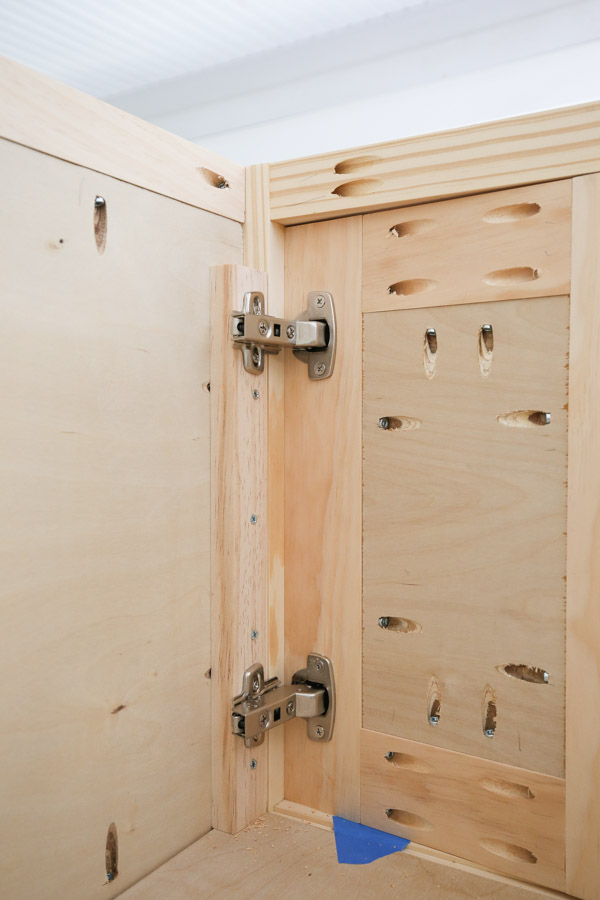
For some reason, once the hinges were attached to the vanity, they were not sitting at a 90 degree angle and the doors were going inwards. This was our first time using these kinds of inset hinges and I have no idea why this was happening. It was super frustrating.
To fix the problem, we installed two magnetic door catches to stop the doors from going inwards which worked great!
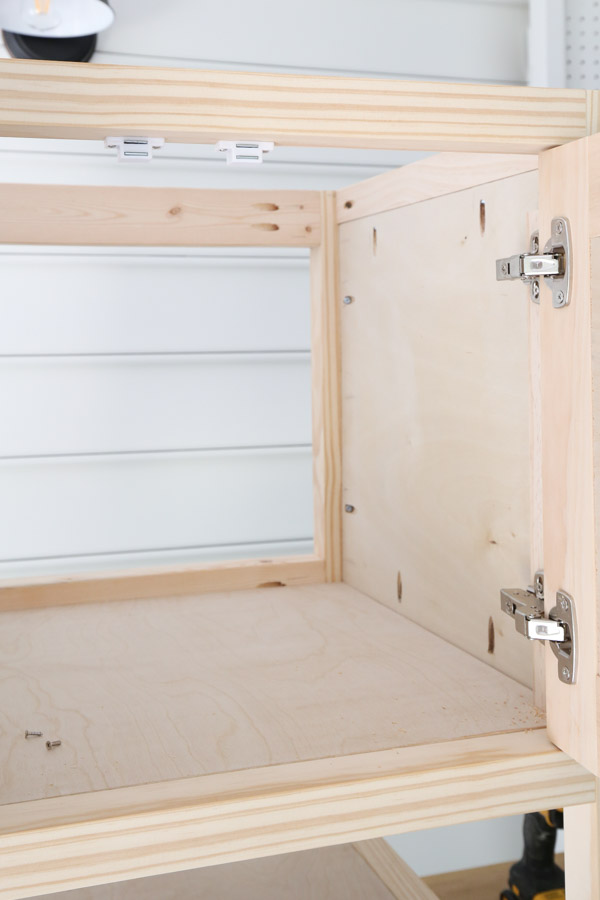
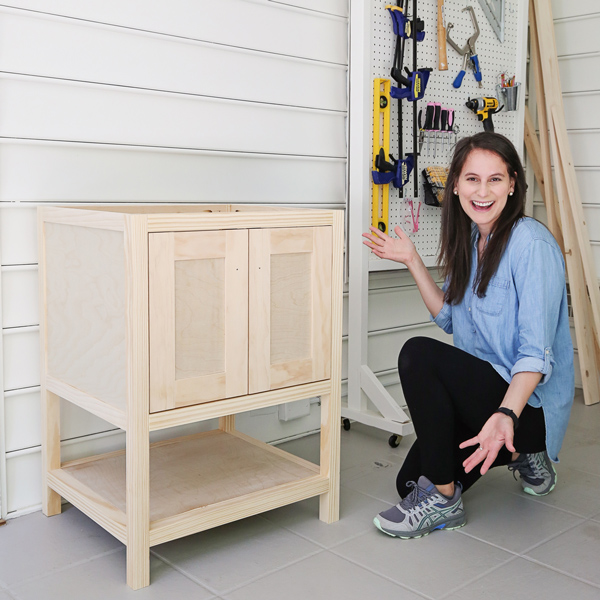
Then, we removed the paint sticks and adjusted the hinges so that we had perfectly even door gaps all around. And that’s it for the build!
Notice how happy I am about those doors and gaps?! lol
9. Stain or paint the bathroom vanity
Finally, we stained the vanity with two coats of Provincial by Minwax and added a satin polyurethane.
See my how to stain wood tutorial for easy tips on staining wood for a beautiful finish!
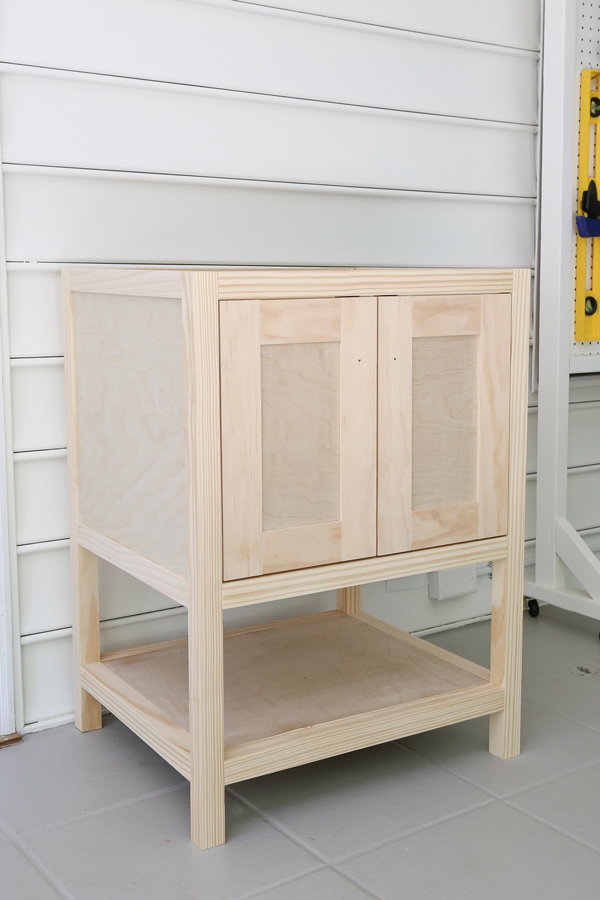
10. Installation of the bathroom vanity
We used a 25″ x 22″ faux marble sink top on our vanity which I think totally elevates the look of it, especially for the style I was going for in our DIY bathroom makeover!
We attached the sink top with silicone caulk and a 1/2″ overhang on each side. The vanity was attached to the wall with 3″ screws through the back 2x3s into the wall studs.
Also, for our plumbing which was lower on our wall, we had to use a special P-trap that flexes. However, a small opening could be cut out of the inside plywood shelf (with a jigsaw or hole saw and drill) to allow plumbing to fit as well.
You can see all of this installation in the DIY bathroom vanity video!
I used two of these beautiful, round, brass knobs on the doors which I love and they come in multiple colors too!
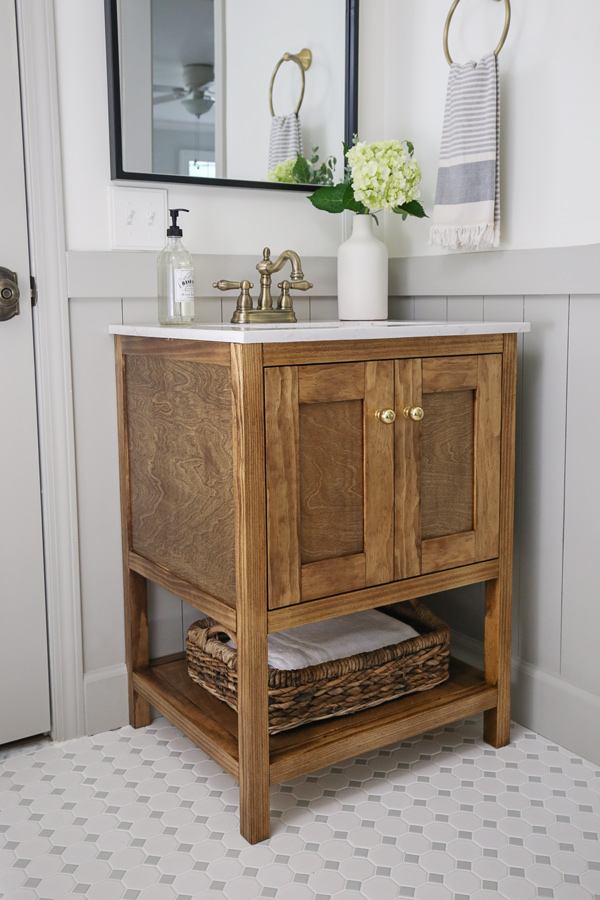
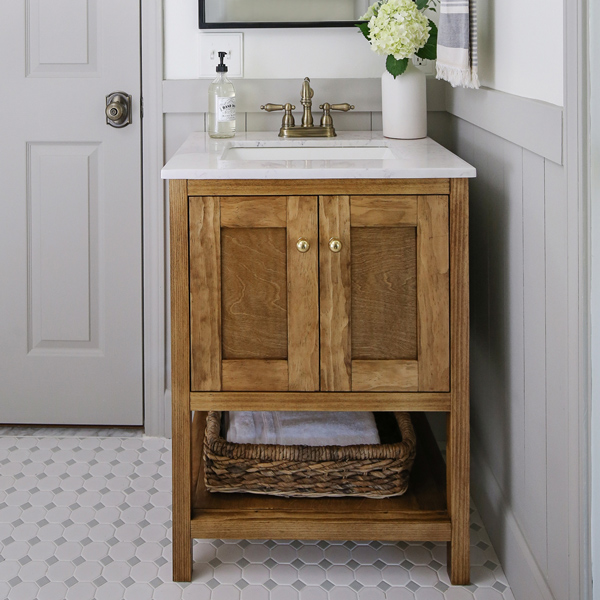
I absolutely love how our DIY bathroom vanity turned out, I think it looks like a custom, high end wood vanity and the best part is that it’s totally budget friendly!
Let me know what you think below and don’t forget the printable DIY bathroom vanity plans too!
Make sure to join our Woodworking for the Home Facebook group and share this project there if you make it! Or tag me on social media @angelamariemade or #angelamariemade
Follow along for my latest projects and sneak peaks on Instagram, YouTube, and Pinterest!
lawrence campbell
Saturday 30th of March 2024
Thank you for such great instructions!!
Just couple of question if I my :
1. You said an overall dimension 21 deep x 24 wide for cabinet, but isn’t really the cabinet has sized for 25 wide x 22 deep the same size as sink , without the - half inch counter top hang
Is that right? Because if not I am confused
Kind regards
Larry
Lynn
Monday 22nd of January 2024
This is fantastic. Thank you for sharing!
Sue
Monday 17th of April 2023
Hello! I'm on step 5 of this project and am thinking about how I want to finish it. I prefer to paint it instead of stain it. Would you recommend caulking all the joints first? Thanks!
Sue
Monday 24th of April 2023
@Angela Marie Made, thank you!
Angela Marie Made
Wednesday 19th of April 2023
Yes I would caulk before painting!
Tracey
Saturday 15th of October 2022
I just found you on You tube last night as I prepare to do a small laundry/bathroom makeover. This vanity is so nice I want to try to build this. I have never built something like this but your directions make me believe with some patience I too could make this. I love your blog and you tube channel. Thank you!
Angela Marie Made
Monday 17th of October 2022
You can do it, you've got this! So glad that you're here, best of luck with your laundry/bathroom makeover!
Rose O'Sullivan
Tuesday 9th of November 2021
Its beautiful, think ill start figuring out my measurements 😊
Angela Marie Made
Monday 15th of November 2021
That's awesome to hear, thank you for sharing!!