Painting a bathroom vanity was not exactly the first room makeover project I envisioned for our new house!
But that’s where I’ve started and below I am sharing how to paint a bathroom vanity which is a great way to help transform a bathroom on a budget!
Just to give you a little background on this project. I shared on Instagram that I’m challenging myself to makeover our master bathroom for only $100!

Simply put, it’s a room we use often every day and it’s also the room that’s bothering me the most looks wise and functionality wise.
Note: This post contains some affiliate links
I really, like REALLY, want to give it a complete gut job and turn it into a beautiful, organized master bath. Yet, that vision is going to cost a few thousand dollars to do it right, even with DIYing most of it. So, the full renovation is going to have to wait at least 6 months.
In the meantime I’m giving it a little makeover to make the space more pretty and functional and I don’t want to spend much more than $100.
Note, the painting process I used here is almost exactly the same process I am sharing for how to paint laminate kitchen cabinets! It works great for bathroom vanity cabinets and kitchen cabinets, both high traffic areas.
How to Paint a Bathroom Vanity:
Materials Needed:
- Painters tape
- Degreaser Cleaner or other cleaner and sponge or brush
- Sandpaper (80-150 grit)
- Primer (I used Kilz Water based primer)
- Benjamin Moore Advance Paint (I used Evening Dove in Satin)
- Paint Brush
- Small Paint Roller – similar here
- Screwdriver
- Light spackle (optional)
First, the bathroom vanity needs to be prepped for painting (steps 1-4), then it can be primed and painted (steps 5-7)
1. Remove cabinet doors and knobs
Use a screwdriver and remove the bathroom vanity doors from the hinges on the vanity and remove the knobs too. You can actually paint with the cabinets still on the hinges but it’s much more difficult and can lead to a more messy paint job if you’re not careful. So, it’s always easier to just take them off.
2. Clean bathroom vanity and doors
Use a scrub brush or sponge and wipe down the bathroom vanity with a cleaner. It’s best to use a degreasing cleaner but all I had on hand was a bathroom cleaner with some bleach in it which I used. Then, make sure to wipe off the cleaner with water and allow it all to dry.
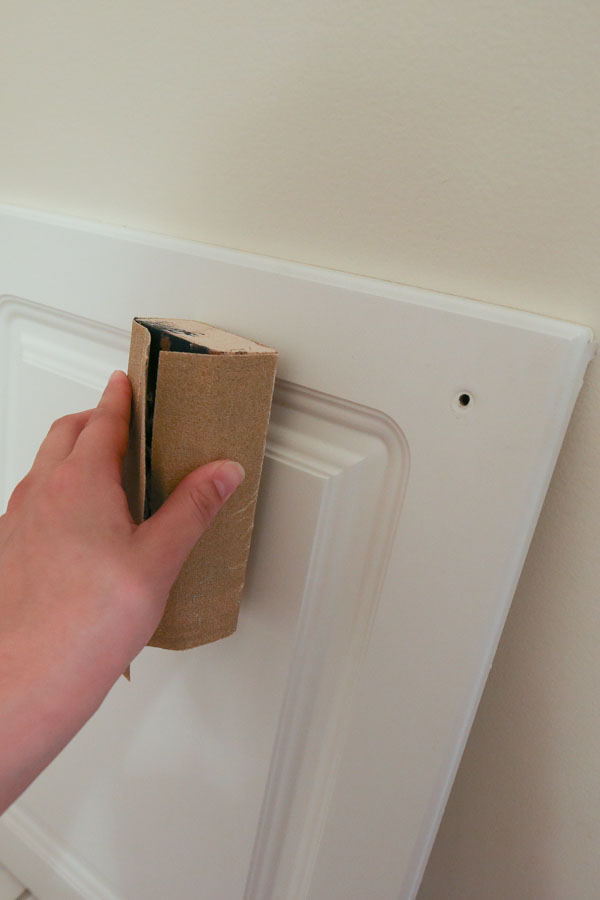
3. Lightly sand bathroom vanity and doors
Use a sanding block and hand sand lightly the cabinet faces and vanity. This can be a quick sanding, it’s just to roughen up the surface to help the primer and paint adhere better. I used 80 grit sandpaper but you can use 120 or 150 grit as well. Wipe the sand dust off with a damp cloth and allow to dry.
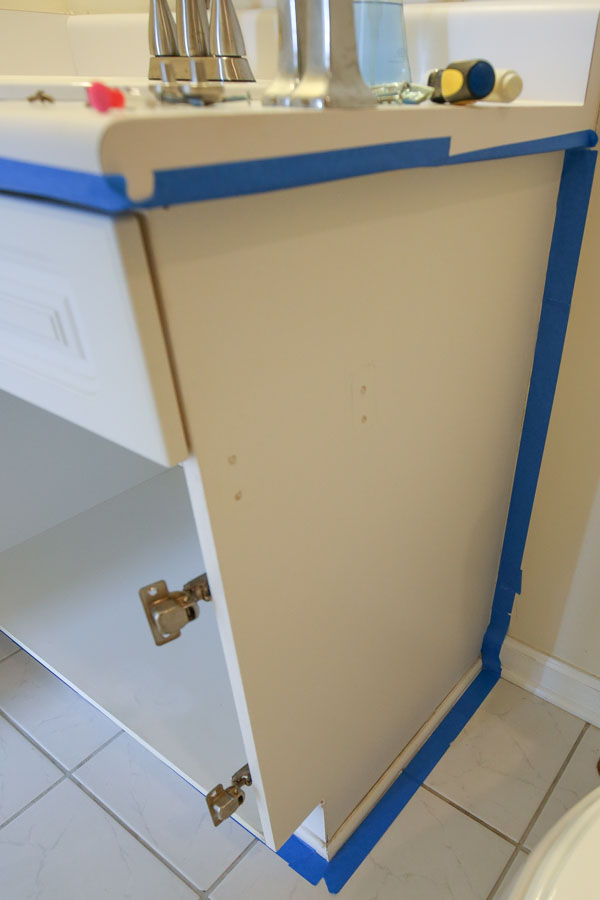
4. Tape off walls, floor, and counter & fill holes (if any)
Use painters tape and tape off any areas that need to be protected from paint, including the walls, floor, and vanity counter top. Also, if there are any holes that need to be filled, go ahead and fill them with a light spackle.
5. Prime bathroom vanity and doors
Use a paint brush to prime any corners, crevices, or areas that can’t be reached with a paint roller. Then, use a roller to apply the primer to the rest of the vanity. Allow it to dry.
Also, although you don’t need to paint the inside of your bathroom vanity, I chose to prime mine since it had some water stains and a slightly musty smell which the primer concealed well.

6. Paint bathroom vanity and doors
***
📩 Want to Save This?
A Note About the Paint:
For paint, I decided to try the Benjamin Moore Advance paint for the first time. I’ve been hearing positive reviews for a long time about it for painting cabinetry, and I figured this small bathroom project would be a good time to try it out.
The Benjamin Moore Advance paint does cost a little more and it was really smelly in my opinion for a water based paint, but it seems very heavy duty and leveled out nicely. Also, since it’s such a high quality, durable paint, specifically formulated for cabinetry, it does not need a top coat. Yay! I do recommend making sure you have a fan going and windows open if possible when using it and the first 24 hours after using it.
Make sure to check out the best paint for cabinets and trim for more details on this awesome paint!
I used the Evening Dove color in satin. I took a risk with this color by not getting a sample because I was trying to save money on this project. At first I wasn’t crazy about the color but it’s growing on me and I like it in darker light when it doesn’t look so shiny. Honestly, I would have preferred it in eggshell but satin is easier to keep clean.
Finally, because the paint is so strong and my cabinets are cheap plastic, the laminate liner on one of the cabinet doors did bubble up a little once painted. It’s not super noticeable unless the light hits it at a certain angle. Though I wanted to mention it as it is something that can occur with painting plastic or laminate cabinets.
Update: This paint has held up extremely well and has been really easy to clean. I used this same paint for painting laminate kitchen cabinets in our kitchen makeover and it worked great there too!
***
Again use a paint brush to paint any corners, crevices, or areas that can’t be reached with a paint roller. Then, use a roller to apply the paint to the rest of the vanity. Allow it to dry. If you notice any drips or fuzzies on your first coat, lightly hand sand them off.

Next, add a second coat of paint to the bathroom vanity. Allow it to dry.
7. Attach doors back on bathroom vanity and add knobs
Once the second coat of paint has dried, go ahead and attach the doors back on the vanity and add your knobs too.
Since it can take paint up to 30 days to fully cure, try to take it easy on the vanity till then. Otherwise for the first 1-2 days or so after painting, keep the doors cracked so they don’t stick to the vanity frame while they are curing.
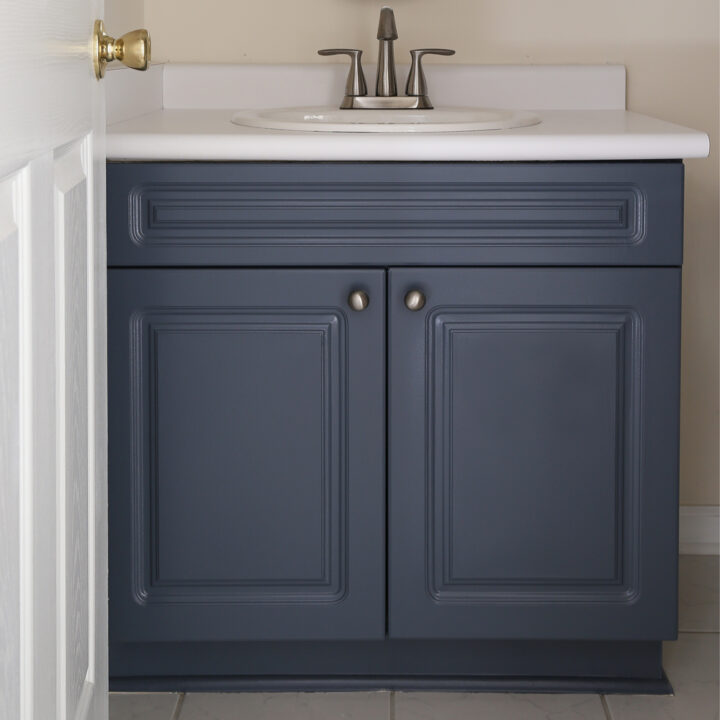
All finished!!! Overall, I like how painting my bathroom vanity turned out! I think it’s a great temporary solution to freshen things up until we replace it with the full bathroom renovation.
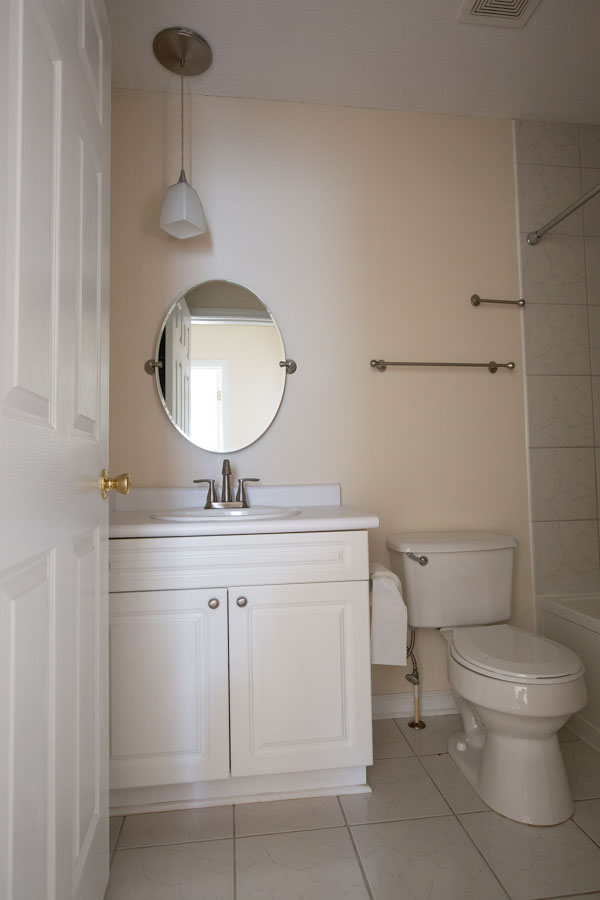
Let’s take a look at the BEFORE photo:
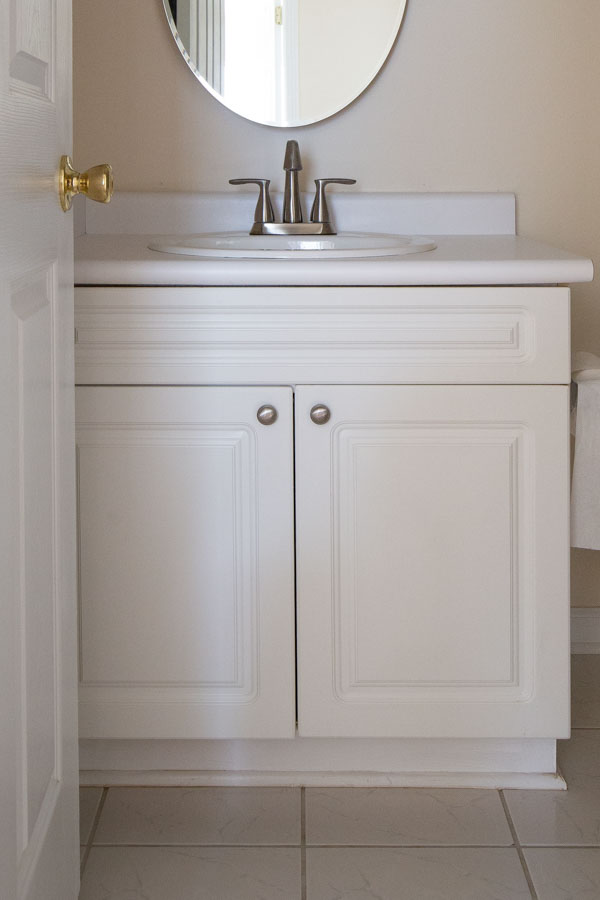
And the AFTER photo:
I hope this tutorial on how to paint a bathroom vanity has been helpful! Have you ever tried painting a bathroom vanity before? Make sure to check out the best paint for cabinets and trim for more details on painting cabinets!
Follow along on Instagram and Insta stories for sneak peeks and behind the scenes of my next project for my $100 bathroom makeover challenge! The next one is going to be a lot of fun – at least I hope it turns out that way!!!
How to Paint a Bathroom Vanity
How to paint a bathroom vanity with a step by step tutorial. Painting a bathroom vanity transforms a bathroom on a budget!
Materials
- Painters Tape
- Degreaser Cleaner and a Sponge or Brush
- Primer
- Benjamin Moore Advance Paint (I used Evening Dove in Satin)
- Light Spackle
Tools
- Paintbrush
- Small Paint Roller
- Screwdriver
- Sandpaper (80-150 grit)
Instructions
- Use a screwdriver and remove the bathroom vanity doors from the hinges on the vanity and remove the knobs too.
- Use a scrub brush or sponge and wipe down the bathroom vanity with a degreasing cleaner. Then, make sure to wipe off the cleaner with water and allow it all to dry.
- Use a sanding block and hand sand lightly the cabinet faces and vanity. Wipe the sand dust off with a damp cloth and allow to dry.
- Use painters tape and tape off any areas that need to be protected from paint, including the walls, floor, and vanity counter top. Also, if there are any holes that need to be filled, go ahead and fill them with a light spackle.
- Use a paint brush to prime any corners, crevices, or areas that can’t be reached with a paint roller. Then, use a roller to apply the primer to the rest of the vanity. Allow it to dry.
- Paint the bathroom vanity and doors with a high quality paint like the Benjamin Moore Advance Line. Use a paint brush to paint any corners, crevices, or areas that can’t be reached with a paint roller. Then, use the paint roller to apply the paint to the rest of the vanity. Allow it to dry. The Advance paint requires a 16 hour dry time between coats.
- After 16 hours, apply a second coat of paint. Allow the second coat to dry and cure for at least 24 hours.
- Attach the doors back on the vanity and add your knobs too.
beth
Monday 22nd of June 2020
I see you started out with a smooth finish. I have a wood finish and was wondering if painting would be a good idea or not with the grain.
Nik
Sunday 30th of August 2020
@beth, Try Aqua Coat Wood Grain filler. I’ve seen a few videos on this but haven’t had chance to try it yet.
Angela Marie Made
Monday 22nd of June 2020
If the wood isn't smooth, I would sand it first until it was smooth. Then use a good primer and then the paint. Here is a link to my sanding tips post: https://angelamariemade.com/how-to-sand-wood/
Joyce
Saturday 6th of June 2020
I have been wanting to try this on a small powder room vanity from a brown to a white. Because if that works real good I might do the other bathrooms but some of those doors are warped I would have to buy new doors. But I’m anxious to try this thanks for the step-by-step. Joyce
Angela Marie Made
Monday 8th of June 2020
You're welcome!
Kelly
Friday 20th of December 2019
In the first part of the paragraph you say to prime the cabinet. Then later you say you used Benjamin Moore Advanced with built in primer. So did you do both? OR can you just use the Benjamin Moore Advanced? Thanks! Looks great!
Angela Marie Made
Thursday 26th of December 2019
I did both! It's best to use primer first then the paint even if the paint has built in primer
Celeste
Monday 18th of November 2019
Great post! Curious if you painted the inside of the cabinet or leave that alone?
Angela Marie Made
Saturday 23rd of November 2019
The inside of our cabinet had a bit of a musty smell. So, I wiped it down with a cleaner, let it dry, then I primed it to help seal it and clear up the smell. I didn't paint it though. If you do want to paint the inside, make sure to let the paint dry and cure for several days or longer if possible to help avoid objects from sticking to the painted surface.
Yoshica Shigg
Saturday 12th of October 2019
I Love it!
Angela Marie Made
Friday 18th of October 2019
Thanks!