Painting laminate kitchen cabinets is an easy and budget friendly way to update your kitchen! Below I’m sharing how to paint laminate kitchen cabinets with just a paint roller and no fancy tools needed!

As part of our $1k budget kitchen makeover plan, I updated our cabinets by enclosing the space above the kitchen cabinets and adding a beautiful DIY range hood cover. But, the kitchen cabinets themselves have that cheap laminate look and definitely needed a makeover with fresh paint and new knobs!
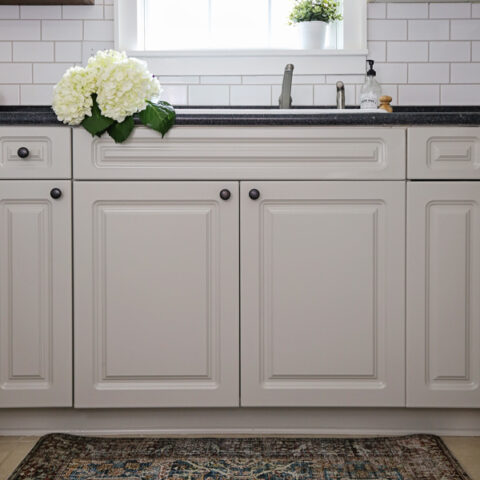
Here is a before photo of our laminate kitchen cabinets:
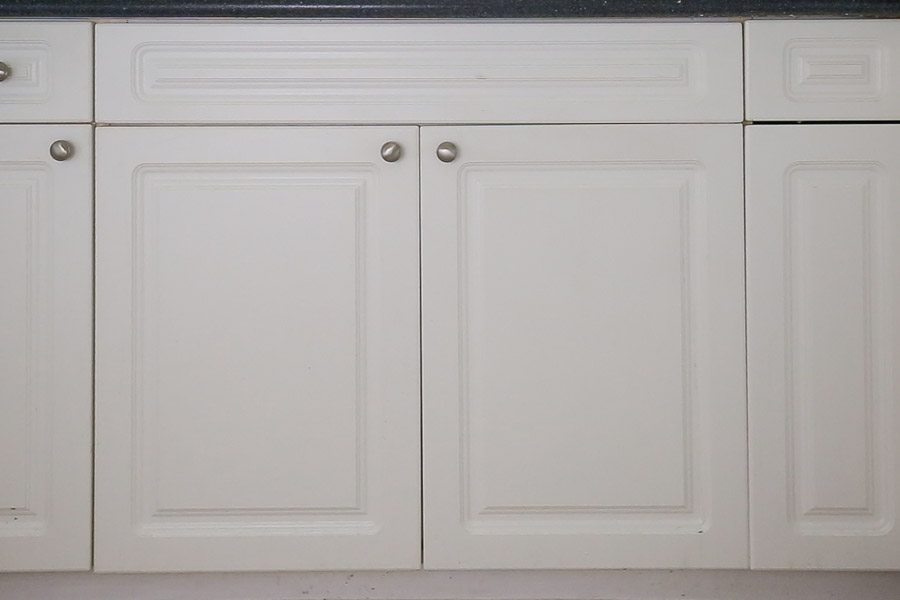
BEFORE PAINTING CABINETS
We had the same laminate cabinets in our master bath and I shared how to paint a bathroom vanity a few years ago. This process is almost exactly the same, except there are more cabinets and drawers involved.
Another advantage to painting our bathroom vanity that had the same cabinets is that I was able to see how well the paint finish held up on them and it held up great! The paint we used makes the laminate cabinets look like new and it’s extremely durable.
The paint we used for painting our bathroom vanity and for painting our kitchen cabinets is the Benjamin Moore Advance line in satin. It’s a super durable, hard finish, self leveling (which gives a flawless, no brush stroke look), and low-VOC. I love how the painted cabinets look after using this paint and the proper prep steps I share below!
We also used this same paint line for painting our DIY built in cabinets. Make sure to check out the best paint for cabinets and trim for more details on this paint!
Many painting kitchen cabinets tutorials use paint sprayers. I’m sure they’re great and they do provide a smooth finish, and if you have one already that’s awesome.
But, honestly, you don’t need one to paint cabinets, so you don’t need to buy one if you don’t want too! I’ve never needed one. And they involve more prep work, plus a good one costs more. A paint roller works great instead, it’s easy, and cheap!
A few more things about painting laminate kitchen cabinets… You can paint the upper cabinets one weekend and the lower cabinets another weekend if you are pressed for time or have a lot of cabinets with limited work space. We did this because we didn’t have the room to do all of them at once. The upper cabinets go much quicker than the lower cabinets!
Also, the key to painting cabinets is to spend the time properly prepping them for the paint, it makes a huge difference in the outcome of the finish! I go over each prep step below.
Note, this post contains some affiliate links. For more info see my disclosures here.
Materials Needed:
- Painters tape
- Degreaser Cleaner (I used this cleaner) and sponge or brush
- Sandpaper (150 grit)
- High quality primer (I used this water based primer)
- Benjamin Moore Advance Paint
- Paint Brush
- Microfiber small paint roller
- Screwdriver/drill
- Light spackle (optional)
- New cabinet knobs (optional, I used these knobs)
How to Paint Laminate Kitchen Cabinets:
Video Tutorial:
Subscribe to my YouTube Channel here!
See the FULL VIDEO TUTORIAL on my YouTube channel and at the bottom of this post!
1. Remove kitchen cabinet doors, drawers, and knobs
Begin by removing the cabinet doors with a screwdriver. A drill can be used too but just be careful to go slow so the screws don’t get stripped. Also, remove the cabinet knobs too.
You can leave the hinges on the cabinet bases if they aren’t in the way. We only had to remove the hinges where two cabinets doors opened next to each other.
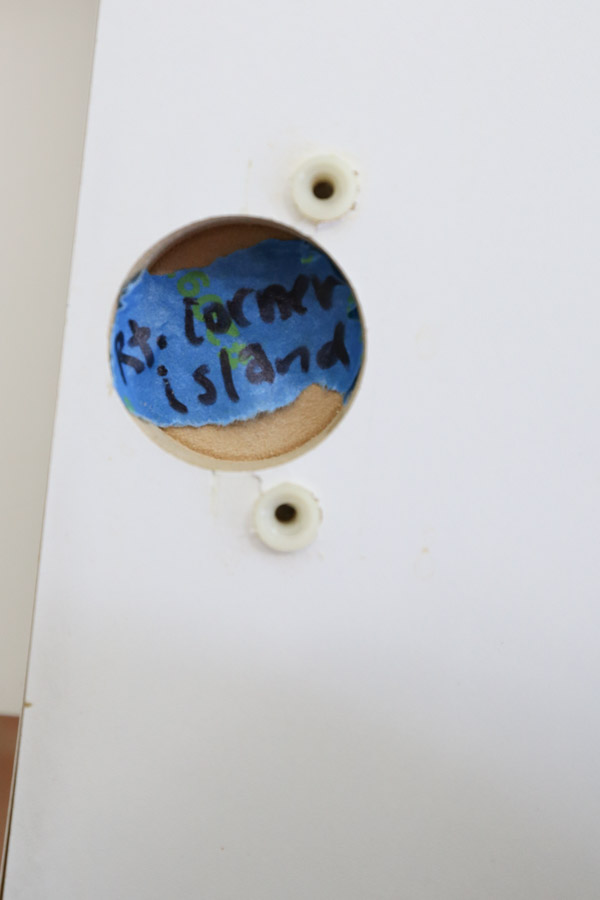
Also, in order to keep the cabinet doors organized, you can add painter’s tape on the back of them and label the location of each door. If you are painting the back of the cabinets too, you can put the tape labels inside of the door hinge hole.
A Note About Painting the Back of Kitchen Cabinets:
We decided not to paint our cabinet backs to save time and because half of them were being painted white and they were all ready white on the back of them!
Further, if you do paint the back of the cabinets, make sure you paint them first and then the fronts last.
Paint Workstation Setup for Kitchen Cabinets:
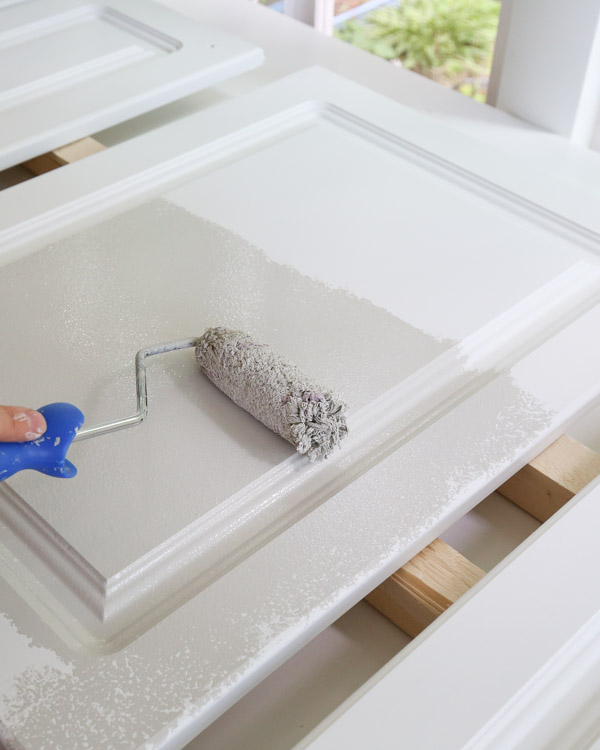
We placed our cabinets on top of two 8 foot 2x2s which were on top of a pair of sawhorses. This setup was simple and made the cleaning and painting process easy for the cabinets.
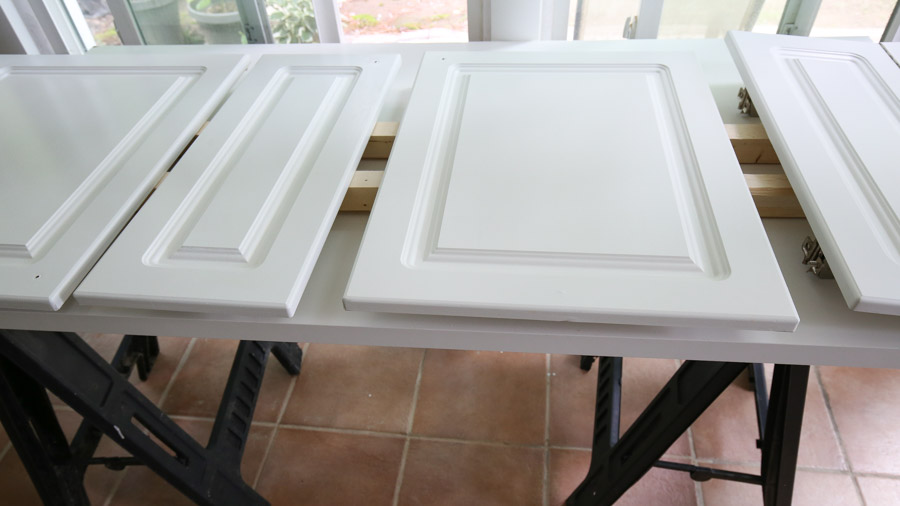
For the drawers, we were originally going to remove the drawer faces, but then we realized they were nailed to the drawer boxes, so we just emptied the drawers and removed the full drawer from the slides instead.
2. Clean the kitchen cabinet doors, drawers, and cabinet bases
It’s crazy how much grease and dirt can build up on kitchen cabinets. It’s really important to clean them well before painting. Use a degreaser cleaner to clean the cabinet doors, drawer faces, and cabinet bases (anywhere that is getting painted).
After cleaning with a degreaser, wipe the cabinets and bases down with water and allow them to dry.
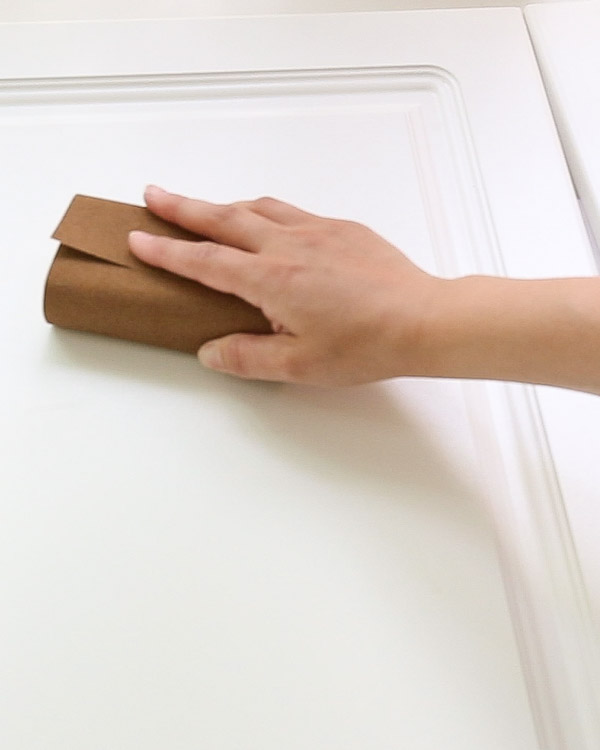
3. Lightly sand cabinet doors, drawer faces, and bases
Use a medium grit sandpaper (I used 150 grit) and lightly hand sand the cabinet doors, drawer faces, and bases.
It’s really important to just lightly sand the surface just enough to scuff the surface so the paint adheres better but don’t sand too hard that you scratch the surface. Laminate cabinets are more prone to scratching, so be very careful!
Wipe the sand dust off with a damp cloth and allow to dry.
📩 Want to Save This?
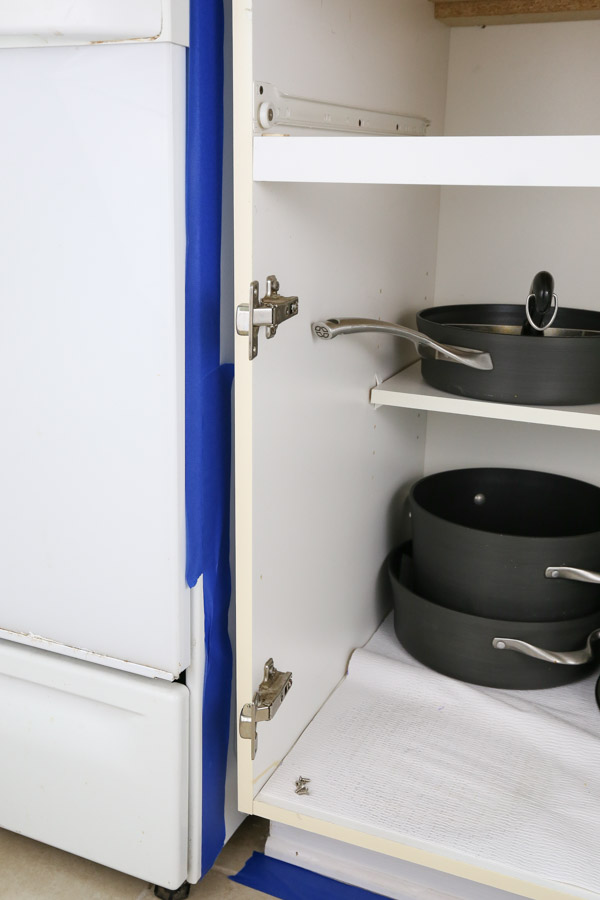
4. Tape off walls, the floor, counters, and appliances with painter’s tape
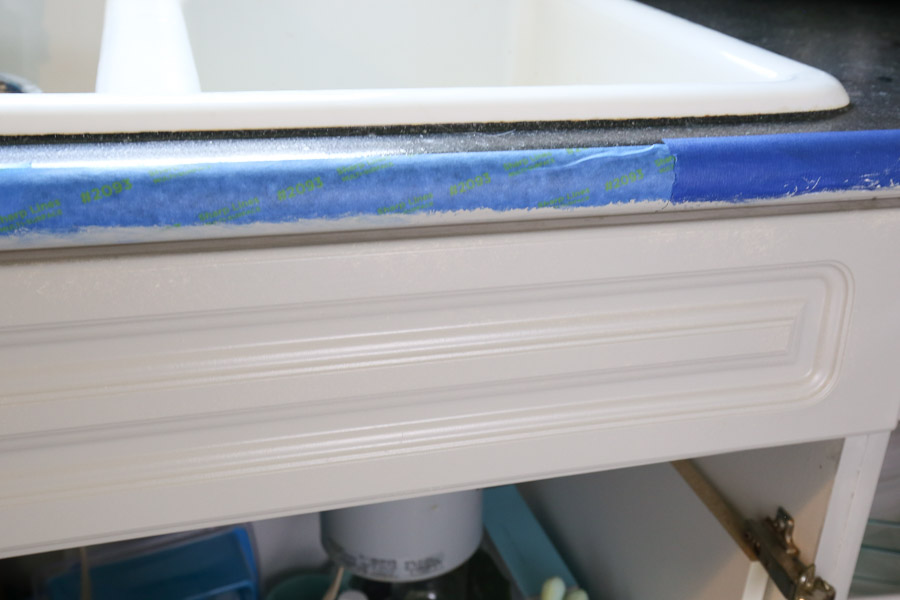
Use painters tape and tape off any areas that need to be protected from paint, including the walls, floor, appliances, and the bottom and sides of the counter top.
Also, if there are any holes that need to be filled, go ahead and fill them with a light spackle at this point.
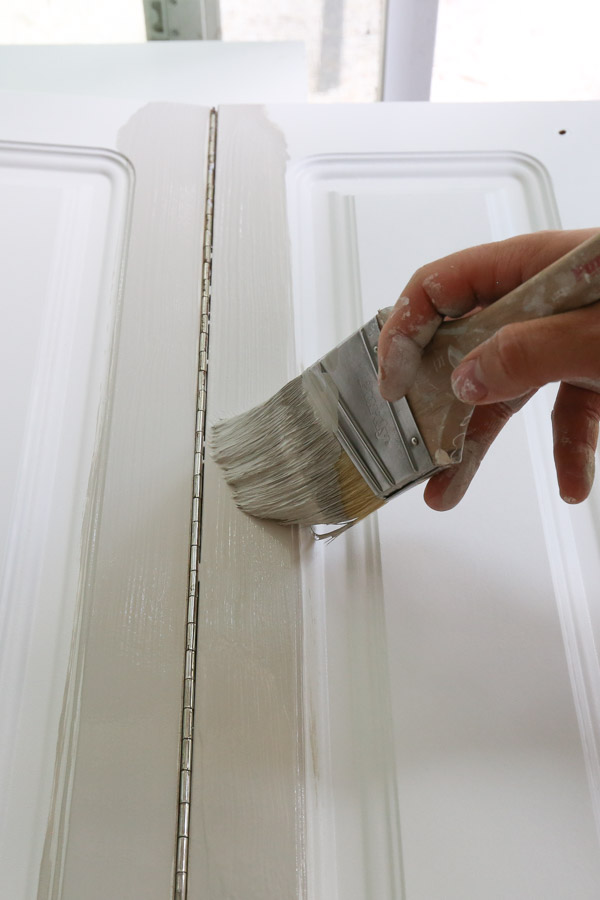
5. Prime kitchen cabinet doors, drawers, and bases
For priming and painting, we used a mini paint roller (it was 4″ x 3/4″ nap, but it can be any size nap) for more control. Make sure to use a high quality, shed free, microfiber roller. In general I don’t use foam rollers for painting cabinets because they can leave a streaky finish.
Use a paint brush to cut in and prime any corners, crevices, or areas that can’t be reached with a paint roller. Then, use a paint roller to apply the primer to the rest of the kitchen cabinets, drawer faces, and bases. Allow it to dry.
Make sure to not roll or brush the primer on too heavy to avoid drip marks. If there are any drip marks once the primer has dried, just hand sand them off and wipe off the dust.
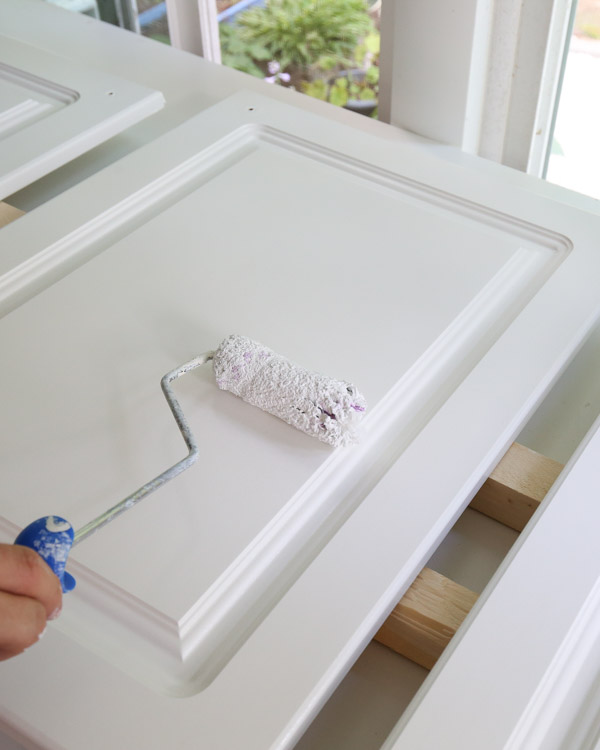
6. Paint kitchen cabinet doors, drawers, and bases
As explained above and in my tutorial on painting a bathroom vanity, the paint we used for painting our laminate kitchen cabinets was the Benjamin Moore Advance line. Using a high quality, self leveling, durable paint like the Advance line that is intended for painting cabinets makes all the difference in the final result of painted kitchen cabinets.
Make sure to check out the best paint for cabinets and trim for more details!
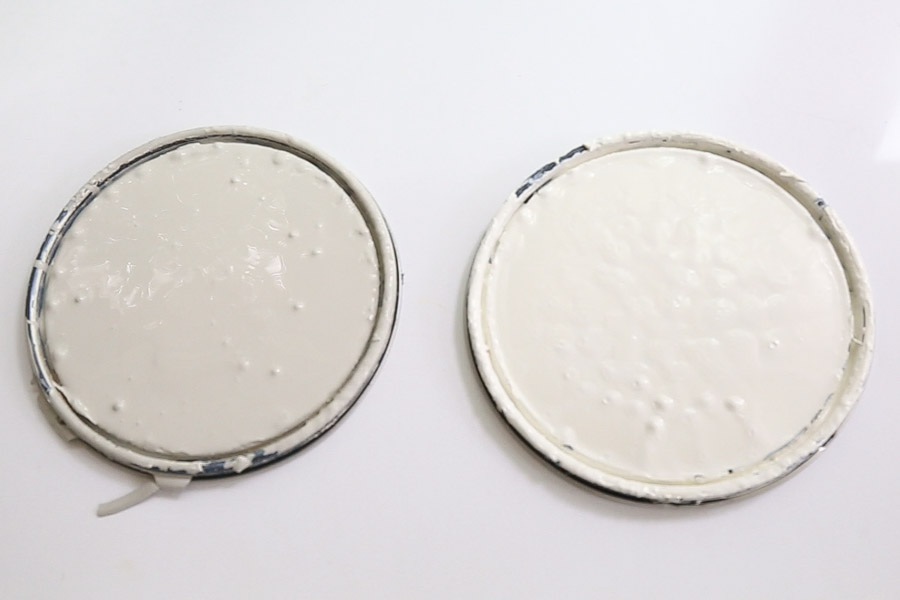
We used White Dove by Benjamin Moore for our upper cabinets and Mindful Gray by Sherwin Williams (we had it color matched at our local Benjamin Moore store) for our lower cabinets.
Again use a paint brush to paint any corners, crevices, or areas that can’t be reached with a paint roller.
Then, use a roller to apply the paint to the rest of the kitchen cabinets. Allow it to dry. If you notice any drips or fuzzies on your first coat, lightly hand sand them off.
The Advance paint requires a 16 hour dry time between coats. After 16 hours, apply a second coat of paint. Allow the second coat to dry and cure for at least 24 hours.
Note, the Advance paint does have an unpleasant smell while it dries, so you may want to leave a fan on in the room or open the windows while it dries.
7. Attach kitchen cabinet doors back on the hinges and add knobs
After the paint has dried and cured for at least 24 hours, add the cabinet doors back on the hinges and insert the drawers back onto the drawer slides. Remove all the painter’s tape as well.
Add the old knobs or spruce things up with new knobs! I replaced my old, cheap knobs with these mushroom knobs.
Since it can take paint up to 30 days to fully cure, take it easy on the cabinet doors and drawers until then. Otherwise for the first 1-2 days after painting, keep the doors cracked so they don’t stick to the kitchen cabinet bases while they are curing.
I think our painted kitchen cabinets look like brand new cabinets! And the painted finish looks even better than the original, cheap laminate finish. Painting kitchen cabinets really makes a big difference for such a low cost!
I will be sharing the full reveal of all of the painted cabinets in the final kitchen makeover reveal next week, stay tuned! In the meantime here is a before and after look!
BEFORE PAINTING CABINETS
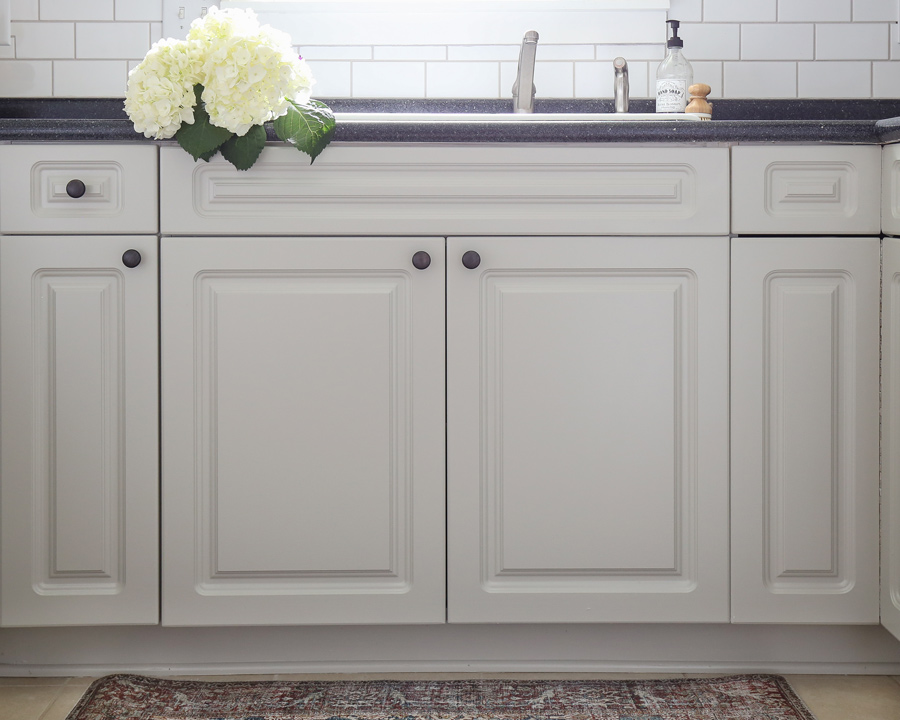
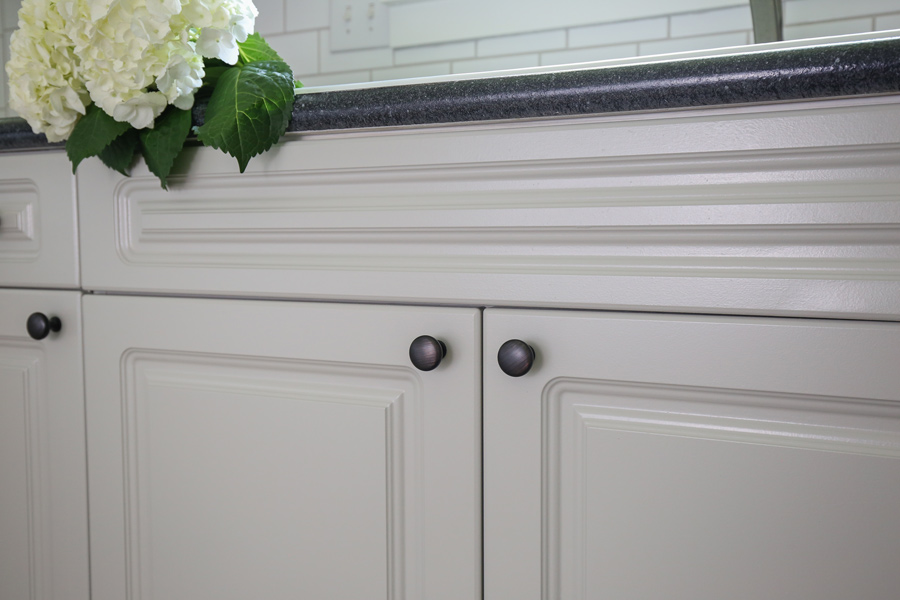
And here’s a close up of the painted finish!
I hope this tutorial on how to paint laminate kitchen cabinets has been helpful! Are you planning on painting your kitchen cabinets? I’d love to hear about it and the paint color you are going to use!
Follow along on Instagram stories for sneak peeks of the kitchen makeover progress and follow along on YouTube for video tutorials of all the DIY projects! The final reveal is coming up next week and I can’t wait to share!!!
How to Paint Laminate Kitchen Cabinets
How to paint laminate kitchen cabinets with just a paint roller! Painting laminate kitchen cabinets is an easy and budget friendly way to update your kitchen!
Materials
- Painters Tape
- Degreaser Cleaner and a Sponge or Brush
- High Quality Primer
- Benjamin Moor Advance Paint
- Light Spackle (optional)
- New Cabinet Knobs (optional)
Tools
- Sandpaper (150 grit)
- Screwdriver/Drill
- Paintbrush
- Microfiber Small Paint Roller
Instructions
- Begin by removing the cabinet doors, drawers and knobs with a screwdriver or drill.
- Set up a paint workstation for painting the kitchen cabinets. We placed our cabinets on top of two 8 foot 2x2s which were on top of a pair of sawhorses.
- Clean the kitchen cabinet doors, drawers, and cabinet bases with a degreaser cleaner. After cleaning, wipe the cabinets and bases down with water and allow them to dry.
- Lightly sand cabinet doors, drawer faces, and bases with sandpaper. Wipe the sand dust off with a damp cloth and allow to dry.
- Use painters tape and tape off any areas that need to be protected from paint, including the walls, floor, appliances, and the bottom and sides of the counter top.
- Prime kitchen cabinet doors, drawers, and bases with a high quality primer and a shed free, microfiber roller. Use a paint brush to cut in and prime any corners, crevices, or areas that can’t be reached with a paint roller. Then, use the paint roller to apply the primer to the rest of the kitchen cabinets, drawer faces, and bases. Allow it to dry.
- Paint kitchen cabinet doors, drawers, and bases with a high quality paint like the Benjamin Moore Advance Line. Use a paint brush to paint any corners, crevices, or areas that can’t be reached with a paint roller. Then, use the paint roller to apply the paint to the rest of the kitchen cabinets. Allow it to dry. The Advance paint requires a 16 hour dry time between coats.
- After 16 hours, apply a second coat of paint. Allow the second coat to dry and cure for at least 24 hours.
- Add the cabinet doors back on the hinges and insert the drawers back onto the drawer slides. Remove all the painter’s tape as well. Add the old knobs or spruce things up with new knobs!
Donna
Sunday 11th of August 2024
I used Benjamin Moore Advance in our bathroom cabinets. It was a huge job with all the prep, but I LOVE them!! The self leveling and finish on this paint is amazing!
Helene
Saturday 6th of May 2023
We don’t have a good range so no ducts are already installed. I see that the one you chose offers the option of being ductless? How does that work?
melanie rescigno
Sunday 14th of August 2022
Hi, after painting, do you seal the cabinets with anything?
Angela
Monday 15th of August 2022
No I did not!
Rose Del Rio
Saturday 16th of January 2021
Cabinet Rescue best paint for kitchen cabinets
Angela Marie Made
Monday 18th of January 2021
thanks!
Nancy Stanglein
Wednesday 18th of November 2020
This method is amazing! I carefully bought all the products and followed directions carefully. The paint is amazing and the microfiber rollers give a perfect finish! So grateful for these instructions!
Angela Marie Made
Thursday 19th of November 2020
Thank you so much!!!