When it comes to finishing wood, knowing how to sand wood is an essential part of the process! Having a smooth, sanded wood surface makes all the difference for a beautiful, wood finish or painted finish on your project.

In my how to stain wood tutorial, I provided an overview of how to sand wood before staining it, but I want to go into more detail on the step by step process, sanding tools, why it’s important, and share my favorite tips too!
Note, this post contains some affiliate links. For more info see my disclosures here.
Why Wood Needs to Be Sanded
You may be wondering, do you really need to sand wood before staining or do you have to sand before painting? Based on my experience, I say yes to both of these questions and that it is even more important with staining wood. As I noted in my how to stain wood post, I really dislike sanding, it’s not fun, but it’s a foundational step in the wood finishing process.
Most raw wood comes in a rough condition (unless it’s purchased pre-sanded) from the home improvement store or lumber yard. It feels rough and a bit saw dusty, with marks, dents, and other blemishes on the surface.
Therefore, if you were to stain over that, it’s going to be a messy, blotchy finish and the true grain of the wood is not going to show through as beautiful as it would if you sanded it first. Also, with staining, when you sand the wood, it opens up the pores of the wood for the stain to really absorb well and evenly.
And if you were to paint over a non sanded wood surface, there is going to be a lot of texture that shows through and again it’s not going to look as well or like a smooth finish. The same concept applies to old wood or wood that has an existing finish on it too!
Below is a photo of two pieces of wood that were cut from the same piece of lumber and stained the same color. One piece of wood has been sanded and the other piece has not. It’s a dramatic difference and shows the importance of sanding wood!

When You May Not Need to Sand Wood
There are times when you can get away without sanding or just do very little sanding. For example, with painting, if a wood surface has already been painted or stained and is smooth and clean, you could paint over it without sanding. Especially, if you are using a primer first and a top coat or sealant wasn’t used.
Or if you are buying a premium piece of wood that is in really good condition, you can sometimes get away with doing less sanding and just use one or two higher grit sandpapers, rather than 3 different grits (explained in step #2 below). It’s really a judgement call based on the condition of the wood and how you prefer the finish to look!
Types of Sanders
There are many different types of sanders and sanding tools available for sanding wood. Below I briefly go over some of the main types and my favorites.
Orbital Palm Sander
I highly recommend an orbital palm sander for most wood projects, which is a very efficient and affordable sanding tool. If you can only afford one sanding power tool, this is usually the best to buy. Most have coordinating sanding discs that easily stick on and peel off the sander too. I use this sander for the majority of my woodworking and home improvement projects.

Corner Sander
I love my small, corner sander which works well for getting in the small corners that an orbital sander can’t reach. It’s really quick and easy to grab for smaller sanding projects too.

Sanding Block or Sandpaper
For light sanding, you can hand sand with just a piece of sanding paper (they come in sheets), or sandpaper wrapped around a small piece of wood, or a sanding block. This is essential to always keep on hand!
Belt Sander
If your wood needs a lot of heavy duty sanding, a belt sander may be a good tool to start with and they are often available for rent or purchase at home improvement stores.
Dremel Tool with Sanding Attachment
The Dremel Rotary tool with a sanding attachment (there are different sizes and shapes available) is handy for tiny corners, crevices, and edges that other sanding tools can’t reach. It’s definitely not a necessity, but a handy, extra tool. We used it to sand an old finish off of the small, turned table legs on our side table makeover and it worked great!
***
How to Sand Wood and Sandpaper Grits
1. Set Up a Work Space and Wear Sanding Dust Protection
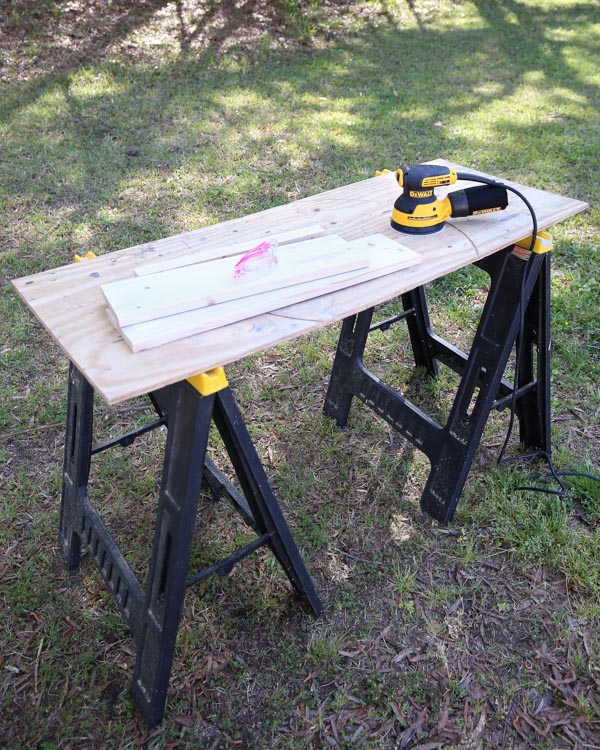
Sanding wood is a messy process (lots of sawdust) and it’s best to do outdoors or in a workshop/garage if possible. Try to use a secure, flat surface or work table. I like to set up a pair of sawhorses and a plywood board from the home improvement store in my backyard.
Note, you can buy shop vac attachments for your orbital palm sander or belt sander to help eliminate even more of the saw dust that isn’t caught by the attached bag on the sander.
There are many types of dust collection. At the very least use a sander with a bag collection. The next step up would be hooking a shop vac up. If you are in a garage or workshop, this is important to do to help control dust.
📩 Want to Save This?
The next level up of dust collection would be a dust extractor. There are even more effective dust collection systems but it can get expensive.
Personal Protection Equipment
Make sure to wear safety goggles to avoid getting sawdust in your eyes. And use hearing protection since sanding is loud.
You should wear a face mask or sanding face respirator too. You can use an inexpensive, disposable sanding mask or a reusable mask.
Also, I like to wear some utility work gloves when sanding to avoid splinters and to help reduce sanding vibration on my hands.
You may feel a bit silly wearing all this gear, but it’s well worth it for safety!

2. Pick your different Sandpaper grits
Sandpaper ranges in different grits from very coarse sandpaper, like 60 grit, to very fine grit sandpaper, like 220 grit or 320 grit. It’s best to start with a low grit sand paper to sand your whole project. This usually takes the longest amount of time as it really gets all the rough stuff off of the wood. As you move up in the grit number of sand paper, the smoother the finish will be on your project piece, and the less material is removed.
Determine which grits you will need for your project. I typically use 80, 120, and 220 grit sandpaper.
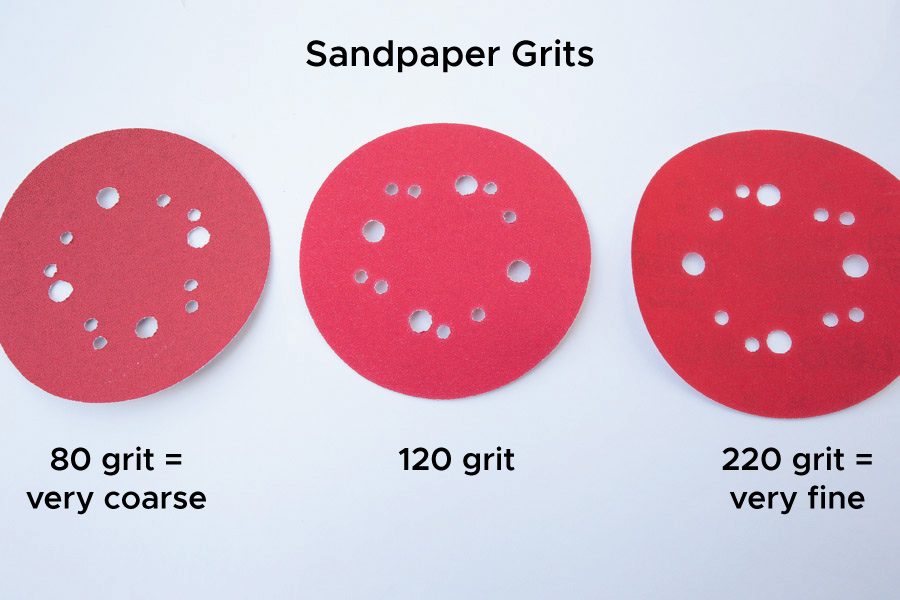
Note, if I am using a premium wood for my project that is in really good condition to begin with, then I will typically just first use 120 and then 220 grit only. But, if my wood is really rough to begin with or has a lot of an old finish on it, I will start with 60 grit sandpaper and move up in the grit number from there.
3. Start with a coarse grit sandpaper
Start with a rough grit sandpaper, such as 80 grit. As noted above, this first round of sanding, with the coarsest grit, will take the longest and remove the most amount of material. There will be a noticeable difference in the look of the wood as you sand. It’s one of my favorite steps as the true color and grain of the wood is revealed as all of the blemishes are removed.
Here is a photo showing half of the wood sanded with just 80 grit sandpaper:

4. Use a medium grit sandpaper
Next, use a medium grit sandpaper, such a 120 grit or 150 grit, to start to smooth the surface of the wood.
5. Finish sanding with a fine grit sandpaper
Finally, finish sanding with a finer grit sandpaper, such as 220 grit. Ultimately, you want to make sure the wood surface feels smooth to the touch once complete. Below is a photo showing our wood fully sanded with 80, 120, and 220 grit sandpaper compared to a photo of the wood before it was sanded.

Wood After Sanding

Wood Before Sanding
6. Remove Sawdust from Wood
Lastly, you need to remove the sawdust from the wood. There are many ways to remove the sawdust, like using a shop vac, a damp cloth, etc.
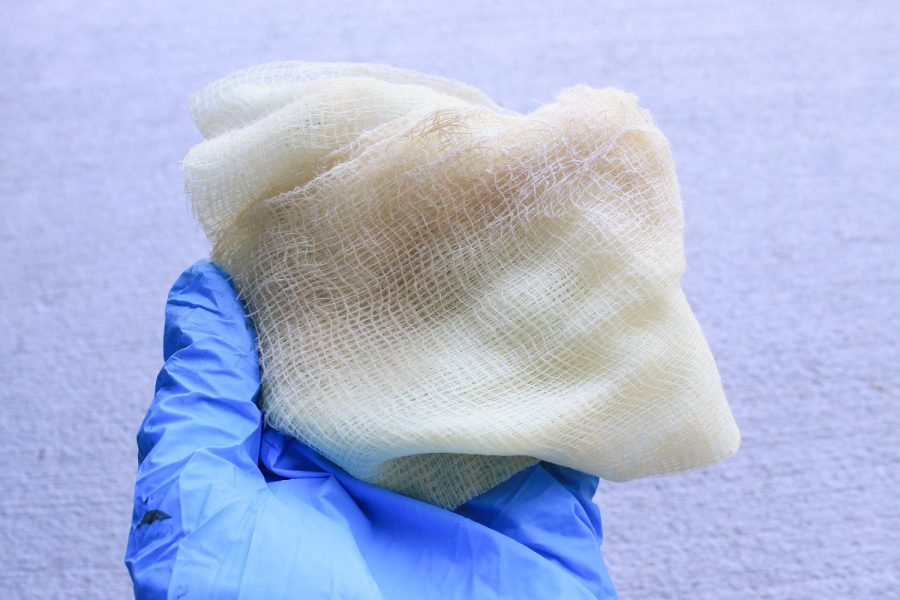
My favorite way to remove the sawdust is to use a soft bristled brush to sweep off the bulk of the sawdust. Then, I wipe down the wood with tack cloth to remove the remaining saw dust. Tack cloth is sticky so I like to wear latex gloves when cutting and handling it, but it works great for removing any remaining saw dust and you don’t need to use a lot of it.
One last tip I want to share about sanding is that I think it’s best to do the bulk of your sanding before cutting or ripping wood to size for a project. It’s much easier to sand larger pieces of wood than small pieces. Then, you can just hand sand (or use another sanding tool) quickly anywhere you need to once your project is complete!
Alright, that’s it for how to sand wood! Now that your wood surface is all sanded and smooth, it’s ready to go for your stain, paint, or other finish application! For help with picking out the right stain color, check out 10 favorite wood stain colors, as well as 5 grey wood stain options! And if you need more information on staining wood, check out my tutorial on how to stain wood and the best way to apply stain.
Thanks again for following along! Be sure to follow along on Instagram and Pinterest for my latest projects, fun updates, and sneak peeks!

How to Sand Wood
How to sand wood and create a beautiful, wood finish! The ultimate beginner's guide to sanding wood with easy to follow steps.
Materials
Tools
Instructions
- Set up your workspace and wear sanding dust protection.
- Pick your different sandpaper grits. I typically use 80, 120, and 220 grit sandpaper.
- Start with a rough sandpaper grit, such as 80 grit, and begin to sand the wood. This will take the longest and remove the most amount of the material.
- Next use a medium grit sandpaper, such as 120 or 150 grit, to start to smooth the surface of the wood.
- Finish sanding with a finer grit sandpaper, such as 220 grit until the wood is smooth to the touch.
- Remove sawdust from the wood with using a soft bristled brush to sweep off the bulk of the sawdust. Then wipe with a tack cloth or damp cloth.
Kim Jamieson
Friday 12th of April 2019
Thanks so much Angela! I really appreciate your suggestions :O)
Angela Marie Made
Friday 12th of April 2019
You're welcome Kim!!
Kim Jamieson
Saturday 6th of April 2019
Thank you Angela for this info! We bought a refinished farmhouse style table with 2 extra leafs last fall. The legs and apron are painted white, the top and drawer fronts were stained & then had a finish over top. Unfortunately, when we got it home we realized that the off-gassing smell was so strong that we could not even bring it into the house. We decided to refinish it ourselves. We had a few warmish days before winter, so we stripped off the top finish with a paint stripper, but then the weather was too cold to work in the garage until recently. I have used an orbital sander to get down beneath the layers of stain & the flat surface of the table looks great. The problem I have though is how to sand the routered edges of the table top. There is a second layer of wood beneath the top, about 3" wide around the edge, so some stain is in that crevice too. I have tried a sanding sponge, but it takes so long, and so much effort and the sponges don't last long. I have tried sanding by hand with a 40 grit and using a kitchen sponge inside the sandpaper, but again it takes SO much time and energy. I have tried using the orbital sander with a lower grade of sandpaper, but it is hard to hold it at a 90 degree angle for long ...however, it is the most effective so far. I still have SO much of the edging to sand though! We live in Canada. We have tried many of the local tool supply stores, woodworking supply stores, home depot type stores, but so far, nothing helpful has surfaced! We are also trying to make a final decision on a finish. It will initially be a stain, but we want to be sure that the top protective coat is low VOC so that we are not running into the same problem that started all this extra work! Do you have any recommendations for such a product?? I am very sensitive to chemical smells. By the way, I am learning a lot and, most of the time, I am enjoying the process, other than the fact that it takes so long and we have to park our vehicle elsewhere for as long as the table is being refinished in the garage! :O) Thanks in advance for any suggestions.
Angela Marie Made
Monday 8th of April 2019
You're welcome Kim! For those tiny crevices, I recommend using a Dremel Rotary tool with a sanding attachment. I've updated the post to include a link to it under the Types of Sanding Tools section. We used it to sand old stain off the small, turned table legs of our side table. They have different size sanding attachments you can use. For the finish, a water-based stain instead of oil-based would definitely be less smelly and have less chemicals/VOCs. Also, if you're going to add a polyurethane for a top coat, I would use a water based poly as well over the water based stain. Hope that helps a little!
marvin shelley - Master Sawdust Maker
Monday 1st of April 2019
Hi - I buy lumber at the saw mill and it is always rough and is about 30% to 90% cheaper than the price in a store. With random orbital sander, I start with 40-60- or 80 grit. Then use 120 to 400 grit, then 800, then use either 1,000 to 2,000 grit. Then the wood is sooooo slick when feeling of it. I rarely use stain. Preference is Spar Urethane with a very light 1000 grit sanding by hand before the 2nd coat.. Then apply the 2nd coat. If the wood is really rough, I first use a belt sander with 120 grit. A more coarse grit leaves deep scratches that take a while to remove. I have wondered why some start with 40-80 grit and go through 6-8 grits gradually removing scratches. I feel that is wasting time.
CS
Saturday 4th of April 2020
Hey Marvin. You don't have delamination issues with the urethane when sanding wood to 2000? Urethane usually needs some "tooth" to stick properly. By the time you hit 1000 you're no longer sanding, you're polishing. I never sand beyond 220 for clear or 120 for stain. Once the clear is shot and cured then I do the rest of what you're talking about.
Smooth typically comes from sanding the clear coat and not the wood. 220 or 320 scuff between clear coats for flatness (and tooth in the case of urethane). If it's solvent based lacquer you don't necessarily HAVE to sand between coats since each coat burns into the next, but I find the next step goes a little quicker if I do. Then a wet sand and buff schedule that suits the sheen you're trying to achieve in either case.
Angela Marie Made
Wednesday 3rd of April 2019
That's good to know! Sounds like a great sanding process!!
Tammy
Sunday 31st of March 2019
That was very informative. My sander and I have a love hate relationship. I swear I can never get those squiggly lines out after I sand. I love how this is very detailed and has lots of clear pictures. Great job on this one.
CS
Saturday 4th of April 2020
Hi Tammy. I know this was a while ago but maybe you'll see it and/or it will help another. Those squiggly lines happen typically for two reasons.
1) When the paper gets loaded. This usually happens when sanding off a clear coat and not really with raw wood. If you lift the paper you will see hard spots of finish that have coagulated, clogging up the paper. Depending on how much builds up they can leave lines.
2) The speed you are moving your sander over the wood. Try moving your sander along the wood at about an inch per second. It will feel slow at first but that's about the correct speed. Do this and those squiggles should disappear for you.
Also doesn't hurt to make sure you don't have any foreign matter on the wood before you start sanding. An orbital will drag anything hard along with it and leave marks. That sounds obvious, I know, but it's always worth cleaning off the surface before sanding to make sure. Compressed air is best if you have it. A lint free cloth is fine if you don't.
Angela Marie Made
Wednesday 3rd of April 2019
Thank you!