Learn how we installed a DIY brick fireplace surround using thin brick veneer!
Last week I shared our cozy fireplace decorated for fall! It was also the first look at our brick fireplace DIY surround on our DIY shiplap fireplace.
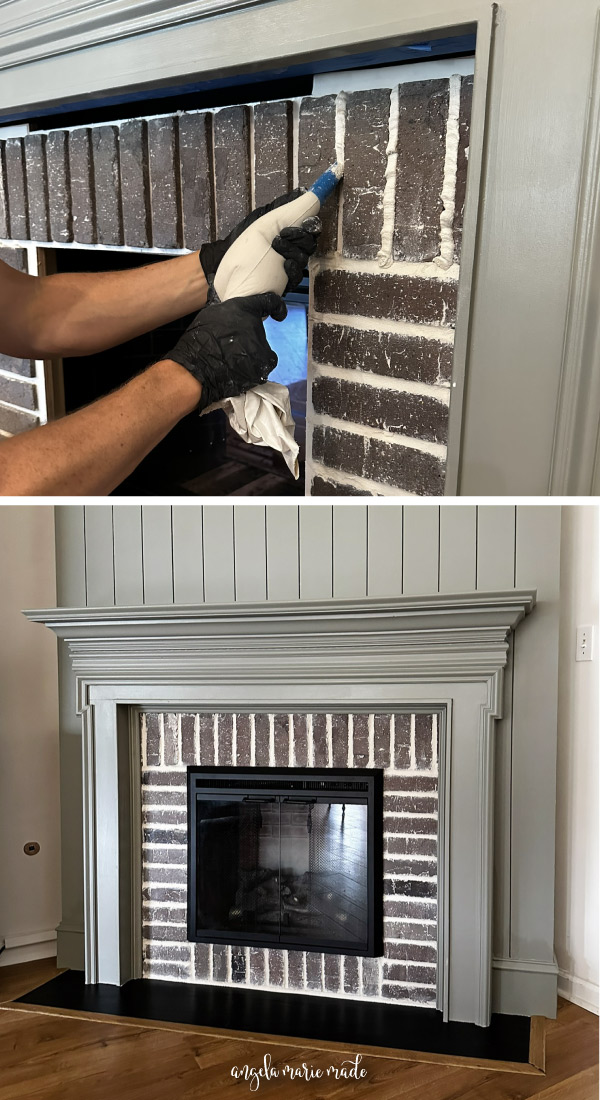
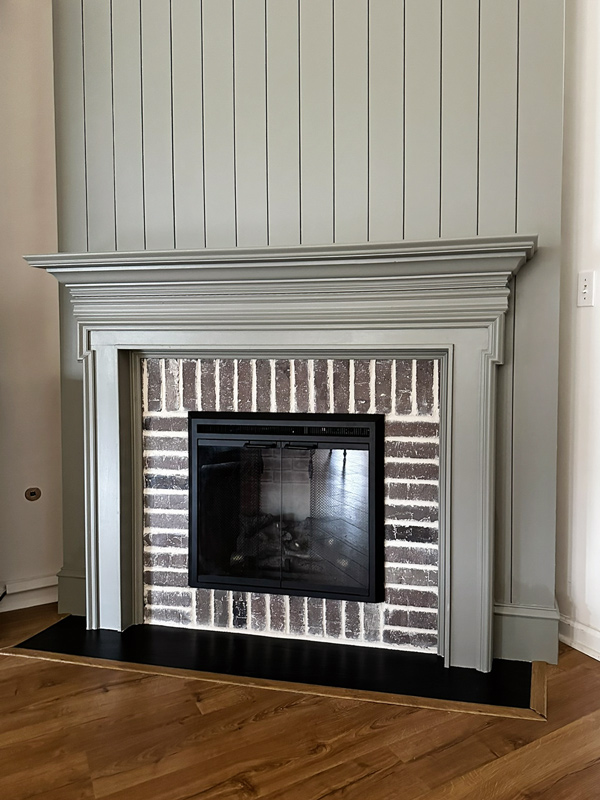
Here is a before and after of our shiplap and brick fireplace makeover transformation:
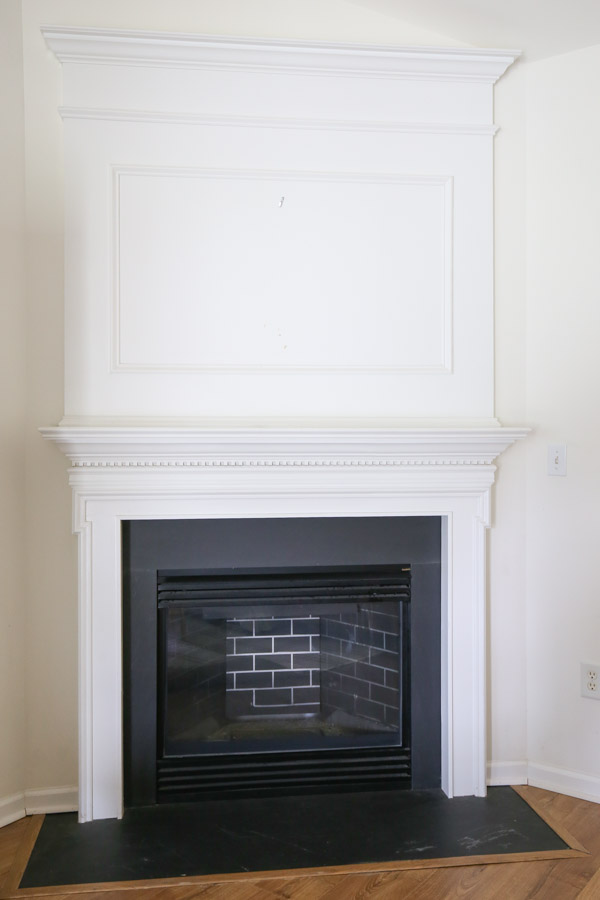
BEFORE
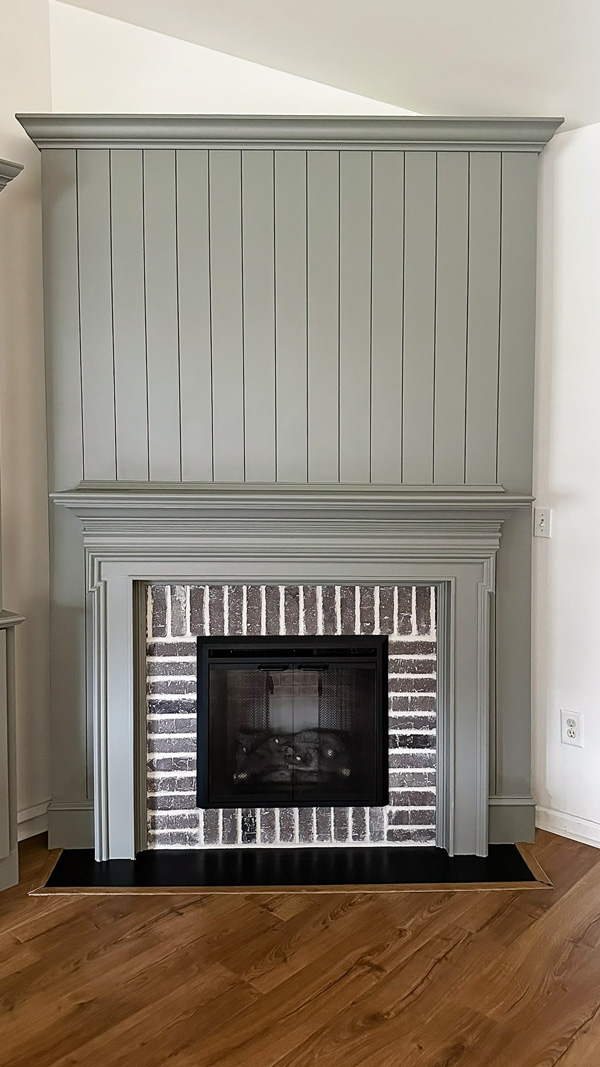
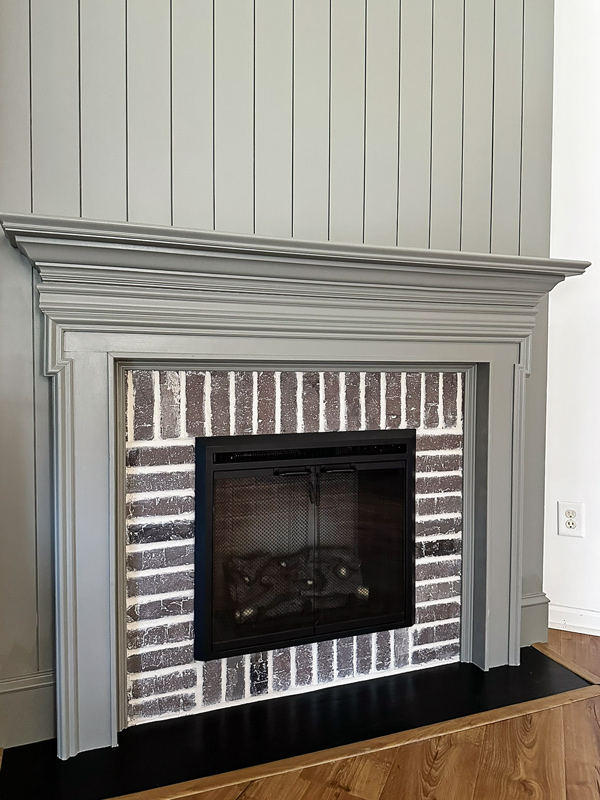
AFTER
Today I am sharing how we installed this brick fireplace! Overall, it is an easier project, it just takes patience and time since it is very messy!
Note, this post contains some affiliate links. I may earn a commission if you shop those links (at no cost to you). Thank you for supporting my small business. For more info see my disclosures here.
Bricks and grout we used
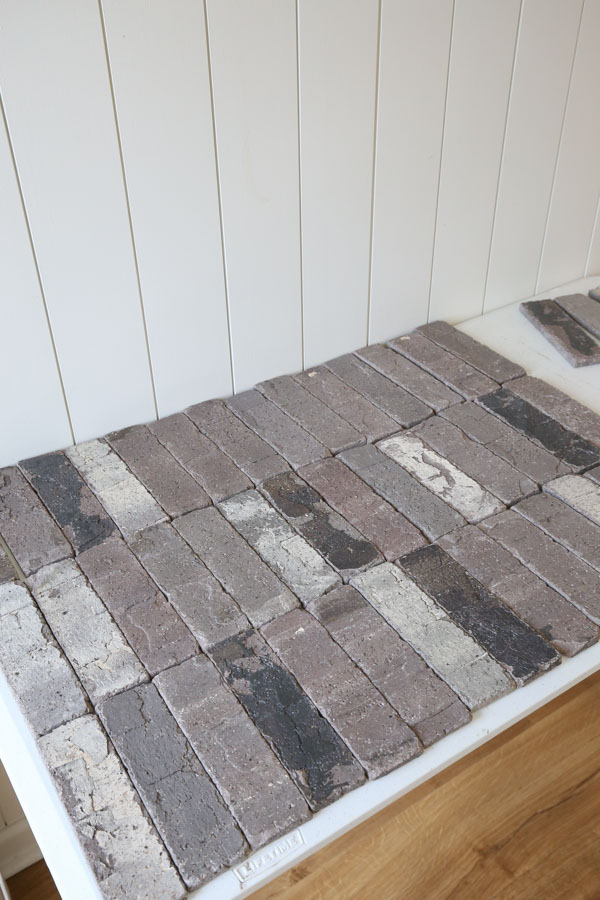
We used this thin brick veneer which is basically a thin brick! We chose a more brown tone color, but they have other colors available.
The texture on it is awesome, so you get the real brick look without the thickness of a regular brick!

A few of the bricks were very black or white, so we tried not to use those, since I wanted a mostly brown tone.
For the grout, we used this premixed, ready to go sanded grout in the color biscuit which is a nice creamy white that works well for brick!
Grout is an easier choice than using a lime wash.
Easy Brick Fireplace DIY
Materials
- Brick Veneer
- Premixed Sanded Grout
- Adhesive Tile Mat or mortar (based on heat source, see step #1)
- Grout Sponge
- Floor Paper Drop Cloth
- 3/4″ thick plywood or other 3/4″ thick wood (optional, may not need, see step #1)
- Grout bag (for grout lines)
- Latex or nitrile gloves
- Groat float
- Molding for outer edges (optional)
Tools
- Wet tile saw (if needed)
- Laser Level
- Miter saw or circular saw (if needed)
- Utility knife
1. Prep the fireplace surround for the adhesive tile mat or mortar
The fireplace surround needs to be prepped for the adhesive tile mat. It can be applied over many surfaces like wood, drywall, tile, etc. This tile mat is such a great, easy alternative to using mortar, it is way less messy too!
We chose to use 3/4″ plywood, which we attached to our 2×4 fireplace frame with we built for our shiplap DIY fireplace.
But, you may be able to just apply it directly over your current surround if it’s flat and smooth!
Also, we removed our electric fireplace insert too.
Using mortar instead of adhesive tile mat
*Note, if you have a wood burning fireplace or gas fireplace (rather than electric or a fake fireplace) that gets very hot, you may need to use mortar instead of the adhesive tile mat due to the heat levels, make sure to read the directions for using the Musselbound for further details!*

2. Apply adhesive tile mat to the surround
Apply the adhesive tile mat (Musselbound) to the surround. We found it easiest to apply it directly, unroll and smooth with our hand as we applied it. Then trimmed to size with a utility knife.
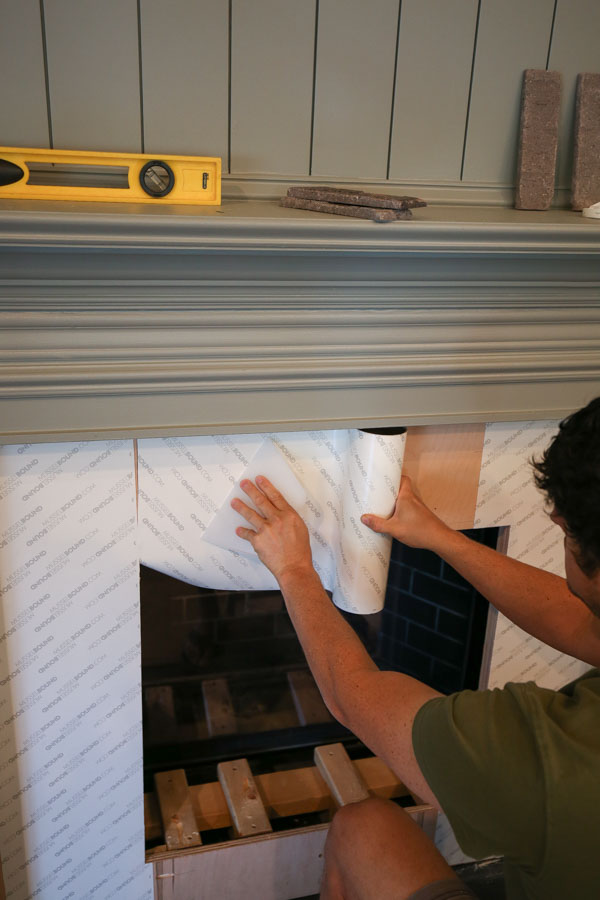
Note, you can smooth it further with a squeegee or other similar tool.
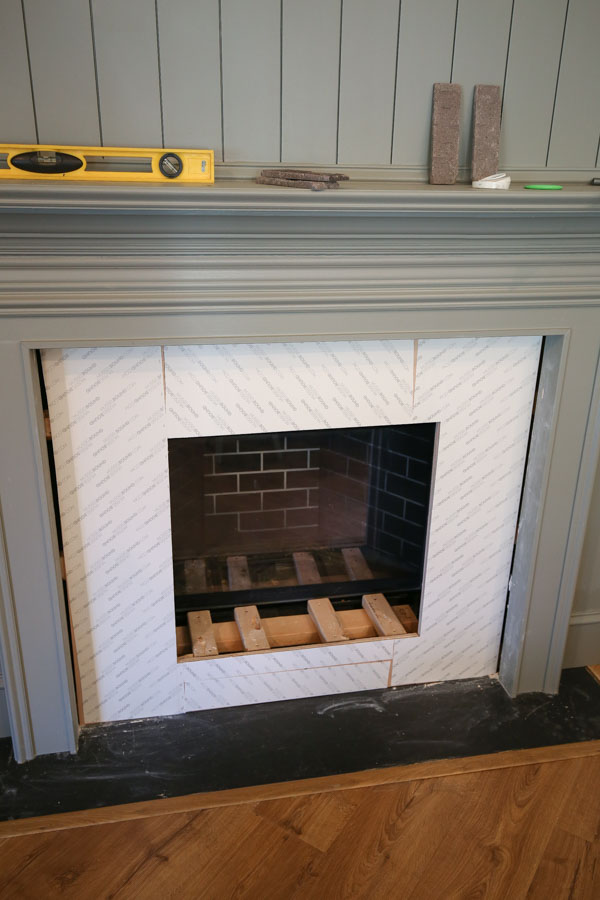
Peel off the top paper layer to reveal the other sticky side.
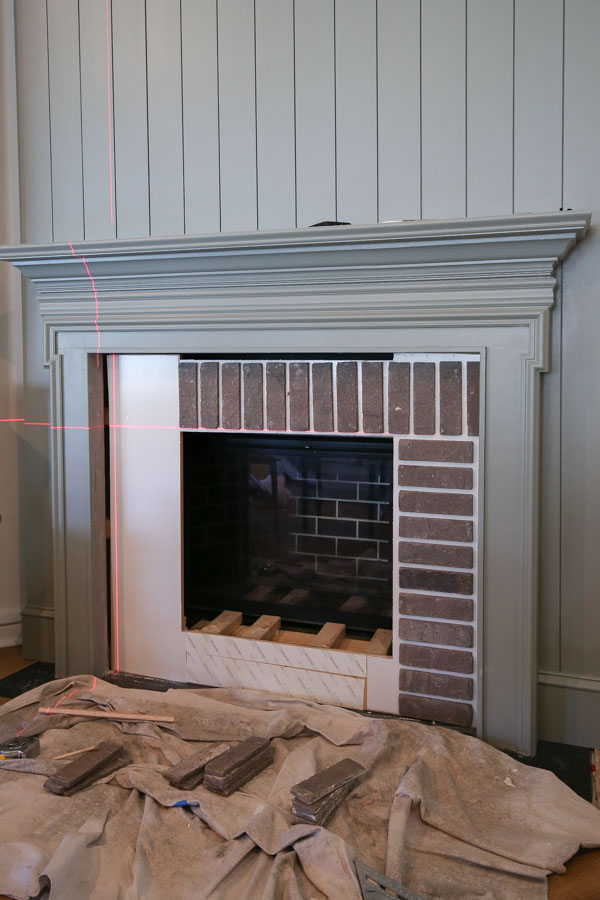
3. Apply the brick veneer to the fireplace
Note, it’s best to determine your brick layout ahead of time so you know how everything will look! You may be able to avoid any cuts too by doing this! We only needed to make cuts for our bottom row of bricks.
Also, we chose to do a 1/2″ gap between each brick. We used a scrap 1/2″ board to do this. You could use one of the bricks too, which are 1/2″ thick!
Use a laser level to apply the brick veneer to the adhesive tile mat. Just press on the brick to secure in place.
📩 Want to Save This?
Alternatively to a laser level you could draw horizontal lines with a marker and level.
If any bricks have issues sticking, you can clean the back of the bricks with water or use construction adhesive.
*TIP: Make sure to have the more textured/bumpy side of the brick facing forward, the back is flat/smooth, this can be confusing when installing!
4. Grout the DIY brick fireplace
Make sure to prep your work area for grout which is very messy! We used brown floor paper, taped in place with painters tape.
If you don’t want an overgrouted look, just fill the gaps in between the bricks using the grout bag. Then, smoosh it down with your finger (wearing gloves). Then, smooth over with a damp grout sponge.
I wanted a slightly over-grouted look, so we tried a few different techniques to get this look.
It can also be known as German schmear, made famous by Fixer Upper and Joanna Gaines! But, this look isn’t quite as over grouted or thick looking. Also, German schmear and white washing methods may use mortar rather than grout.
First we tried applying the grout over the bricks and gaps with a grout float, waiting 10-15 minutes, then wiping away with a wet grout sponge.
However, this was causing a whole lot of the grout to fall out of the gaps. If we waited even longer for the grout to dry so it wouldn’t do this, then it was too hard to wipe the excess grout off the brick and get the look we wanted.
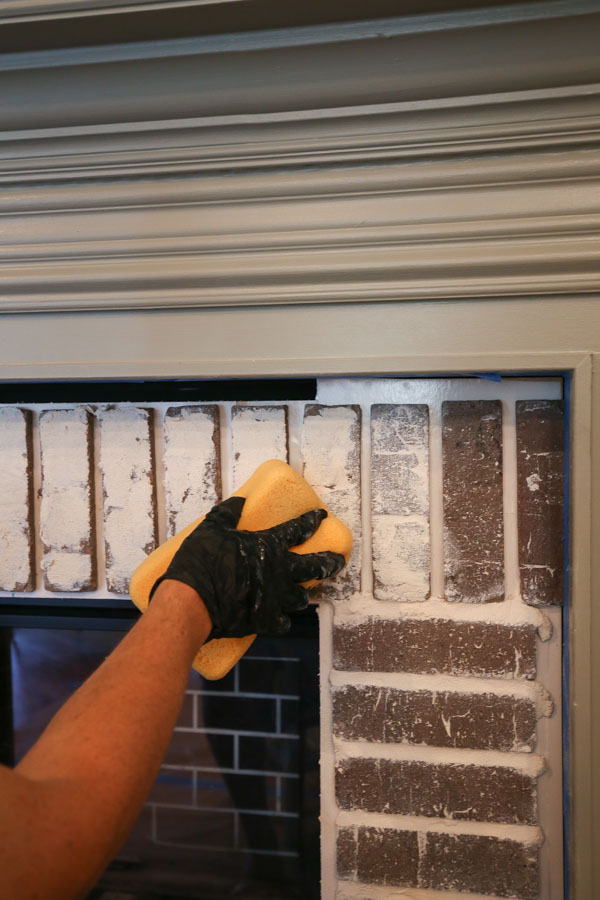
So, the best method we found was to apply the grout to the bricks FIRST with the float.
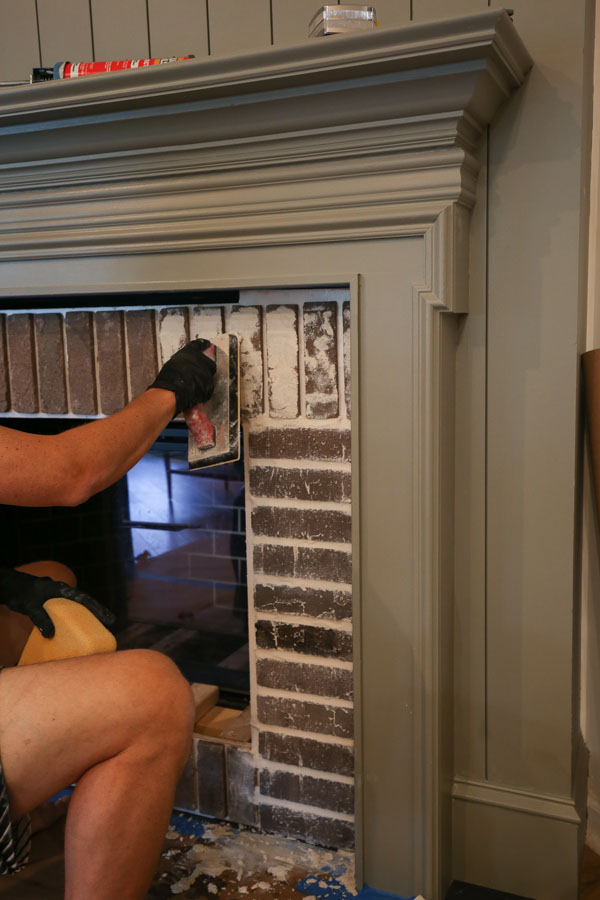
Wait 5-10 minutes, then wipe away the excess to get that slightly over grouted look.
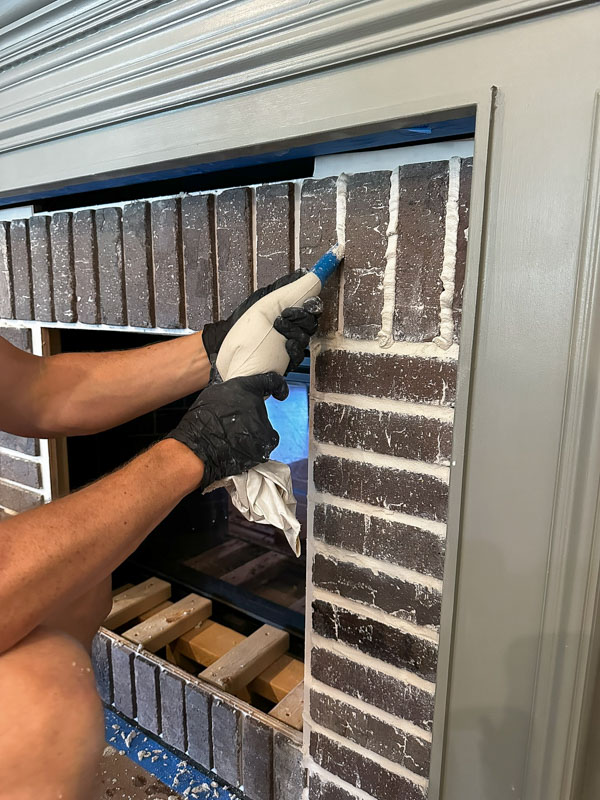
Then, we went back and filled in the gaps using the grout bag. Then, smoothed over with a damp grout sponge.
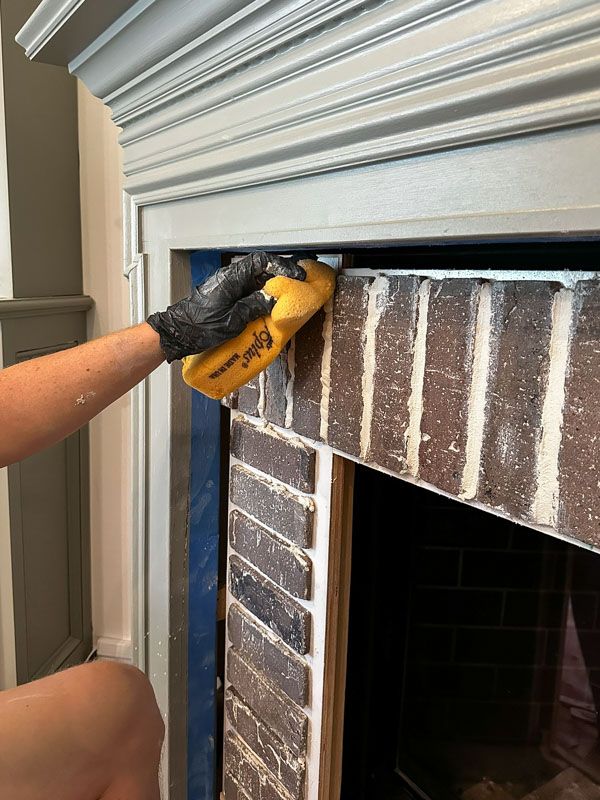
5. Dehaze the brick (optional)
Just like with tile, grout causes a hazing effect when it dries. This can look good for an over-grouted look. But, if you don’t like it just wipe it away with a damp grout sponge. It’s best to do the next day.
6. Apply molding or trim (optional) to finish brick fireplace DIY
If desired, to cover any uneven edges, apply molding or trim along the edges of the brick!
The end result of this over grouted brick fireplace DIY gave us the old-world charm and timeless character in this living space that I was envisioning for our fireplace! Originally I wanted a stone fireplace, but I love how the brick turned out! And it’s way better looking than a faux brick fireplace.
The brick has helped to make it a beautiful focal point of our living room. Make sure to see our fireplace decorated for fall here! Next up, I will be applying some light fixtures to our fireplace!
Follow along for my latest projects and sneak peaks on Instagram, YouTube, TikTok, and Facebook!