Sharing how we built a DIY shiplap fireplace with a faux stone fireplace DIY surround and converted from a gas fireplace to electric fireplace.
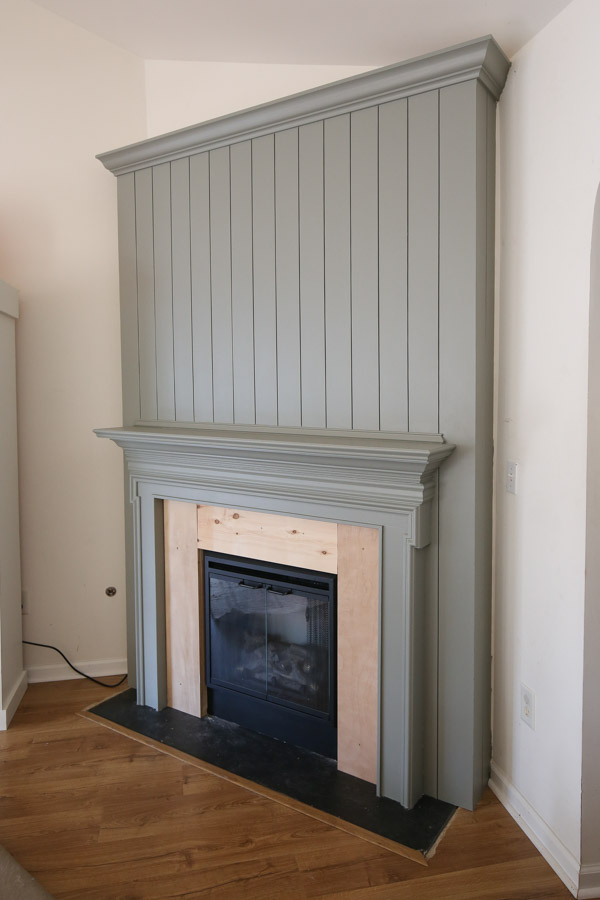
Our fireplace makeover in our living room has been quite a process. Here is what it looked liked when we moved into our new house a few years ago:
BEFORE
When we moved in, the fireplace did not actually function. The gas connection was still present but the gas fireplace insert had been removed, so it was just empty.
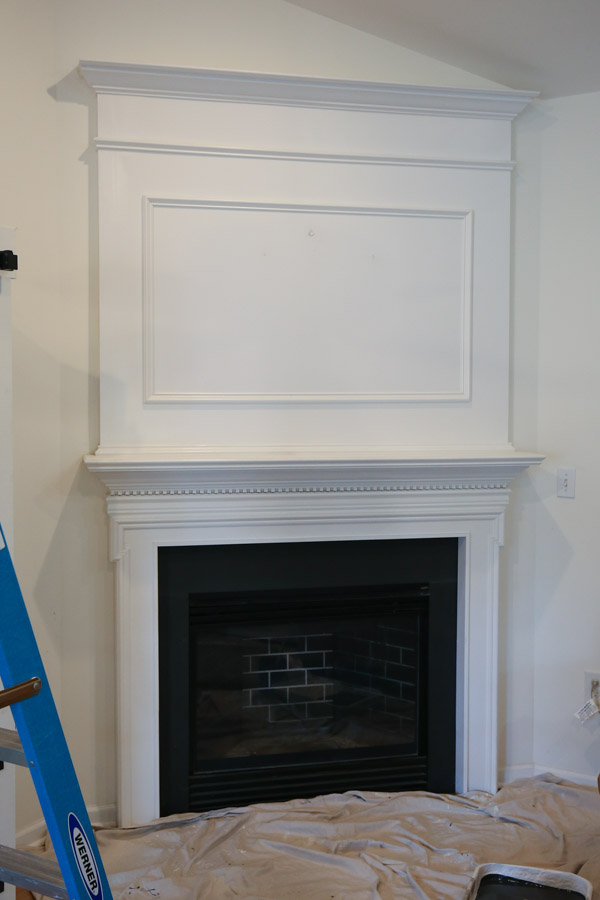
About a year ago, we painted the entire fireplace and mantel black and I added some candles to make it more inviting and as a temporary fix up until we had time to really transform it!
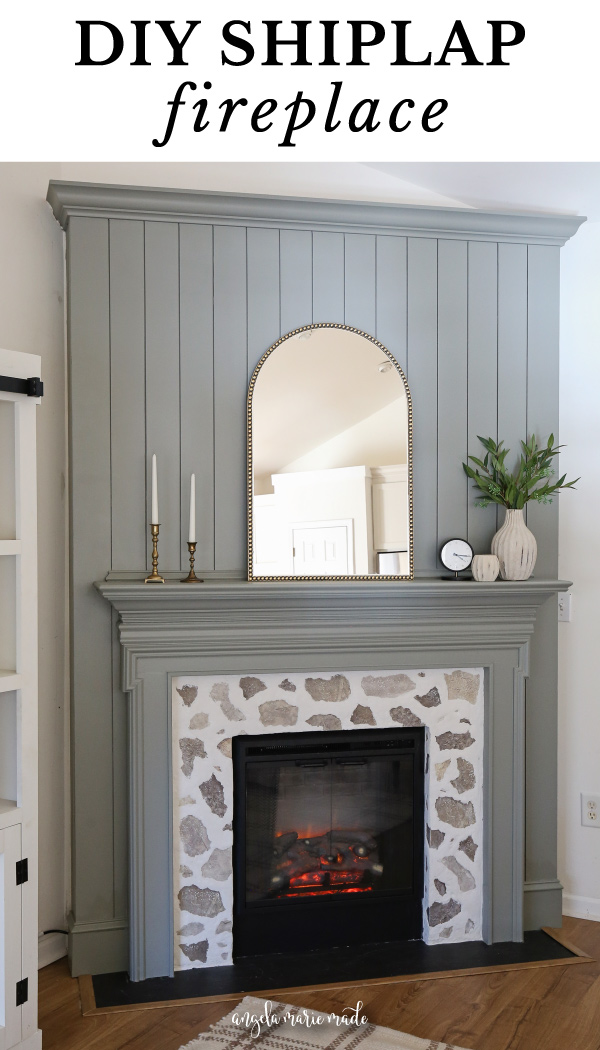
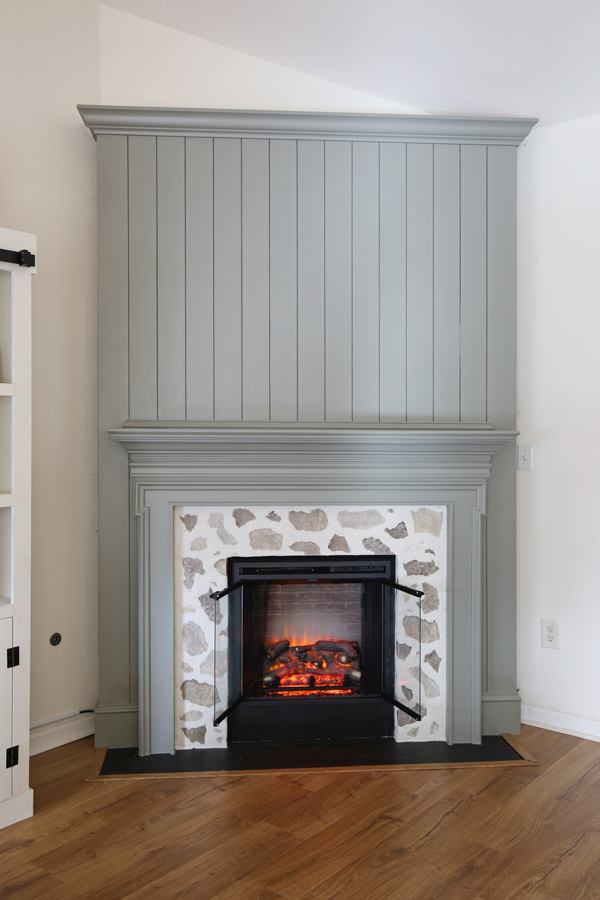
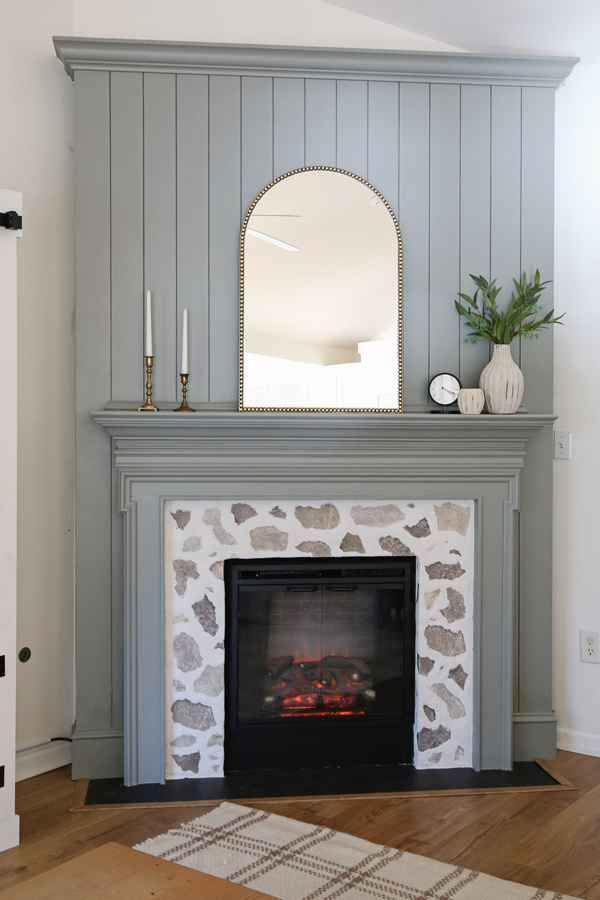
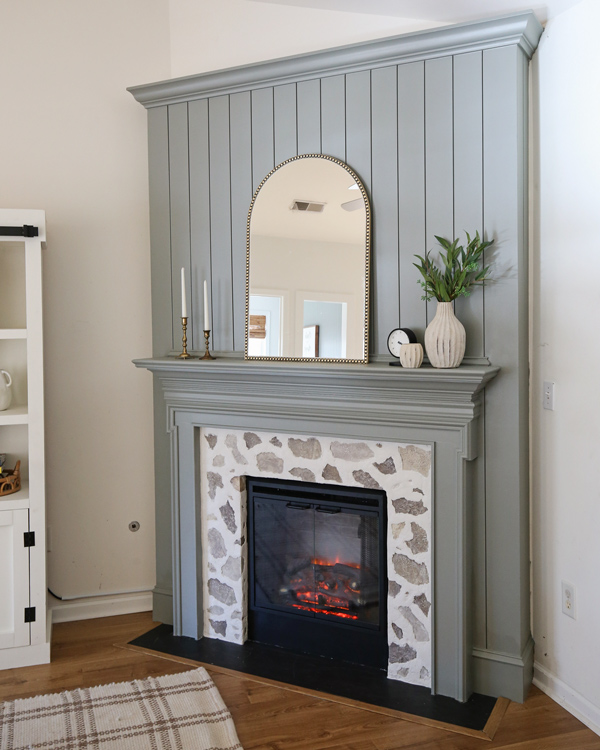
I envisioned this fireplace with a vertical shiplap look, lots of molding, and an over grouted, stone surround. Here is what our fireplace looks like now after it’s second makeover!
AFTER
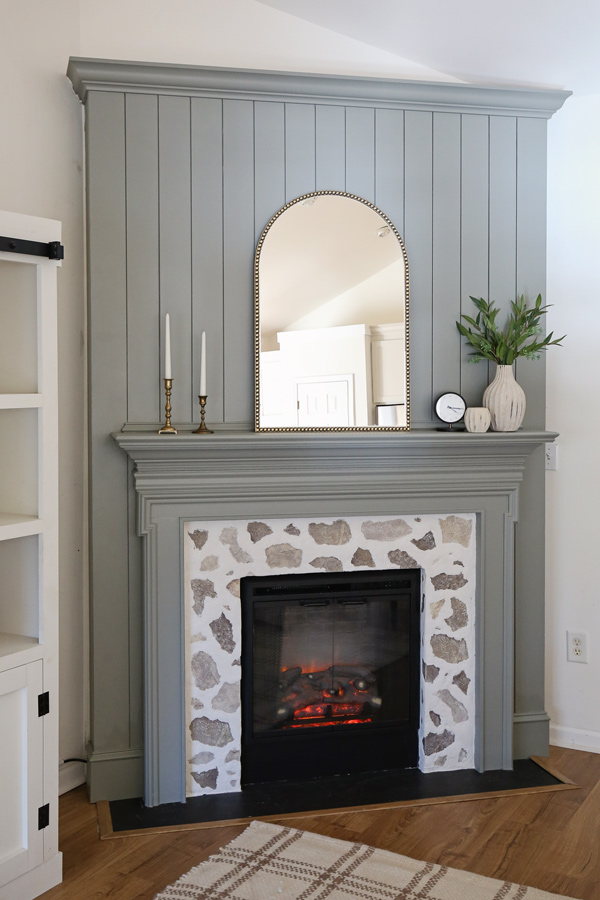
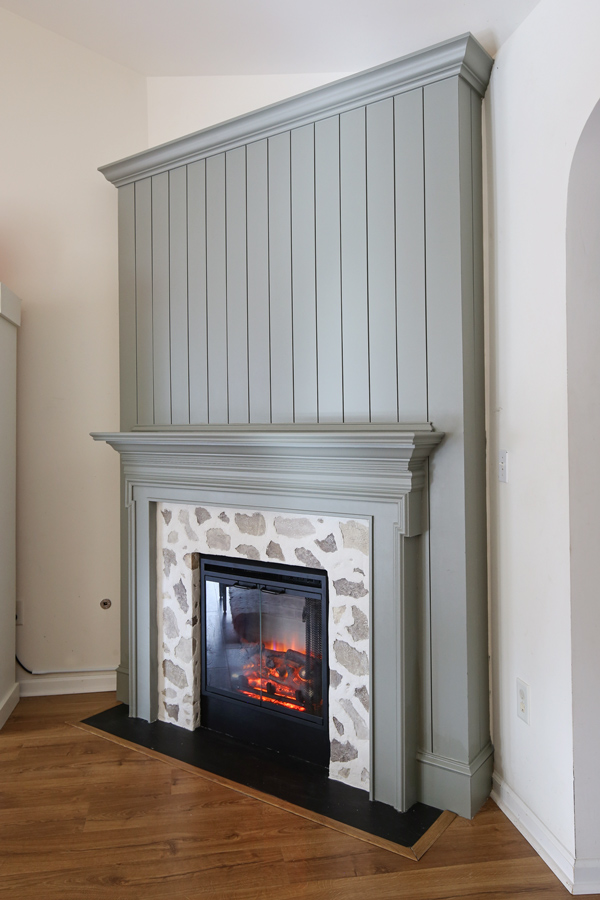
I love how the vertical DIY shiplap fireplace wall turned out and I will be sharing the steps below on how we completed this part and also how we converted it from gas to electric.
The stone part turned out nice, but not how I was originally envisioning, so I won’t be sharing a tutorial on this part.
We used faux stone instead of real stone for cost and time savings and it just didn’t work out like I really wanted it too. So, I’ll share more details on the plan for this part at the end!
Note, the tutorial below is going to be more of an overview tutorial of each step, rather than exact quantities and measurements. You will need to make custom cuts based on the size of your fireplace.
A lot of this building process is similar to our previous DIY fireplace with an electric insert where I shared very detailed steps. So, make sure to check out that tutorial if you want even further details on building an electric fireplace surround!
Note, this post contains some affiliate links. I may earn a commission if you shop those links (at no cost to you). Thank you for supporting my small business. For more info see my disclosures here.
How to Build a DIY Shiplap Fireplace
Materials
- Shiplap (we used these 5.25″ x 8ft and 7″ x 12ft boards)
- Framing lumber (we used 2x2s, 2x3s, & 2x4s)
- 3/4″ thick plywood or other 3/4″ thick wood (we used 1x12s ripped to size)
- 1/4″ thick plywood (optional)
- Crown molding
- Wood Glue
- 2 1/2″ Kreg screws
- 2 1/2″ self tapping screws (or wood screws)
- 1″ and 1 1/4″ brad nails
- Paintable caulk
- Paint
- Wood filler or spackle
- 26″ Electric fireplace insert
Tools
- Brad nailer
- Miter saw
- Circular Saw or Table saw
- Drill
- Kreg Jig
- Stud finder
1. Build the frame
For the first step, we removed the existing mantel, drywall box, and trim details.
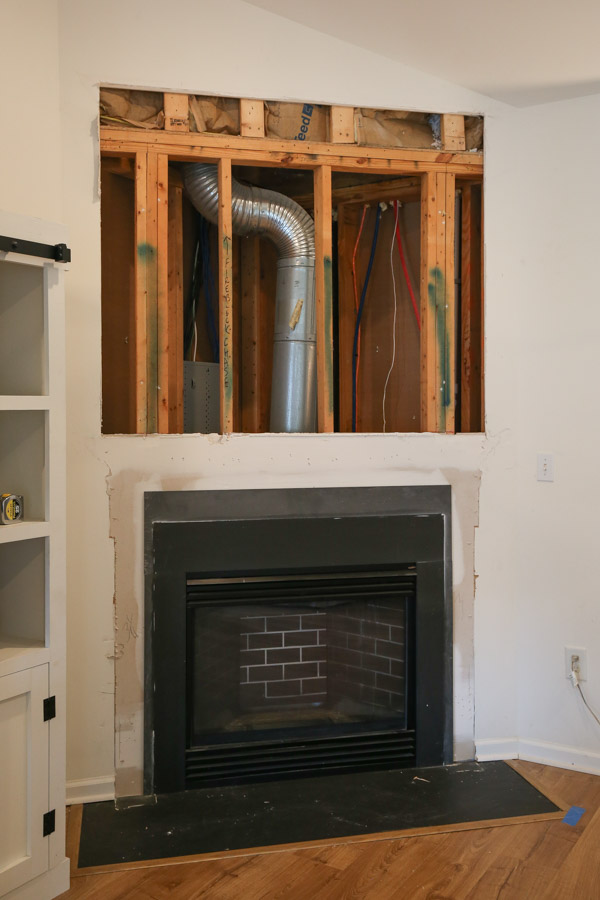
Then, we built the entire frame for the fireplace out of framing lumber on the floor based on the dimensions we needed for our wall, existing mantel, and fireplace insert size. We used a mix of screws and Kreg screws into pocket holes.
To determine the frame width, we took into consideration how many full shiplap boards we would need so we would have full boards at each end.
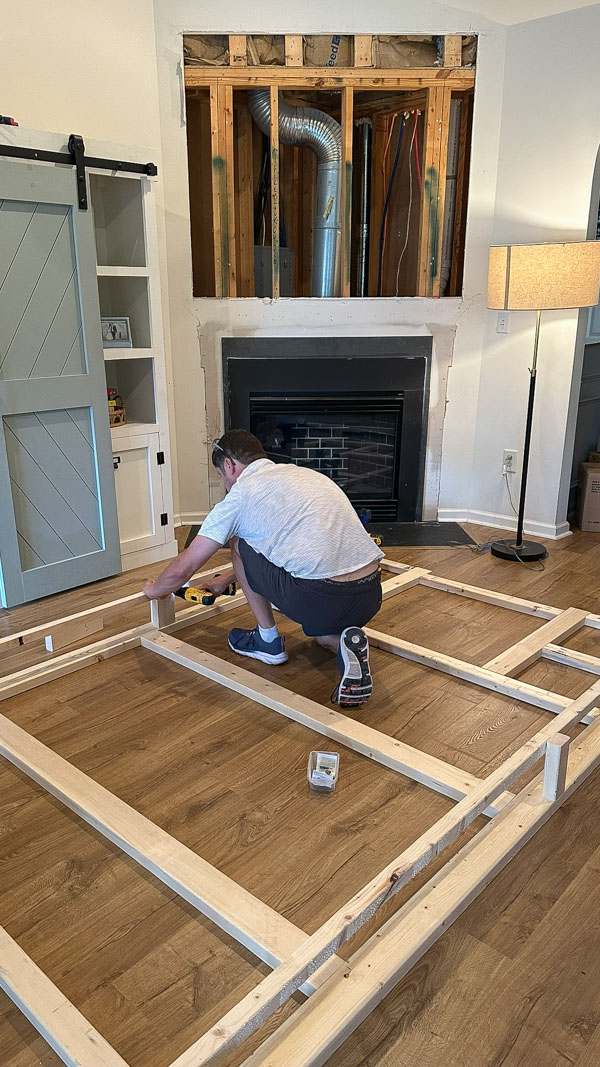
Then, we used a stud finder and attached this frame to our wall studs with a drill and screws.
For more details on building a fireplace frame, I have an entire blog post, check out my DIY fireplace with an electric insert tutorial! I used the same fireplace insert (just a wider size) in this previous tutorial that I used for this fireplace.
Tip: Before moving on, make sure to test fit your electric fireplace insert and make sure it fits!
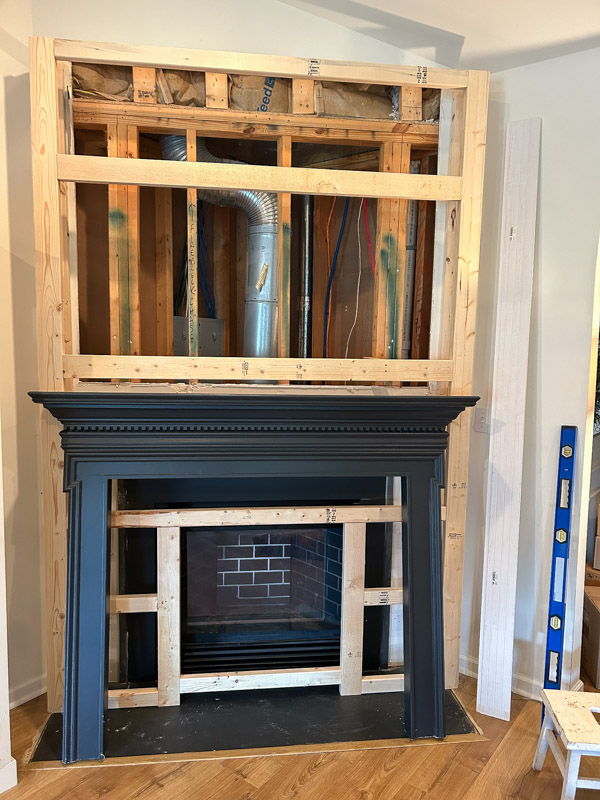
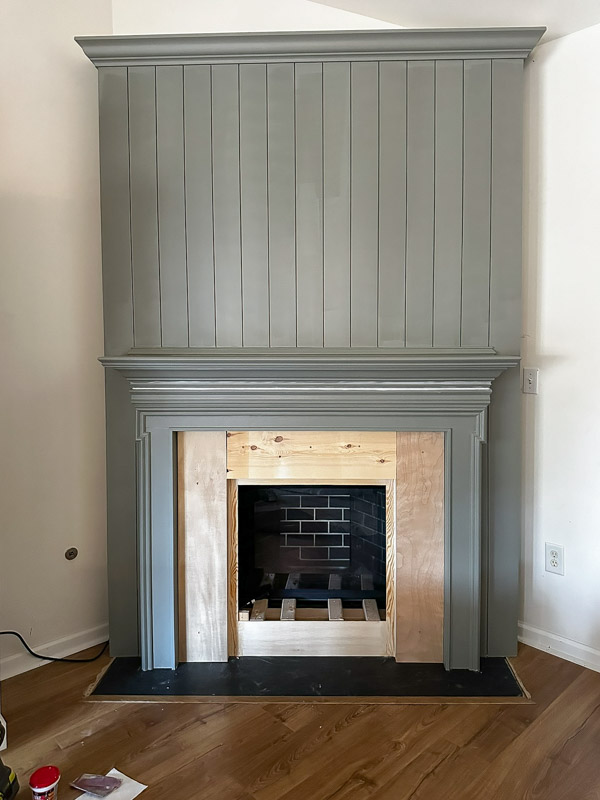
2. Install the shiplap
Cut the shiplap boards to size with a miter saw and install them to the frame with a brad nailer and 1 1/4″ brad nails.
The shiplap boards we used come in both 5 inch and 7 inch widths. We used the 5 inch boards on the front. The first board was started exactly in the middle of the frame front.
For the corners of the side walls we used the 7 inch boards ripped to size with a 45 degree mitered edge on the corners. We used a table saw to miter the edges of them.
For more details on working with shiplap, check out my DIY vertical shiplap wall here.
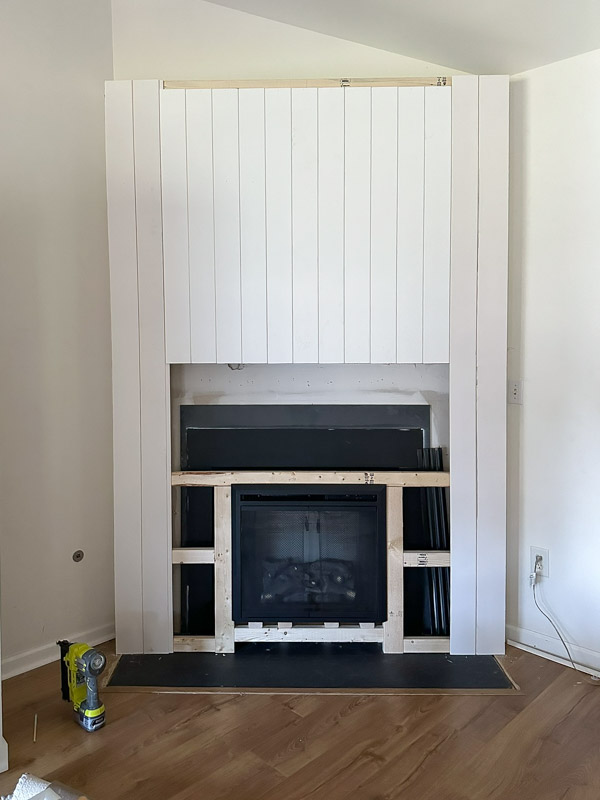
3. Add trim and build or install the mantel
Now it’s time for all of the trim pieces and molding details! We installed crown molding along the top of our DIY shiplap fireplace.
Then, we installed our original mantel back in place.
📩 Want to Save This?
I didn’t love the dental molding on the mantel, so we added a small piece of molding over the dental molding to cover it.
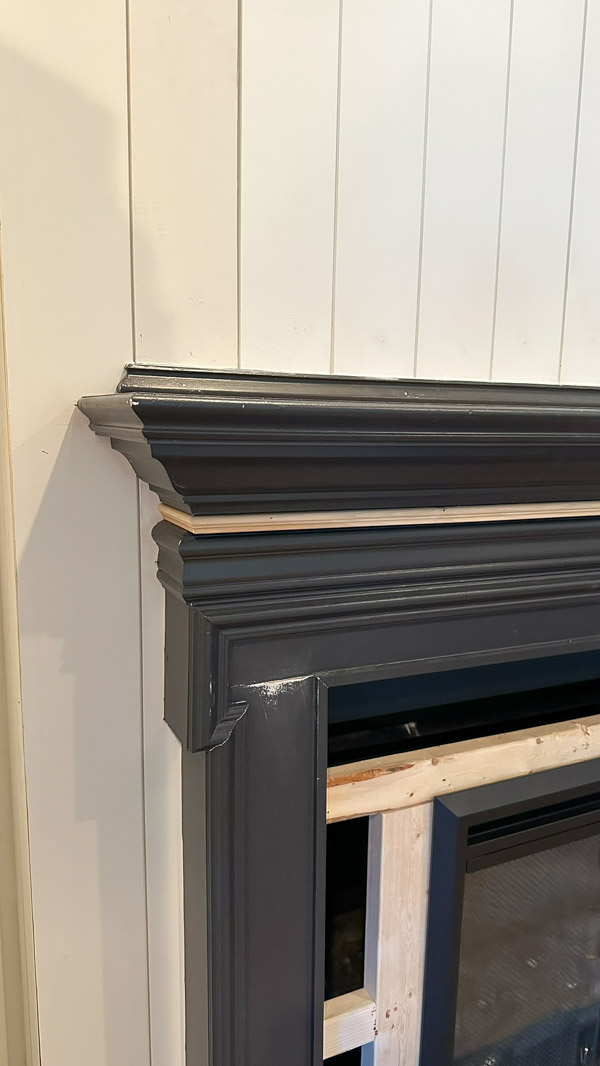
Also, along the bottom we added in some baseboard with trim using leftover trim from the original fireplace. You can see this in the final photos, since we added it at the end.
We prepped everything for paint by filling in nail holes and caulking.
Note, if you don’t have an existing mantel, you can build one! See my DIY fireplace for details on how to build a fireplace with a mantel.
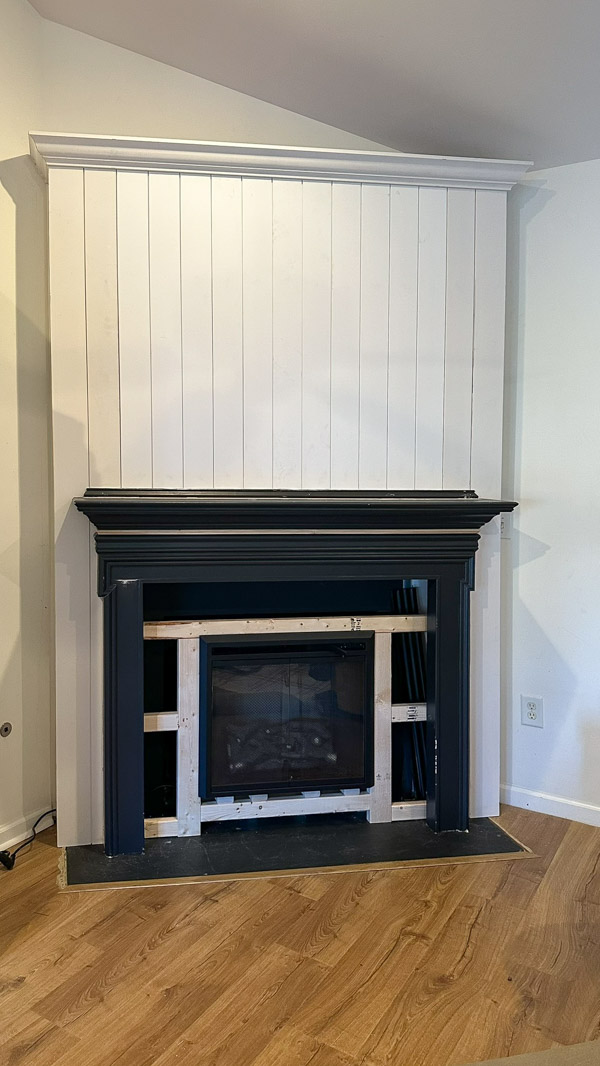
4. Paint the DIY shiplap fireplace
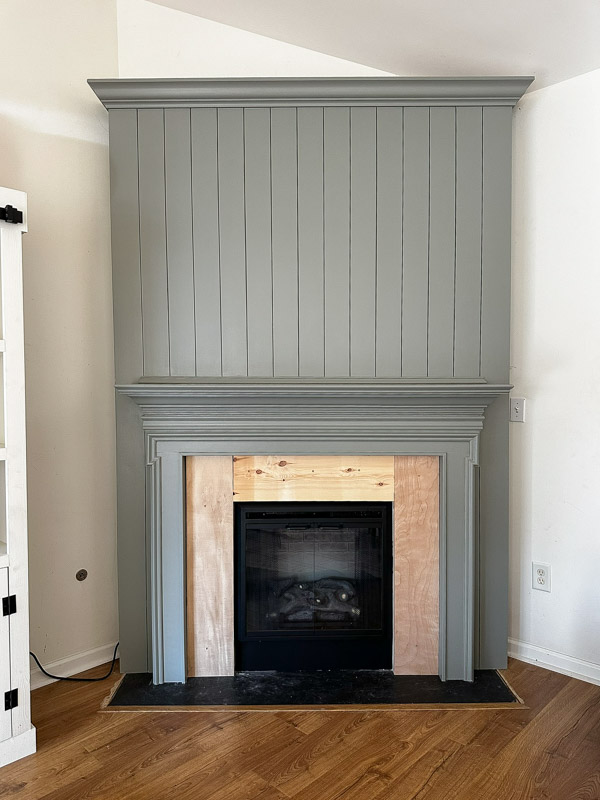
Paint is the next step. We painted our fireplace Cornwall Slate by Sherwin Williams. It’s the same color we used on our DIY office built ins!
5. Install the surround material
One of the last steps is to prep the fireplace surround for the surround material, we used wood and plywood to cover the framing lumber.
We used 1/4″ plywood on the bottom attached with brad nails into the framing. And then a mix of 3/4″ plywood, 1x2s, and 1x10s ripped to size for the rest of the surround. We attached the wider boards with screws.
We did have to add in some additional framing lumber in to support all of the surround wood.
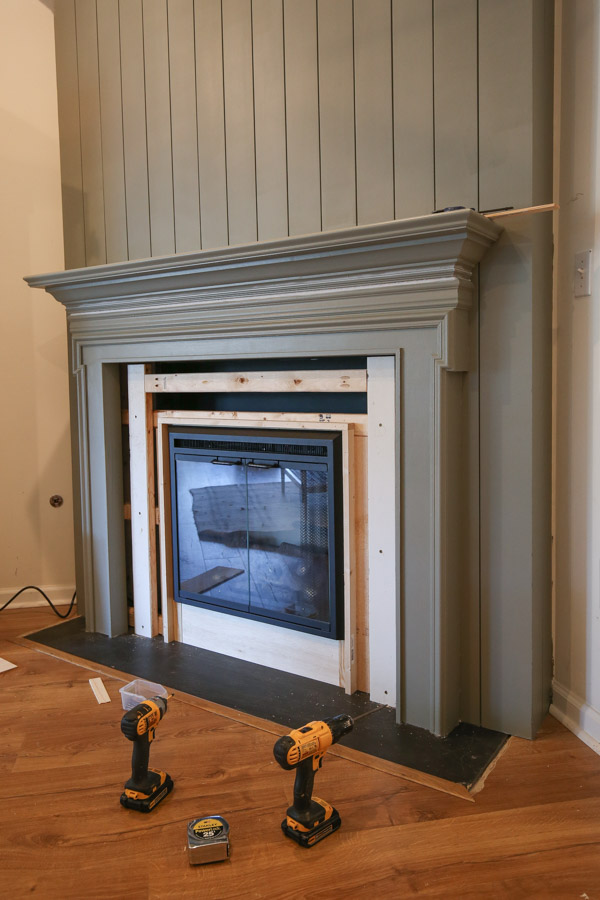
At this point we painted the bottom 1/4″ plywood black to blend in with the fireplace insert better.
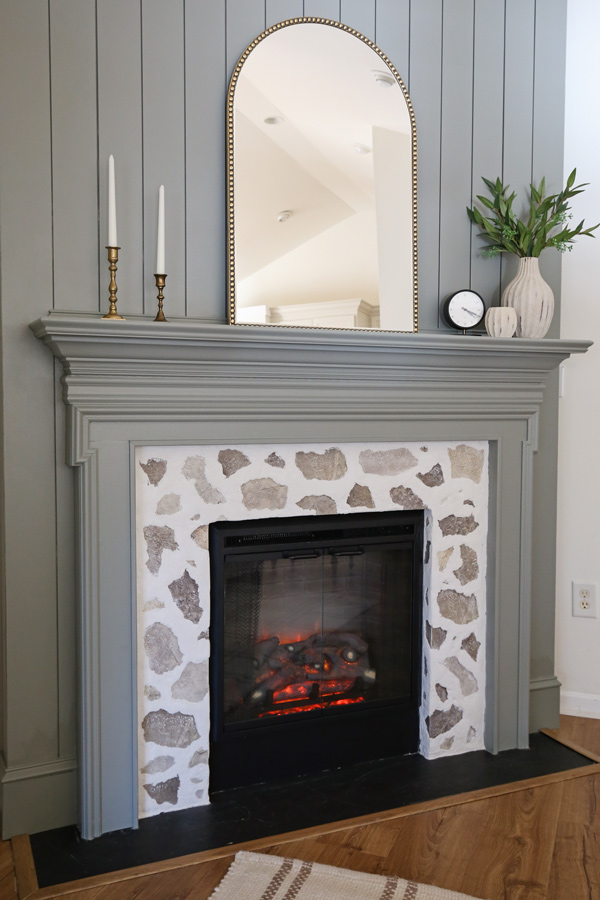
Faux stone fireplace DIY
As I explained above, we added a faux stone to the fireplace surround. I used these plastic stone panels and cut the rocks out to make them look more realistic. We attached with Liquid Nails. Then, I grouted around them with mortar.

I had tested out joint compound, but found the mortar to look the most realistic. I smushed the mortar down with a plastic tool and smoothed it out with a sponge.
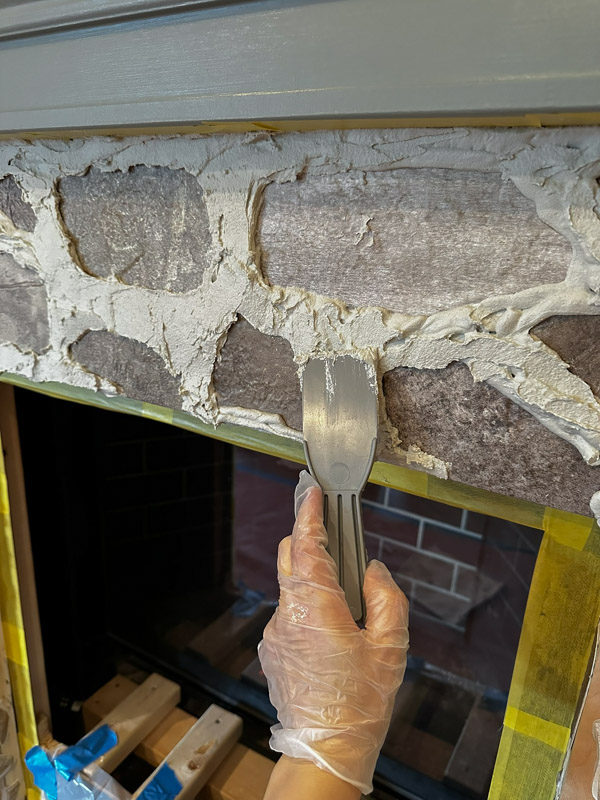
To be honest, we really ran out of time on this project and mortar is very time sensitive! But we had to stop and pick our kids up from school. So, this part just didn’t get the attention it needed. Further, it was difficult to work with such flat stones!
In the end I am living with it for now, I like it but I don’t love it and it’s bothering me. So, we are planning to replace it with a thin real brick tile later this spring! Stay tuned!
6. Install the electric fireplace
The final step is to install the electric fireplace! We did have to cut a hole out of the side of the shiplap to run the fireplace insert cord to our nearby outlet. I plan to get a bigger cord cover for it so it blends in with the wall better.
I love this electric fireplace insert by the way. It comes with a remote control and it has optional heat and crackle sound settings. The flame looks very realistic too.
We still need to paint the wall a fresh white which will really make this DIY shiplap fireplace pop and look even better!
I love the final result of this DIY shiplap fireplace makeover and I am embracing the faux stone look as best I can. It did look very cozy and cute decorated for Christmas!
I can’t wait to share the final look with the brick surround!
Follow along for my latest projects and sneak peaks on Instagram, YouTube, Pinterest, and Facebook!
Katy
Friday 12th of December 2025
What sheen of paint did you use? Did you use the same as your walls?
Angela Marie Made
Sunday 4th of January 2026
Eggshell!