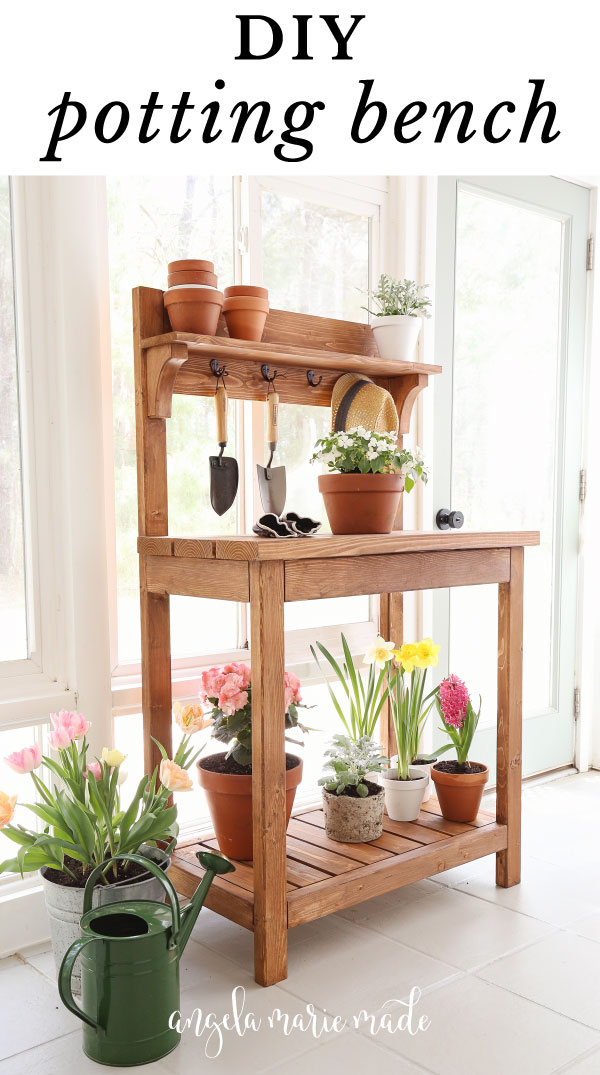
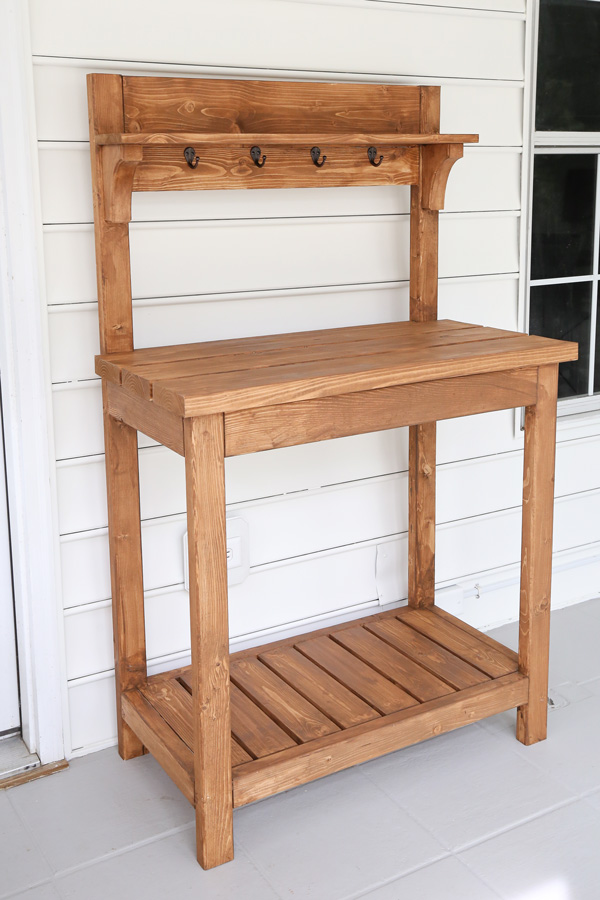
Learn how to build a cute and functional DIY potting bench!
Spring is here and it’s my favorite time of year in Charleston!
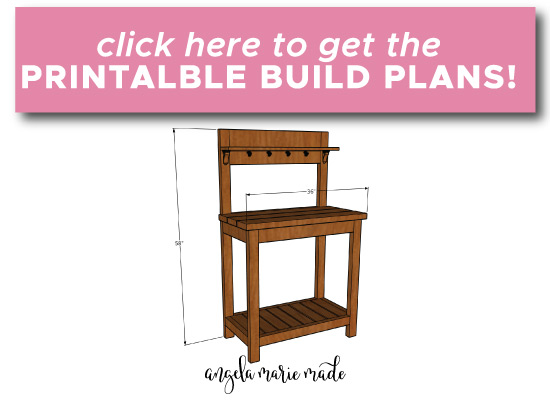
To help with my gardening, I built a DIY potting bench, which I’m sharing how to build below with a how to video, build plans, and a step by step tutorial!!
Today’s project is a fun spring build collaboration on YouTube with my friend Anika over at Anika’s DIY Life. You can check out her YouTube channel here!
Anika shares awesome woodworking and beginner DIY projects and really helpful home improvement projects too!
Anika built an awesome DIY planter with a self watering feature which is perfect for spring and summer! So make sure to watch her self watering DIY planter video! Definitely a favorite channel to follow!
The total cost of my potting bench, including the lumber, corbels, & four hooks was about $95. Also, I had the stain for another project, but that costs $15 for a quart.
FINAL DIMENSIONS OF POTTING BENCH: 19″ deep x 36″ wide x 58″ tall
Note, this post contains some affiliate links. I may earn a commission if you shop those links (at no cost to you). Thank you for supporting my small business. For more info see my disclosures here.
How to Build a DIY Potting Bench
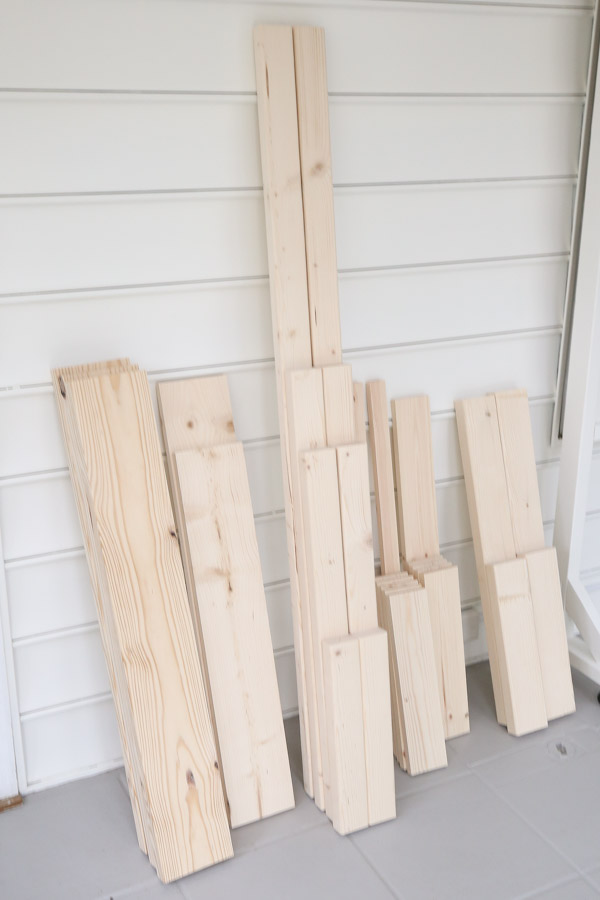
Materials:
- (1) 2×6 @ 10ft
- (1) 1×6 @ 6ft
- (2) 1×4 @ 8ft
- (1) 2×4 @ 8ft
- (3) 2×3 @ 8ft
- (1) 2×2 @ 8ft (furring board)
- (1) 1×2 @ 8ft (furring board)
- 1 1/4″ wood screws or self tapping screws
- 2 1/2″ wood screws or self tapping screws
- 1 1/4″ & 2″ brad nails
- 1 1/4″ and 2 1/2″ Kreg screws
- (2) Wood corbels
- Wood Glue
- Exterior wood stain (I used a quart of Valspar exterior stain in Pinebark)
- Hooks (optional)
- Stainable wood filler
Tools:
- Kreg Jig
- Miter saw
- Brad nailer
- Drill
- Clamps
- Tape Measure
Potting Bench Video Tutorial:
Subscribe to my YouTube Channel here!
1. Make lumber cuts for the potting bench
Click here for the printable DIY potting bench plans which include the cut list and step by step building steps with easy to follow diagrams!
Use a miter saw and make the following cuts from the 2×4:
- (2) 2×4 @ 29″ (for front/back aprons)
- (2) 2×4 @ 15″ (for side aprons)
Make the following cuts from the 2×3s:
- (2) 2×3 @ 29″ (for front/back aprons)
- (2) 2×3 @ 15″ (for side aprons)
- (2) 2×3 @ 58″ (for legs)
- (2) 2×3 @ 34 1/2″ (for legs)
Make the following cuts from the 2×6:
- (3) 2×6 @ 36″ (for middle shelf)
Make the following cuts from the 2×2:
- (1) 2×2 @ 29″ (for middle shelf)
Make the following cuts from the 1×4:
- (1) 1×4 @ 29″ (for top shelf backing)
- (8) 1×4 @ 15″ (for lower shelf)
Make the following cuts from the 1×2:
- (2) 1×2 @ 31″ (for lower shelf)
Make the following cuts from the 1×6:
- (1) 1×6 @ 29″ (for top shelf)
- (1) 1×6 @ 34″ (for top shelf)
2. Add pocket holes to boards
Make sure the Kreg Jig is set for 1 1/2″ thick wood.
Add pocket holes on each end of the following boards:
- (2) 2×4 @ 29″ (for front/back aprons)
- (2) 2×4 @ 15″ (for side aprons)
- (2) 2×3 @ 29″ (for front/back aprons)
- (2) 2×3 @ 15″ (for side aprons)
Adjust the Kreg Jig settings to 3/4″ thick wood and add pockets holes to each end of the following:
- (1) 1×6 @ 29″
- (1) 1×4 @ 29″
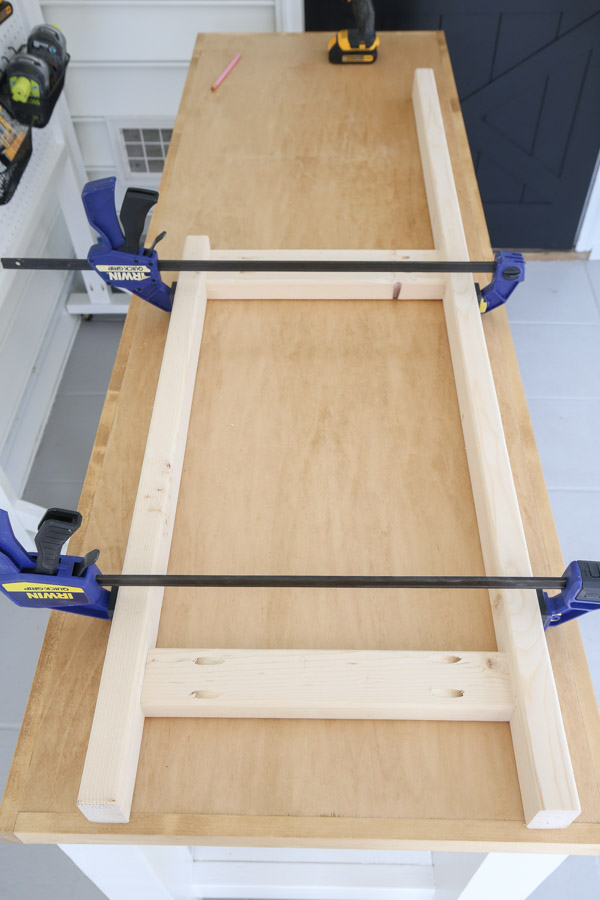
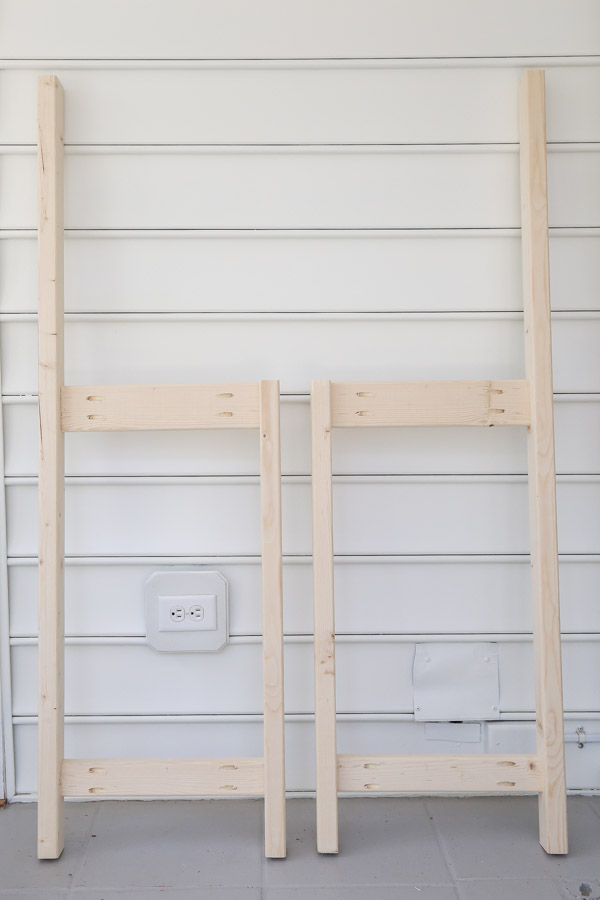
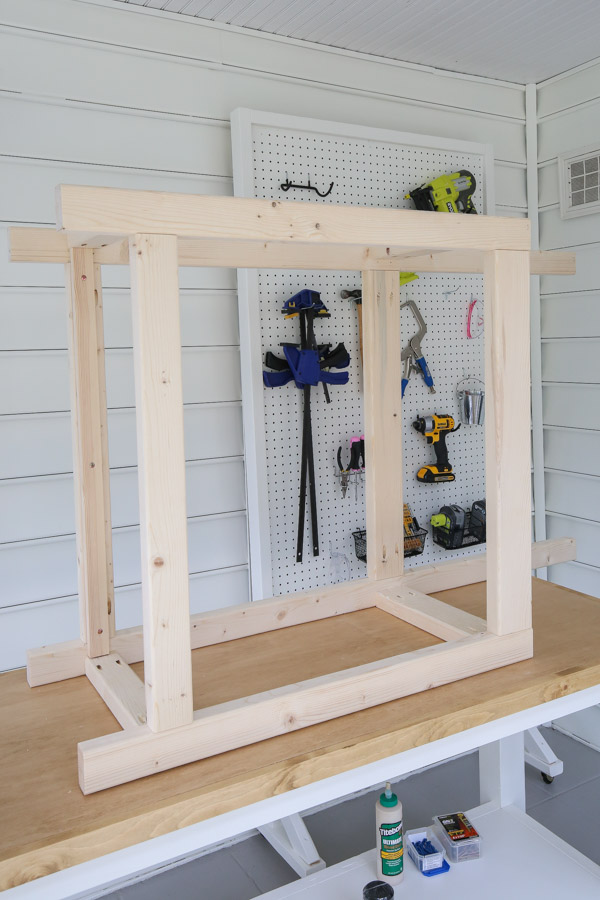
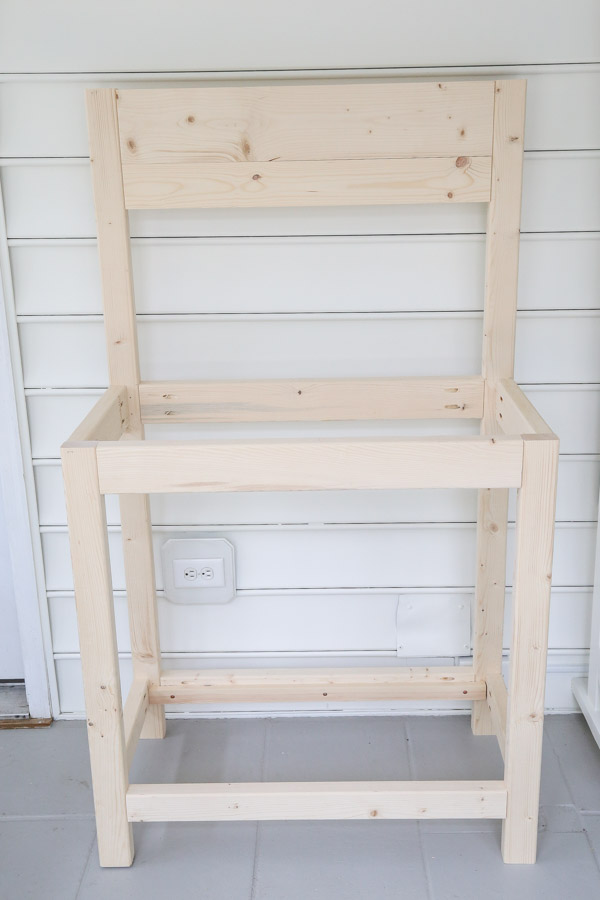
3. Assemble the side frames of the potting bench
Lay out one of the 58″ and 34 1/2″ 2×3 legs on their sides. Measure and mark 34 1/2″ up from the bottom of the 58″ 2×3 and then 4″ up from the bottom of both 2x3s.
Attach the 2×3 legs together with a 2×4 @15″ at the top 34 1/2″ mark and attach a 2×3 @15″ at the bottom 4″ marks.
Use wood glue and 2 1/2″ Kreg screws to attach the boards together and make sure the pocket holes are facing inwards.
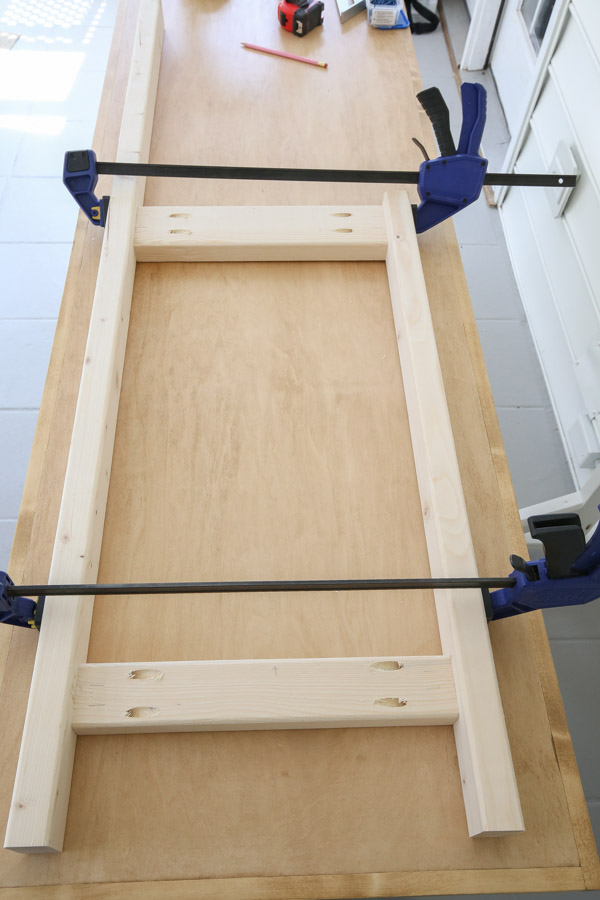
Repeat these steps again to form the second frame, except for this second side, attach the boards so they are going the opposite direction as shown here.
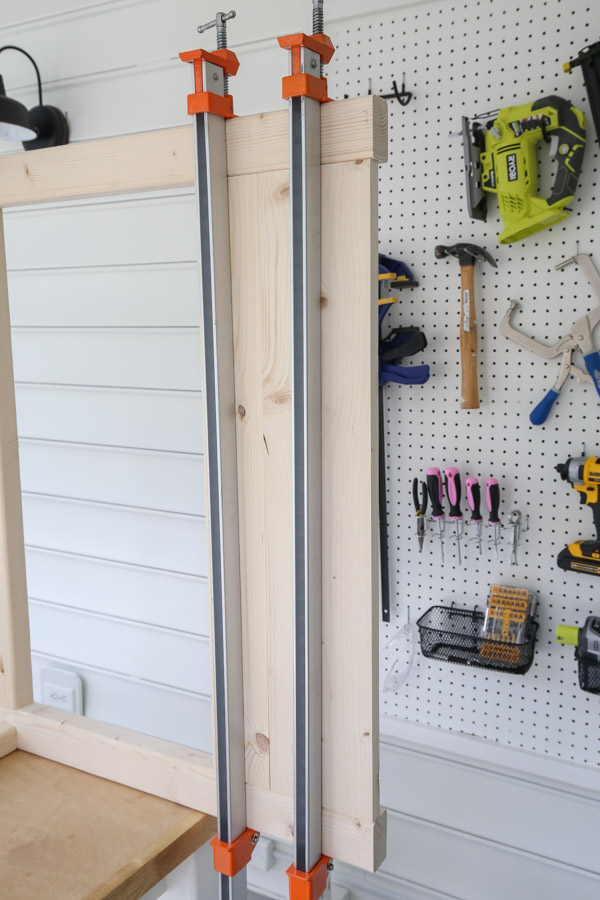
4. Assemble the back and front of the potting bench to the side frames
Attach the two sides frames together and create the back of the DIY potting bench by attaching one 2×4 @ 29″, 34 1/2″ up from the bottom of the 2×3 potting bench legs.
Use wood glue and 2 1/2″ Kreg screws to attach the boards together and make sure the pocket holes are facing inwards. Also, I used our 48″ clamp to help with this part.
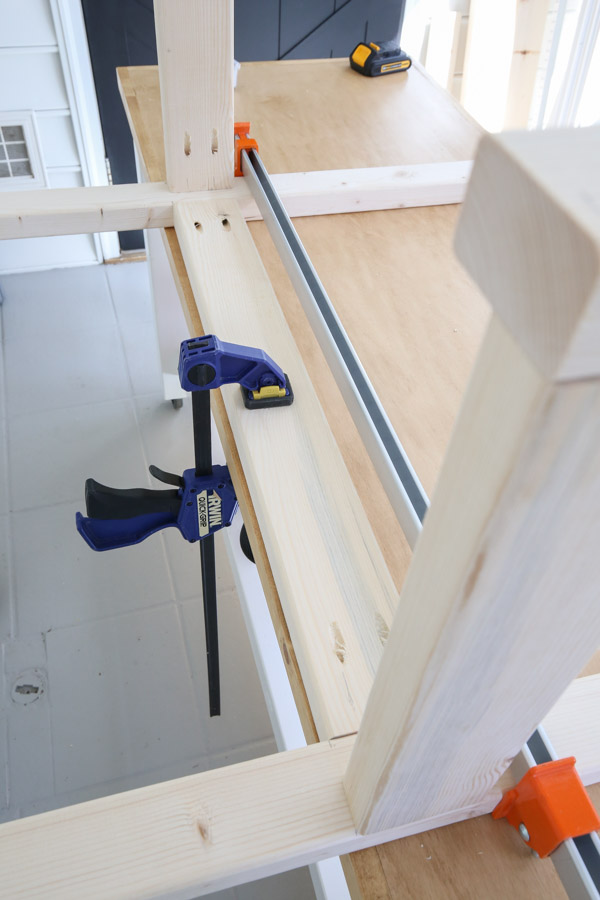
Next, attach a 2×3 @ 29″, 4″ up from the bottom of the 2×3 potting bench legs with Kreg screws and wood glue.
📩 Want to Save This?
After the 2×3 @ 29″ is installed, measure and mark 3/4″ down from the top of the 2×3 on both sides.
Then, attach a 1×2 @ 31″ with wood glue and self tapping 1 1/4″ screws (or regular wood screws) at these marks. This is to create a shelf support for the 3/4″ thick slat boards for our lower shelf.
Flip the potting bench frame over and repeat all of these steps to create the front frame.
See all of these steps in action in the potting bench video tutorial here!
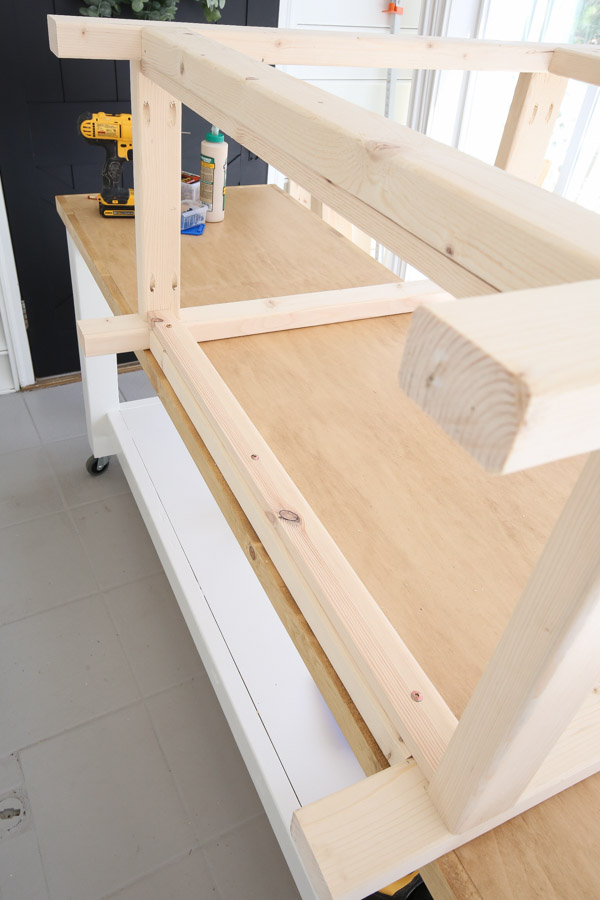
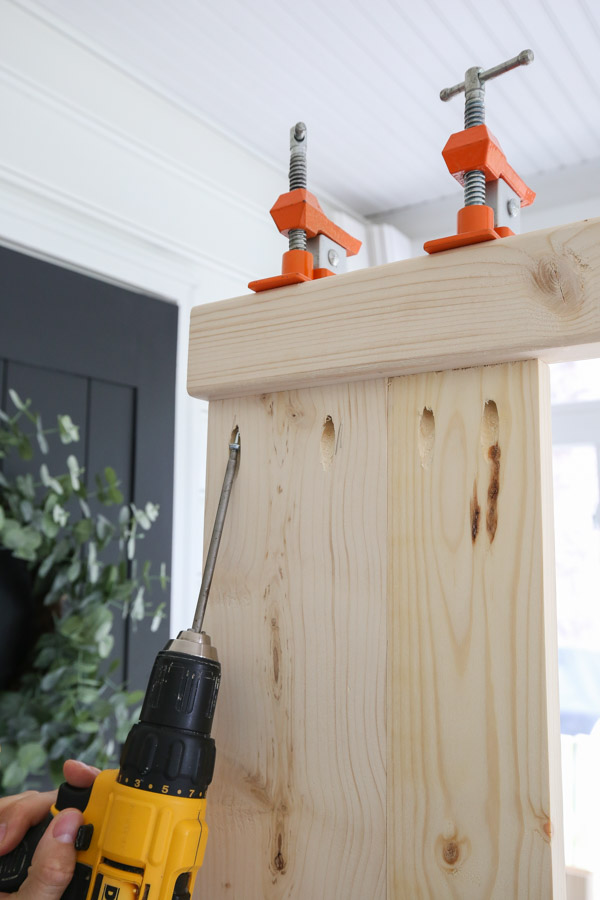
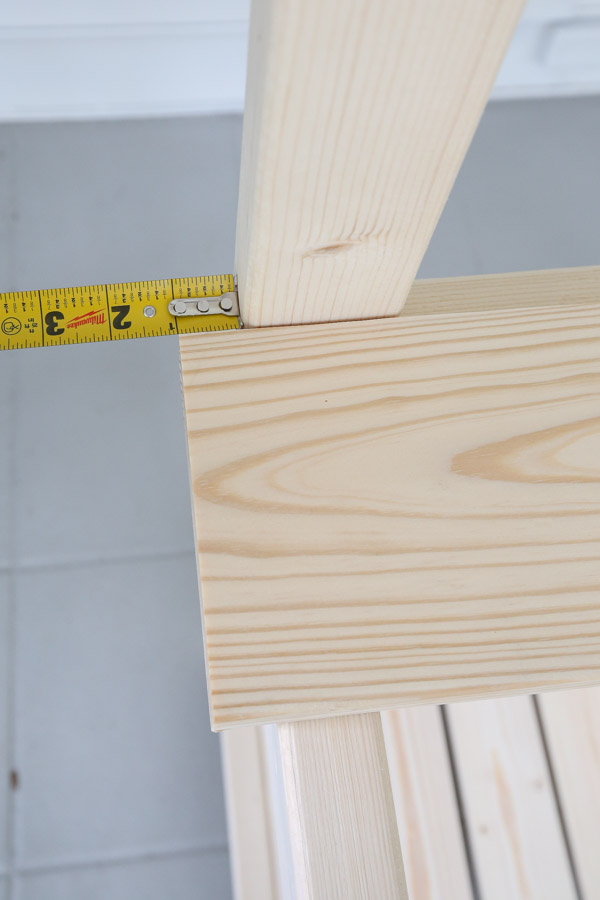
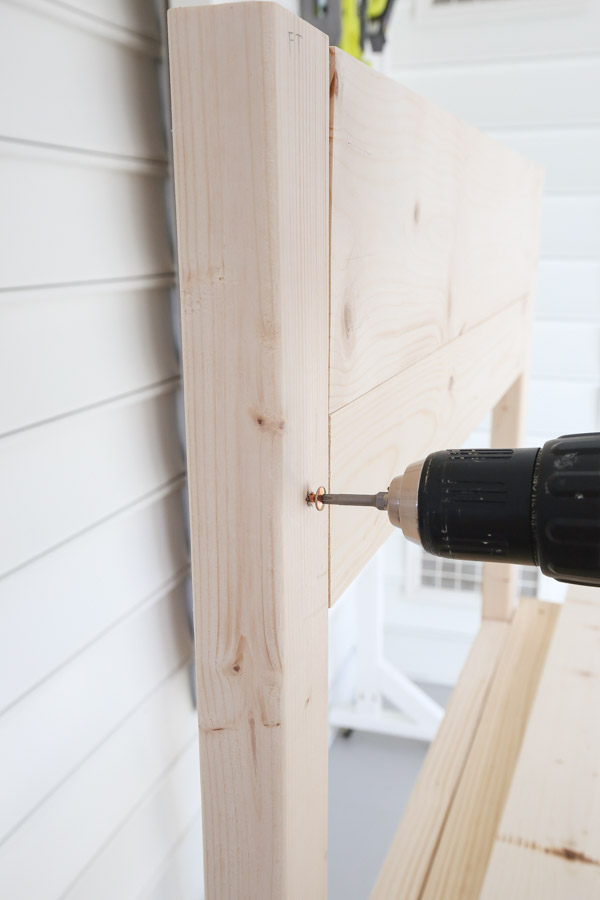
5. Install the top shelf frame boards of the DIY potting bench
We found it easiest to hang the top of the potting bench over the edge of our work surface and then clamp the 1×6 @ 29″ and 1×4 @ 29″ boards in place with the front edges flush with the 2×3 fronts.
Then, we attached them with 1 1 /4″ Kreg screws.
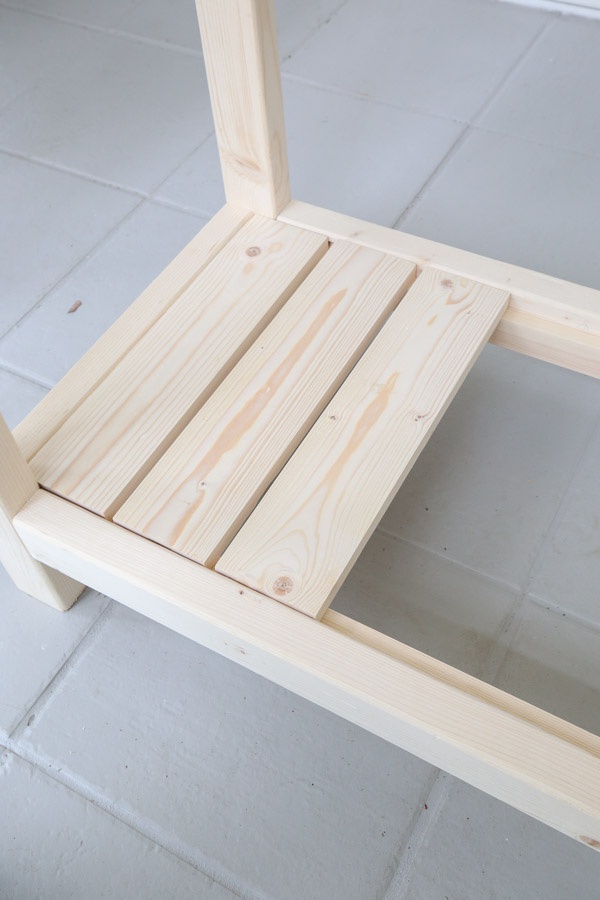
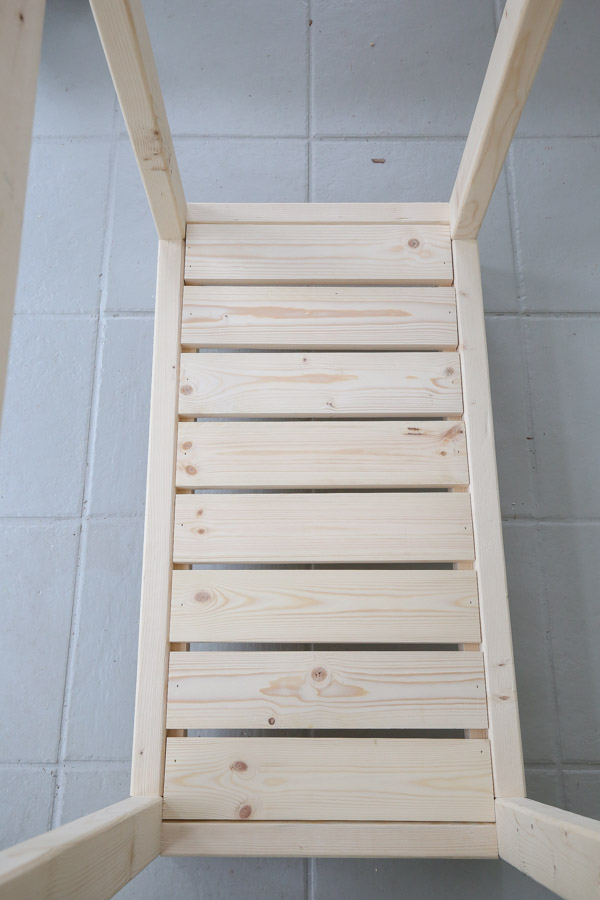
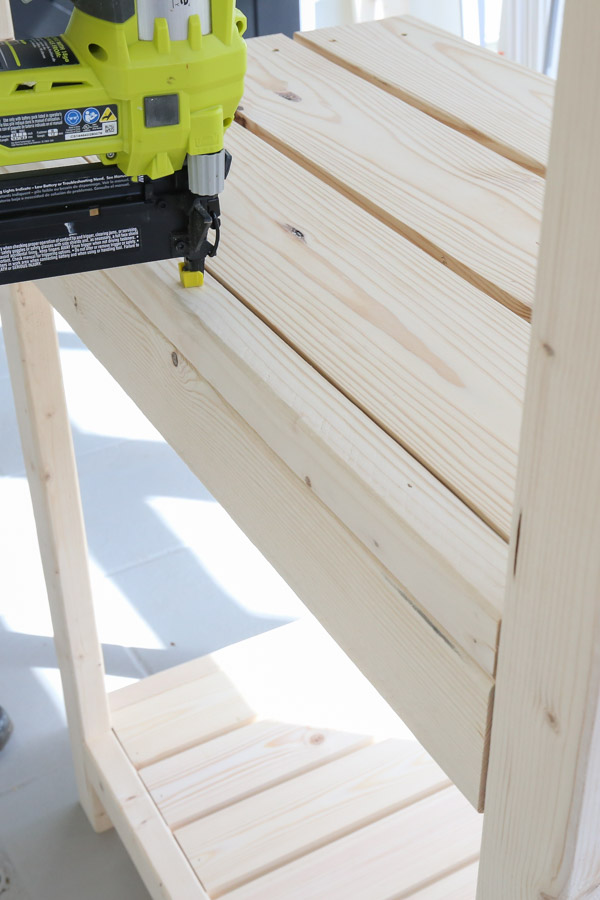
6. Add the the slat boards to create the lower shelf
Lay the 1×4 slat boards on top of the 1×2 supports, spaced about 1/2″ apart to create the lower shelf. Secure in place with wood glue and 1 1/4″ brad nails.
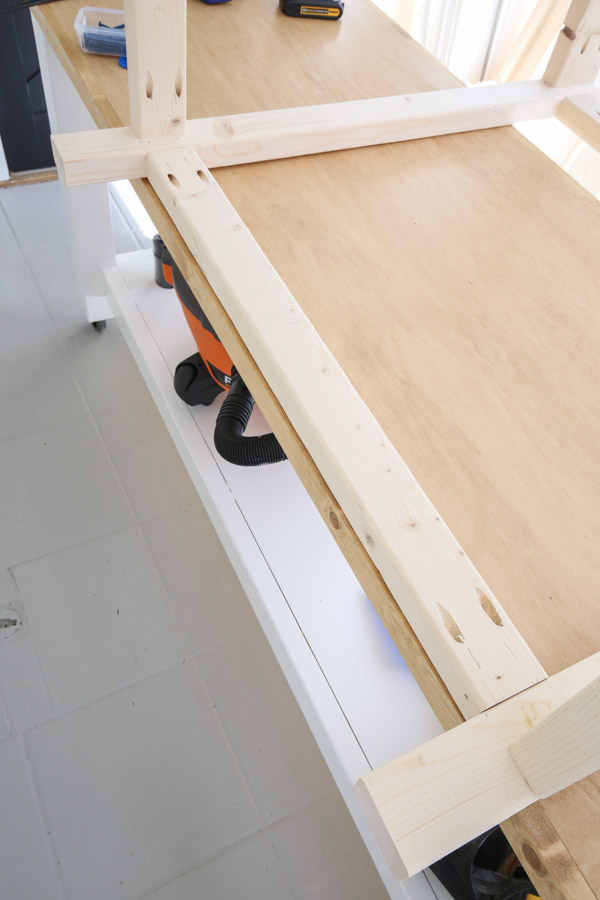
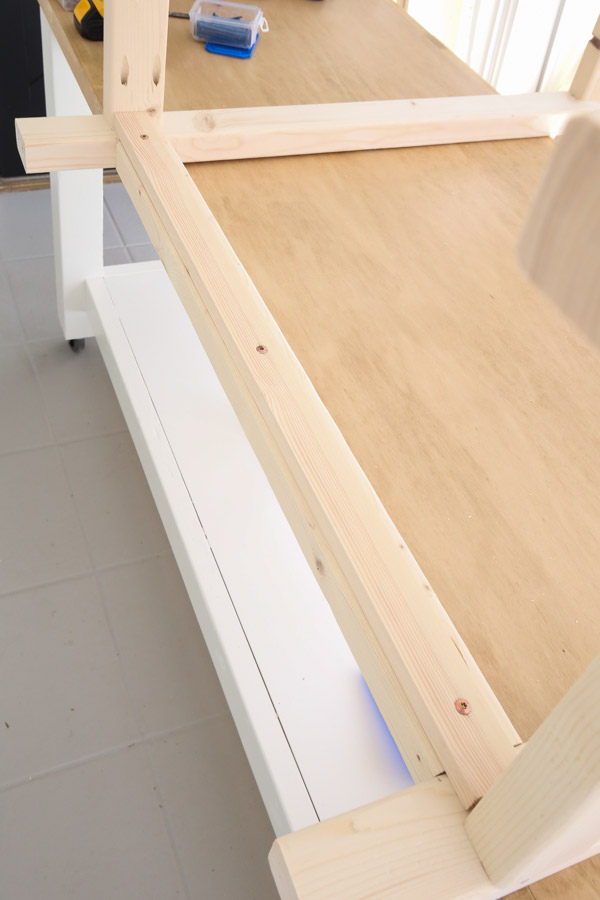
7. Build the middle shelf of the potting bench
Place the first 2×6 board on top of the bench frame so it’s against the back legs and there is a 1″ overhang on each side of the 2×6.
Attach the board to the frame with 2 1/2″ self tapping screws on each side. Make sure they are countersunk beneath the wood surface a little bit.
Attach the next two 2×6 boards this same way leaving a 1/2″ gap between each board.
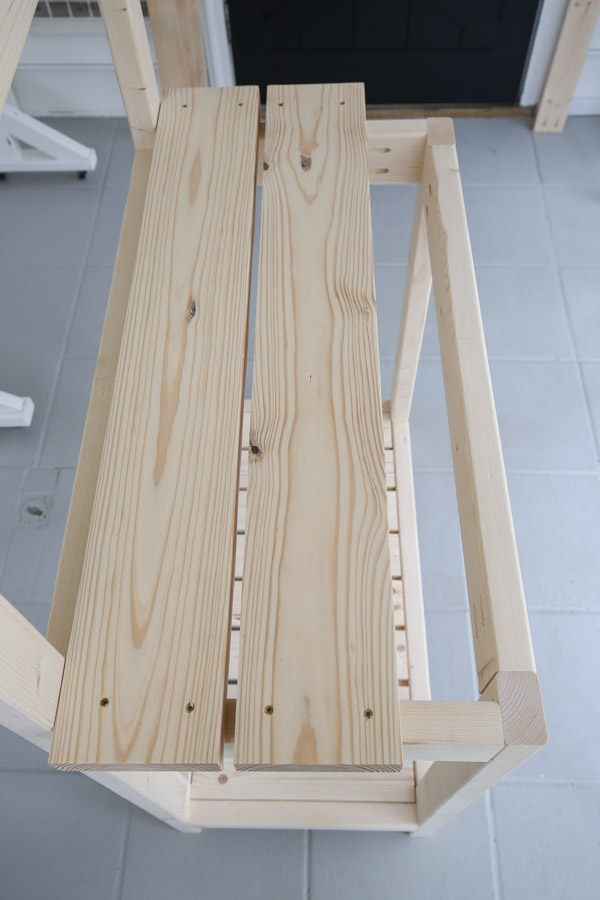
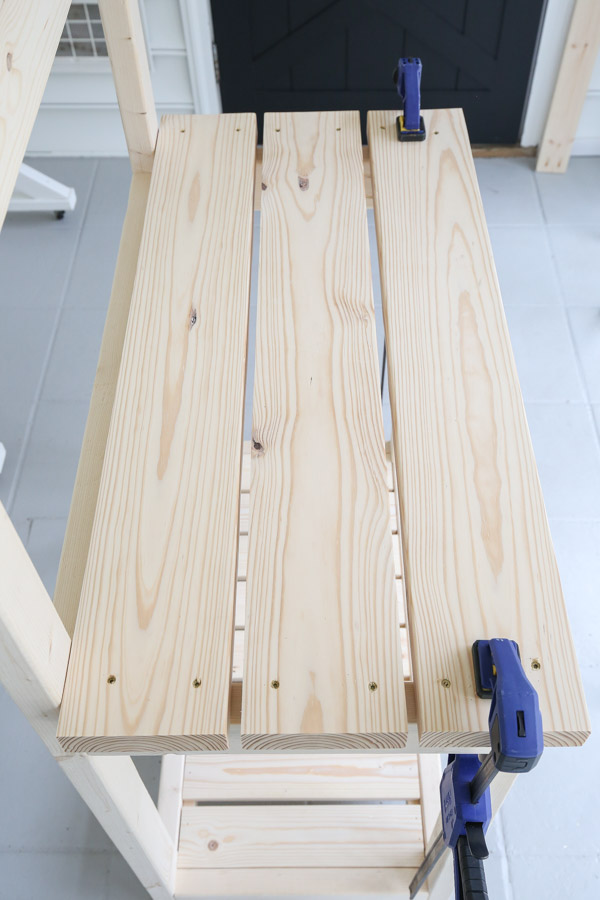
Finish off the top shelf by adding a 2×2 @ 29″ between the back 2×3 legs with wood glue and 2″ brad nails.
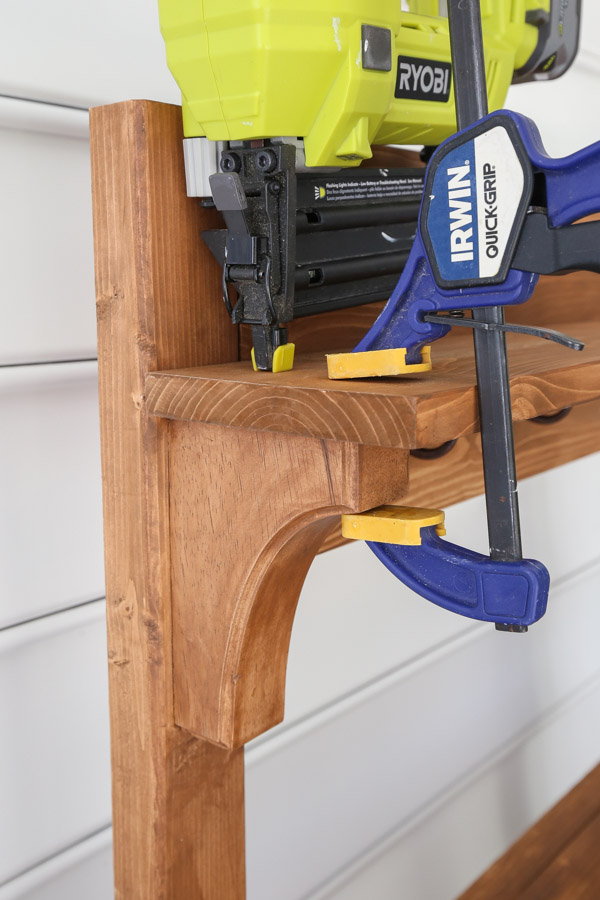
8. Install the shelf corbels
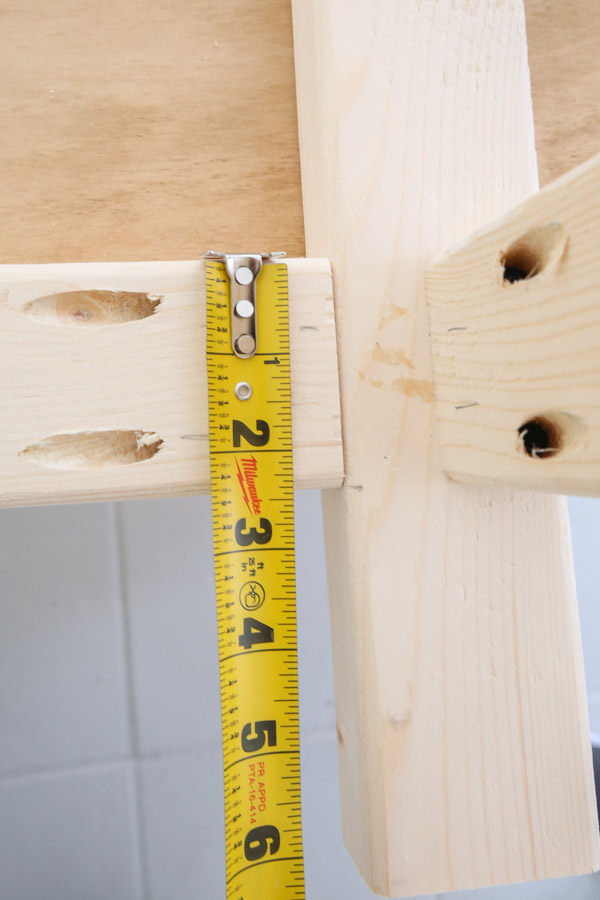
Decide where you want to install your shelf. We marked a center point at 6 5/8″ down from the top of the 2×3 and 1 1/4″ in from the sides.
Then, we used a 1 1/4″ self tapping screw at this mark for our first corbel to sit on. We also used some wood glue and a clamp as well. Make sure to wipe away the excess wood glue with a damp paper towel.
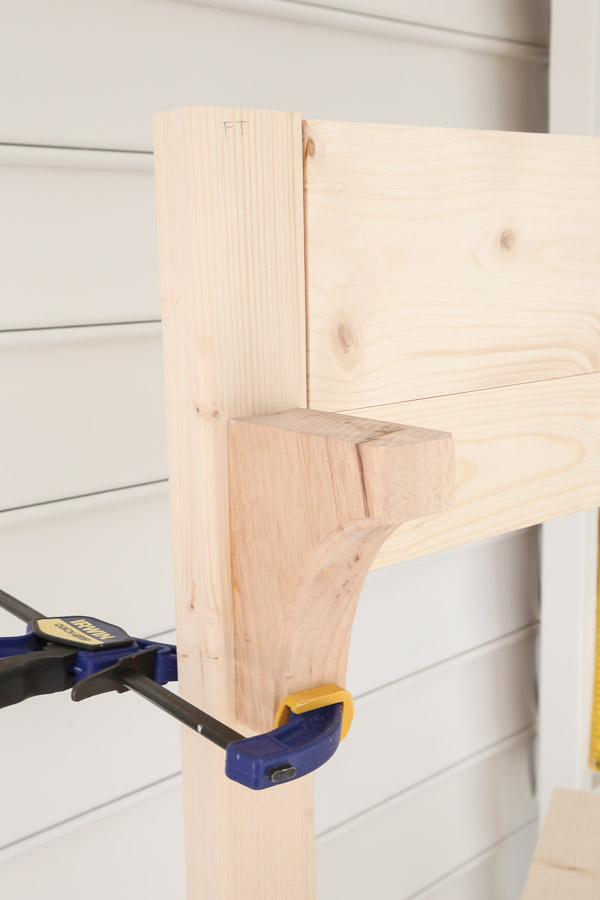
Repeat these steps for the other shelf corbel.
It’s easier to wait to install the shelf on top of the corbels and go ahead and stain the DIY potting bench and add the hardware hooks first.
9. Stain the potting bench
Prepare the potting bench for stain.
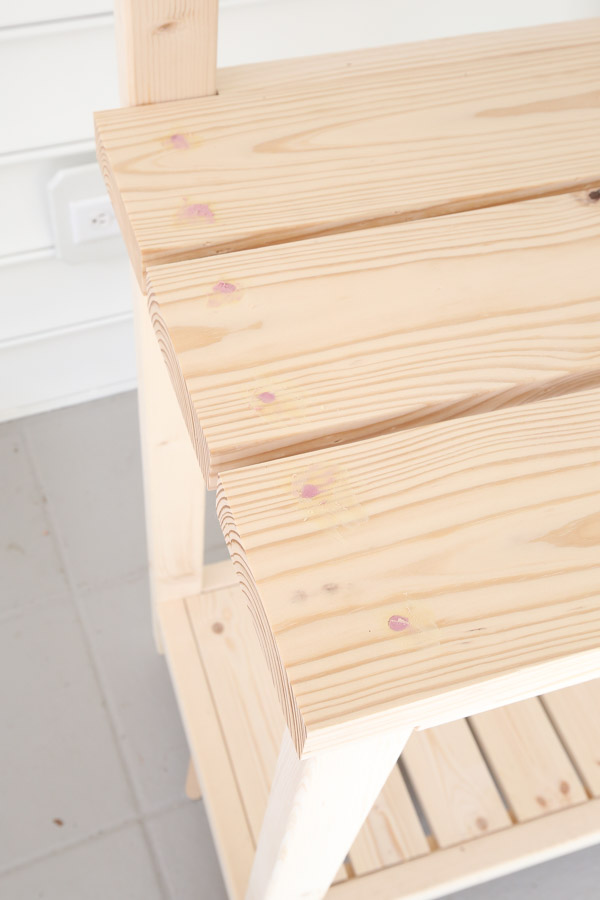
Fill any screw or nail holes in with stainable wood filler if desired. And sand the wood filler once dried and any joints if needed.
We stained our potting bench with one coat of Valspar semi transparent exterior stain in Pine bark. Also, we used a foam brush to stain in between the boards.
You can see the staining in action in the DIY potting bench video tutorial here!
10. Attach the shelf and hooks
Finally, attach the hooks in place with the included screws. The hooks I used were 1″ wide and I spaced them each 5″ apart on the 1×4 @ 29″.

Attach the 1×6 shelf on top of the corbels with wood glue and 1 1/4″ nails.
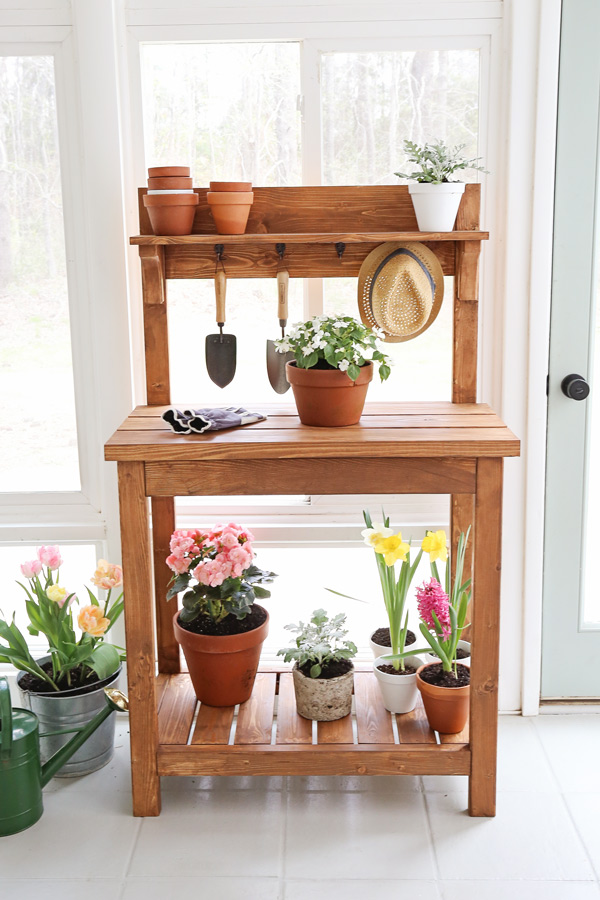
I had so much fun picking out flowers at the garden center and planting them using our new potting bench. I love how cute and functional our DIY potting bench turned out!


Don’t forget to check out Anika’s channel and her awesome DIY planter video!
Make sure to join our Woodworking for the Home Facebook group and share this project there if you make it! Or tag me on social media @angelamariemade or #angelamariemade!
Follow along for my latest projects and sneak peaks on Instagram, YouTube, and Pinterest!
Hussain Shihbaan
Monday 8th of May 2023
Is this plan available in metric units?
Angela Marie Made
Thursday 11th of May 2023
No, unfortunately I don't have it available in metric units, you will have to use a converter tool!
Christine
Saturday 29th of April 2023
I love your work and I thank you for posting your how-tos! You are very inspiring. I have never done a scrap of woodworking but now I want to try….
Angela Marie Made
Monday 1st of May 2023
Aw, thank you! You can do it!! :) I have lots of resources available on my blog for beginners, check it out if you are interested! https://angelamariemade.com/woodworking-for-beginners/
B
Monday 27th of February 2023
Wow. WANT! This is gorgeous and so well-designed!
Angela Marie Made
Monday 27th of February 2023
Thank you!
Myca Pierce
Wednesday 8th of June 2022
I made the grilling cart as my very first project. I love it and feel so inspired!
What lengths of clamps do you recommend i invest in? This will help me work on this project alone.
I cant wait to make the potting table.
Angela Marie Made
Thursday 9th of June 2022
I would recommend investing in a larger clamp for this project - I used our 48" clamp a lot throughout this project and it really made it easier. I'd say a variety of sizes is best, look for a pack with multiple sizes! 12" clamps are probably my most used size!