Learn how to install vertical shiplap on your walls! This method for DIY vertical shiplap walls is cheap and easy!
Oh how I love shiplap! We’re currently renovating our guest bathroom and I knew I wanted to add vertical shiplap walls to add character and charm to the space!
Several years ago we installed shiplap for the first time, and I shared how to create DIY shiplap accent walls with horizontal shiplap on a budget, as well as how to paint shiplap walls. Today I’m sharing how to install vertical shiplap!

Types of Shiplap Boards
To save money, we chose to do faux shiplap boards using plywood instead of using real shiplap wood boards, like we did on our DIY shiplap ceiling, our dining room vertical shiplap half wall, and our DIY vertical shiplap wall from floor to ceiling, which are more expensive. The finished product and look are very similar!
Another reason I wanted to use plywood is because we could use 1/4″ thick plywood which works better for wall treatments. When you want to keep your existing baseboards or install new baseboards and you need to keep the total wall treatment thinner than door casings. Real shiplap is typically 1/2″ to 3/4″ thick.
We just did a vertical shiplap half wall, so more like vertical shiplap wainscoting.
But you can also do it all the way up the wall too if you prefer, without the 1×4 middle trim board, and add crown moldings like we did with our DIY shiplap ceiling! We installed it from floor to ceiling in our hallway and with real shiplap boards and crown molding.
There are so many different DIY wall panel ideas to consider for a room!
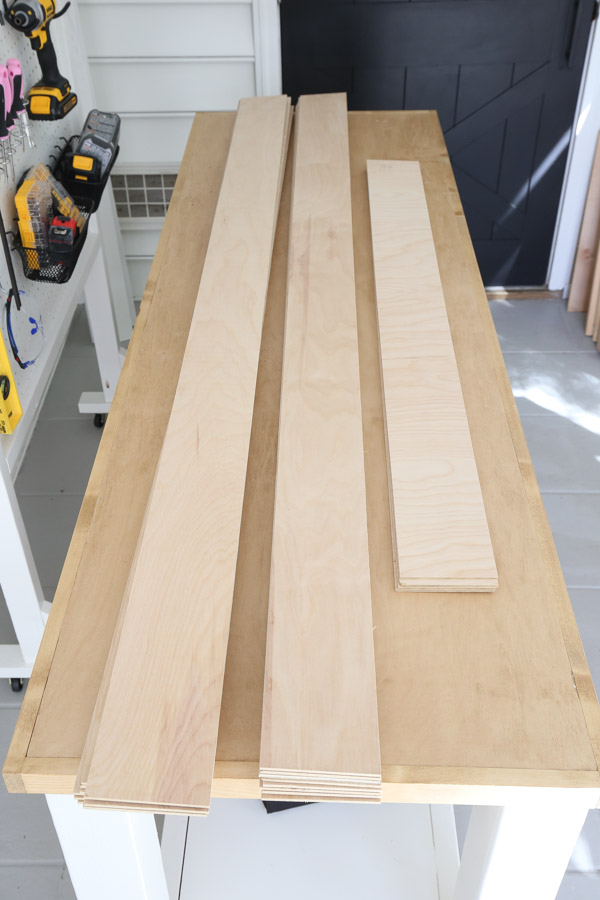
We used two 4ft × 8ft sheets of premium, formaldehyde free plywood (linked below), for a total plywood cost of $60. The total cost of this wall treatment, including the trim and baseboard was about $120, very budget friendly!
Note, this post contains some affiliate links. I may earn a commission if you shop those links (at no cost to you). Thank you for supporting my small business. For more info see my disclosures here.
Materials:
- 4ft x 8ft plywood @ 1/4″ thick*
- 1×4 @ 8ft**
- Construction adhesive (we used Liquid Nails)
- 2″ and 1″ and 1 1/4″ brad nails
- Lightweight Spackle or wood filler
- Paintable caulk
- Paint (we used Sherwin Williams Mindful Gray in eggshell)
- Primer (if boards aren’t pre-primed)
- Paintbrush and Roller
Tools:
- Miter saw
- Brad nailer or nail gun
- Level
- Dremel or jigsaw (optional, only if needed)
- Table saw or Circular saw (optional)
- Measuring tape
- Stud finder
- Prybar & Utility Knife (to remove old baseboard – optional)
- Sandpaper or Power sander
*I used this formaldehyde free plywood from Home Depot that was also pre-sanded
**The amount of boards you will need depends on the measurement of your wall(s). Determine how many 4ft × 8ft sheets of plywood you need based on your wall size and vertical shiplap height/width (see step #1 for more details).
DIY Vertical Shiplap Video Tutorial:
Subscribe to my YouTube Channel here!
1. Cut plywood to size for the vertical shiplap boards
The first step is to determine how high up you want your vertical shiplap wall to be (or if you want to do a full wall) and determine what size you want the vertical shiplap boards to be.
We wanted to do our vertical shiplap a little bit lower than halfway up the wall at 39 1/2″ high to avoid light switches and outlet covers. So, that meant our vertical shiplap boards should be 36″ tall which is 39 1/2″ less 3 1/2″, the width of our 1×4 trim board.
However, we ended up cutting our boards to 35″ tall since our 5″ baseboards would cover the bottom of the boards and our cuts didn’t have to be perfect. You can see more details on this in the DIY vertical shiplap video!
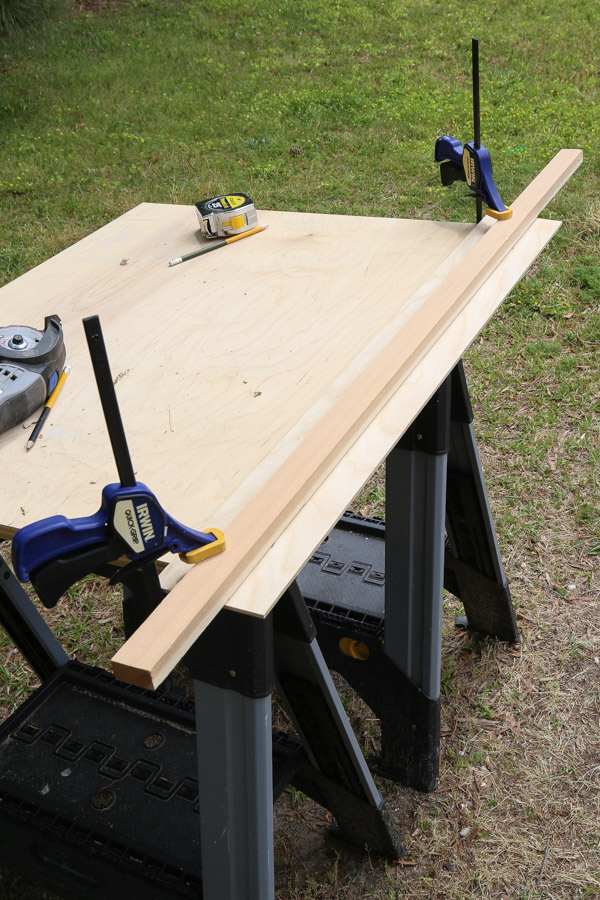
We had our plywood rip cuts done at the home improvement store into 4 1/2″ wide boards. You can also use a table saw or circular saw and straight edge guide to make the rip cuts.
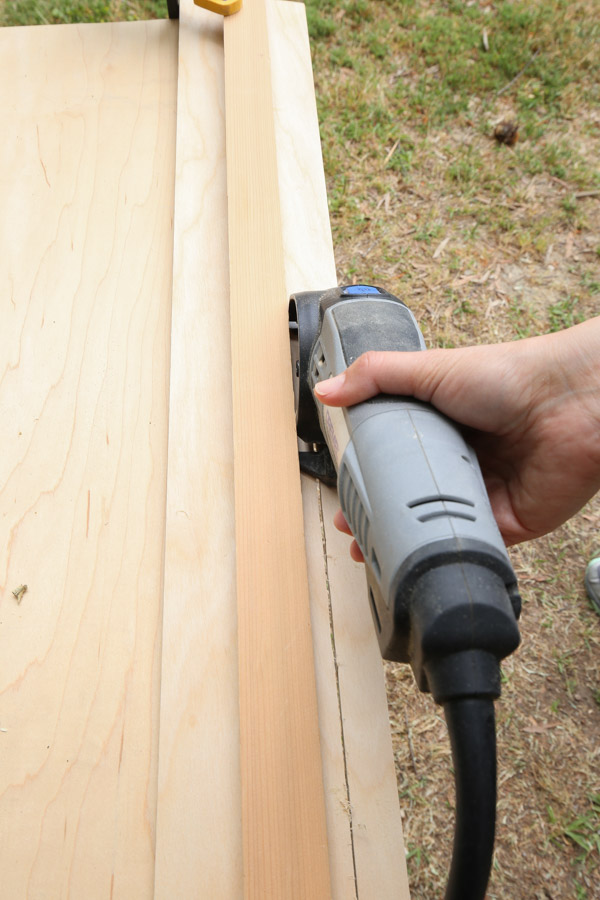
We used our corner sander to sand the the edges of the ripped boards since plywood has rough edges.
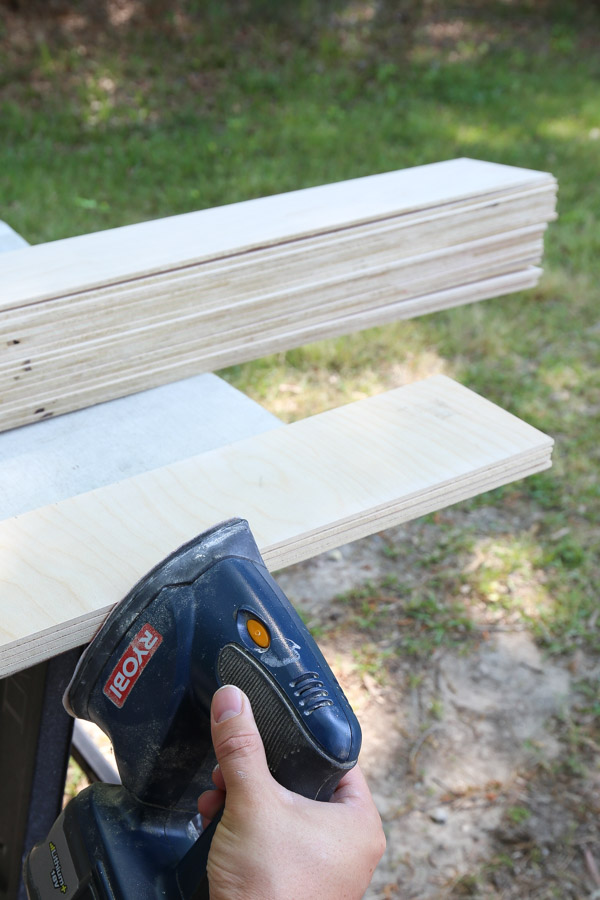
Then, we used a miter saw to cut the 4 1/2″ wide plywood strips into 35″ tall boards.
Also, after each miter saw cut, we quickly sanded the cut edges.

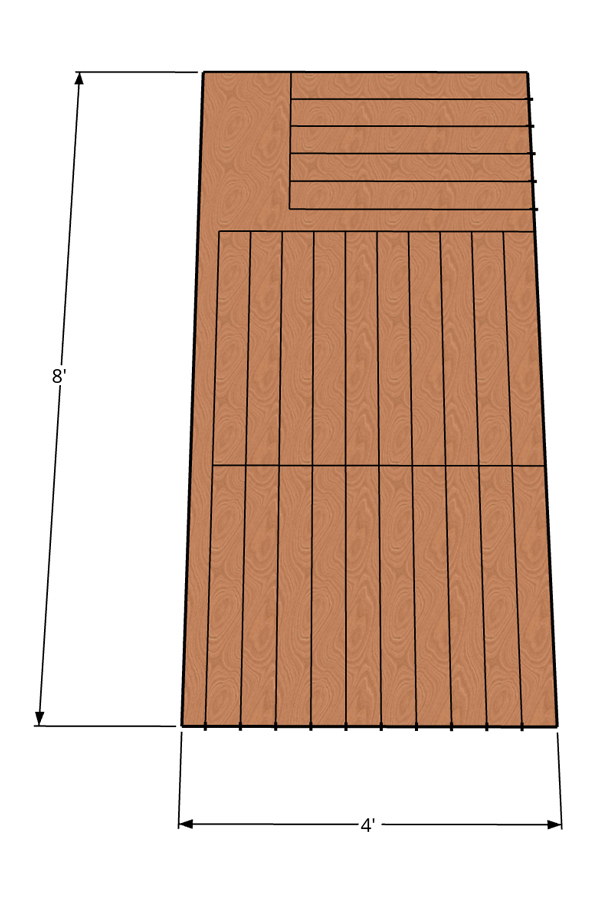
Note, with 4 1/2″ wide boards at 35″ tall, we were able get 25 vertical shiplap boards from one 4ft × 8ft sheet of plywood:
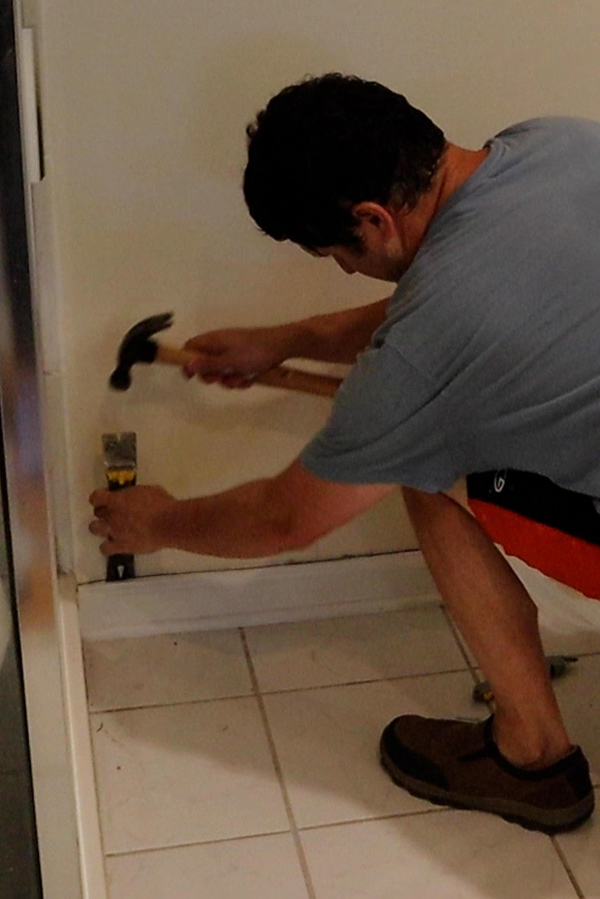
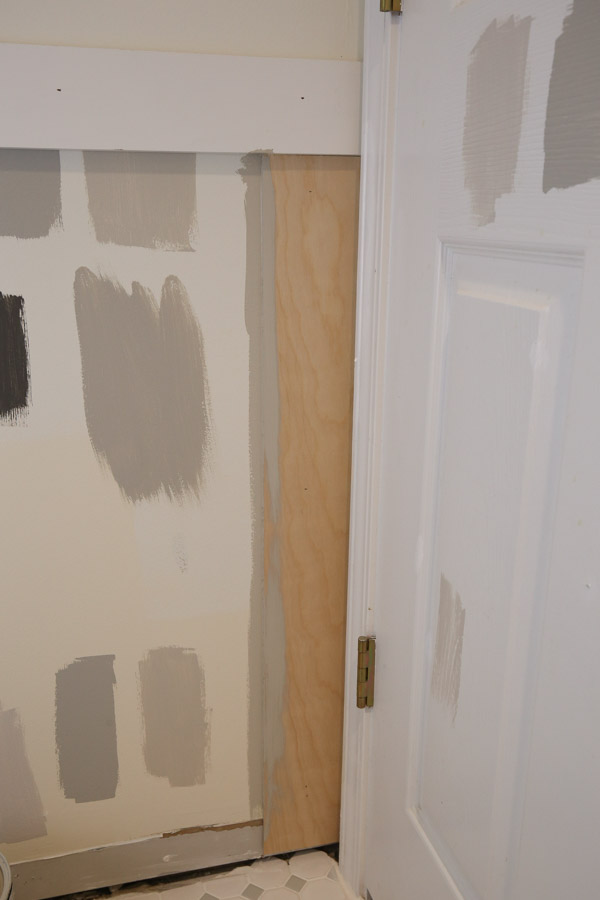
2. Remove existing baseboards from the wall if desired (optional)
Because the plywood we are using for our shiplap is only a 1/4″ thick, you can add the shiplap boards flush with your existing molding.
You can also replace your baseboard. We decided to replace our baseboard with a taller baseboard with a more classic look and less builder grade molding.
To remove the existing baseboard, score the top and corner caulk lines with a utility knife. Then, use a prybar and hammer to remove the baseboard from the wall.
A Note About Baseboards:
If you are replacing your baseboards and your door casings are only 3/4″ thick, then it’s best to use floor molding that is only 1/2″ thick or less if you want to use it over the shiplap boards like we do in this tutorial.
However, if you want to use 3/4″ thick baseboards, then you should install your new baseboards first and you will need to make perfect height cuts for your vertical shiplap boards so they are flush with the baseboard, since you aren’t covering the shiplap with the baseboard.
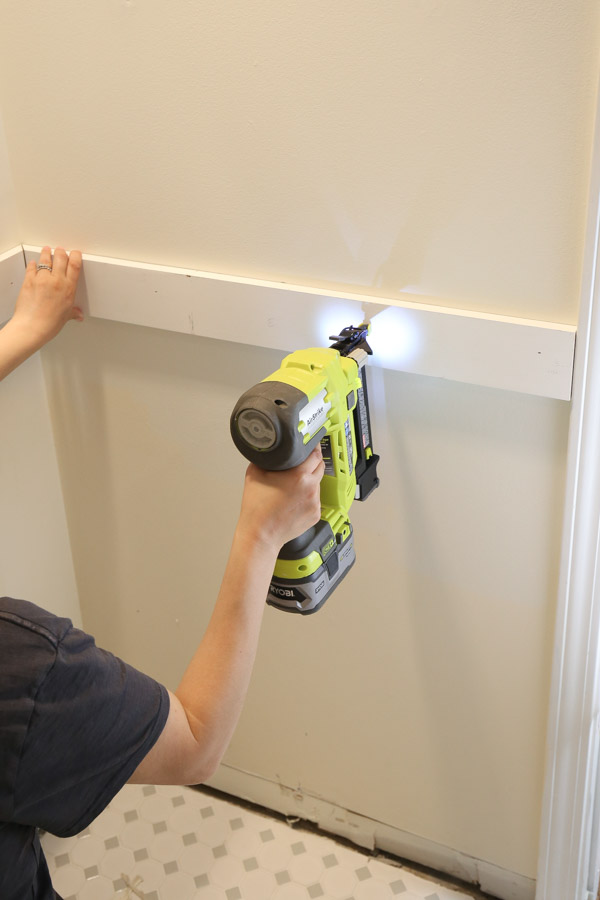
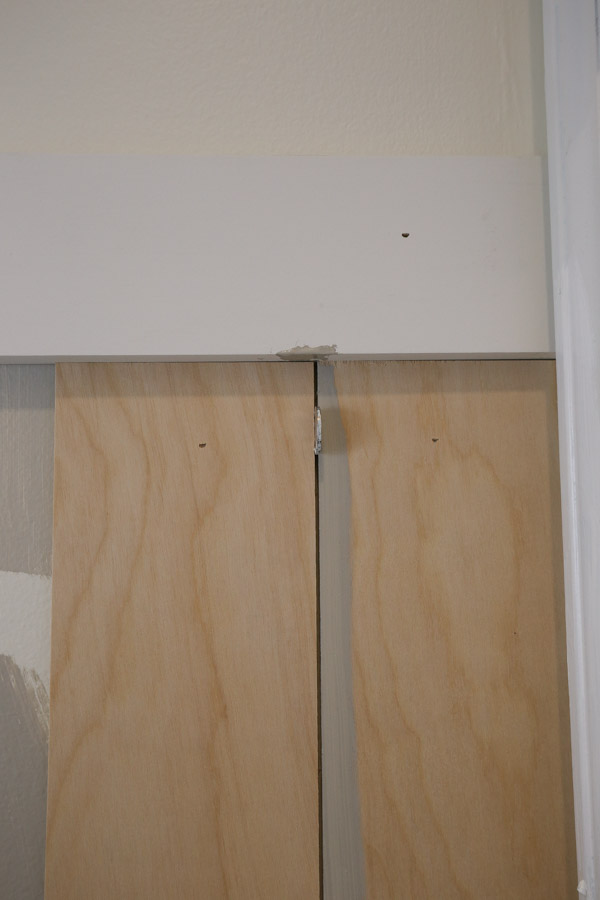
3. Attach the 1×4 trim to the wall
If you are doing a vertical shiplap half wall like us, begin by attaching the 1×4 trim board to the wall.
Use a tape measure and mark 39 1/2″ (or your desired height) up from the floor and draw a line at that mark using a level.
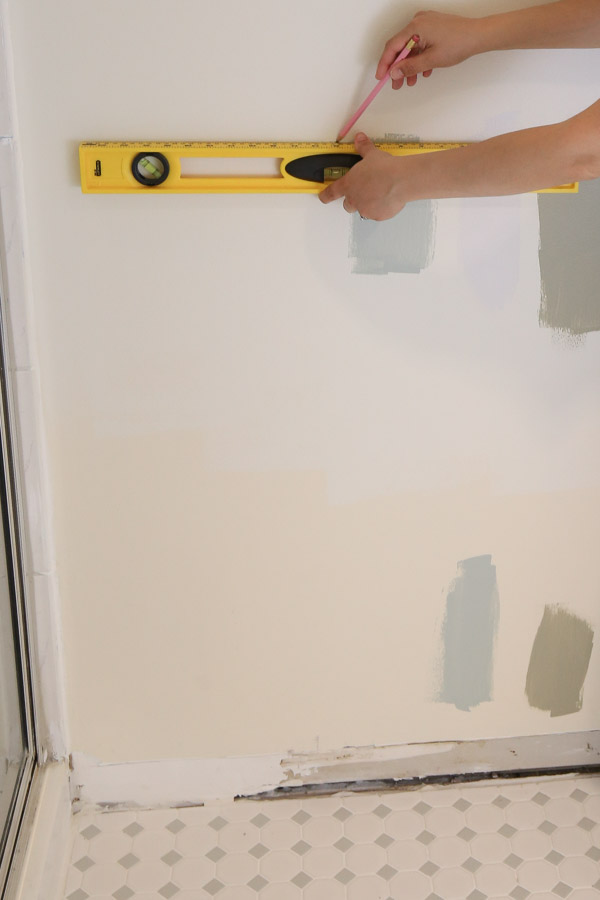
Then, cut a 1×4 board to size for the length of the wall and install it at that line.
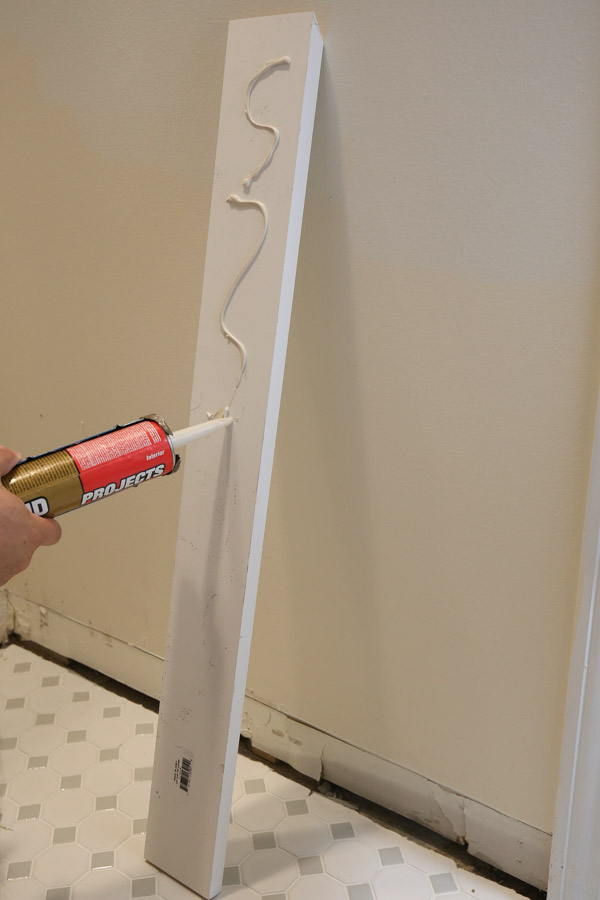
Install the 1×4 with 2″ brad nails into the wall studs. If you are unable to hit enough wall studs like us, you can use Liquid Nails and 1 1/4″ brad nails instead to secure the board to the wall.
Note, for corners we used a 45 degree bevel cut for the 1×4 ends.
📩 Want to Save This?
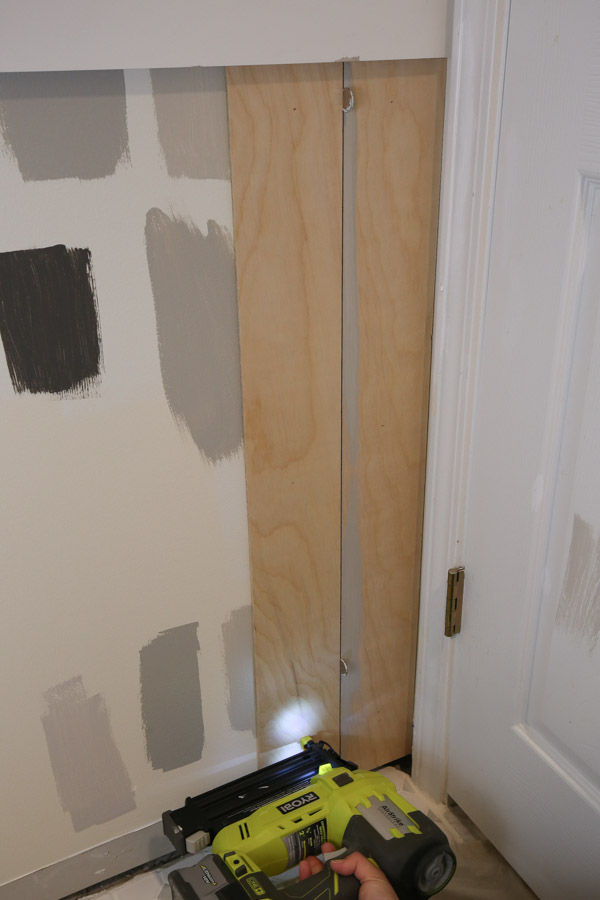
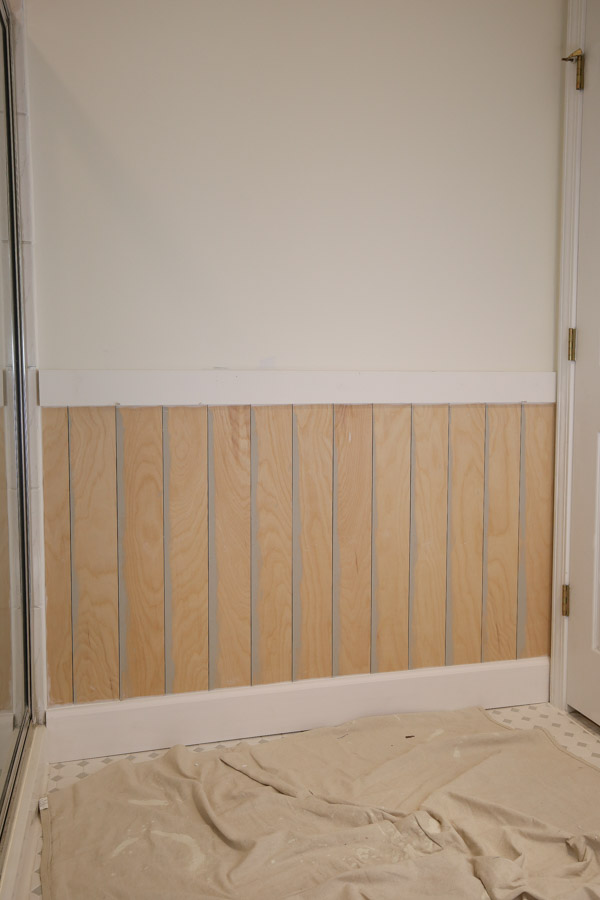
4. Attach the first vertical shiplap board to the wall
Attach the first board to the wall with the top of the board lined up under the 1×4 trim. Use construction adhesive (we used Liquid Nails) and 1″ brad nails to attach the vertical shiplap boards to the wall.
Also, it’s best to start in a corner that will be the most visible, since the last board on the wall will most likely need to be cut to size and won’t be a full width board.
5. Paint in between the vertical shiplap boards
Since there will be small gaps between each vertical board, use a paint brush and paint the gap area between the boards and the side of the board with the same color paint that you will use on your vertical shiplap.
As I explained in my how to paint shiplap walls tutorial, this really helps save time and effort with painting instead of trying to get in between the gaps after your boards are installed. We did this for our DIY shiplap accent walls too!
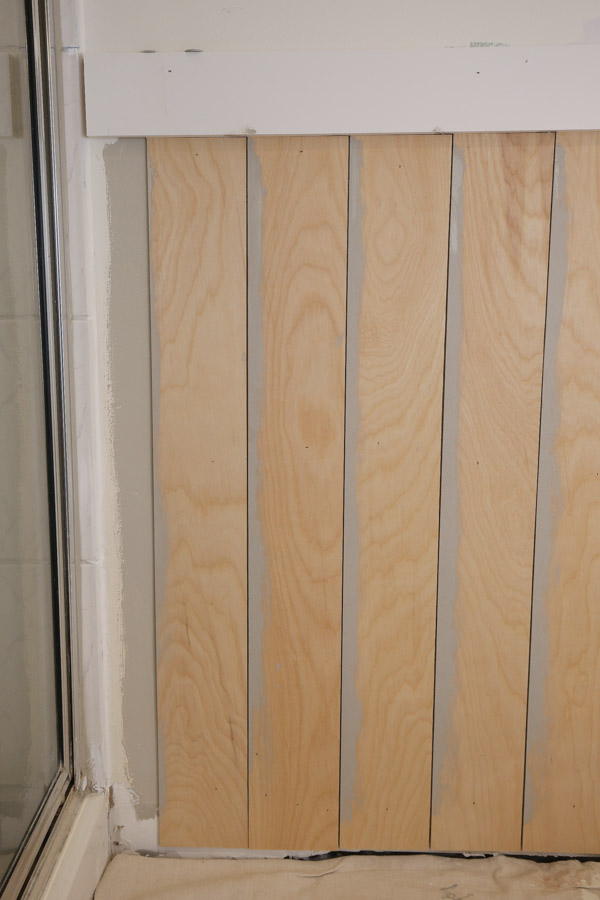
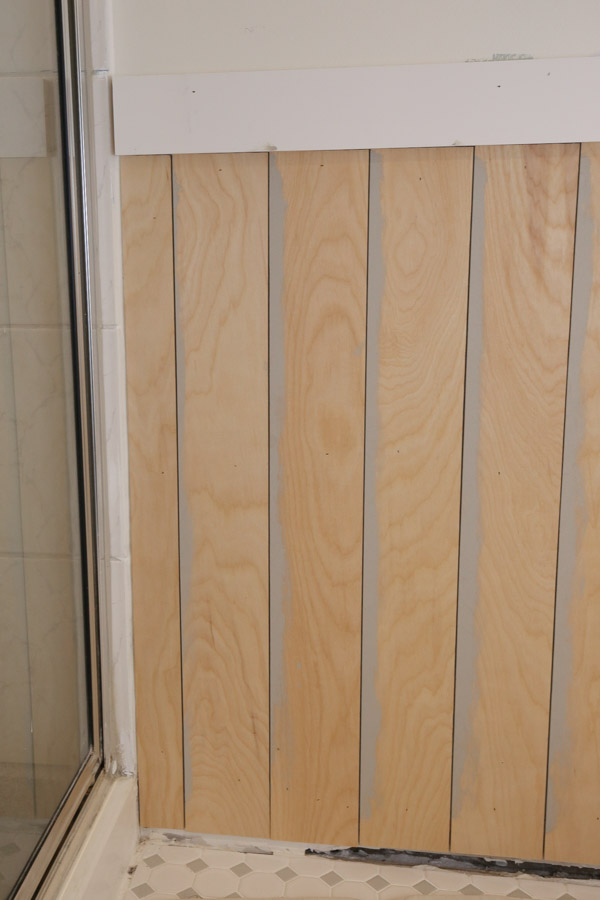
6. Use spacers and attach the remaining vertical shiplap boards
Between each board, use spacers between the boards to leave a small gap which provides that shiplap look! We used nickels, but anything with a similar thickness works.
These spacers provide the look of real shiplap like our vertical shiplap wainscoting in our dining room where we used real boards.
Attach the next board to the wall the same way as the first board and continue this process until you get to the end of the wall.
Note, you can see all of this in action in the How to Install Vertical Shiplap video here!
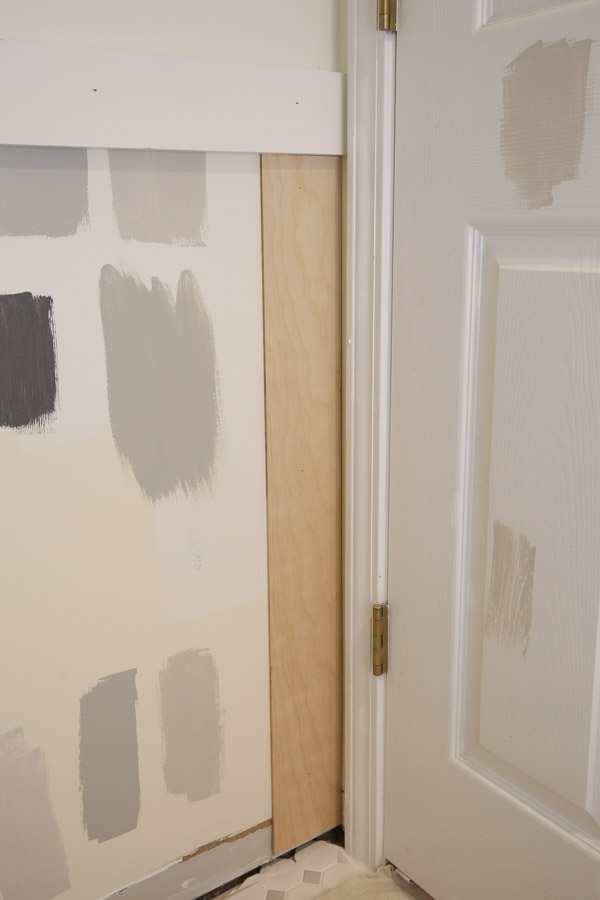
7. Rip cut the last shiplap board to size if needed
When, you get to the end of the wall, you will most likely need to cut the width of the last board to size to finish the vertical shiplap wall.
Measure the remaining space left and subtract a 1/16 of an inch (for the nickel gap) to get the width needed for the last board.
We used our Dremel with a 1×2 board as a straight edge guide to cut our board to the needed width. You can also use a table saw or jig saw.
Install the last board with Liquid Nails and brad nails.
We had to rip cut the last board for our vertical shiplap wall from floor to ceiling in our hallway too.
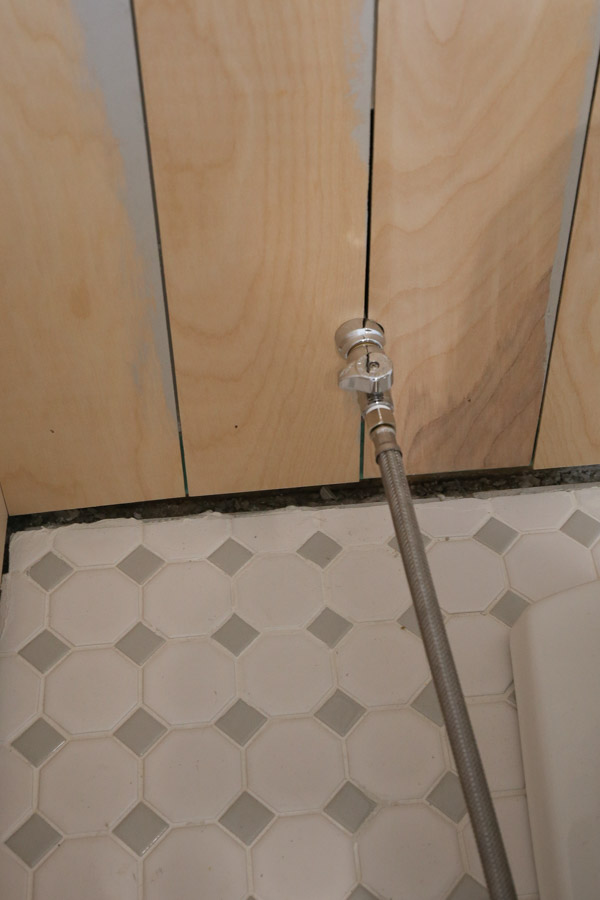
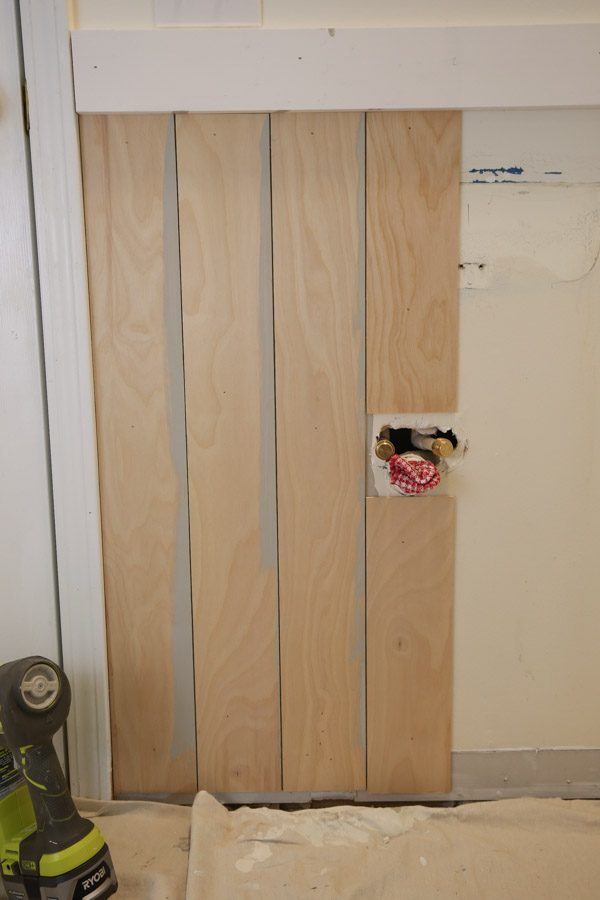
8. Make special cuts for wall outlets, pipes, or light switches (if needed)
Continue installing the shiplap boards on the remaining walls.
At some point you may need to make a special cut for something like a wall outlet, pipe hole, or light switch.
Measure and mark on your board where you need to cut it for the special cut. Use a Dremel, jig saw, or drill to make the special cut.
9. Install new baseboards if needed on vertical shiplap walls
Install your new baseboards if you didn’t keep your old baseboards. We installed our new baseboards over the vertical shiplap boards.
10. Fill nail holes and caulk
After the shiplap and baseboards are installed, prepare for paint by filling in all the nail holes with a lightweight spackle. Once the spackle has dried, lightly sand it.
Then, caulk all seams and corners needed on the vertical shiplap walls with a paintable caulk.
11. Prime and paint the vertical shiplap, trim, and baseboards
Prime any boards with raw wood that didn’t come pre-primed.
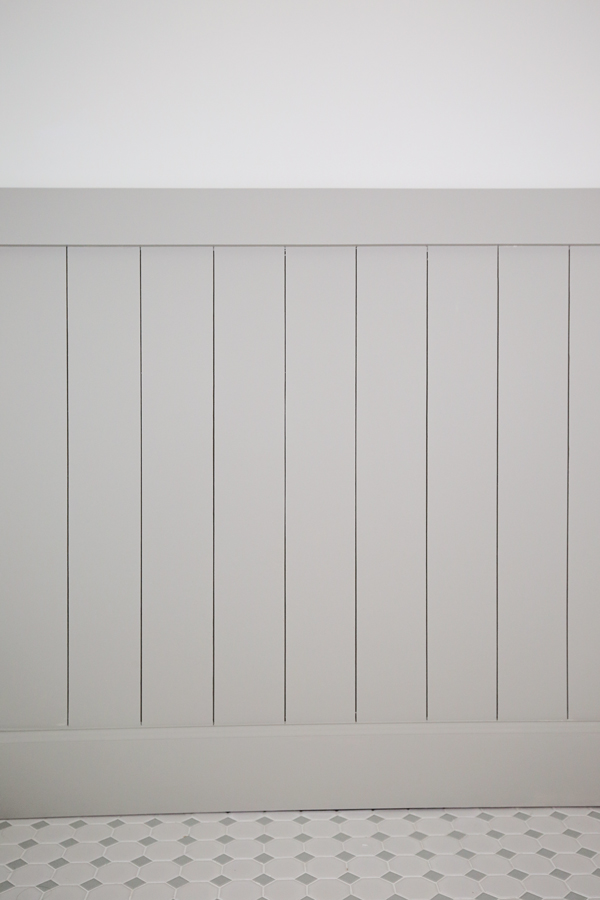
Finally, paint the the vertical shiplap, trim, and baseboards! We used Sherwin Williams Mindful Gray in eggshell for our paint color, the same color as our DIY board and batten wall!
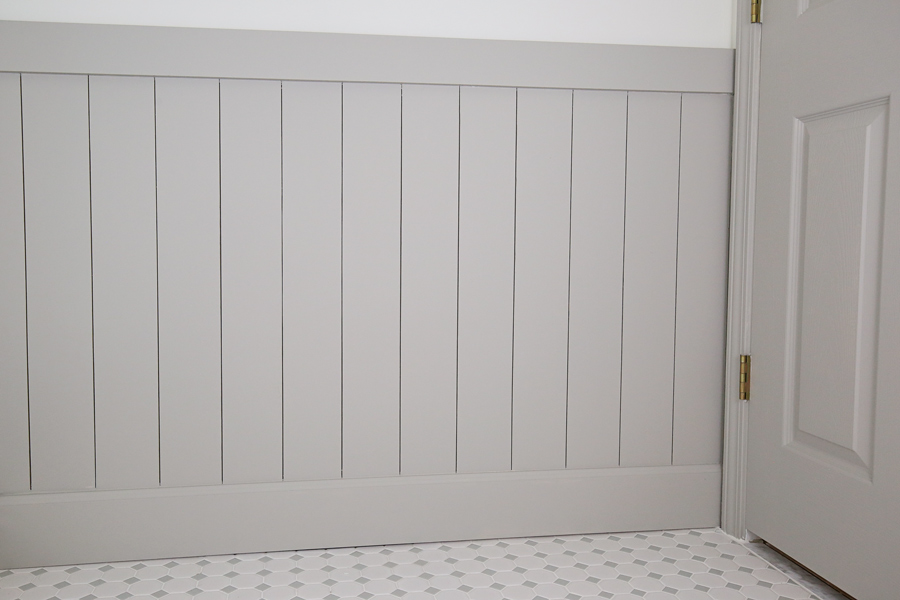
I love the final look of our vertical shiplap walls! It adds so much character and charm to the space!
Let me know what you think of this how to install vertical shiplap tutorial or if you have any questions below!
Don’t forget to check out our dining room vertical shiplap half wall and vertical shiplap from floor to ceiling with real shiplap boards too as another install option! Also, make sure to check out our other DIY wall panel ideas too!
And make sure to follow along Instagram, YouTube, and Pinterest, I’ll be sharing the bathroom makeover final reveal soon!
Follow along for my latest projects and sneak peaks on Instagram, YouTube, TikTok, and Facebook!
Emily
Tuesday 29th of July 2025
Hi! Love this project, currently calculating my measurements. Has this held up well? Were you worried at all about not adhering all of the boards to studs / installing horizontal boards for them to anchor to? Or is this a non issue since they are so thin? Thank you!
Angela Marie Made
Friday 1st of August 2025
Yes, it has held up great! As long as you use the right length of nails, they will stay adhered to the wall studs.
Amar
Thursday 24th of October 2024
Hi! Thanks for the tutorial. Wondering if you glued the back plywood on or is using brad nails sufficient (thinking about removal in the future)? Also have the plywood lasted in a humid shower environment?
Thanks!
Natalie
Wednesday 16th of October 2024
Hi! This looks amazing! Do you think that this method would work on a whole wall? from floor to ceiling?
Rachelle
Sunday 16th of June 2024
What color paint is the wall above the shiplap?
m
Tuesday 21st of May 2024
what tile is this?