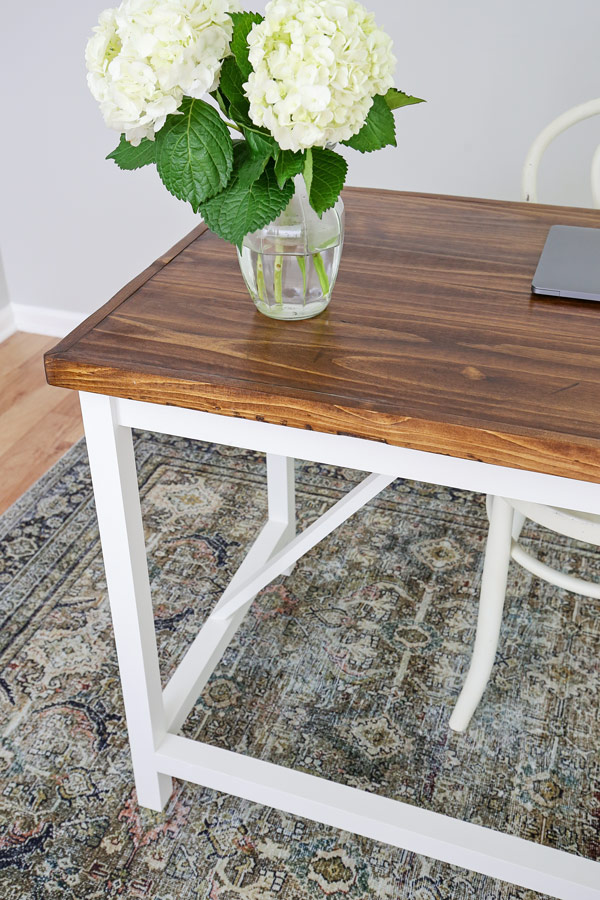
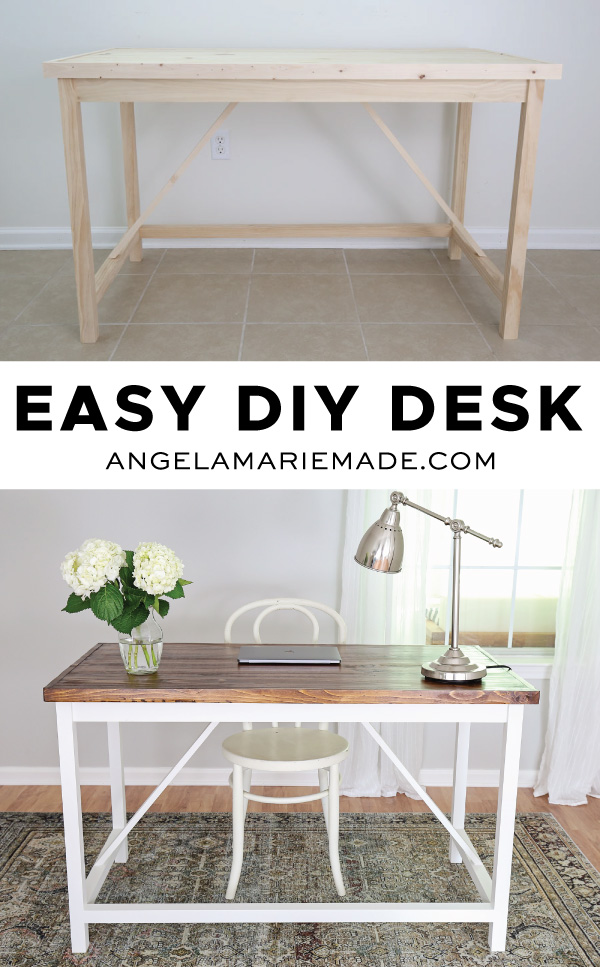
With Brandon and I both working from home, we wanted to build a simple and easy DIY computer desk that was a good fit for our office!

I kept the design of this DIY desk very simple with a classic and modern rustic vibe. I love how it turned out!
Also, I know the X-style design is popular on furniture, but I’ve been seeing some V-style designs lately and I love the look! So, I added a V-style design to the base of this desk. It’s super cute and it doesn’t get in the way either when you are sitting down.
This desk cost us $86 in lumber, but we used premium 2x2s for easy finishing. You can build it with 2×2 furring boards and it would cost $28 less, so about $58 total!
Note, this post contains some affiliate links. For more info see my disclosures here.
FINAL DIMENSIONS OF DESK: 49.5″ long x 25″ wide x 30″ tall
How to Build a DIY Computer Desk:
- (1) Edge glued project panel 24in x 4ft*
- (3) 2×2 @ 8ft**
- (2) 1×4 @ 8ft***
- (2) 1×3 @ 6ft
- (3) 1×2 @ 8ft
- 1 1/4″ wood screws
- 1″ and 1 1/4″ brad nails
- 1 1/4″ and 2 1/2″ Kreg screws
- Wood glue
- (2) 1/2″ wood shims or wood paint stirring sticks
- Light spackle (optional, if painting)
- Stain or Paint
Tools:
- Kreg Jig
- Miter saw
- Drill
- Brad nailer
- Clamps
- Tape Measure
*3/4″ thick plywood may be used instead. Make sure to pick a very straight panel board! The actual width of our panel board was 23.5″ not the nominal size of 24″.
**2×2 furring boards or premium boards may be used. I used premium boards for easy finishing! If you want to spend less, you can use furring boards instead.
***I used 1×4 furring boards because they are going to be underneath the desk and hidden.
Video Tutorial:
Subscribe to my YouTube Channel here!
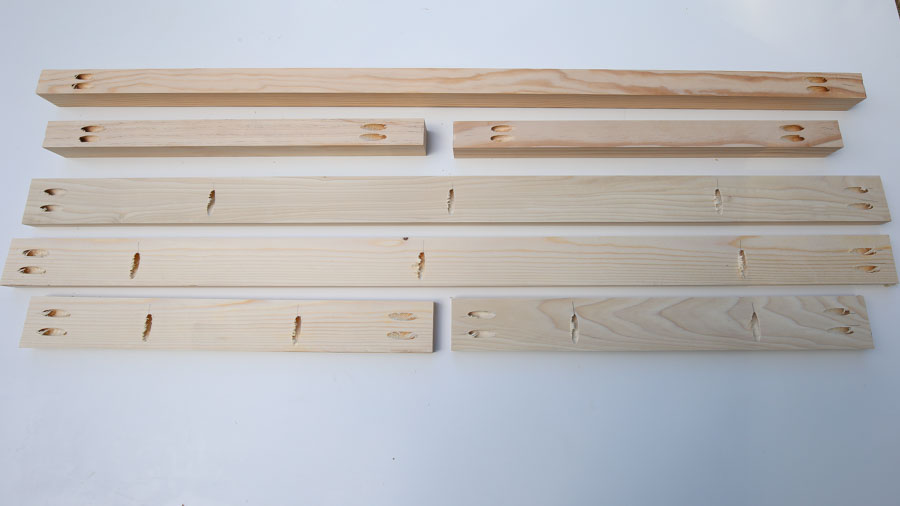
1. Make initial lumber cuts for the DIY desk
Use a miter saw and make the following cuts from the 1×4s:
- 2 pieces @ 48″
Make the following cuts from the 2×2s:
- 2 pieces @ 20″
- 1 piece @ 44 1/2″
- 4 pieces @ 28 1/2″
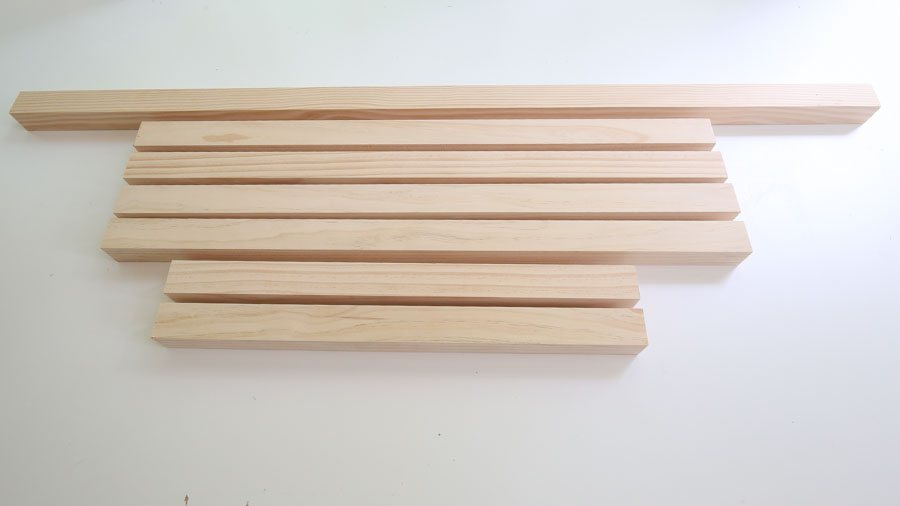
Make the following cuts from the 1×3s:
- 2 pieces @ 44 1/2″
- 2 pieces @ 20″
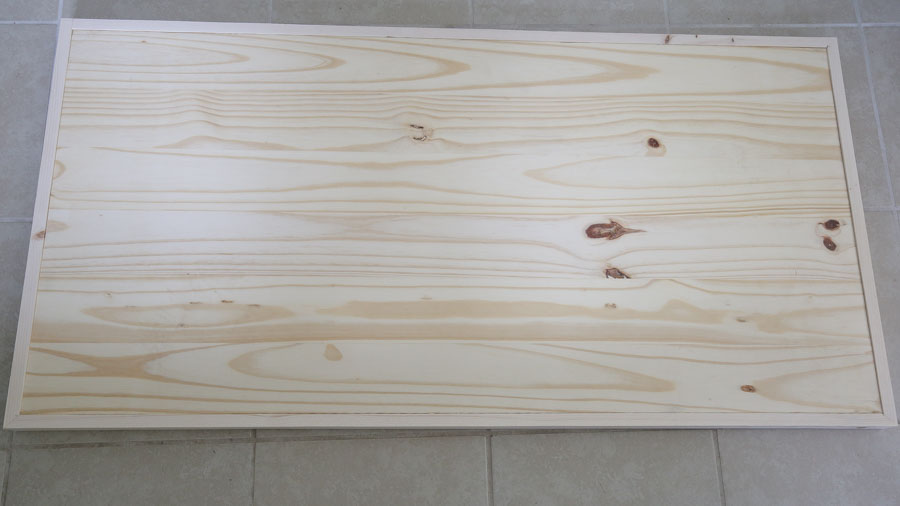
2. Build the top of the desk
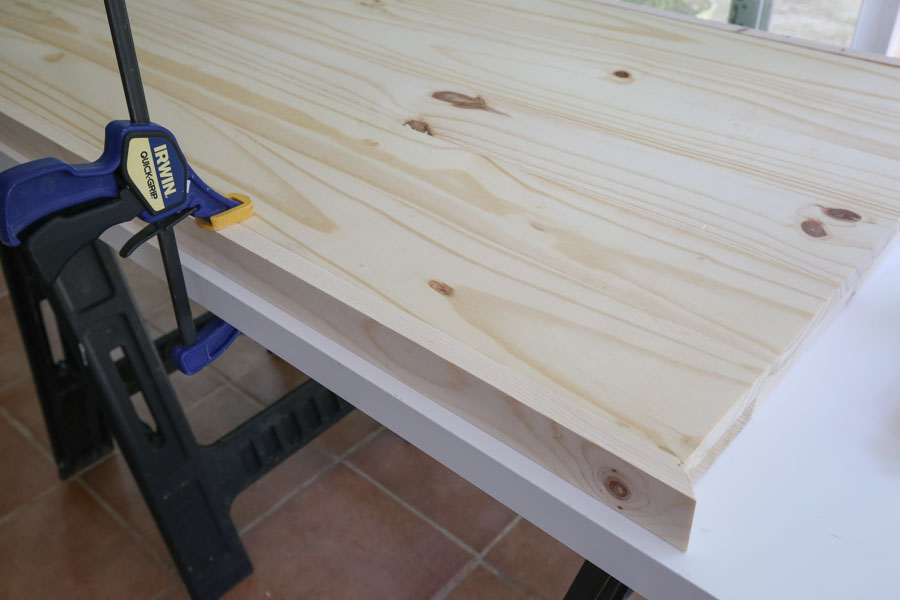
Attach the two 1x4s @ 48″ along the front and back edges of the plywood panel with wood glue and 1 1/4″ wood screws.
Next, measure the exact distance between the two 1×4 boards and cut 2 more 1×4 boards to that size for the two sides of the panel board. 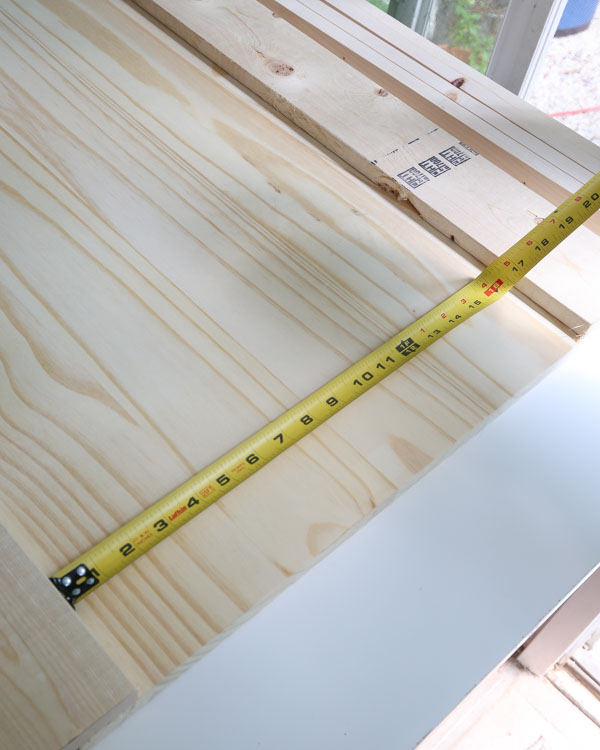
Attach with wood glue and screws.
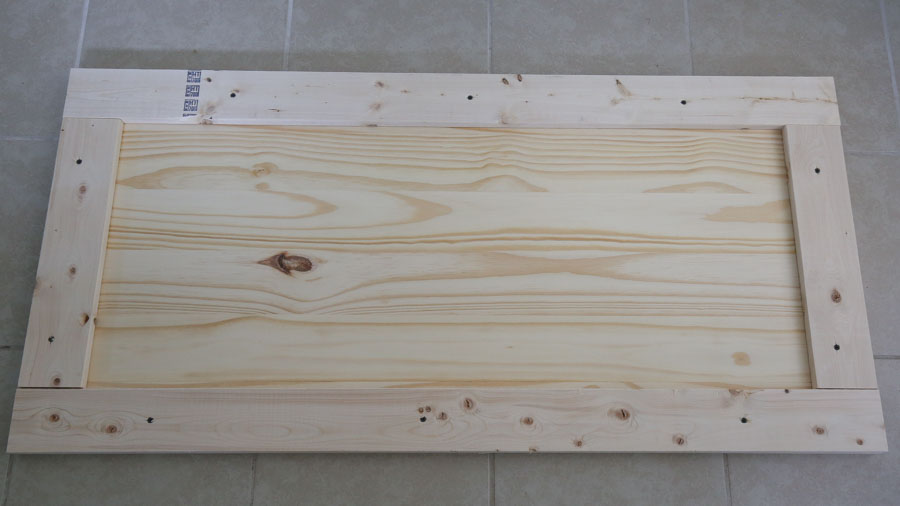
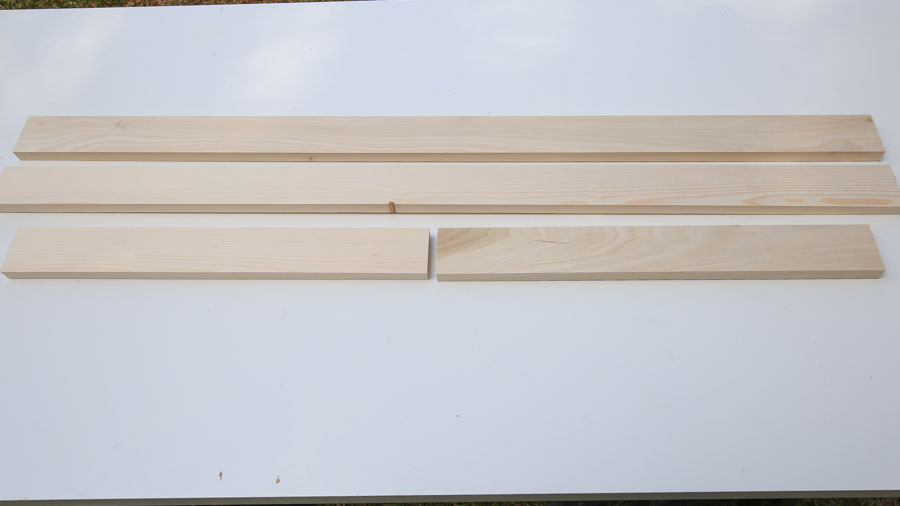
Next, make the following cuts from the 1x2s with 45 degree angled cuts to frame out the plywood panel:
- 2 pieces @ 48″ from short point to short point
- 2 pieces @ 23 1/2″ from short point to short point
- 2 pieces @ 31″ from long point to short point
Note: Make sure to measure your project panel board’s actual width in case it is a slightly different measurement than 23 1/2″ wide. If that’s the case, adjust the 23 1/2″ cuts listed above for that actual measurement!
Attach the 1×2 boards along the sides of the plywood panel with 1 1/4″ brad nails and wood glue.
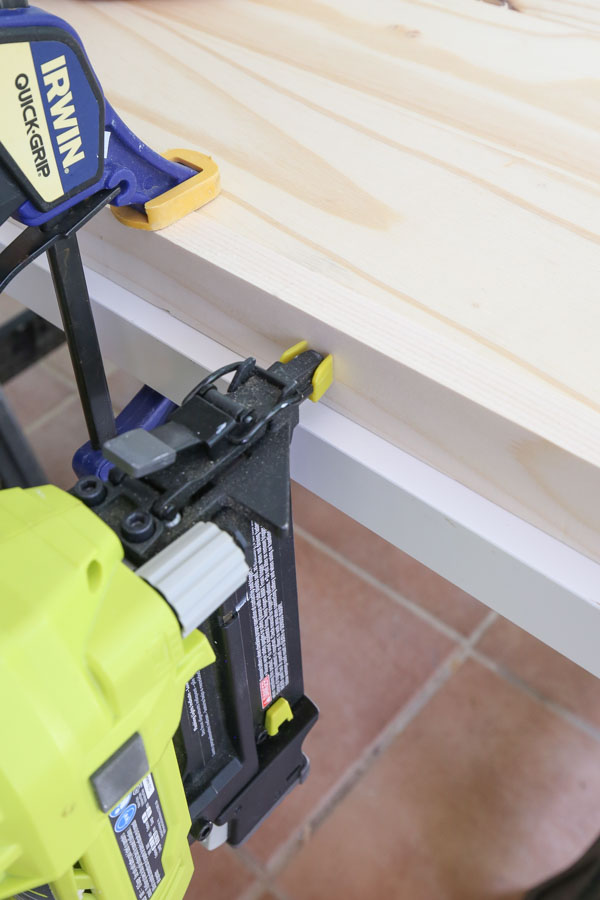
NOTE: We had about 1/16″ of the 1x2s sticking up over the plywood panel. We just sanded the boards down so that the top of the desk was all flush.
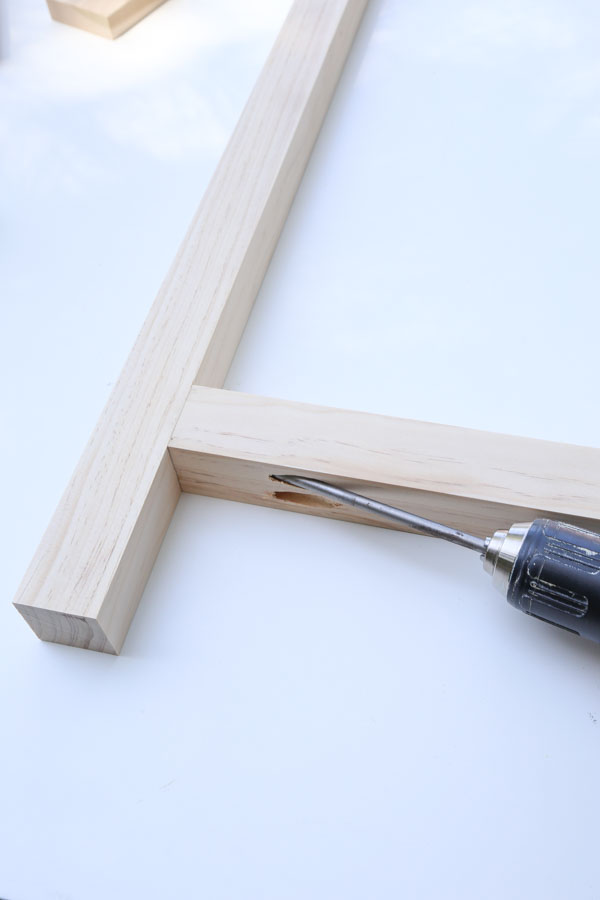
3. Add pocket holes to boards
Now it’s time to add pocket holes to the boards for assembling the desk legs and aprons.
Add pocket holes to each end of the following 2x2s:
📩 Want to Save This?
- 2 pieces @ 20″
- 1 piece @ 44 1/2″
Then add pocket holes to each end of the 1x3s and along one side of the 1x3s (as shown in the below photo).
4. Assemble the sides of the desk frame
Begin by building the two desk sides.
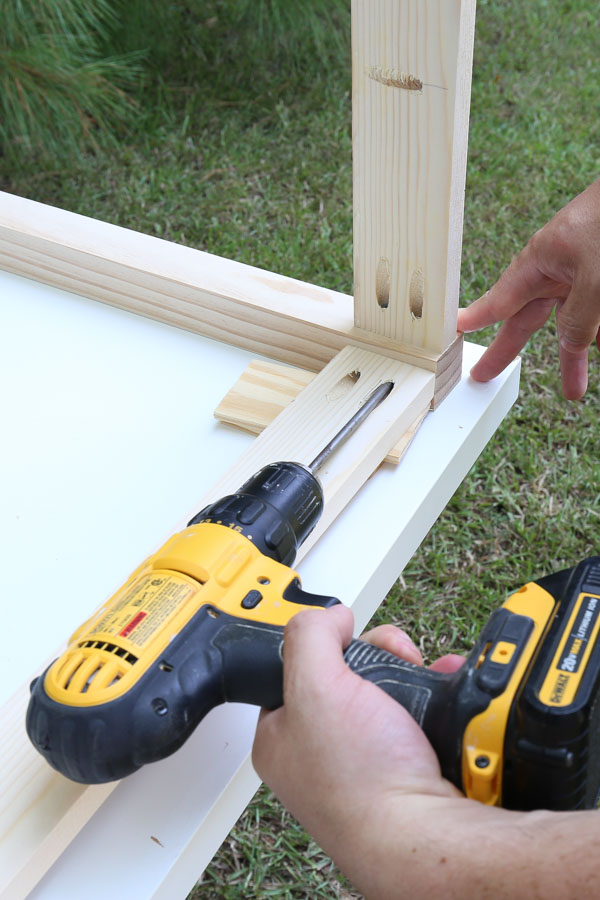
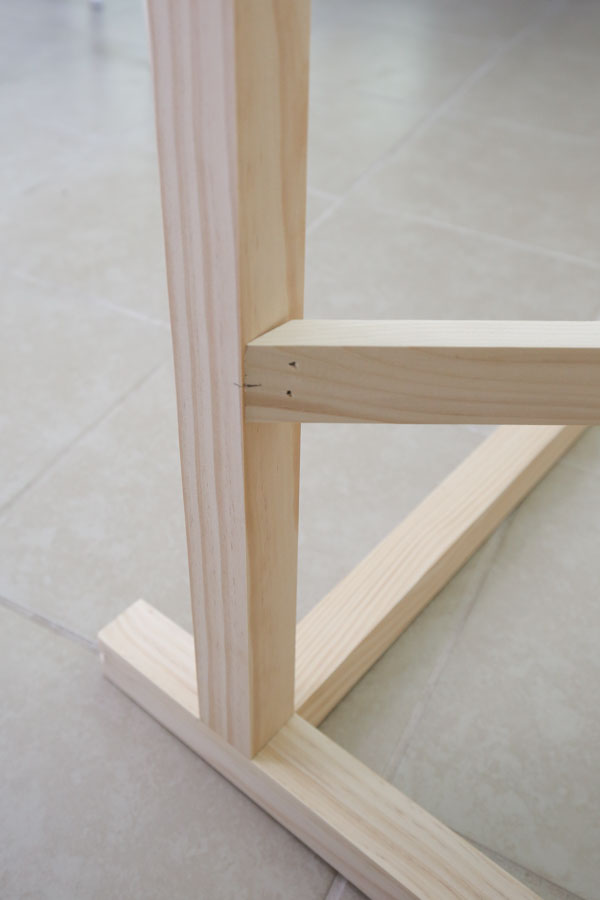
Mark 3 1/2″ up from the bottom of two 28 1/2″ 2x2s. Attach one of the 20″ 2×2 boards between the two 28 1/2″ boards at the 3 1/2″ mark using wood glue and 2 1/2″ Kreg screws.
Then, attach one of the 20″ 1×3 boards between the 2x2s at the top end with 1 1/4″ Kreg screws. Place 1/2″ wood shims or two painting stir sticks under the 1×3 so that it’s attached 1/2″ in from the edges of the 2x2s.
*Make sure that your side pocket holes are facing upwards since these are the holes that will be used to attach the desk frame to the top!
Repeat these steps for a second desk side.
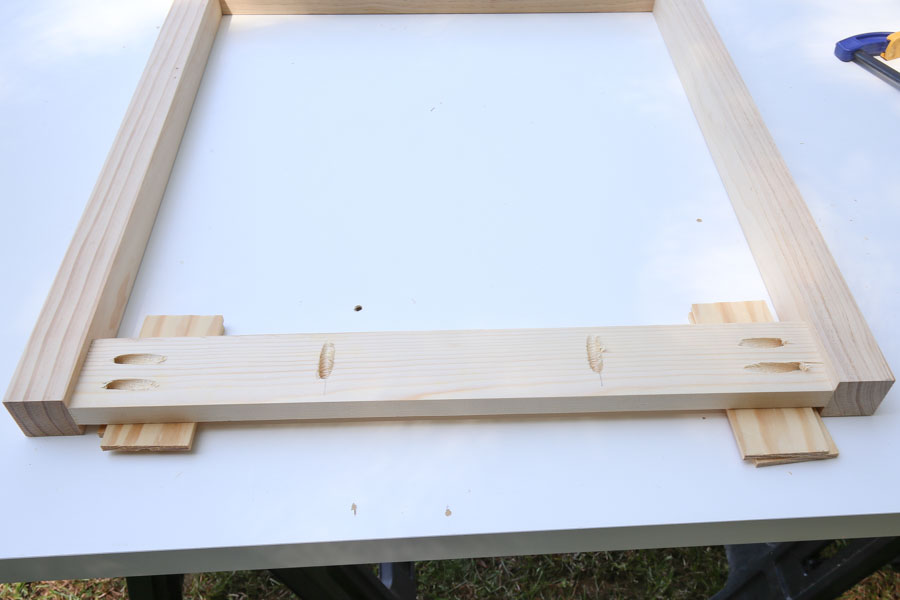
5. Finish assembling the front and back of the desk frame
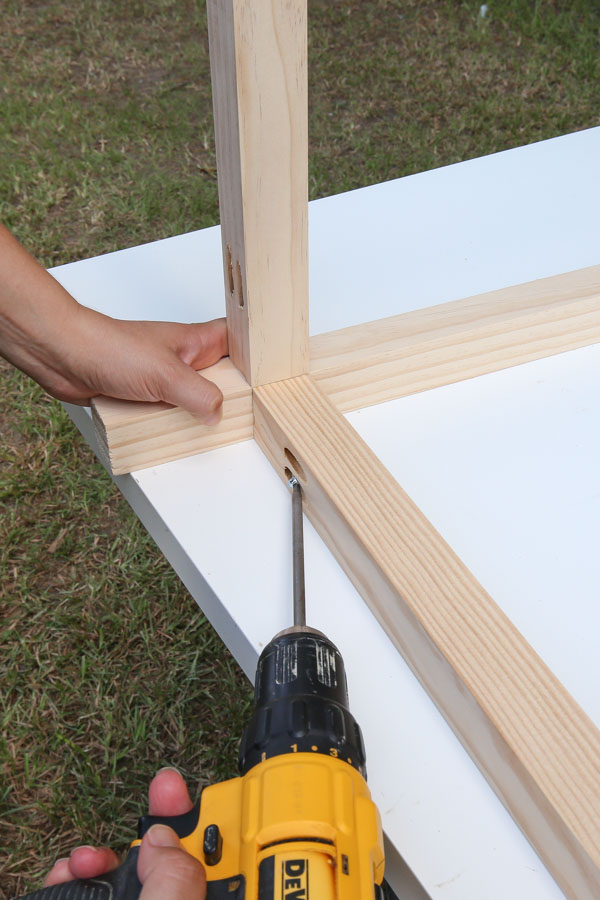
Attach the two 44 1/2″ 1×3 boards to the top ends of the desk side frames to create a front and back desk apron as shown in the photo below. Make sure to use the 1/2″ wood shims again while attaching. Use 1 1/4″ Kreg screws.
*Again, make sure that your pocket holes are facing upwards since these are the holes that will be used to attach the desk frame to the top!
Lay the desk down and attach the 44 1/2″ 2×2 along the backside of the frame 3 1/2″ up from the bottom of the desk legs using 2 1/2″ Kreg screws.
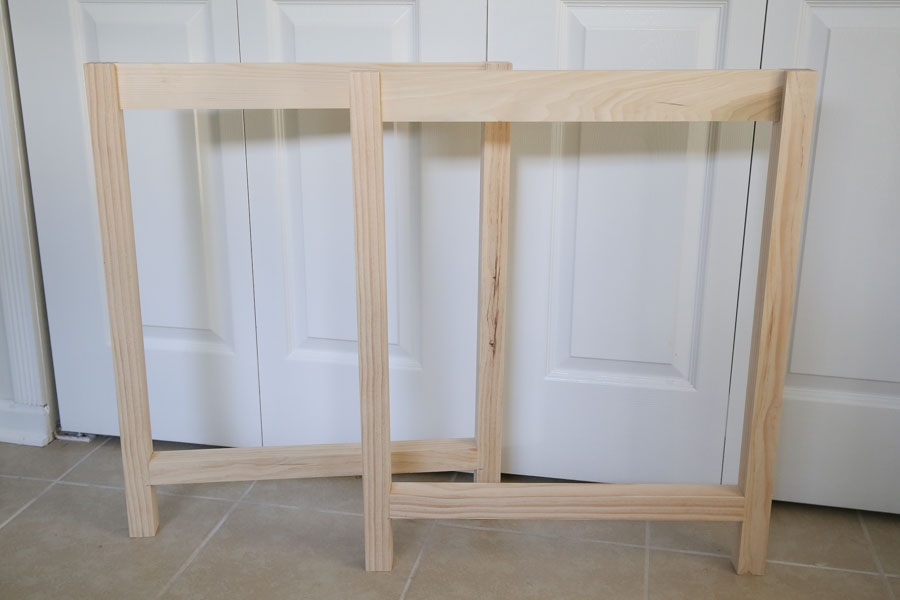
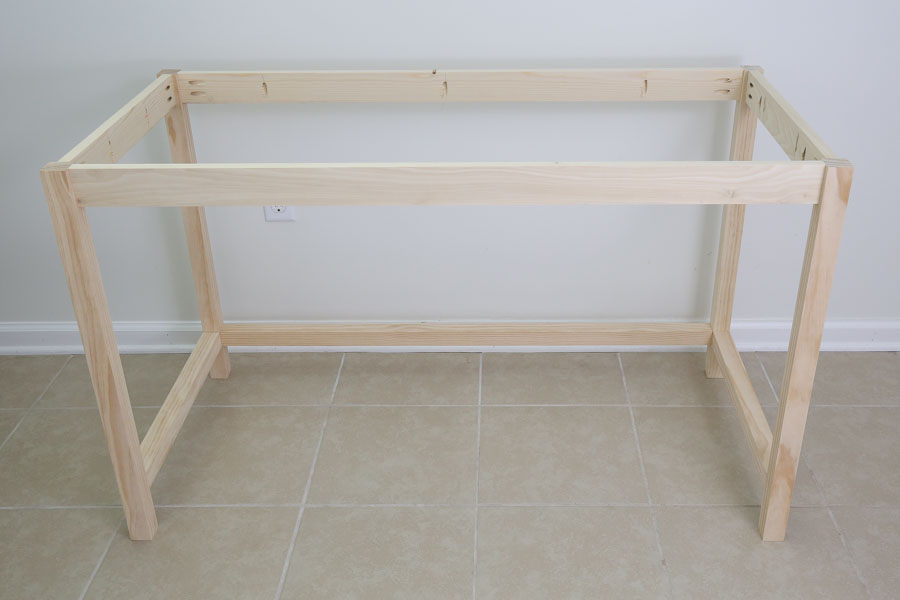
Here is what your DIY computer desk will look like at this point:
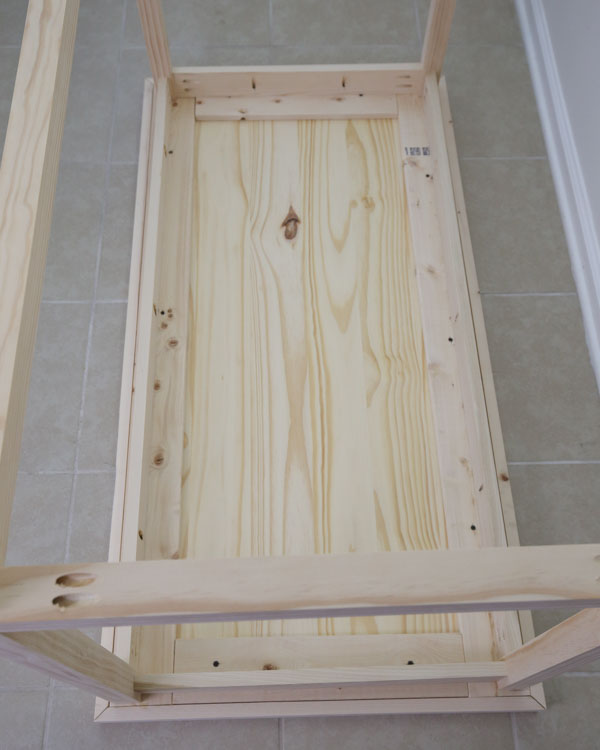
6. Attach DIY computer desk top to the desk frame
Turn the desk top upside down and mark 1″ in from the corners on all 4 corners. Then, line up the desk frame (upside down) with the desk legs at these marks so that the base frame is centered on the desk top. Attach the frame to the top with 1 1/4″ Kreg screws.
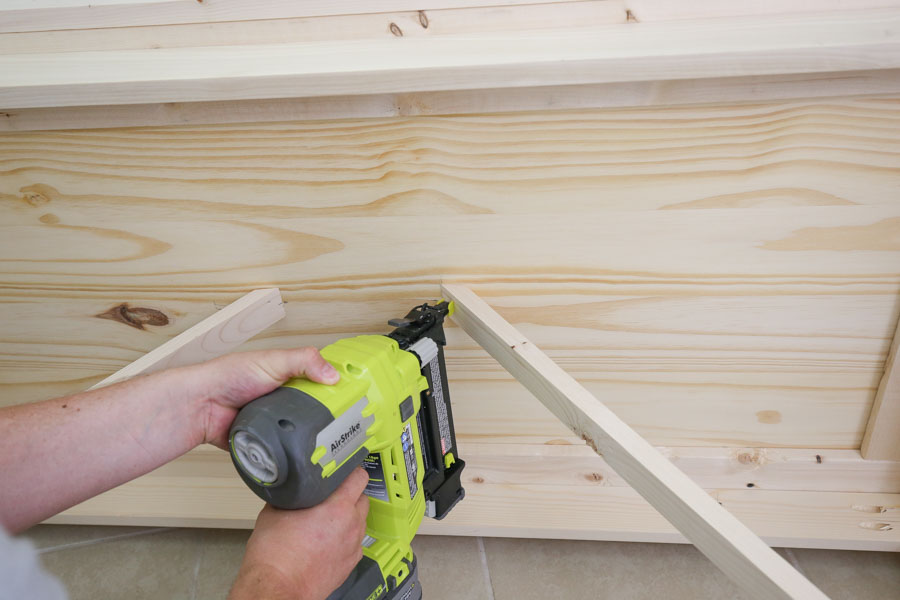
7. Attach V-design boards
At this point you can leave the desk as is or jazz it up a little with the v-design boards like I did!
Mark the middle point under the desk top between the two long aprons and mark the center point on the 20″ 2×2 side frames. Then, attach the 31″ 1×2 boards with 45 degree angled ends at the these points with 1″ brad nails and wood glue.
Yay now the DIY computer desk build is complete!

8. Paint or Stain DIY wood desk
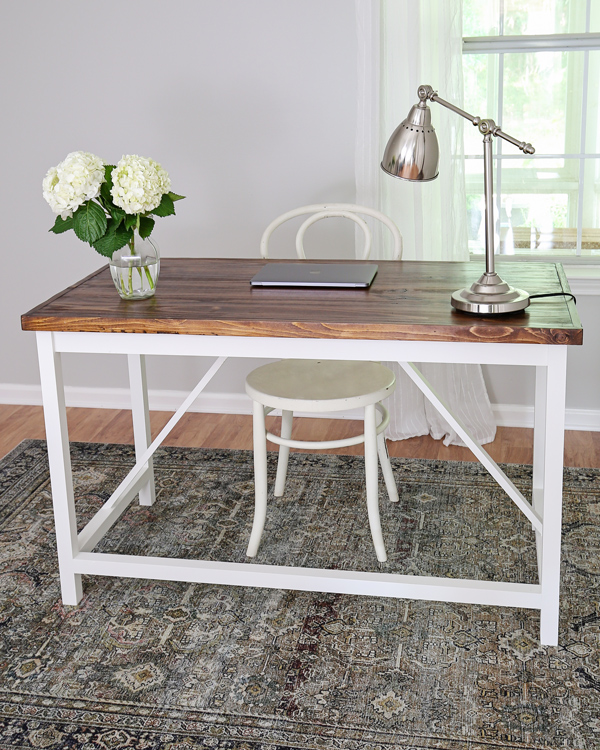
You can either paint or stain your desk! We chose to stain the top in an English chestnut stain and we sealed it with this polyurethane. And I painted the base in white dove by Benjamin Moore in eggshell.
This easy and simple DIY desk turned out great and we are loving it in our office, especially with our new rug too!
What do you think?! Are you need of a new desk too? I think we may end up building some kind of matching shelving unit or bookcase to go with it because I want to get our office more organized now that we have a pretty, new desk!
Follow along on Instagram and Facebook for my latest projects and sneak peeks!
Want to save for later?! Pin it here:
Alex
Tuesday 8th of October 2024
If you have a palm router / plunge router, you can use a roundover bit to round over the corners once the frame is assembled. It softens the edges, and the rounded corners look really nice.
It also hurts less when you stub your toe against it :)
Rita
Wednesday 18th of November 2020
Can I print out the directions for the desk?
Angela Marie Made
Thursday 19th of November 2020
You would need to print the actual web pages, I don't have any printable build plans for this.