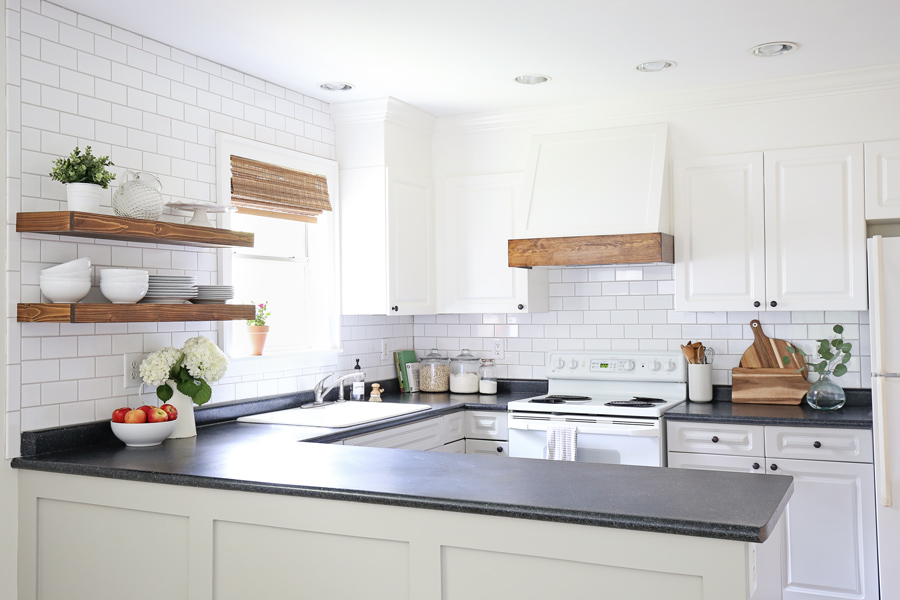
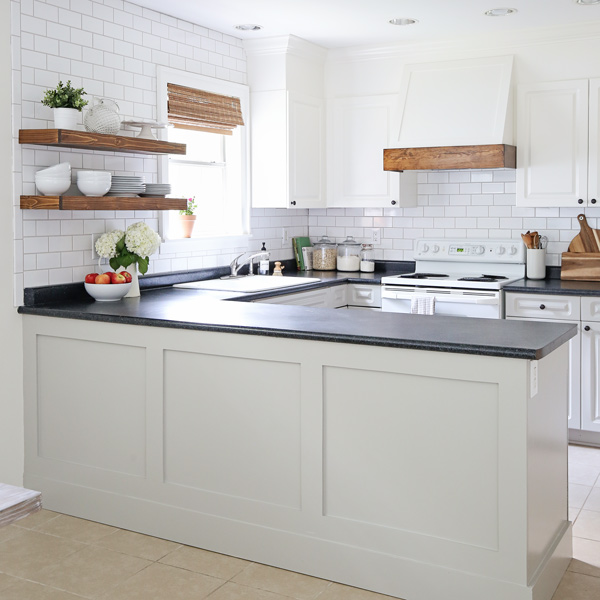
I’m excited to finally share the reveal of our DIY kitchen makeover on a budget! This kitchen makeover took Brandon and I many long weekends and nights to complete, starting back in March when I shared about the initial kitchen plans and our $1000 budget maximum.
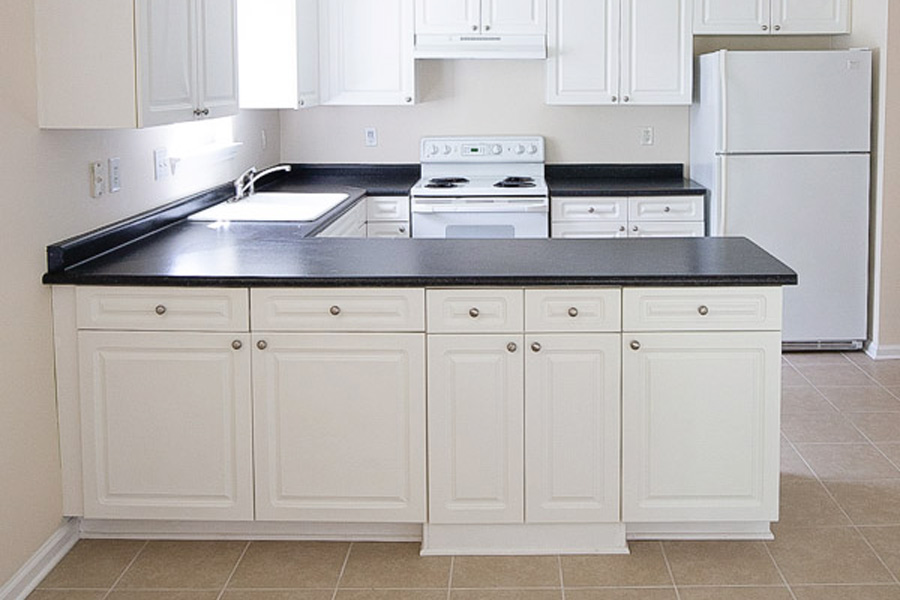
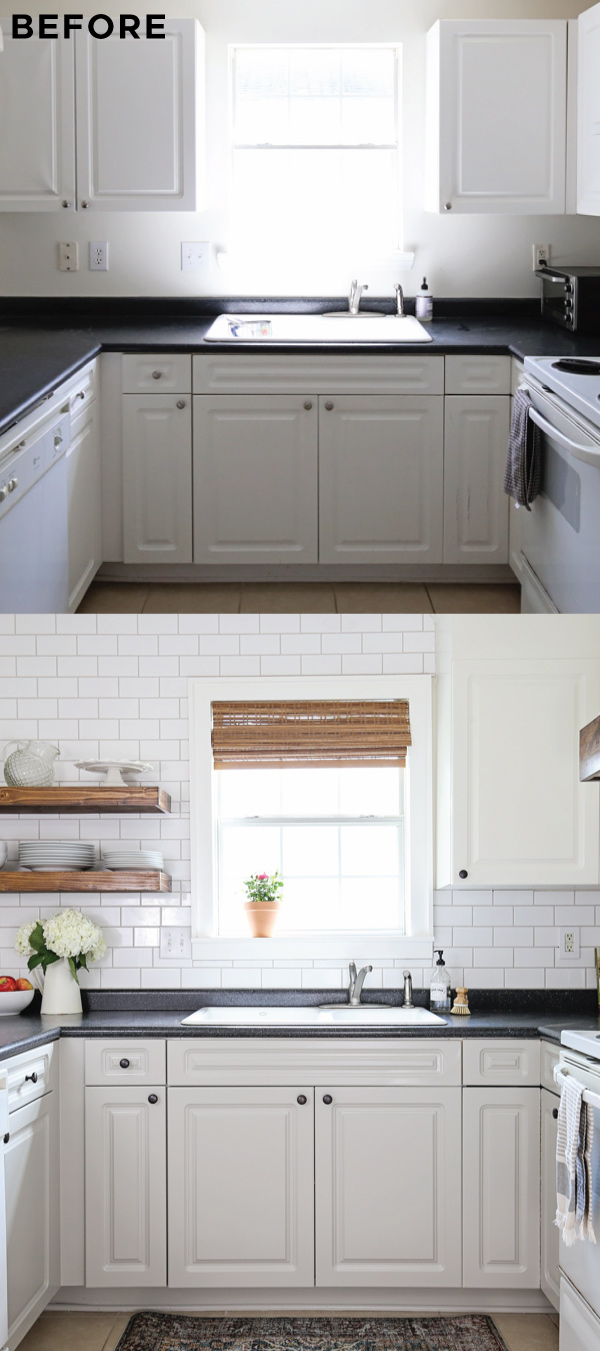
Here is a look at the BEFORE PHOTO:
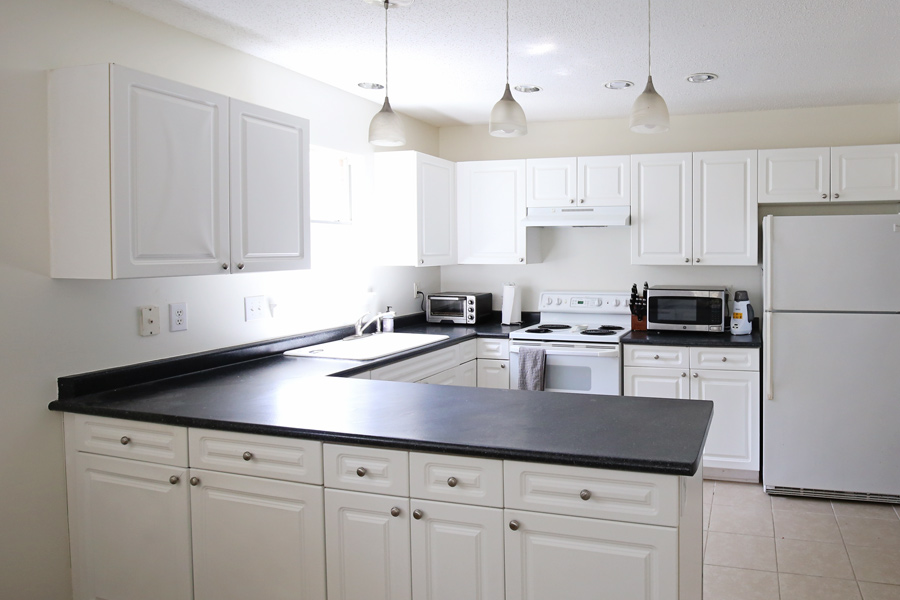
BEFORE MAKEOVER
Before I get started, I do want to mention that I have a full product and project source list at the bottom of this post, as well as a budget breakdown!
Further, you can see a full, DIY kitchen makeover reveal VIDEO of the whole process on my YouTube channel! It shows way more than the photos but I do share many details below, so check both out 🙂
Subscribe to my YouTube Channel here!
Note, this post contains some affiliate links. For more info see my disclosures here.
When we moved into our home, the kitchen was really basic and bland. The only updates we had made in it over a 1.5 year time frame, were painting the yellow beige walls white and adding a pull out trash and recycling cabinet.
Honestly, I avoided doing any updates in the room because kitchens are so intimidating to update. Not only are they usually a larger space, but in general they are typically quite expensive and labor intensive to update.
At the same time, kitchens are the heart of the home, so I really wanted to warm the space up and make it feel more like us. I decided to stop waiting for a big budget makeover with dreamy everything and just make the most of the space using DIY and a $1000 budget maximum.
In order to stick to our $1k budget, we had to keep our current cabinets, counters, flooring, and appliances, basically all of the major features of a kitchen. And I really wanted to replace our black laminate counter tops, I seriously can’t stand them! I dream of marble kitchen countertops or quartz countertops that look like marble!
To make the most of the budget, I focused on budget friendly, DIY projects that really make a big impact and add custom character that you don’t get with a standard kitchen. And of course updates that would make the black laminate countertops look better so I wouldn’t dislike them quite so much!
For the style of this kitchen, I didn’t create a mood board like I normally would have because we have a baby now and I just didn’t have the time! Instead I had a bunch of ideas in my head, random photos pinned to a Pinterest board, and a vision in mind that I just followed through with.
BEFORE:
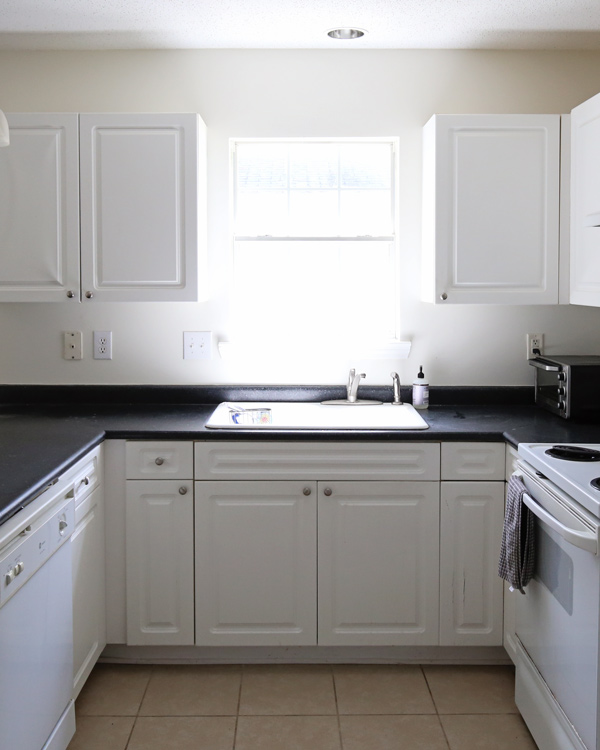
BEFORE makeover
Overall, I’d say the style is classic with a touch of modern farmhouse and cottage style. What would you say it looks like? Haha see I just had a mix of ideas.
Because I was working with laminate countertops and less expensive appliances and cabinets, I did try to do a classic design, color, and style plan that would compliment and enhance everything. This meant a combo of fresh whites, warm grays, oil rubbed bronze metals, and adding golden brown, stained wood elements.
I stayed away from using color on any of the big kitchen features and added color instead through the decor (like the vintage looking rug) and natural kitchen elements like greenery and fruit.
DIY Project 1: Remove upper cabinet and install DIY floating shelves
The first project we did was remove our bulky upper cabinet to the left of our sink, which was awkward to open. This cabinet blocked off the natural light and flow of the space.
We replaced the upper cabinet with DIY floating shelves instead. Although, we ran into quite a few issues with the installation of our floating shelves because of some missing studs, they were totally worth the hassle. 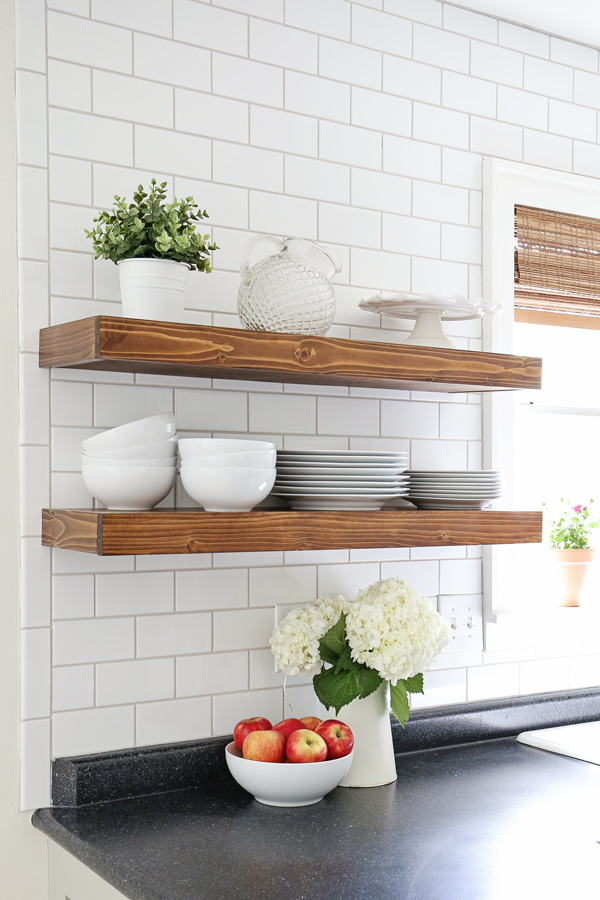
Not only do I love the look of the floating shelves, with the warmth and openness they provide, but functionality wise, they’ve been great! We keep our bowls and plates on the lower shelves, which makes it really easy to grab them and unload them from the dishwasher. Plus, we use them daily, so we don’t worry about them getting dusty.
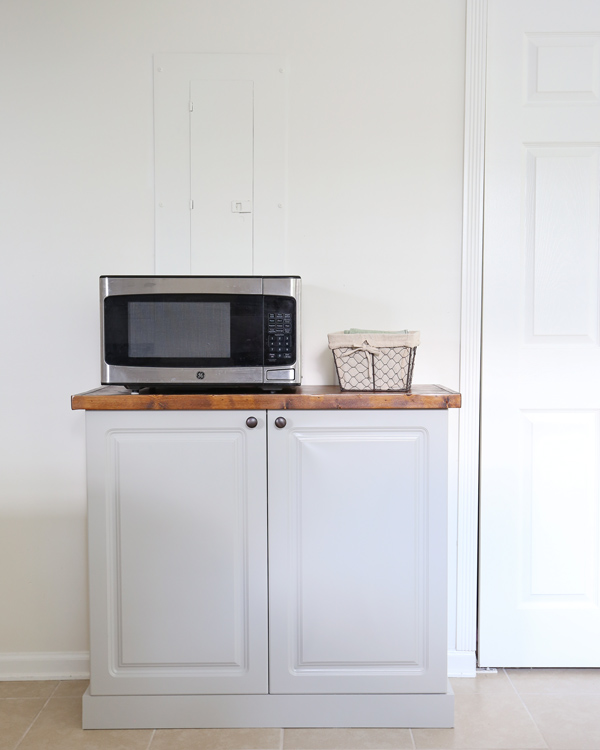
DIY Project 2: Create a built-in cabinet and countertop with old upper cabinet
We up-cycled the upper cabinet we removed, and turned it into a built cabinet on the side of our kitchen, with a custom wood counter top. So, we didn’t loose any of the storage space and we gained additional countertop space that we are using to hold our microwave and keep it out of the main view of the kitchen. This built in only cost us $20 to install!
We also primed and painted our electric panel above the built-in to be the same color of the wall so it blended better.
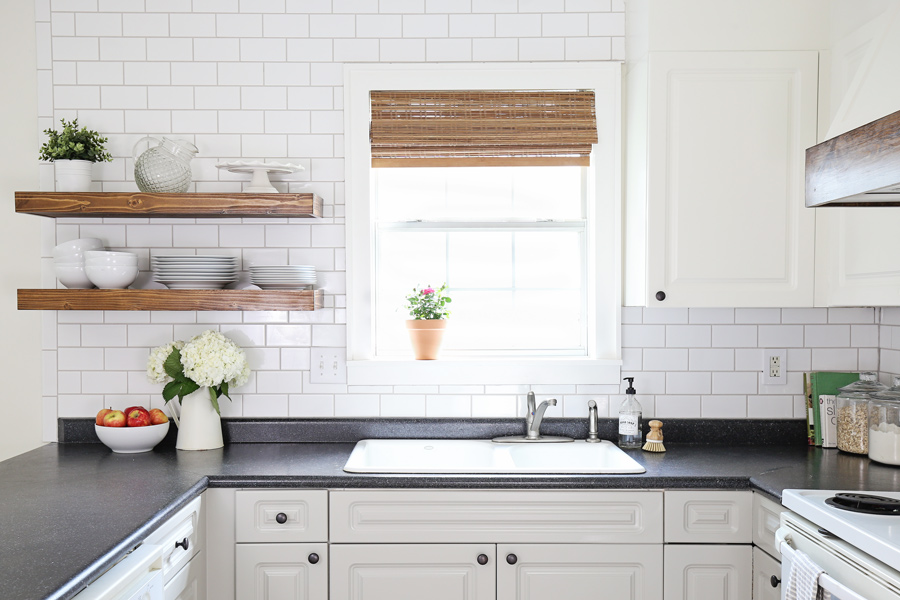
DIY Project 3: Install a subway tile backsplash
After removing our upper cabinet and before we installed our floating shelves, we completed a major DIY project for the space, which took up a big chunk of our budget: installing a subway tile backsplash. Originally, I budgeted only $200 for this project because we already had the tools for installing tile, so I thought inexpensive subway tile wouldn’t cost much.
However, once we got started, we ended up needing more mortar and other supplies than I anticipated, costing us an extra $100. Ugh!
Also, I originally planned on doing a dark grout to go with our dark laminate counter tops. But, last minute, we went with a light gray grout because we were worried that the dark grout would show too many of the imperfections of our tiling job.
This was only our second tile job, so we played it safe with the lighter grout. Although I do like how the light grey turned out, I kind of regret not going with the dark grout because I think it would have looked really good!
Either way though, I love the custom character of the classic, white subway tile. It totally elevated the look and feel of the kitchen.
I did realize that tiling is just not a DIY project I prefer to do though haha. I love woodworking, that’s my jam!
I understand why contractors charge a lot for tiling after doing an entire kitchen backsplash! It seemed much harder than installing our hexagon, porcelain tile that looks like marble in our small bathroom renovation.
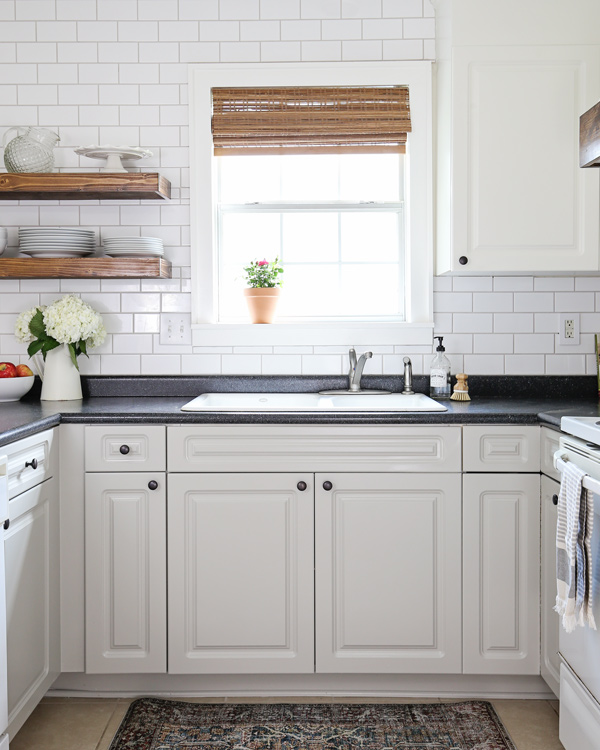
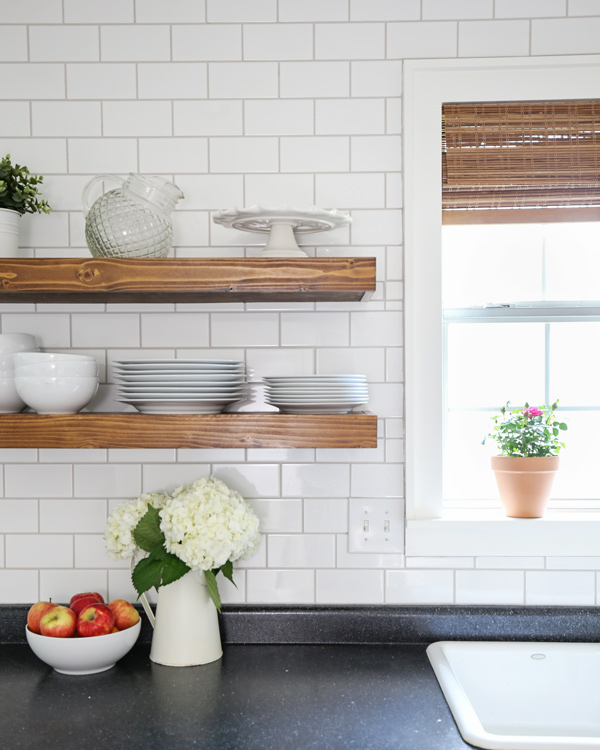
DIY Project 4: DIY window trim around kitchen window
Let me back up one step real quick, I forgot to mention that before adding subway tile, we covered our phone jack outlet (it wasn’t pretty nor in use) with a drywall repair kit and we installed DIY window trim using the same tutorial as our living room window trim.
It’s a small project, but it adds that custom, classic character look that I love. Plus, how cute is my little rose flower pot on the new window sill?! It’s the first sight you see when you walk in the room. We also added bamboo roman shades that I love too, which add texture and warmth to the space.
📩 Want to Save This?
DIY Project 5: Board and Batten Kitchen Island Makeover
The next big project we tackled was a board and batten kitchen island makeover.
Our island had cabinets on both sides, it just looked funny to me. Most of the drawers and the middle cabinets didn’t actually work, so they weren’t functional at all.
The whole concept just wasn’t working, so we removed the drawers and doors and installed board and batten. I think it looks much better now!
Here is a before look at the island for a comparison:
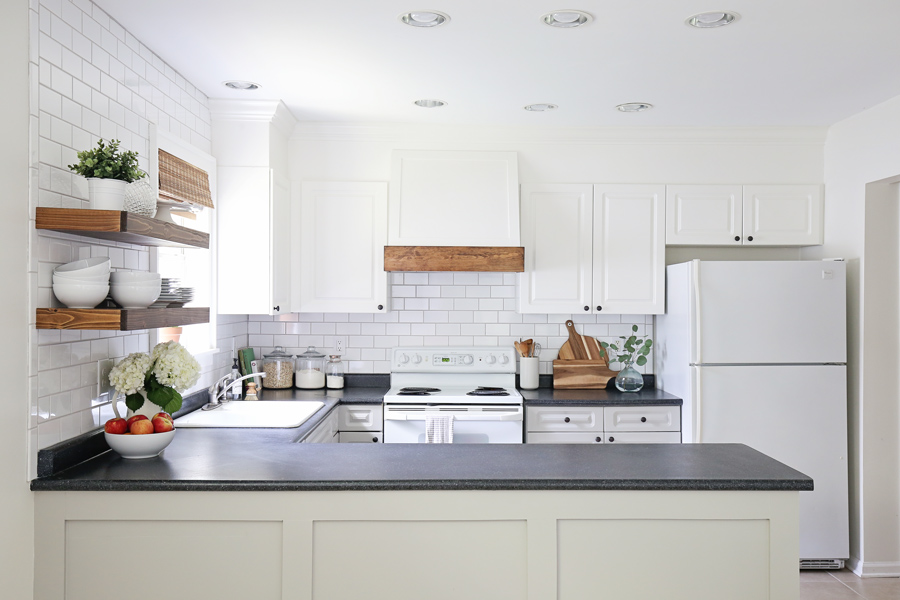
DIY Project 6: Update Lighting
After transforming the island we moved onto the top view of the kitchen! I removed the pendant lights over the island. They just weren’t my style, the scale of them wasn’t right and they really blocked the view into the kitchen area.
I replaced the pendants with recessed lights which is what they were originally installed as and it was such an easy and cheap project that made a big difference!
Speaking of lighting, I really wanted to convert our recessed light over the sink into a cute, pendant light, but it was one of the last projects on my list and we ran out of money (and time) in the budget because I was going to have to buy a converter kit and a medallion in order to center the light over the sink.
I was super bummed and wish I would have made this happen. I even ordered some pendant light options, but ended up returning them to stay on budget.
DIY Project 7: Remove popcorn ceiling and paint ceiling
After removing the island pendants, it was time to remove our popcorn ceiling. This is the last popcorn ceiling project ever that we do lol. It’s so messy, why do contractors install this awful stuff?
I show how we removed our popcorn ceiling in our DIY kitchen makeover video, but here’s an overview. First, we used painter’s tape and taped plastic up everywhere, the walls and the floor.
Then, we used a weed sprayer and sprayed water on the ceiling in sections, and then scraped with a drywall taping knife into a bucket to catch most of it.
Then, we removed all of the plastic. After that we added two coats of ceiling paint and then cleaned up all the dust from the kitchen floor. The least favorite project by far! But, wow what a difference the updated ceiling made! So fresh and clean and bright!
DIY Project 8: Enclose the space above the kitchen cabinets
After that we enclosed the space above the kitchen cabinets and added crown molding. This project really elevated the cabinets from standard and boring to custom and pretty! I love molding and it’s one of the best ways to add character to any space!
DIY Project 9: DIY Range Hood Cover
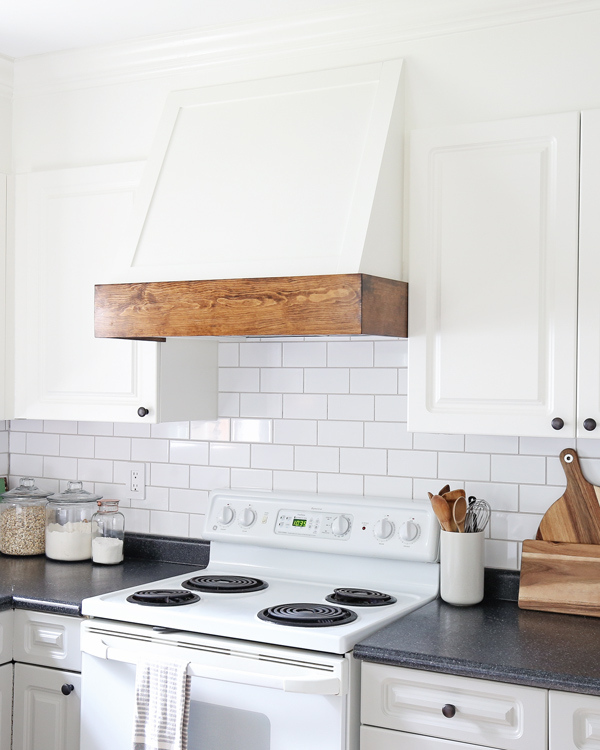
My absolute favorite DIY project for this DIY kitchen makeover was the DIY range hood cover. It is now the focal point of the room and just gorgeous! It adds warmth, character, and style to our kitchen.
Before we added the DIY hood range cover, our range hood was really outdated and not a pretty sight. We replaced the range hood and built a custom range hood cover for less than $200 and it transformed the room dramatically. I just love it! It makes our old stove look so much better too!
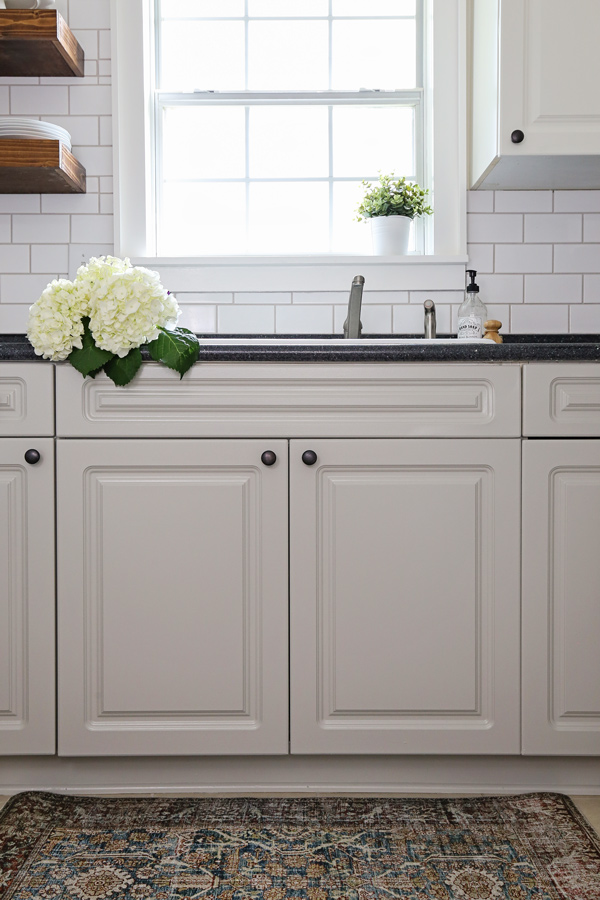
DIY Project 10: Paint kitchen cabinets & add new knobs
The last DIY project we completed was painting laminate kitchen cabinets and adding new, oil rubbed bronze knobs which helped to compliment the black laminate counter tops. We used White Dove by Benjamin Moore for our upper cabinets and Mindful Gray by Sherwin Williams for our lower cabinets.
Decorating the kitchen
After finishing all of the DIY projects, it was time to decorate! I added this cute, vintage rug under the sink. I love the style and feel it adds to the space!

Besides the new rug, most of the decor and items in the kitchen we already owned, so I just decorated with what we had and tried to keep things functional and pretty.
I did pick up fresh flowers and eucalyptus from Trader Joe’s which I added to some flower vases and pots.
The only other update I ran out of money for, besides the over the sink pendant light, was a new kitchen faucet. It’s probably much less noticeable though in the grand scheme of things, so I’m not as bummed about this as the pendant light and dark grout.
The Kitchen Makeover Budget
I tried my best to keep track of everything for this makeover. The full breakdown is at the bottom of this post. The total came in at $963! This is the first time I’ve ever stayed under budget for a room makeover! It meant forgoing some fun items, like a new facuet and pendant light, but it all worked out!
***
Wow I can’t believe everything we did! I really love how it turned out despite all of the challenges. It’s a huge improvement from where we started.
I enjoy walking into this space every morning and drinking my coffee with the sun shining through our cute, updated window and kitchen!
Not only do I love the look of our updated kitchen, but it’s much more functional now and I’m so happy we were able to utilize DIY to stay under our $1000 budget!
Brandon can’t wait to cook all of his easy, simple, and delicious recipes in our beautiful, updated kitchen! And I can’t wait to enjoy them in this space now.
Thanks for following along on our kitchen makeover on a budget journey! Follow along my latest projects and sneak peaks on Instagram, YouTube, and Pinterest!
DIY Kitchen Makeover Sources, Projects, and Budget:

- Subway tile (similar here) & supplies – $266
- Grout (warm gray) (similar here) – $34
- Bamboo Roman Shades – $50
- Rug
- Knobs – $40
- Utensil Holder – already owned – $0
- Vases (Michael’s & Home Goods) – already owned – $0
- Wood Dish Scrub Brush – already owned – $0
- Glass Jars – already owned – $0
- Cutting Boards – Home Goods – $28
- Built-in Cabinet – $20 (see mini how to in video)
- Popcorn ceiling removal – $0 (see mini how to in video)
- Ceiling Paint – $25
- DIY Floating Shelves – $40
- DIY Board and batten kitchen island makeover (& gray paint) – $90
- Enclosing space above cabinets – $60
- Painting laminate kitchen cabinets (& white paint) – $55
- Range hood – $140
- DIY range hood cover – $29
- DIY Window Trim – already owned supplies needed – $0
- Other misc. – $53
- GRAND TOTAL: $963
Paint Colors Used:
- Upper Cabinets & Enclosure – White Dove by Benjamin Moore in satin
- Lower Cabinets & Island – Mindful Gray by Sherwin Williams in satin
Save fore later! Pin it here:

Dianne George
Monday 2nd of March 2026
I have Peacock green granite counter tops. They have turned into an eyesore. I installed a back splash. I also wanted to add shallow cabinets with maybe two small pantry along my far wall. I thought of using a very light green subway tile for the backsplash and getting the far wall cabinets in the same color. would , in your opinion update the space? then what neutral color would I paint the walls. My cabinets are Kraft maid maple.
Josee
Tuesday 2nd of July 2024
You are so talented! thank you for your inspirations.I hope to be as comfortable as you are with the woodworking some day.
Angela Marie Made
Wednesday 10th of July 2024
Thank you! You will, keep at it! :)
Patty
Sunday 11th of June 2023
Do you have a tutorial for installing subway tile backsplash that you added in your kitchen? I just bought a home and I want to try this myself. Thank you so much! Patty
Ken Bingo
Saturday 3rd of September 2022
I was trying to send you pics of my cabinets. They don’t go to ceiling, look beautiful and I just sprayed them
Angela Mendoza
Thursday 30th of July 2020
That hood....fabulous! Can you give more detail on how you built that?
Angela Marie Made
Tuesday 4th of August 2020
Thanks! The video linked above shows all the steps!