
After taking a break from projects for several weeks, I’m ready to get back in the groove again!
I love to work on tidying and organizing in January (like so many others), however I feel like I have a lot of organizing and decluttering to do which is probably going to take more than one month haha!
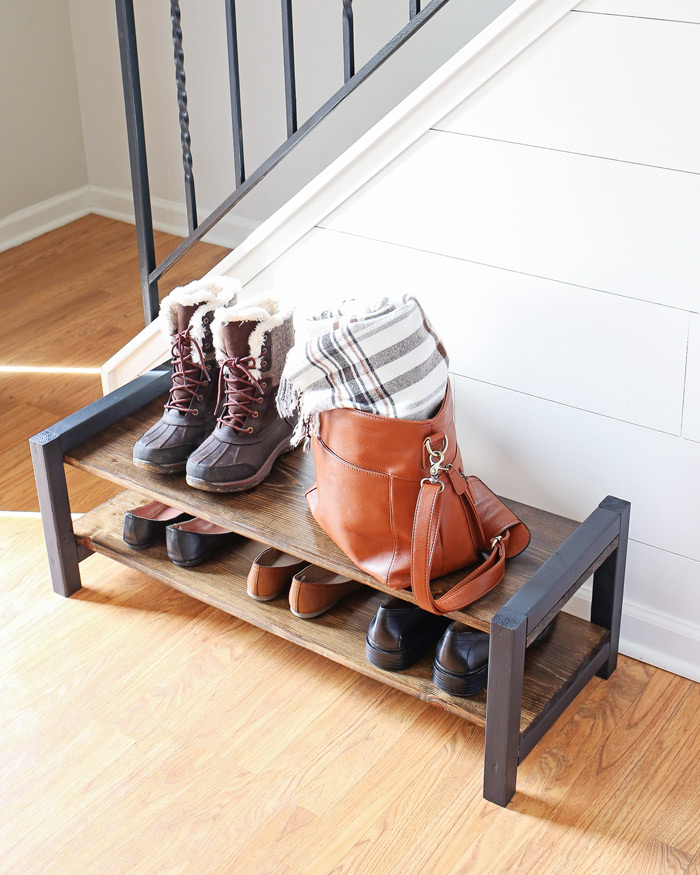
One of the first problems I wanted to tackle was the shoe pile up that kept happening by our front door entryway, as well as in our hall closet.
I knew I wanted a shoe rack that was pretty enough to display by the front door, but also that was simple to build and easy to use and throw shoes on top of daily. So, I came up with some Entryway DIY shoe rack plans!
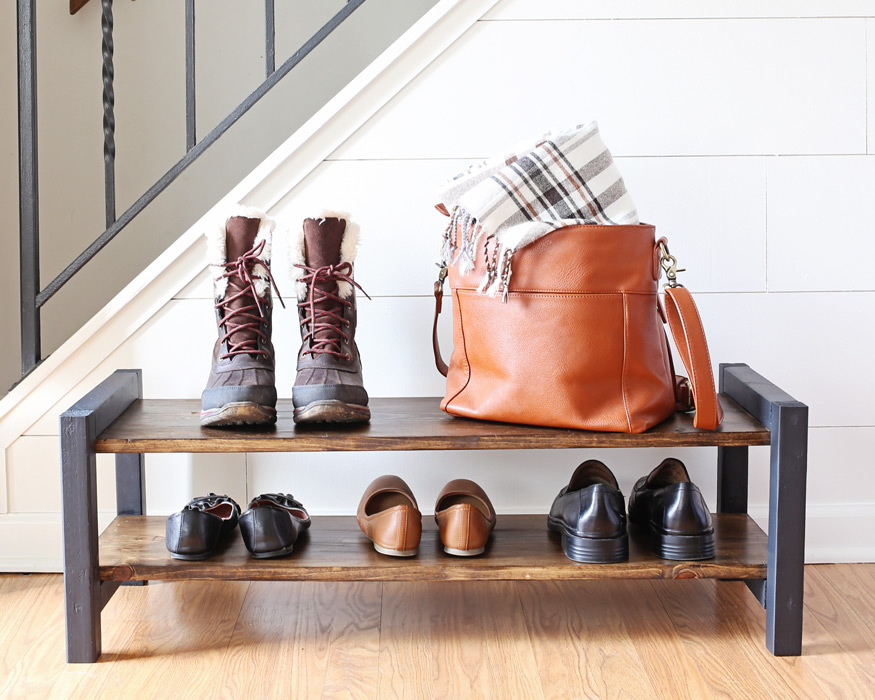
This project cost me less than $15 in building materials. The final size of the Entryway DIY Shoe Rack is about 12″ tall x 14″ deep x 36″ long.
Note, this post contains some affiliate links. For more info see my disclosures here.
How to build an Entryway DIY Shoe Rack:
Materials
- (1) 2×2 @ 8ft
- (1) 1×12 @ 6ft
- 2 1/2 inch, 2 inch, and 1 1/4 inch wood screws
- Paint (I used Black satin by Benjamin Moore)
- Stain (I used Dark Walnut by Minwax)
- Polyurethane (I used this water based poly)
- Lightweight Spackle
Tools:
- Miter saw
- Drill
- Brad Nailer
- Clamps
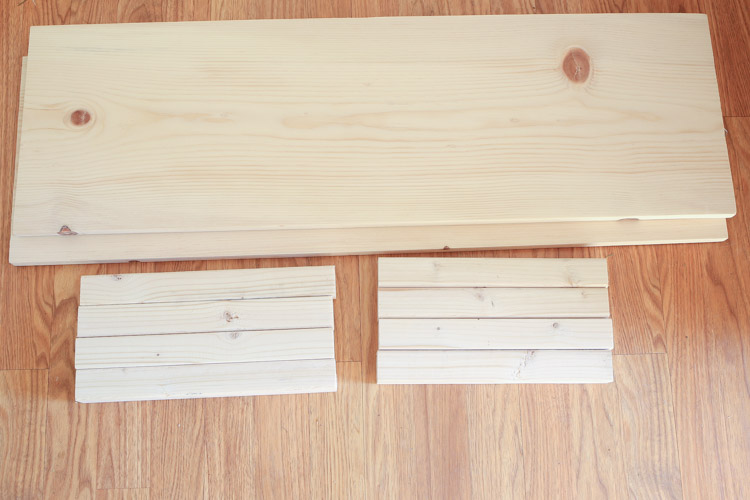
1. Cut wood to size
Use a miter saw and make the following cuts for the 2×2:
- 4 pieces @ 12 1/4″
- 4 pieces @ 11 1/4″
For the 1×12 @ 6ft, cut in half so two 3ft pieces remain. Have your home improvement store cut this in half for you (unless you want to make the cut yourself).
Note, I went ahead and stained and painted my wood at this point before assembling everything. This isn’t necessary to do now but I found it was helpful.
2. Assemble Shoe Rack Frame Sides
Attach one of the 12 1/4″ pieces to the end of the 11 1/4″ piece using a 2 1/2″ wood screw. Make sure to drill a pilot hole first. Also, be sure to countersink the screw so it’s beneath the wood surface level so you can cover these holes later for painting. The 2×2 wood is soft enough to push the screw in a bit below the surface level.
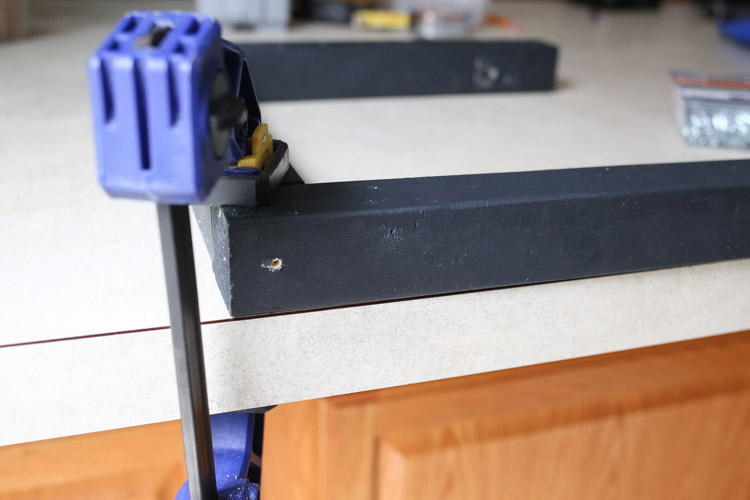
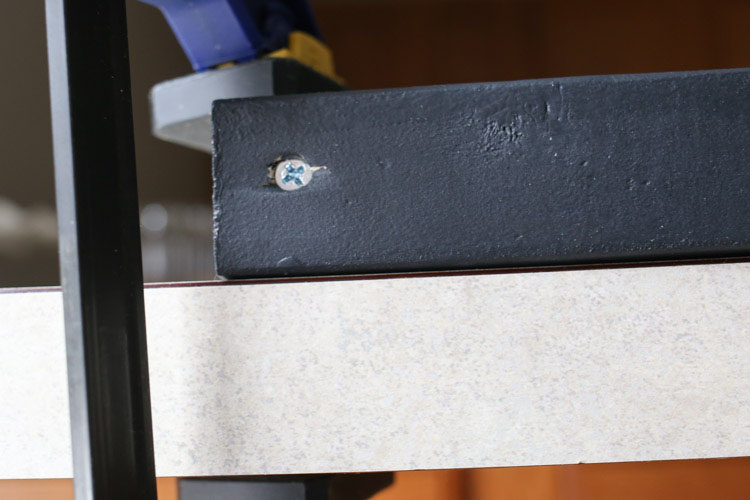
Repeat on the other side and your shoe rack frame should look like this:
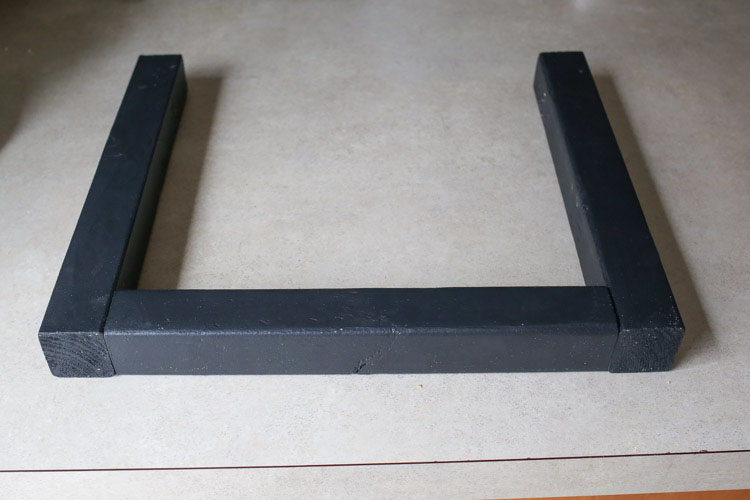
Repeat the above steps for the other side of the frame.
📩 Want to Save This?
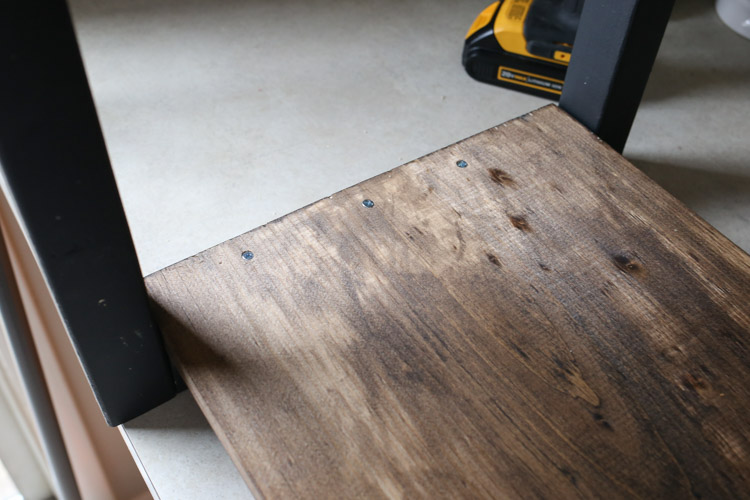
3. Attach top shelf of Shoe Rack
Sit one of the shoe rack frames straight up and lay one of the 1×12 @ 3ft pieces (this will be the top shelf, it’s upside down in this step) on top of the 11 1/4″ wood piece. Line the edges up and clamp in place. Then, drill 3 pilot holes and attach to the 2×2 frame with 1 1/4″ wood screws.
Repeat on the other side.

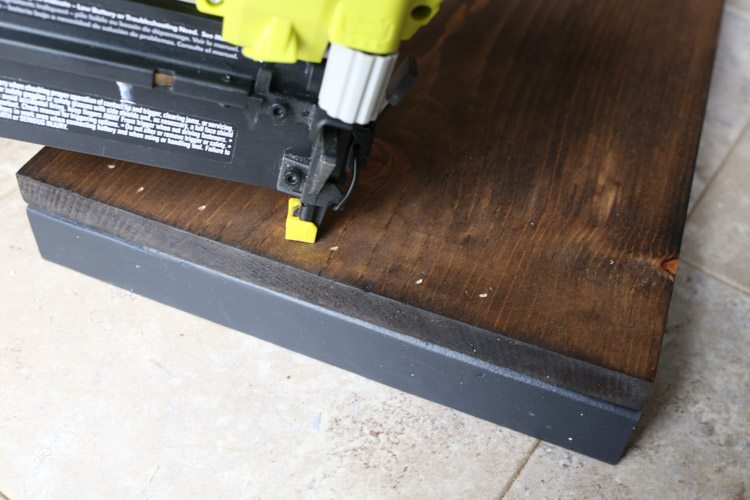
4. Attach Bottom Shelf to Shoe Rack
Lay the other 1×12 board on top of the two remaining 11 1/4″ wood 2×2 pieces, with one 2×2 piece at each end. Attach with 2″ wood screws through the bottom of the 2×2 pieces OR you can attach with brad nails and a brad nailer from the top of the 1×12 like I did in the below photo. But, if you don’t have a brad nailer, just flip upside down and attach with pilot holes and screws from the bottom of the 2×2 instead. I went a little overboard with the nails…
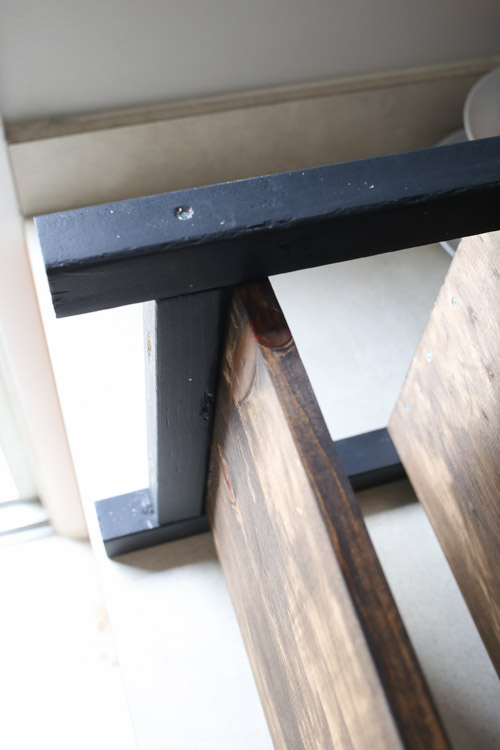
Then, attach this bottom shelf to your Entryway DIY shoe rack. To do this, turn the shoe rack on its side and lay the bottom shelf on its side too and place it so it’s 1 1/2″ up the side of the 2×2. Then, drill a pilot hole and attach with a 2 1/2″ wood screw countersunk again (it helps to clamp in place for this step). Repeat for the other 3 sides.
5. Fill Holes and Paint/Stain
Fill the screw holes in with a lightweight spackle and then paint over them. If you didn’t paint/stain like I did in step 1, go ahead and do that to finish your Entryway DIY shoe rack! Also, I added two coats of water based poly on the stained wood for added protection. For tips on how to stain wood for a beautiful finish, check out my How to Stain Wood post.
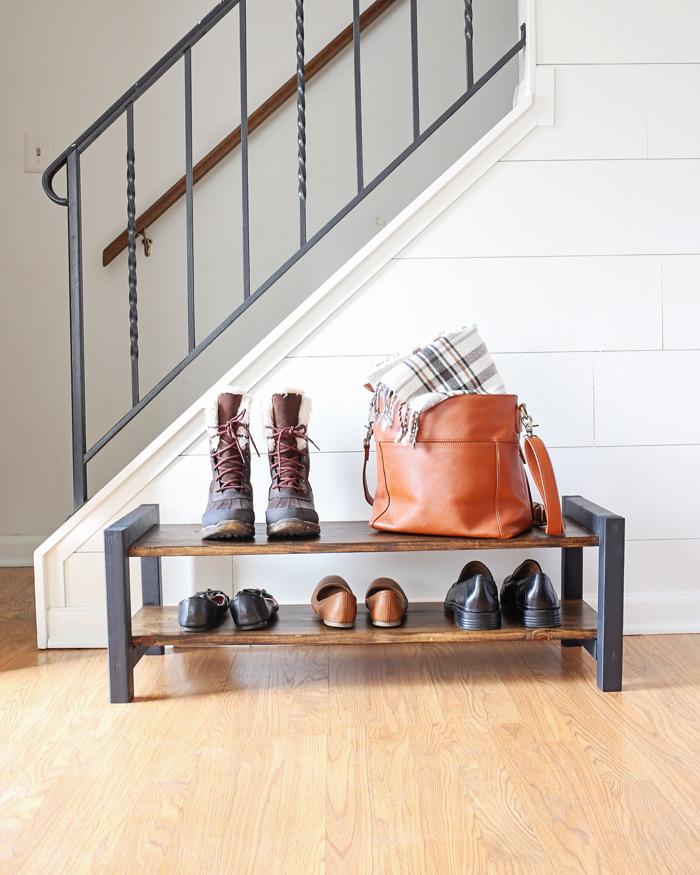
I haven’t decided yet if we will always keep the Entryway DIY shoe rack by the front door, it may get moved into our hall closet once I tidy and declutter that space. I really don’t like shoes out at all, but Brandon really doesn’t like having to go into the closet for his shoes, so we shall see!
Have you started any organizing projects so far this year?! I’ll be sharing a more fun organizing tutorial next week, stay tuned!
Follow along on Instagram and Facebook for my latest projects and sneak peeks!
Brian
Sunday 14th of August 2022
So I thought this was a brilliant idea . I went ahead and made some tweaks - made the shelves about 4.5 feet long.. made the middle part of the arms an inch longer and then positioned the shelves on opposite ends (you get a stair step almost). I think it adds some character with a tiered look! Appreciate the idea - was really nice to get back in the shop again! - Brian
Angela Marie Made
Monday 15th of August 2022
Very cool! So happy to hear this project got you back at it with woodworking!!
billy
Wednesday 1st of June 2022
Not sure if you read this anymore.
I have a few questions about this, as I'm a tad confused. Please forgive my ignorance on the matter as this area is very foreign to me but something I've always been interested in.
The materials list has a 1x12 and then pieces of wood cut to 12 1/4'' and 11 1/4'' .
As per the steps, the 1x12'' board is to be placed on top of the 12 1/4'' frame piece. According to her photos though, the board and legs are completely flush. Shouldn't there space since it's not an exact measurement?
Is there something I'm missing with those instructions?
Furthermore, If I wanted to make an adjustment to this project (I have a 1x11 1/4'' x 6 feet, not 1x12 - it was advertised wrong or cut wrong at the store) how would you adjust the legs/frame measurements?
If the board is 3/4'' shorter than the directions, should I reduce the other measurements by 3/4'' as well?
Apologies for the wall of text. I appreciate any help. Thank you kindly.
Angela Marie Made
Wednesday 8th of June 2022
I think the reason you're the measurements are not adding up perfectly is because of nominal vs. actual measurements of wood. Check out my blog post about it - I think that you will find that this clears up the confusion! https://angelamariemade.com/intro-to-woodworking-lumber-size-guide-free-printable/
Deb
Monday 15th of November 2021
scout project
gene schmidt
Saturday 31st of October 2020
I am one for maybe over doing things, but knowing people sit on this, I would glue and screw the top shelf to the frame or put them on top of frame. Brad nails can come loose and somebody could end up on the floor. Really looks nice.
Angela Marie Made
Monday 2nd of November 2020
Thank you, I appreciate the feedback.
tiffany
Wednesday 15th of August 2018
does this hold up pretty well with shoes and dirt? easy wipe surface?
Angela Marie Made
Thursday 16th of August 2018
Yes! I usually just vacuum and dust it to quickly clean it. But, I also used 2 coats of poly on the wood boards to finish it which allows for easy wiping with a damp cloth when needed.