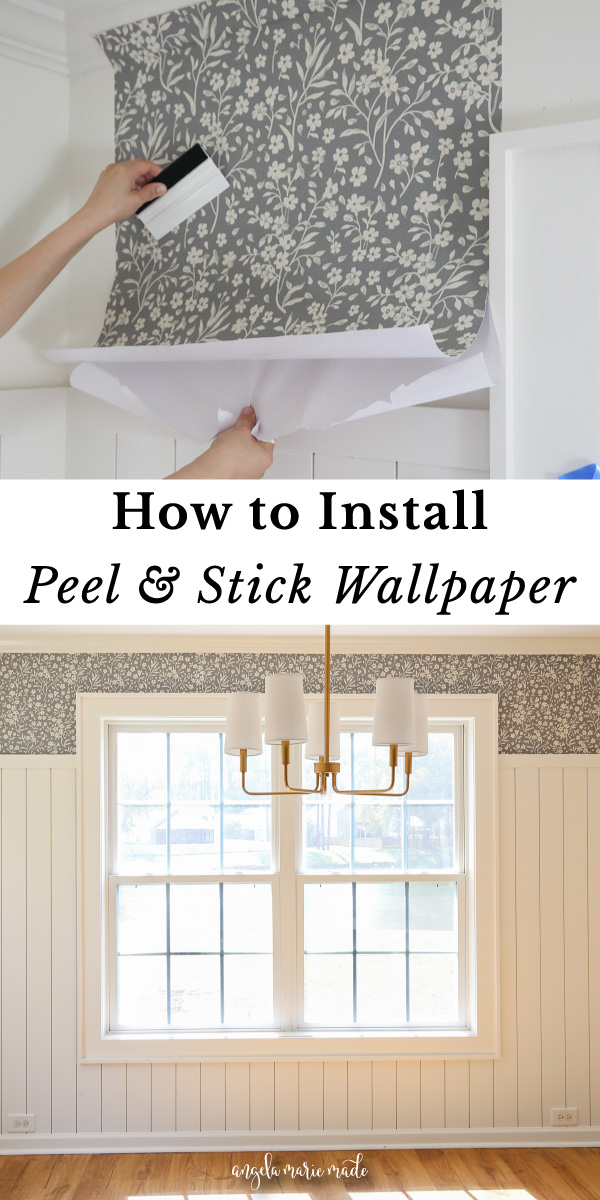
Learn how to install peel and stick wallpaper the easy way with my simple installation trick!
I’m excited to share all about our DIY peel and stick wallpaper that I installed in our dining room!
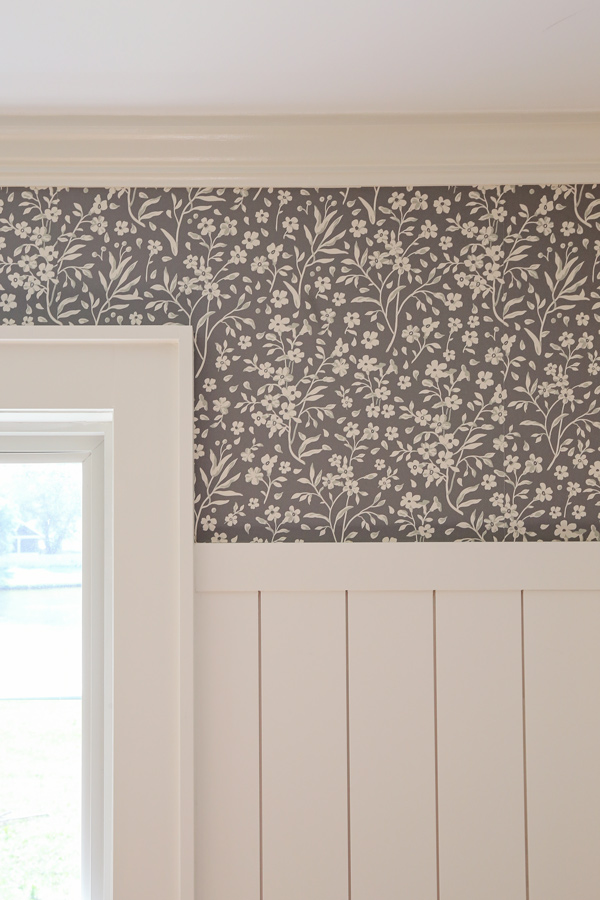
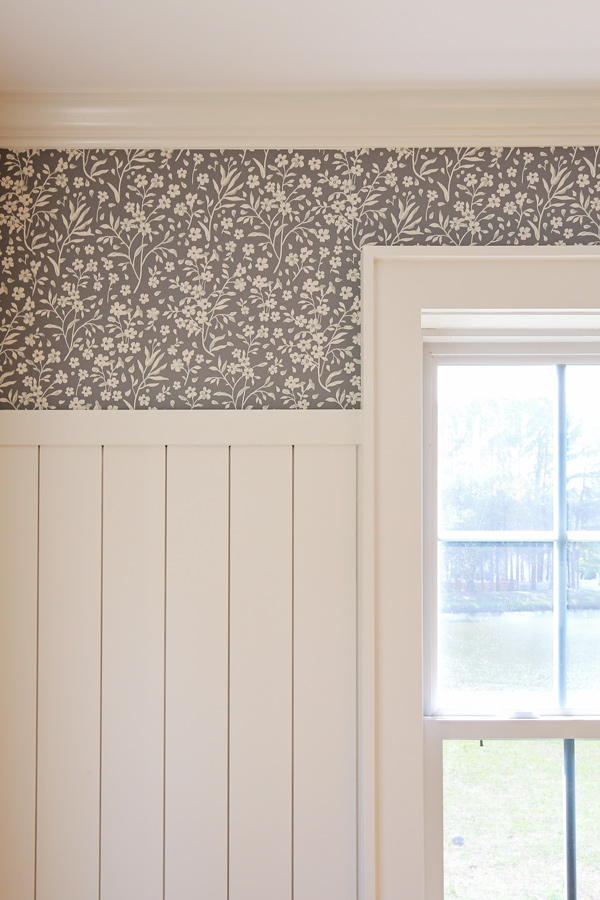
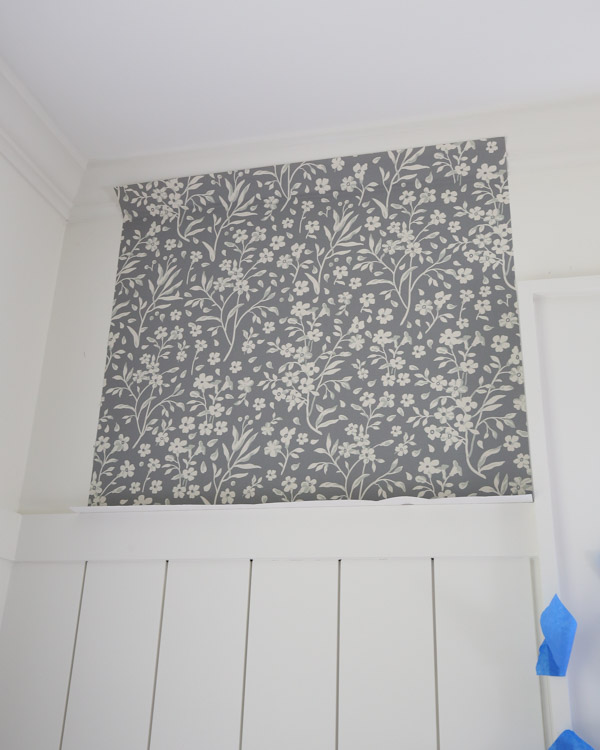
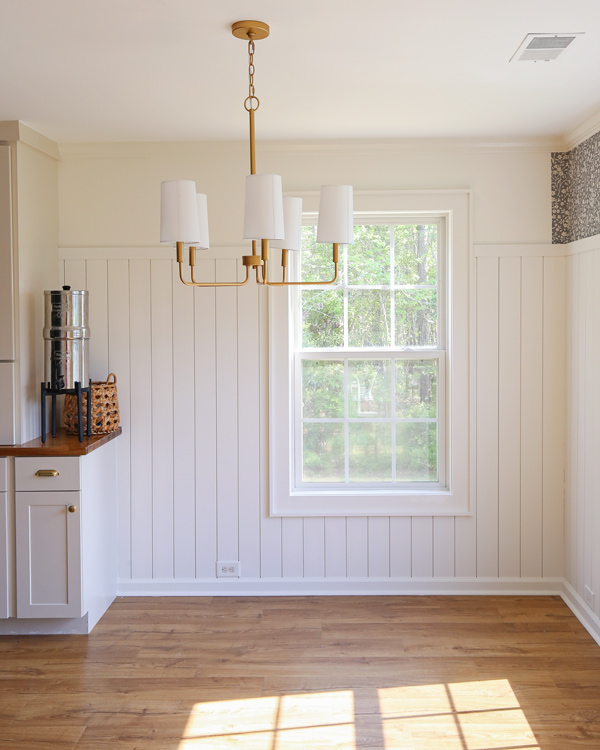
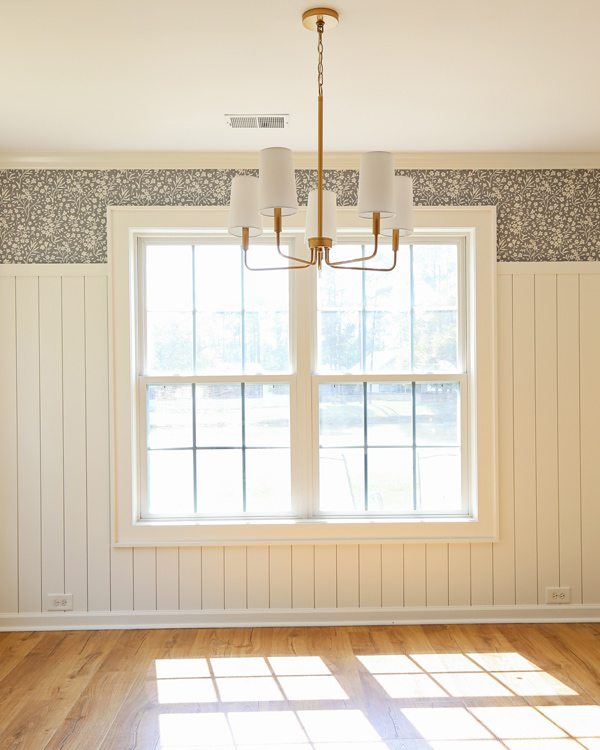
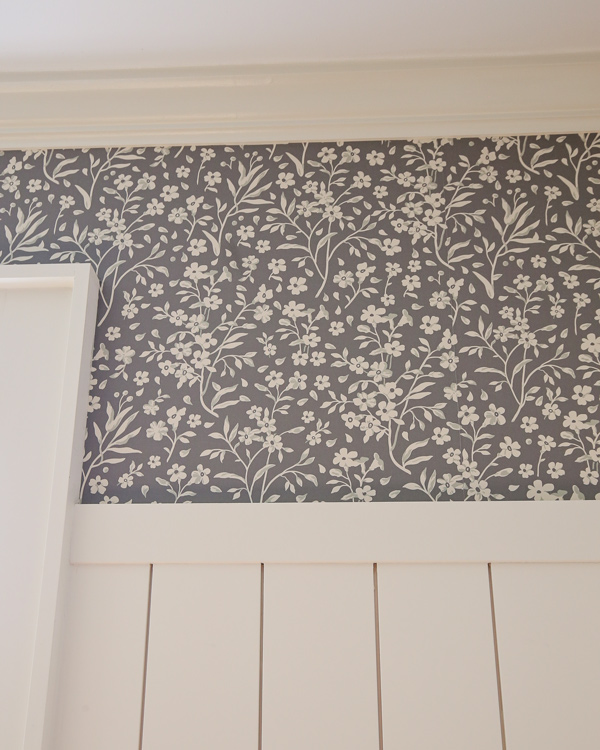
For our dining room wallpaper, I was dreaming of a beautiful, floral wallpaper above our vertical shiplap. I really want to create a relaxed, welcoming, cottage feeling in our space.
Note, this post contains some affiliate links. I may earn a commission if you shop those links (at no cost to you). Thank you for supporting my small business. For more info see my disclosures here.
After looking at many samples of peel and stick, floral wallpaper, I ended up choosing this dark green and white floral wallpaper.
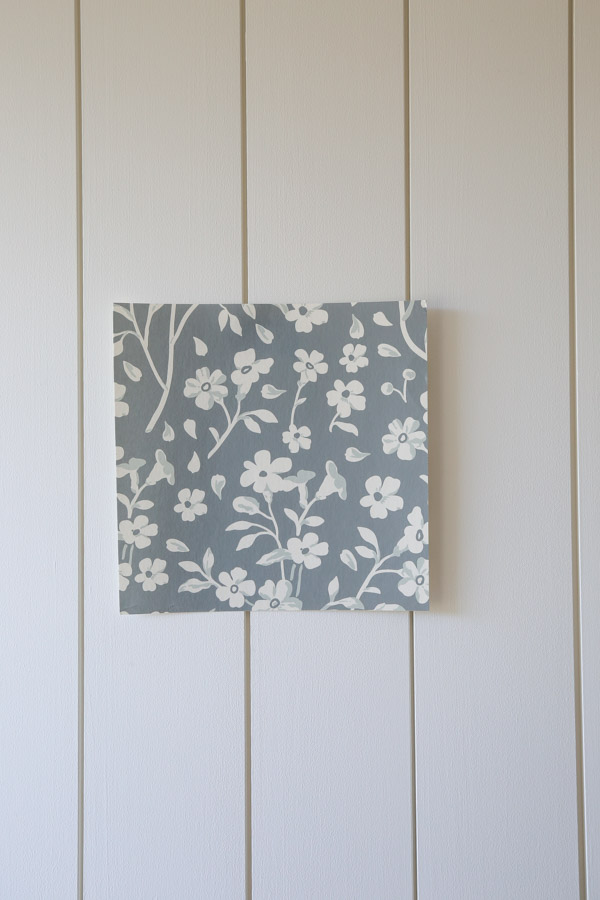
I thought the color palette would look best year round and it was so dreamy and beautiful! It was also my 4 year old’s favorite too!
This isn’t my first wallpaper project, but it is my first time using peel and stick wallpaper. Although I have used peel and stick flooring and DIY peel and stick backsplash tile.
For my first wallpaper project, I used traditional, unpasted wallpaper in my son’s nursery room.
Peel and stick wallpaper vs traditional wallpaper
DIY peel and stick wallpaper is very popular and for good reason! It’s less messy and easy to remove if you get tired of it compared to traditional wallpaper.
It also doesn’t damage drywall like traditional wallpaper can sometimes since it is removable wallpaper. It’s a great option if you are renting too!
However, I will say it is not easier to install than traditional wallpaper, in my experience! Both types take time and a lot of patience! But, I am sharing a trick today to help make the installation of peel and stick wallpaper easier!
One other difference between peel and stick wallpaper and regular wallpaper is that peel and stick wallpaper is typically more expensive per square foot.
You don’t usually get as much per roll either, so keep that in mind when calculating how much you need and the cost!
If you want to save money consider doing just an accent wall rather then an entire room which will be an additional cost.
Cost of peel and stick wallpaper
The cost of peel and stick wallpaper will vary based on where you purchase it from. But, I recommend getting the best quality wallpaper that you can because they are not all made the same.
Originally, I was looking at some less expensive options, but the quality was really poor based on the reviews. You want the wallpaper to stick well and not peel up over time or be too difficult to work with while installing. For this reason, the higher quality will cost more.
The total cost of the floral peel and stick wallpaper I used was $242 (I did use their 15% off coupon). This was the cost for one 12ft and one 8 ft roll which was for two partial walls above vertical shiplap.
And this higher cost is why I did a vertical shiplap half wall, to help reduce the total cost, but still get the look I wanted!
How much wallpaper to get
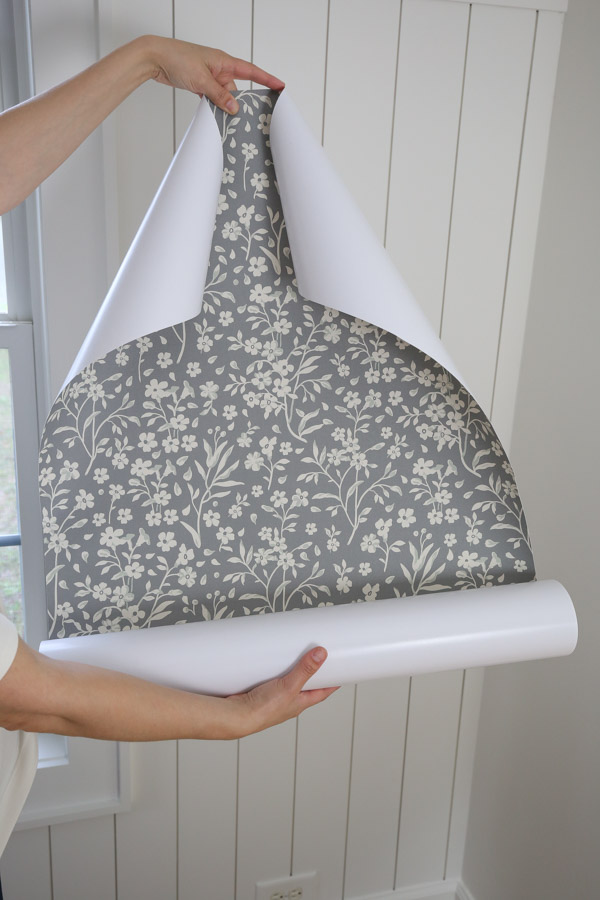
Note, you will likely need more wallpaper than you think. Our wallpaper roll was 24 inches wide and the pattern repeat was every 24 inches for lining up each section, so this required a lot more wallpaper than we originally planned.
To determine the amount needed, measure your wall length and width. Multiply the length x the width to get the square footage. Then, see how many square feet the wallpaper roll covers.
Order an extra roll if possible for any mistakes, miscalculations, or large pattern repeats!
How to install peel and stick wallpaper
Materials
- Peel and stick wallpaper (we used this floral peel and stick wallpaper)
- Cutting Mat (optional)
- Painter’s tape
- Pencil
Tools
- Extra sharp utility knife with snap off blades
- Measuring tape
- Level
- Sharp scissors
- Smoothing tool (I also used a squeegee)
- Vinyl weeding tool or something with a pin end (optional)
DIY peel and stick wallpaper video
See all of these peel and stick wallpaper application steps in action in my Instagram stories or in a short video on YouTube!
1. Prepare the wall for the peel and stick wallpaper
The first step is to prepare the wall.
Make sure the wall is smooth and that it has not been painted in the past few weeks before starting. The directions that came with my wallpaper said two weeks, but I think 30 days is best since paint takes 30 days to fully cure.
Remove any wall outlet cover(s) or other removable covers.
Wipe the wall down with a damp cloth to remove any dust or dirt. Note, if your walls are really dirty, you can wipe them down with a degreaser like I did for our peel and stick tile backsplash.
2. Plan out the installation for your peel and stick wallpaper
There are a few ways to start your peel and stick wallpaper. It would be easy to just start in the corner and work your way down, and for some people that will work just fine.
But here are a few things to consider when determining where to start and if you should start at a different point on the wall:
First, if you are going to be installing the wallpaper on more than one wall and want the wallpaper to continue on the adjacent wall. Corners are a tough place to start with a full sheet of peel and stick wallpaper.
Second, if you are just applying the wallpaper on one accent wall, and want to start in a corner, you want to make sure that when you get to the end of the wall, you aren’t left with a really tiny space and you have to work with a very small strip of wallpaper.
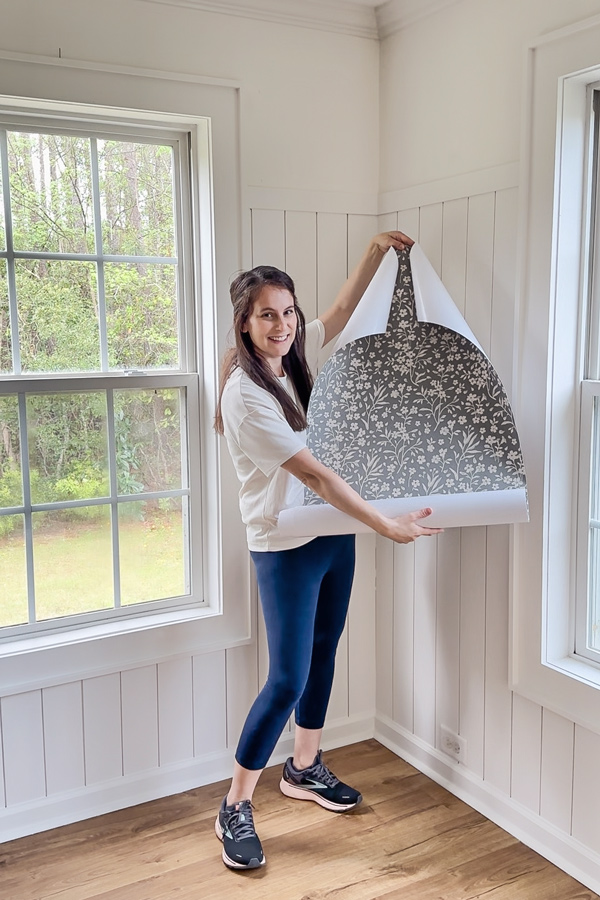
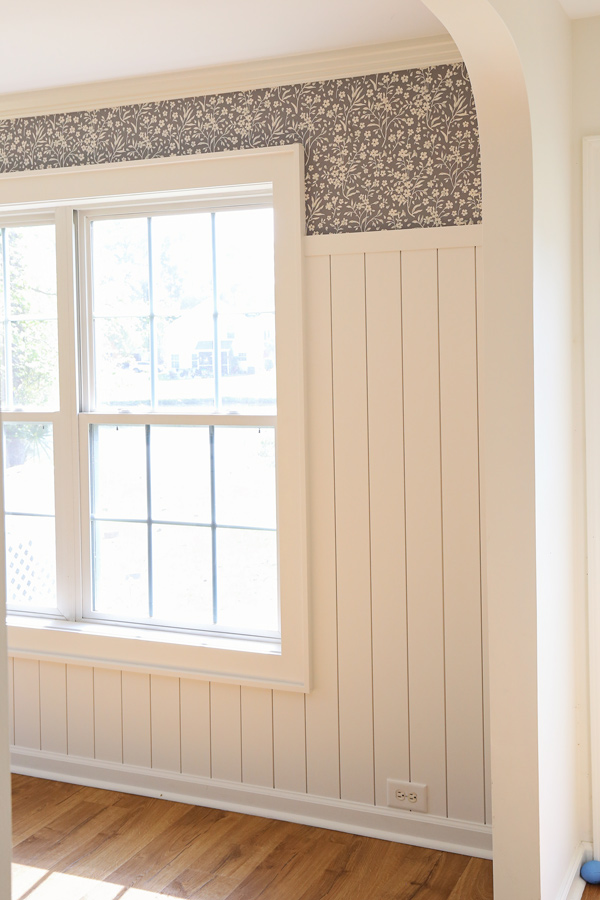
Third, if you have any special wall objects to work around, like a window, like we did, take this into consideration as these are more challenging to work around.
So, for all of these scenarios, instead of starting in the corner, you can start a few inches away from the wall corner like I will be demonstrating in this tutorial!
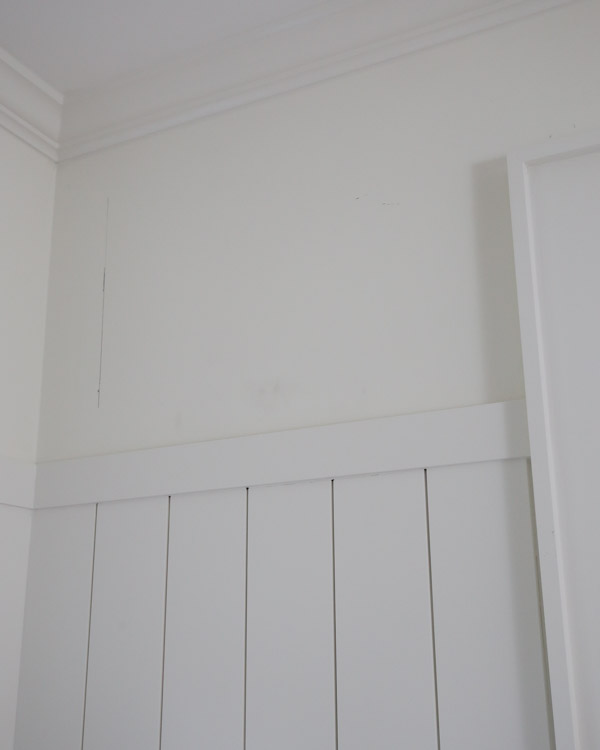
3. Draw a level starting line for the first wallpaper edge
Determine where you want the edge of your first wallpaper piece to be and draw a straight, vertical line using a level for where the wallpaper will start.
This level line ensures the wallpaper will be applied straight and not crooked!
4. Cut the first piece of wallpaper
Measure the width from the ceiling (or crown molding) to the baseboard or wall treatment (like my DIY vertical shiplap half wall).
Then, using sharp scissors, cut the first wallpaper 3-4 inches longer than this measurement.
By cutting the wallpaper to size it will help make installation easier, but you want it a few inches longer to have some excess at the top and bottom to work with when lining up and installing.
The excess will get trimmed at the end!
To help make cutting easier, use painter’s tape to help hold the wallpaper down.
Measure the cut needed from the top edge of the wallpaper roll and make a mark. Repeat again from the bottom edge of the wallpaper. Then, draw a line with a straight edge, like a level to create a cut line.

5. Install the first piece of wallpaper
Line up your first piece of wallpaper with the level line. Then use painter’s tape to secure this first panel in place on the wall.
*Here is my special trick for making DIY peel and stick wallpaper installation easier!*
Apply the tape just in the middle/bottom part of the wallpaper on each side. This creates a middle hinge and will prevent the wallpaper from shifting while installing.
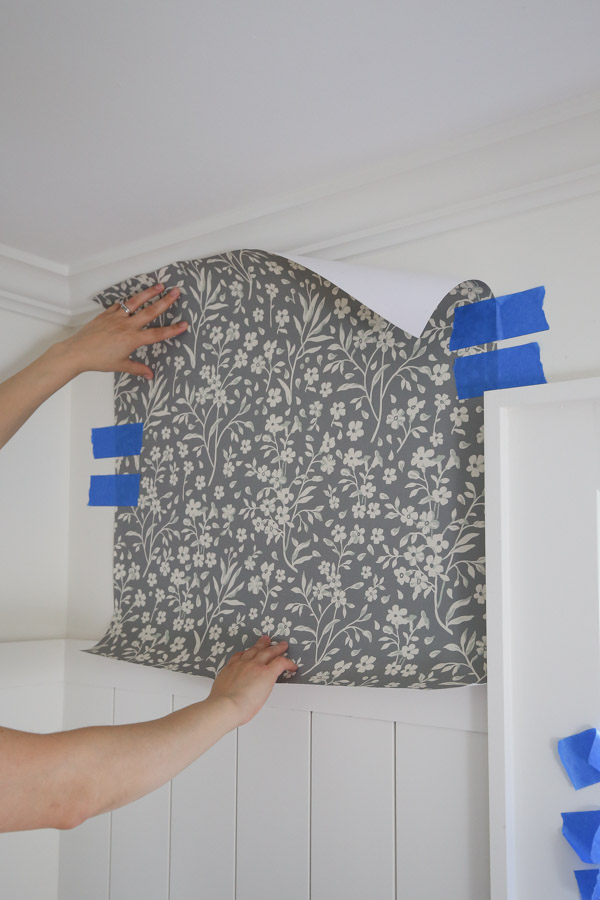
It also ensures precision during installation because you lined everything up before removing any backing paper which is easier to do before removing the backing paper.
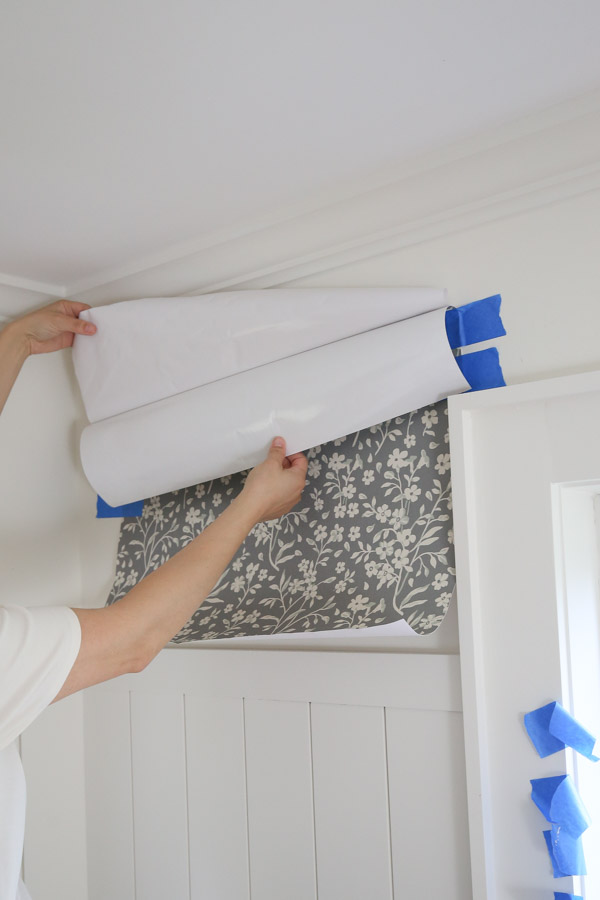
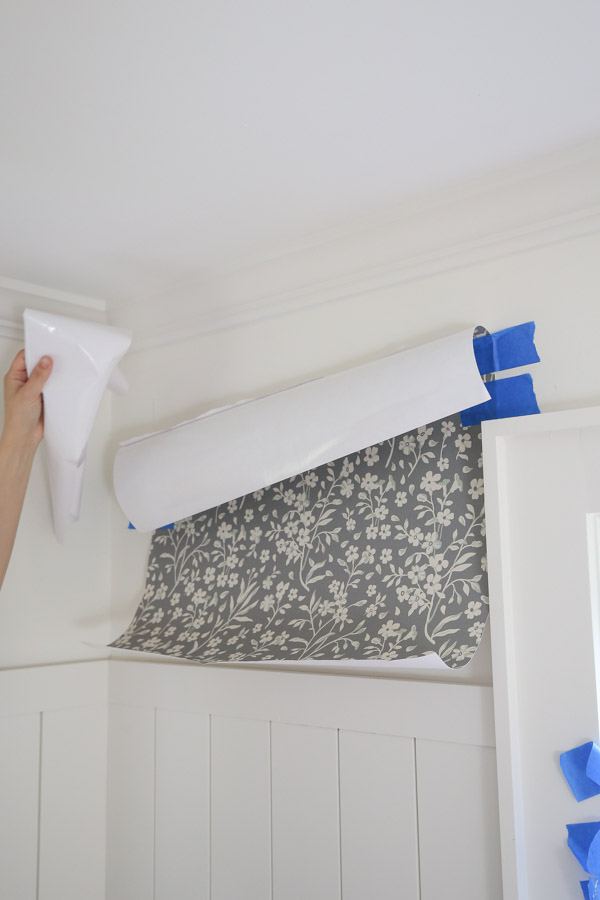
Next, peel back several inches of the white backing paper from the top side of the wallpaper and cut it off with scissors to remove it.
📩 Want to Save This?
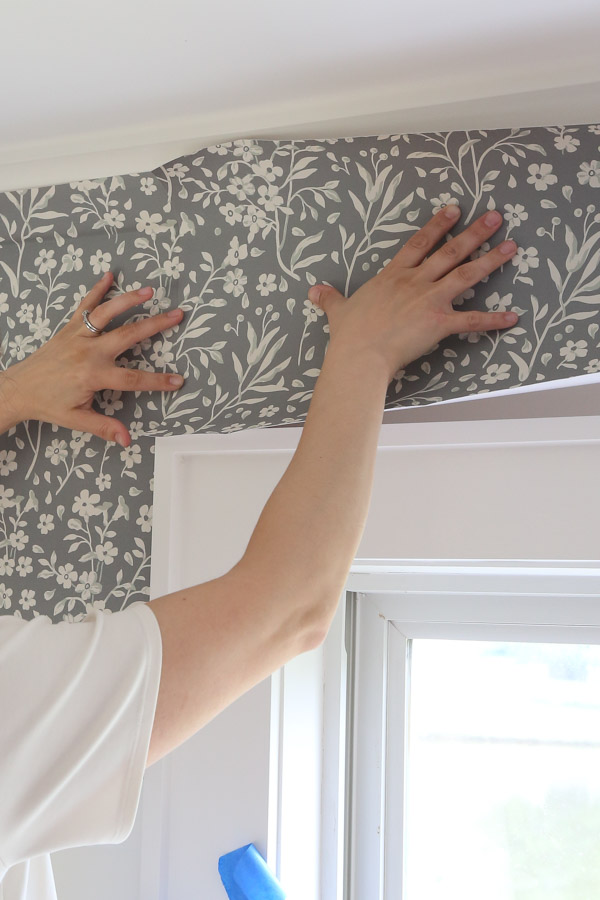
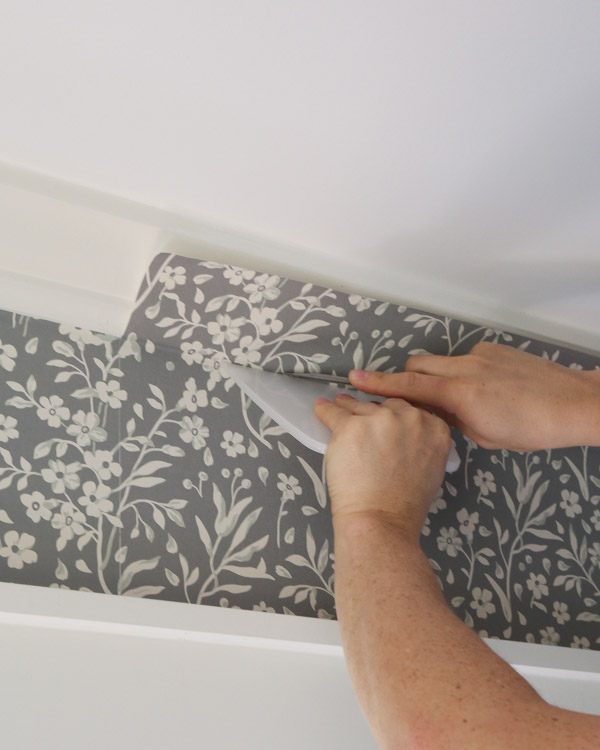
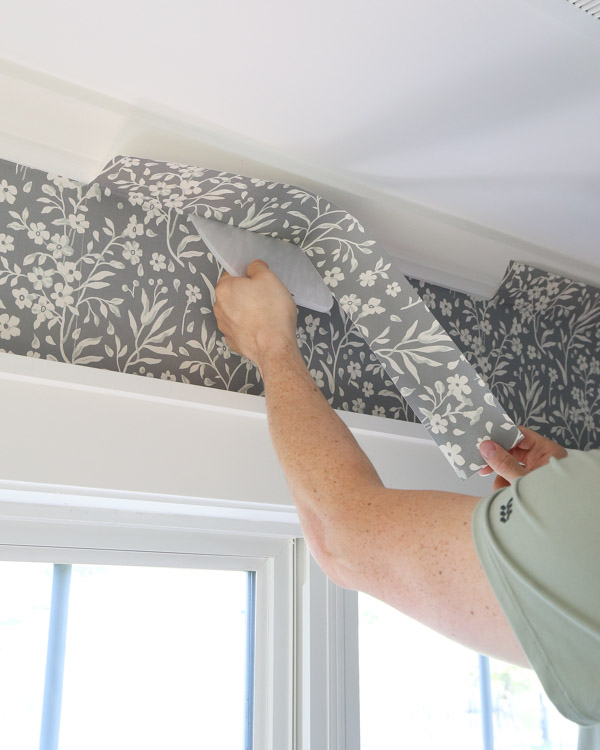
Then, apply the sticky wallpaper side down against the top of the wall and smooth it out with a wallpaper smoother or squeegee as you stick it to the wall.
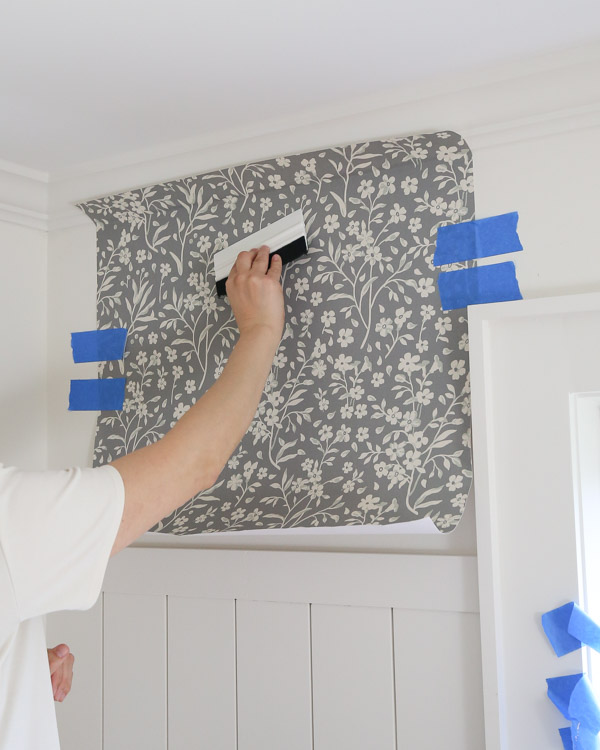
Try not to be too rough when smoothing the wallpaper out so it doesn’t scratch it.
Now that the wallpaper is secured in place on the wall, remove the painter’s tape.
Slowly and carefully remove the rest of the white backing paper pulling from the bottom side of the wallpaper, while smoothing down the wallpaper to the wall from the top of the wall to the bottom of the wall at the same time.
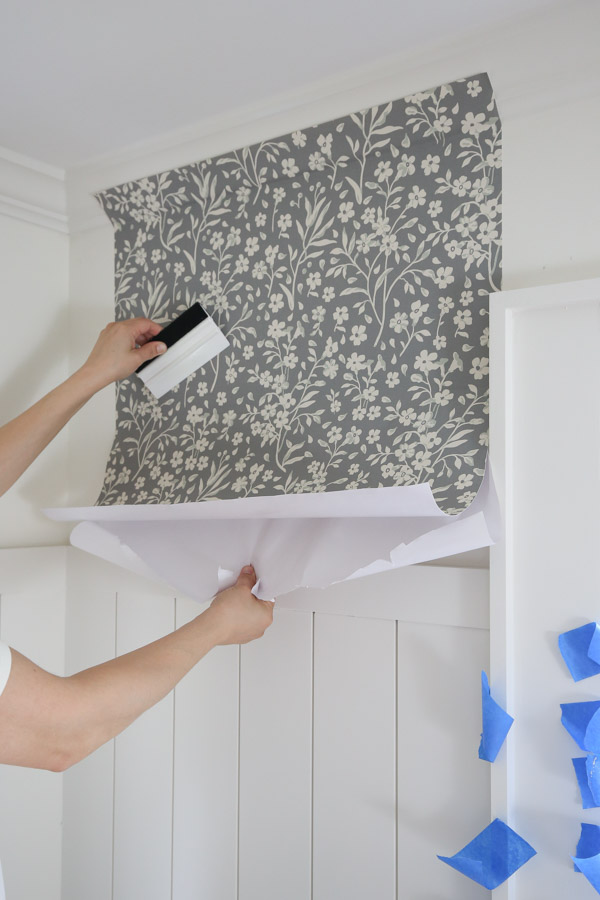
Your wallpaper should be installed exactly how you lined it up initially!
Tip: If you are having trouble getting the backing paper off initially, you can peel it back gently a few inches at the top before installing to “loosen” it up but don’t remove it yet!
This is the same trick I use for installing our peel and stick backsplash tile and it can be used for any type of vinyl application not just DIY peel and stick wallpaper!
Tip #2: If you have trouble getting the backing paper off at any point use a Vinyl weeding tool or something with a pin end to help! This tool also helps to pop out any air bubbles in the wallpaper after it’s installed on the wall!
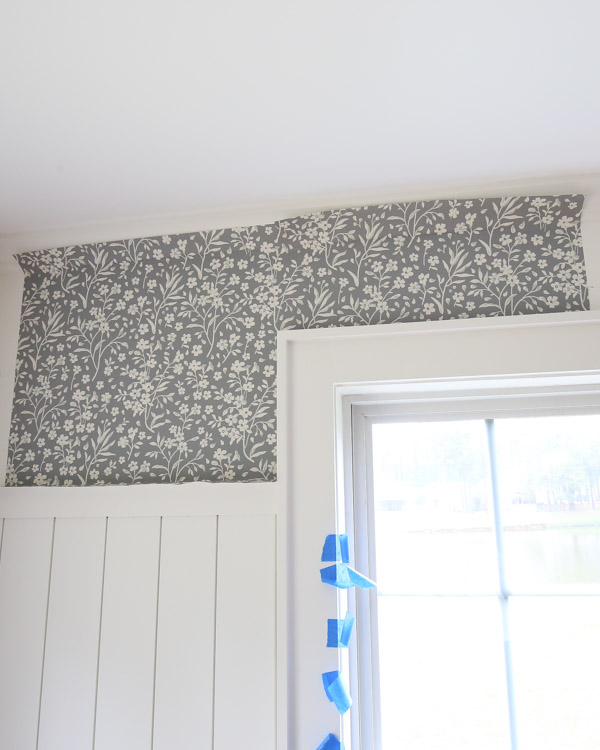
6. Install the second piece of wallpaper
To install the next piece of wallpaper, identify where the pattern repeats on the wallpaper roll and matches the pattern edge on your first piece of wallpaper installed on the wall.
Again, cut the wallpaper to size leaving a few inches of excess on the top and bottom.
Line up the second piece of wallpaper with the pattern on the first piece and tape in place for installation with painter’s tape. ***Make sure when you line up the second piece edge that you overlap it about 1/16″ of inch on the end of the first wallpaper piece.
Overlapping helps to avoid small gaps during installation or over time if any expansion/contraction occurs. It provides that seamless look and is key for how to install peel and stick wallpaper!
7. Continue installing the DIY peel and stick wallpaper
Continue installing the DIY peel and stick wallpaper using the same methods as above.
Make special cuts as needed
We needed to make a special cut around our window.
We just held the next full panel of wallpaper up in place and marked where the wallpaper needed to be cut out on the wallpaper sheet using a pencil. It helps to have a second person for this step.
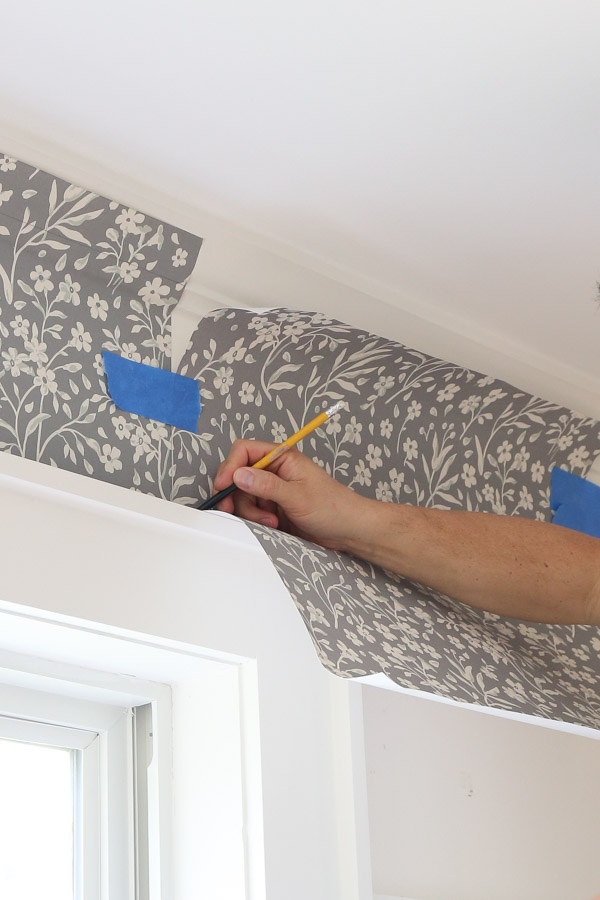
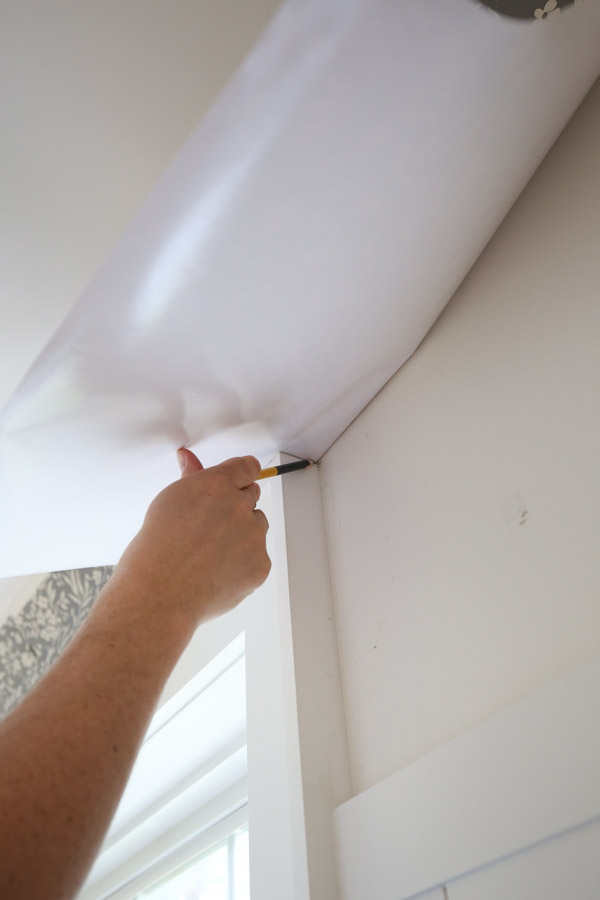
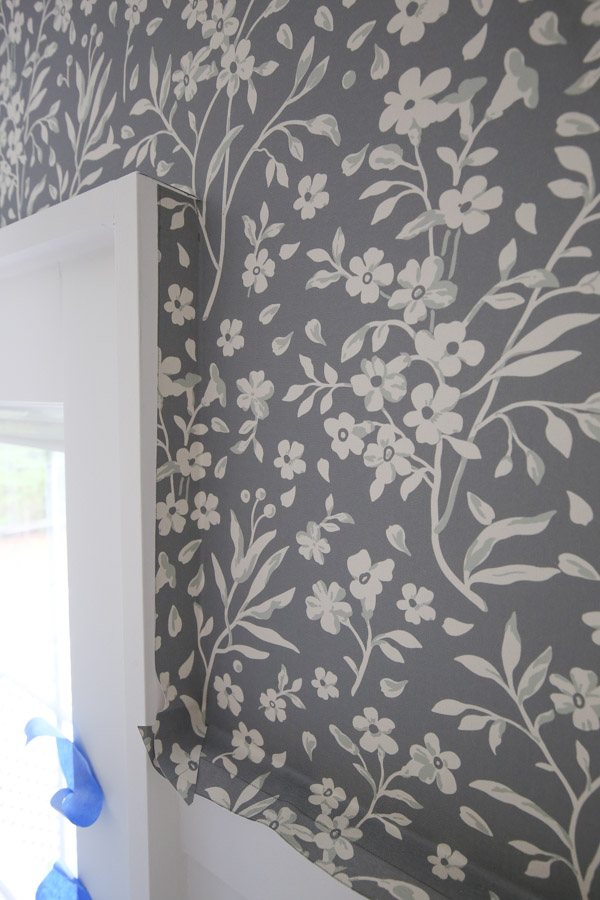
Then we cut at the mark, leaving a little bit excess again so we could get a tight fit around the window corner and trim it perfect at the end.

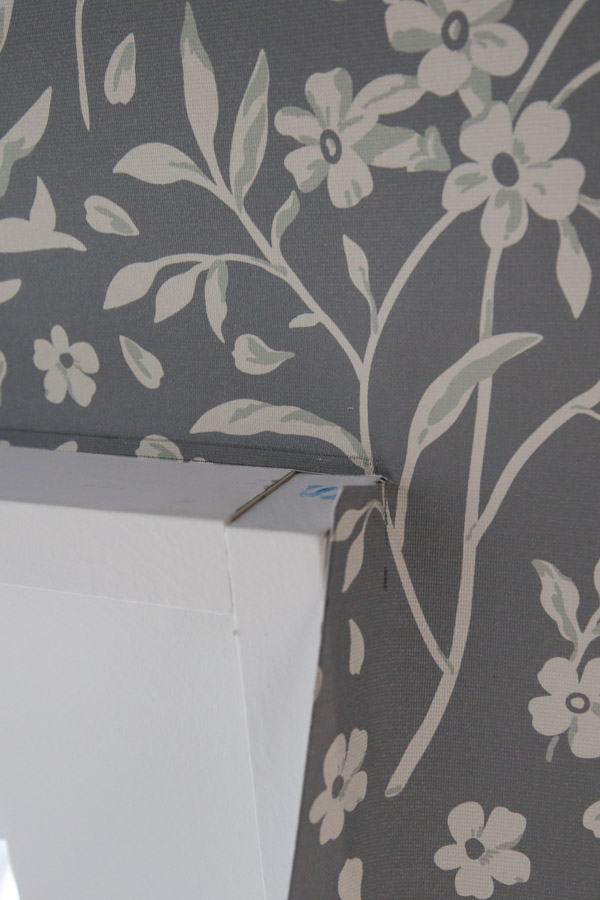
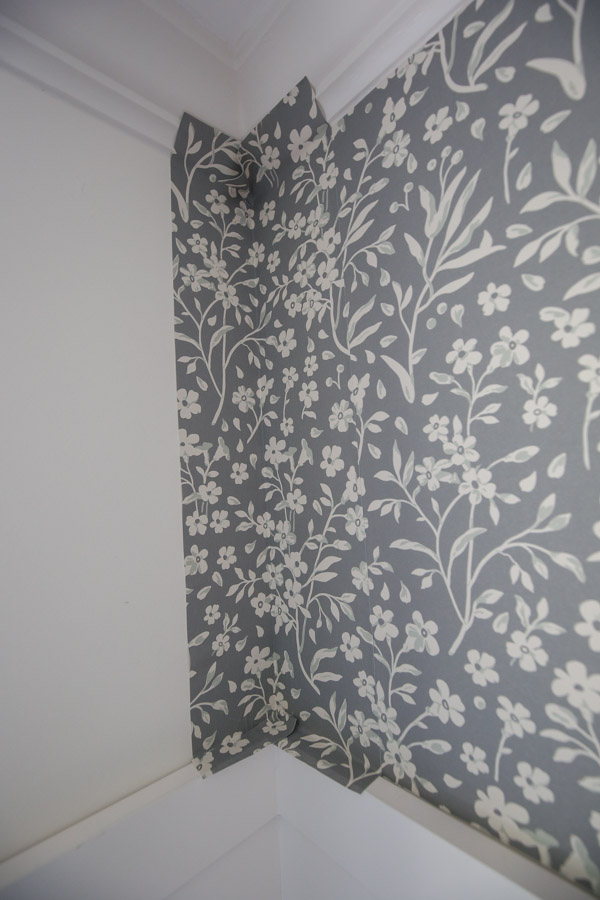
Note, when working around corners with wallpaper, it helps to cut a small angled slit at the corners where the wallpaper is creasing so it can bend easily.
Once the wallpaper is installed, the slit will be trimmed off and if any remains it will blend in. Just don’t cut too far in!
You can see in my photo below I added a slit at the top and bottom corners.
8. How to install peel and stick wallpaper in a corner
Accent Wall Corners
When you get to the wall corner or last piece of wallpaper and it does not need to continue onto the next wall (it’s just a wallpaper accent wall), the corner cut is pretty simple.
Measure the remaining wall space from the wall corner to the wallpaper edge. Add 1-2 inches to this measurement for your cut measurement for the width of your wallpaper.
Again you want a little excess wallpaper to go over the wall corner. Most walls are not straight, so you will cut the excess off at the end and have a perfect cut of the wallpaper on your wall corner.
Mark this measurement on a new wallpaper piece.
Cut the wallpaper to size at this mark using scissors and ensuring the cut is straight again.
Line up the wallpaper on the wall where you want to install it and tape in place. Use your smoothing tool to press the wallpaper into the wall corner and crease it.
Before applying the wallpaper to the wall it helps to partially cut a slit at the top and bottom crease of the wallpaper just like for the special cuts in the previous step.
Adjacent wallpaper corners with wallpaper
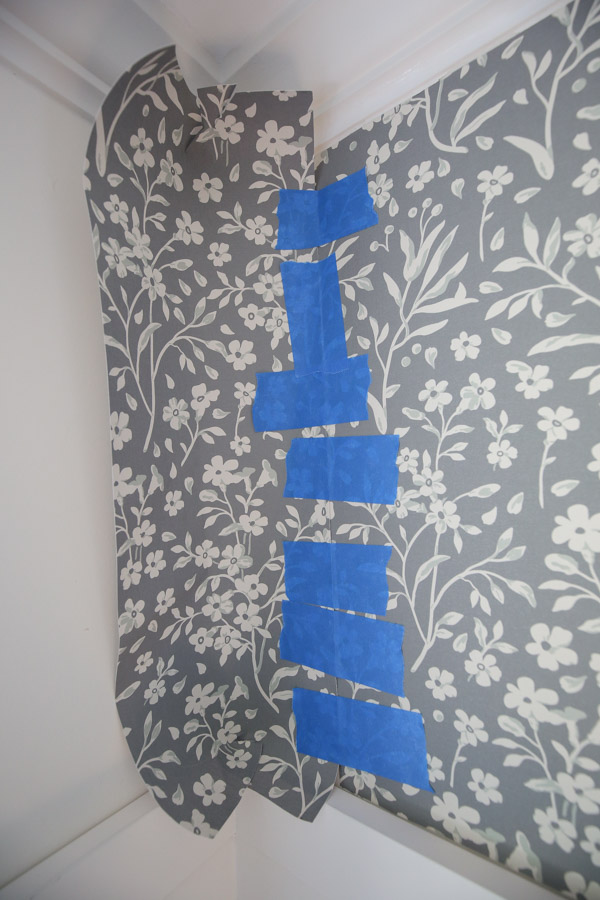
If you are going to be continuing the wall paper on the adjacent wall, the wall corner installation is a little more tricky. Here is how to install peel and stick wallpaper in a corner where the wallpaper needs to continue.
You need to wrap the wallpaper into the corner so a few inches will continue onto the next wall. This is harder to do with peel and stick wallpaper than traditional wallpaper.
So, this is another reason why it helps to work with a smaller piece of wallpaper rather than a full piece!
Again line up a new wallpaper piece with the pattern repeat. Then, cut the piece to size, leaving a few extra inches, like 3-5 extra inches to wrap around to the other wall.
Line up the cut piece in place again and apply painter’s tape. You will need to use your smoothing tool to crease it into the corner and then cut slits again. For this piece I had to cut several slits at the top and bottom.
Apply the corner piece with the same painter’s tape method as described above.
It does take extra time and patience on this piece. Alternatively, you can try removing all of the backing paper first if you find that to be easier for this piece!
I ran out of wallpaper, but the next step is to line up a new piece with this wrapped piece. If you think the part on the adjacent wall went on crooked, you can mark and cut a new straight, level line with a sharp utility knife.
9. Trim excess peel and stick wallpaper off
The last step is to use a sharp utility knife to trim the excess wallpaper. We used this special ultra sharp utility knife with break off blades which worked much better than our standard utility knife and razor blade!
To trim the excess, gently peel the excess wallpaper away from the wall, then hold the smoothing tool into the wall crease and use it as a straight edge while scoring and trimming the excess with the utility knife.
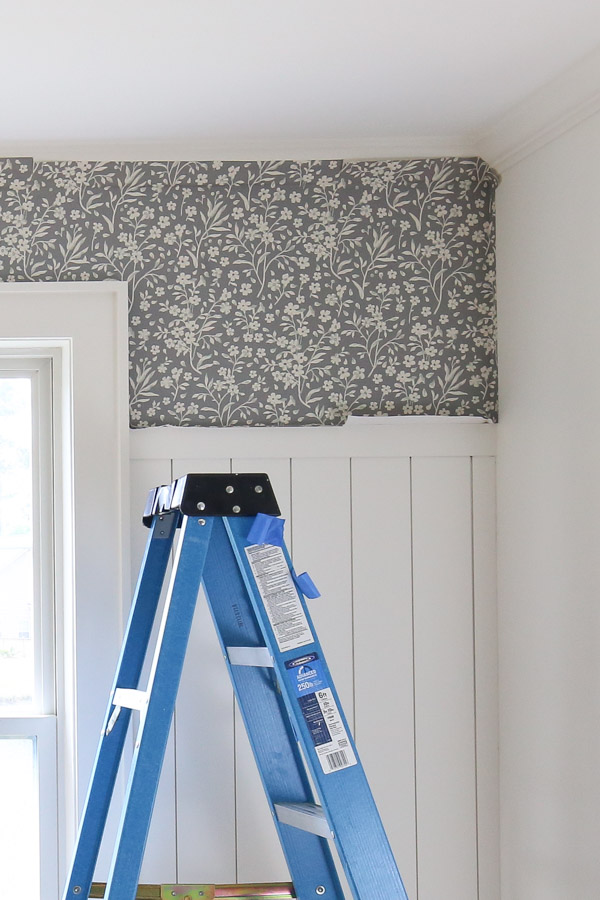
That’s it! I just love how our DIY peel and stick wallpaper is turning out!
I will finish the other side once the rest of our wallpaper arrives! I hope this how to install peel and stick wallpaper tutorial has been helpful!
Follow along for my latest projects and sneak peaks on Instagram, YouTube, and Pinterest!
Jamie
Sunday 19th of January 2025
Hello. Beautiful shiplap and wallpaper. Your links for the wallpaper are not working. Could you send me a link?
Angela Marie Made
Tuesday 21st of January 2025
Sure, here is the link! https://northandfinch.com/products/meadowlark?variant=44403693027542