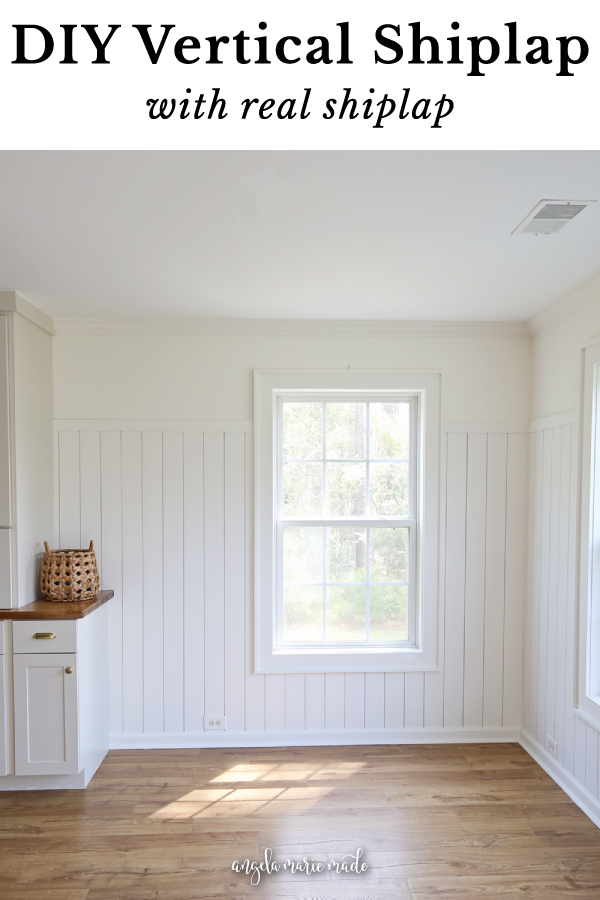
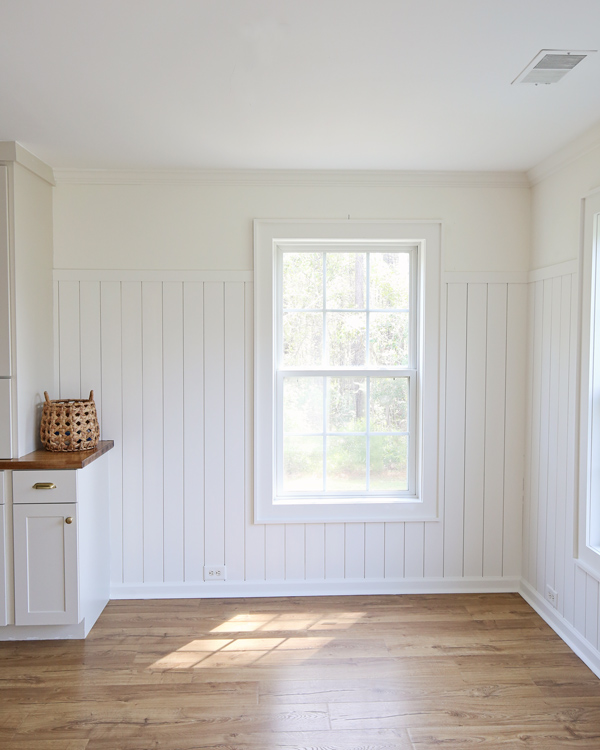
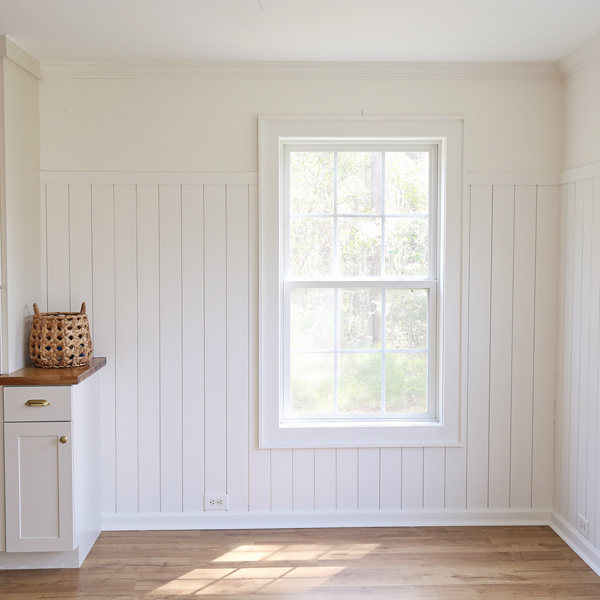
Learn how to install a vertical shiplap half wall using real shiplap boards and add a ton of character to your space!
We are in the process of making over our dining room and a vertical shiplap half wall was a big part of the renovation and design plan.
I love vertical shiplap walls and I’ve used them twice before. First, I installed a vertical shiplap bathroom wainscoting in our last home and then we did a floor to ceiling vertical shiplap wall in our hallway.
Shiplap adds a ton of character to a space! It can also be done horizontally, which we did for our DIY shiplap accent walls in our past living room and in our entryway makeover.
We have even installed a DIY shiplap ceiling and DIY shiplap barn doors! As you can see my love for shiplap runs deep!
Vertical Shiplap Half Wall Design Options
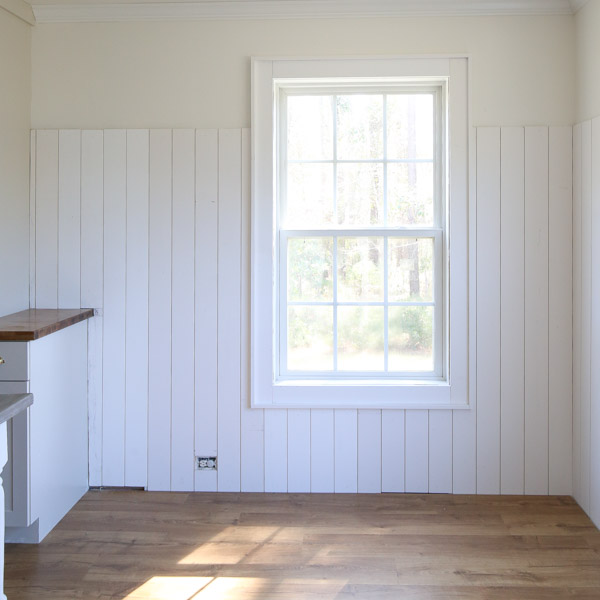
I decided to do vertical shiplap for our dining room for a more modern look and go part way up the wall so we could install peel and stick wallpaper above it. I love the look of shiplap and wallpaper, it’s so dreamy!
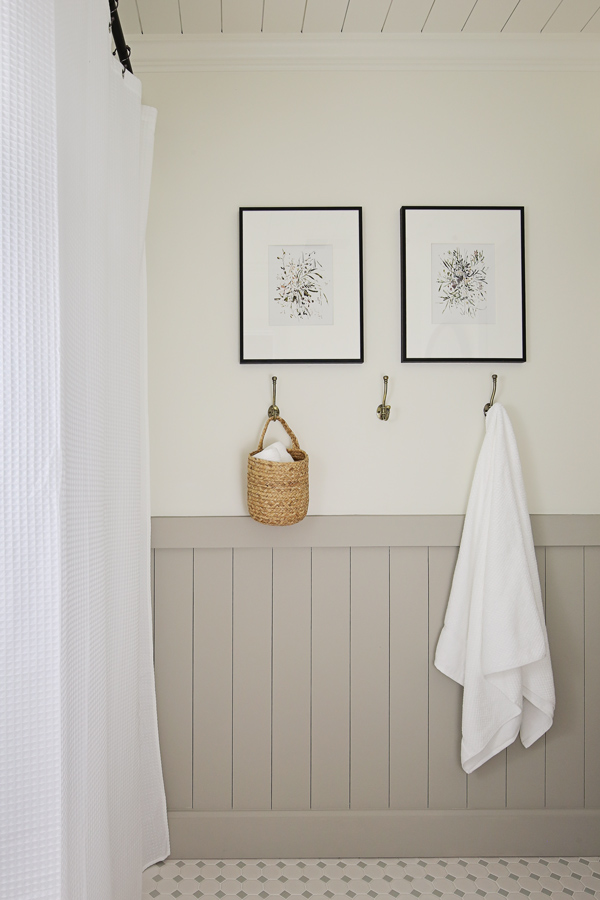
When it comes to planning the final look and design of a vertical shiplap half wall, you can do the shiplap exactly half way up the wall or even a little more or less than half way up the wall like I did for our vertical shiplap bathroom wall treatment.
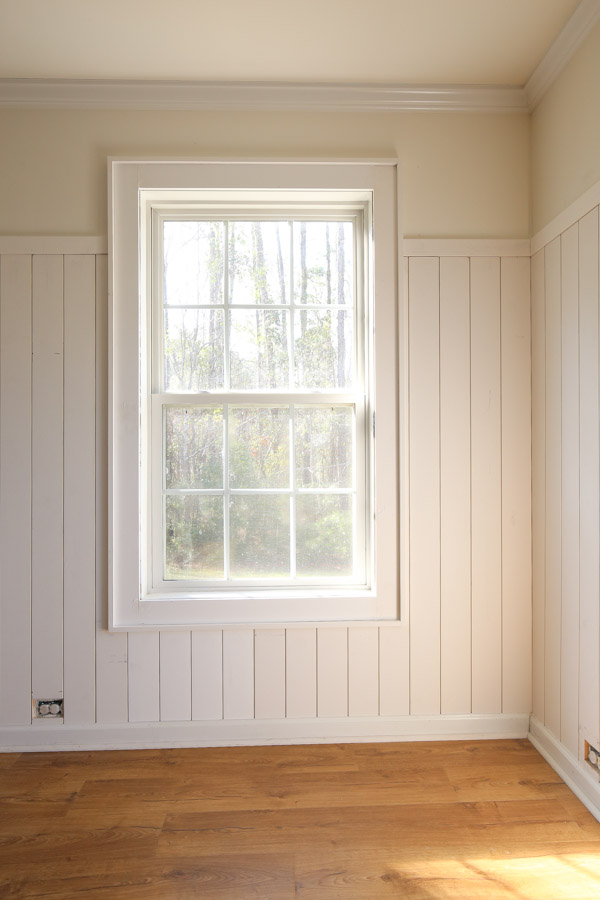
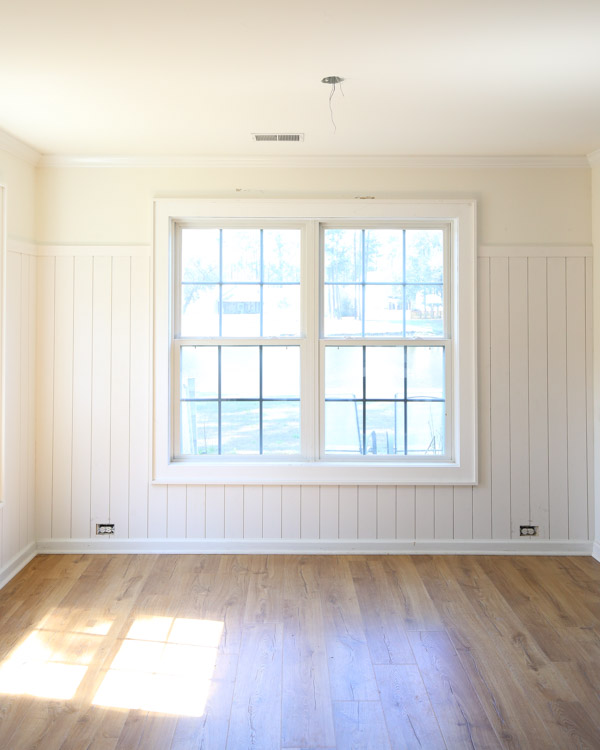
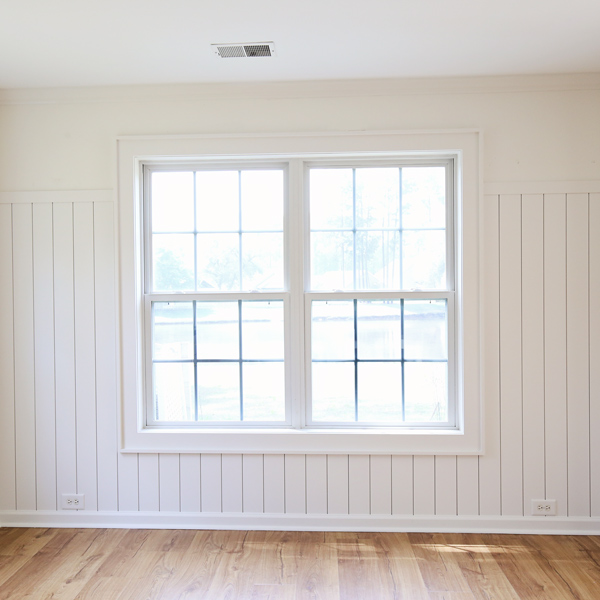
Or you can go even more up the wall, about 3/4″ up the wall which is what I am doing in this tutorial for our dining room shiplap wall. The installation process is the same, the only difference is the length you cut the shiplap boards too.
The reason I did 3/4″ up the wall is because it allowed me to do less wallpaper since the wallpaper I am ordering is expensive. Further, it’s just another fun way to do it and looks great!
One more design consideration is windows. If you are installing 1/2″ or 3/4″ thick shiplap (explained below), you want to make sure you are ok with how it looks next to your current window trim.
Our window trim was very thin, so we replaced it and installed this quick and easy DIY window trim which looks perfect with our new shiplap!
Note, this post contains some affiliate links. I may earn a commission if you shop those links (at no cost to you). Thank you for supporting my small business. For more info see my disclosures here.
What kind of board is used for shiplap?
The best board to use for any shiplap project is a real shiplap board which has a rabbet cut or L- shaped groove along each side and joins to other shiplap boards by overlapping with this rabbet joint.
Shiplap is often confused with tongue and groove boards. Check out my post explaining the differences between shiplap vs tongue and groove.
I’ve used real shiplap on several projects including our floor to ceiling vertical shiplap wall, DIY shiplap ceiling, and IKEA Billy bookcase hack with shiplap.
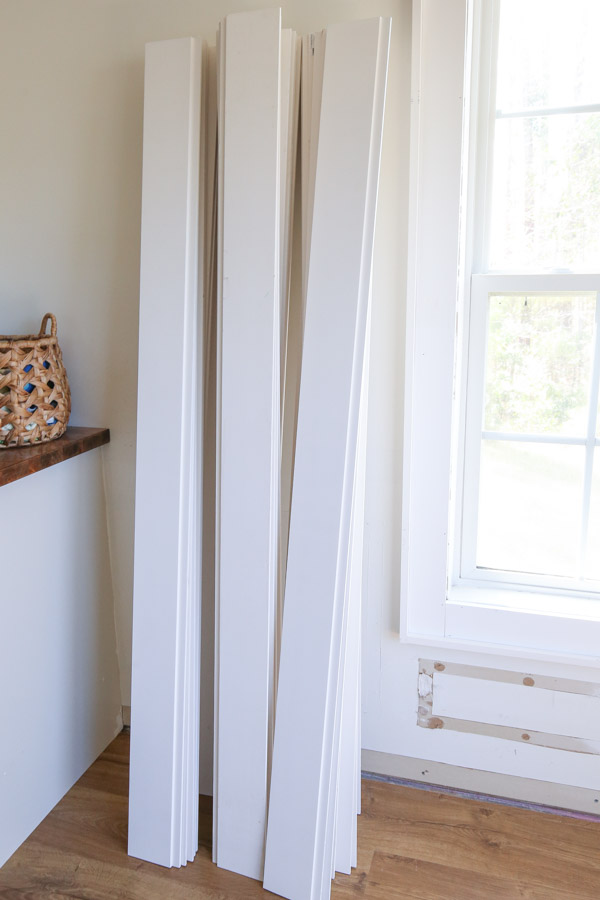
My favorite shiplap boards to use when painting vertical shiplap walls are these primed shiplap boards from Lowe’s.
Not all shiplap boards are made the same (including Home Depot shiplap boards) and I discuss some differences in my easy DIY vertical shiplap wall tutorial here.
How to install shiplap cheaply
If you want to get the look of vertical shiplap but you are on a small budget, you can actually do it much cheaper than using real shiplap boards by using 1/4″ plywood to create faux shiplap boards.
Check out my how to install vertical shiplap easy and cheap method using plywood that we used in our DIY bathroom makeover for our vertical shiplap bathroom half wall.
Another less expensive material option is this shiplap panel board. It would need to be cut to size but it’s a great alternative option for a larger room or if you are on a budget!
How to Install a Vertical Shiplap Half Wall
Material quantities will vary based on your wall dimensions.
Materials
- Shiplap boards (we used these pre-primed shiplap boards)
- Primed 1×3 @ 8ft
- Construction adhesive, like Liquid Nails
- 2″ and 1 1/4″ brad nails”
- Lightweight Spackle or wood filler
- Paintable caulk
- Paint (we used Swiss Coffee by Benjamin Moore in eggshell)
- Primer (if boards aren’t pre-primed)
- Paintbrush and Roller
- Wall outlet spacers
Tools
- Miter saw
- Brad nailer or nail gun
- Level
- Dremel or jigsaw (optional, only if needed)
- Table saw or Circular saw
- Measuring tape
- Stud finder
- Pry bar
- Utility cutter
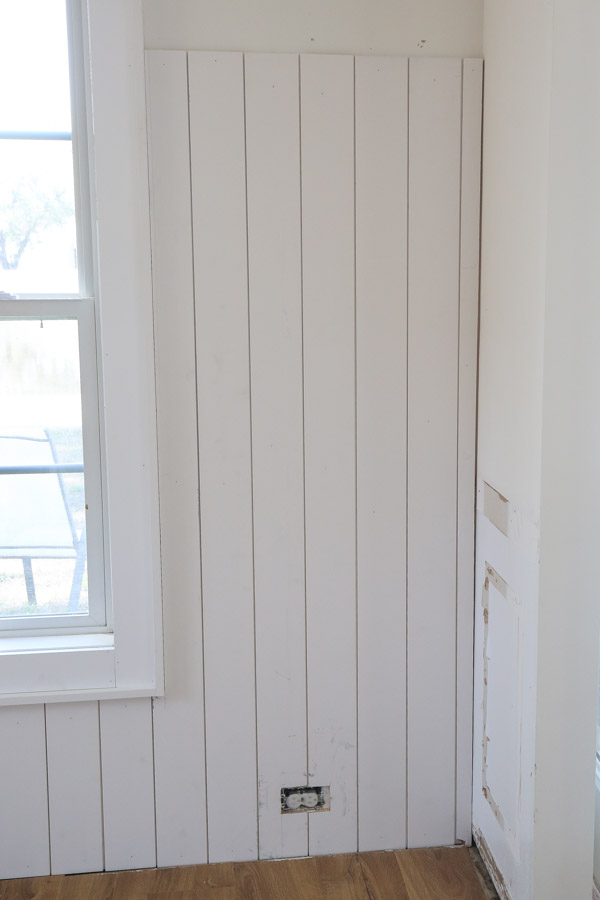
1. Determine the amount of shiplap boards needed for the half wall
Begin by measuring the width of your wall(s) where the shiplap will be installed. Divide the wall width by the shiplap board width. That will be the number of shiplap boards needed.
Note, because of the shiplap gap, the actual width of each board can vary some. For this reason, it’s best to get a few extra shiplap boards. I find with shiplap I always end up needing more than I calculated.
Also, determine how high you want the shiplap to go up the wall.
Because we were doing 3/4″ up the wall, we decided to get the 12ft primed shiplap boards and have them cut in half at the store. Doing this saved money, made the boards easier to transport, and saved time since we didn’t have to cut most of the boards to size ourselves.
This also meant our boards would go 6ft up the wall since they were 12ft boards cut in half. But, with the top trim, the final height is actually 74.5 inches (6ft + 2.5 inches) for the top trim board.
Make sure to account for your trim and baseboard! Our baseboard is going over the bottom of the shiplap.
Here is another example. For our vertical shiplap half wall in our bathroom, we cut the boards to a little bit lower than halfway up the wall at 36″ to avoid light switches. But the final height with baseboard and top trim was 39 1/2″.
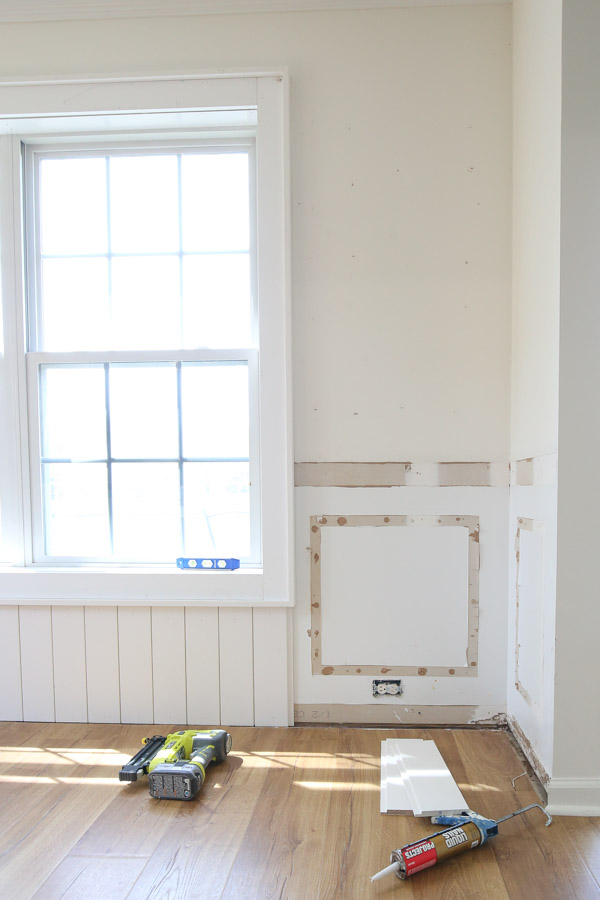
2. Remove existing baseboards from the wall
Because shiplap boards are about 1/2″ or 3/4″ thick, it’s best to remove your existing baseboards.
Remove the existing baseboard by scoring the top and corner caulk lines with a utility cutter. Then, use a prybar and hammer to remove the baseboard from the wall.
If you will be reusing the baseboard, be careful when removing it.
Also, we had existing picture frame molding on our walls, so we removed that too.
3. Cut vertical shiplap boards to size
If you didn’t have your boards already cut to size at the store like we did, go ahead and make the cuts using a miter saw.
Note, even if you did get your boards cut at the store, you may need to make a few cuts during installation if the boards weren’t cut perfectly accurate at the store.
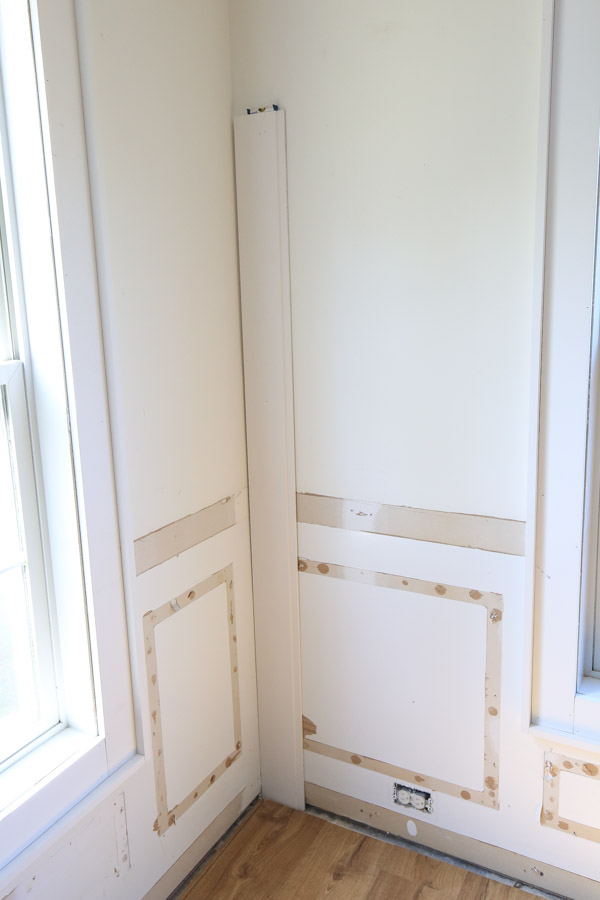
4. Install the first vertical shiplap board
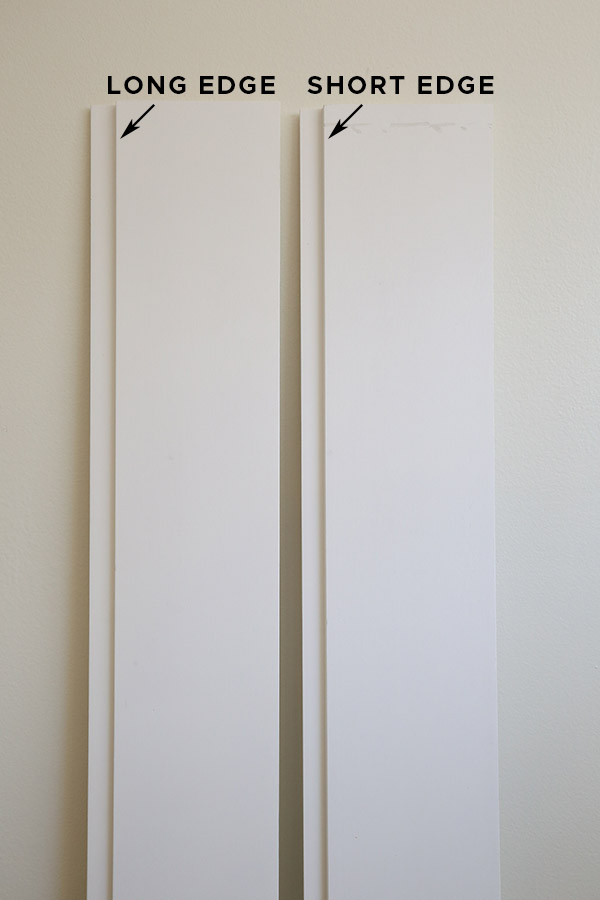
Line up the first vertical shiplap board with the corner of the wall. Make sure that the straight edge of the board is lined up on the wall side and not the shiplap tongue edge.
If you are using boards like these Lowe’s shiplap boards, make sure to start with the back side towards the wall.
As I explained in my floor to ceiling vertical shiplap tutorial and DIY shiplap ceiling tutorial, each board has a short edge and a longer edge. The shorter edge is the back and the longer edge is the front. Make sure to install them correctly. Some have a sticker on the back too!
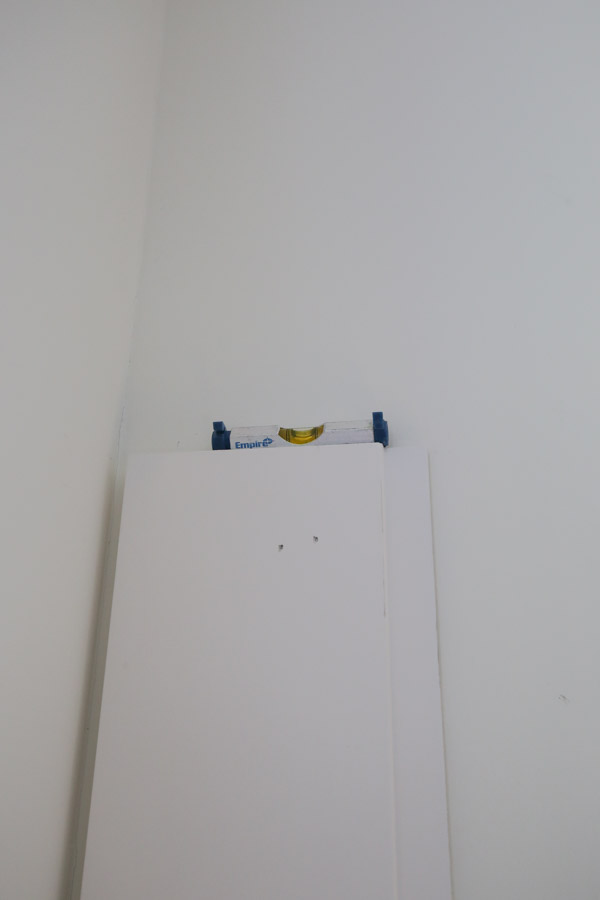
Use a level and make sure that you are installing the first board level. Many walls like ours our not square, so you many have to tilt the board slightly.
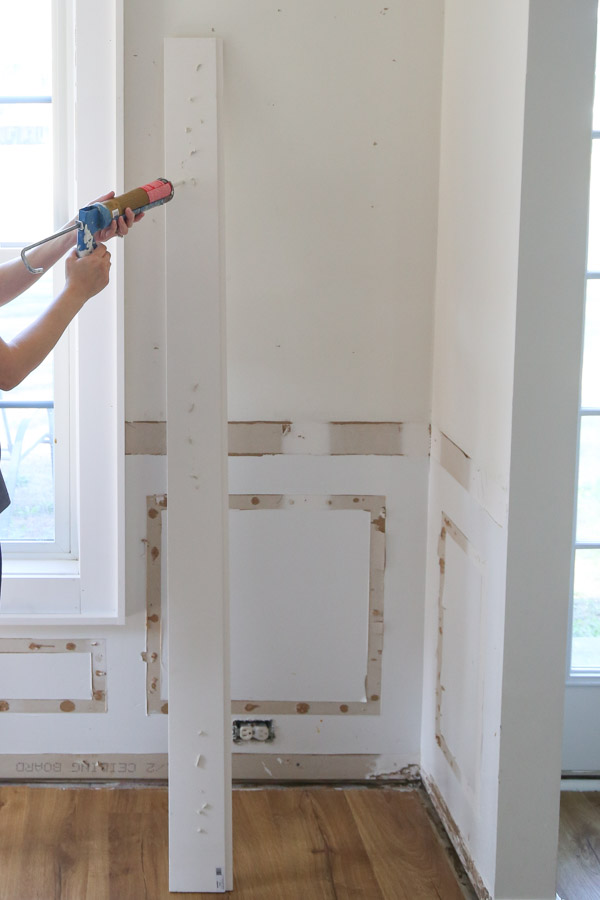
To actually install the shiplap, use a little bit of construction adhesive, 2″ brad nails, and a brad nailer to attach the vertical shiplap boards to the wall.
Wall outlets, windows, and other spacing considerations
I wanted to mention that if you have things like wall outlets, switches, windows, etc you will need to cut around these. I’ll explain how we cut around ours in the next few steps.
But, if you want you to try and avoid a small gap and thin board cut when you get to a window or the last board on the wall, you could lay out the boards before hand. By doing this you can see if you will only have a small amount left as the last cut.
If you do, then you could start with a less wide first board, by ripping (cutting) it down to a less wide size. This will make sense more as I get to these steps. It’s a very similar concept to tiling!
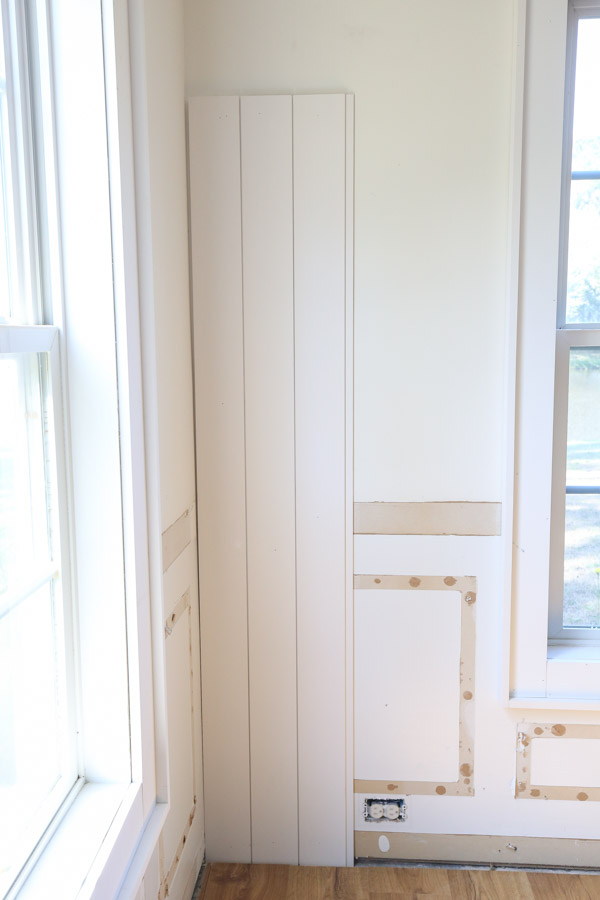
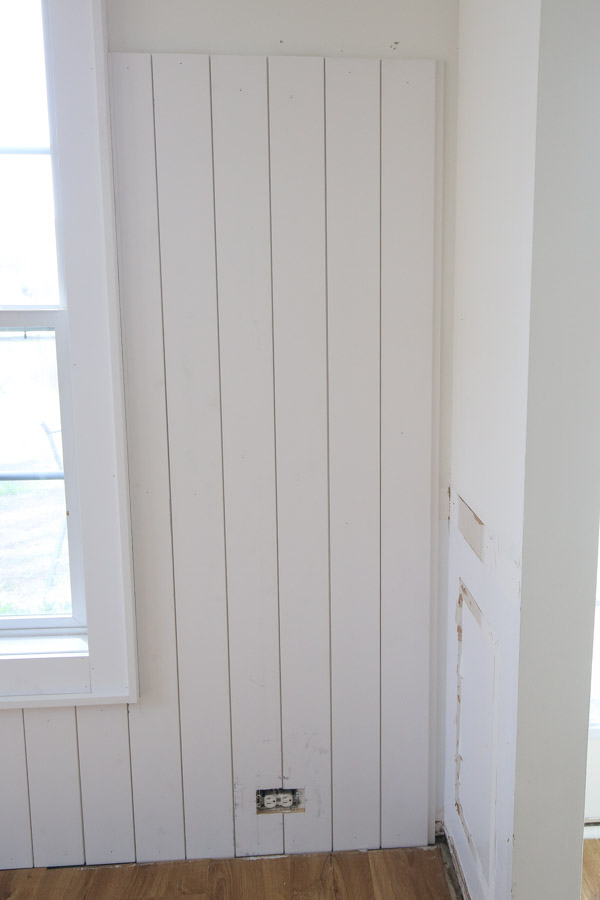
5. Install the remaining vertical shiplap boards
Continue to install the remaining vertical shiplap boards. Make sure when you are installing them, the top of the boards are all level with each other and at the same height.
📩 Want to Save This?
It does not matter if the bottom of the boards line up with each other since they will be covered by the baseboard.
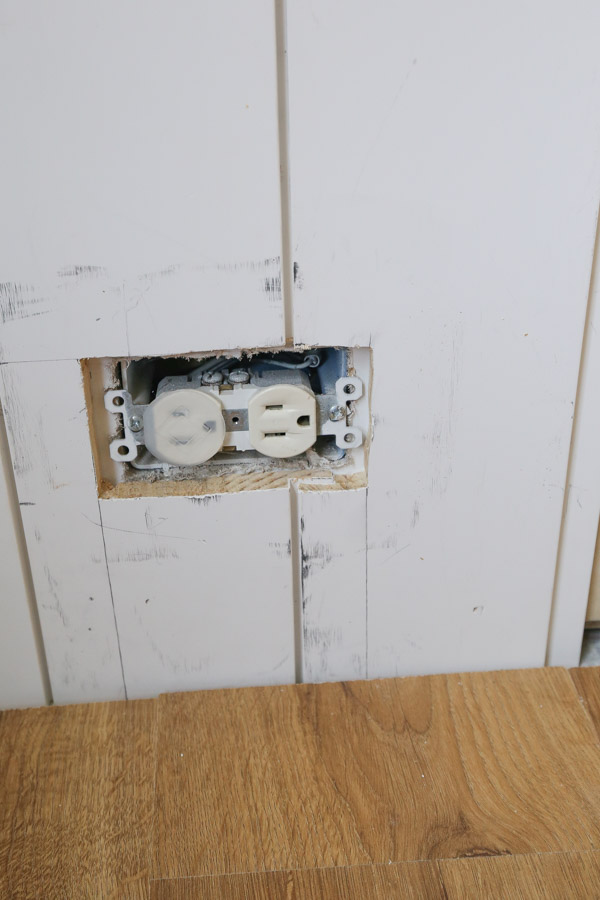
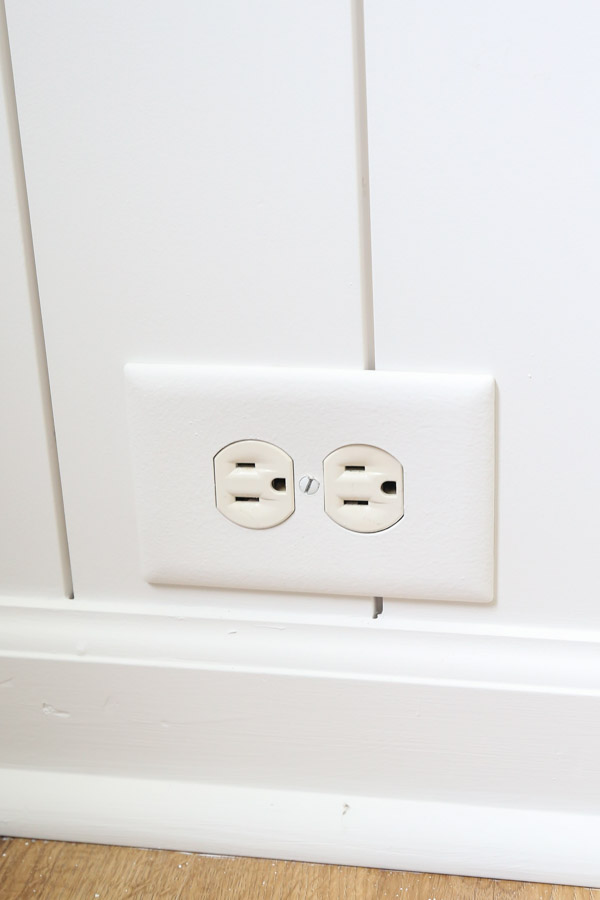
Cut around wall outlets
When you have a wall outlet or something else on the wall, you need to cut around it.
Remove any wall outlet covers. Measure and mark on your board where you need to cut it for the special cut.
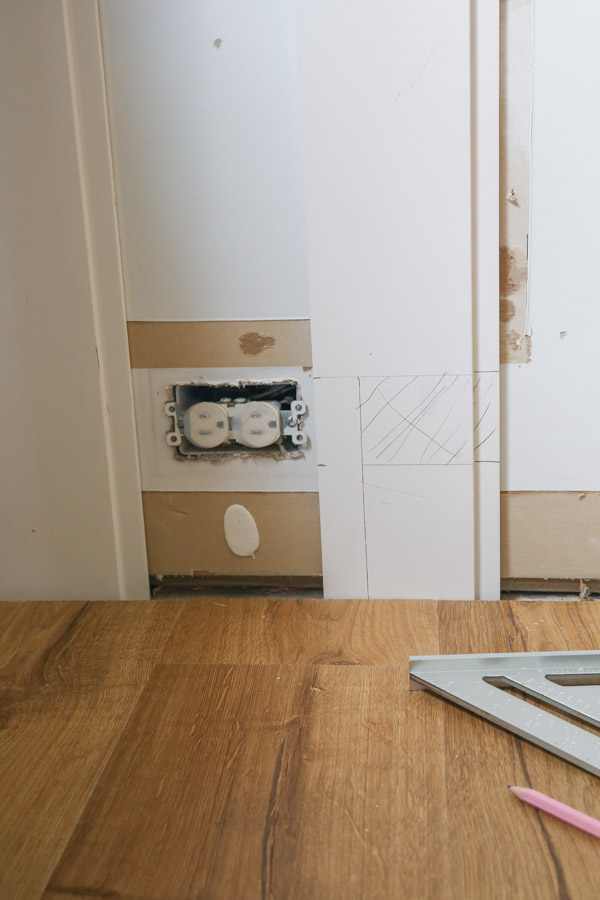
Use a Dremel or drill and jig saw to make the special cut. We did this for our bathroom vertical shiplap with plywood and cutting around pipes. And we had to do it here for our dining room wall outlets.
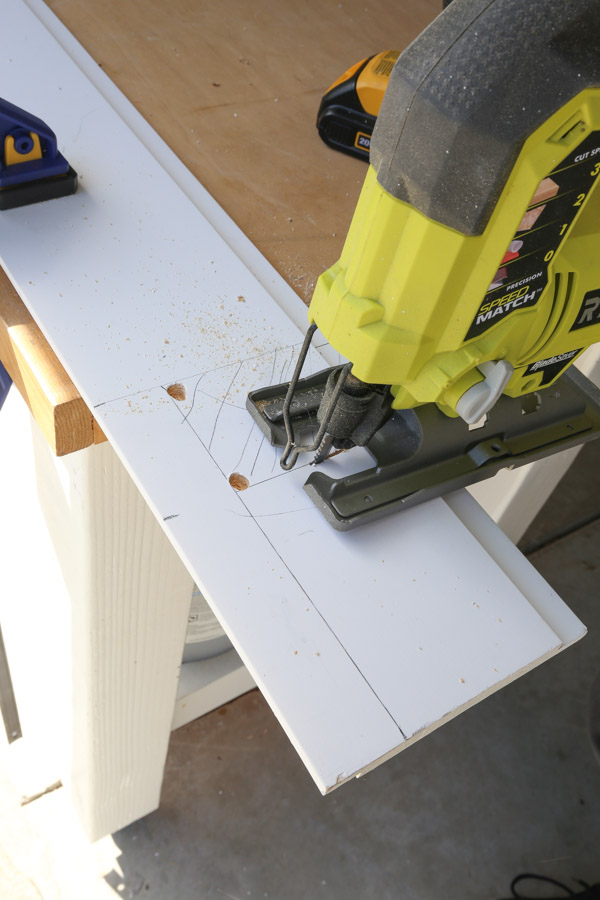
After measuring and marking where we needed to cut, we used our drill to start the cut, then our jig saw to finish. The cut didn’t need to be perfect since the wall outlet covers it.
Cut around windows
When we got to cutting around our windows, we used both the jig saw for the smaller cuts and then our table saw or circular saw and straight edge guide for the longer cuts.
This is the hardest, most time consuming part of this project! And when we got to our next wall, we had a really thin strip to cut out.
This is a great example where we should have laid our boards out first to realize this and we should have started the first board on this wall cut down to a less wide size! But, we were in a rush, so we just made it work!
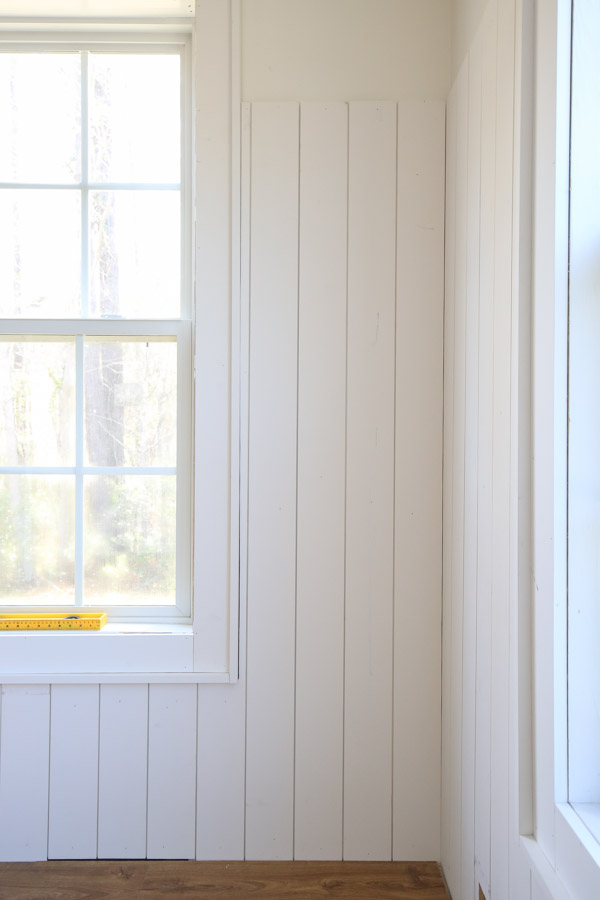
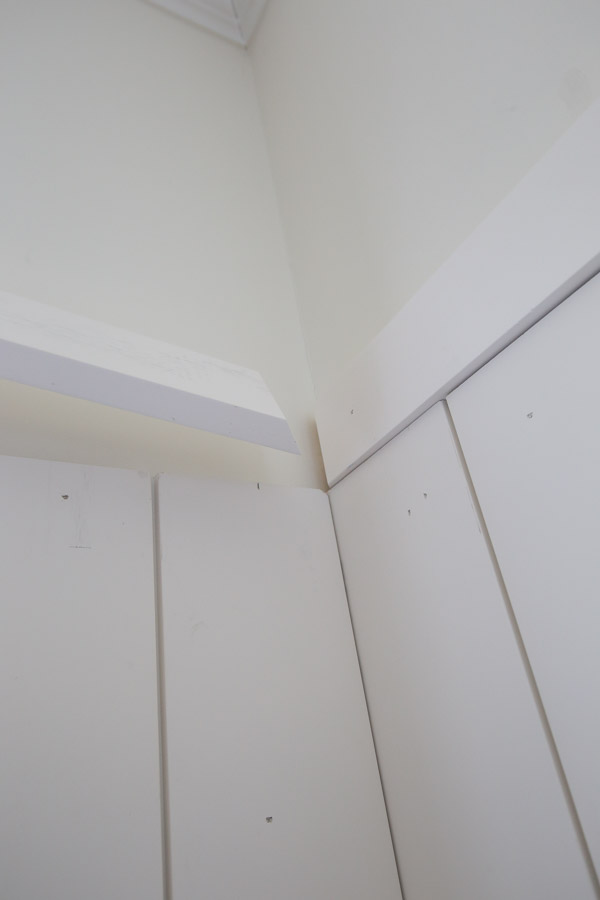
Wall Corners
As you can see in the photo above, where the shiplap boards meet at these inside wall corners, we just butted up the boards next to each other to keep the install easy. Make sure to place the non tongue side of the board towards the corner/wall!
This corner seam will get caulked before painting so it will all be a seamless look.
Also, make sure when you start the next wall, to use a level again for installing the first board.
If you have outside wall corners, it would look best to bevel the side edges of the shiplap boards where they meet!
6. Rip cut the last shiplap board to size if needed
When you get to the last board, measure the remaining space left and rip cut the shiplap board to that size. We’ve had to do this for all of our shiplap projects!
Note, you can subtract an extra 1/8″ from the measurement to give yourself some wiggle room to get the board in place and then caulk the difference at the end.
To make a rip cut, use a table saw or circular saw and straight edge guide.
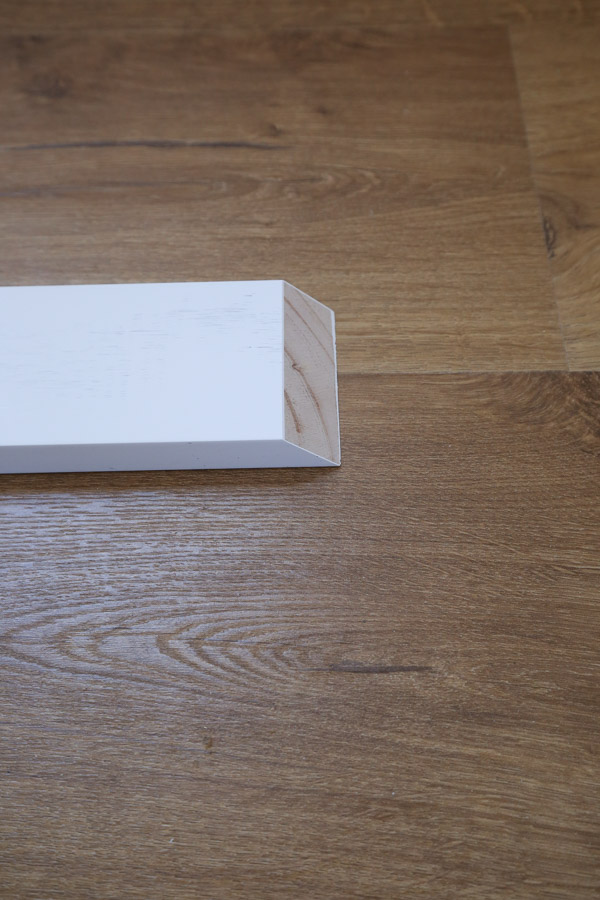
7. Install the top trim over the vertical shiplap half wall
After installing the vertical shiplap, install the 1×3 top trim board.
Note, we actually installed this top trim before our shiplap for our bathroom vertical shiplap half wall because we were using thin plywood boards. For this project, with real shiplap boards, it’s easier to get them in place without the top trim in the way!
To install the top trim, begin by measuring and cutting the boards to size.
Mark the wall studs using a stud finder. Install the board to the wall studs with 2″ brad nails. If you can’t hit a wall stud, you can use some Liquid Nails again.
Make sure it is level when installing!
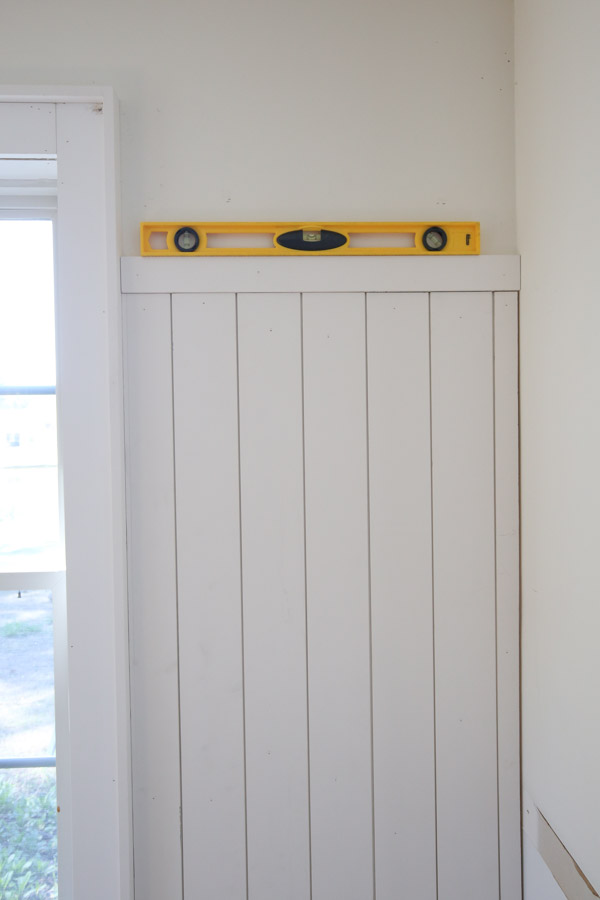
For corners, we made bevel cuts and joints for a nicer final look.
8. Install the baseboard to the vertical shiplap walls
Install your original baseboard (or new baseboards if you prefer) on top of the shiplap with 1 1/4″ brad nails and a brad nailer.
Note, for any adjacent wall or walls that don’t have shiplap, you will need to cut the baseboard by 1/2″ or the thickness of the shiplap board so it aligns properly with the baseboard on your shiplap wall.
9. Prep for paint and paint the vertical shiplap half wall
Prep for paint by filling in all the nail holes with a spackle or wood filler. Once the spackle or wood filler has dried, lightly sand it smooth.
Caulk all seams on the vertical shiplap half wall with a paintable caulk and let dry.
For painting, begin by painting the shiplap gaps with an angled brush if you didn’t paint them yet.
As explained in my how to paint shiplap tutorial it’s easiest to paint these gaps in as you install the shiplap for a darker color. But, it’s ok if you wait to the end too, it just takes a little longer!
We used Swiss Coffee by Benjamin Moore in eggshell for the vertical shiplap walls and trim. I love white shiplap, but it also looks beautiful painted with a bold color too!
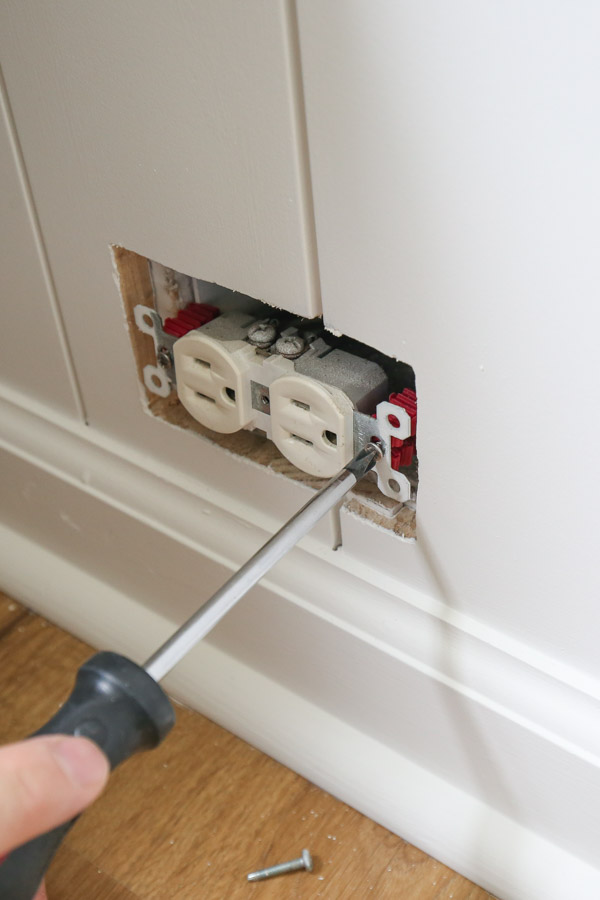
10. Install wall outlet spacers if needed
The last step is to install wall outlet spacers if you have any outlets. Because the shiplap boards added a 1/2″ thickness to the wall, there is now a 1/2″ gap between the outlet and cover. These outlet spacers fix that!
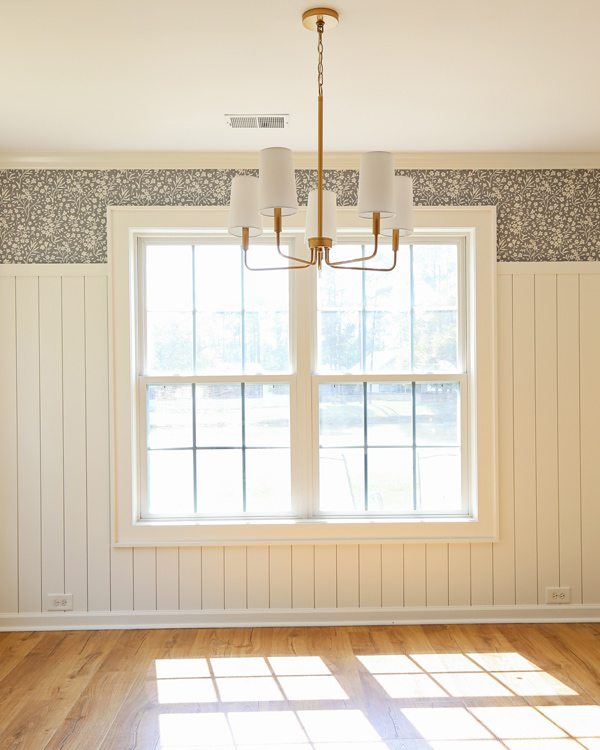
Our DIY vertical shiplap half wall looks great and is adding so much character and coziness, and visual interest to our dining nook! I can’t wait to add the floral wallpaper above it next!
UPDATE: Here is a photo with the DIY peel and stick wallpaper installed!
Don’t for get to check out some of our other great shiplap projects, including our vertical shiplap bathroom wainscoting, floor to ceiling vertical shiplap accent wall in our hallway, and our DIY shiplap ceiling too!
Follow along for my latest projects and sneak peaks on Instagram, YouTube, TikTok, and Facebook!
Kelli
Tuesday 7th of April 2026
Would I be able to do this around a new woodstove, in new construction? How would the wallpaper do?
Kristine
Sunday 3rd of November 2024
What is the color of the gray shiplap picture you have in here?
Angela Marie Made
Thursday 9th of January 2025
Mindful Gray by Sherwin Williams!
Jane Vetzikian
Friday 5th of April 2024
I like what you've done with the shiplap but I wanted to see the finished look with wallpaper!