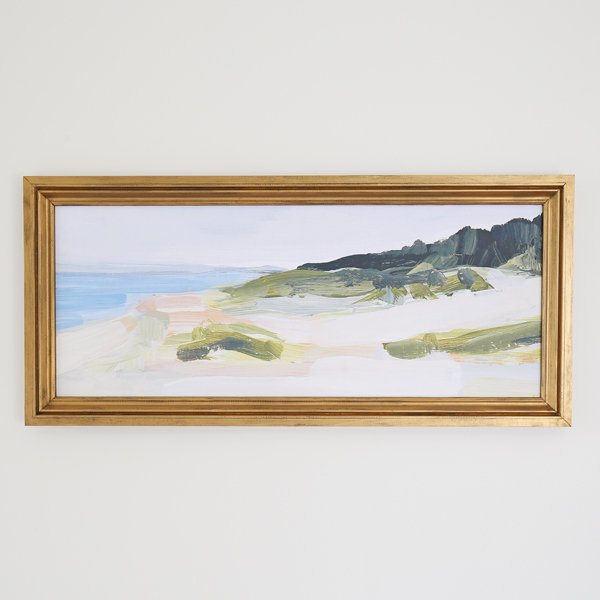
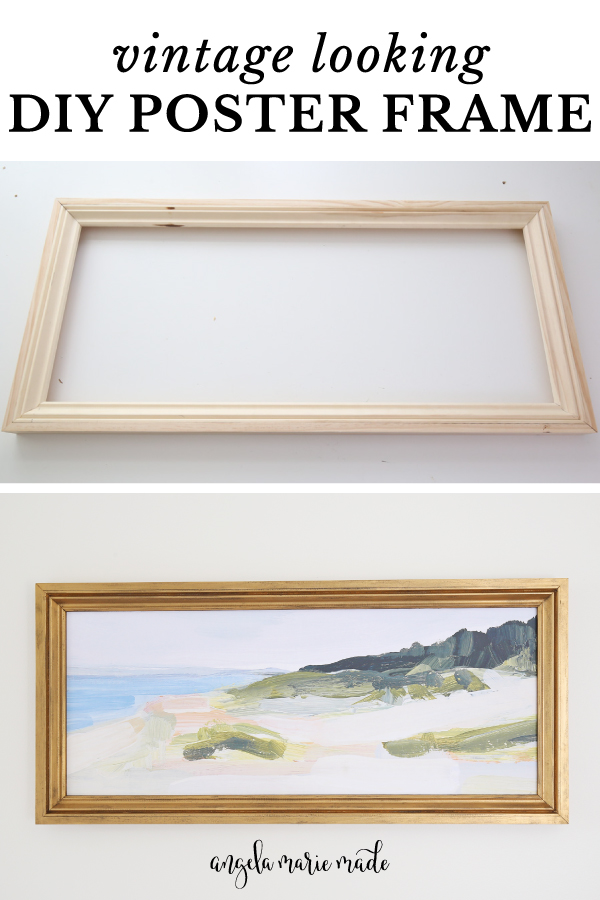
Today I’m going to show you how to make a vintage looking DIY poster frame!
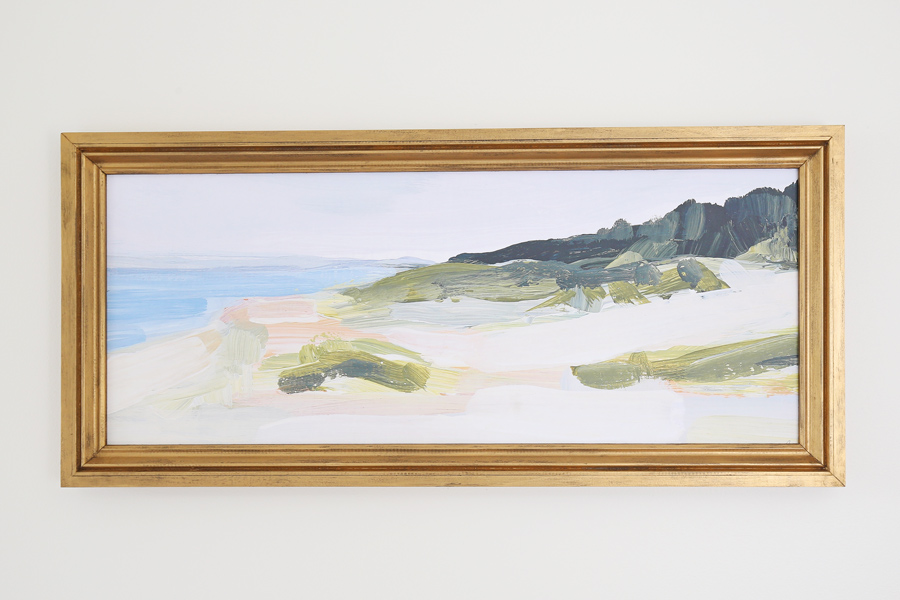
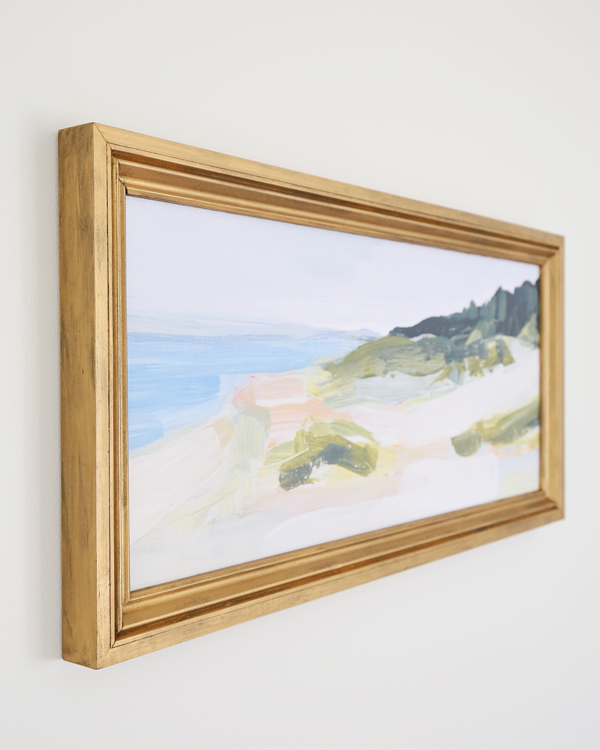
For our bedroom makeover that we are working on, I really wanted to do a large piece of artwork over our bed and I wanted it to be in a long, vintage gold frame, like the kind that I’ve been seeing all over Pinterest.
Well, I didn’t have time to go thrifting for the perfect frame, so I decided to make one instead at the exact size I wanted out of wood.
Note, this post contains some affiliate links. I may earn a commission if you shop those links (at no cost to you). Thank you for supporting my small business. For more info see my disclosures here.
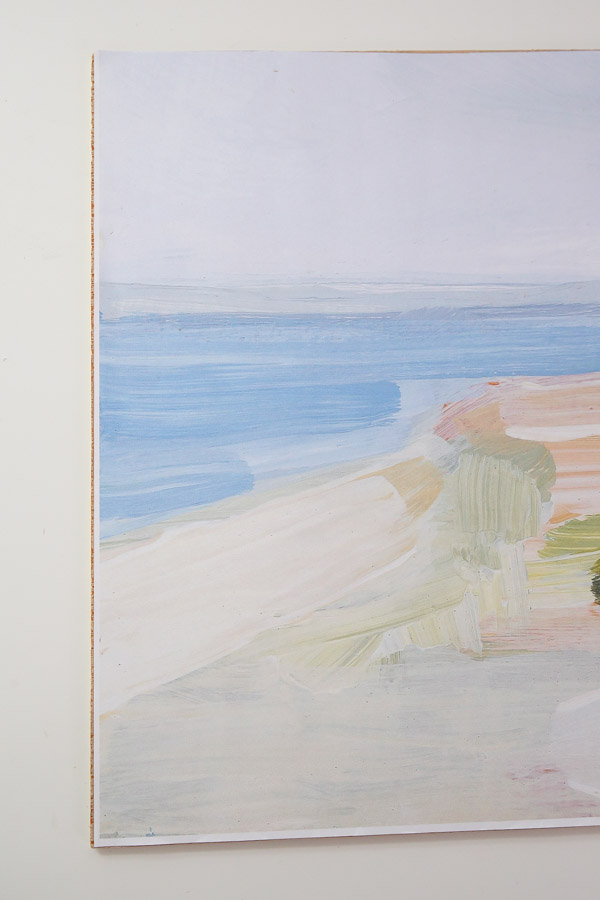
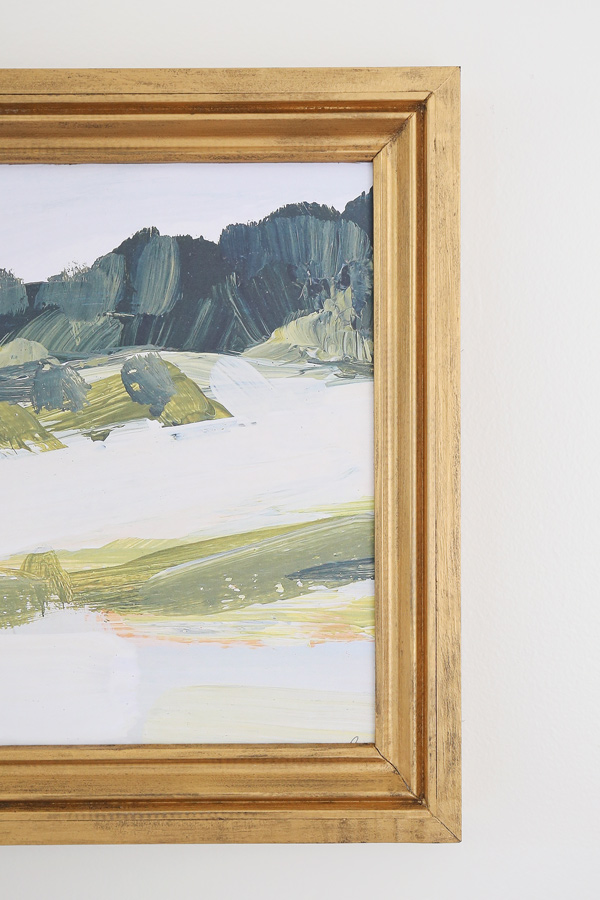
I bought my poster artwork as a digital download from Juniper Print Shop and I love the abstract landscape painting and colors!
I had it printed as a 24 x 36 poster from mpix which is my favorite place to get things printed, the color and quality are great!
Vintage DIY Poster Frame:
Materials
- (3) 1/2″ thick x 2″ x 3ft*
- 2ft x 4ft plywood @ 1/4″ thick
- (1) 3/4″ thick molding x 8ft (I used this molding)
- 1″ brad nails
- Wood glue
- Spackle or wood filler
- Black spray paint
- Inexpensive paint brush (I used this one)
- Rub n Buff – Gold Leaf
- 24×36 poster artwork
- Glue Dots
Tools
- Miter saw
- Circular Saw or Table saw (optional)
- Drill
- Brad nailer
- Clamps
*Alternatively, you could just use 1x2s @ 8ft long (which are 3/4″ thick and come in longer sizes), but I wanted mine to be 1/2″ thick.
Final Poster Frame Measurements: 15 1/2″ tall x 34″ wide x 1 1/2″ deep (using the same molding as I did)
Video Tutorial:
Subscribe to my YouTube Channel here!
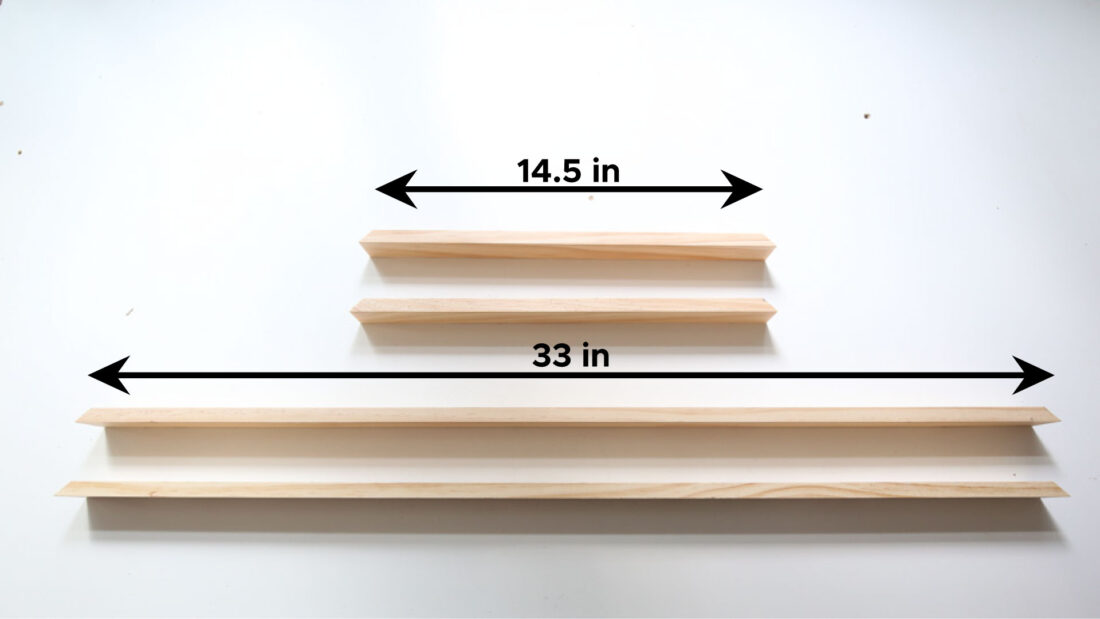
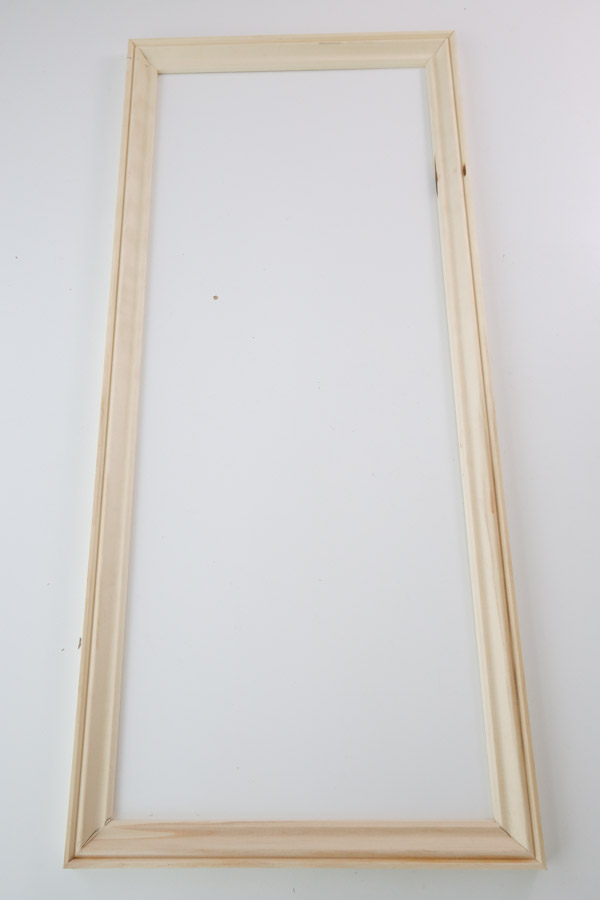
1. Cut molding and lumber to size
Use a miter saw and make the following cuts from the molding with 45 degree angle cuts:
- (2) pieces @ 14 1/2″ from long point to long point
- (2) pieces @ 33″ from long point to long point
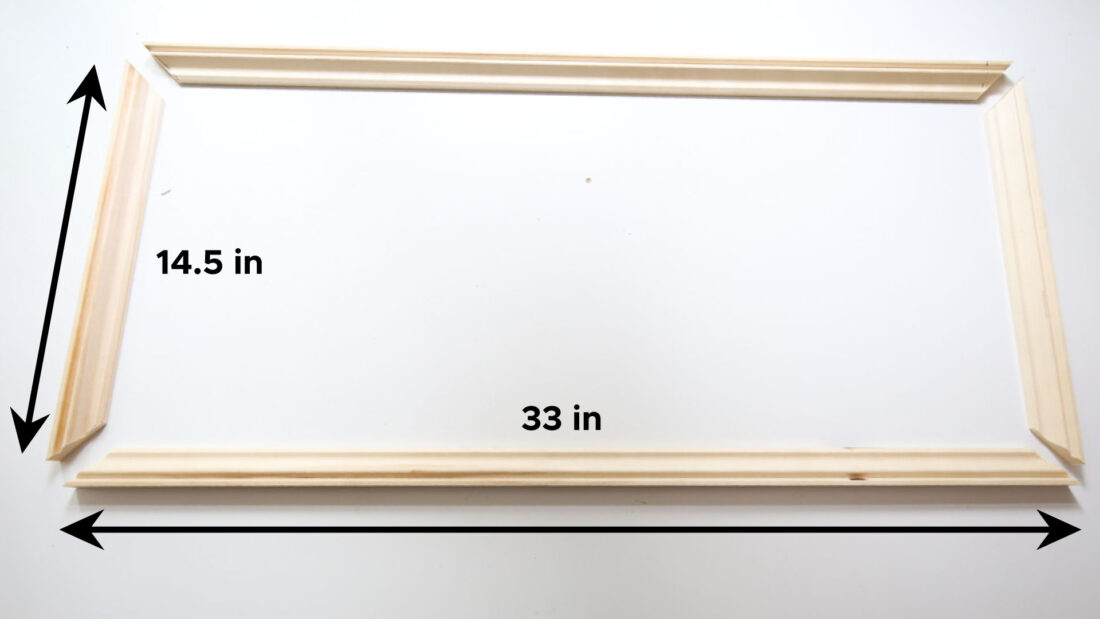
Then, make the following cuts from the 1/2″ thick boards with 45 degree bevel cuts:
- (2) pieces @ 14 1/2″ from short point to short point
- (2) pieces @ 33″ from short point to short point
Next, have the 1/4″ thick plywood cut at your home improvement store or use a circular saw with a straight edge guide or a table saw. Cut the 1/4″ thick plywood to a little bit less than the inside size of the frame (which will be 14 1/2″ tall x 33″ wide). We did:
- 1 piece @ 14 3/8″ x 32 7/8″
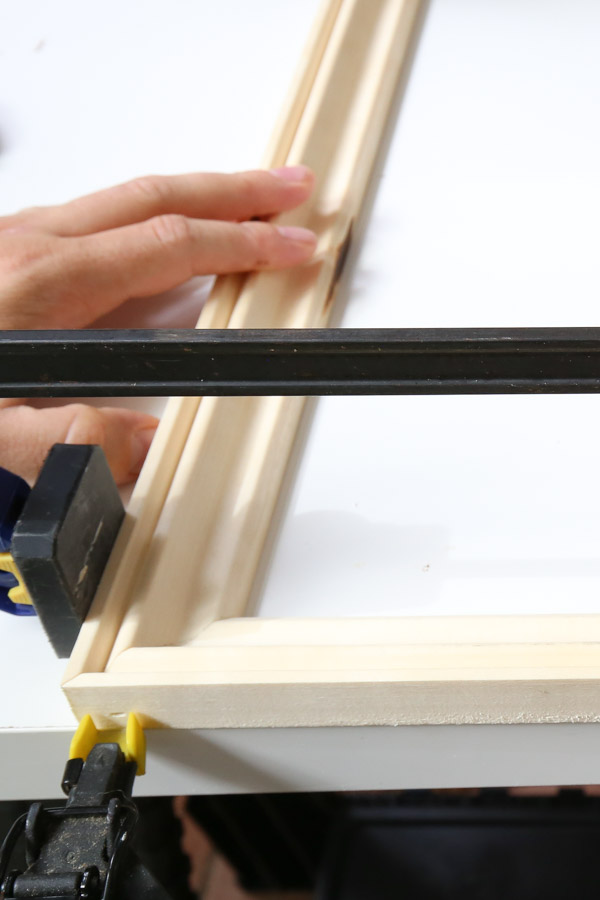
2. Attach frame molding together
Use wood glue and 1″ brad nails with a brad nailer and attach the the molding together at the corners to construct the poster frame. We used clamps to help with this step.
Also, just add one nail towards the bottom of the molding edge where it’s thicker.
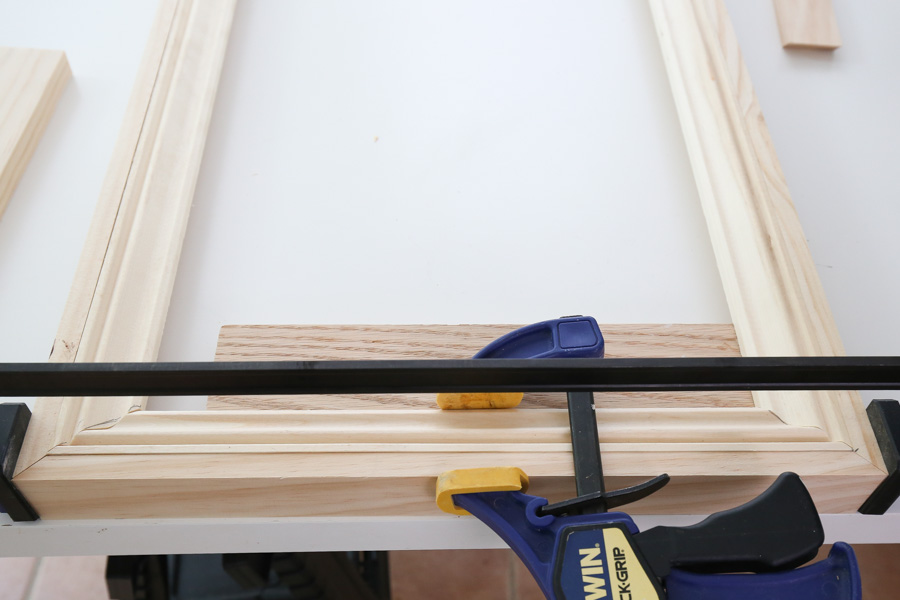
3. Attach outside board to frame molding
Use wood glue and 1″ brad nails again and attach the 1/2″ thick boards around the frame molding. We used clamps again to help with this step as well as some scrap 3/4″ wood to hold the frame up in place.
Also, we marked 3/4″ down from the outside board edge to make sure we added the brad nails in just above this mark, again so they went through the thicker part of the molding.

📩 Want to Save This?
After adding the nails around the edges, we put two nails through each of the 4 corners where the two 1/2″ boards joined each other.
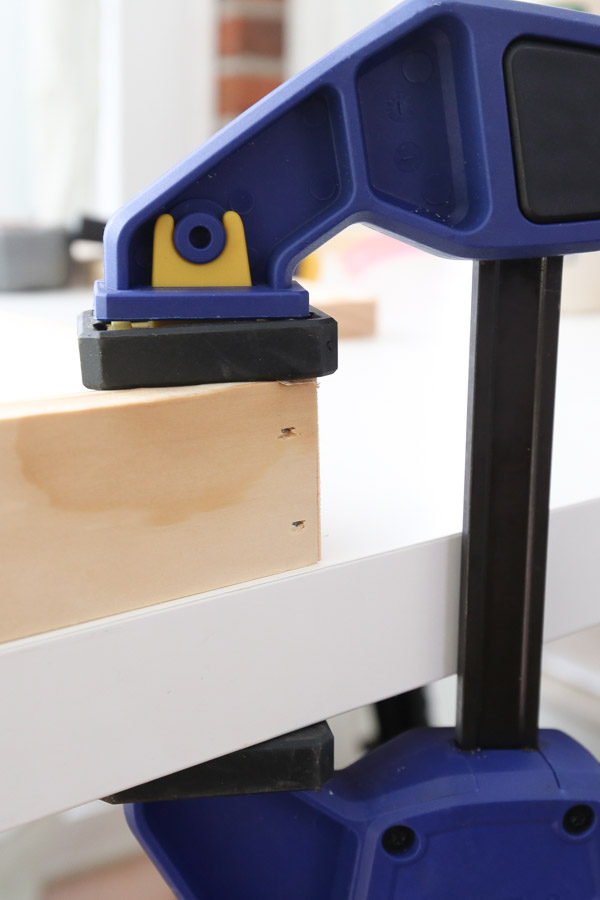
4. Fill holes with wood filler
Fill nail holes and any gaps with wood filler or a lightweight spackle.
5. Cut poster to size with scissors
Next, cut your poster to size. I used my frame to determine where I wanted to cut my poster.
Cut the poster to fit your 1/4″ plywood backing board. I made my poster a little bit smaller than the plywood.
At first I tried to use a craft blade cutter to cut the poster, but then I realized it was much easier to just use scissors since I didn’t need a perfect cut because my poster edges will be covered by the frame.
You can see this in action in my DIY poster frame video tutorial!
6. Attach poster to plywood
I used one glue dot on each corner of my poster to secure it to the plywood. These are easily removable if I ever want to change the artwork.
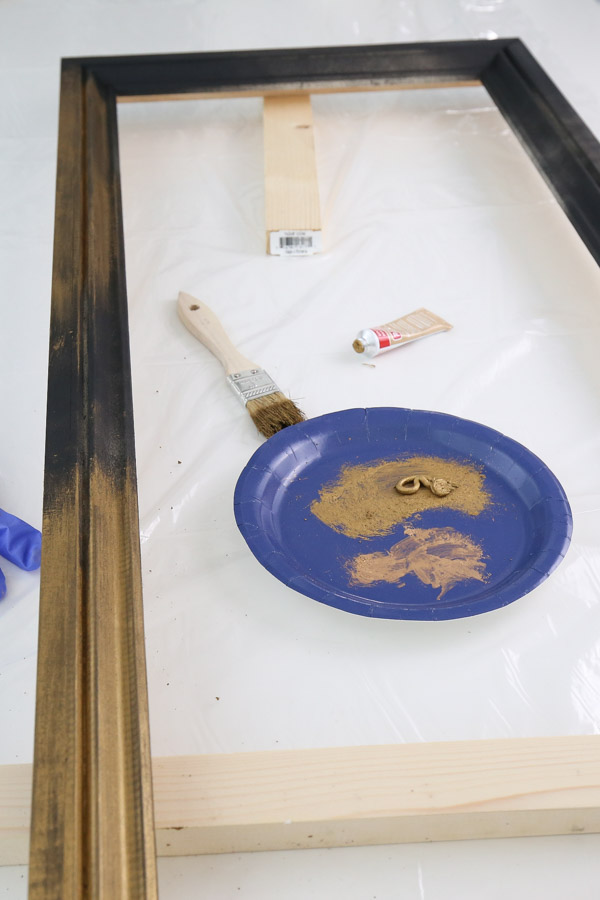
7. Add a finish to the DIY poster frame
I chose to do a metallic gold finish for my frame. I wanted it to look like a vintage, worn gold finish. I saw this Rub ‘n Buff tutorial by Jenna Sue Design and loved the look of it, so I decided to do it.
I started with a flat black spray paint on the frame. Then, I used the color gold leaf by Rub ‘n Buff and a cheap $1 chip brush and lint free rag to apply it and buff it. It dries super fast and is a bit difficult to rub into the wood, so you have to work quickly.
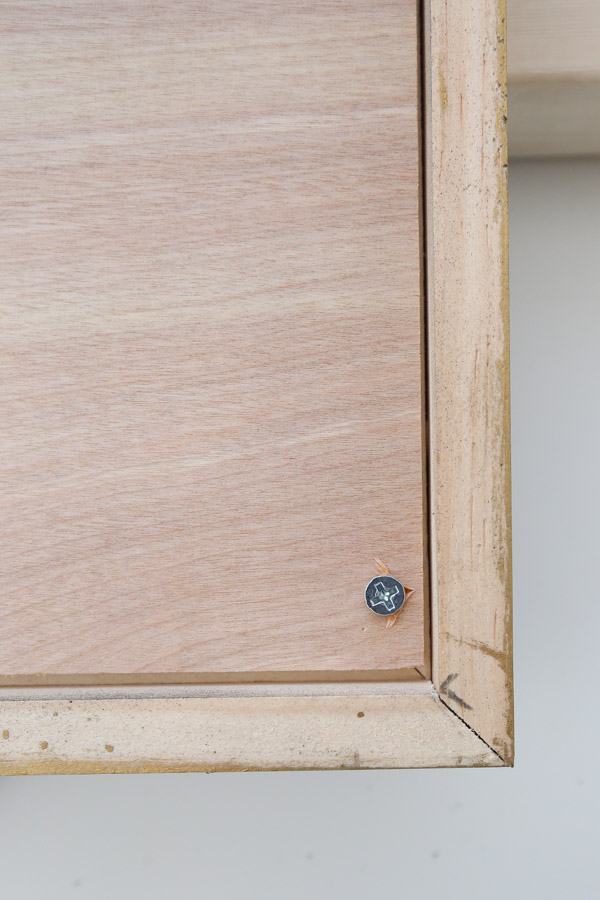
8. Attach plywood with the artwork to the frame
Lastly, attach the plywood to the frame with 3/4″ screws through the back of the plywood. Make sure to add them towards the edges of the plywood so the screws go through the thicker part of the molding. And don’t put them through the joint where the frame corners meet.
And that’s it!
Follow along on Instagram stories for sneak peeks of our bedroom makeover progress and follow along on YouTube for video tutorials of all the DIY and decor projects!
Want to save for later?! Pin it here:
Arman Nolledo
Thursday 7th of December 2023
What if the poster I want to frame is a different size? How did you derive your cut lengths for the wood? Thanks.
Xochitl Moya
Saturday 31st of October 2020
So so Beautiful and easy to build!! I love your tutorials <3
Angela Marie Made
Monday 2nd of November 2020
Thank you, I'm glad you find them so helpful!
ColleenB.~Tx.
Saturday 31st of October 2020
WOW! That is awesome and such a great tutorial. Was wondering; I would like to print this out for my hubby but don't see where there's a 'print' button.
Angela Marie Made
Monday 2nd of November 2020
Thank you so much!! I actually purchased the print from Juniper print shop, I have a link to it in the post.