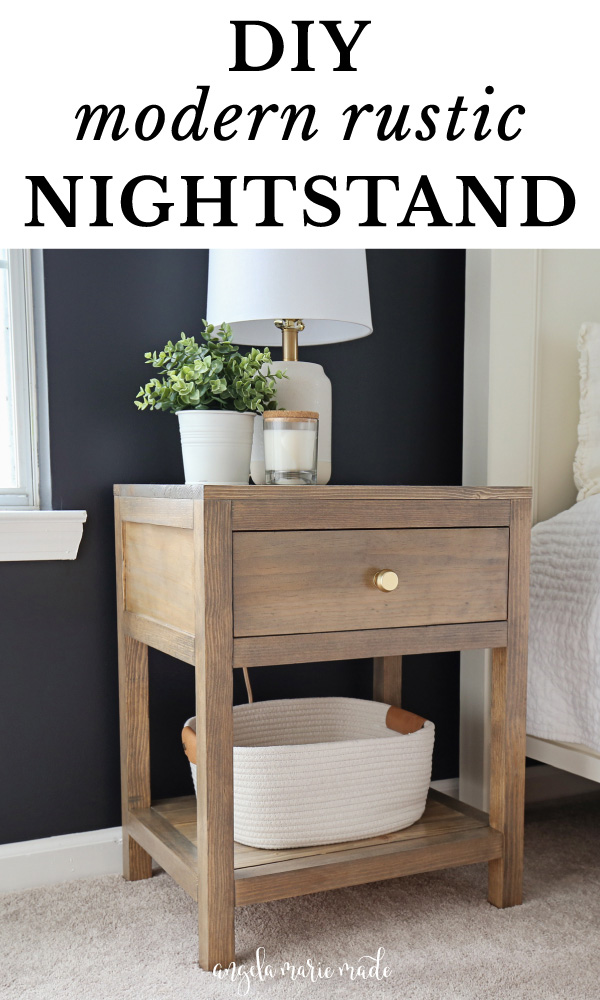
Learn how to build a DIY nightstand with drawer!
For our bedroom makeover I knew I wanted to build a pair of DIY wood nightstands for each side of our bed.
We’ve been using my old IKEA nightstand for my side and a plastic drawer set for Brandon, haha! Clearly, it was time for an upgrade!
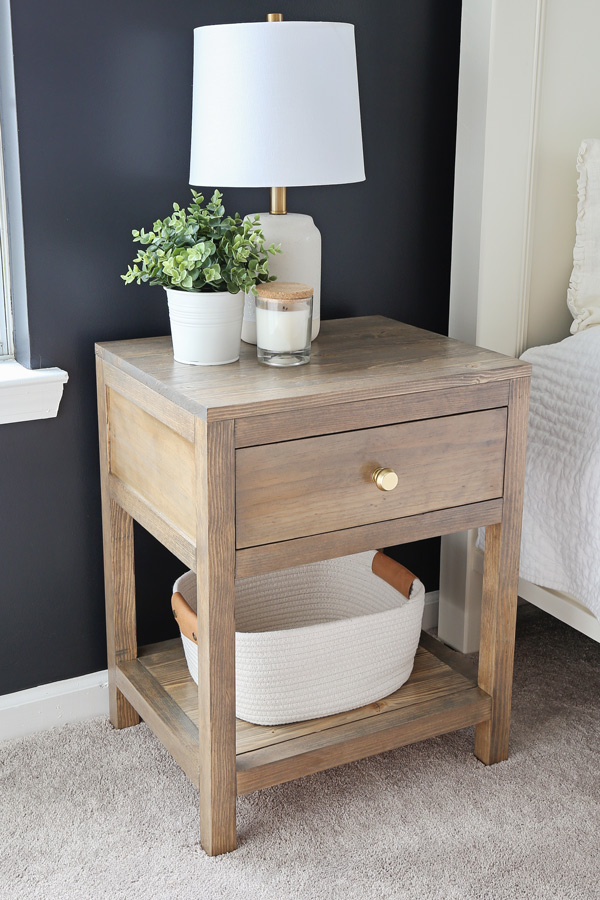
I am really excited to now have a matching pair of real, solid wood nightstands, that we made! And I love the modern rustic look of them too!
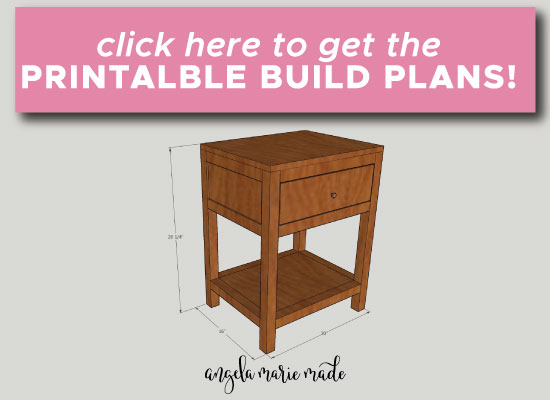
I have the full tutorial, video tutorial, and printable build plans below!
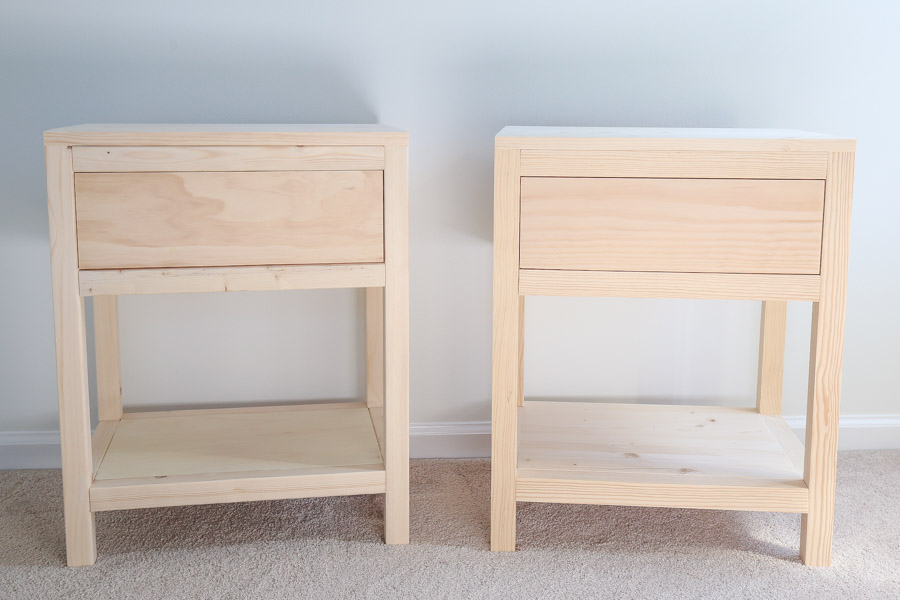
These nightstands can be made with premium wood or knotty pine wood (for the 2x2s and 1x6s) to save money. We actually made one of them with 2×2 furring boards and one with premium 2x2s. It’s about $90 with the premium and $50 with the cheaper wood to build one of them.
If you do end up using the 2×2 furring boards, make sure to measure them in case they are slightly smaller than 1.5″ thick like the premium boards. If so, make sure to adjust the below cut measurements for that difference when building.
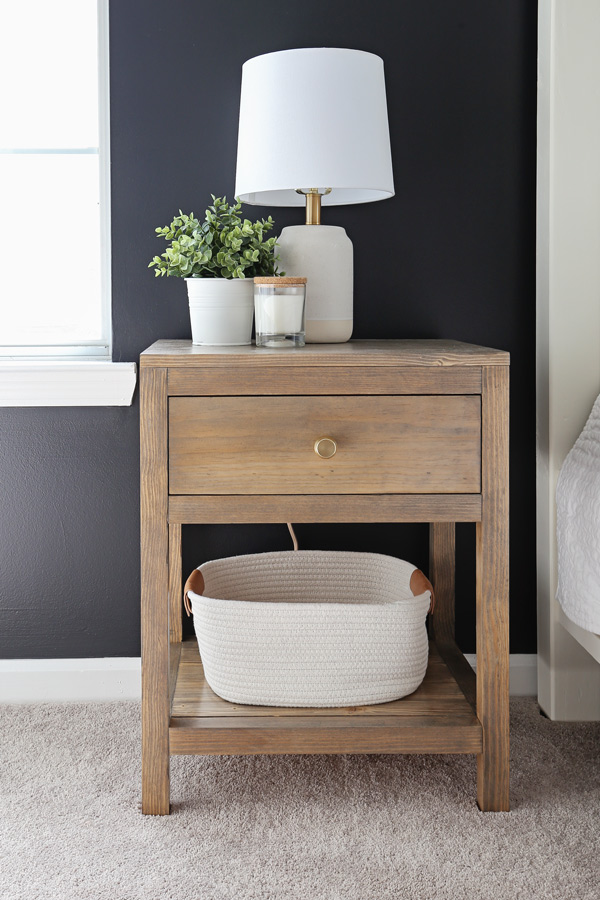
Final Nightstand Measurements: 26 1/4″ tall x 20″ wide x 16″ deep
Note, this post contains some affiliate links. I may earn a commission if you shop those links (at no cost to you). Thank you for supporting my small business. For more info see my disclosures here.
How to Build a DIY Nightstand with Drawer:
- (4) 2×2 @ 8ft
- (1) 3/4″ x 16″ x 48″ edge glued panel board***
- (1) 2ft x 2ft plywood @ 1/4″ thick
- (1) 1×6 @ 6ft
- (1) 1×4 @ 6ft
- 12″ or 14″ Drawer slide packs
- 3/4″ and 1″ wood screws
- 1 1/4″ brad nails
- 1 1/4″ and 2 1/2″ Kreg screws
- 1/4″ wood shims or paint sticks
- (1) 1/2″ x 2″ x 3ft boards or 1/2″ plywood
- Cabinet knobs
- Paint or Wood stain
- Kreg Jig
- Miter saw
- Circular Saw or Table Saw
- Drill
- Brad nailer
- Clamps
- Speed Square
- Level and mini level
- Tape Measure
***Make sure to measure the actual width of your panel board and confirm it’s 16″. We found our 16″ wide panel board at Lowe’s.
Video Tutorial:
Subscribe to my YouTube Channel here!
1. Make the initial lumber cuts for the nightstand
Click here for the printable build plans of the cut list and building steps!
Use a miter saw and make the following cuts from the 2×2s:
- (4) 2×2 @ 25 1/2″ (for nightstand legs)
- (6) 2×2 @ 13″ (for nightstand sides)
- (6) 2×2 @ 17″ (for nightstand front & back)
Make the following cuts from the 1×6:
- (2) 1×6 @ 13″ (for nightstand sides)
- (1) 1×6 @ 17″ (for nightstand back)
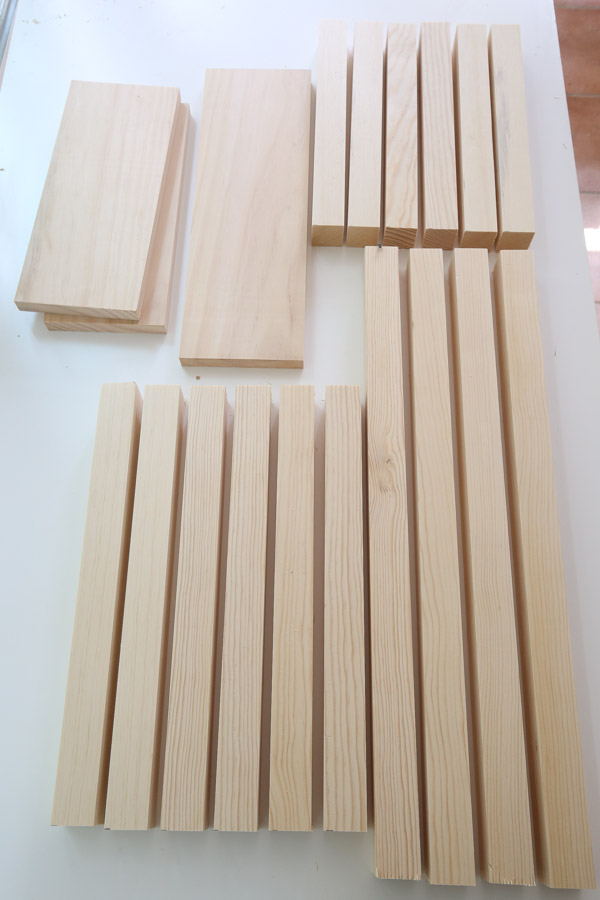
Make the following cuts from the 1/2″ x 2″ x 3ft board:
- (2) pieces @ 13″ (for drawer slide install to cabinet sides )
Use a circular saw with a straight edge guide or table saw and cut the 4ft panel @ 3/4″ thick:
- 1 piece @ 16″ x 20″ (for top of nightstand)
2. Add pocket holes to boards
It’s time to drill pocket holes on our boards using a Kreg Jig. If you need tips on using one, see my how to use a Kreg Jig tutorial! Also, make sure to adjust your settings for the different wood thicknesses below.
Add pocket holes on each side of the following 2×2 boards:
- (6) 2×2 @ 13″
- (6) 2×2 @ 17″
For two of the 2x2s @ 17″, add two pocket holes set for 3/4″ wood along one side of the boards as shown below. These holes are for attaching our top 3/4″ panel board to the nightstand frames.
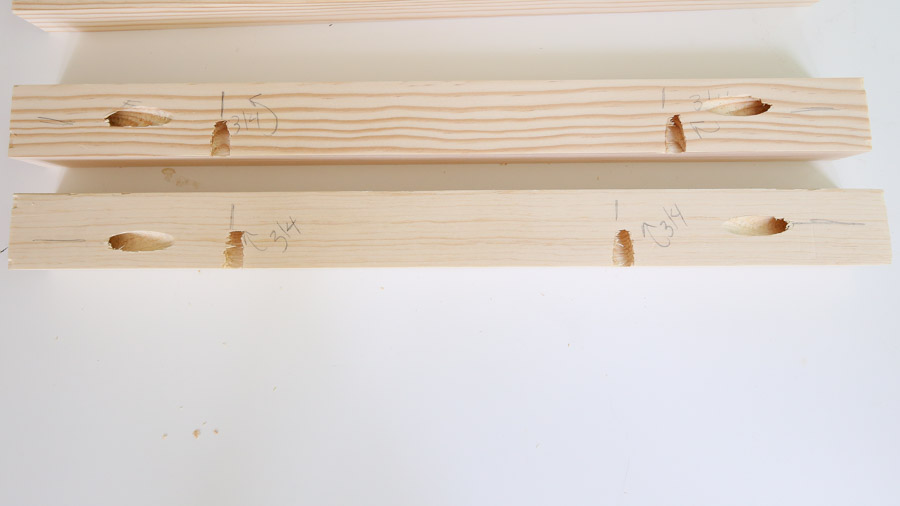
And add two pocket holes to each of the the following 1×6 boards:
- (2) 1×6 @ 13″
- (1) 1×6 @ 17″

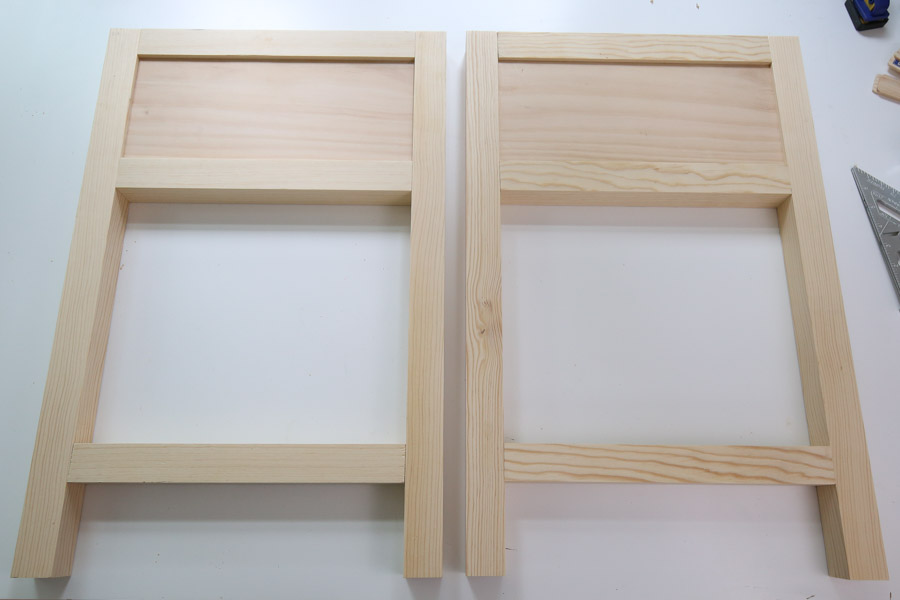
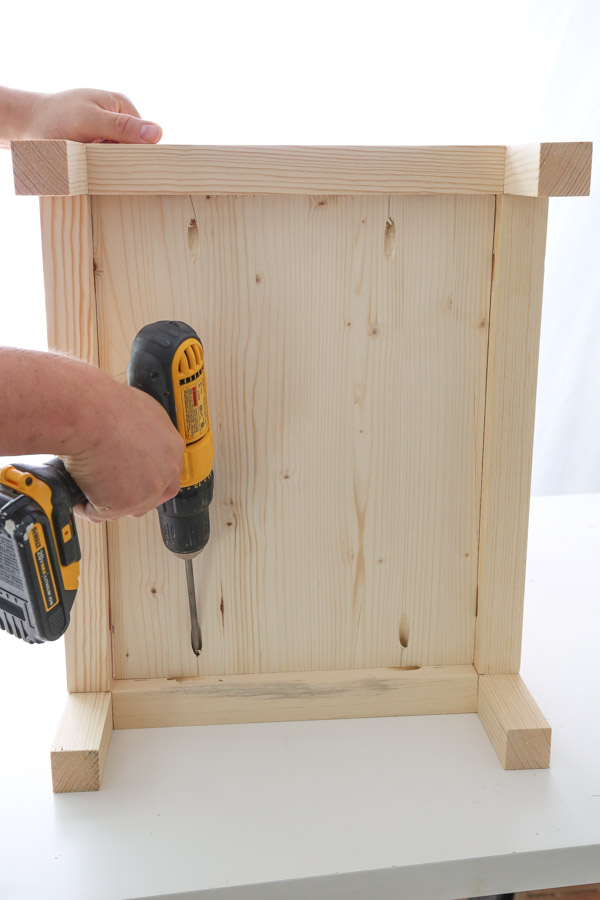
3. Assemble side frames of DIY nightstand
Attach two of the 2×2 @ 25 1/2″ boards together with one of the 13″ 2×2 boards on the ends using a drill and 2 1/2″ Kreg screws.

Then, add one of the 1×6 boards @ 13″ under the 2×2 @ 13″ using 1 1/4″ Kreg screws. Also, place 1/4″ wood shims or two painting stir sticks stacked under each side of the 1×6 so that it’s attached 1/4″ in from the edges of the 2x2s on the front side.
To finish off the side, add a 2×2 @ 13″ under the 1×6 with 2 1/2″ Kreg screws and add another one at 3 1/2″ up from the bottom of the leg sides (which will be for the bottom shelf).
Repeat the above steps to create a second nightstand side.
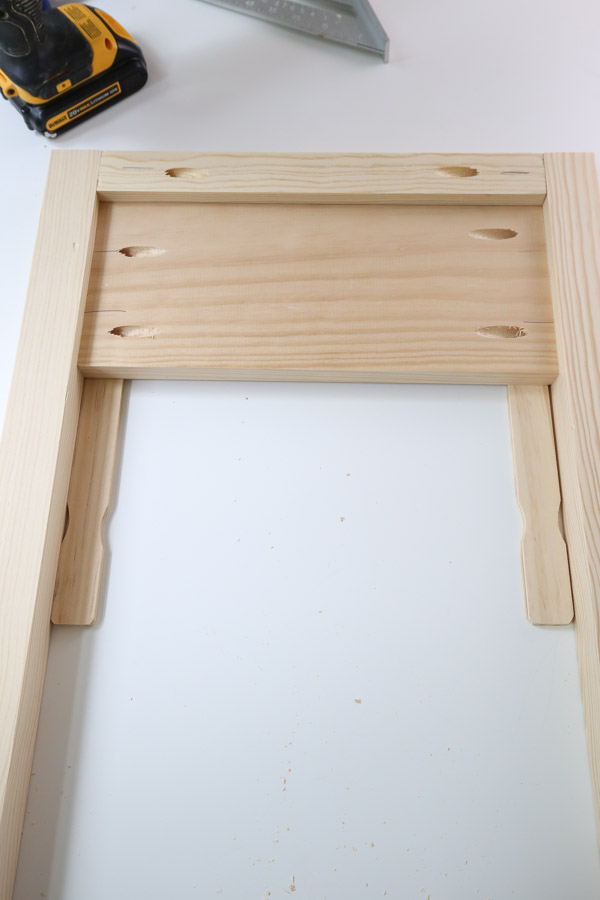
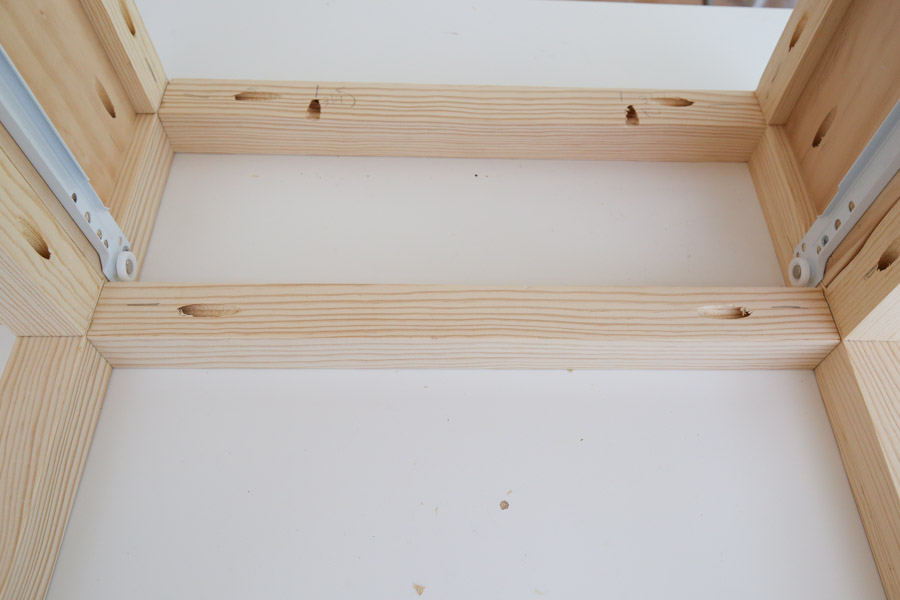
4. Assemble the back of the nightstand to the side frames
Attach the two sides frames together and create the back of the nightstand by attaching one 2×2 @17″ (with the 4 pocket holes) at the top, one 1×6 @ 17″ in the middle, and a second 2×2 @ 17″ underneath of the 1×6.
*Make sure to attach the top 2×2 @ 17″ (with the 4 pocket holes) so that the pocket holes along the edge are facing upwards.
Then, add one 2×2 @ 17″, which will be for the bottom shelf, 3 1/2″ up from the bottom of the leg sides.
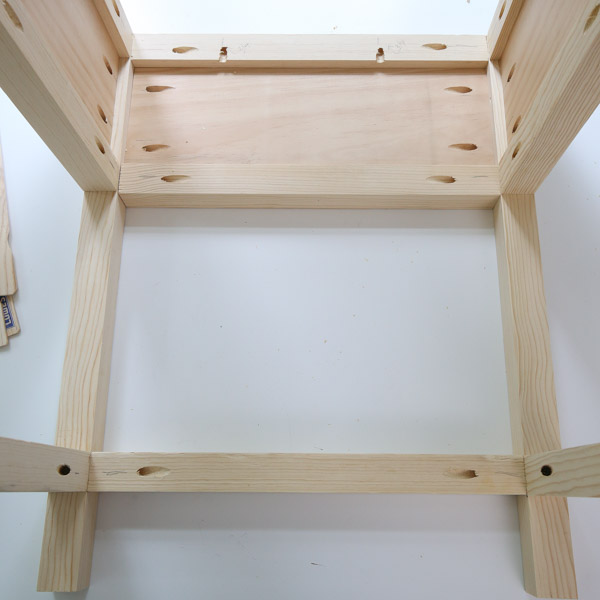
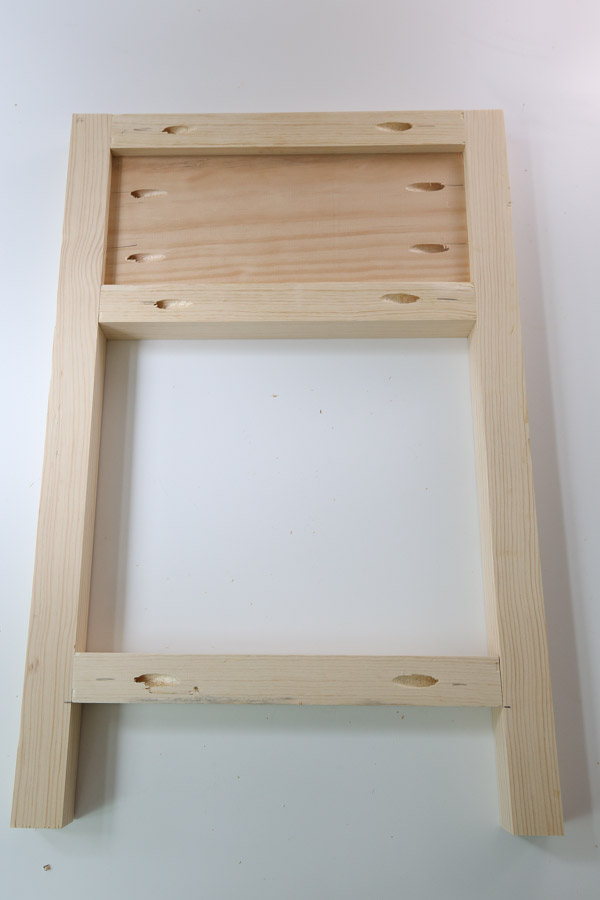
5. Assemble the front of the nightstand to the side frames
Attach the two sides frames together from the front of the nightstand by attaching the second 2×2 @ 17″ (with the 4 pocket holes) at the top of the side frames and facing inside. Again make sure the the pocket holes along the inside edge are facing upwards.
Finally, add a 2×2 @ 17″ for the bottom shelf, 3 1/2″ up from the bottom of the nightstand, on the front side.
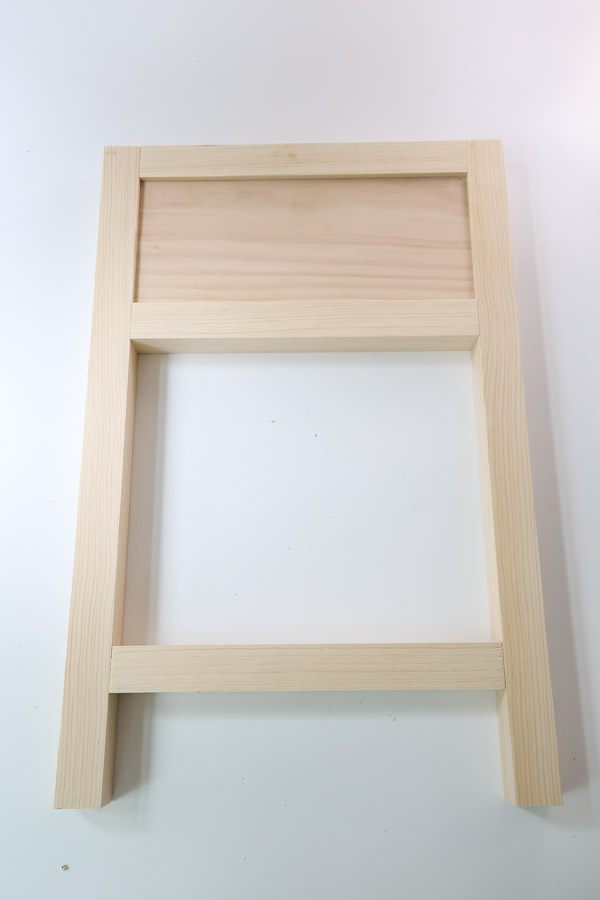
At this point, make sure your nightstand is square, so that the drawer will be installed correctly.
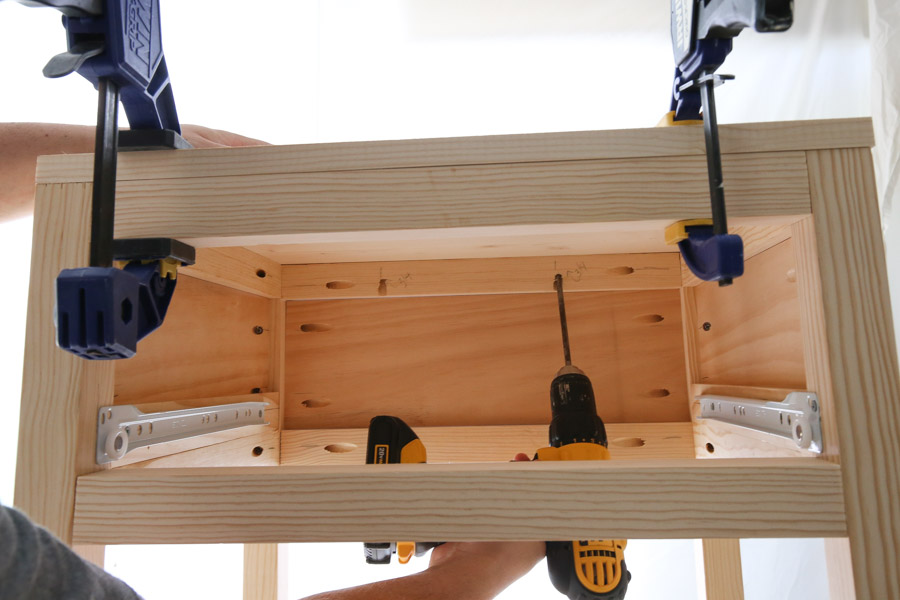
6. Build and install the DIY nightstand drawer box
It’s time to build the drawer! Follow the instructions included with your drawer slides for installation.
I used these 12′ drawer slides, which I will explain below how I installed and built our drawer with them. I also used this same kind for my DIY makeup vanity.
Note, you can use 14″ drawer slides with this build, I used 12″ here since I had a pair on hand already. So, if you do use 14″, adjust the below measurements accordingly.
You can see all of this drawer installation in action in my DIY nightstand video tutorial!
📩 Want to Save This?
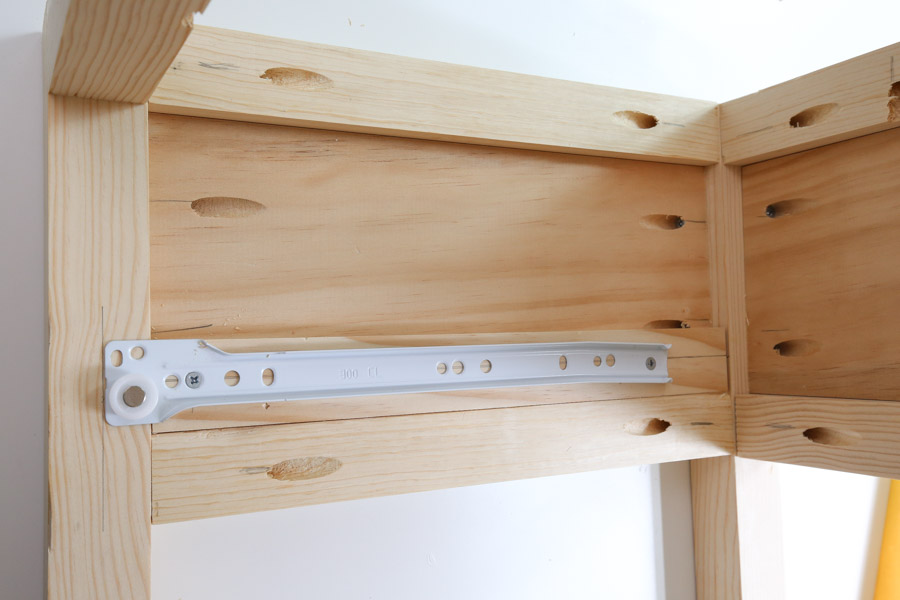
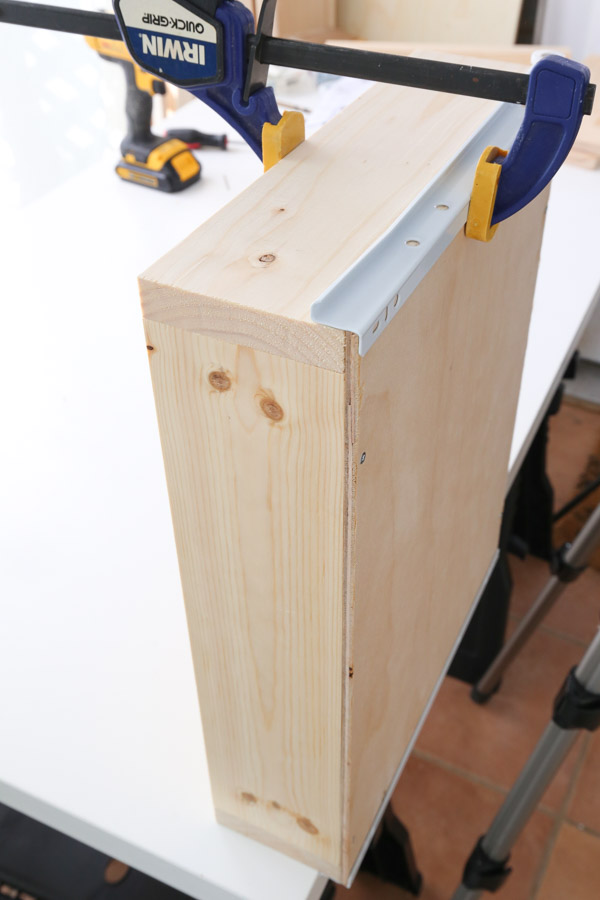
Attach left and right cabinet sides of drawer slides to the nightstand
First, in order for our drawer slides to attach to the inside of our nightstand, we had to add wood along the inside sides so there was a flush wood surface to mount the slides.
Screw 1/2″ plywood or 1/2″ wood boards (we used these 1/2″ boards) @ 13″ to both inside sides on the nightstand, right above the bottom 2×2 @ 13″ with 1″ wood screws. Make sure to countersink the screws beneath the wood surface.

Next, per our drawer slide instructions, we drew a line at 3/4″ (the thickness of our drawer face) + 1/16″ from the front edge of our nightstand legs on the front left and right sides. This mark is where the front of the drawer slides marked CL (cabinet left) and CR (cabinet right) should be lined up.

Then, I marked 3/4″ up from the top of the 2×2 to mark where the front bottom edge of the drawer slide should be lined up. The instructions said to do at least 1/2″ up, but I wanted a little extra clearance for our drawer box!
From this mark, we used a level and drew a line along the inside to the back. Line up the center of the drawer slide along this line.
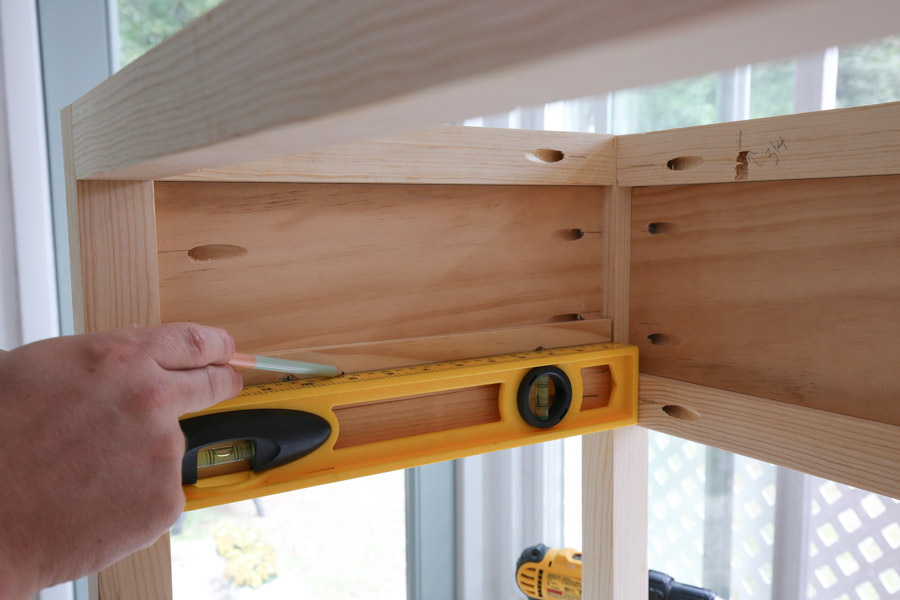

Before screwing in, use a mini level on the drawer slide (you can clamp in place for this) and make sure it’s level. After checking, drill pilot holes and screw the drawer slide in place with the screws included with the slides. Repeat on the other side.
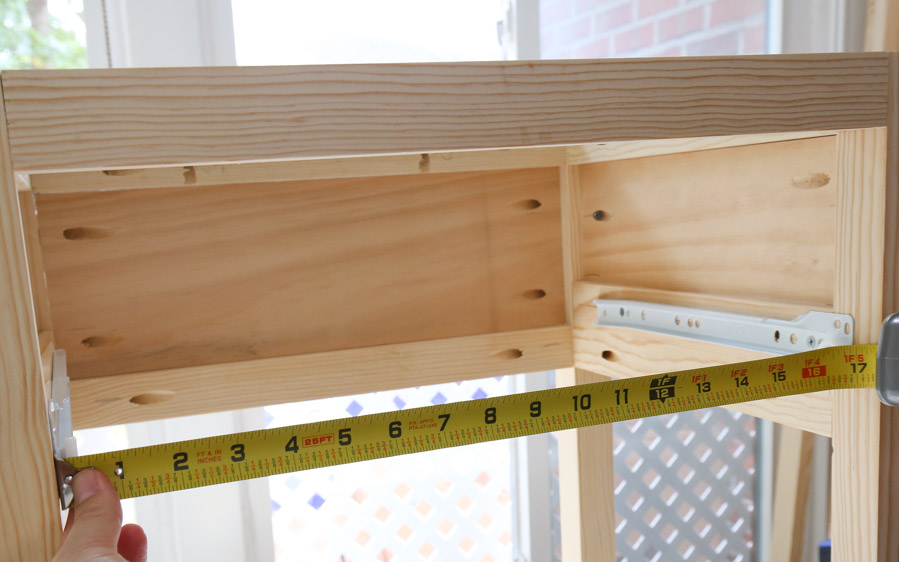
Build the drawer box
Measure the opening between the left and right legs and subtract an inch. It should be 16″ (17″ – 1″), but measure just in case there is any variation. Then cut the 1/4″ plywood to this 16″ width by 11 3/4″ long for the drawer bottom.
We used a circular saw and straight edge guide to make our plywood cuts. You can also use a table saw.
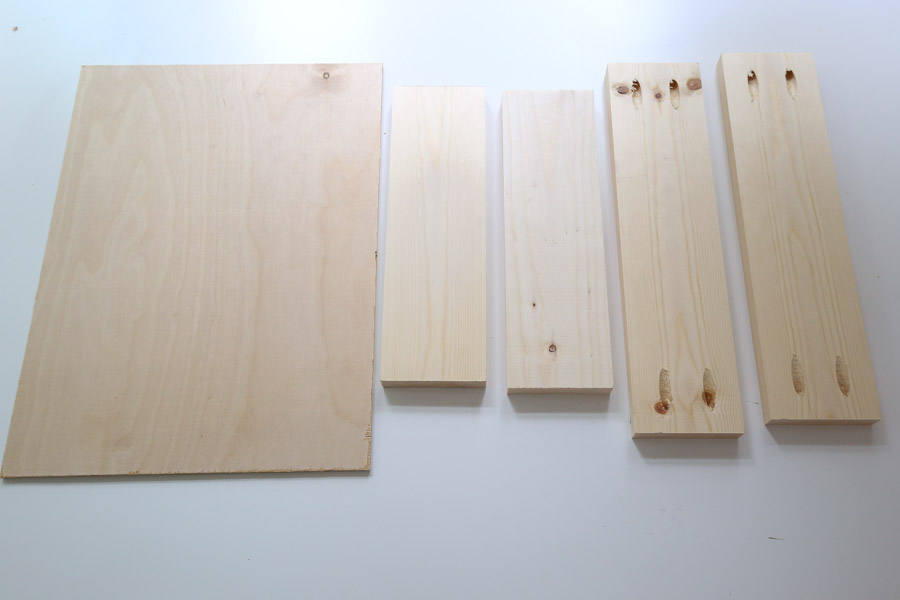
Construct the drawer box frame using the 1×4. For our 16″ x 11 3/4″ plywood bottom we made the following cuts:
- (2) 1×4 @ 14 1/2″
- (2) 1×4 @ 11 3/4″
Add pocket holes to both sides of the (2) 1x4s @ 14 1/2″. Attach them to the (2) 1x4s @ 11 3/4″ with 1 1/4″ Kreg screws to create the drawer box.

Attach the 1/4″ plywood bottom to the drawer box with 1″ wood screws (make sure to drill pilot holes first).
Add drawer slides to the drawer box
Line up the drawer slides labeled DL (drawer left) and DR (drawer right) on the sides of the drawer. Make sure the drawer slide fronts are attached at the front edge of the drawer. Clamp in place and add screws at the front and bottom sides. Make sure to drill pilot holes first!
Make sure the drawer fits!

Add the last 2×2 to the nightstand front
Now that the drawer slides are attached and our drawer box is built, add the final 2×2 @ 17″ to the front of the nightstand, aligned with the other 2x2s.
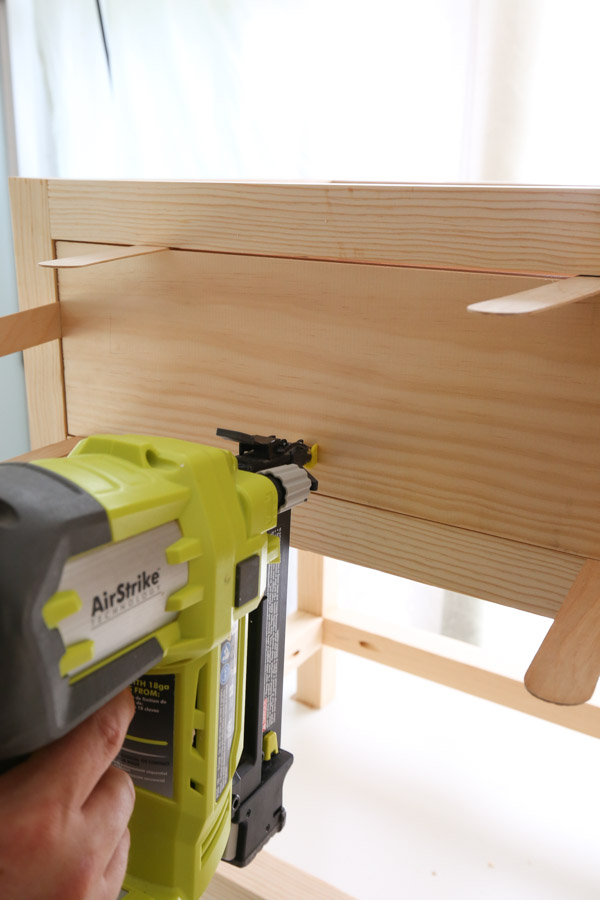
7. Attach the drawer face to the drawer box
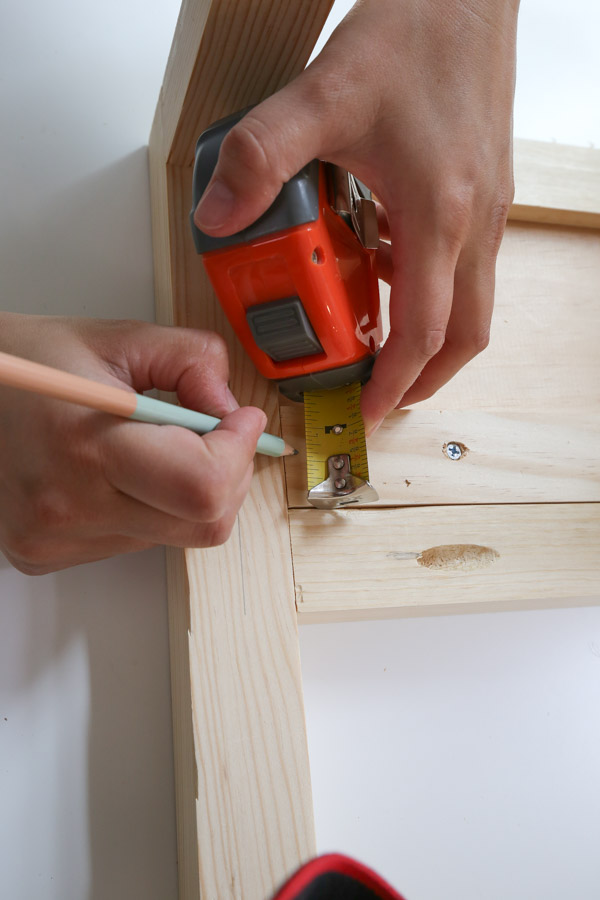
Measure the opening distance length and width where the drawer face will be going between the 2x2s.
You want your drawer face to be a 1/4″ less than these measurements so there will be a 1/8″ gap between the nightstand frame and drawer face. Alternatively, you can also do just 1/8″ less, or 1/16″ gap on all sides, if you prefer smaller gaps like I do!
Use a miter saw and cut the remaining 1×6 board for the length cut of the drawer face. For the width cut of the drawer face, use a table saw or circular saw and straight edge and cut the width cut.
Install the drawer face to the drawer box with wood glue and 1 1/4″ brad nails. I like to hold my drawer face in place with popsicle sticks to make sure I get the gaps right while doing this. Also, I like to do just one nail in the front, and then the other nails from the back.
8. Install the bottom shelf of the nightstand
Measure the length and width for the bottom shelf between the lower 2x2s. Cut a 3/4″ panel board to this size. It should be 13″x17″ but there may be slight variation so double check the measurements!
9. Attach the top of the nightstand
Attach the 3/4″ panel board @ 16″ x 20″ to the top of the nightstand with wood glue and 1 1/4″ Kreg screws.
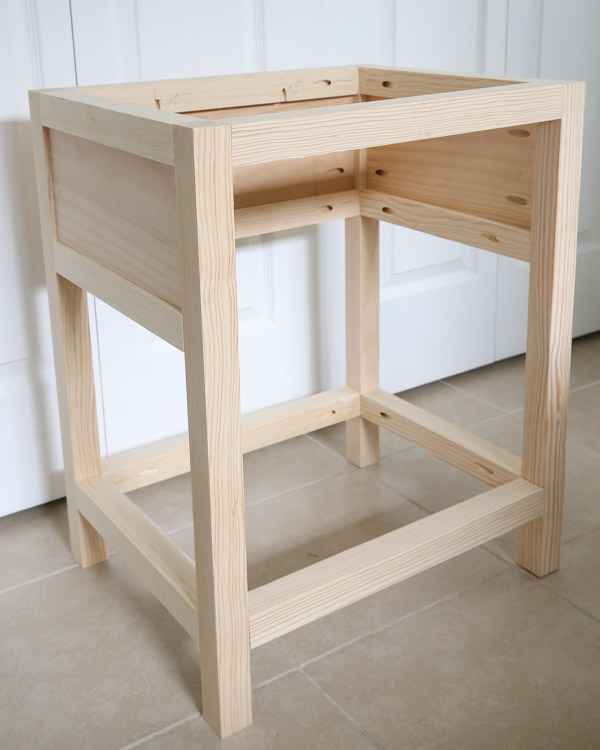
And now your DIY nightstand with drawer build is complete! Yay!
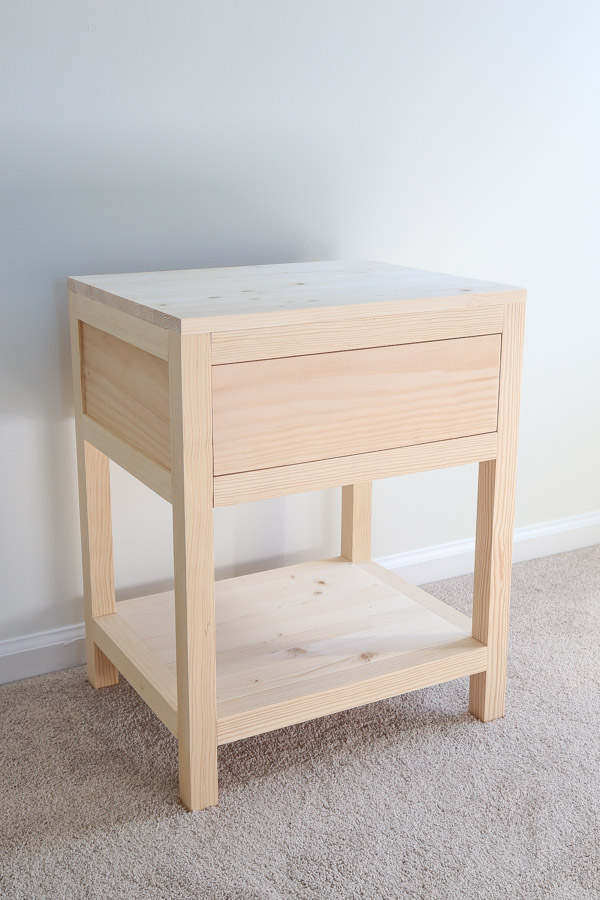
Here is our matching set, the one on the left is with the 2×2 furring boards and the one on the right is with the 2×2 premium wood:
10. Stain or paint nightstand
Stain or paint the nightstands. We chose to do one coat of Classic Gray by Minwax followed by one coat of Early American. Then, we added a satin polyurethane to finish it off.
Check out my how to stain wood tutorial for my staining tips and process!
11. Add a knob or pull
Finally, add your drawer knob or pull to the front to complete your DIY nightstand! I added these modern, aged brass knobs!

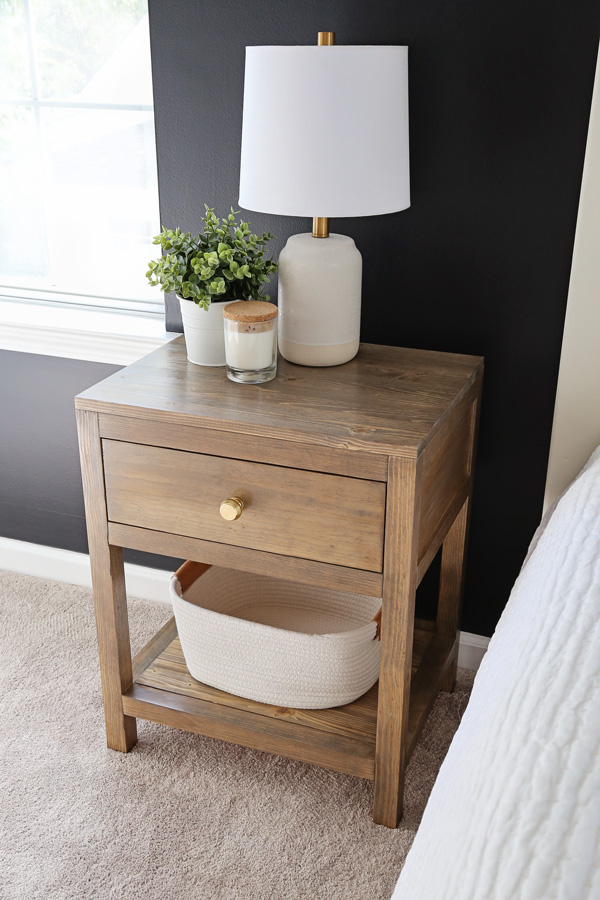
Well I am totally in love with how these DIY nightstands turned out! From the modern rustic look to the custom finish and brass, hardware, I simply can’t get over how beautiful I think they turned out!
Plus it sure is nice to have real wood nightstands that match now! And I love that we handmade them too!
What do you think of this DIY nightstand with drawer build? I hope this how to build a nightstand tutorial has been helpful! Could you use one or a pair in your home? Let me know below in the comments!
Check out our DIY bed frame and bedroom makeover reveal too!
Follow along on Instagram stories for sneak peeks of our bedroom makeover progress and follow along on YouTube for video tutorials of all the DIY and decor projects! I can’t wait to share more upcoming projects for this space!
Want to save for later?! Pin it here:

J. Patrick Morgan
Tuesday 31st of December 2024
In the process of building a set of these, with modifications for slide-forward tops with drop-in storage, an enclosed bottom cubby, and built-in power stations! Had to adjust the dimensions to make my set a bit taller and wider.
rob
Sunday 1st of September 2024
I don't understand the leg dimensions on cut list - If I buy (4) 2x2x8s and leg cuts are 25 1/2 that equals to 102" that equals 8 1/2 ft???? So 1 8 foot 2x2 doesn't work
Kim
Saturday 13th of May 2023
Fabulous nightstands.
Angela Marie Made
Monday 15th of May 2023
Thank you! :)
Noah
Sunday 27th of November 2022
Hi. Question regarding the 1 x 6 boards. What is the actual size of those boards. Is it 3/4 by 5 1/2 that you used?
Thank you!!
Angela Marie Made
Tuesday 29th of November 2022
Yes, the actual size of the boards is 3/4" by 5 1/2"! For more information on lumber sizes and for my free lumber size guide printable check out my blog post: https://angelamariemade.com/intro-to-woodworking-lumber-size-guide-free-printable/
Eric
Tuesday 4th of October 2022
What would you say the weight limit of the top of the night stand is? I want to set about 70 lbs on it.