I’m excited to share today how to build a DIY rustic TV stand! For years I’ve wanted a pretty TV stand. Ha! I know that sounds kind of odd, but I’ve never had a pretty or nice quality TV stand.

I already think TVs and all the cords with them are eye sores in home decor anyways, so not having a nice TV stand just makes it worse for me.
Originally, I wanted a large cabinet or hutch with doors to enclose our TV and hide it away when it wasn’t in use. However, I changed my mind on this and decided a cute, higher quality TV stand would work with our new living room decor.
I started looking for one I liked and of course all the TV stands or media consoles I liked were at least $1k, which wasn’t in the budget!
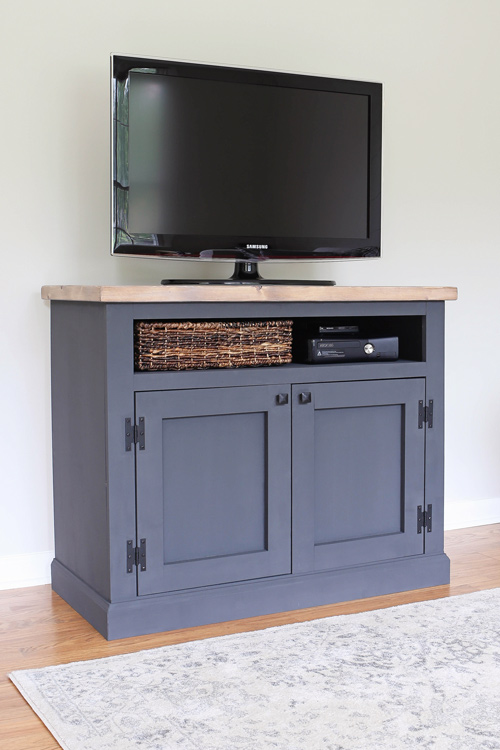
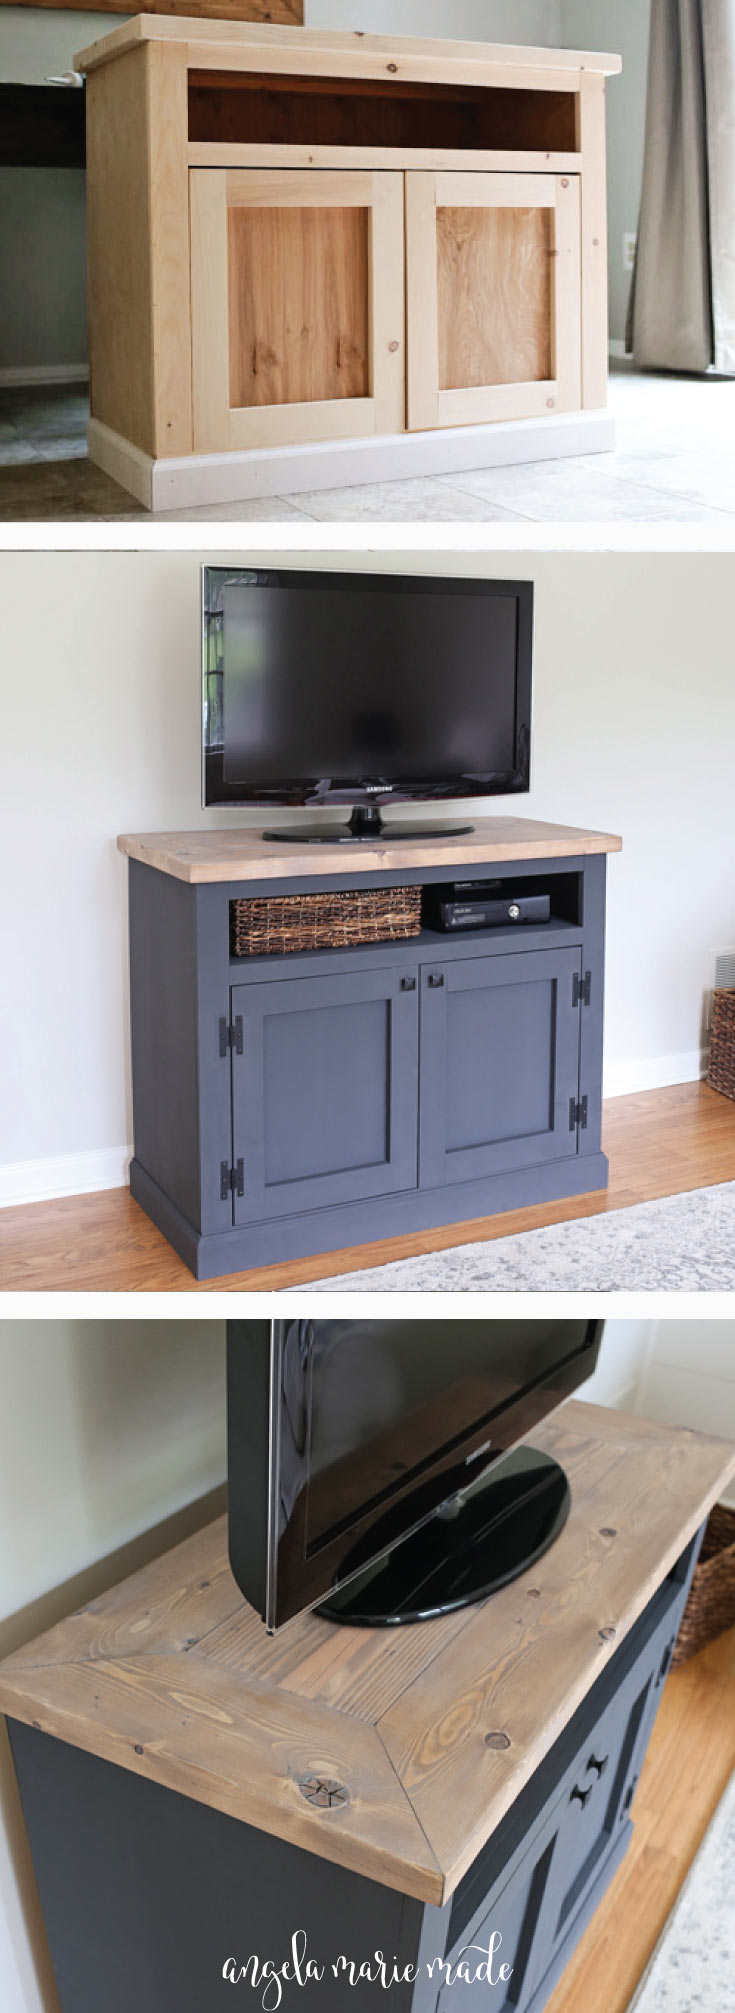
This led me to design and build a rustic TV stand instead! And I think it’s just the cutest DIY TV stand I ever did see…I may be a bit biased 🙂
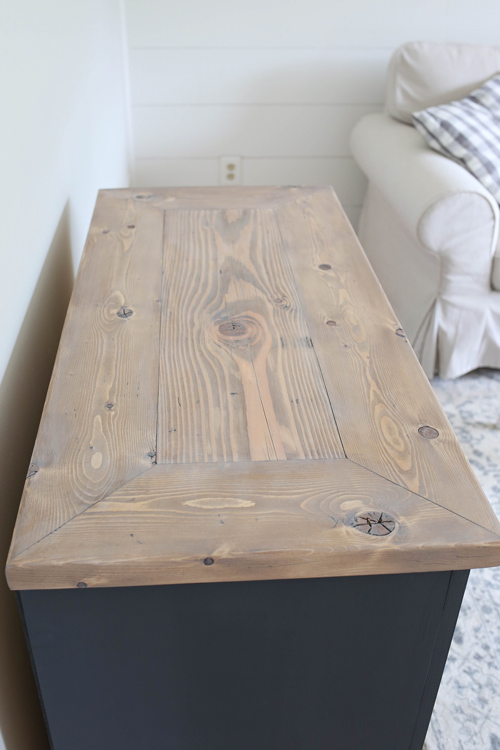
I am also in love with the pretty wood design and weathered wood finish I used for the top of the TV stand! The tutorial on how to create this weathered wood finish is included in Weathered Wood Recipes, which you can learn more about here!
This DIY TV stand cost me about $130 to make, including the hardware which was around $27. The final size of the TV stand is 32″ tall x 39.5 wide x 18.75″ deep.
Note, this post contains some affiliate links. For more info see my disclosures here.
How to build a DIY Rustic TV Stand:
Materials
- (4) Surface mount door hinges – similar here
- (2) Cabinet Knobs (I used these)
- (1) 4ft x 8ft @ 1/2″ thick plywood*
- (1) 4ft x 4ft @ 1/4″ thick plywood
- (1) 2×6 @ 10ft
- (1) 2×10 @ 8ft
- (1) 1×4 @ 10ft
- (1) 1×2 @ 8ft
- (2) 1×3 @ 8ft
- 3 1/4″ tall Base molding (sold by the foot) @ 6.5ft or this molding can be used
- 3/4″ and 1 1/4″ Wood Screws
- 1 1/4″ Brad Nails
- 1″ and 1 1/4″ and 2 1/2″ Kreg screws
- Wood glue
Tools
- Kreg Jig
- Miter saw
- Circular Saw
- Drill
- Brad nailer
- Clamps
*I used 1/2″ thick plywood to keep the TV stand lighter, but you can also use 3/4″ thick if you prefer.
1. Make TV Stand Top Cuts
I decided to make a TV stand top with a more unique design:
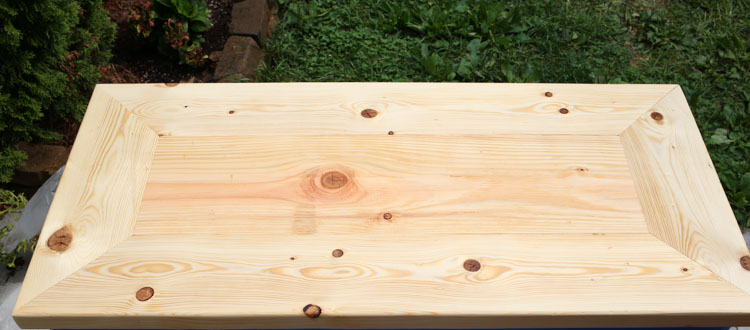
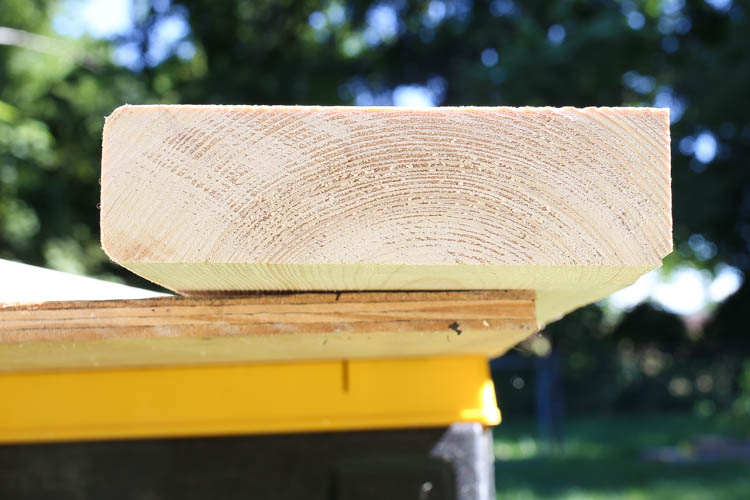
Because 2x thick wood is being used, the edges are round, so the inner edges need to be trimmed to make them perfectly straight.
Use a circular saw and a straight edge guide (or table saw) to trim off 1/8″ on just one side of the 2×6 wood.
Then, trim off 1/4″ on just one side of the 2×10 and 1″ off the other side of the 2×10 so the total width of the 2×10 is now 8″. When the three boards are put together as shown in the TV stand top photo above, the total width will now equal 18 3/4″.
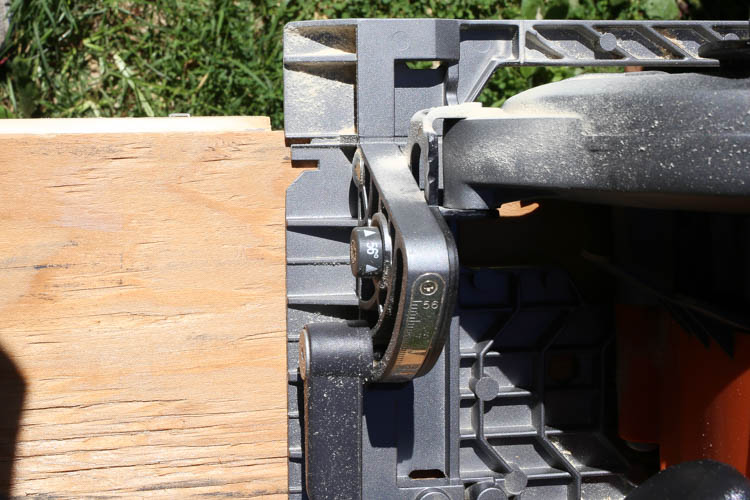
Use a miter saw and cut the 2×6 to the following sizes with 45 degree mitered cuts:
- 2 pieces at 39.5″ each
- 2 pieces at 18.75″ each
Cut the 2×10 (that is now 8″ wide) to the following size with a 90 degree straight cut:
- 1 piece at 28.75″
2. Add Pocket Holes and Attach TV Stand Top Boards
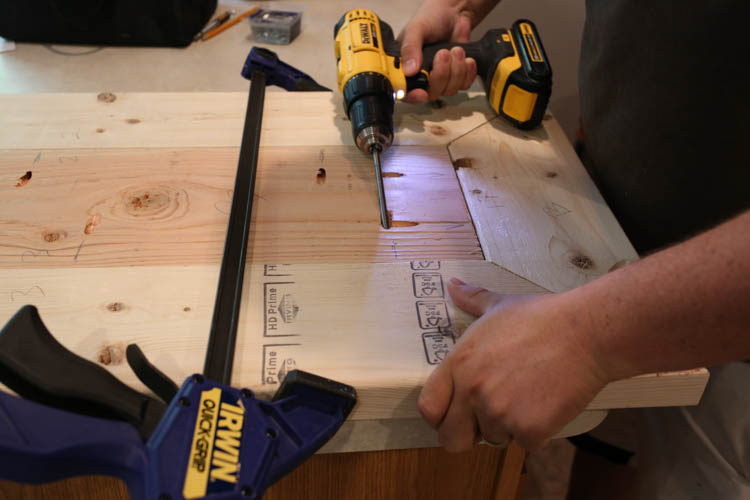
Use a Kreg Jig and drill pocket holes as shown in the photo below.
*Tip: See my how to use a Kreg Jig post for an easy, step by step tutorial and video tutorial on how to use the Kreg Jig!
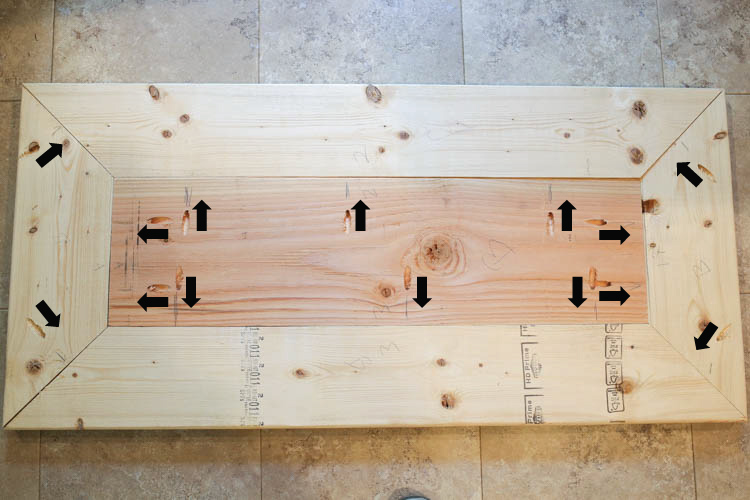
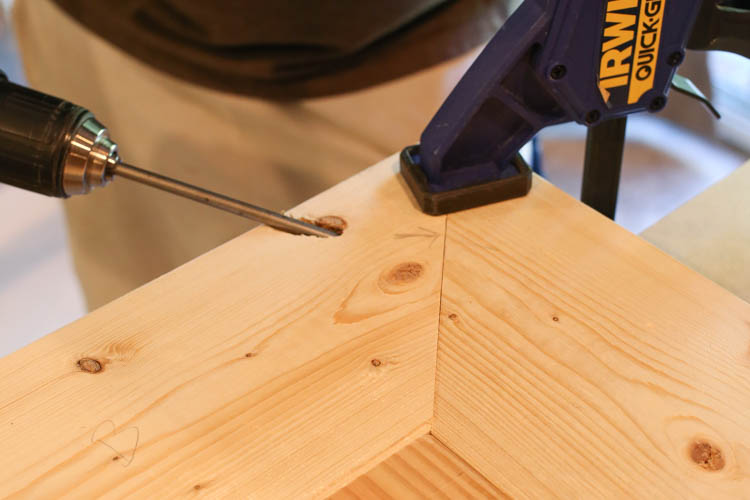
Then, attach the TV stand top boards together as shown in the above photo using 2 1/2″ Kreg screws. We used clamps to help with this part.
3. Make Plywood cuts & add Pocket Holes for the TV Stand Base
Use a circular saw and rip your 1/2″ thick plywood to the following sizes:
- 2 pieces at 30.5″ long x 17″ wide (for the sides)
- 2 pieces at 36.5″ long x 17″ wide (for the bottom and middle shelves)
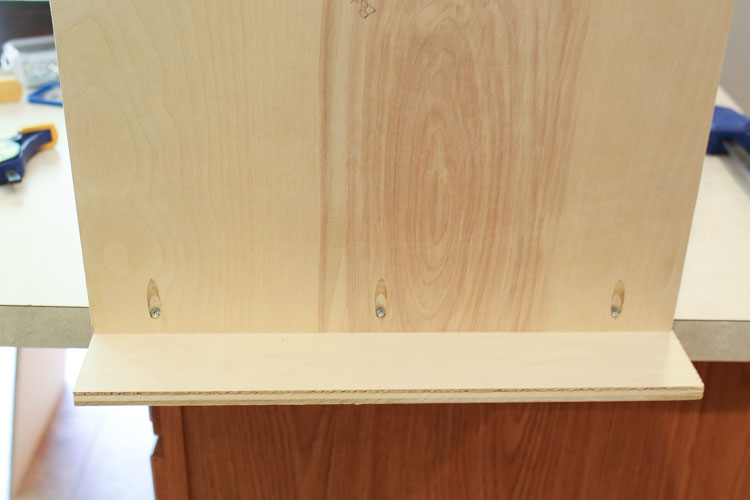
Then, add three pocket holes on both sides of the 36.5″ pieces (photo below). Make sure to adjust your Kreg Jig for 1/2″ thick wood.
For the two 30.5″ side pieces, just add three pocket holes along the top side.
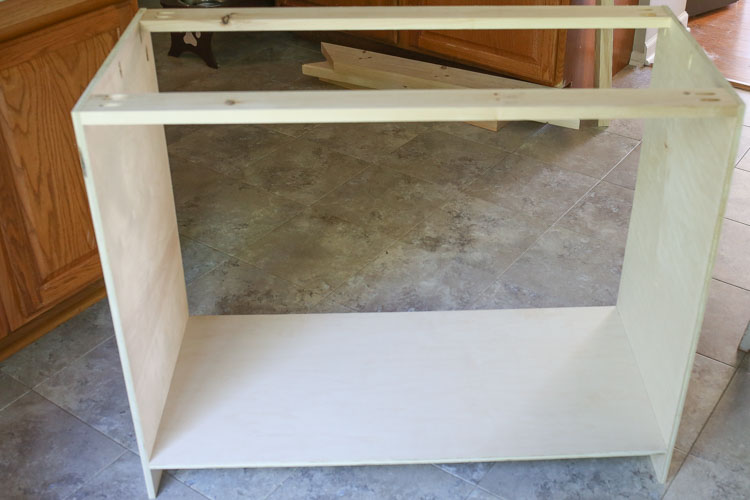
4. Attach TV Stand Base Pieces Together
Mark 3.5″ from the bottom of two 30.5″ side pieces and attach the bottom shelf (36.5″ long piece) to the sides with 1″ Kreg Screws.
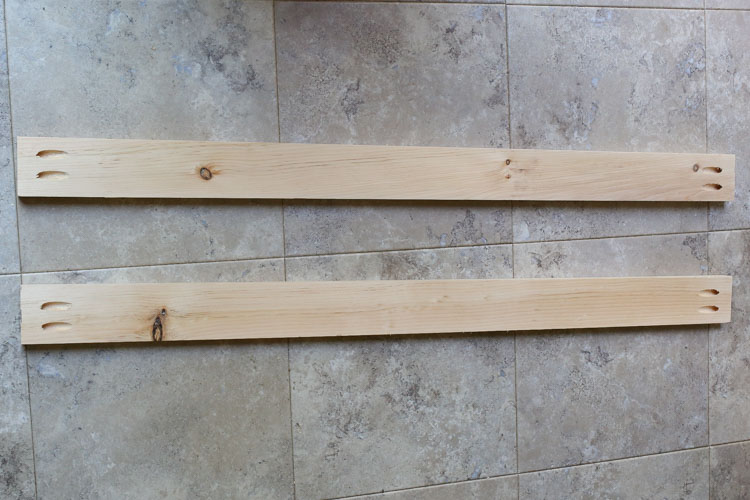
Next, using the 1×4, cut two 1×4 pieces at 36.5″ long each and add pocket holes to the ends.
Then, attach them as top support braces to the top two sides as shown in the photo below using Kreg Screws. I turned the TV stand on its side for easy attaching.
Also, because 3/4″ thick wood is being drilled into 1/2″ thick wood, I think we adjusted our Kreg Jig for 3/4″ depth wood but used 1″ Kreg screws. I can’t remember for sure on this part so make sure to test it out first!
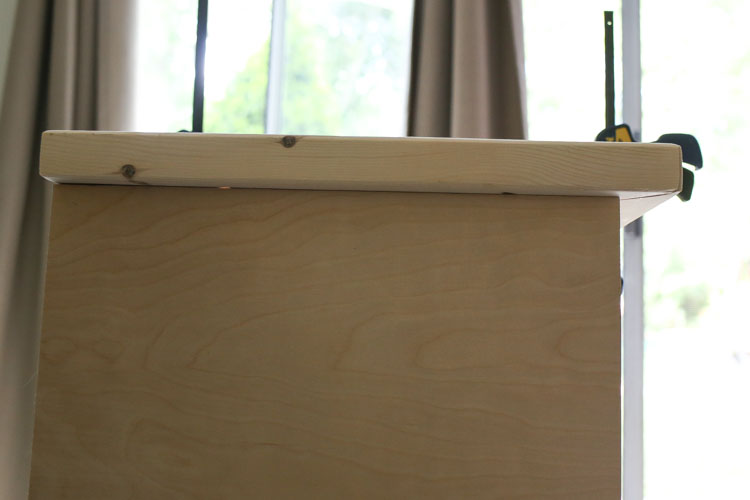
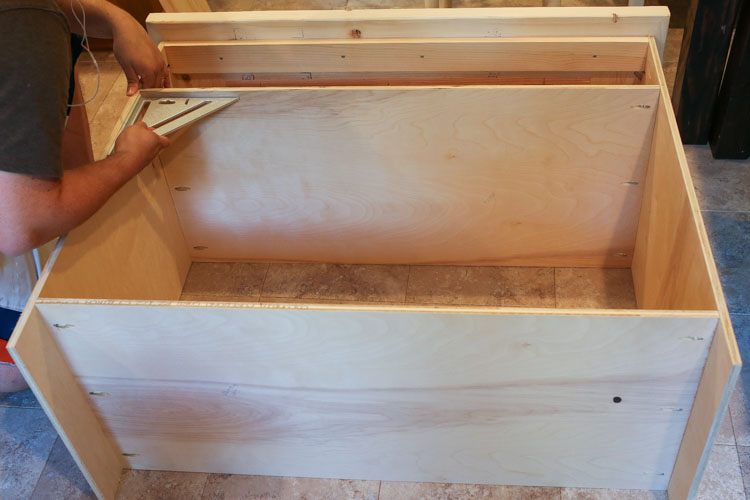
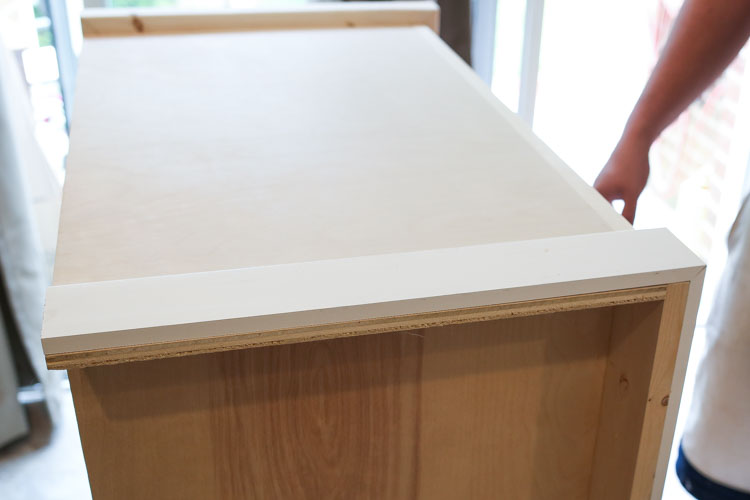
5. Add TV Stand Top to Base
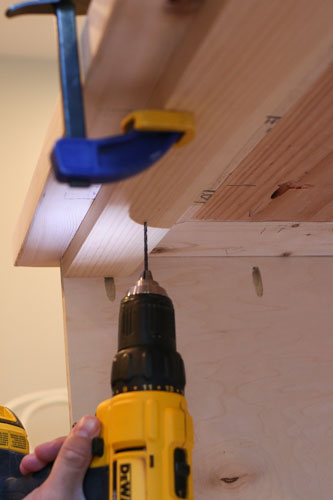
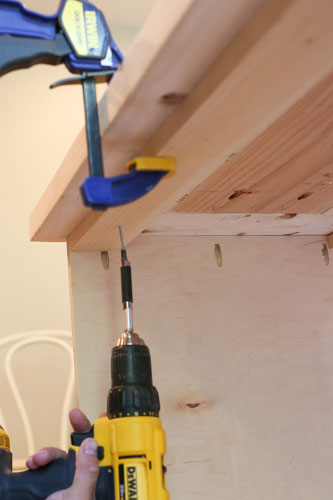
Line up the TV stand top so that the back of the TV stand base and top are flush with each other but the sides and front have about 1″ overhang from the top. Clamp it in place.
Use 1 1/4″ wood screws and attach the TV stand to the base by screwing the wood screws along the bottom of the 1×4 supports in the front and back. Don’t forget to drill pilot holes first!
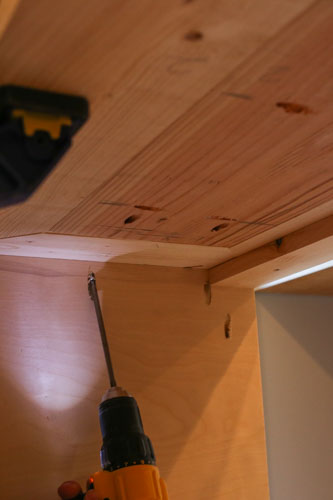
Then, add 1″ Kreg screws into the pocket holes on the TV stand base sides.
6. Attach Middle Shelf
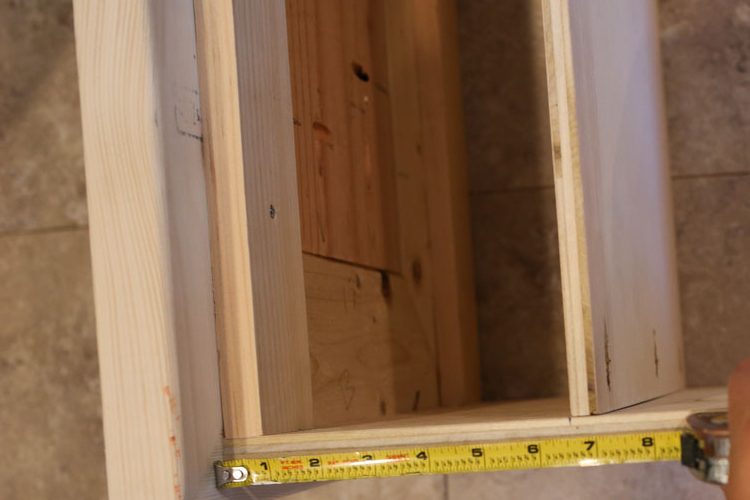
Turn the TV Stand on its back. Measure 6.5″ from the bottom of the TV stand top and mark it on both sides of the TV stand base.
Attach the 36.5″ middle shelf plywood piece to the sides at the 6.5″ mark using 1″ Kreg screws.
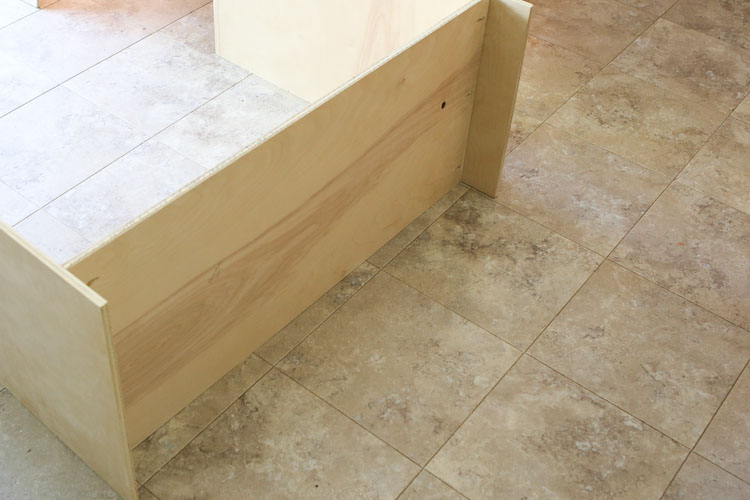
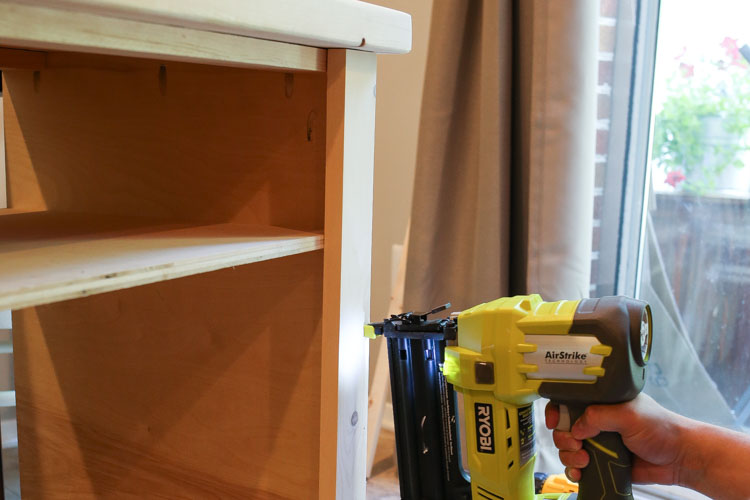
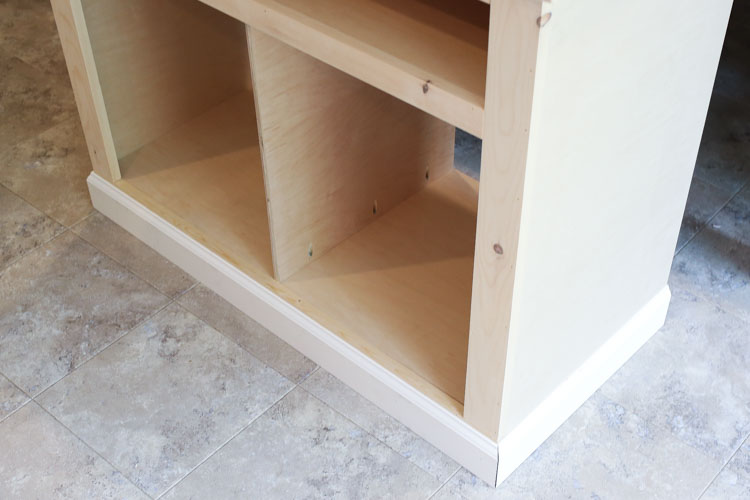
7. Attach Bottom and Side Trim
Measure the width along the bottom of your TV stand and cut a 1×4 piece to size. Attach it to the bottom front of your TV stand with a brad nailer and 1 1/4″ brad nails and wood glue.
Then, do the same for the two side trim pieces except use 1x3s instead of a 1×4.
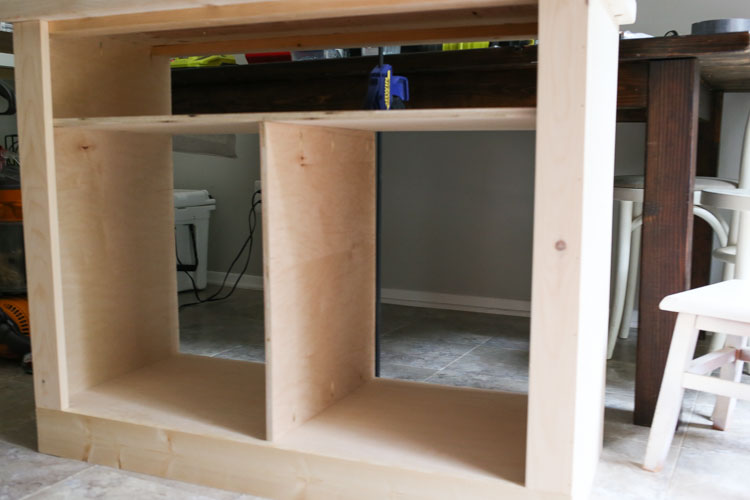
8. Attach Middle Divider to DIY TV Stand
Measure the height from the middle shelf to the bottom shelf and cut your 1/2″ plywood to this exact height and a width of 17″ deep.
Add pocket holes along the top and bottom.
Attach the divider to the middle of the TV stand with 1″ Kreg screws.
📩 Want to Save This?
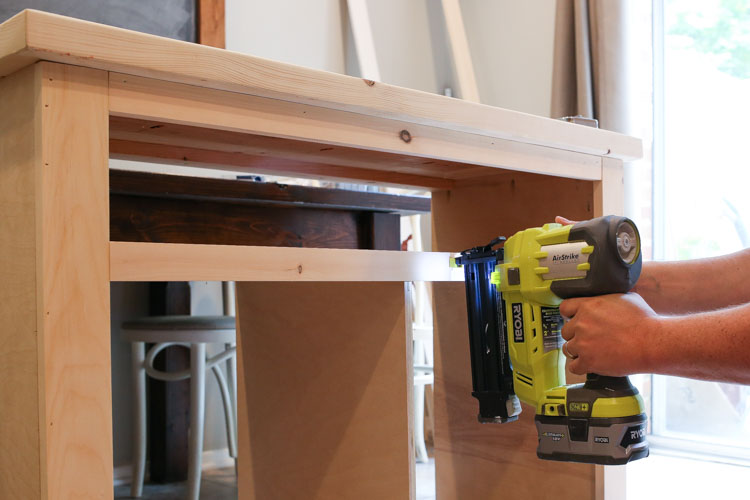
9. Add Middle Trim pieces
Measure the width from the insides of the two 1×3 side trim pieces and cut two 1x2s to that size.
Attach the 1×2 middle trim pieces under the TV stand top and middle shelf with a brad nailer and 1 1/4″ brad nails and wood glue.
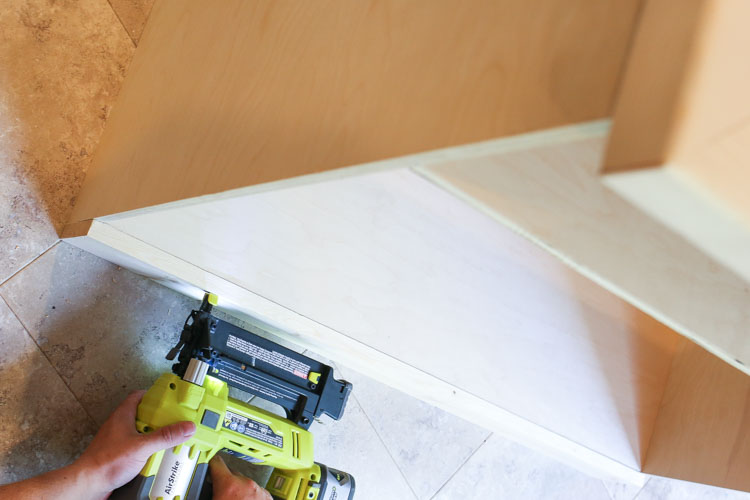
10. Add Base Molding
Measure the bottom sides and front of the DIY TV stand. Cut the base molding to size for these pieces. Note, for the corners where the base molding meets, cut a 45 degree miter cut.
Attach with 1 1/4″ brad nails and wood glue.
11. Assemble Doors for DIY Rustic TV Stand
The doors I am building are inset style doors with surface mount hinges.
However, you can use concealed hinges with inset doors like in our DIY wall cabinet for our laundry room instead. Another option is to do overlay style doors with concealed hinges like our DIY garage cabinets.
Measure the height and width of the opening between the side trim pieces and middle and bottom trim for your doors.
There will need to be an 1/8″ gap around both doors for installation. So subtract 1/4″ from your height measurement to determine the total door height for both doors.
Then, subtract 1/4″ from your width measurement and divide by two to get the width measurement of each door.
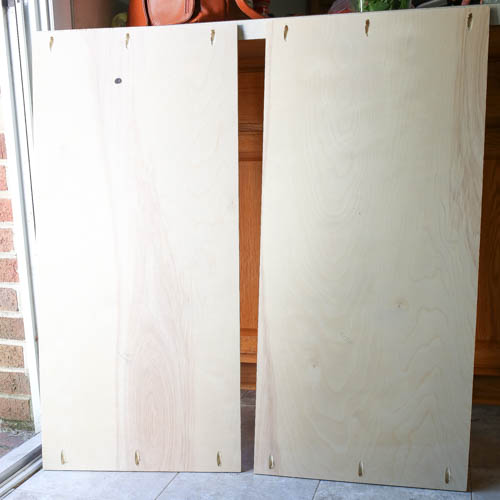
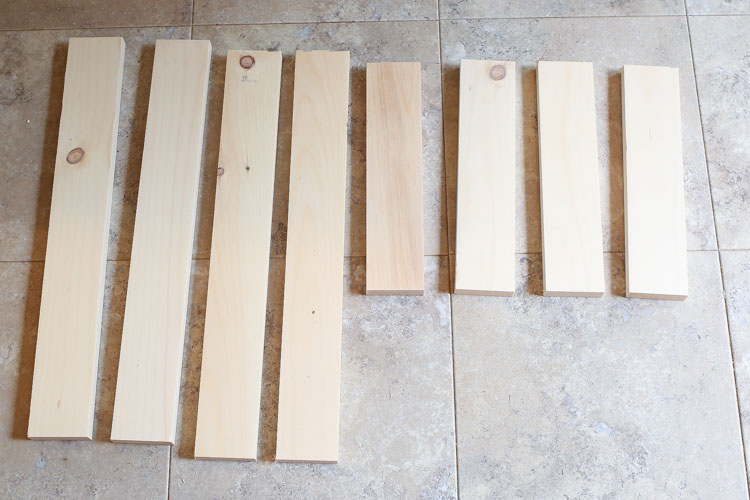
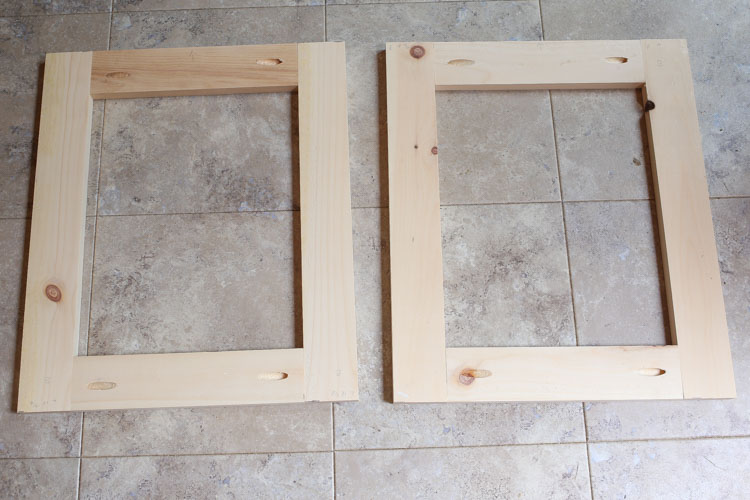
Construct the two doors using 1/4″ plywood and 1x3s.
Cut a 1×3 to size to create the frame pieces of your door. Add pocket holes as shown in below photo and attach together with 1 1/4″ Kreg Screws.
Next, measure the opening of your door frame and add at least 1″ to the height and width of the measurement for the 1/4″ plywood door backings.
Use a circular saw and cut two door backings from the 1/4″ thick plywood to the correct size.
Attach door backings to the back of the doors with 3/4″ wood screws.

Insert doors into the TV stand opening and make sure they fit properly.
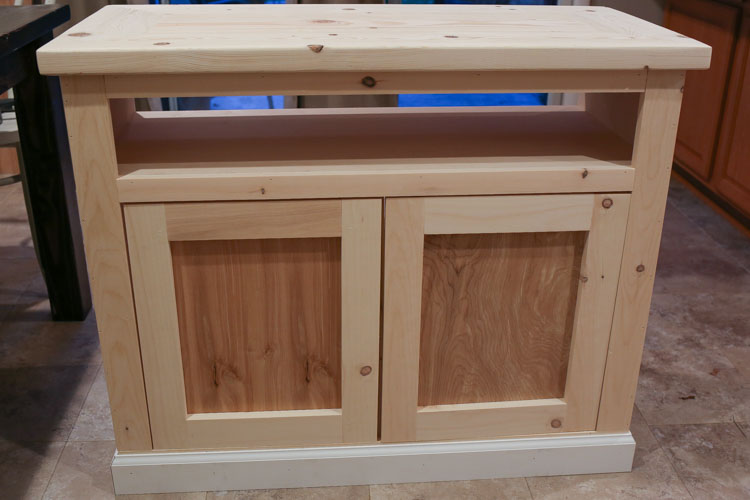
12. Paint the TV Stand Base & Doors
Before attaching the doors to the TV stand with hinges, it’s easiest to go ahead and paint the TV stand base and doors at this point.
I painted my DIY rustic TV stand with Rustoleum Chalk Paint in Charcoal.
Allow the paint to dry.
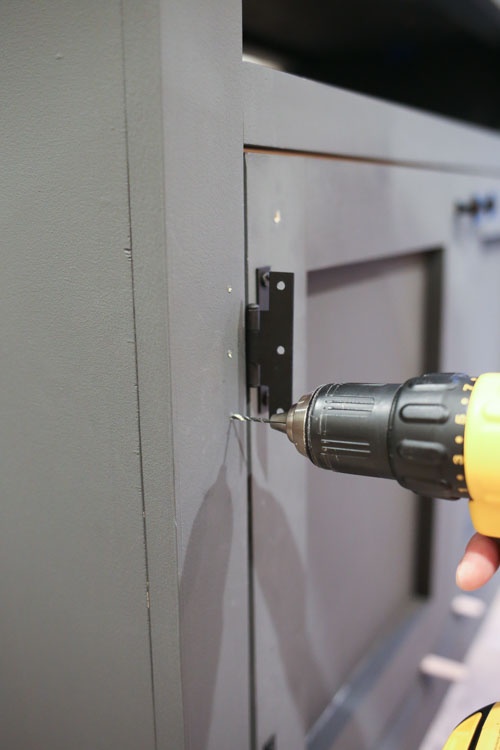
13. Add Hardware, Doors, & Backing to TV Stand
Attach the door knobs to the door.
Next, attach the hinges to your door first.
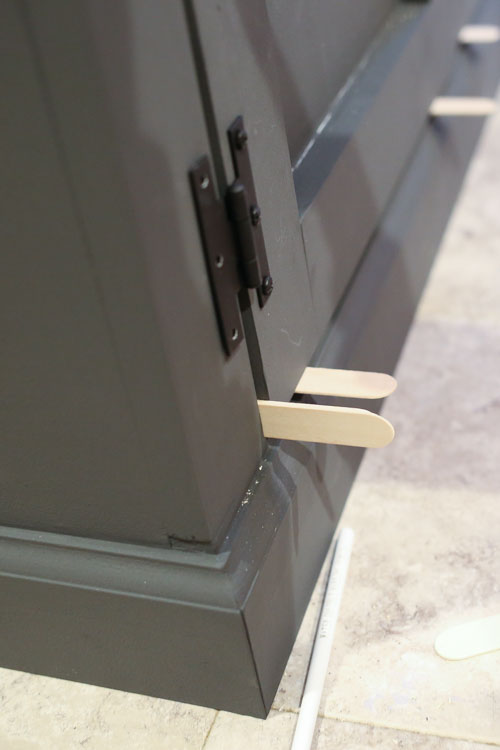
Then, attach the doors to the TV stand side trim pieces ensuring there is a 1/8″ gap around the doors. It’s helpful to have a second person help with this part.
Also, we used popsicle sticks to help make sure we had enough of a gap as we were installing the doors.
Finally, measure the back of your TV stand and cut the remaining 1/4″ thick plywood to size for your TV stand backing.
Attach with 3/4″ brad nails or wood screws. Also, I painted just the part of the backing that was going to show through the shelf opening.
14. Apply Weathered Wood Finish or Stain to the top of the TV Stand
Lastly, apply stain or a weathered wood finish to the top of your TV stand to complete your DIY Rustic TV Stand!
I used a special weathered wood finish recipe that is part of my Weathered Wood Recipes e-book of finish tutorials. But, you can also just do a stained wood top. See my post on how to stain wood for staining tips.
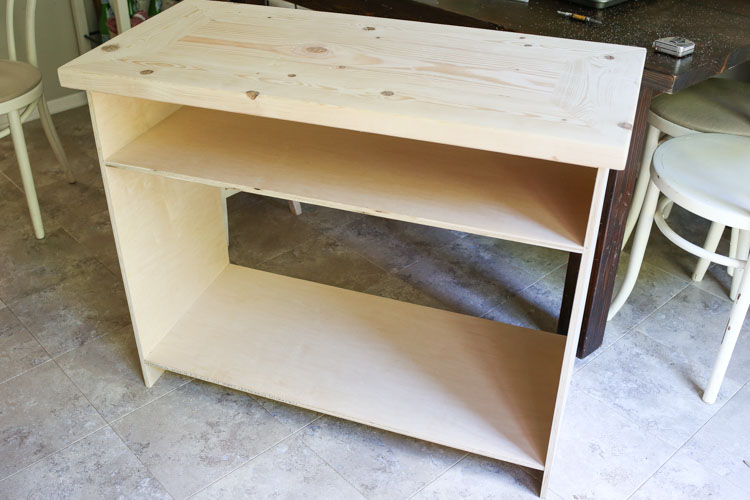
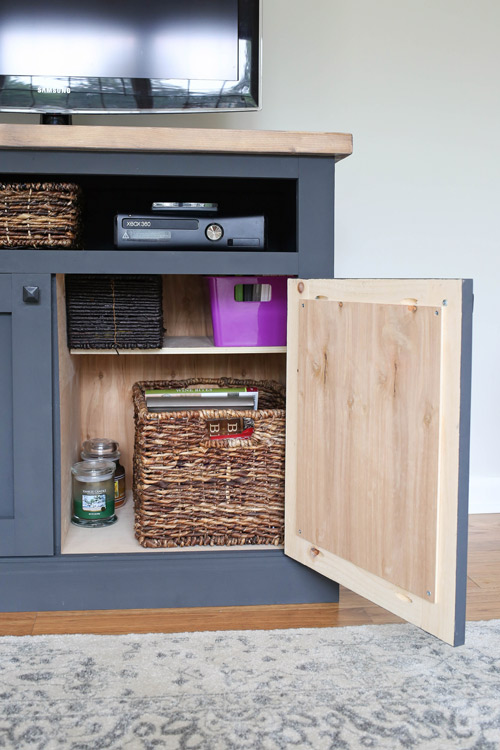
Yay! All finished! Add your TV and admire your beautiful woodworking job!


I also decided to add some shelves with the extra 1/2″ thick plywood! Love extra storage!
I just love how our DIY rustic TV stand turned out! I basically just sit and stare at it instead of watching TV haha! What do you think of the design?! I hope these DIY TV stand plans have been helpful!
I’d love to see your version of this build! Feel free to share photos with me on Instagram or Facebook!
Follow along on Instagram and Facebook for my latest projects and sneak peeks!
Misha
Saturday 19th of November 2022
What are the dimensions? I couldn't find them in the post.
Angela Marie Made
Tuesday 22nd of November 2022
The final size of the TV stand is 32″ tall x 39.5 wide x 18.75″ deep!
Dana
Thursday 24th of May 2018
Hi! Absolutely beautiful work! I'm interested in making this as a bedside table! How did you add the additional shelves inside the doors? Thank you so much!
Angela Marie Made
Thursday 24th of May 2018
Thanks Dana! To add the extra shelves, I used shelf support pegs and drilled 2 holes on each side for them. Then, I placed custom size wood for the shelves on top of the pegs.
SG
Tuesday 13th of March 2018
Hi, Nice tv stand. Can I ask you what kind of wood you used in building it? The $130 cost doesn't seem that much for the project. Recently I built a small nightstand and the was surprised at how much the wood was for it (over $150). But I used Maple and Birch, and maybe that was the difference. I'm trying to learn how to build things, but at the same time do so economically while using the best wood I can. Maybe you can give me some advice in this regard.
Thanks.
Angela Marie Made
Tuesday 13th of March 2018
Thanks! I used common pine wood for the 1x thick wood from Home Depot. And for the plywood I used 1/2" thick plywood which is less expensive than the 3/4 thick. Finally, for the top of the TV stand with the 2x thick wood, I just used the whitewood lumber which is very inexpensive (https://www.homedepot.com/p/2-in-x-6-in-x-10-ft-2-and-Better-Kiln-Dried-Heat-Treated-Spruce-Pine-Fir-Lumber-161721/202091222). I usually stick to pine wood whenever possible with building because it is less expensive but still pretty. It does require more sanding usually, but it's worth it to me to save $. Hope that helps!