I’m sharing the last of the DIY wood sign series posts today: how to frame a DIY wood sign. I’m going to show three different methods for attaching the wood sign to the wood frame, all of which are pretty easy!! These methods can also be used to frame chalkboards, canvases, and more!
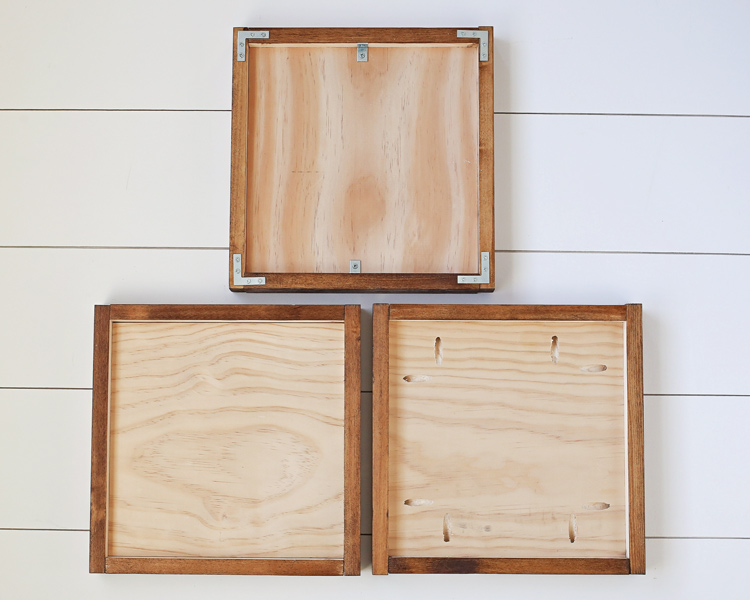
All of these methods result in the same final framing look from the front view of the sign!

My DIY Wood Sign with Calligraphy Quote sparked this DIY wood sign series. The series started with How to Paint DIY Wood Signs, which covers all about painting and the best materials to use.
The next post on transferring your design to wood explained How to make a DIY Wood Sign with a Vinyl Stencil. But, if you don’t have a vinyl machine, you can also easily transfer a design to wood with this pencil tracing method.
Now let’s get started with the last step, how to frame a DIY wood sign!
Note, this post contains some affiliate links. For more info see my disclosures here.
3 Ways How to Frame a DIY Wood Sign:
Materials Needed for all 3 Sign Framing Methods:
- Wood Sign Backing
- 1×2 @ 8ft
- Wood Stain (I used Minwax Provincial)
- Miter Saw
- Clamps
- Tape Measure
- Wood glue
*Note, I’m using the wood sign backing from my last DIY wood sign post with a vinyl stencil and the material amounts are based on that sign size. If you are using a different size sign backing, make sure to adjust your materials accordingly.
Prepare DIY Wood Sign Frame Pieces
1. Cut wood sign frame pieces to size
If using the same size sign as me (11 3/4 x 11 3/4), then use a miter saw and cut your 1x2s to the following sizes: two pieces @ 11 3/4″ and two pieces at 13 1/4″. Before making the cuts though, make sure to measure all sides of your sign for exact measurements and adjust cuts accordingly (even if just 1/8 of an inch off) as the height or width may be slightly different on the wood sign backing. Tip: The more precise your measurements and cuts are, the better framing job you will have with no gaps.
If you have a custom size sign do two sides at the exact length of the top and bottom sides and two at 1 1/2″ plus the length of the left and right sides.
2. Sand and Stain Wood Frame Pieces
Sand your 1×2 wood frame pieces. Then, stain all sides (except the back unless desired) of your 1×2 frame pieces. For tips on how to sand and stain wood for a beautiful finish, check out my tutorial on how to stain wood. Allow stain to dry for several hours.
Now it’s time to frame our DIY wood sign backing! Below are three different methods for wood sign framing. Tip: For all of these framing methods, using clamps is essential, it makes all the difference when it comes to ensuring the wood frames are lined up accurately and securely to the wood sign.
Method 1: How to Frame a DIY Wood Sign with a Brad Nailer
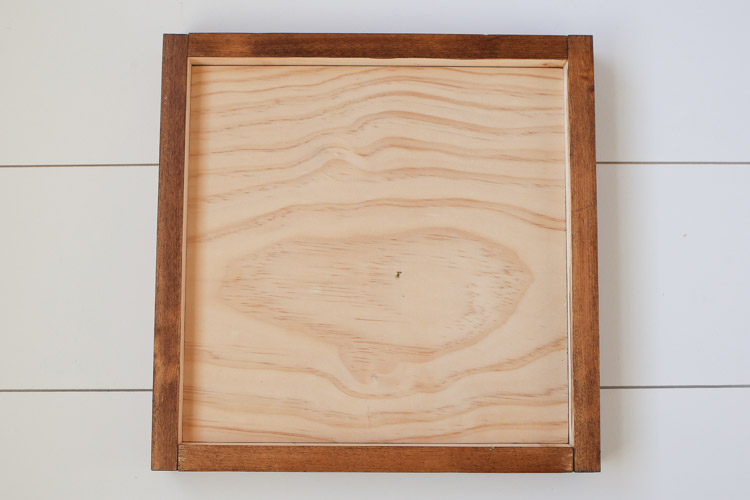
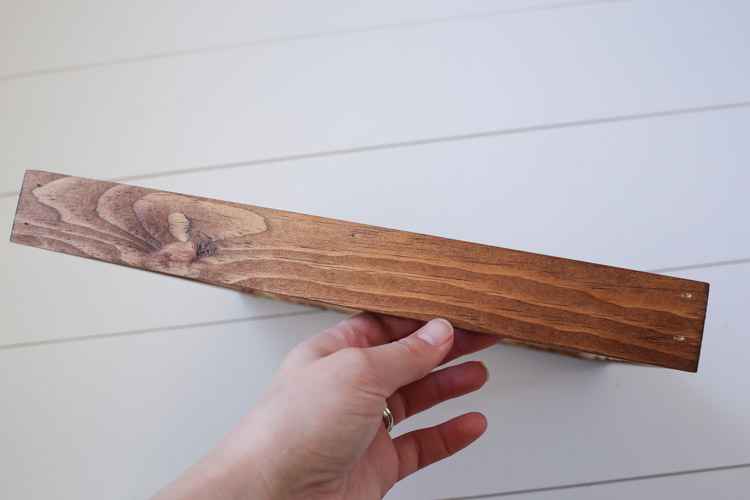
Using a brad nailer is my favorite, quick and easy method for sign framing. You will need a Brad Nailer. This is also the same method I used for my DIY wood sign with a calligraphy quote.
Materials Needed:
- Brad Nailer
- 1 1/4″ brad nails
- Wood glue
1. Attach first wood frame piece to wood sign backing
Place the wood sign backing (front side up) on a scrap piece of 1x wood near the edge of your work surface.
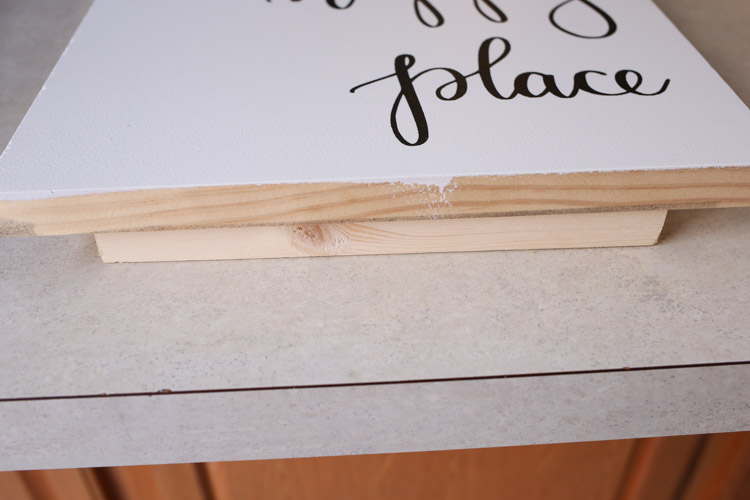
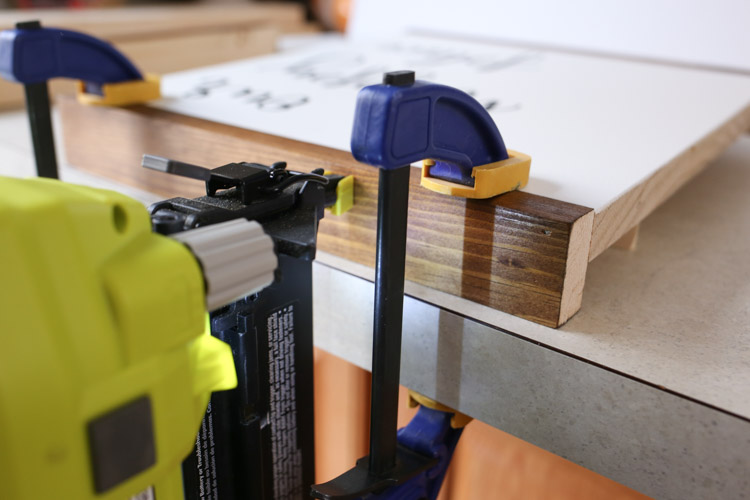
Clamp one of the 11 3/4″ wood frame pieces to the work surface and lined up with the bottom edge of the wood sign backing as shown below. Then, attach the wood frame with a brad nailer and 1 1/4″ brad nails and some wood glue along the sign edge. Wipe any excess wood glue away immediately with a damp paper towel!
2. Attach the other wood frame pieces
Repeat the above process on the opposite, top edge side of the wood sign. Then, repeat on the left and right sides with the longer wood frame pieces. For these make sure to add some brad nails on the top and bottom of the corners of the side pieces. This ensures nails are going into both the wood sign backing and the top and bottom frame pieces.
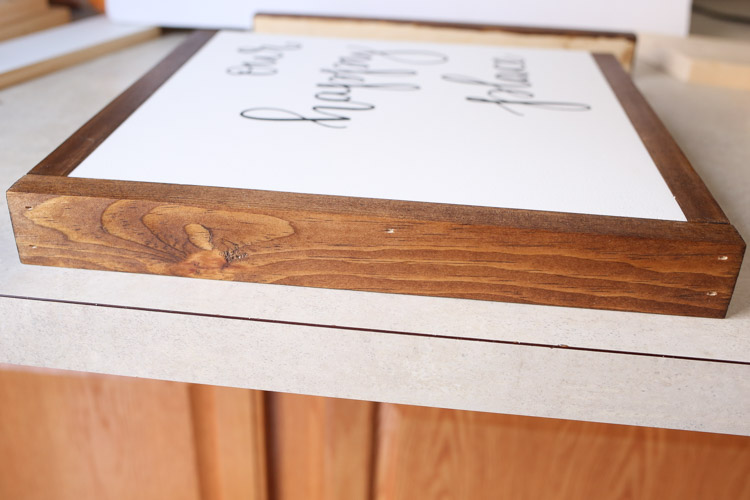
After all sides are attached, fill the nail holes with stainable wood filler and touch up with stain, if desired.
Method 2: How to Frame a DIY Wood Sign with Corner Braces
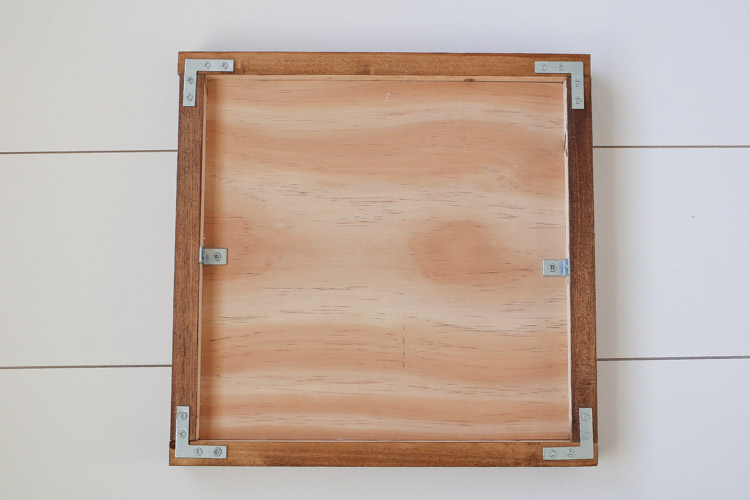
Corner braces (also similar to mending plates) are an inexpensive solution if you don’t have a brad nailer/Kreg Jig or if you don’t do these types of projects often!
Materials Needed:
- Flat corner Braces
- 3/4″ Corner Braces
- 3/4″ Wood Screws
- Drill
- Screwdriver
- Wood glue
1. Attach bottom and top wood frame pieces with corner braces
Place your wood sign backing upside down on your work surface and clamp it down. Line up one of the 11 3/4″ wood frame pieces with the bottom edge of the wood sign backing. Place a corner brace on the middle edge and mark with a pencil the hole opening.
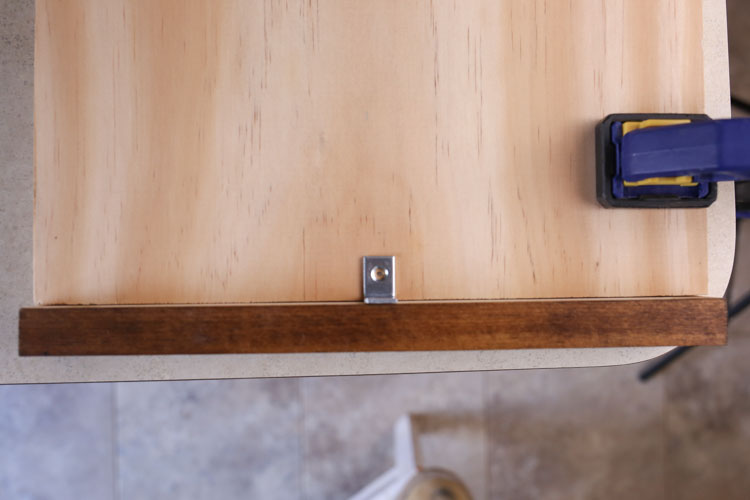
Drill a pilot hole on the pencil mark. Then, attach the corner brace to the wood sign backing with a 3/4″ wood screw. I clamped the wood frame piece in place so everything stayed lined up correctly while screwing in the corner brace.
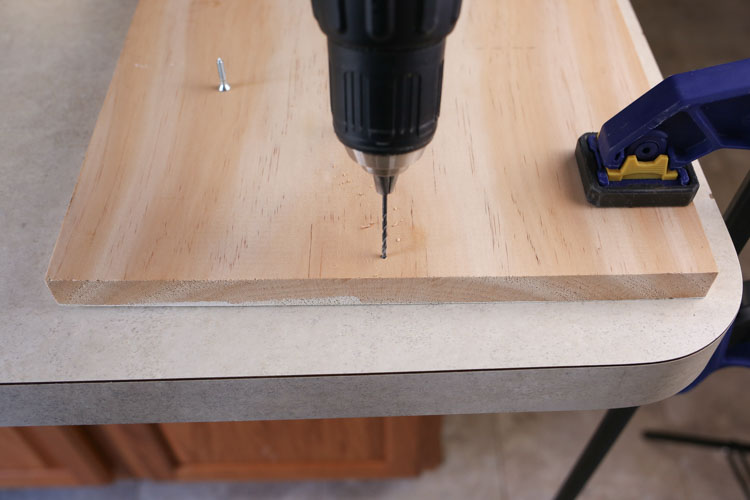
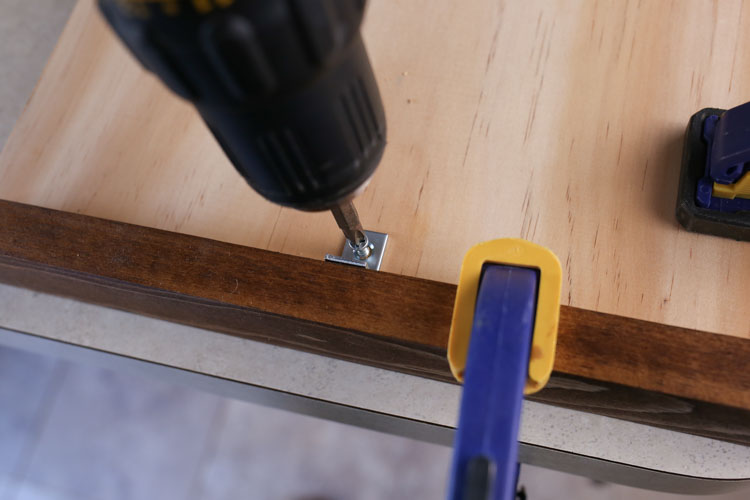
Next, attach the other side of the corner brace to the wood frame piece. Begin by marking the pilot hole spot with a pencil, then drill the pilot hole.
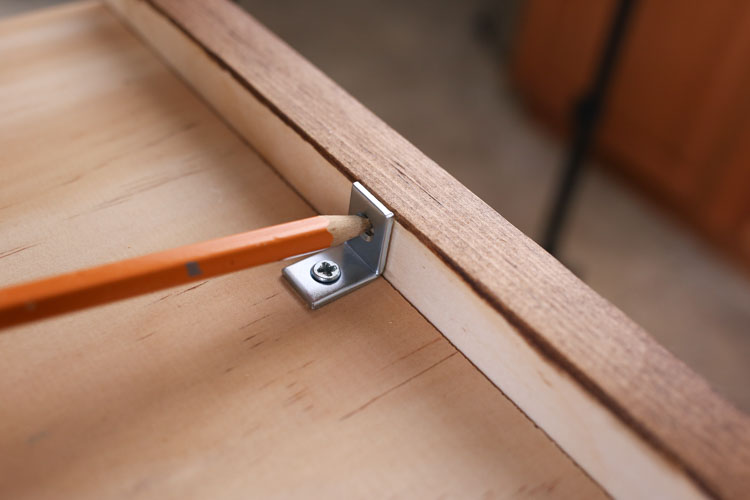
For attaching this wood frame piece, I turned the wood sign on its side and clamped to my work surface. I started drilling the screw in with a drill and then finished it off with a screwdriver since it was a tight spot to get the drill into.
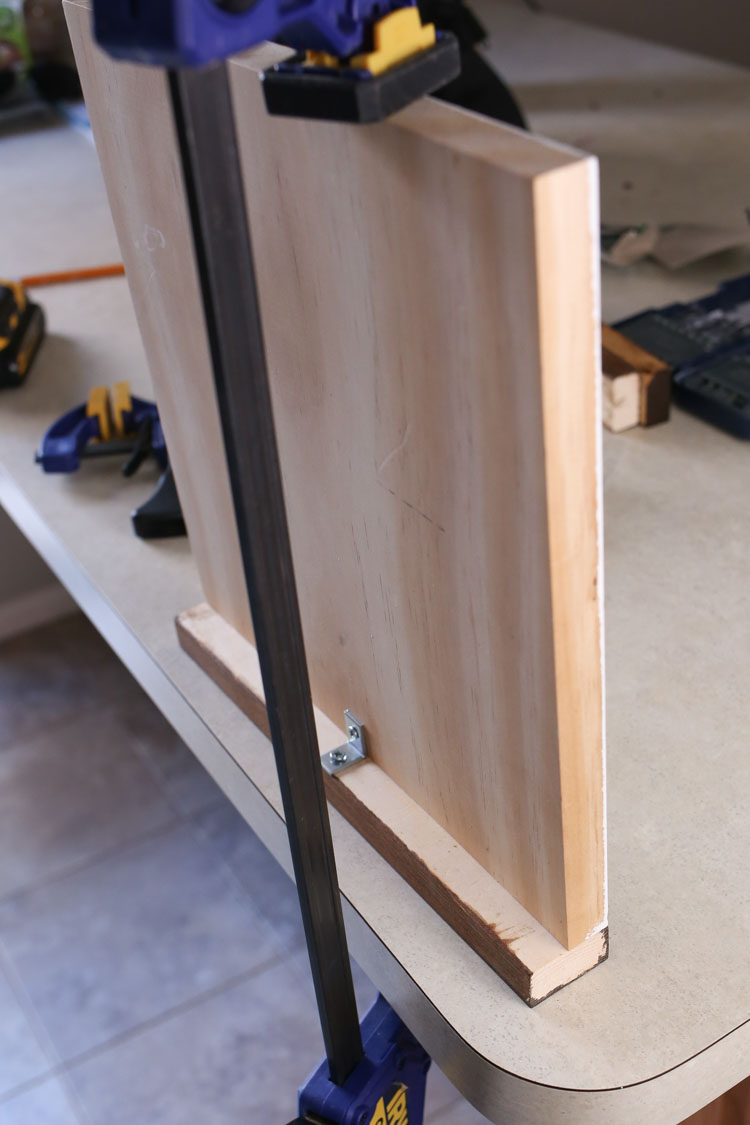
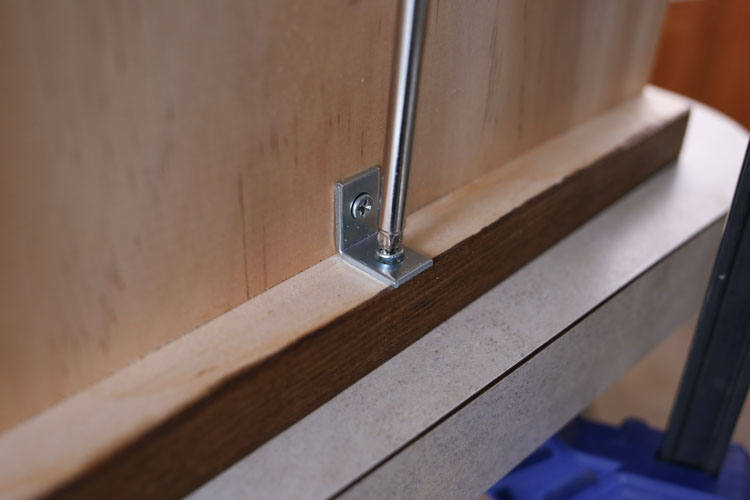
Repeat the above steps on the opposite, top edge of the sign with a second corner brace. Note: if you are using this method on a larger sign, you should use 4 – 8 corner braces instead of 2 braces. And use some wood glue too if using on a larger sign!
2. Attach wood frame pieces with flat corner braces
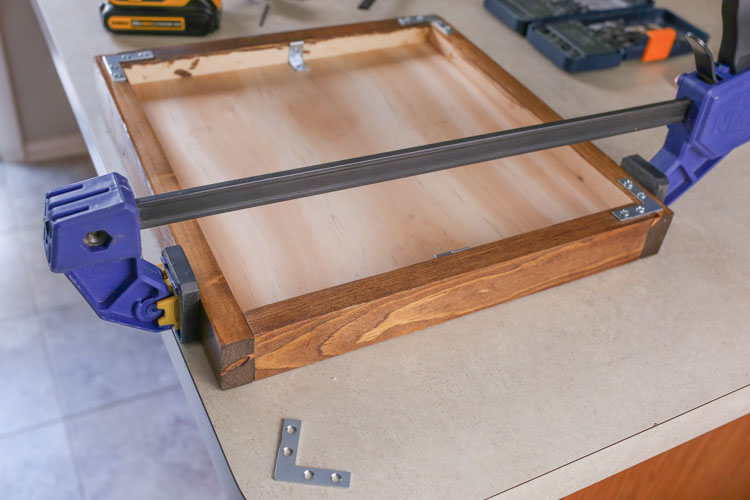
Attach the longer side pieces with flat corner braces. Begin by lining up the flat corner braces on top the corners, then drill pilot holes and wood screws. For this part I clamped the braces in place.
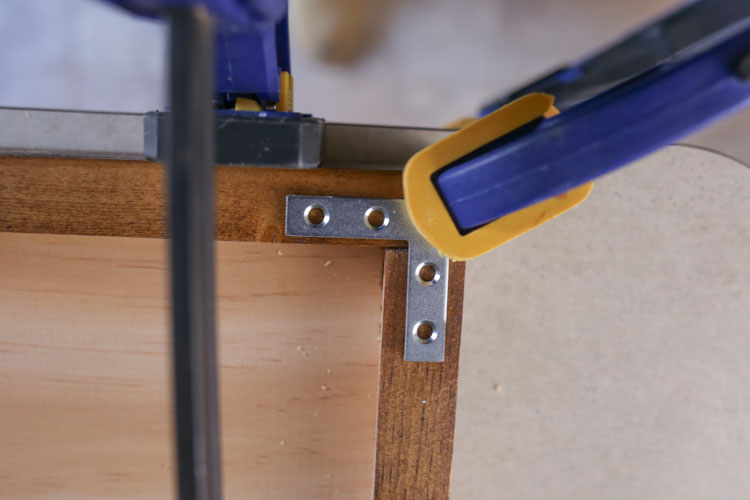
Also, it really helps, especially on the last wood frame piece, to use a large clamp to hold the wood frame pieces securely in place with the wood sign.
Method 3: How to Frame a DIY Wood Sign with a Kreg Jig
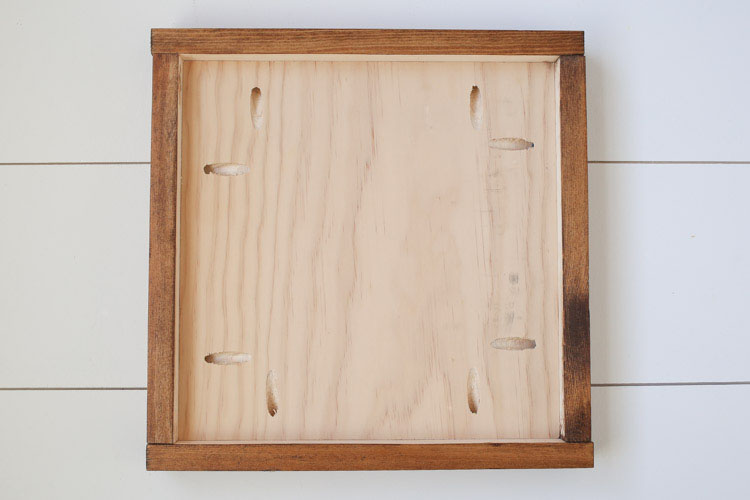
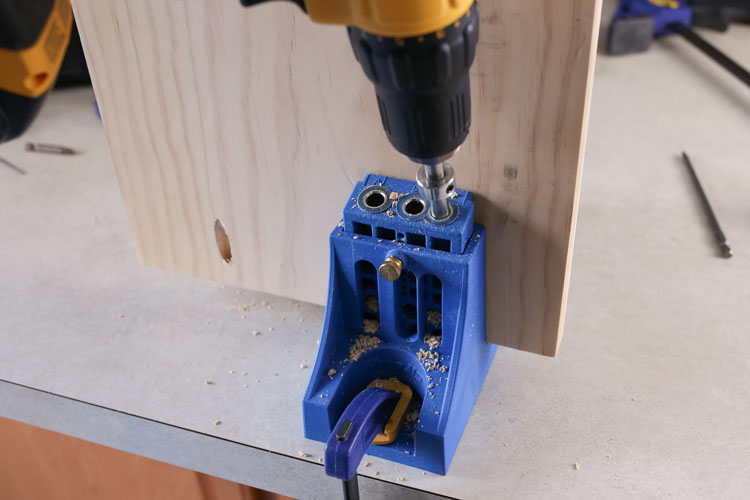
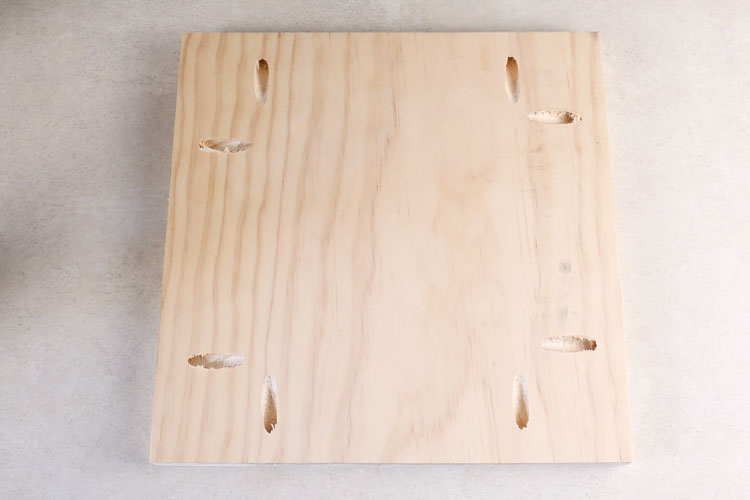
I use a Kreg Jig (when I have a really large or oversized sign that is very heavy. A Kreg Jig uses pocket holes to attach the wood frames to the sign backing, which provide a very strong joint connection. Also, pocket holes are nice because they are hidden on the back of the sign and there are no holes to fill on the side frames.
Tip: See my how to use a Kreg Jig post for an easy, step by step tutorial and video tutorial on how to use the Kreg Jig and to ensure your Kreg Jig settings are set up properly.
Materials Needed:
- Kreg Jig
- Drill
- 1 1/4″ Kreg screws
1. Drill pocket holes on all sides of the back of the wood sign
2. Attach wood frame to sign with Kreg Screws
Clamp everything in place and attach each wood frame piece to the wood sign backing with 1 1/4″ Kreg Screws and a drill. And use some wood glue along the sign edge too before attaching with the Kreg screws. Wipe any excess wood glue away immediately with a damp paper towel!
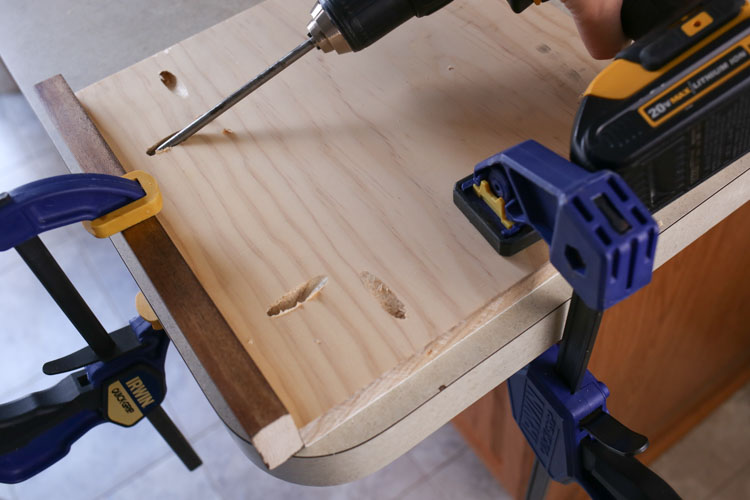
And that’s a wrap on wood sign framing! All of these framing methods result in the same pretty framed view from the front!

Well that concludes the how to make DIY wood sign series!!! I hope all of these detailed, step by step tutorials have been helpful and you feel like you can tackle all your wooden sign projects! Let me know if you have any questions in the comments!
Follow along on Instagram and Facebook for my latest projects, fun updates, and sneak peeks!
More From the DIY Wood Sign Series:



Billie
Friday 16th of August 2019
What is wood sign backing?
Angela Marie Made
Monday 19th of August 2019
It's the large wood background board that the sign design gets painted onto.
Hc
Sunday 28th of July 2019
Have you ever had issues with the nails coming out in odd angles when using your brad nailer? I’ve been making signs this way and a good amount of the nails have to be fixed because they are just randomly bending and flying out of the sign everywhere!
Angela Marie Made
Tuesday 30th of July 2019
Occasionally, I will have a nail pop at an angle. When it happens for me it's because I didn't hold the brad nailer at a 90 degree angle when nailing into the frame. Could that be what's causing your issue? If you are holding the brad nailer straight at a 90 degree angle and it's still happening, I'd test the nailer out on some scrap wood and see if it's still happening. If so, it could be an issue with the brad nailer itself not functioning properly.
Kelly
Tuesday 18th of December 2018
This is great! What is the stain color you used in the photo examples in this tutorial/example?
Angela Marie Made
Wednesday 19th of December 2018
I used Provincial by Minwax
Debbie
Saturday 17th of November 2018
I love your signs they’re beautiful! You by far give the best tutorials and make it so easy to understand. I really like that you give your readers different options for making the frames since some may not have all the necessary tools for option 1. I’m looking forward to making this and to reading more of your tutorials! Thank you so much for sharing your creativity with us :)
Angela Marie Made
Monday 19th of November 2018
Thanks Debbie! I'm so glad to hear that they are helpful!
Marissa W.
Tuesday 30th of October 2018
Total amateur here... For the brad nailer method, which gauge nailer did you use? For the corner braces method, you didn’t have a problem with the wood splitting? What kind of wood are the frame pieces? Thanks so much!
Angela Marie Made
Wednesday 31st of October 2018
I used the Ryobi Airstrike Cordless brad nailer (18 Volt). I didn't have any wood splitting for the corner brace method because I drilled pilot holes first. There is a picture of this in the 2nd photo down from step #1 (method 2). The wood frame pieces are 1x2 common pine. Here is a link to them: https://rstyle.me/n/daytgxcbwkf Hope that helps Marissa!!