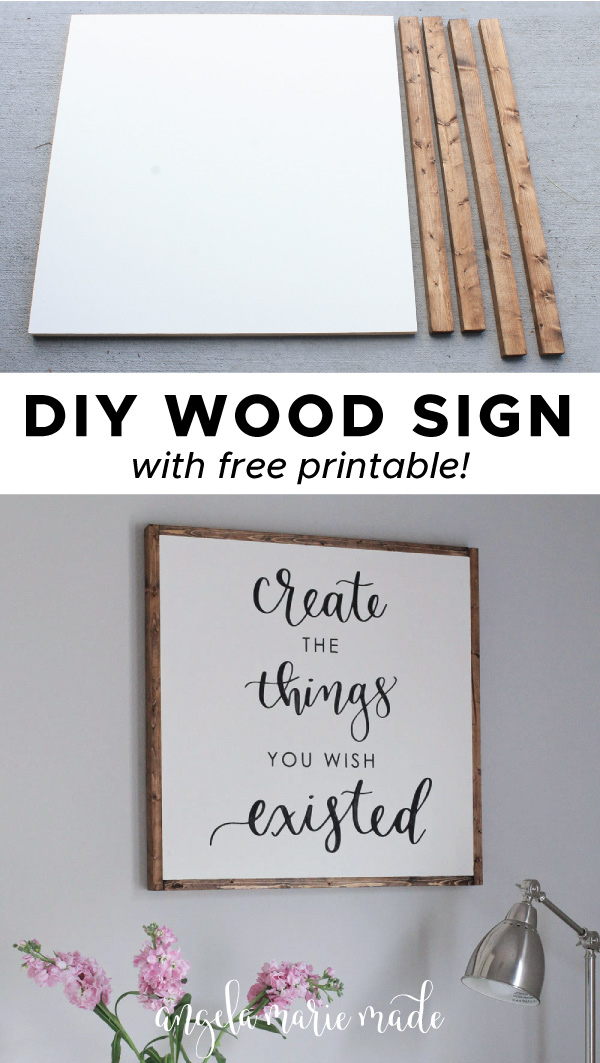
Today I’m going to show how to make a large DIY wood sign and I have a free printable of the design available below too!
I’ve been working on my office makeover for what seems like forever! Finally, I’m nearing the end of the process trying to determine my wall art.
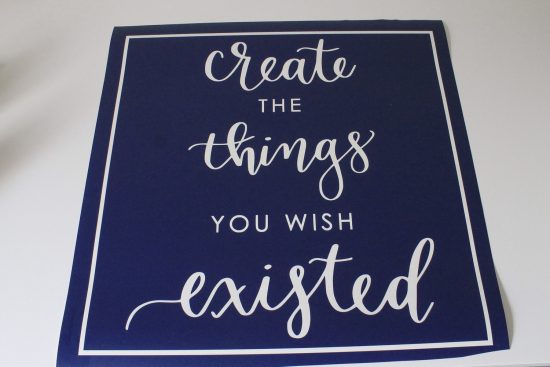
I knew I wanted a simple, rustic, wooden sign for above my desk with an inspiring quote that incorporated my calligraphy. Picking the right quote was incredibly difficult for me, especially because I can be so indecisive and I changed my mind at least three times haha!

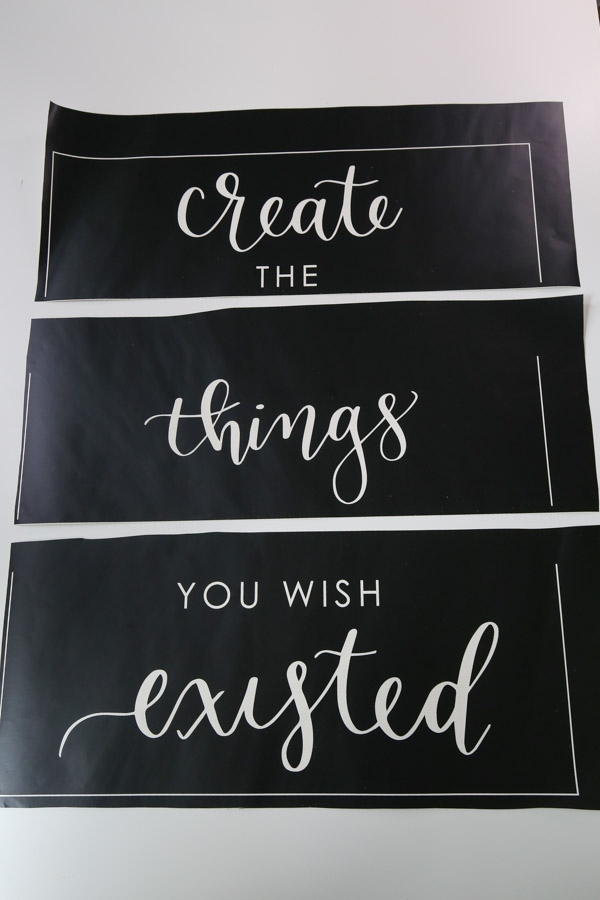
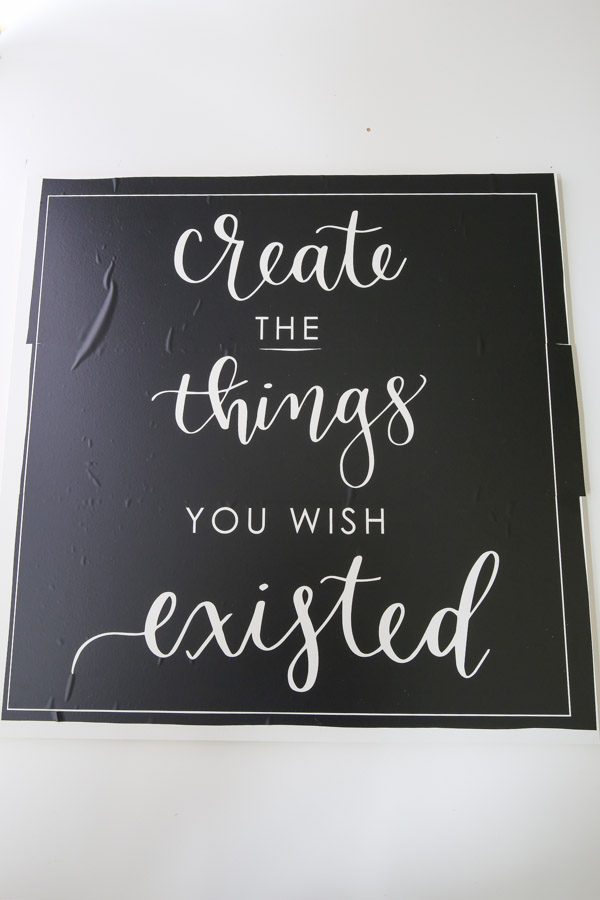
I decided on the quote “Create the things you wish existed,” although I’m not sure of the source of it. I liked this quote because it can relate to all things creative/art/DIY or it can be applied to really any goals in life you wish to achieve!

Note, this post contains some affiliate links. For more info see my disclosures here.
I’m going to show how to make the wood sign and how to transfer the design to the sign. I’m sharing a free printable file and SVG file below of the quote, which features my hand lettering!
These freebie files are available in the free printable library, which you can get access to by clicking the button below if you aren’t already subscribed!
(Printables are for personal use only, no commercial use is allowed, thanks!)

There are many ways to apply the design or lettering to your wood sign. I’m going to share two methods here.
One method is with just a pencil and NO vinyl cutting machine or stencil. It’s a really easy way how to print on wood. The second method uses a a vinyl cutting machine to make a vinyl stencil, I’ll be using my Cricut. But, you can also make a vinyl stencil with a Silhouette Cameo too.
Also, in this tutorial I am using the Cricut Explore Air 2, but check out my tutorial on how to make a large DIY wood sign with the Cricut Explore 3!
How to make DIY Wood Signs:
Materials:
- “Create the Things you Wish Existed” Printable file (free printable available here)
- 1/2″ thick plywood panel at 2ft x 2ft
- (2) 1×2 @ 8ft
- 1 1/4″ brad nails
- Paint for the the sign background (I used White Dove by Benjamin Moore)**
- Paint or spray paint for the lettering**
- Paint rollers
- Stencil brush or marker or paint marker (optional for lettering, see step #4)
- Wood Stain (I used this stain)
- Wood glue
- Cricut, Silhouette Cameo, or other cutting machine (OPTIONAL, see step #4)
Tools:
- Miter Saw (or have your home improvement store make the cuts)
- Brad Nailer or Hammer
- Clamps (optional)
**Paint – For details on painting signs and the best type of paints to use for DIY wood signs, see the best paint for wood signs.
Video Tutorial:
I have a step by step video tutorial for this wood sign on my YouTube channel!
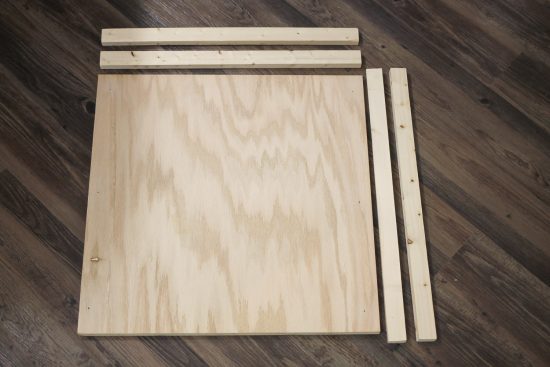
1. Cut wood to size for DIY wooden sign with saying
Using a miter saw, cut your 1x2s to the following sizes (or have your local home improvement store make the cuts for you):
- Two pieces at 24″
- Two pieces at 25 1/2″
Note, if you have a custom size sign do two wood pieces cut at the exact length of the top and bottom sides and two at 1 1/2″ plus the length of the left and right sides.
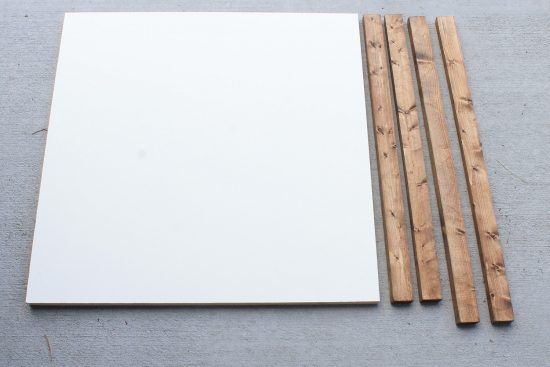
2. Stain wood sign frame
Stain all sides of your 1×2 frame pieces. For tips on how to stain wood for a beautiful finish, check out my tutorial on how to stain wood.
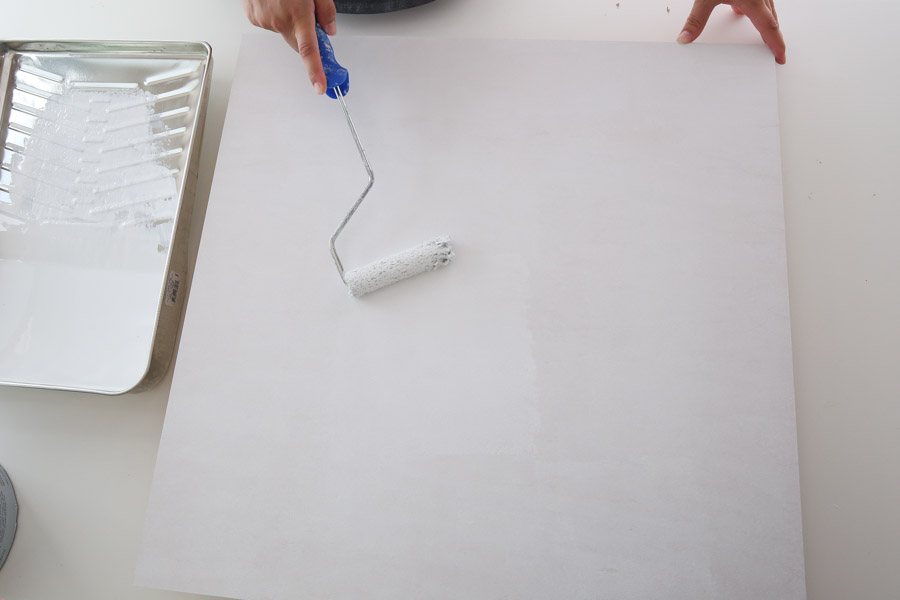
3. Prime and paint wood sign
Use a paint roller and prime the front side of your 2ft x 2ft plywood piece. Let it dry.
Then, apply the first coat of paint to your sign board. Let dry and then apply a second coat of paint. To learn my favorite methods for painting wood signs and the best kinds of paint to use, see How to Paint DIY Wood Signs.
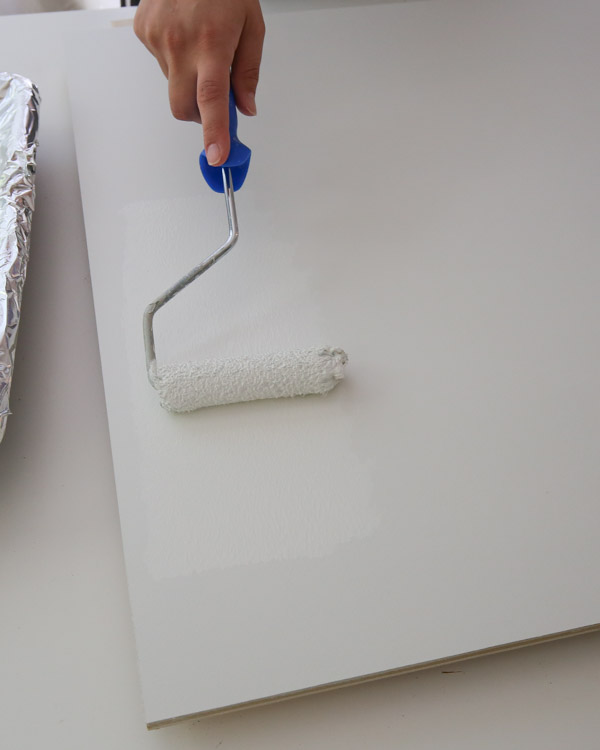
For this sign, I used Benjamin Moore White Dove in eggshell for my sign background board.
LET THE PAINT DRY AND CURE FOR AT LEAST 24 HOURS!
4. Transfer the design onto the painted DIY wood sign
Time for the lettering! There are many ways to print on wood and transfer a print design to a wood sign. And if you have a favorite way I’d love to hear in the comments!
I’m going to share two methods here, one method with with just a pencil and NO machine or stencil! And a second method with a vinyl stencil using a vinyl cutting machine. I’ll be using my Cricut for this example. But, I show how to make a make a vinyl stencil with a Silhouette Cameo here.
Transfer Design Method #1 – Pencil Tracing Method (NO vinyl machine or stencil needed)
If you don’t have a vinyl cutting machine, this method uses a pencil to transfer the design to wood. Although it is more time consuming, it’s very easy!
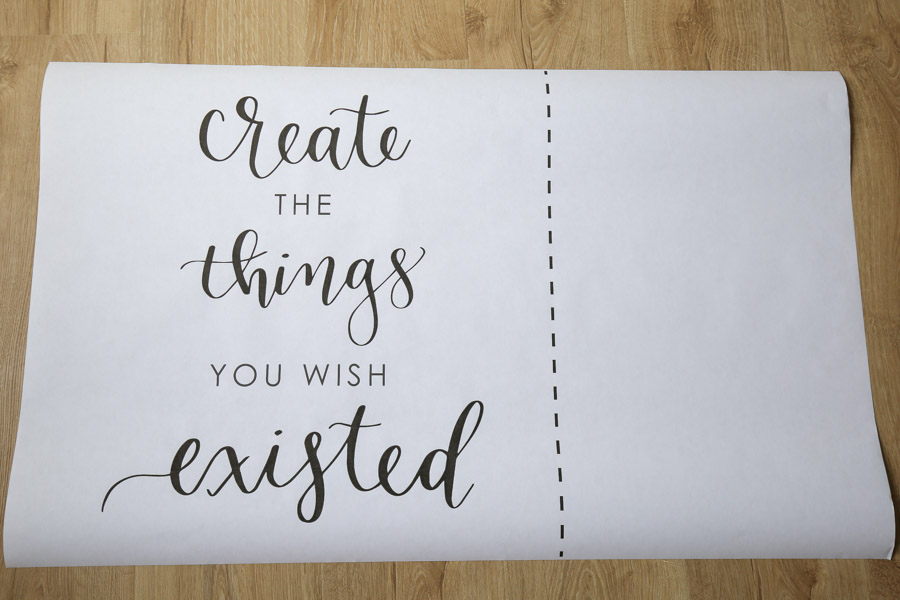
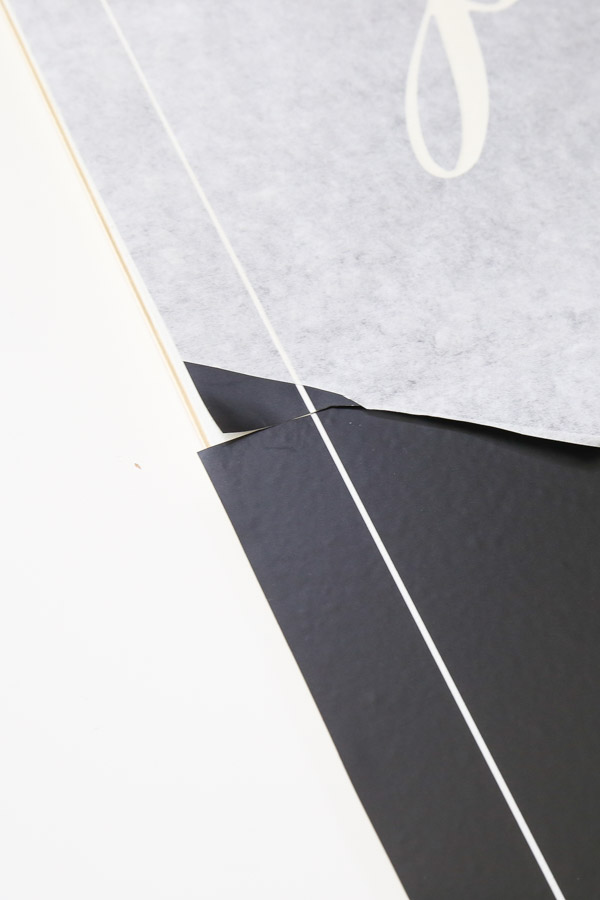
A. Get enlarged print of design
Have the free design file printed as an enlarged print at your local copy store. Staples and Fedex Office both offer 24″ x 36″ engineering or architectural prints for $3-$5. And I’ve included a free, 24″ x 36″ download of the design in my free printable library, which you can get access to by clicking the button below if you aren’t already subscribed!
Then, once you have the enlarged print, use the easy pencil tracing method to print on wood.
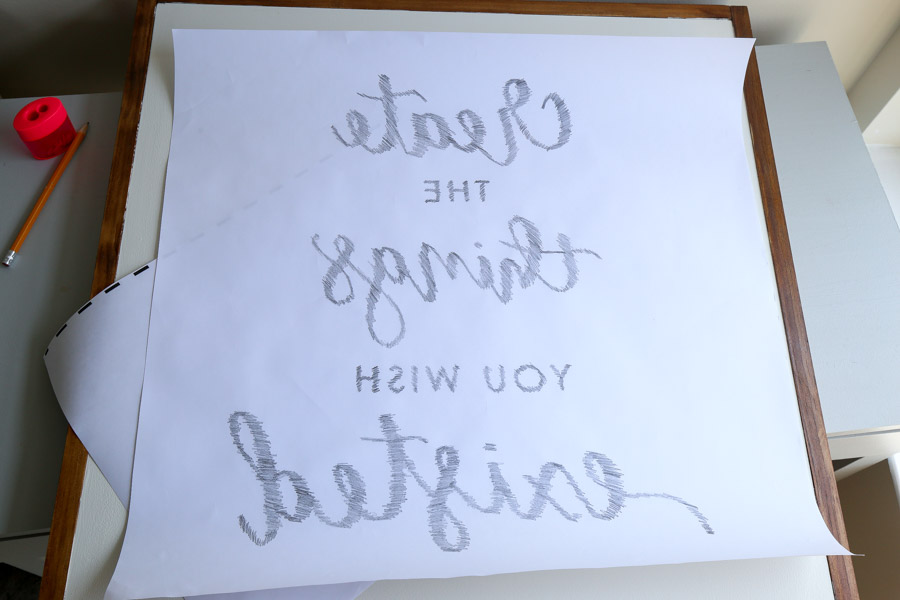
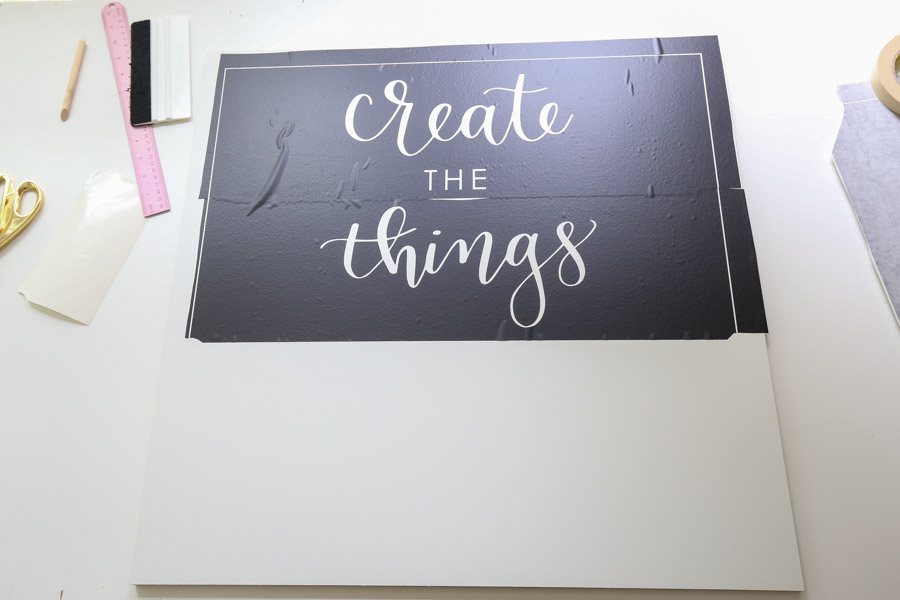
B. Flip print over and shade over the design through the back
So, first you flip your large poster print over and shade over the lettering that shows through the back with a pencil. Make sure to place a piece of paper underneath to avoid the ink getting on your work surface.
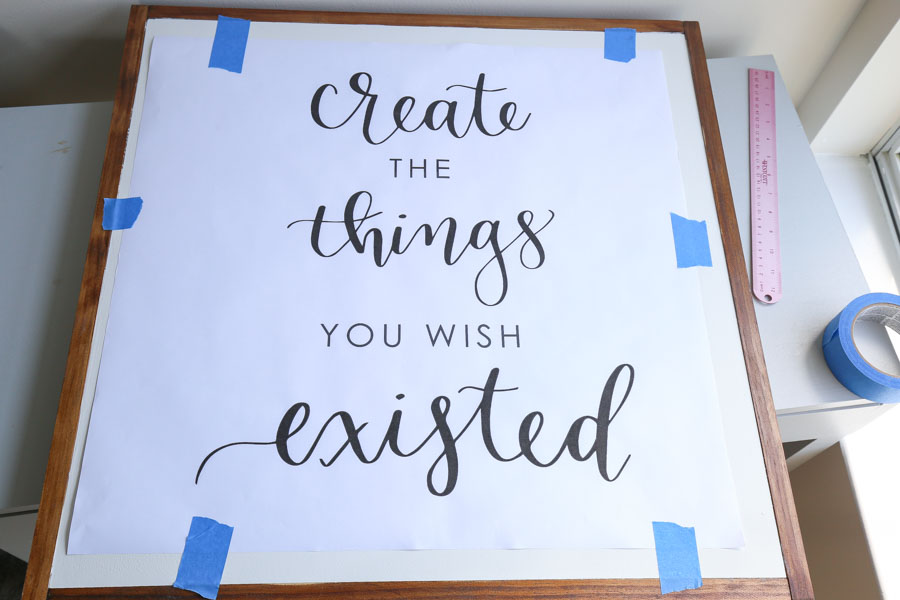
Flip the poster print back over and secure it to your sign with painter’s tape or masking tape, centered on the sign.
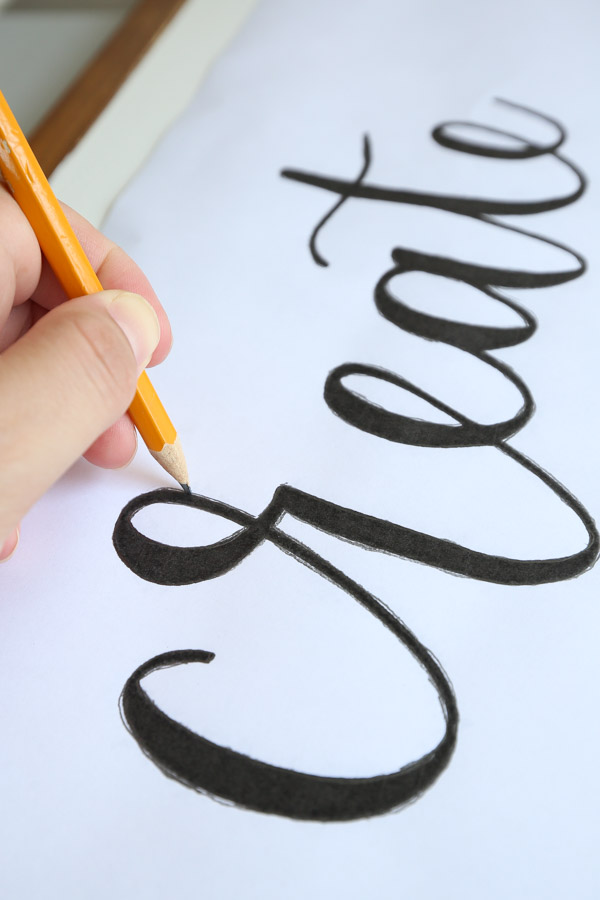
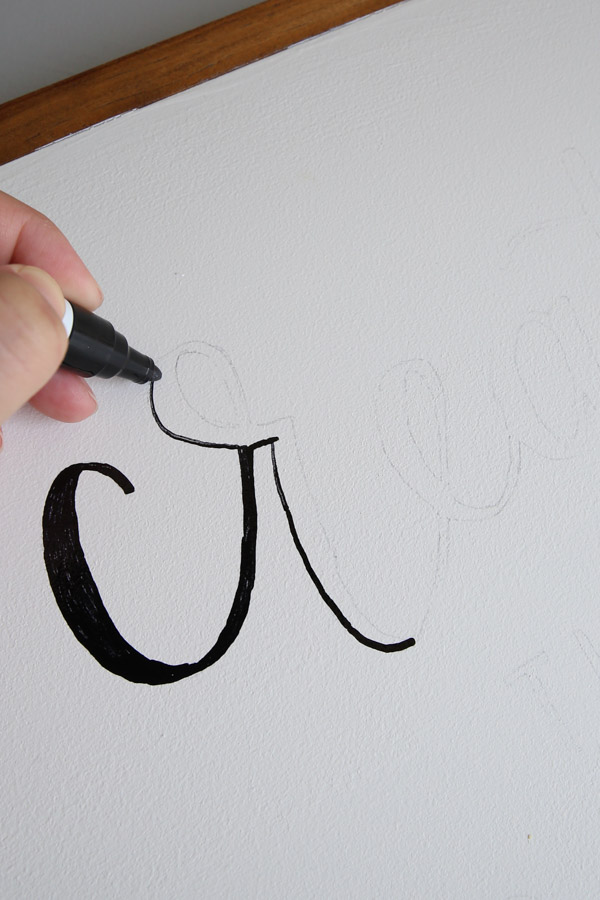
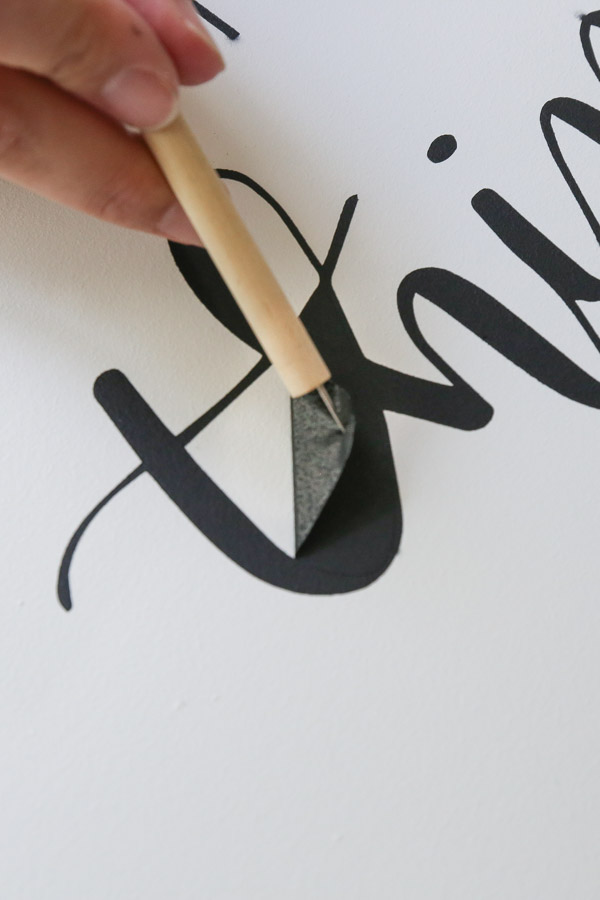
C. Trace the design outline with a pencil
Trace the lettering outline with a pencil with some pressure.
D. Trace the pencil design outline with a marker or paint pen
Proceed with painting in your letters after you have the design outline on your wood. For this method, a paint marker or permanent marker works best for tracing over the pencil lines! You may need a few of them since they tend to dry out fast on these large signs.
***
Transfer Design Method #2 – Vinyl Stencil with a Cricut
A QUICK NOTE ABOUT THE ORIGINAL SIGN:
Before I get into this second method, how to make wooden signs with stencils, using my Cricut, I want to explain how I originally made the sign for the first time.
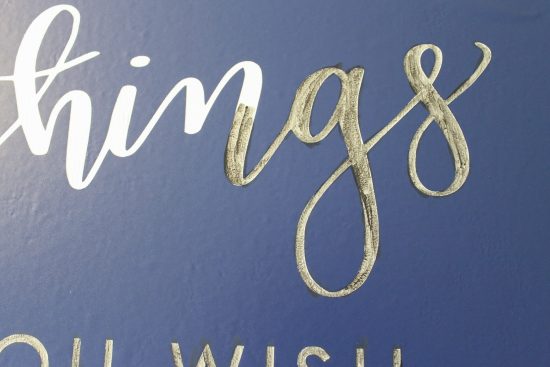
Originally, I printed the design out with my professional vinyl cutting machine (which cuts up to 24″ wide) as a vinyl decal and used it as a vinyl stencil on the wood sign (shown in below three photos).
Then, I painted two coats of black acrylic paint with a small, art, paint brush, making sure I didn’t put the paint on too heavy to prevent it from seeping under the vinyl.

Most people don’t have professional vinyl machines that can cut this large decal. So, I remade the sign recently with my Cricut and I’m explaining below step by step how to make the vinyl stencil in sections with the Cricut!
***
Materials Needed for Vinyl Stencils for Wood Signs Method:
- Create the Things SVG file (get the free file here)
- Cricut
- 12×24″ cutting mats
- Vinyl (I use Oracal 631 matte vinyl)
- Vinyl weeding tool
- Transfer tape (I use Oratape HT55)
- Vinyl Application Squeegee
- Masking tape & Painter’s tape
- Craft razor blade cutter
I have the full step by step detailed tutorial on how to make this DIY wood sign with a Cricut in my video here! But, I will share below a summary of the steps as well for how to make stencils for wood signs!
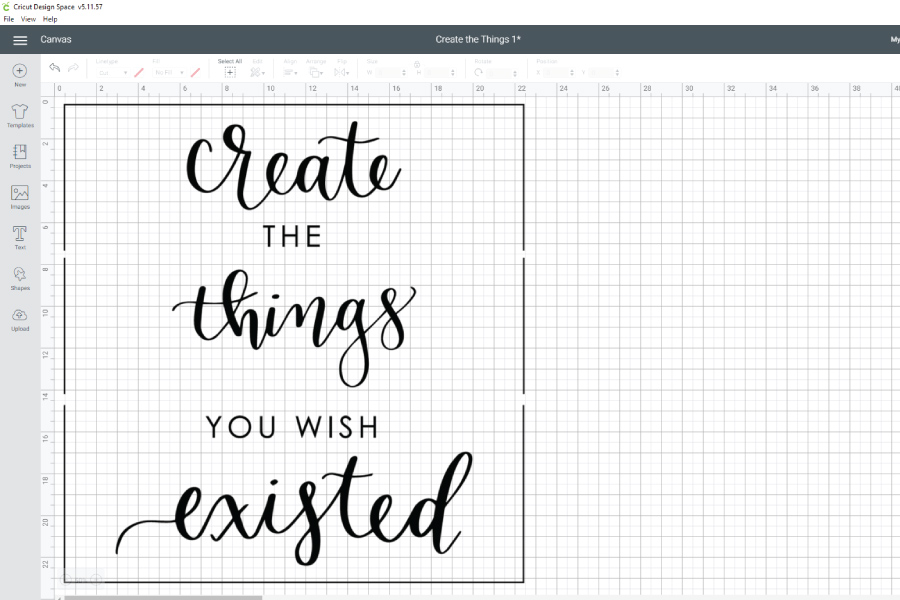
A. Prepare the SVG file in Cricut Design Space
Check out my video tutorial to see a step by step of how to prepare the SVG file in Cricut Design Space so the design is split into 3 sections for cutting on 12×24″ mats.
B. Cut the vinyl stencil with the Cricut
Cut the three sections of the design out on vinyl and the 12×24″ cutting mats.
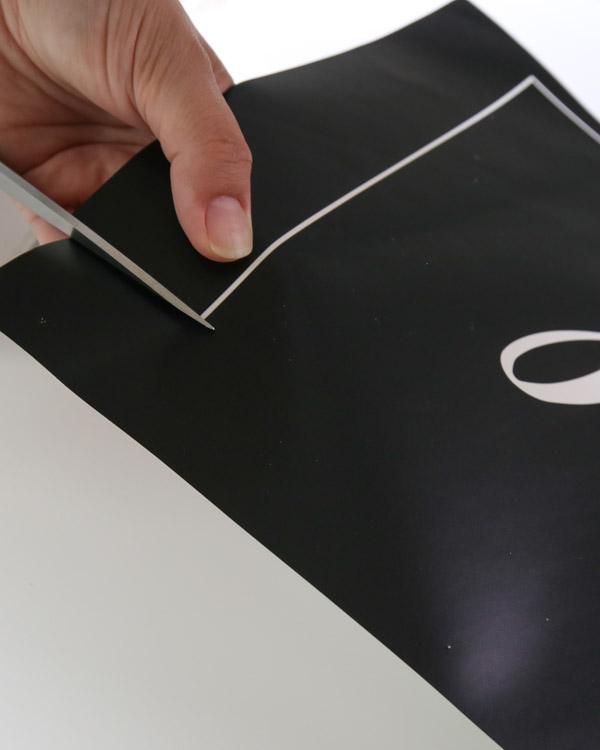
C. Weed the vinyl stencil
Remove each vinyl decal from the cutting mat.
Weed the vinyl using a vinyl weeding tool to help. Make sure to remove the lettering part and leave the surrounding vinyl, to make a vinyl stencil.
Make sure to keep the square box outline around your stencil on each of the three sections.
D. Cut the edges of the square box outline
After weeding, cut the vinyl away right on the edge of each square box outline. This is so we can easily line up our square box outline for each vinyl section for a perfect fit on the sign backing board.
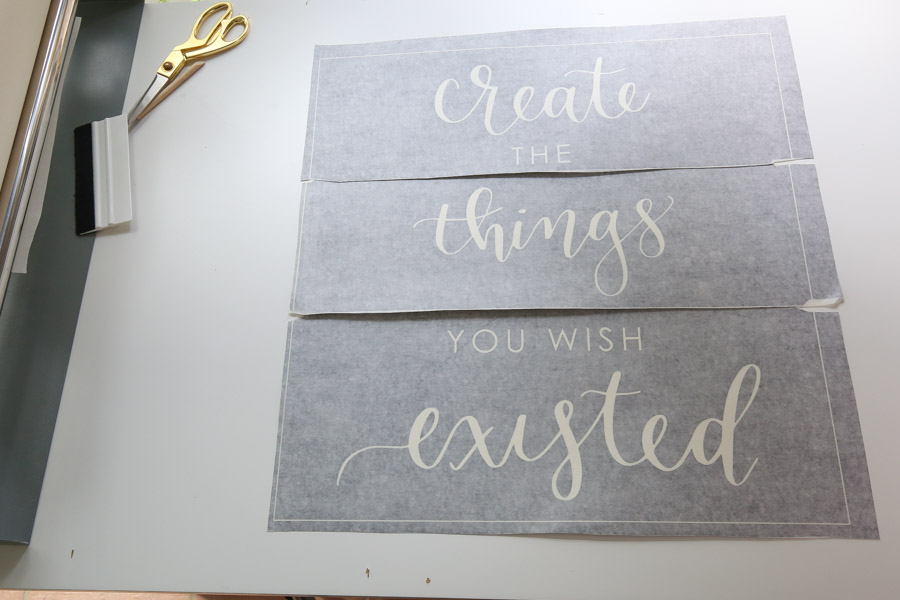
E. Apply transfer tape to the wood sign stencil
Next, apply transfer tape to your stencil. I like to use a transfer tape roller. It makes the process super easy especially for larger decals.
I start by taping the corners of the vinyl stencil down with masking tape. Then, I pull the transfer tape over the vinyl stencil and press the end of it down on the work surface and smooth it over the vinyl with a squeegee.
Cut the excess transfer tape off of the 3 vinyl stencil sections.
F. Apply the vinyl stencils to the sign one section at a time
Center the first vinyl stencil on the wood sign backing. Use a ruler and make sure it’s 1” from the square outline edge and the sign edge.
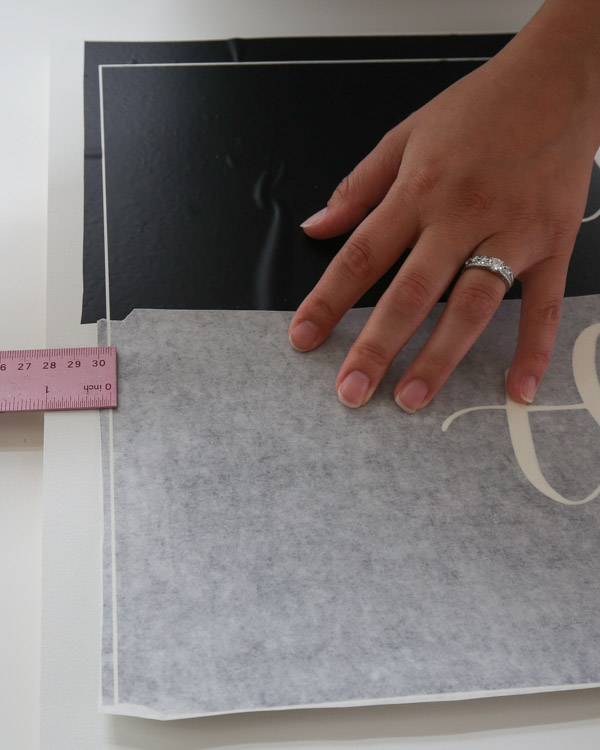
Apply the first section to the sign. See my video here for a detailed step by step on applying vinyl to wood signs. Also, I have the vinyl application details in this how to make a vinyl stencil tutorial (step #3).
Repeat these steps for the next two sections. Make sure to line each section up using the square outline edges and a 1” space between the sign board edges and square outline.
Also, it helps to remove a tiny bit of the transfer tape for lining the square up.
G. Tape off wood sign edges
Use painter’s tape and tape off the exposed edges and any open areas not covered by the vinyl.
H. Paint or spray paint over vinyl stencil
Finally, use either paint and a stencil brush or spray paint and paint over the vinyl stencil with multiple light coats. Light coats help to avoid bleed-through.
J. Remove the vinyl and tape
Remove the vinyl and tape! You will be left with your beautiful design transfer on the DIY wood sign! If any bleed-through occurred, you can do touch ups with a small paint brush!
***
Also, I just want to mention that if you are learning how to make wooden signs to sell, this transfer method is great for providing a beautiful, professional look! For more information, check out my tips on how to make wooden signs to sell.
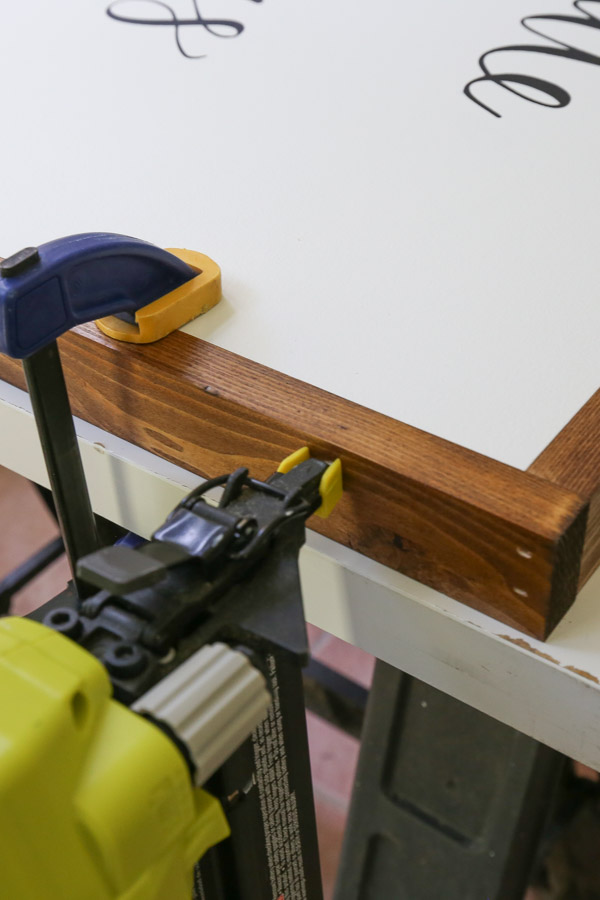
5. Attach wood frame to DIY wood sign backing
Now it’s time to attach the framing to the sign!
I like to place scrap 1x2s which are ¾” thick and a ¼” thick board under the sign so they line up perfectly with the 1×2 frame boards.
Use wood glue and a brad nailer with 1 ¼” brad nails and attach the frame boards to the sign. Start with the 25 1/2” pieces along the sides and use clamps to keep them in place. Then add the 24” pieces on the top and bottom.
Make sure to wipe any excess wood glue away immediately with a damp paper towel.
You can use extra nails on the top since they won’t really show when hung on the wall.
Lastly fill the nail holes with wood filler and then stain.
Note, if you’d like more details and methods for framing, check out my post on how to frame wood signs.
Now your DIY wood sign is complete! Yay!!


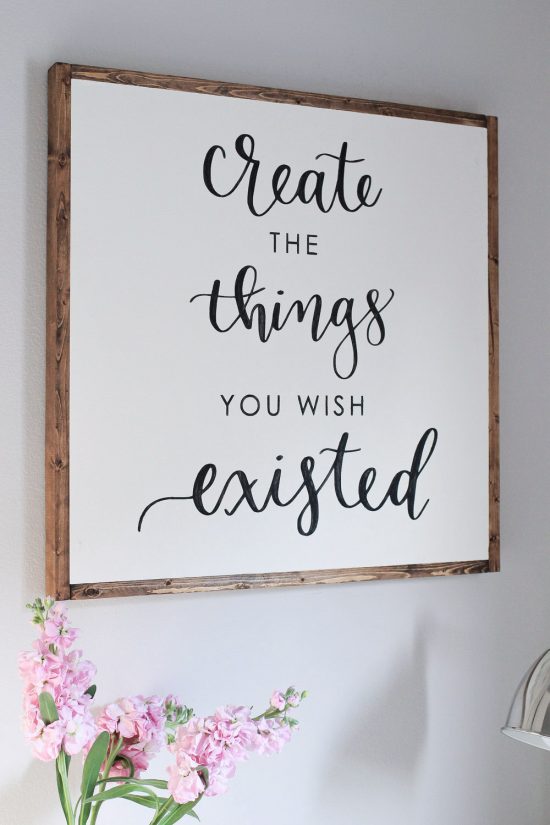

I hope this tutorial on how to make a wooden sign with a saying has been helpful! Don’t forget to check out my other DIY large wood sign tutorial too!
I will be sharing some more office projects in the upcoming weeks.
If you make this sign, please share it with me on social media @angelamariemade or #angelamariemade!
Be sure to follow along on Instagram and Facebook and YouTube for my latest projects, fun updates, and sneak peeks!
Want to save for later?! Pin it here:
More From the DIY Wood Sign Series:
- How to Make a Wood Sign with a Vinyl Stencil
- How to Easily Transfer a Design onto Wood
- How to Paint DIY Wood Signs
- 3 Ways How to Frame a DIY Wood Sign
Summer
Sunday 21st of February 2021
Hi! How did you get the square outline around the design? Also, what font is the cursive? I love it!!!!! Can't wait to make it :)
Angela Marie Made
Thursday 25th of February 2021
I used a cricut and go into more detail on method #2 and in the video. The font is actually my hand lettering that I digitized. Thank you!
Jill Holly
Friday 30th of August 2019
Thank you so much for getting back to me!! <3 Jill
Jill Holly
Thursday 29th of August 2019
Hi can you please tell me the brand name of the 24 in vinyl cutter you used? I was thinking about purchasing the US CUTTER which is 34in. Any advice would be greatly appreciated!!!
Angela Marie Made
Friday 30th of August 2019
It was the Graphtec ce6000-60. It worked great and I never had any issues with it. It is definitely an investment though, so I would recommend it if it's something you are going to use often. Another brand that I've heard great things about is the Roland. I don't know much about the US Cutter brand as far as performance goes.
Angela Scott
Sunday 24th of February 2019
I saw a very similar sign the other day in the ultrasound dept of my hospital. I have been so sick, and when I saw that sign I didn't have my phone with me. I had the nurse write the quote down for me because I love that quote, and I didn't want to forget what it said. The nurses didn't know who made it or where it came from. Who ever made it used the bead board paneling and painted it white and made the frame like yours. It had the same calligraphy and lettering, so they must have it got it from you! I am thrilled that you have posted this!
Angela Marie Made
Monday 25th of February 2019
Thanks so much for letting me know Angela! I love hearing about others who have made the sign and I'm glad to hear it's in a good place!!
Jen
Friday 22nd of June 2018
Hi! I'm new to making signs and have been using Oracal 631 and 651 to apply straight to the sign (as opposed to creating a stencil. Have you ever used this method? I'm worried about the letters peeling with time but haven't been able to find any info on whether this will be an issue or not. Thanks so much! Your sign is beyond gorgeous.
Angela Marie Made
Monday 25th of June 2018
Thanks!! Yes I have used just Oracal vinyl before on signs for the lettering/designs. For those signs that I made a few years ago with just the vinyl, I haven't had any peeling issues. Since you're using Oracal, which is a high quality vinyl, it can last several years or longer for indoor signs. I think the oracal 651 (which has outdoor durability) can last much longer, so you may want to use that for extra long term durability. The letters may peel over time, but I'm not sure how many years it would take, and I would think that it also depends on humidity levels and other environmental factors. But I don't think it's anything you need to worry about happening right away unless the vinyl had initial issues with sticking to the surface.