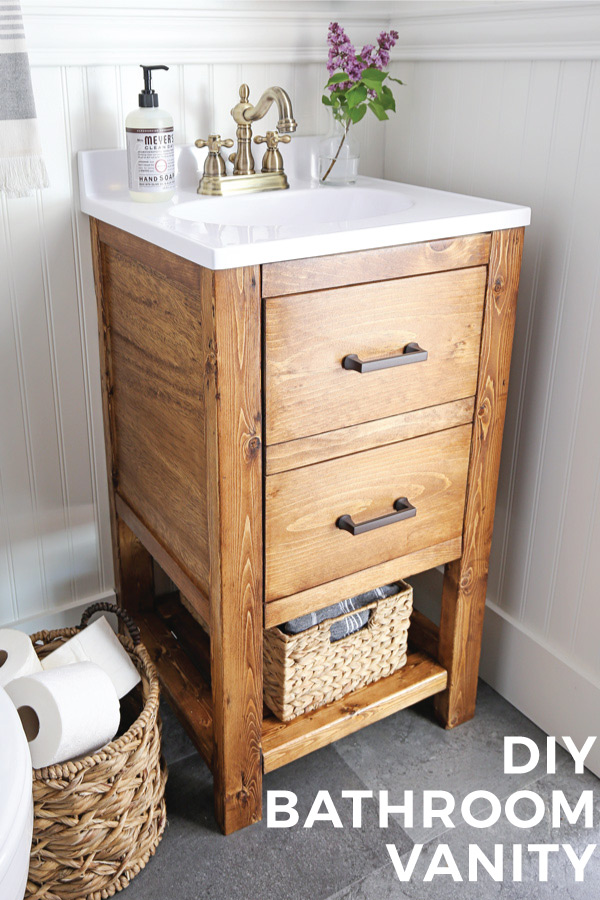
Our DIY bathroom vanity is my favorite feature of our small budget bathroom makeover that I shared last week!
And I’m excited to share the tutorial details on how I built this DIY rustic bathroom vanity for $65!
I had been dreaming up our DIY bathroom vanity build plans for months. I wanted the vanity to be cute and look high end, like a custom built piece you would find at a top notch furniture store.
However, I wanted to make it for as little as possible, and it cost me about $65 for the lumber and hardware! Major savings for our bathroom renovation since bathroom vanities are expensive!

I love that the drawer fronts are actually faux drawers! And they are actually a door, so I call it a faux drawer door front ha! Below is a photo showing this before we finished installing our plumbing. I’ve included a video clip at the end of the post too showing this in action!
Also, I have another style DIY bathroom vanity (with double doors) tutorial that you can check out too!
Note, this post contains some affiliate links. For more info see my disclosures here.

How to Build a DIY Bathroom Vanity
Materials
- (2) Door Hinges (I used these hinges)
- (2) Cabinet Pulls (I used these pulls)
- Magnetic Door Catch
- (1) 2ft x 4ft @ 1/2″ thick plywood
- (1) 2ft x 2ft @ 1/4″ thick plywood
- (3) 2×3 @ 8ft
- (1) 1×2 @ 8ft
- (1) 1×8 @ 6ft
- (1) 2×2 @ 8ft furring strip
- 3/4″ and 2 1/2″ Wood Screws
- 1″ and 1 1/4″ and 2 1/2″ Kreg screws
- Wood Glue
- (2) 1/8″ wood shims or wood paint stirring sticks
Tools
- Kreg Jig (available here too)
- Miter saw
- Circular Saw
- Drill
- Brad nailer (optional)
- Clamps
- Tape Measure
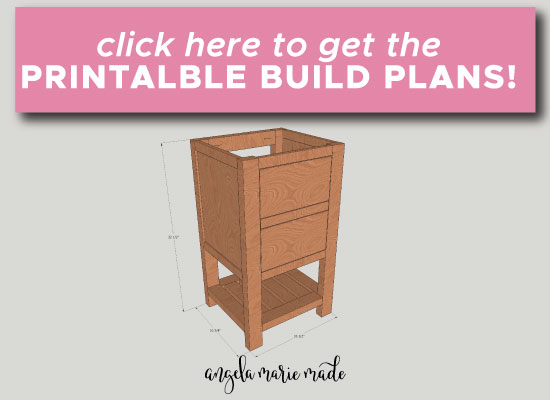
Bathroom Vanity Dimensions: I built this DIY bathroom vanity to go with a 19″ x 17″ sink (similar here) for our small bathroom and to have 1/4″ sink overhang over the vanity. You can adjust the measurements as necessary if you’d like to use a different size sink! The final dimensions of this DIY rustic bathroom vanity are 32 1/2″ tall x 16 3/4″ deep x 18.5″ wide.

NOTE: For printable bathroom vanity build plans, click here!
1. Make lumber cuts for the DIY Rustic Bathroom Vanity
Use a miter saw and make the following cuts from the 1×2 @ 8ft long piece:
- 2 pieces @ 13 1/2″ (for vanity front)
- 4 pieces @ 13 3/4″ (for vanity sides)
Make the following cuts from the 2x3s (Tip – make sure you use very straight 2×3 boards):
- 4 pieces @ 32 1/2″ (for vanity legs)
- 2 pieces @ 13 1/2″ (for back frame of vanity – step #4)
Use a circular saw and make the following cuts from the 2ft x 4ft plywood board:
- 2 pieces @ 16 1/2″ x 13 3/4″ (for vanity sides)
- 1 piece @ 16 3/4″ x 13 3/4″ (for vanity base – step #6)
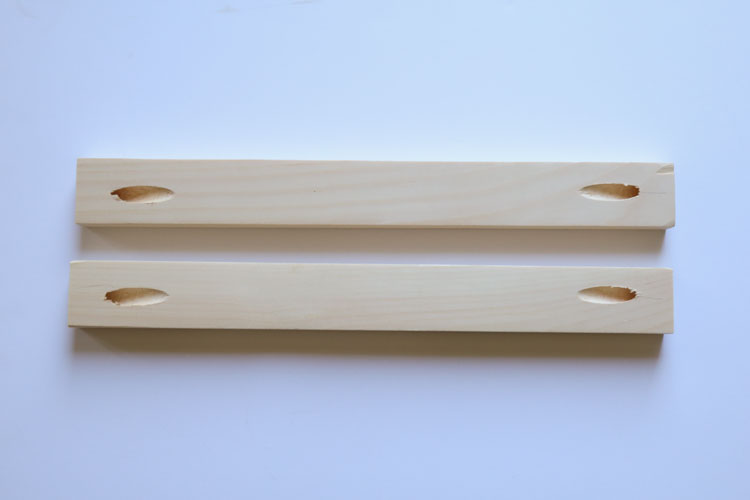
2. Add pocket holes and attach wood vanity side boards
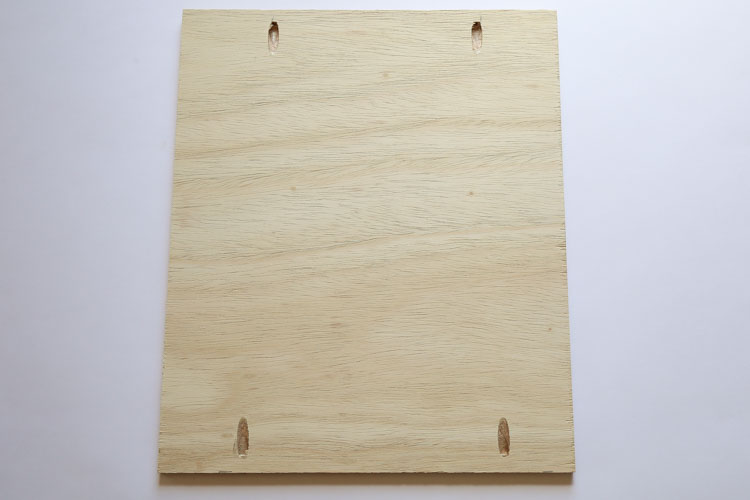
Add two pocket holes with the Kreg Jig (available here too) to each side of the 2 plywood pieces @ 16 1/2″ x 13 3/4″. Make sure to set your Kreg Jig settings for 1/2″ thick wood.
Tip: See my how to use a Kreg Jig post for an easy, step by step tutorial and video tutorial on how to use the Kreg Jig!
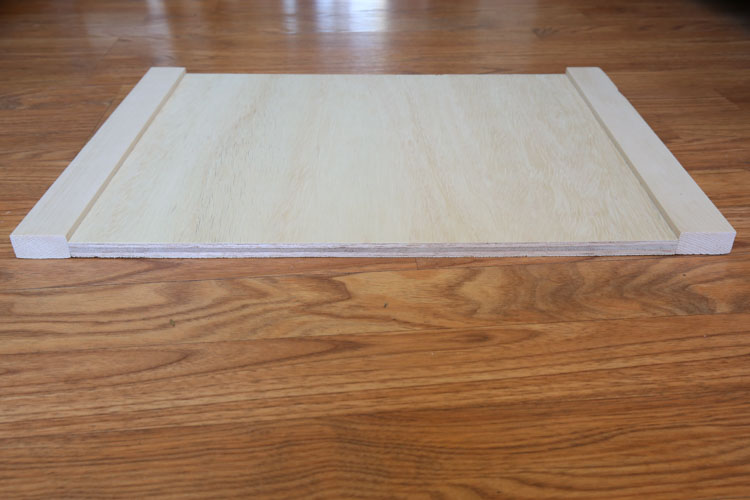
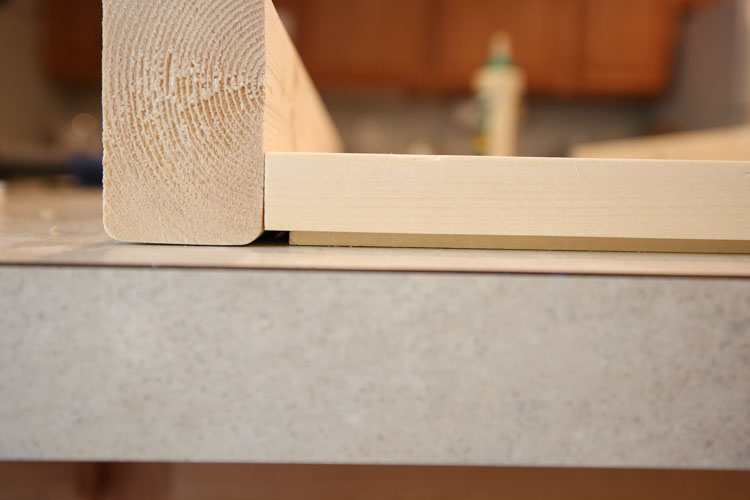
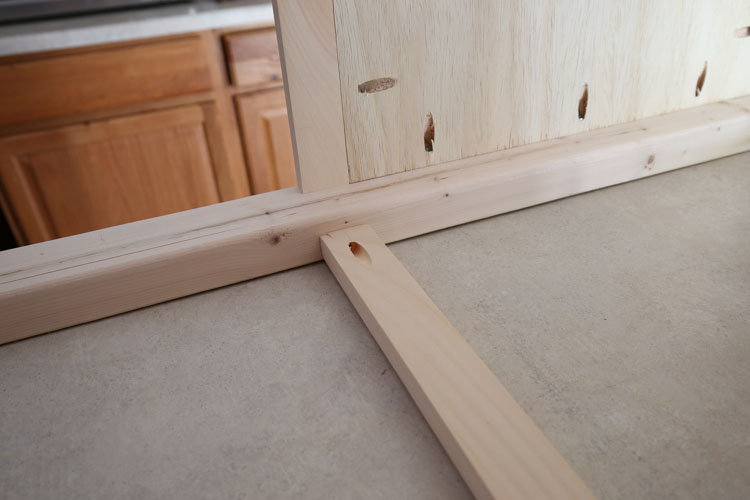
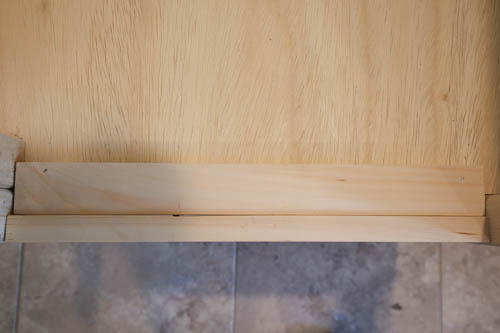
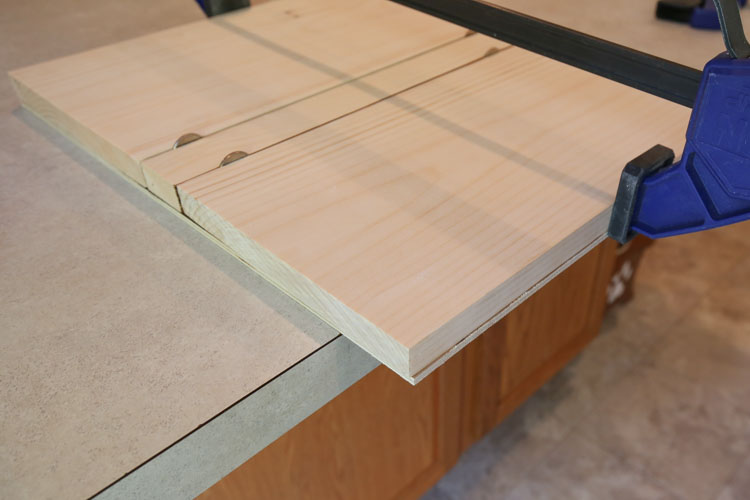
Then, attach one of the 13 3/4″ 1×2 pieces to the 16 1/2″ x 13 3/4″ plywood board with 1″ Kreg screws and wood glue. Make sure the edge of the 1×2 board is flush with the side edge of the plywood board that has the pocket holes. Use a clamp and two 1/8″ wood shims or two paint stirring sticks that are 1/8″ each to help with this part as shown in the below photo.
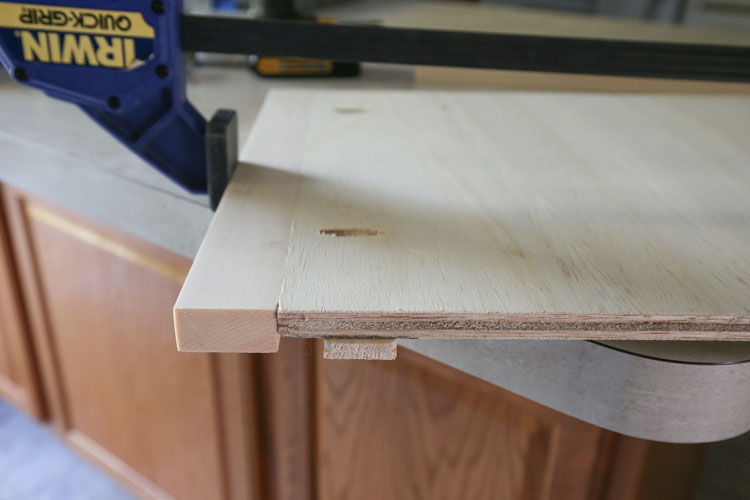
Repeat on the opposite side of the board and then for the other 16 1/2″ x 13 3/4″ plywood board with the remaining 13 3/4″ 1×2 pieces to finish creating your side vanity pieces!
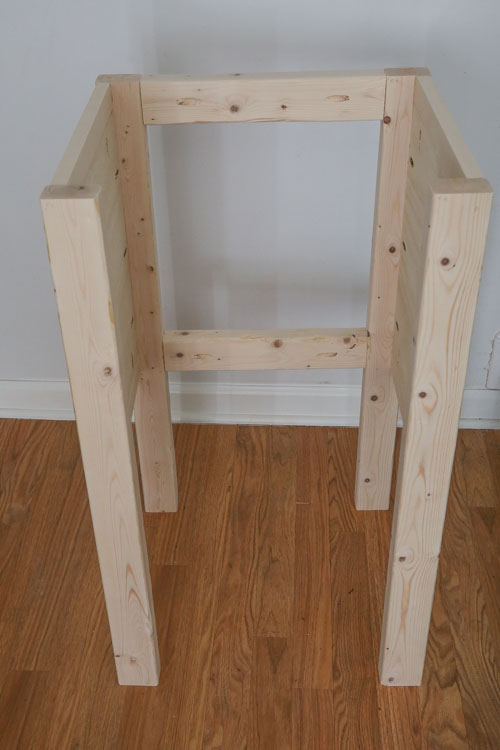
3. Attach wood bathroom vanity legs to vanity side pieces
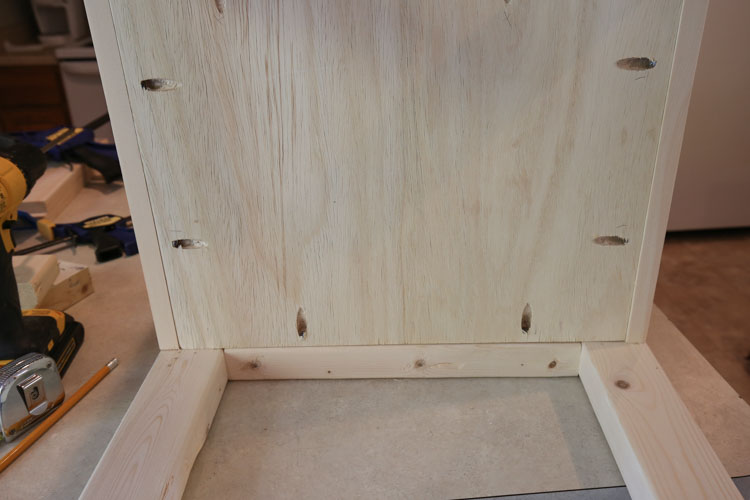
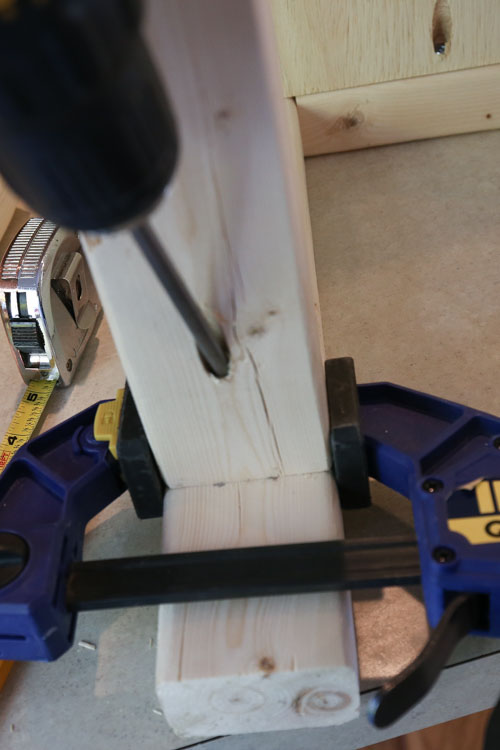
Add 3 more pocket holes along each side of the vanity side boards as shown in the below photo.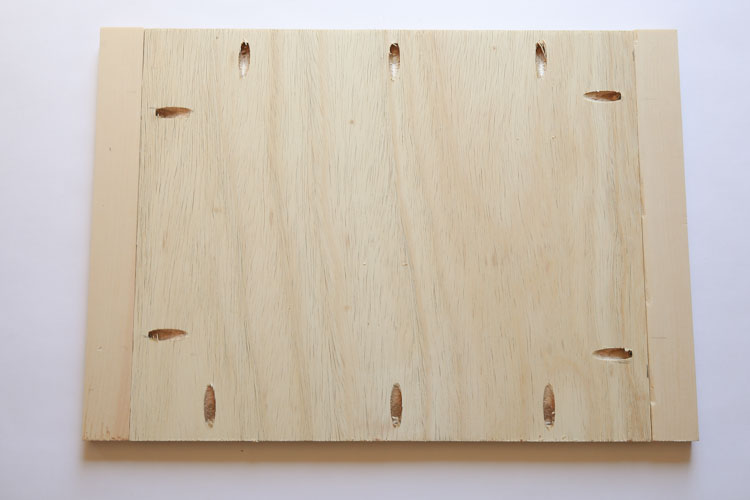
Place a 2×3 @ 32 1/2″ on each side of the bathroom vanity sides. Use a 1/8″ shim or paint stirring stick and place it under the top and bottom of the side vanity edges. Then, clamp together the legs to the wood vanity sides to hold everything in place and attach the boards with 1″ Kreg screws and wood glue.
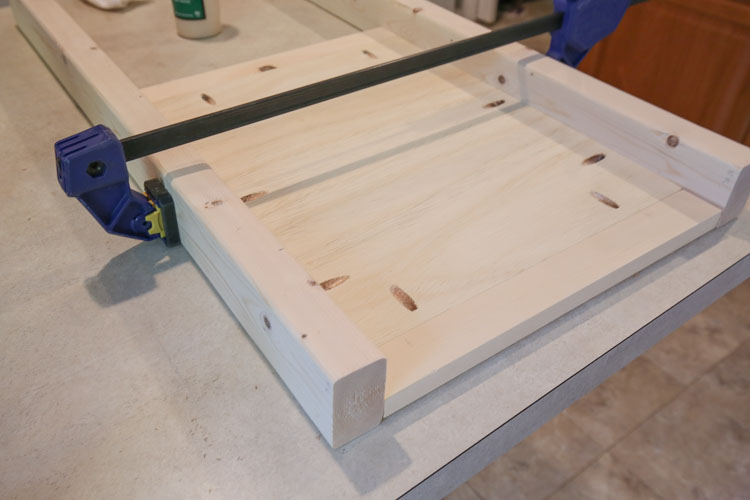
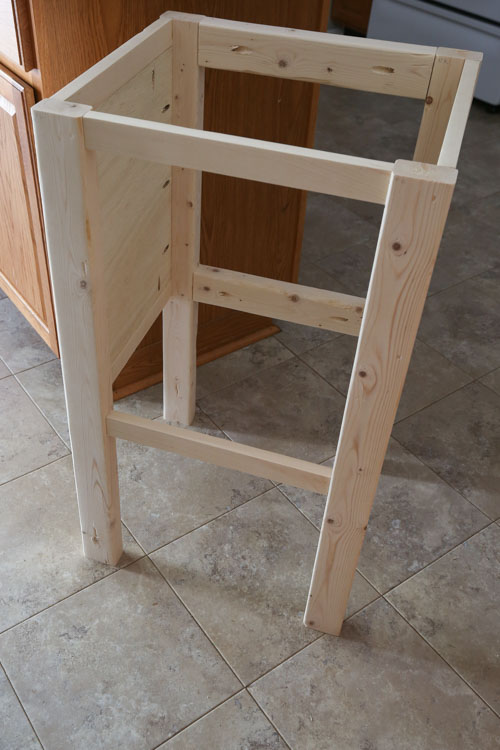
Once finished, one of your vanity sides with legs will look like the below photo. Repeat for other side.
4. Attach back framing boards to bathroom vanity sides
Add one pocket hole on each side of the two 2×3 pieces @ 13 1/2″. Make sure to set the Kreg Jig settings to 1.5″ thick wood.
Attach the first 2×3 piece to the top of the two bathroom vanity sides with wood glue and 2 1/2″ Kreg screws.
Next, attach the second 2×3 to the middle making sure that it aligns at the bottom of two side pieces, which is 13″ up from the bottom of the legs.
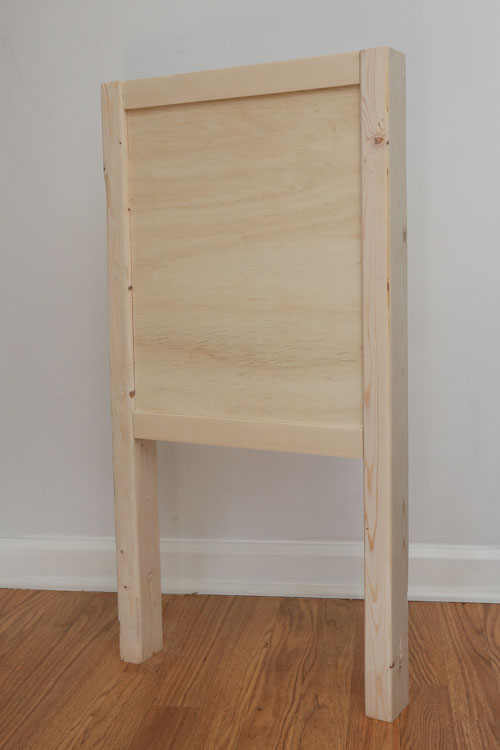
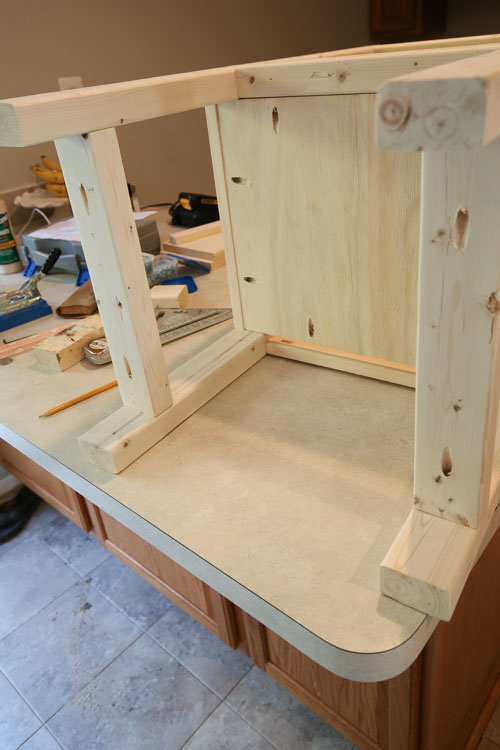
Once the back framing pieces are attached, the bathroom vanity will look like the below photo. The back area will remain open for any plumbing to come through. And you will be able to attach the vanity to the wall by screwing through these back framing pieces into the wall.
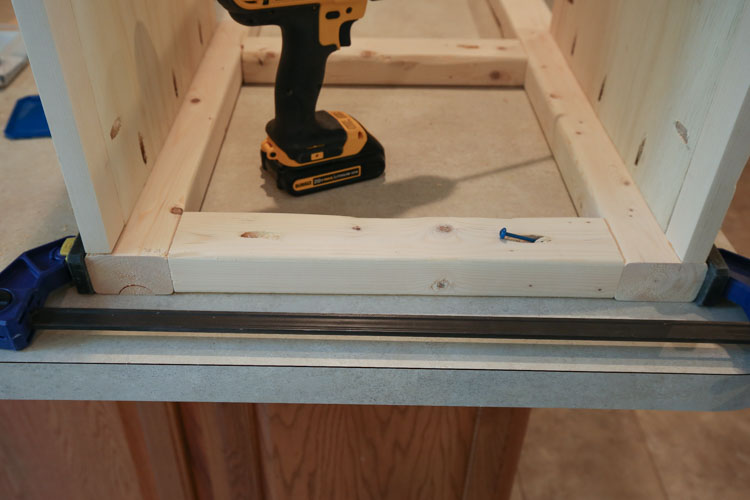
5. Add front boards to wood vanity
Add two pocket holes to the two 1×2 pieces @ 13 1/2″ (make sure to set Kreg Jig settings to 3/4″ thick wood).
Using wood glue and 1 1/4″ Kreg Screws attach a 1×2 to the top front of the bathroom vanity. And attach one to the middle front (again should be 13″ up from the bottom of the leg).
After both are attached, it will look like the below photo. Except originally when I attached these 1x2s they weren’t perfectly flush with the edges of the legs and I had to redo this so they were, I just didn’t get to retake this photo with that fixed!
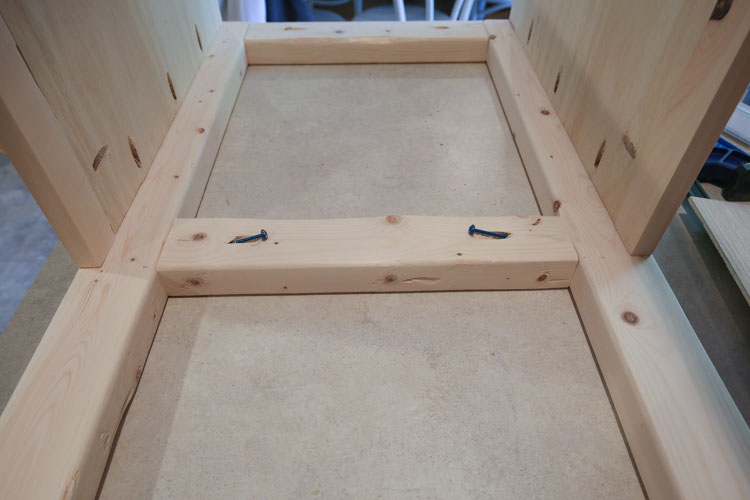
6. Add base board to bathroom vanity
Add two pocket holes to each side of the plywood piece @ 16 3/4″ x 13 3/4″ (make sure to adjust Kreg jig settings to 1/2″ thick wood). This will be the base of the inside of the vanity. Attach it with 1″ Kreg screws and wood glue.
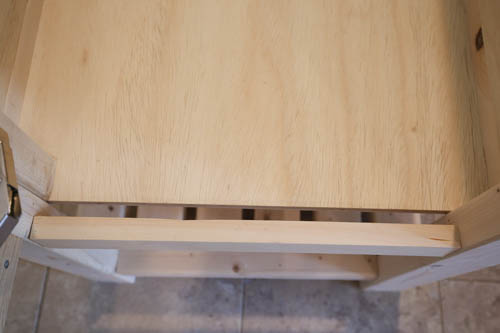
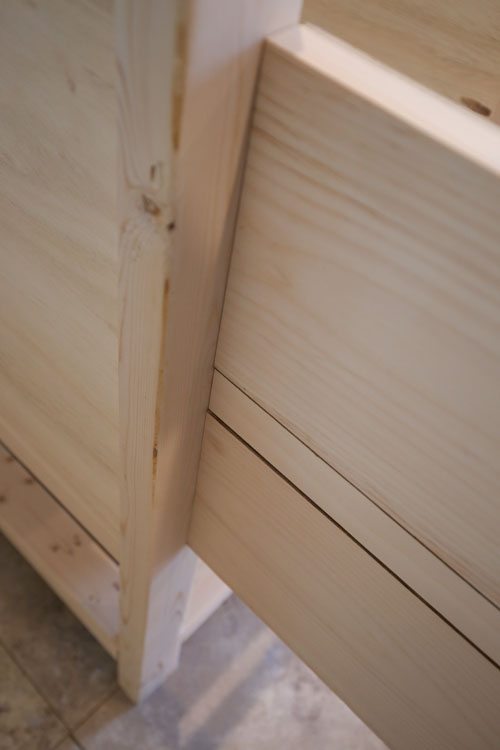
Note, a small gap will remain at the front of the base board. You can leave this or cover it with some scrap wood, which is what I did. Here is a photo from once I finished the build showing the gap and how I covered it:
📩 Want to Save This?
7. Add bottom shelf rack to bathroom vanity
Use the remaining 2×3 wood and cut two pieces at 13 3/4″ to fit between the two side legs. Note, measure this distance first as it may be slightly different than 13 3/4″. Then, add a pocket hole to each end of the 2×3 pieces. Attach to the vanity legs with 2 1/4″ Kreg screws 3″ inches up from the bottom of the vanity legs.

Next, measure the distance between the front legs and the two back legs and cut two 2×3 pieces to this size. Add two spaced out pocket holes on each side and attach to the vanity legs with 2 1/4″ Kreg Screws to finish framing out the bottom shelf.

Then, for the rest of the shelf rack pieces, measure the exact distance between the front and back shelf boards and cut four 2×3 pieces to size. Add pocket holes and attach with 2 1/4″ Kreg Screws to complete your bottom shelf rack! I spaced these 4 rack pieces out about 3/4″ each.
8. Build DIY bathroom vanity door
So, for the bathroom door (or faux drawer door front), there will be a 1/8″ inch gap around the door on all sides. These DIY bathroom vanity plans are designed so that the door height will already be to size (16 1/4″ tall) based on the wood that is being used. So you just need to measure the exact width opening of the front where the door will go and subtract 1/4″ to allow for 1/8″ gap on the left and right sides.
Use a miter saw and make the following door cuts from the 1×8 board:
- 2 pieces cut to the exact door width opening less 1/4″
Use a miter saw and make the following door cut from the remaining 1×2 board:
- 1 piece cut to the exact door width opening less 1/4″
Use a circular saw and make the following cut from the 2ft x 2ft 1/4″ thick plywood:
- 16 1/4″ tall x exact door width opening less 1/4″
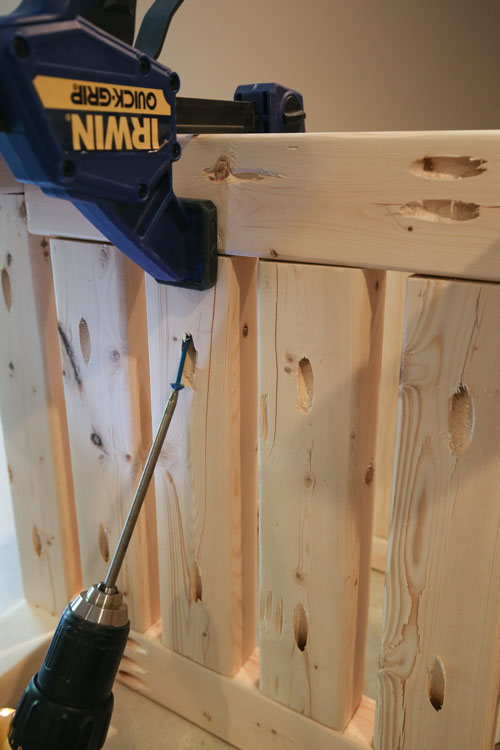
After making the cuts, lay your 1×8 board on top of the plywood piece, followed by the 1×2 , and then the 2nd 1×8 board. Space each board out with quarters and clamp together as shown in the below photo. The quarters help to create the gaps that give the illusion of drawers!
Also, before attaching this all together, I stained in between the gaps (where the quarters are) so it would be easier to do then after everything was all attached.
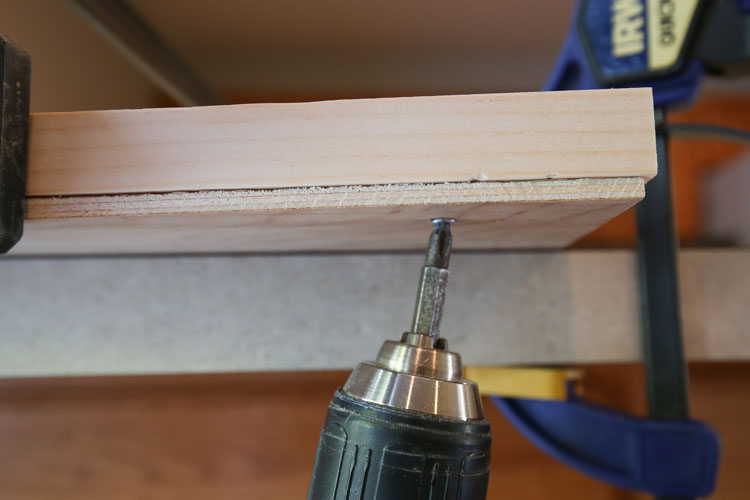
Attach everything together by attaching the bottom plywood board to the top boards. I used 3/4″ wood screws and a drill and attached from the bottom. But, you could also use a brad nailer and 3/4″ nails instead.
9. Attach door to DIY bathroom vanity
Ok, last building step! I really don’t like hanging doors, but I followed the directions that came included with the hinges and it worked out. I recommend following the instructions with your hinges, but I will briefly explain how we hung our door to hopefully help clarify them more!
***
Update: I recently built another style DIY small bathroom vanity with doors and used inset European hinges. Check out that tutorial and my how to build a bathroom vanity VIDEO in that post for more details on that style hinge!
***
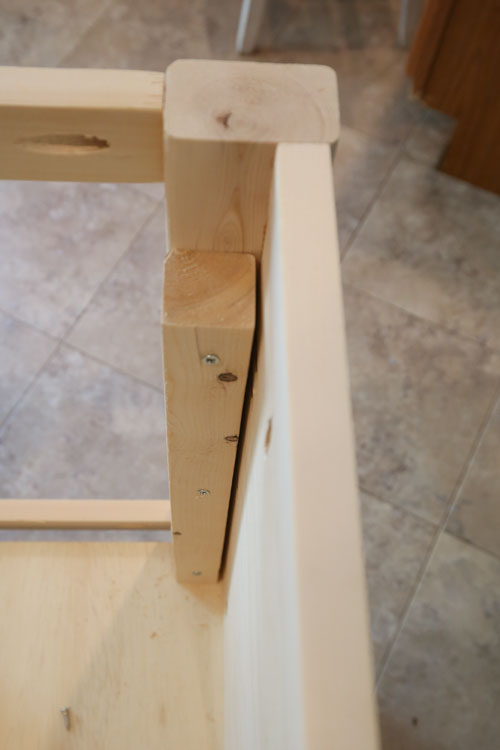
First, with the hinges we used, you will need to add a wood block piece that is flush with the leg on the side the hinges will be attached. We used a 2×2 furring strip cut to size and attached it with 2 1/2″ wood screws.
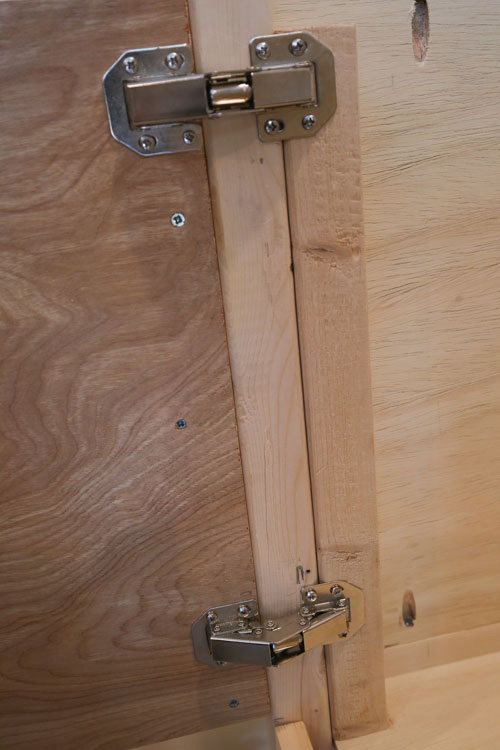
To attach the hinges, first attach the hinges to the door making sure that the hinge edges are lined up with the door edges.
Then, attach the hinges to the vanity approximately 1″ from the vanity leg edge to the inside hinge edge. Essentially, you want the door to open so that on the outside there will be no gap when the door is open. And make sure there is an 1/8″ gap around all sides when hanging (you can use the 1/8″ shims to help while attaching). Again follow the hinge directions, but this is how we did it!
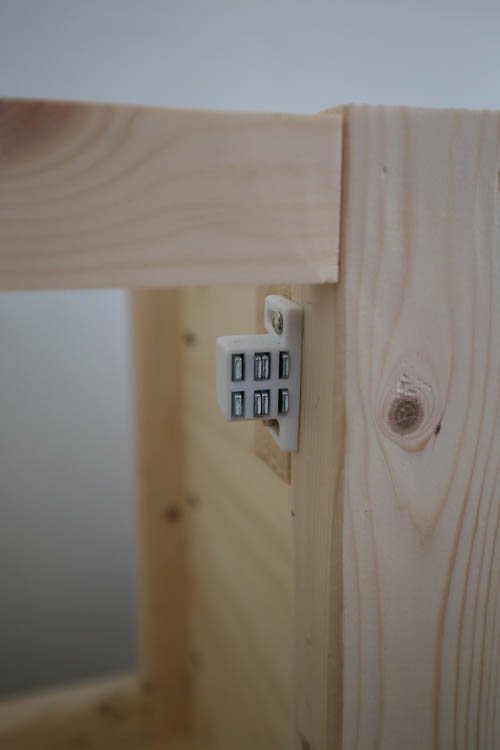
Lastly, I added a magnetic door catch to the inside so the door closed in the right spot.
Yay, that’s it, your DIY bathroom vanity build is complete!
10. Sand, Stain, Poly, and add cabinet pulls to DIY Rustic Bathroom Vanity!
Finish off your project by sanding, staining, and adding polyurethane. For details on sanding, see my how to sand wood guide. I used Minwax Early American stain and Minwax oil based poly in satin. For tips on staining for a beautiful finish, check out my how to stain tutorial. Finally, add your cabinet pulls!
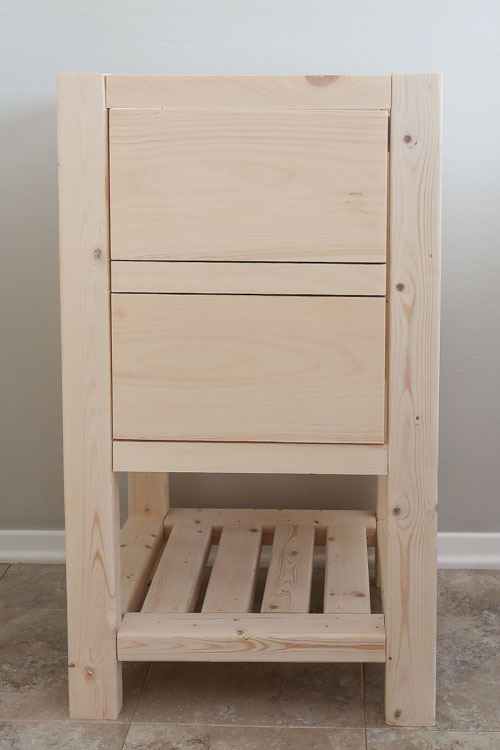
Here is our bathroom vanity before installation:

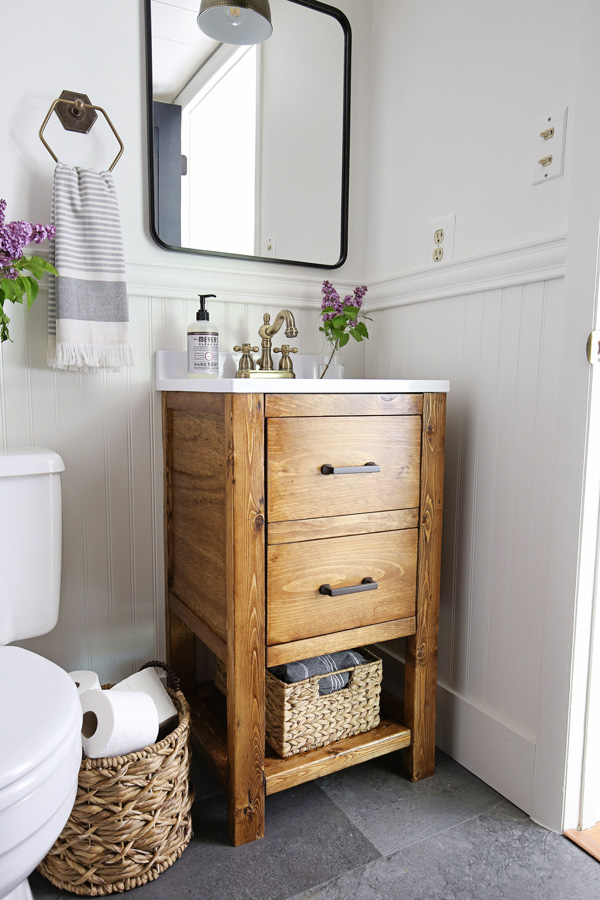
And here is our bathroom vanity after installation in our bathroom makeover.

I am just in love with how it turned out!
I hope these build plans on how to build a DIY wood vanity have been helpful! What do you think?
If you want to save this tutorial for later, Pin It here:
Follow along on my latest projects and sneak peaks on Instagram and Pinterest!
Here is a quick video clip showing the opening of the faux drawer front!
Molly
Monday 19th of July 2021
UPDATE: After restarting my computer, I tried to purchase this again and it worked! Excited to make this.
Angela Marie Made
Tuesday 20th of July 2021
That's great to hear, thank you!
Molly
Monday 19th of July 2021
Hello Angela,
I am so glad I found your site and these plans. I have tried purchasing your plans. I have tried through Chrome and Safari, but I am told there is an error. Any suggestions? Thank you!
Shelby Hannam
Monday 10th of May 2021
When cutting the plywood is it 16 1/2” long or wide? Same for the one piece that’s 16 3/4 x 13 3/4”??
Angela Marie Made
Tuesday 11th of May 2021
16 1/2" long
Phillip
Thursday 6th of May 2021
How did you attach the vanity top to the vanity?
Angela Marie Made
Tuesday 11th of May 2021
We used a silicone adhesive
Starr White
Friday 27th of November 2020
This is very nice! I wish I were more carpenter competent lol. I would buy one of these from you
Angela Marie Made
Monday 30th of November 2020
Thank you!