On the main wall in our living room, we added an easy DIY floating shelf with brackets.
It was one of my favorite projects in our modern rustic living room makeover and is a major focal point in the room!
This project was super easy and you only need one piece of wood and a set of brackets!
Note, this post contains some affiliate links. For more info see my disclosures here.
In the past I’ve made a DIY floating shelf with no brackets for my office makeover. But this time I wanted to keep things more simple and use hidden, heavy duty steel brackets (similar here).
The advantages to using these steel brackets were that I could use them with solid wood (that’s 1.5″ thick) and they were easy to install and they are easy to remove (if needed in the future).
Also, I love that they are hidden which provides a more modern floating shelf look!
Floating Shelf Bracket Details
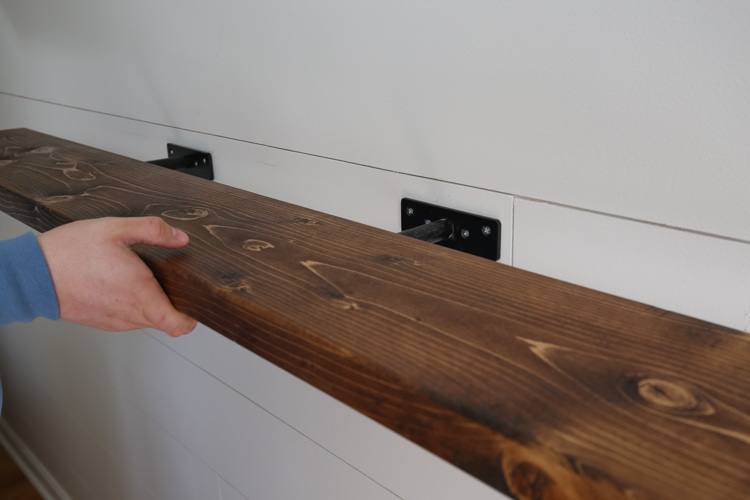
The brackets that I used are about 1/8″ thicker than a 2×8 (which is 1.5″ thick). However, once hung on the wall it’s really hard to tell unless you get up close. I decided to go with them because they are heavy duty and I only needed to buy two of them to support my longer shelf with heavier items.
Update: The brackets I used are no longer available, but these floating shelf brackets are very similar and only 1″ thick, so they would be totally hidden behind the 2×8 wood board that is used in this tutorial!
Here are even more floating shelf bracket options too!
Floating Shelf Depths and Hardware
My wood shelf depth was 7 1/4″ because I used a 2×8 board in this tutorial. The brackets I used, as well as these alternative floating shelf brackets, can be used for shelf depths of 7″ to 12″.
However, if you are making wider shelves (closer to 12″ wide) and shelves that are heavier, I would only use these brackets if you can secure them to the wall studs instead of drywall with anchors.
For this tutorial since I only used a 7 1/4″ deep shelf, wall anchors worked well! Although, I do recommend using better quality wall anchors than what comes with the brackets if you do use them.
How to Make an Easy DIY floating shelf with brackets
Materials:
- (1) 2×8 @ 8ft
- Steel brackets (similar here)
- Wood Stain (I used this stain)
Tools:
- Miter saw (optional)
- Drill
- Spade Drill Bit (at least 6″ long)***
- Studfinder
- Hammer
- Level
***Note: Originally, I used a 7/8″ drill bit which works, but after making these again, I used a 13/16″ spade drill bit instead which is just 1/16″ bigger than the 3/4″ bracket rod. But, if you use a different size bracket, make sure to use a different size spade bit! For the 1/2″ bracket rod, use a 9/16″ spade bit.
1. Cut wood to size
First, determine how long your floating shelf needs to be. I made my floating shelf 55″ long so it was about 2/3 the size of our couch since I was installing it over the couch. If you need to make it longer than that you may need to get more than one set of brackets.
Use a miter saw and cut your 2×8 to size. Or have your home improvement store make the cut for you.
2. Sand and stain floating shelf
At this point I found it was easiest to go ahead and sand and stain my floating shelf. I used Provincial by Minwax for my stain color. I skipped the top coat since I wanted a very matte look and didn’t need a sealant since the shelf is just for decor.
3. Hang brackets on the wall
First use a studfinder and determine where the wall studs are where you want to hang your floating shelf. Your brackets will need to be spread out enough to distribute the weight of your shelf.
Ideally you really want to hang the brackets on the wall studs. However, if the studs don’t fall where you need the brackets to be then you will need to drill into drywall and use heavy duty anchors with the brackets (similar here). We ended up having to drill into drywall.
As I said at the beginning of this post, if you are using deeper shelves (closer to 12″ deep), it is important to secure into wall studs!
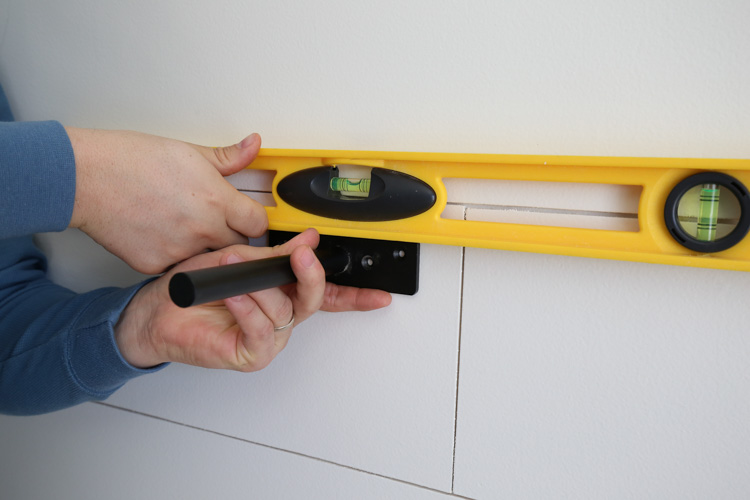
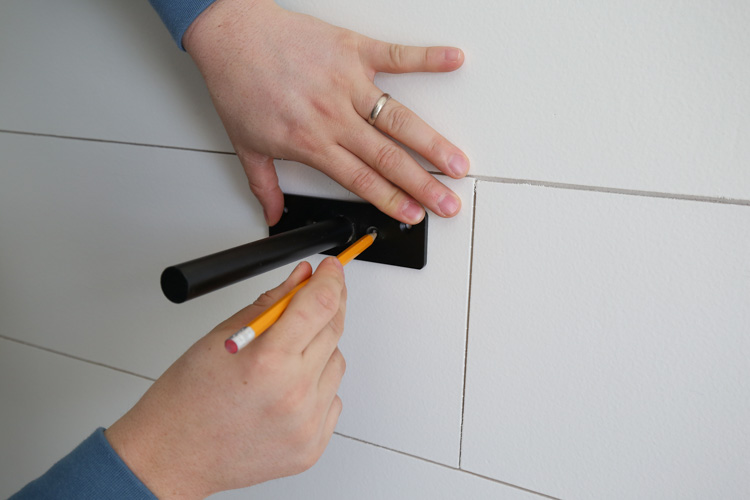
Hold the first bracket up to wall where you want to install it. Make sure the bracket is level, then mark the holes with a pencil.
📩 Want to Save This?
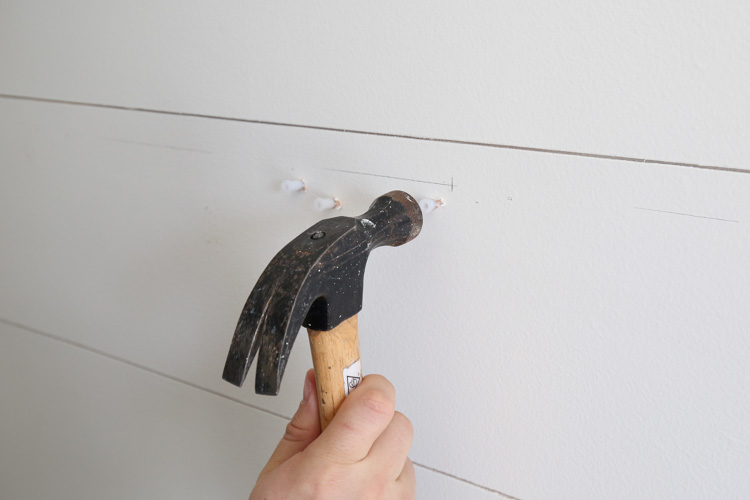
Drill pilot holes over the pencil marks. Then, tap the wall anchors into the holes with a hammer.
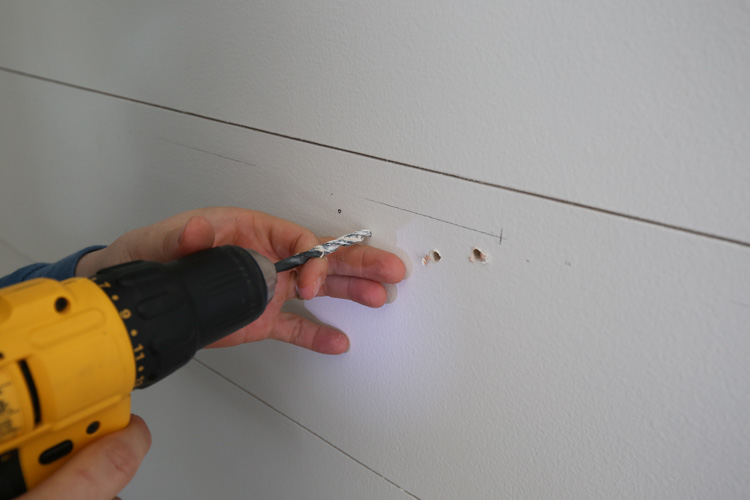
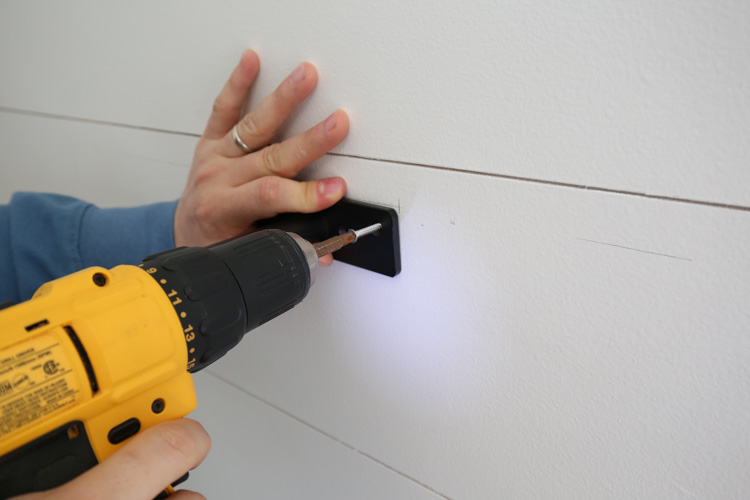
Next, install the bracket using the provided screws and drilling them into the wall anchors.
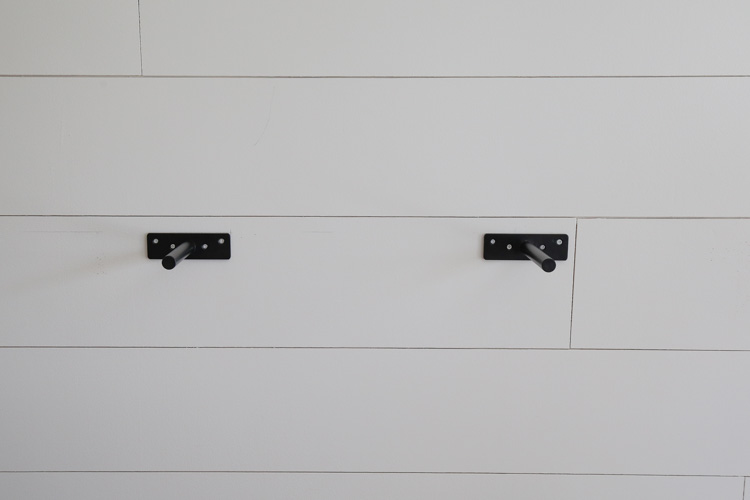
After installing the first floating shelf bracket, hold the second bracket up to wall where you want to install it. Make sure the bracket is level with the first bracket, then mark the holes with a pencil and repeat the same steps used above for installing the first bracket.
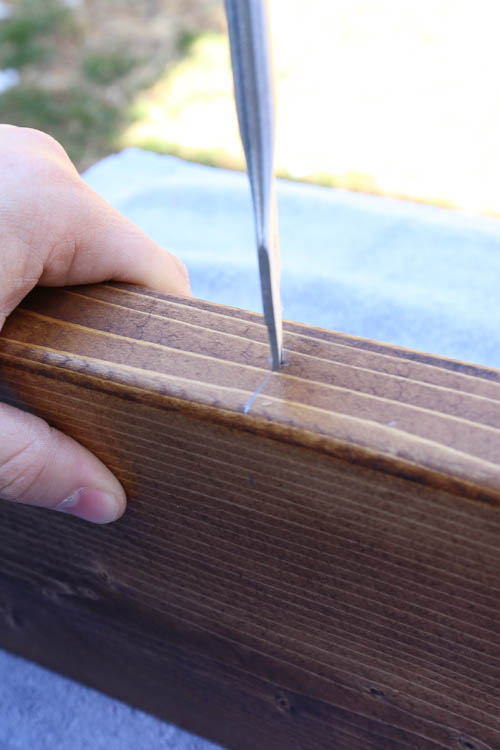
4. Drill bracket holes in DIY floating shelf
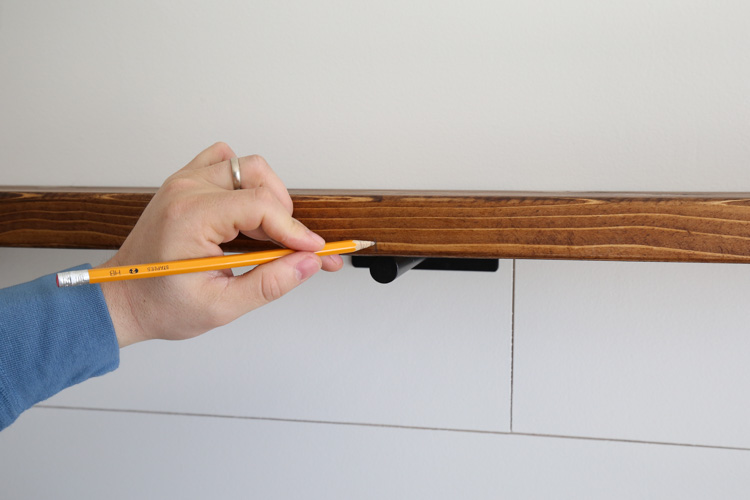
Place your floating shelf on top of the wall brackets exactly how you want it to be once installed. Mark with a pencil the center point over the bracket. Then, mark the center point of this location on the shelf edge where the holes will be drilled.
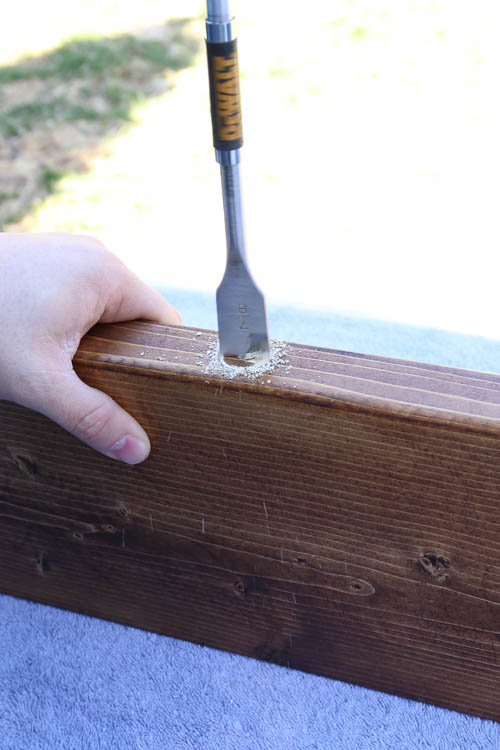
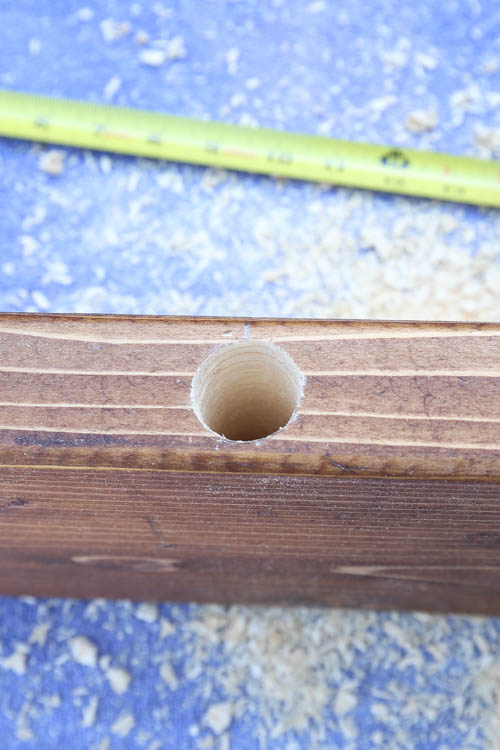
You want to drill your bracket holes about 6″ – 6 1/4″ deep to properly fit the brackets. Drill the bracket hole with the 13/16″ drill bit and use a tape measure to ensure it’s at least 6 inches deep.
Update: Originally, I used a 7/8″ drill bit which works, but after making these again, I used a 13/16″ drill bit instead which is just 1/16″ bigger than the 3/4″ bracket rod. But, if you use a different size bracket, make sure to use a different size spade bit! For the 1/2″ bracket rod, use a 9/16″ spade bit.
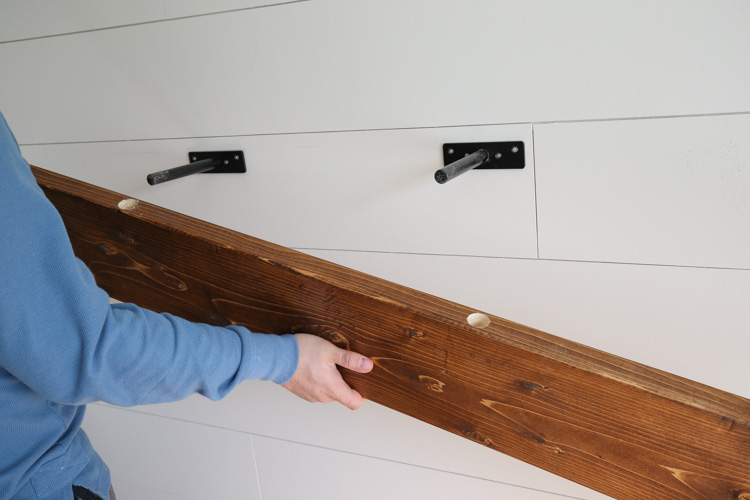
One more tip, you can use a wood chisel and chisel out about 1/4″ of the wood where the brackets hit on the wall side of the shelf so that the wood shelf sits totally flush against the wall. I chose not to do this because the brackets really can’t be seen unless close up! But it is another option!
5. Install easy DIY floating shelf on wall
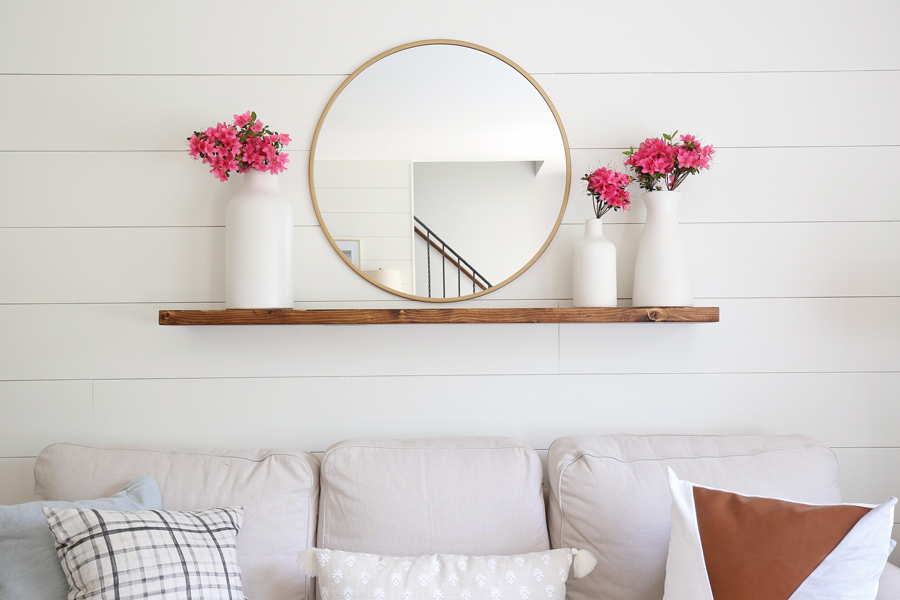
Carefully slide the floating shelf onto the wall brackets. And that’s it! Now it’s time to decorate it and enjoy!
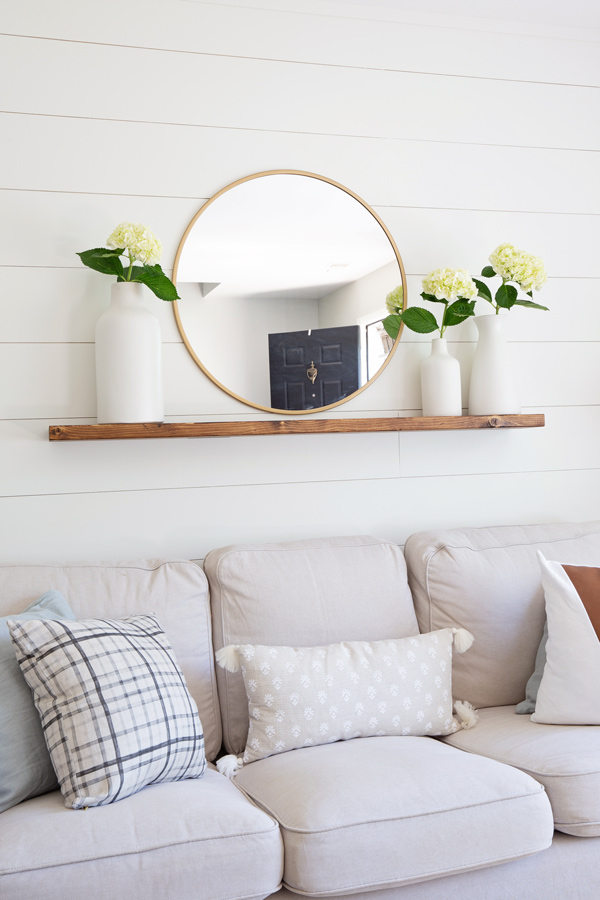
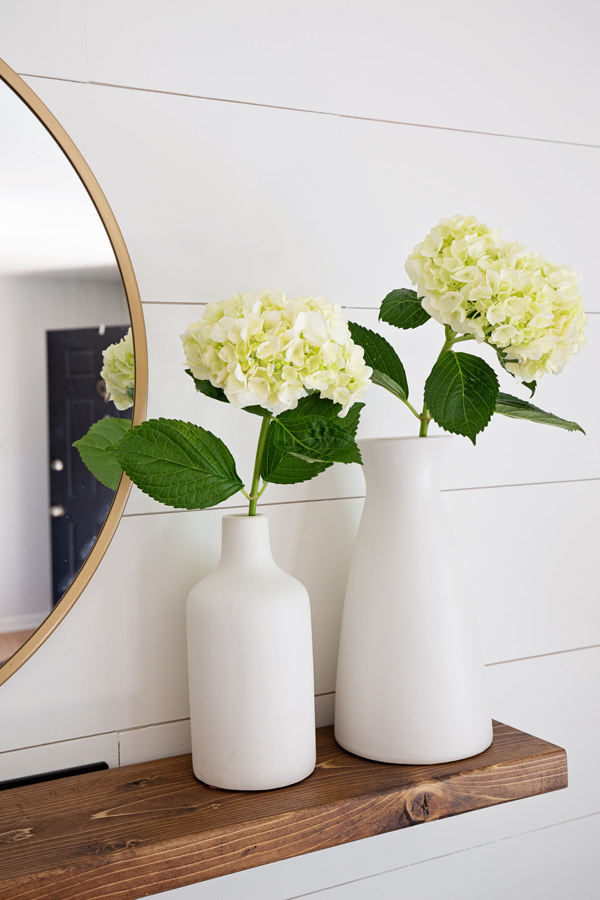
I love how our floating shelf looks over the couch in our living room! It’s so fun to decorate with the changing seasons!
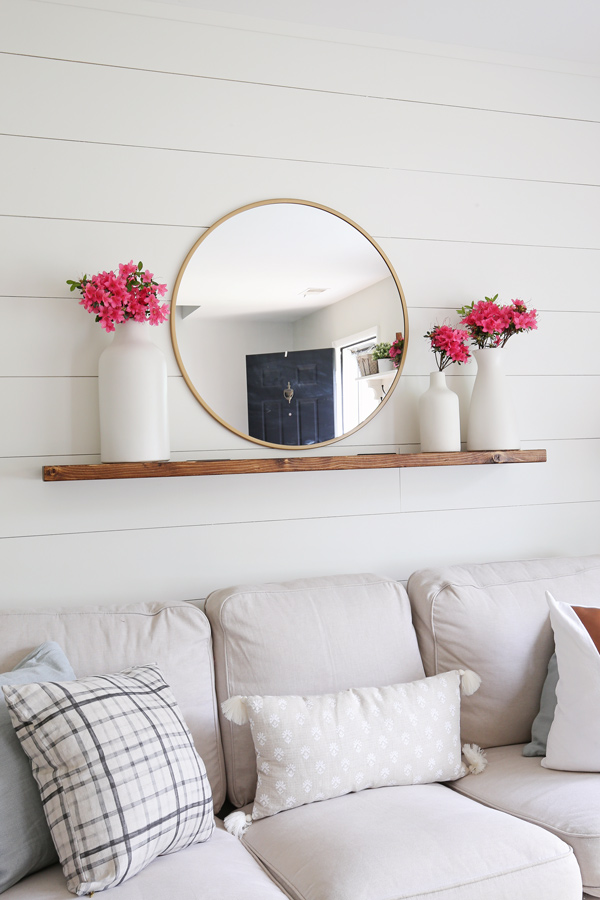
I couldn’t decide if I preferred decorating the floating shelf with pink azaleas or white hydrangeas! Which do you like better?!
Hope this easy DIY floating shelf with brackets tutorial has been helpful! Follow along on my latest projects and sneak peaks on Instagram and Pinterest!
Rachel
Thursday 12th of December 2024
I came across your picture on Pinterest while searching for ideas to redecorate my living room after years of the same thing and looking cluttered. I love the look! 🩵🩵 I ended up using a silver mirror from Wayfair at 32” and my shelf is 52” long, it really helped open up that wall and I love it!! Only thing that was a major struggle(and totally manufacturing issue) is that the brackets I ordered from the Amazon link: good thing they came in a set of 4 because one of them the part that attaches to the wall wasn’t flat, one the part that goes into the wall was bent inward wasn’t straight(it bent inward or outward depending which way you put the holes drastically) and one the part that goes into the shelf was slightly bent inward! Had to drill the holes then slightly finagle the bit the right direction to get the bracket all the way in. Again, that is bracket manufacturer quality control issue, but by the time I realized it I was too far in and made too many holes in the wall to send them back and who was to say the next set didn’t do the same thing :( But hey, it’s done and it looks great! Aside from the bracket manufacturing this was a relatively easy first DIY! My plan is to have a general decor and then for Christmas and fall change it a little! Btw I vote the pink flowers, they add a pop of color! Thank you!!
Valerie
Tuesday 21st of December 2021
Thanks for the tutorial! Wondering how long it took you to drill each hole? With a regular drill it is taking FOREVER! Any recommendations?
Angela Marie Made
Tuesday 4th of January 2022
Not long at all, you may need to upgrade to a more powerful drill if possible!
Maddi
Thursday 9th of September 2021
Thank you for your tutorial! I am wanting to do this but with a depth of 12in instead of the 8in. So I'm assuming my brackets should have a depth of 10in instead of 6in and the drill bit should be at least 10in long. However, I'm struggling to find a drill bit that long. Do they make drill bits that long? If not, is that why you chose to just do the 8in depth?
Angela Marie Made
Friday 10th of September 2021
The same brackets that I used will work with 7-12" depth so you should be fine using them.
Sara
Saturday 24th of April 2021
What size mirror did you use?
Angela Marie Made
Monday 26th of April 2021
It's 28x28, here is a link(affiliate) with the full details: https://rstyle.me/n/c2jkjzcbwkf
KaSandra
Wednesday 25th of March 2020
I have a question do you think it would hold for kitchen shelves? I love the way yours turned out!
Angela Marie Made
Thursday 26th of March 2020
Thank you! So I want to update what I said last week. We were going to use these for our kitchen floating shelves but our wood was really heavy (2" thick white oak), I could barely lift it. We were unable to get the brackets into all studs because there was only 1 stud where we wanted to hang the shelves. Unfortunately, without getting both brackets into the studs, it just wasn't enough support, even with using heavy duty toggle bolts for drywall. So, I would only recommend them for really heavy shelves, like the kitchen shelves, if you can get them into studs only, not drywall.