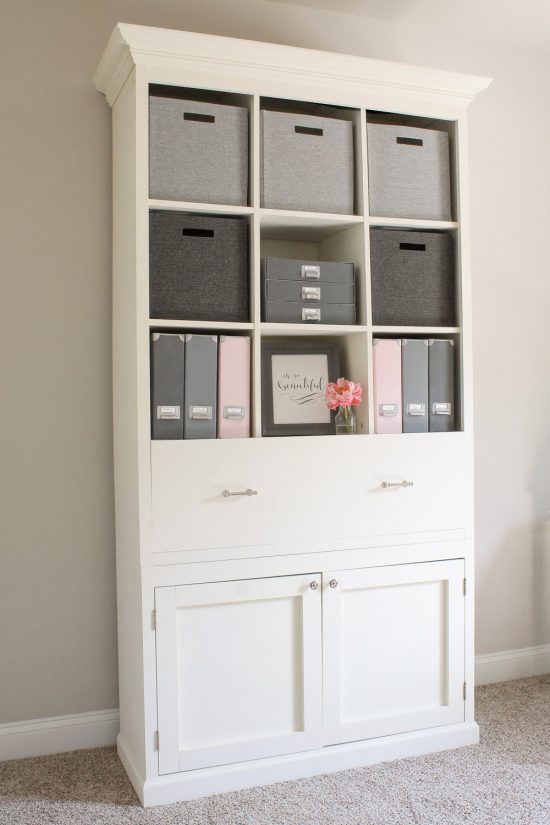
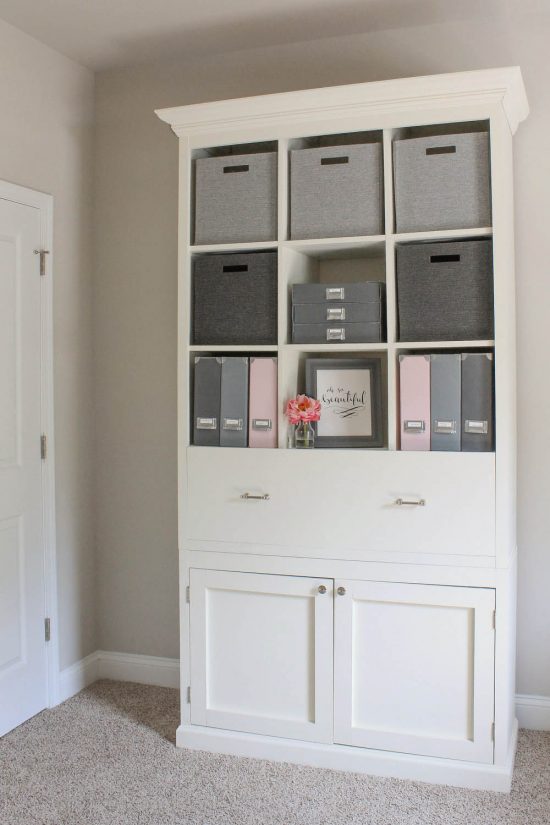
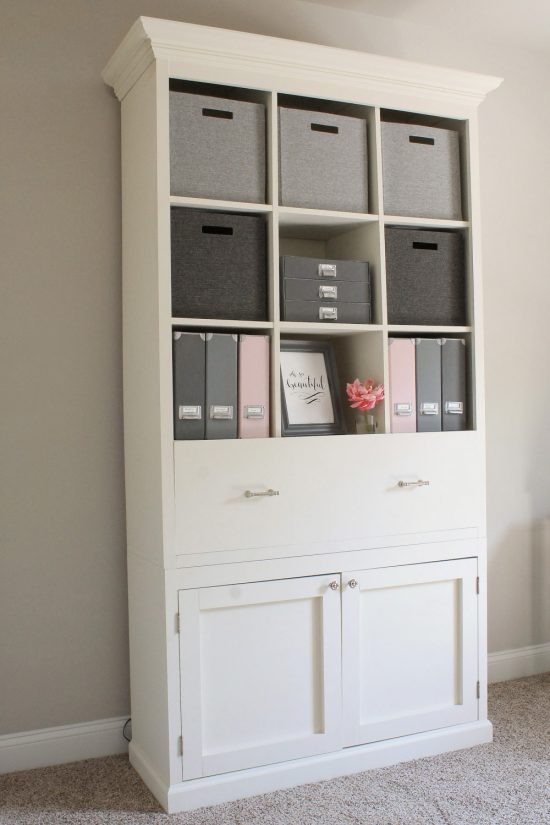
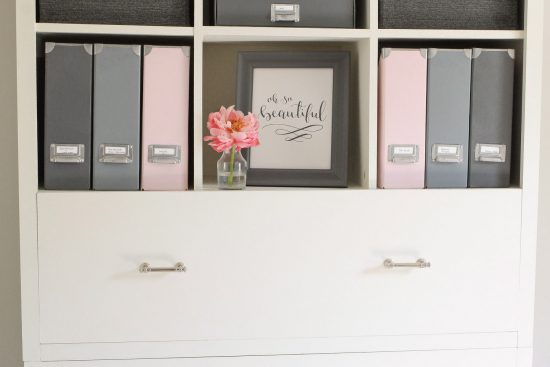
Wow! I can’t believe this office storage build is finally complete (as well as this tutorial)! Let me start by providing some background on this piece. My office was feeling cluttered and disorganized, I really needed some better storage solutions. I wanted storage that would be functional and pretty!
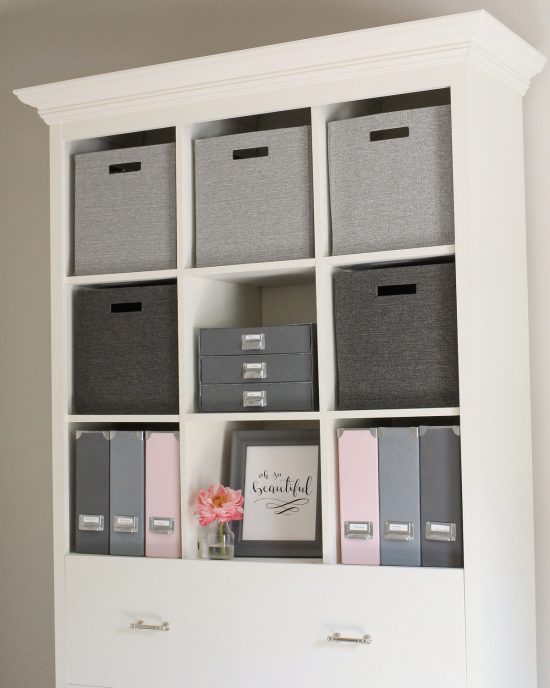
I started searching for a large office storage bookcase unit that would function in many ways: craft storage, pretty displays, hidden storage, filing draws for paperwork, printer storage, etc. I really could not find anything like I was envisioning. I wanted a piece with cubbies, drawers, and doors.
If there was something even similar to what I needed, it was super duper expensive and still just not quite right. Solution: Build a custom office storage unit myself. Oh boy! I get these big projects in my head and I just can’t stop sometimes. This was definitely my most challenging furniture build yet, I made lots of mistakes and learned a lot!!! Overall, I love how it turned out even with some imperfections!
Note, this post contains some affiliate links. For more information see my disclosures here.
This project cost me around $350 total in supplies, but if I were to buy anything remotely similar, all of my options were well over $1.5k!
Below are the steps that I took to build this DIY Office Storage Cabinet Bookcase. Let me preface by saying that I am not an expert builder or woodworker, just a DIY lover! And this project was a total learning curve where I had to figure out many steps along the way since I had to create the project build plans on my own. If you are interested in building something similar (or the same), I hope this helps a little and in some steps I have shared in italics learning lessons/tips from my experiences. I recommend reading over all the steps first before starting.
Update: Check out my DIY office storage cabinets and DIY built in office cabinets to see more office storage ideas and to see how my skills have improved since I wrote this post!
1. Determine the size of the office storage cabinet. I chose the total dimensions of 92.5″ x 46″ since it worked best with my space. The top piece was 63.5″ x 46 and the bottom base piece was 29″ x 46″. Keep in mind the height of mine was nearly 8ft. tall, but I have 9ft. ceilings so it’s perfect for me! In my last home, the ceilings were the standard 8ft tall though and this still fit great and really utilized wall height space.
Tip: The office storage cabinet is made up of two pieces and the top part is very heavy! It takes two really strong people to move it, another consideration when deciding size!
2. Determine how much wood you need based on the size of your build. I needed the following supplies:
- 3 sheets of 4ft x 8ft x 3/4″ plywood
- 1 sheet of 4ft x 8ft x 1/4″ plywood (for backing)
- 2 sheets of 2ft x 4ft x 1/4″ plywood (for draw bottom and door panels)
- One 1×6 @6ft
- Two 1×2 @8ft and one 1×2 @6ft
- Two 1×3 @8ft and one 1×3 @6ft
- One 1×4 @8ft
- 7ft – 8ft of Crown moulding
- Base moulding 3 1/4″ tall @7ft
- 14″ Drawer slides
- Wood glue
- Knobs/Pulls for doors and draw
- Door Hinges
- 1 1/4″ Brad nails
- 1 1/4″ Kreg screws
- Circular saw (or you can have your home improvement store make the long cuts for you)
- Miter saw
- Drill
- Brad nailer
- Kreg Jig
Part One: Cubby and Draw Top Piece
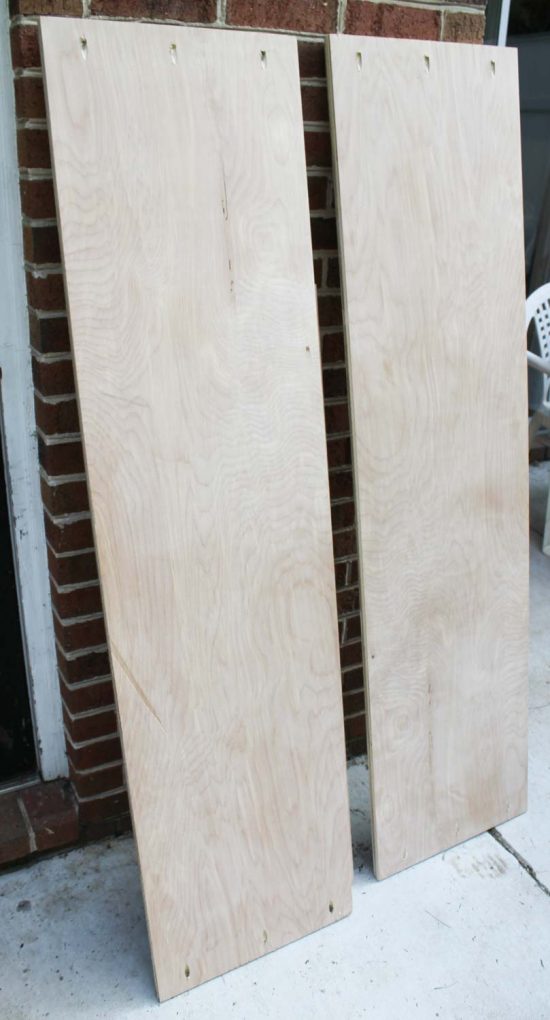
3. Make the following cuts from the 4ft x 8 ft x 3/4″ plywood (be sure to check/change these measurements as they might vary some for your custom size build). ***Note: after these first cuts, most of the remaining cuts should be made as you build since they will need to fit perfectly to your piece. It’s always best to measure twice and cut once!
- Two side pieces 16″ x 62″
- Top and base pieces 16″ X 46″
- Two inner cubby vertical pieces 16″ x 48″
Tip: I had Home Depot rip (cut) down my plywood to the sizes I needed for some of the larger cuts like these.
4. Add pocket holes with the Kreg jig to the top and bottom of the two side boards.
5. Attach the two side pieces with 1 1/4″ kreg screws and wood glue into the base piece and then the top piece.
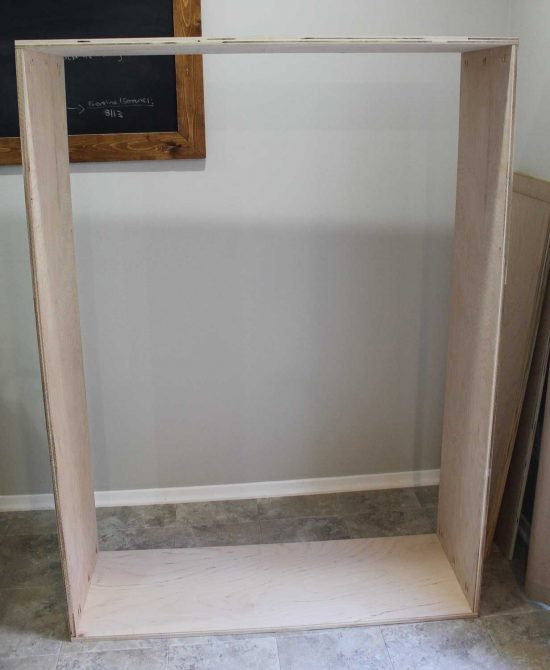
6. Measure and mark 1.5″ on the bottom piece from the edge of the side piece. This is marking where your trim edge will start after it’s attached. Then, from this line measure and mark 13 3/4″ on the base piece for your cubby opening. Repeat on the other side of the bottom piece.
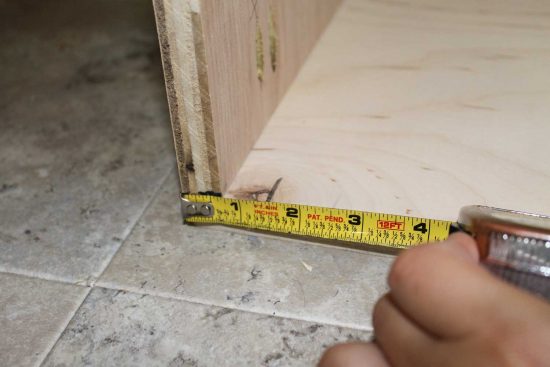
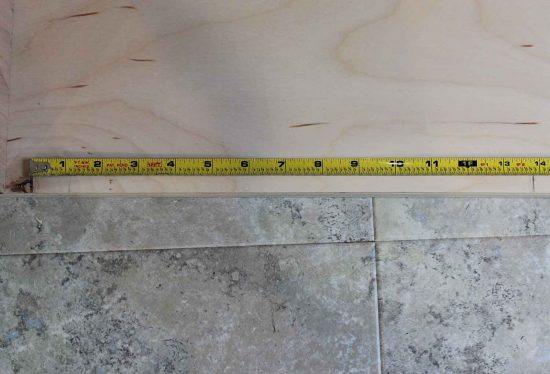
7. Drill pocket holes on the top and bottom of your inner cubby vertical pieces. Then, using kreg screws and wood glue, attach these two pieces to the bottom piece where you marked the two 13 3/4″ lines in from the sides. Note, your unit is upside down for these steps, it’s easier to build it that way.
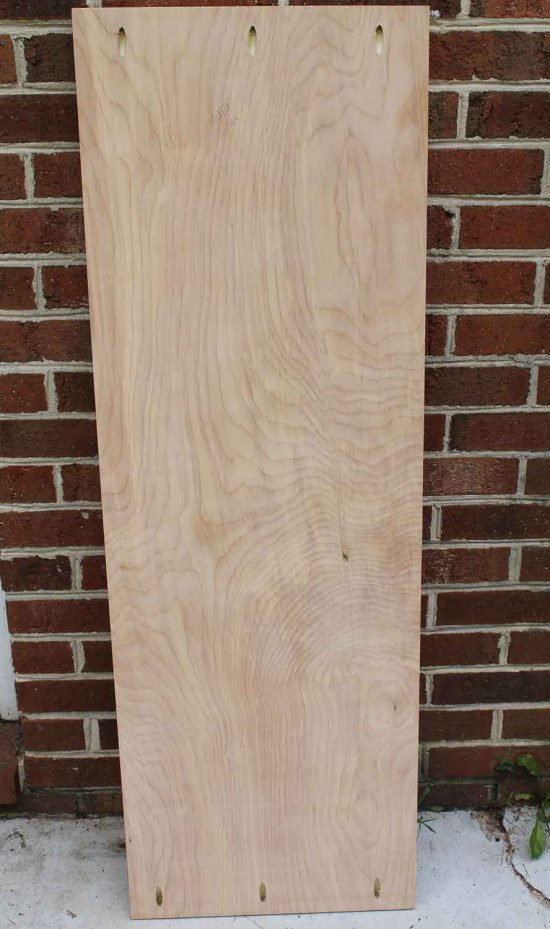
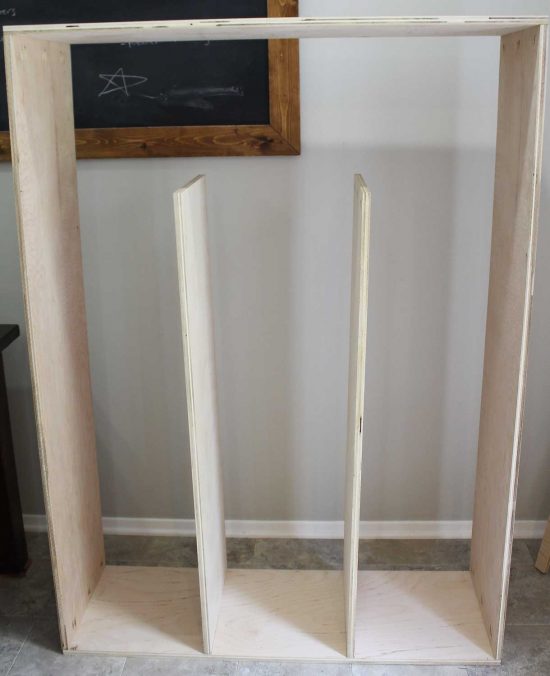
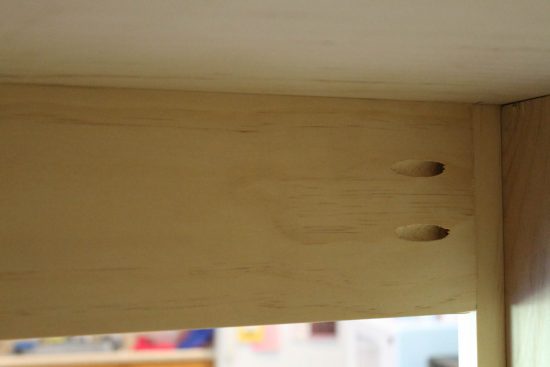
8. Measure the exact width from the inside of the two pieces to get the width of your cubby base board. Mine was about 16″ x 44 3/4. Cut the board and add pocket holes on the ends. Then, attach it with kreg screws and wood glue to the side pieces and two inner cubby vertical pieces. Make sure your pocket holes are facing up (as shown in the bottom photo) since this will be the inside of your drawer and won’t be seen.
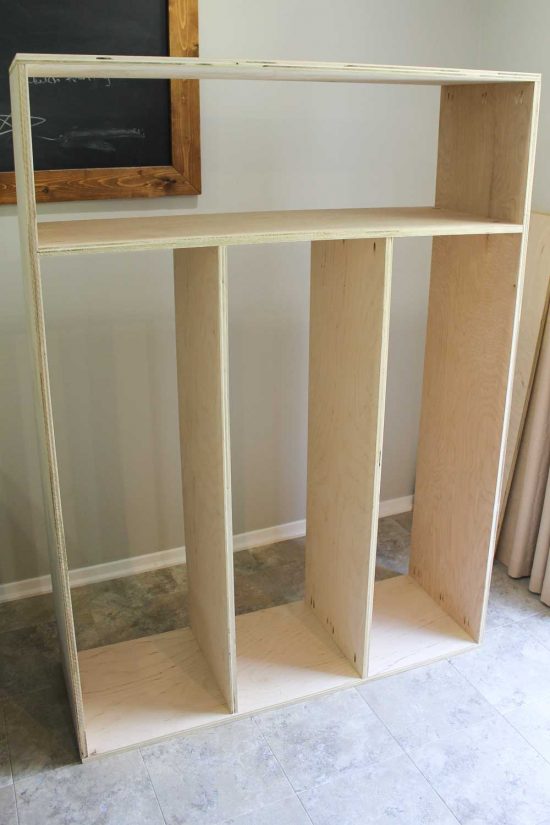
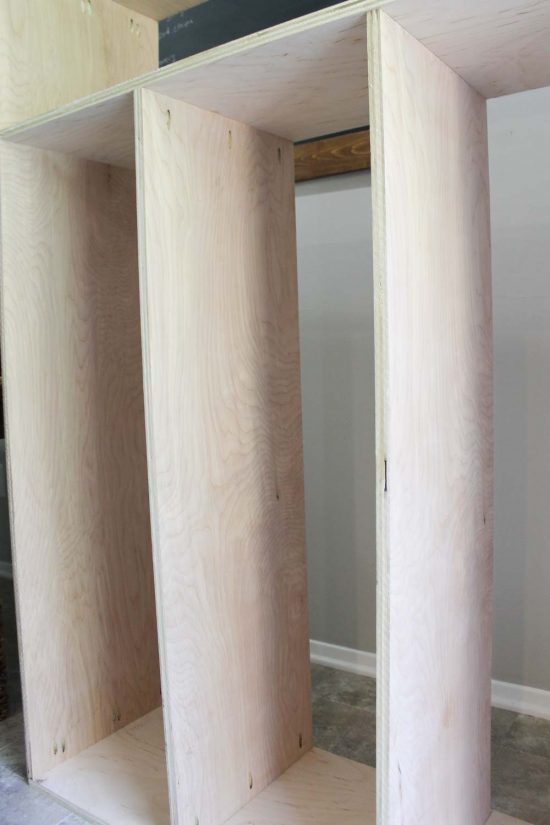
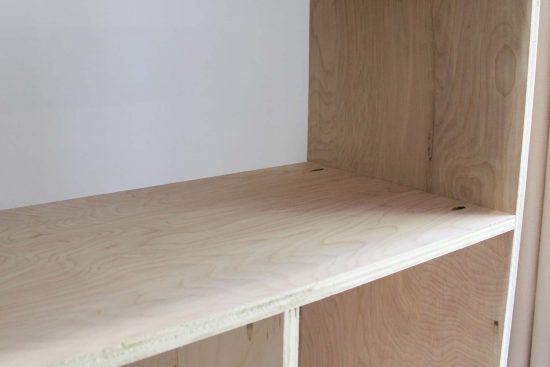
9. Time for some cubby shelf measurements! I made my bottom two rows of cubby openings 13.5″ tall. As shown in the photo below, the office storage cabinet is upside down at this point, so measure 13.5″ from the horizontal cubby base board and mark it on the sides of the inner cubby vertical pieces and side pieces.
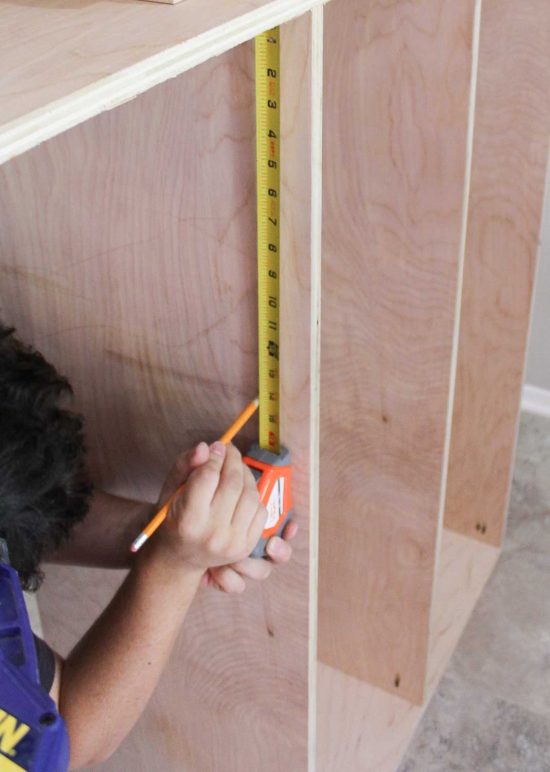
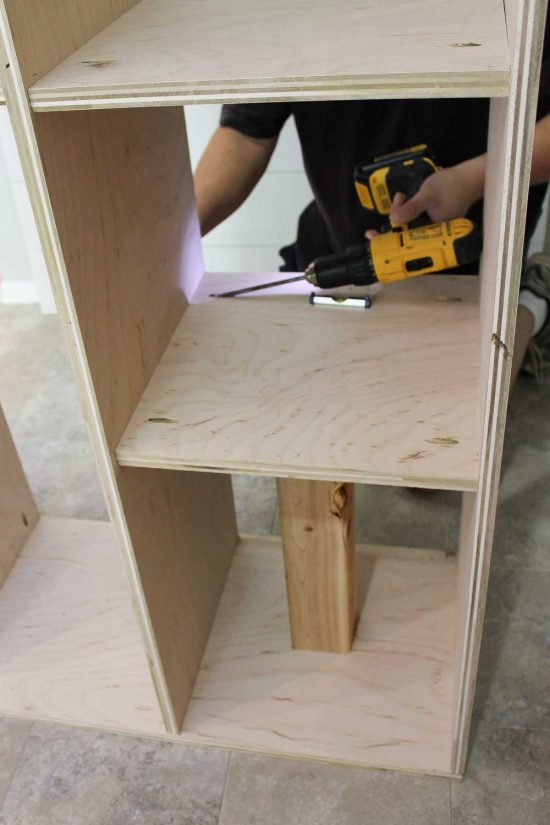
10. Measure the exact length and widths for your six cubby shelves and cut them to size. Add pocket holes to all six of them. Then, attach your first row with kreg screws, making sure that they are being attached where you made marks on the side pieces. This part can be tricky by yourself. I recommend either having someone help you by holding the shelves in place or putting some kind of scrap wood (cut to size) underneath to hold the shelf in place (as shown with the 4×4 in the below photos). Also, we used a level as we drilled the kreg screws in ensuring the shelves would be level.
Tip: For the depth of the cubby shelves, I made them a little less than 16″ deep to allow for some wiggle room when attaching them and so that my backing panel behind the cubby shelves would be perfectly flush with the sides and top/base pieces when attached.
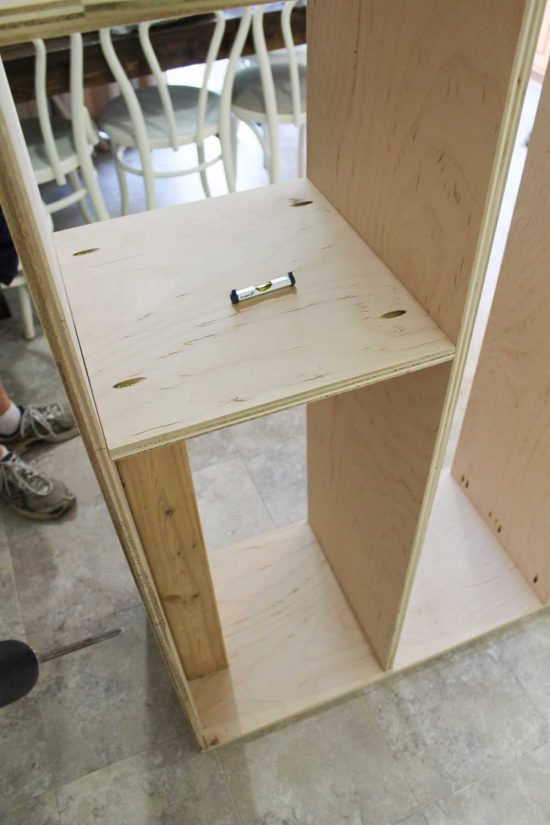
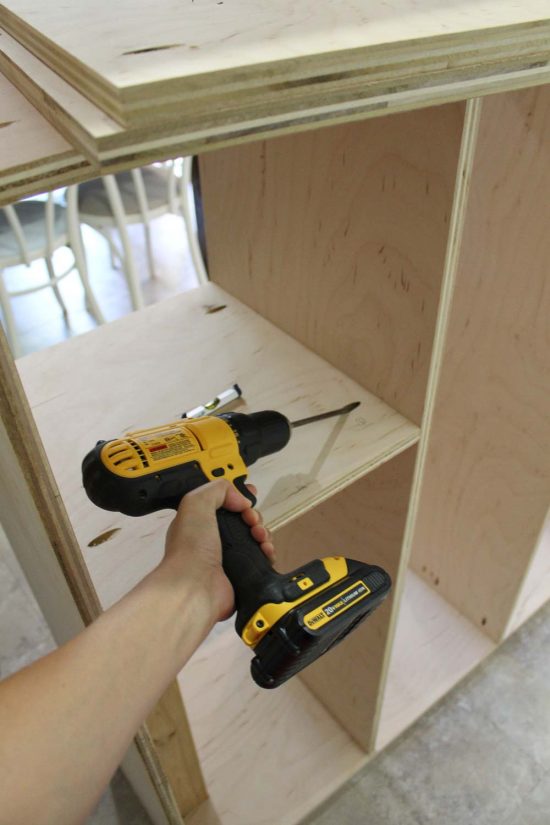
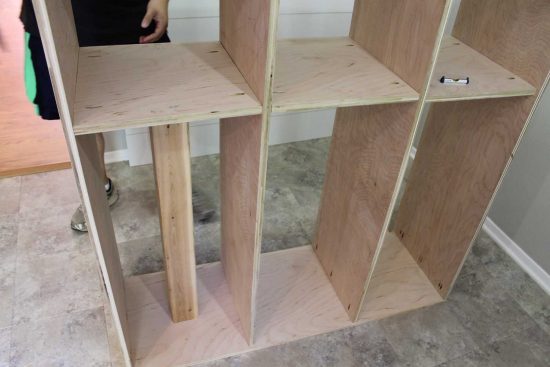
11. For the second row of cubby shelves, measure 13.5″ down from the first row of cubby shelves and mark on the sides. Attach with kreg screws. We then cut our 4×4 scrap wood down to size again to help finish attaching the second row of shelves.
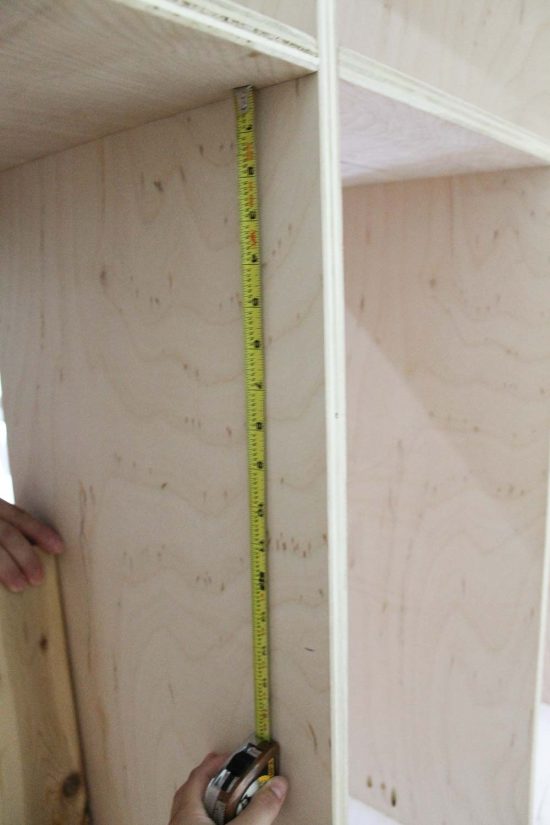
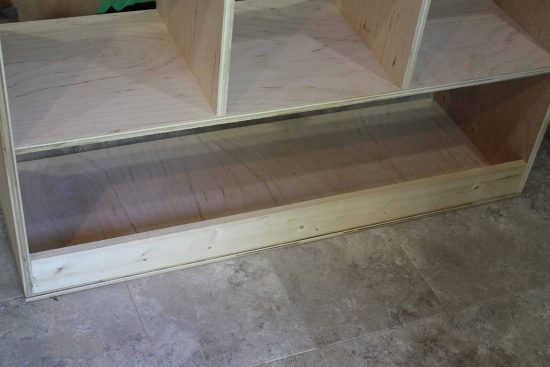
12. At this point we flipped the whole piece over so that it was sitting up the correct way. Then, we added a 1×4 (with pocket holes and kreg screws) to the bottom back to add support and reduce any wobbling there might be.
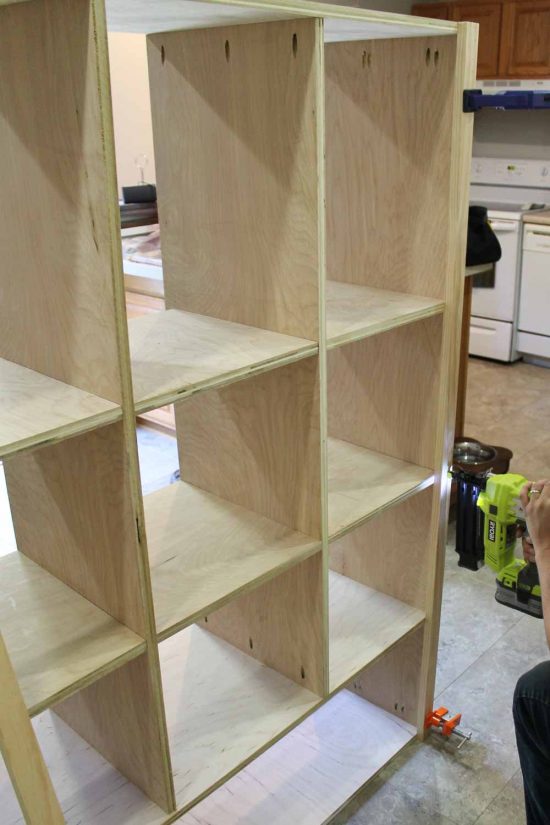
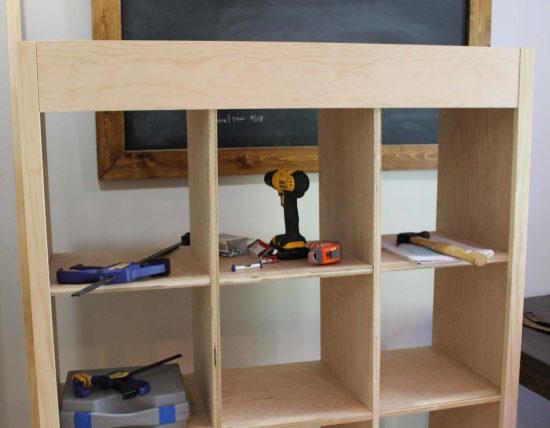
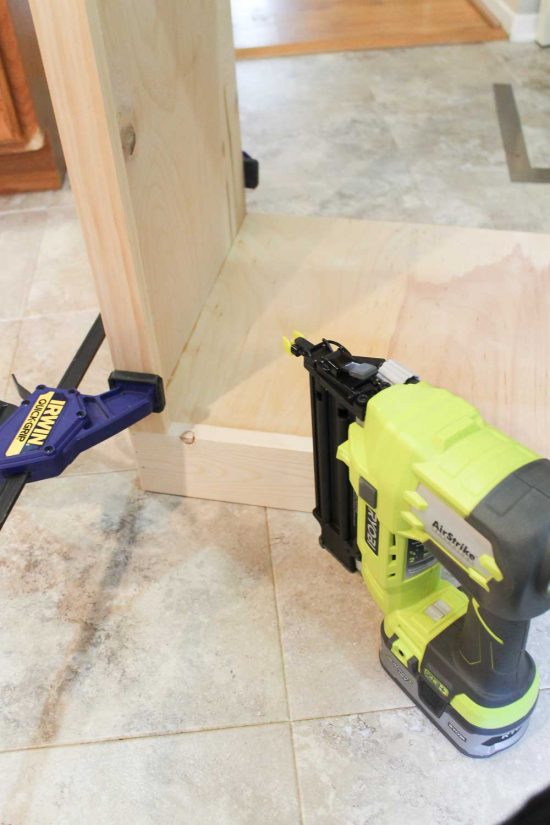
13. Add the trim. Start by cutting 3 pieces of the 1x2s for the two side trim pieces and the bottom trim piece. Attach to the side and bottom edges with your brad nailer, 1 1/4″ brad nails, and wood glue (a clamp helps with this part as shown in the first photo below). We used our Ryobi Coordless Airstrike brad nailer for this part. Next, measure and cut the 1×6 to fit along the top edge and add pocket holes. Then, attach the 1×6 to the top edge (this will be the piece your crown moulding gets attached to) with brad nails (along the top), kreg screws (on the sides), and wood glue. Make sure the top edges are flush with each other when attaching.
Part Two: Custom Size Drawer
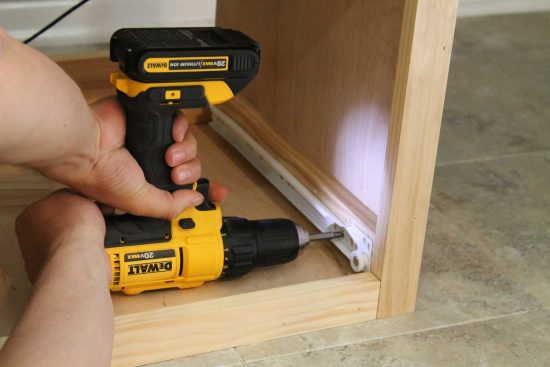
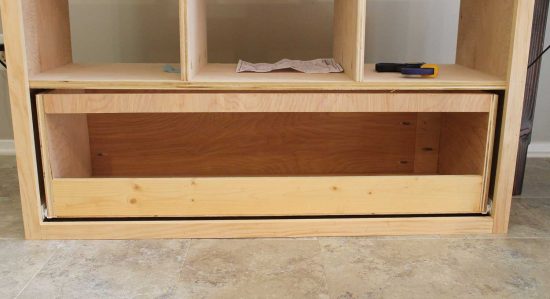
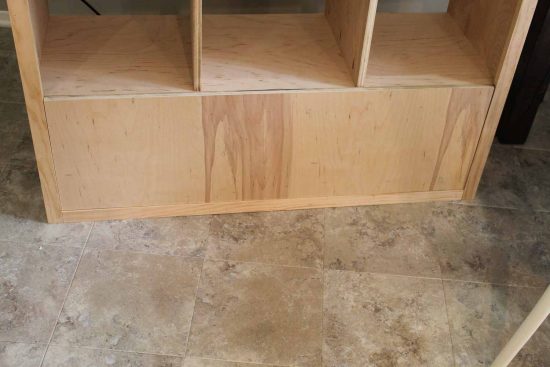
14. Install the drawer slides and cut the drawer box and drawer face to size. For the drawer, it’s very important to follow the drawer slide instructions. This was my first time making a drawer, so I won’t go into detail here. I recommend looking at some other drawer tutorials online if this is your first drawer install as well. I used this helpful tutorial from Shanty-2-Chic as a guide for this part. There’s three differences between their tutorial and this one. First, add a 1×2 (with kreg screws and wood glue) on both sides (for your drawer slides to attach too) and make sure it is raised off the bottom so that the bottom of the 1×2 is just above the top of the 1×2 base trim piece (shown in 1st photo below). Raising up the slides with the 1×2 will allow your drawer to slide out above the trim. Second, for the front of the drawer box, I didn’t use a whole sheet of plywood (to save material, I used scrap plywood pieces as shown in the middle photo below). Third, the front face of my drawer, that is attached to the drawer box, sits flush with the trim, I did not add any moulding to it.
Tip: I highly recommend these inexpensive drawer slides from Lowes. I first attempted to install fancy, full extension, soft close drawer slides and had the worst experience. The drawer would NOT close right or work properly. I messed with it for a long time. I switched to the easy drawer slides noted above and they worked so well! Thank goodness!
Part Three: The Crown Moulding!
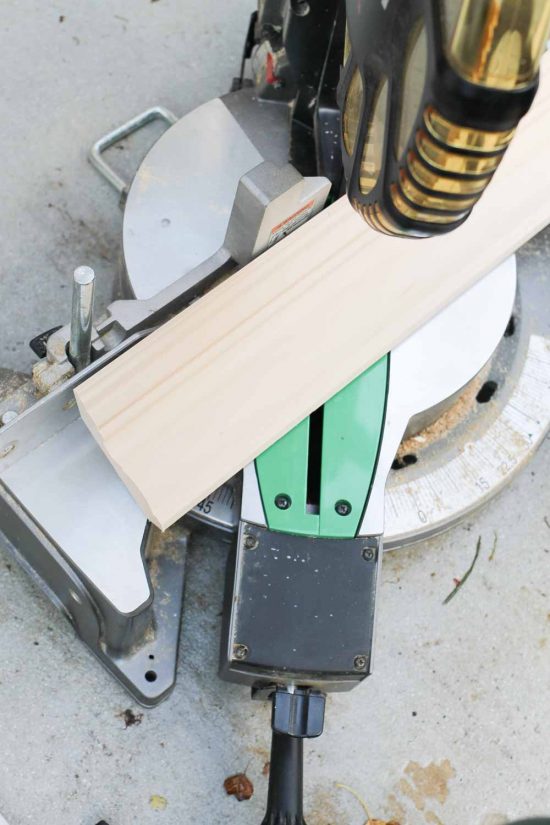
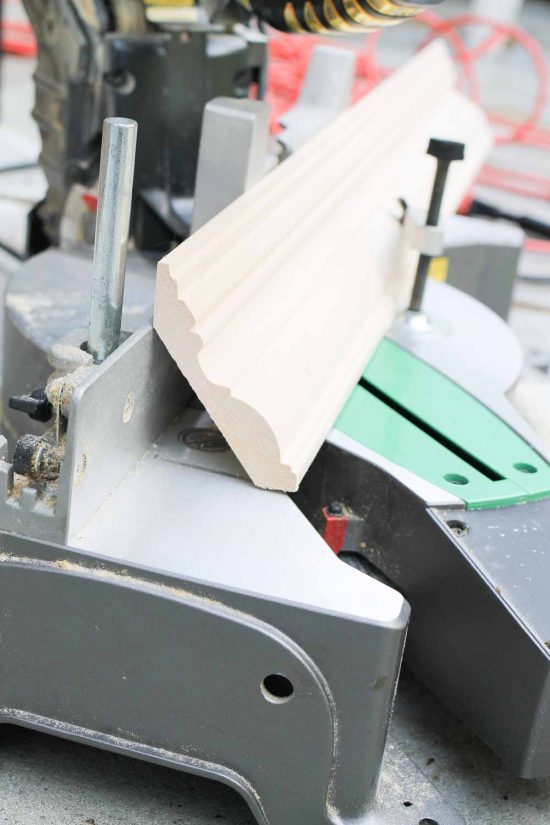
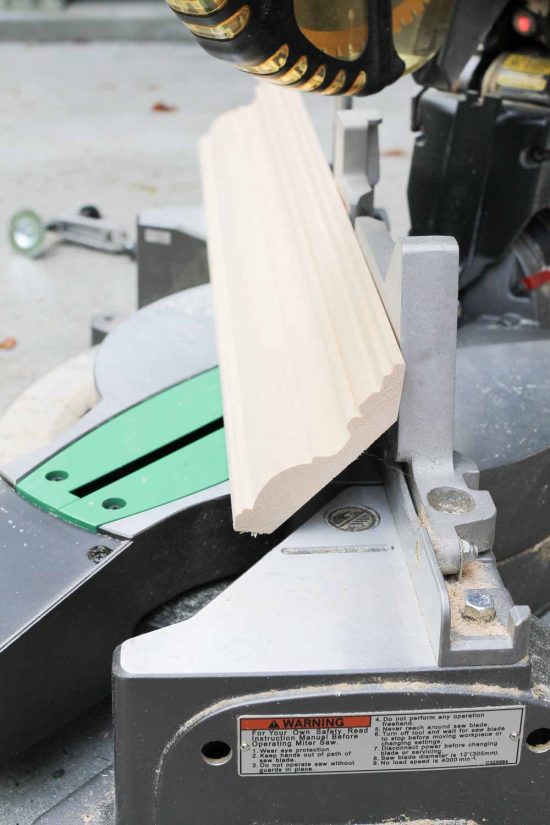
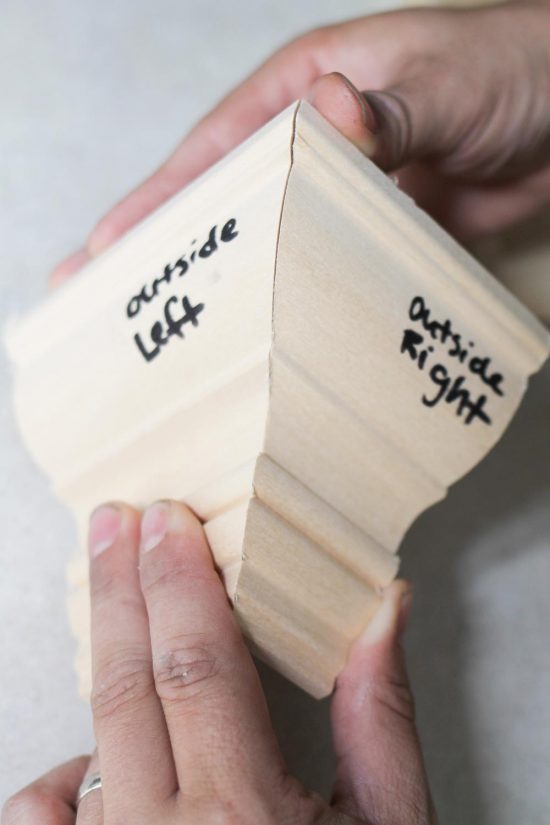
15. The crown moulding is what makes this piece (in my opinion), it is like the frosting to this build…does that make sense? It was so important to making my style vision for this piece a reality and I splurged on more expensive crown moulding. With that said, ugh boy was it hard to figure out crown moulding cuts (since this was my first time ever working with fancy crown moulding). Basically, the key is to turn your miter saw to a 45 degree angle to the left (for the outside left corner), turn the moulding upside down, and rest it against the back edge of the miter saw when making the corner cut. The first 2 photos below shows this. Repeat these same steps for the outside right corner, except make sure your miter saw is turned 45 degrees to the right (shown in the 3rd photo below). Once I figured out how to make the cuts, I made some samples to help guide me (shown in 4th photo below). Attach your crown moulding with brad nails and wood glue. You may need shorter brad nails depending on the moulding thickness.
Tip: If you are new to crown moulding cuts like I was, I recommend buying some less expensive moulding to practice on…I wasted $ messing up on several cuts of my expensive crown moulding.
Tip #2: Although I figured out the crown moulding cuts, I still didn’t master them! There were some small cracks/gaps after installing the moulding. I used a light spackle to fill in the gaps and it worked great, you could barely tell the gaps were ever there after the piece was painted. If you plan on staining the piece, stainable wood filler would be the best product to use.
Part Four: Base of DIY Office Storage Cabinet Bookcase
16. Cut the side pieces, middle piece, and top piece of the base to the following sizes:
- Two sides 16″ x 28 1/4″
- Top piece 16″ x 46″
- Middle piece 16″ x 24 3/4
- Bottom piece 16″ x 44 1/2″
17. Add pocket holes to one of the ends on both side pieces and attach into the top piece with kreg screws and wood glue. Note, you are starting the build of the base upside down at this point.
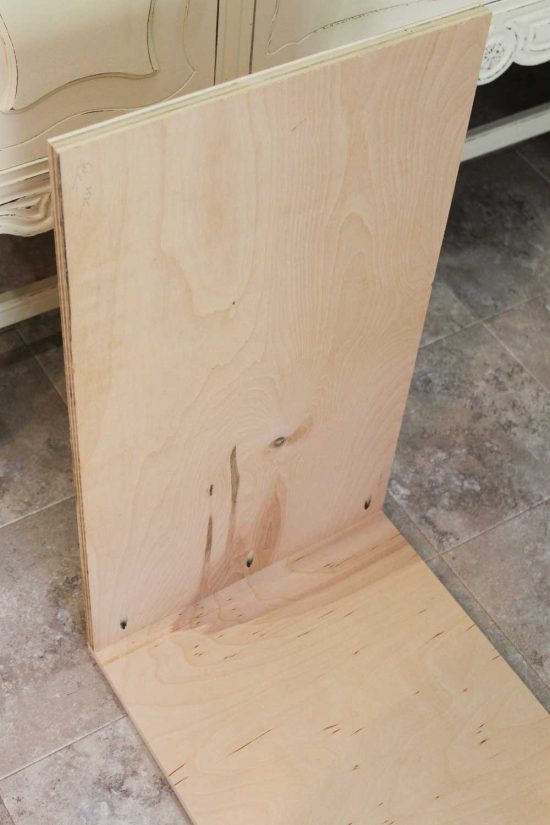
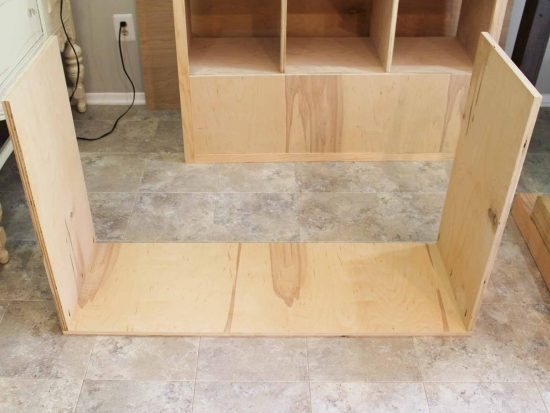
18. Add pocket holes to the middle piece on both ends and attach exactly in the middle of the top piece (I put my pocket holes on opposite sides as you can see in the below photos, but you can do them both on the same side, it doesn’t matter).
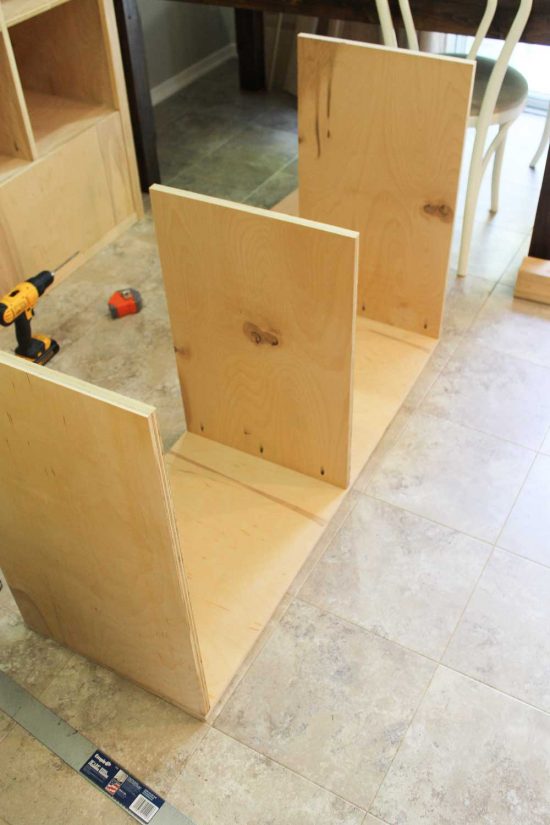
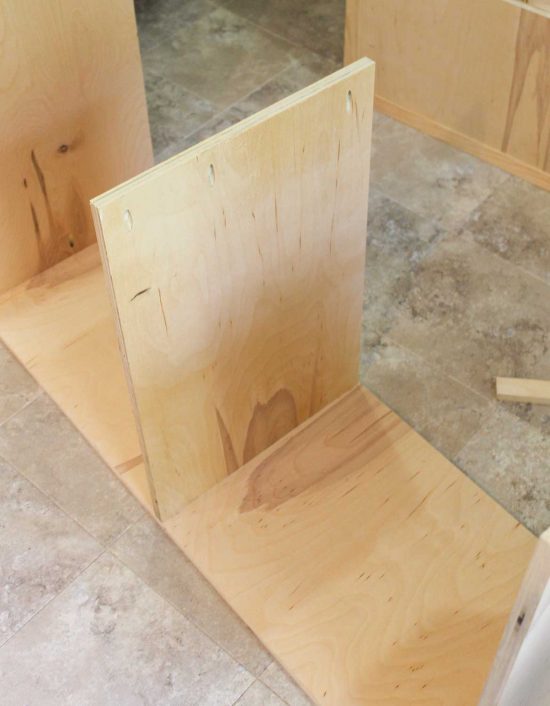
19. Add 10 pocket holes to the bottom base piece as shown in the photo below.
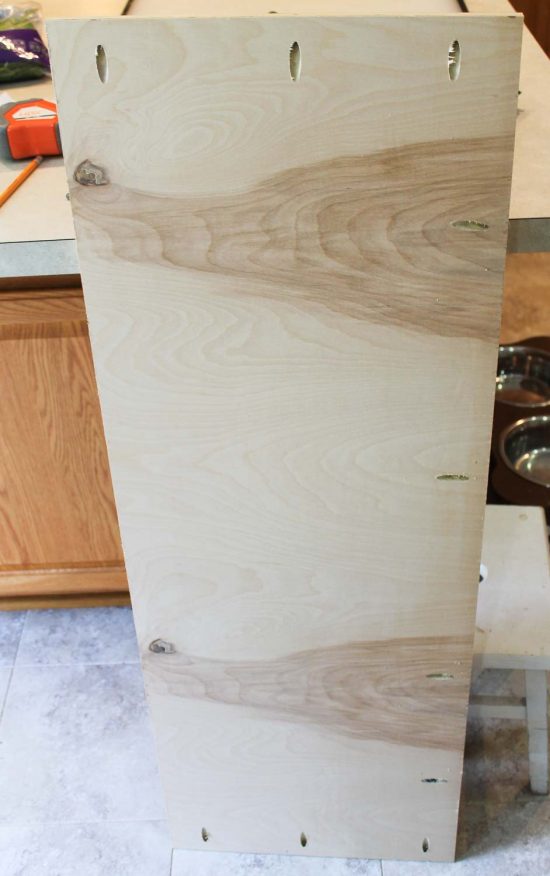
20. The next step might be a bit confusing since I don’t have too many pics of this step, but you are going to attach the bottom base piece to the two side pieces and middle piece. To start, flip the entire base 90 degrees so that it is sitting on its side. Then, attach the bottom base piece into both sides with kreg screws and wood glue. Then, attach the middle piece into the base with kreg screws and wood glue.
Tip: You can keep flipping the piece and add the kreg screws in order to give you the best angle for screwing them in.
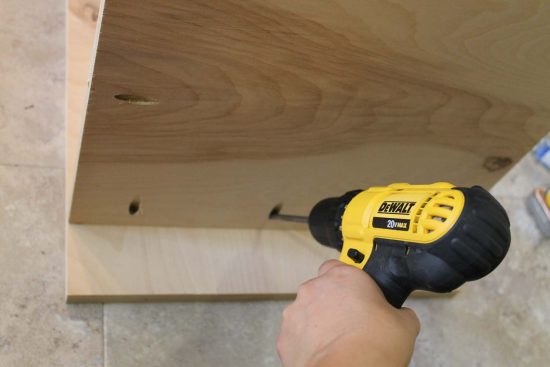
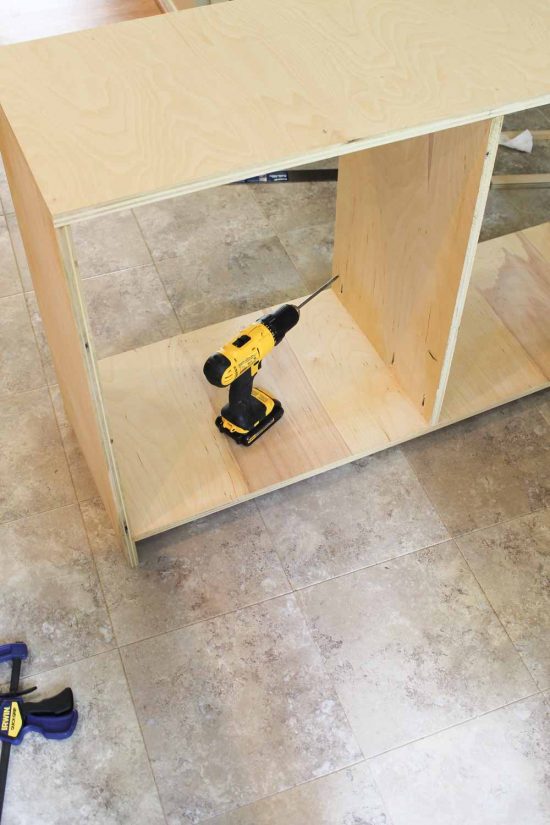
21. Cut the 1×4 to size to go along the front bottom of the base. Attach with brad nails and wood glue first and make sure it is sitting flush with the ground when attached. Clamps help! Then, flip the base over on its front and add kreg screws into your previously drilled pocket holes.
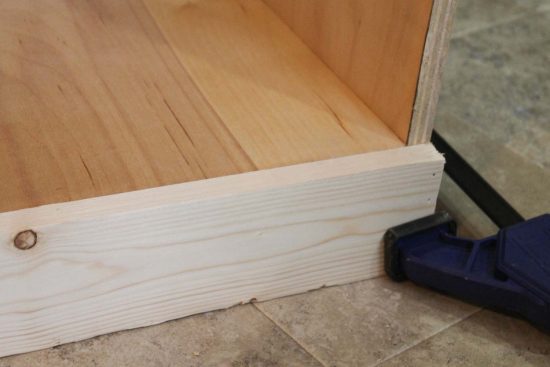

22. Cut the top trim (1×3) and side trims (1x2s) to size. Attach with brad nails and wood glue. Then, cut the base moulding to size and cut the corners with 45 degree miter cuts. Attach along the bottom of the base with brad nails and wood glue.
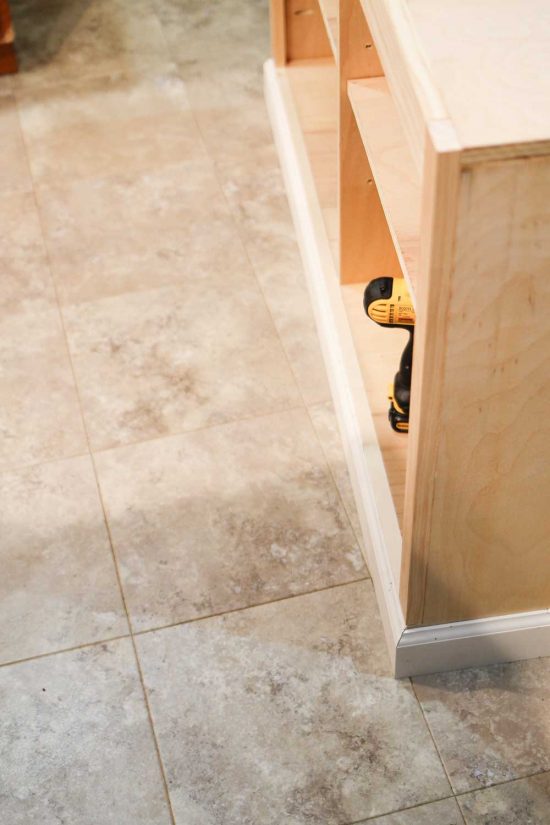
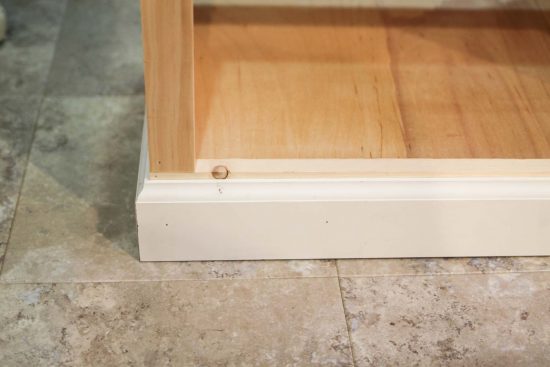
23. Door time! Measure the door opening for both doors. Make the door frame 1/8″ smaller all around. This means the total door frame will be 1/4″ less than the height and width of the door opening. Use the 1x3s to cut the frame pieces for the doors and add pocket holes to them. Then, assemble the frame pieces with kreg screws. After the frames are assembled, cut the door panels (from the 1/4″ plywood) to size (make sure they are bigger than the frame openings) and attach to back of frames with 3/4″ brad nails (or 3/4″ screws like I did).
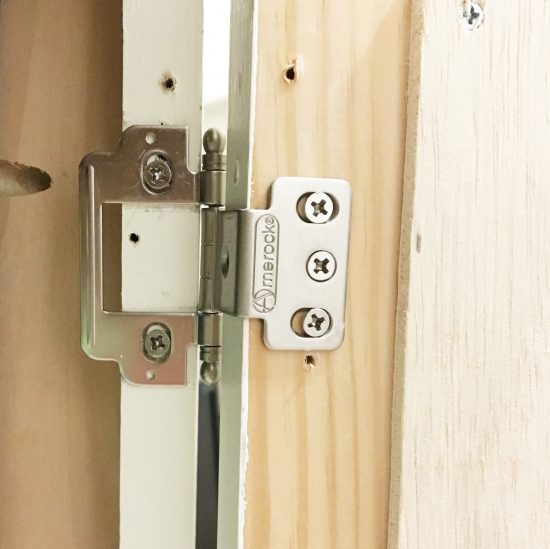
***Tip: This was my first building and installing doing doors and it was the hardest part of the whole build, I went through at least 4 different hinge sets to try to find a hinge type that would install the doors properly (lots of time and $ wasted and extra drill holes). I learned more about door types and hinges than I wanted too haha. One of main issues is that I made these doors so they had to be installed to a frame with inset doors (instead of overlay doors), which is one of the most challenging ways. To make installation easier, I recommend installing them as overlay doors if you want the hinges hidden (so you would need to make the doors a little bigger than your door opening). Or if you want them to be installed inset like mine with the trim frame (and not so much hassle) you could use surface mount/exposed hinges. I however did not want the look of exposed hinges and finally found these hinges which worked! However, due to all my issues, the doors did not get installed perfectly level…lesson learned for next time, but at least they work! This door hinge guide from Rockler does a great job of explaining the different hinges and door types.
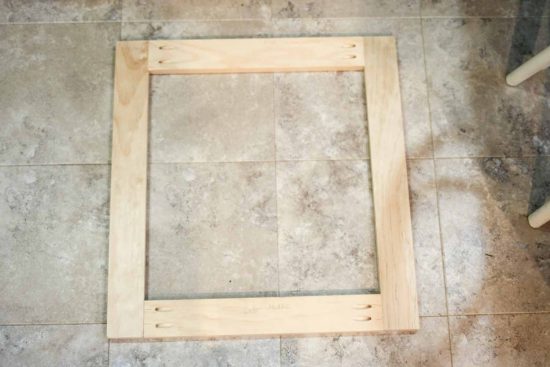
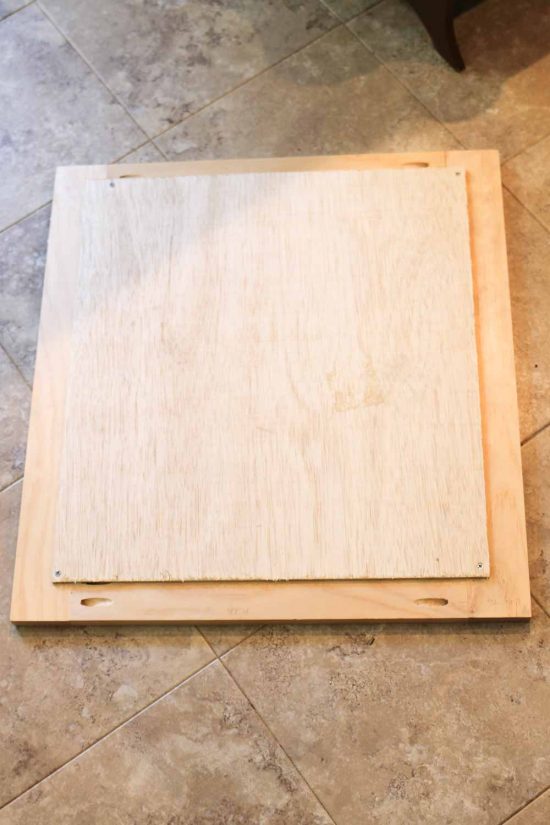
24. Attach the doors with your hinges. I used these hinges. Notice all my extra drill holes from my door hinge learning experience haha! Also, I added magnetic door latches to my doors to help keep them shut.
25. Cut your two backing pieces to size (with the 1/4″ plywood). Use brad nails or screws to attach.
Tip: Paint or stain your piece first before attaching the backing pieces, it makes the finishing process easier!
And that’s a wrap on this build! Yay!!! For finishing, fill all your brad nail holes with stainable wood filler (if you are staining) or the light spackle. Then, paint or stain. Finally, add your knobs/pulls hardware for the doors and drawer. You can also add some L brackets on the back to hold the top and base piece together and then a no tip hardware too if you’d like.
I know that was a lengthy DIY post, but worth it in the end! I hope I explained the steps clear enough, this is the longest DIY step post I’ve ever written and again it’s another learning curve for me!
Check out my DIY office storage cabinets and DIY built in office cabinets to see more office storage ideas!
Some more fun projects and builds will be coming soon! Be sure to follow along on Instagram and Pinterest for my latest projects, fun updates, and more!
April Epp
Saturday 13th of February 2021
Hi Angela, I love the look and size of this unit. I have been trying to figure out what to do in my living room to house my TV. I think I might make this without the cubbies in the top part (keep the top row of cubbies) and it will be perfect, and since my ceilings are only 8 feet it will almost look like a built in piece. I can't wait for nice weather to get outside to build this. I used your outdoor furniture plans last summer to outfit my deck and have gotten quite a few compliments on them. I love your blog, always so inspiring!
Angela Marie Made
Monday 15th of February 2021
That is so great to hear, I love re-imagining projects to suit your own spaces, that is so creative :) Thank you!!!
Vickie
Wednesday 1st of November 2017
Wow, super excited to have found your blog. I have had the same issues with trying to find something that fits my needs at a price I am willing to pay. Your cabinet is gorgeous and exactly what I am looking for. Can you build 3 (or 1 long one) for me! :) I have already emailed your link to my guy, who like you loves DYI and has done a few great jobs around the house. Your plans will certainly make his (our) job a little easier. I am eager to get started! Thanks!
Angela
Wednesday 1st of November 2017
Thank you Vickie! I am so happy to hear that these plans are helpful for you and your DIY guy!! Hope it turns out awesome and I'd love to see pics of the final project!
Christene Holder
Monday 12th of June 2017
I love this!!! This is exactly the type of furniture I'm envisioning for my office/ DIY space. I may just have to try to make one myself. You've totally inspired me. I love home DIY but I have to admit that I'm a little overwhelmed when it comes to making furniture. I never really know how to start. I'm gonna have to try this!
>> Christene Keys to Inspiration
[email protected]
Monday 12th of June 2017
Thank you Christene! I totally understand about being overwhelmed with making furniture! I was the same way at first, but once you finish building your first piece it becomes addicting haha! Let me know if you have any questions! This piece was definitely a huge learning curve for me!
charlene raubenheimer
Friday 17th of March 2017
absolutely gorgeous and DO-ABLE!!
[email protected]
Friday 17th of March 2017
Thank you Charlene!!
Ana White
Friday 23rd of September 2016
So excited to find your blog, you do amazing work! Love it! Ana
Angela
Friday 23rd of September 2016
Thank you so much Ana! Your comment has totally made my day!!! I love following your blog and you have the most amazing project builds! Thanks for stopping by!