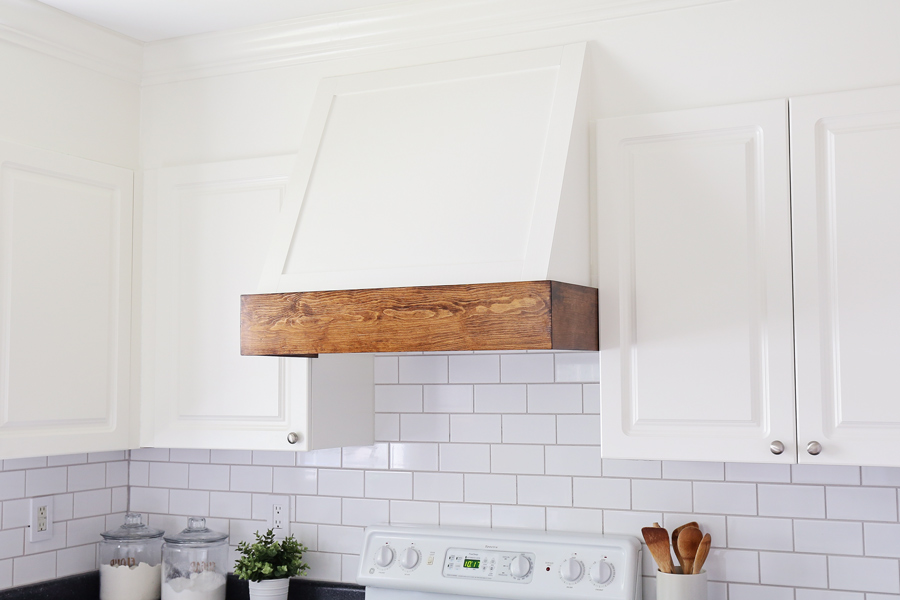
Our DIY range hood cover is complete! It turned out gorgeous and the cover itself cost less than $30!
This custom project has really started to bring our $1k kitchen makeover together.
Our range hood went from an eye sore to a beautiful, focal point of the kitchen.
This DIY hood range cover combined with enclosing the space above our kitchen cabinets has added lots of character and charm!
Below are the before and after photos!

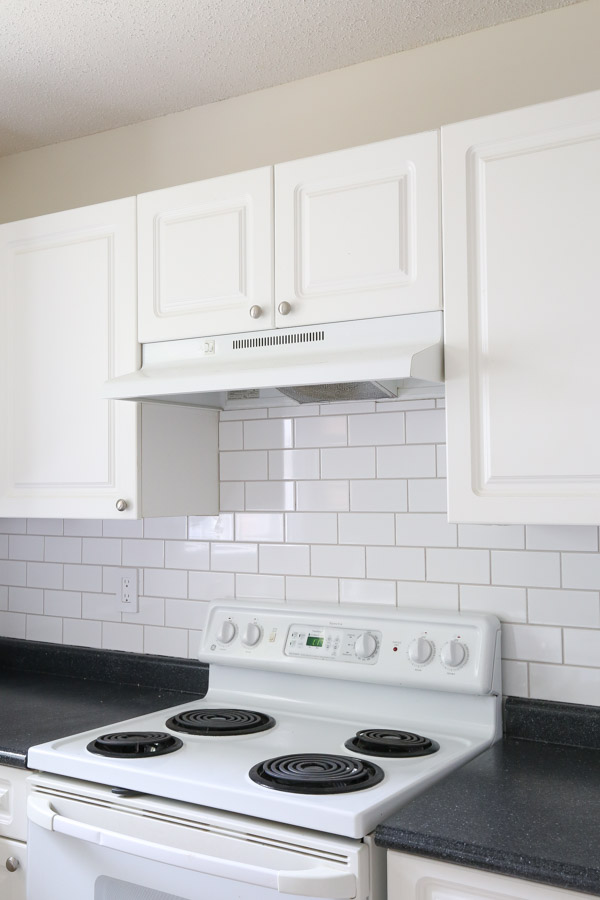
And here is a before photo of our old range hood:
Let’s get real here though, I almost gave up on this project half way through while trying to figure out the best way to do this project and the angles involved. So glad I didn’t though!
Because this project was so custom to our kitchen and all kitchen range hood setups vary, I’m not going to do a highly detailed tutorial like I normally do. Instead, it’s going to be more of a high level overview of what I did in case you want to do something similar.
I basically figured out each step as I went. There may be better ways to do this, but based on my set up and the design I wanted, this process worked for me!
Note, this post contains some affiliate links. I may earn a commission if you shop those links (at no cost to you). Thank you for supporting my small business. For more info see my disclosures here.
How to build a DIY Range Hood Cover:
Materials
- 1×6 @ 8ft
- 8ft x 4ft @ 1/4″ thick plywood (we used this plywood)
- 1×2 @ 8ft**
- 2×2 @ 8ft **
- 2 1/4″ x 8ft lattice board @ 1/4″ thick
- 1×4 @ 3/8″ thick boards (optional)
- 1″ and 1 1/4″ and 2″ brad nails
- 2 1/2″ screws
- 2 1/2″ Kreg screws
- Paintable Caulk
- Lightweight Spackle
- Wood filler
- Paint
- Wood stain (I used this color)
- Polyurethane
- Paint
- Range Hood Insert (I used this range hood with bottom buttons)
Tools
- Miter saw
- Brad nailer
- Kreg Jig
- Circular Saw
- Measuring tape
- Clamps
- Level
**Note, the amount of boards you will need depends on the measurement of your range hood.
Video Tutorial:
See this step by step tutorial in action in my DIY range hood video tutorial!
Subscribe to my YouTube Channel here!
1. Install a new range hood if needed
For the range hood cover design I wanted to do, we had to replace our old range hood as it was too big and it didn’t have the buttons on the bottom side. Plus, it was really outdated and needed to be replaced anyways.
We needed a ductless, under cabinet mount range hood that was less than 28″ wide so I could fit side trim pieces.
At first I ordered this range hood which is specifically for building custom hood covers around and it can be installed as ducted or as a ductless vent hood. Once it arrived though, the installation was confusing.
I returned it and ordered this range hood instead, which was a little more expensive but perfect for what I needed.
This vent hood insert comes in many sizes (I used the 24″ size in white) and can be installed as ducted or ductless as well. It comes in other colors like stainless steel.
For this step, we also removed our cabinet doors located above the range hood.

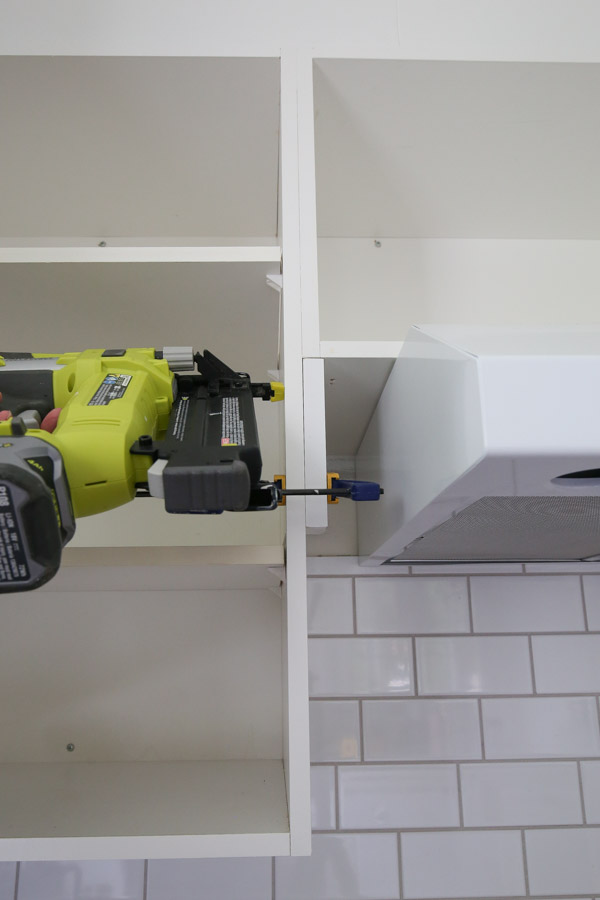
2. Add side cabinet trim if needed
If your existing cabinets have side trim pieces, then you can skip this step. My cabinets do not, the doors extend right to edge. So, I added side trim pieces with a brad nailer and 1x2s, the same height as the range hood.
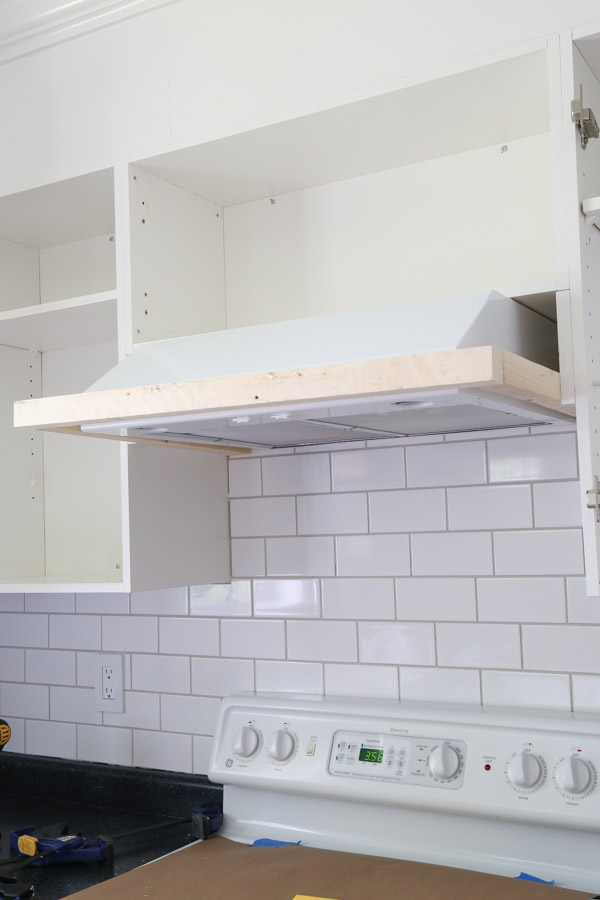
3. Install a range hood cover frame
The key to this project was building a sturdy support frame for the DIY range hood cover. First, I made two side pieces with 2x2s and 1x2s nailed together to fit behind the 1×2 side pieces.
Then, I used my Kreg Jig and 2 1/2″ Kreg screws to create pockets holes on each end of the side pieces to secure them to the front 2×2 frame board. You could just use a drill and regular screws but I wanted an extra strong joint.
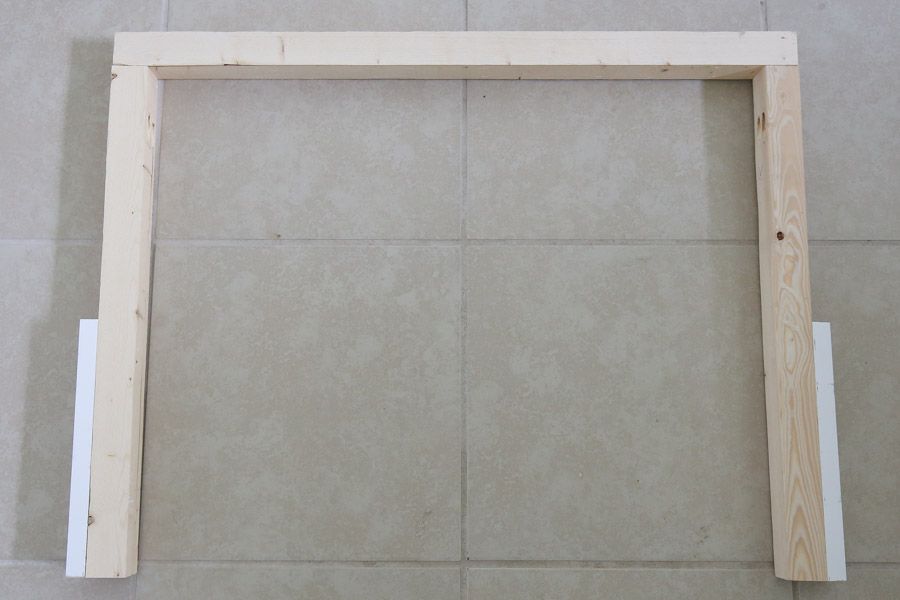
This bottom frame extended out 1″ more than the depth of my range hood.
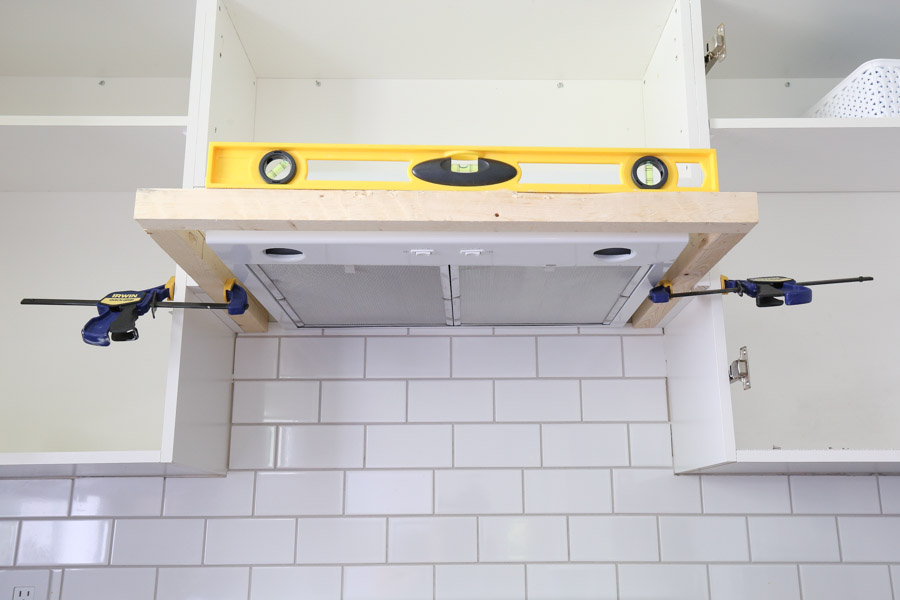
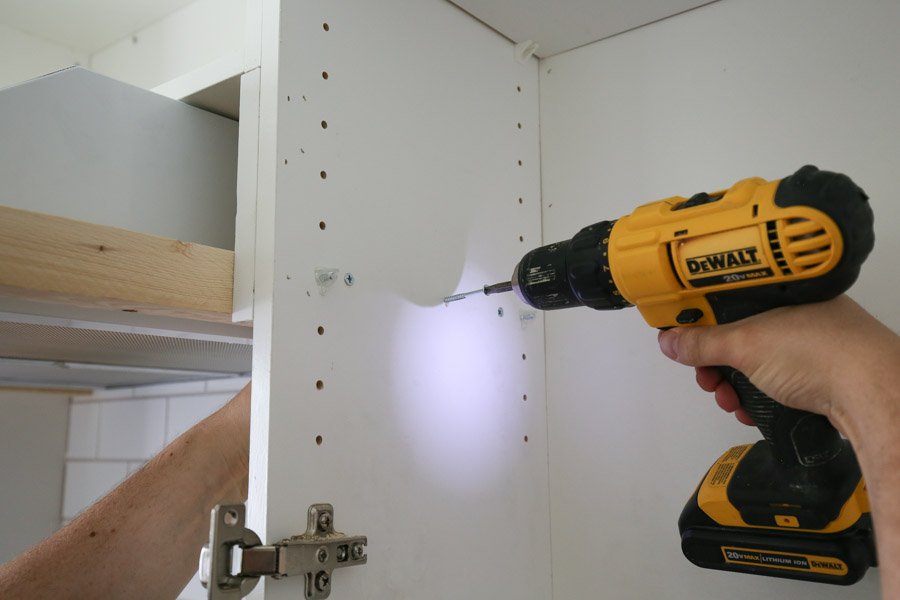
We attached the frame to the cabinets with 2 1/2″ screws through the side cabinets which are attached to the wall studs.
The result was a very sturdy frame!
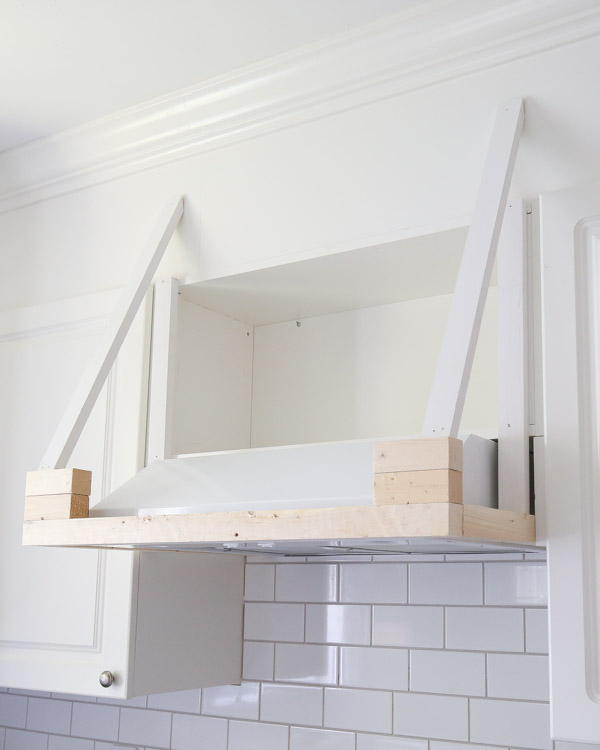
4. Add angle frame supports to range hood frame
The last part of the frame build is the angle framing support for the side frame. Ugh this is the step that made me want to quit midway through this project.
Honestly, looking back I was just overthinking this step and making it more difficult than it needed to be with the angles.
You can see more details of this step in the DIY range hood video tutorial here!
First, we added 1x2s that were 1/4″ in from the side 1×2 pieces so that our side range hood cover pieces (1/4″ thick plywood) had something to nail into along the back. These boards were nailed into our cabinets.
Next, I added two 2x2s stacked on top of each other with 2″ brad nails on each side as support pieces. I did this so that my 1×6 stained wood board could be installed at the correct height and to provide support for the angle framing boards.
For the 1×2 front angled boards, I held the board out past the stacked 2x2s to mark the exact angle needed which was about 21 degrees (again check this step out in the hood range cover video). Since we were working with a right angle triangle, I did some geometry to then figure out the top angle cuts!
X = 180 degrees – 21 degrees – 90 degrees
X = 69 degree angle
Well my miter saw only cuts up to 55 degrees. And I didn’t want to hold the board at a wonky angle while cutting. So, then we realized we didn’t need it be perfect and we just cut as far of an angle as we could, the 55 degrees, and that was enough of an angle cut to nail into the wall and create a top frame.
Then we nailed the bottom part of the board into the stacked 2x2s.
📩 Want to Save This?
Also, we added some 1x2s inside of the cabinet front corners to have a smaller gap to caulk.
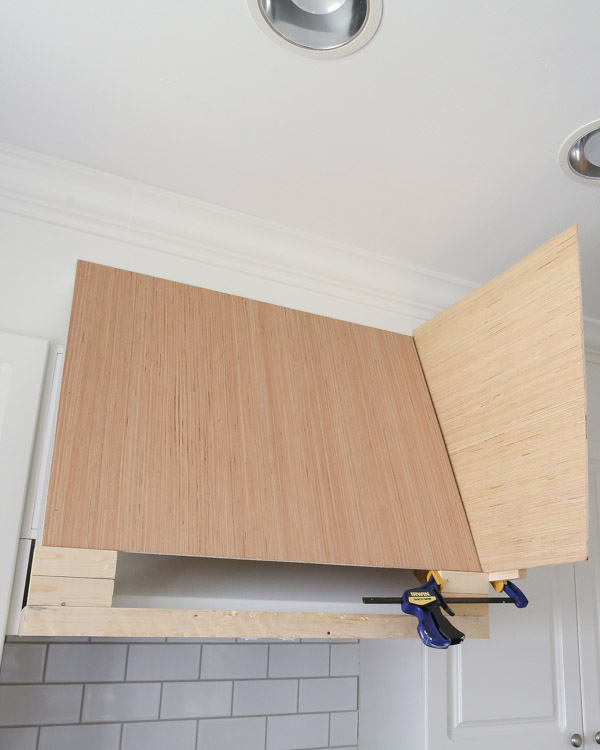
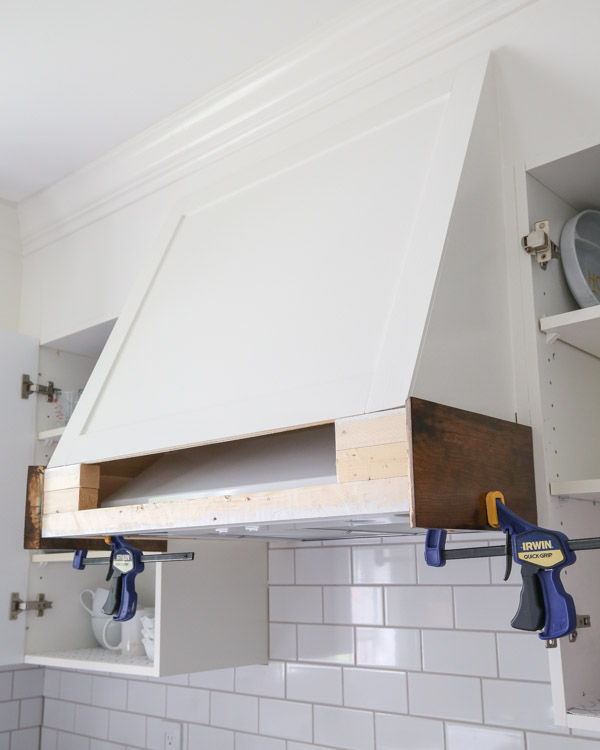
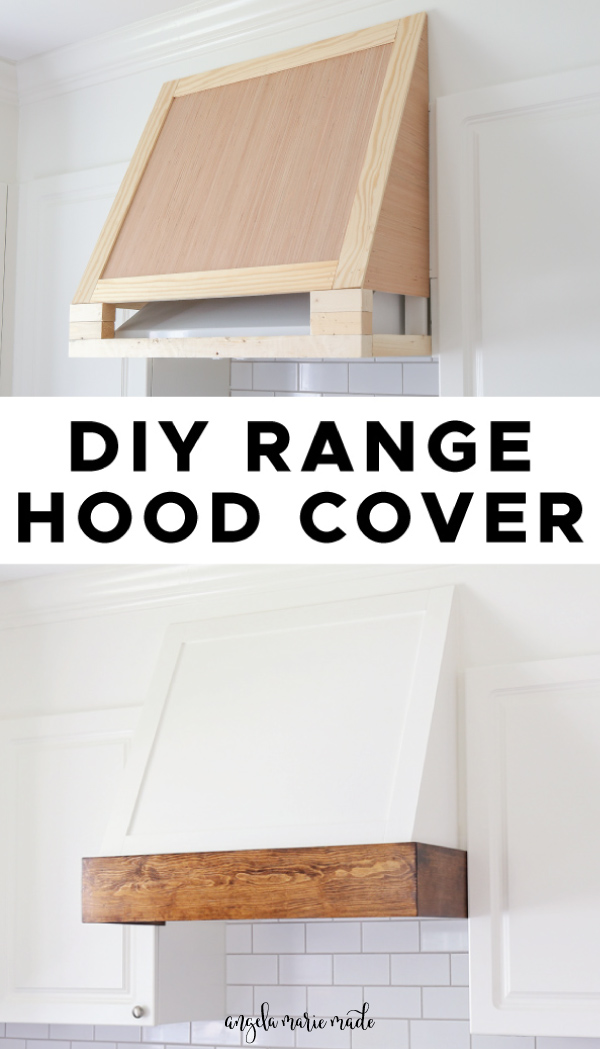
5. Attach plywood range hood cover
Use a circular saw and cut the 1/4″ plywood to size for the front cover or front panel. We made ours a little taller than the angled 1×2 boards.
Secure the piece of plywood with 1″ brad nails and a brad nailer to the 1x2s to create the front of the hood.
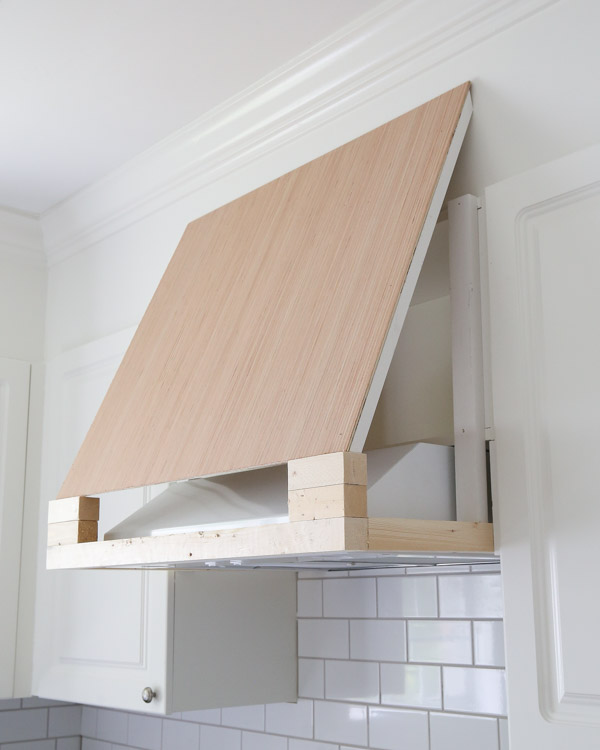
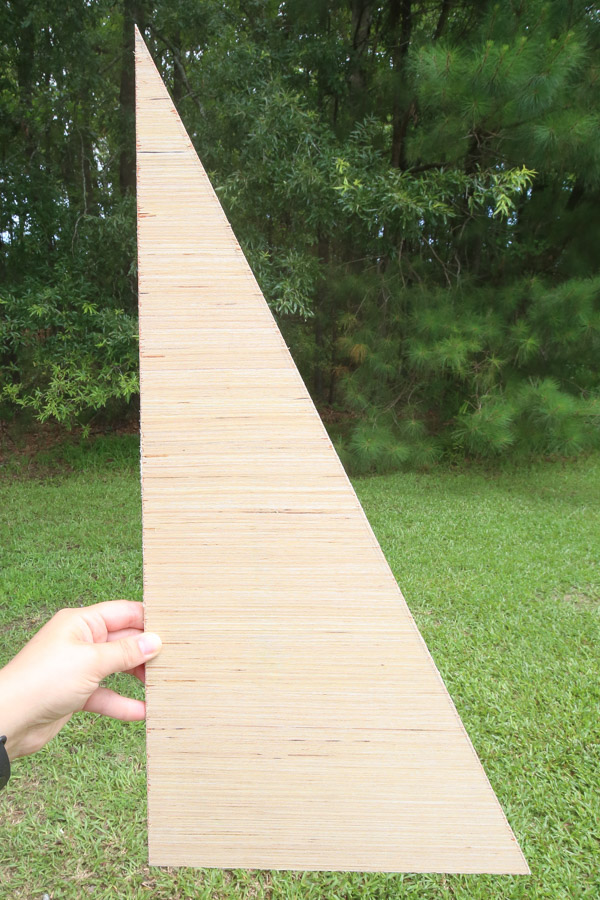
For the sides of the hood, I clamped plywood up and then traced the exact shape we needed to cut. Then, a circular saw and straight edge guide was used to make the perfect cut.
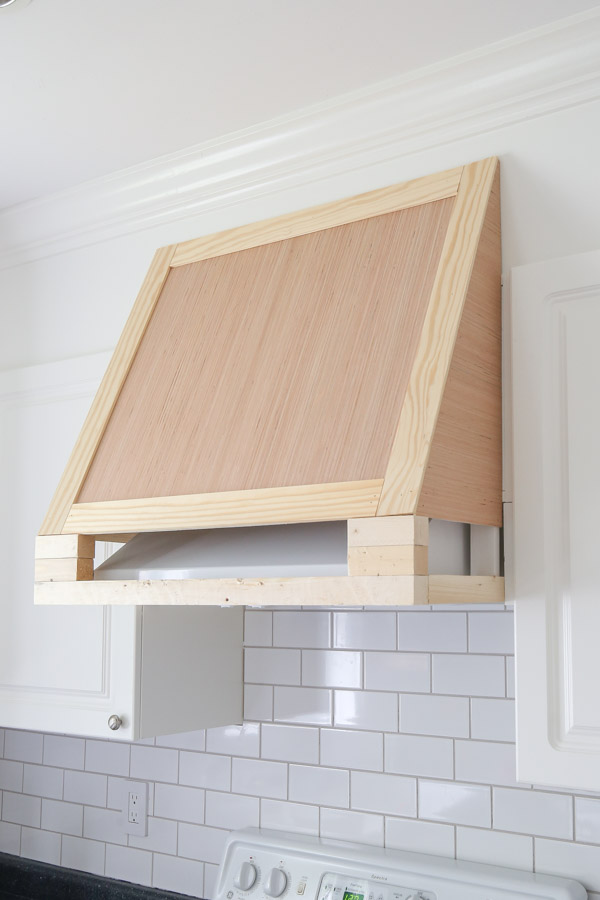
6. Add front range hood cover trim
The front range hood cover was trimmed out with this lattice trim and 1″ brad nails and nail gun. It hides the plywood edges too! If this range hood cover were larger I would have added trim to the sides too, but it was just too small.
7. Caulk, fill holes, prime, and paint DIY hood range cover
At this point we caulked all the gaps and seams, filled nail holes with a lightweight spackle and wood filler, primed, and then painted. I used the same paint as our extended kitchen cabinet enclosure, Benjamin Moore Advance in White Dove (satin sheen).
8. Cut and install 1×6 stained wood board to range hood cover frame
This step was my favorite part of this DIY hood range cover!
Cut a 1×6 to size to trim out the front of the frame hood cover. The front board needs a 45 degree bevel cut on each end. And the two side boards need a 90 degree end and a 45 degree bevel end.
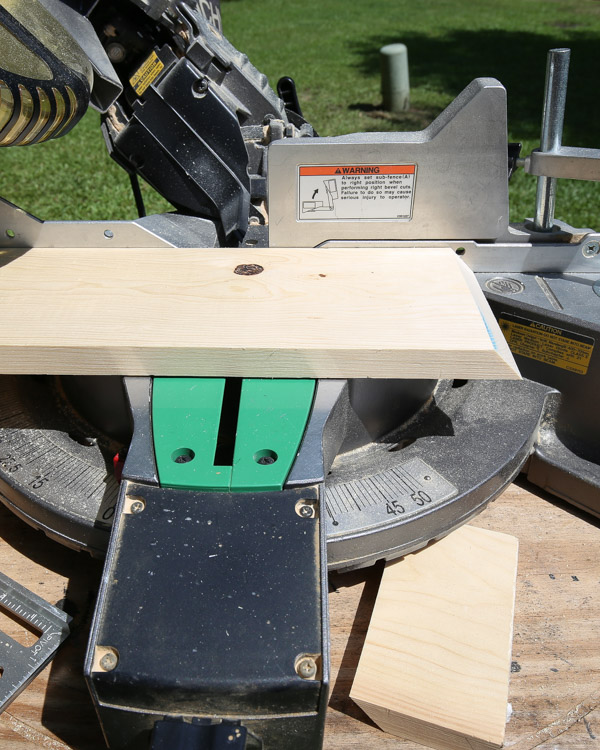
Here is one of the side board ends:
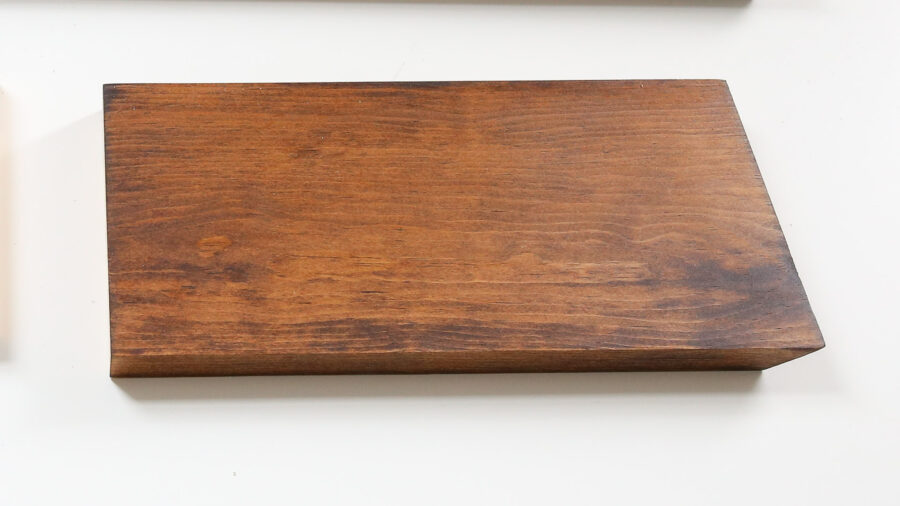
Stain and poly the 1×6 boards for the front piece. I used this color stain and this polyurethane.
I wanted everything to be very wipeable being above a stove, so that’s why we added poly to the wood, plus it looks great. See my tips for staining wood for a pretty finish! And make sure the wood is sanded properly too!
Install the side boards first, clamped into place and level, with 1 1/4″ brad nails. We left about 3/4″ of wood exposed under the range hood. Then, nail the board for the front of the range hood to the side boards and frame.
Don’t forget you can see all of this in action in my DIY range hood video tutorial!
You can also use a little wood glue where the 1×6 mitered ends meet, but I wouldn’t use wood glue anywhere else in case in ever want to disassemble it.
Alternatively, you could use crown molding here instead of a 1×6, but this is easier than crown!
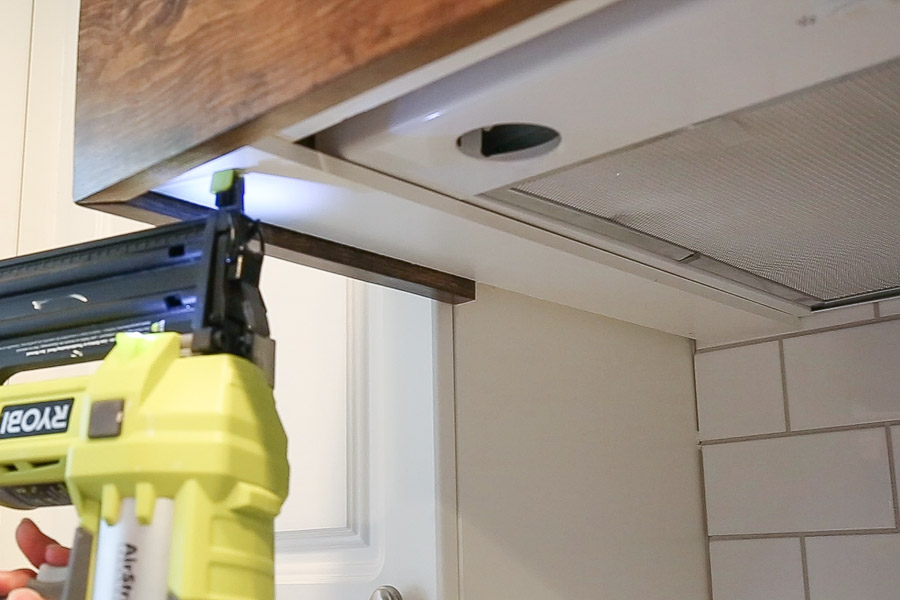
9. Finish the underneath side of the range hood cover (if needed)
Lastly, I wanted a clean look underneath of the range hood cover for the bottom of the hood. I used these 1×4 @ 3/8″ thick boards cut to size and painted them white, then nailed them into the frame to cover it.
I just used them along the sides, since I wanted to leave a gap along the front side underneath.
Here’s the finished cover!
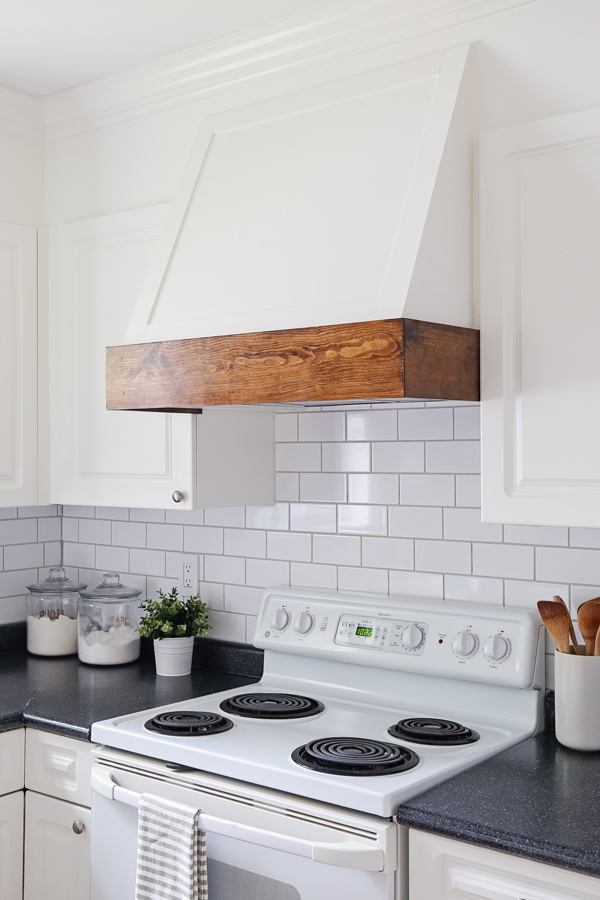
Well I am just in awe at how lovely this DIY range hood cover turned out! It has really brought our kitchen makeover together thus far and looks beautiful with our tile backsplash too! I love the warmth and character it provides and has made a huge difference!
I still can’t believe we built a custom range hood cover ourselves!
Brandon is very excited to cook all of his simple and delicious recipes under it!
I’m so glad I didn’t give up on this project! What do you think?
I know we could really use a new range now, but that will just have to wait for a phase 2 makeover since this phase 1 makeover only has a $1000 budget!
Follow along on Instagram stories for sneak peeks of the kitchen makeover progress and follow along on YouTube for video tutorials of all the DIY projects! The final reveal is getting close, I can’t wait to wrap this kitchen makeover up!
One more before and after with our new vent hood cover!

Frequently Asked Questions
How to make a range hood cover?
To make a range hood cover, first build a support frame using framing lumber secured to wall studs or cabinets. Next, create the cover with thin plywood and trim it out. Finally, paint or stain the range hood cover!
See my step by step DIY vent hood cover tutorial above for more details.
How can I hide my exhaust hood?
To hide an exhaust hood, built a DIY range hood cover using wood and plywood. Alternaitley you can use another material like drywall or shiplap. But, it needs to be framed out first with framing lumber secured to the wall studs or cabinets.
Want to save for later?! PIN IT HERE:
Mary Kochendorfer
Friday 19th of April 2024
How did you install the vent to the cabinets?
Paula Friesner
Saturday 6th of November 2021
Os there a reason you did not include the 1×6 trim board in the supply list? Love the tutorial. Thank you.
Angela Marie Made
Monday 8th of November 2021
No, I totally missed that. Thank you for letting me know, I just updated the material list.
Ellie Minx
Thursday 22nd of July 2021
*overheat
Ellie Minx
Thursday 22nd of July 2021
I am working on a very similar project with the same vent hood you purchased. My husband was concerned about the safety hazard of covering the vent hood on all four sides and not having it vented. He called the manufacturer and they told him not to do it because it could overhear or trap mold and odors. Have you had any of those problems?
Angela Marie Made
Friday 23rd of July 2021
We have not because it is not fully enclosed, we have left room for air to circulate underneath the outside frame and there is a 1/4" gap at the top. Either way just do what you are comfortable with!
Tammy
Wednesday 21st of July 2021
Where did you find the 28 in hood vent?
Angela Marie Made
Thursday 22nd of July 2021
I actually used a 24" range hood and it is linked under Step 1 of the tutorial in the post.