Often times in my DIY building projects I use a Kreg Jig, for joining wood together. I absolutely love this tool because it’s really easy to use AND it works awesome! It has been really useful in helping me build furniture efficiently and effectively! Below is a step by step tutorial and a video tutorial on how to use a Kreg Jig!
Note, this post contains some affiliate links.
As I shared in my woodworking tools for beginners post and my 6 easy steps to getting started with woodworking post, the Kreg Jig is my favorite tool ever! It uses pocket holes to join two pieces of wood together with a strong, high quality joint. It’s much simpler in my opinion, than some of the traditional wood joinery methods like biscuit, mortise and tenon, and dovetail joints.
How to Use a Kreg Jig
Materials Needed:
- Kreg Jig – I use the K4 Kreg Jig in this tutorial (since discontinued) but I use the 720 Pro now!
- Clamp
- Power Drill
- Kreg Screws*
*See link to Kreg Screw size chart in step #4 below
1. Set Kreg Jig Settings for Wood Thickness
First, take note as to the thickness of your wood. For my example, the wood I am using is a 1×4, so it’s 3/4″ thick. See my lumber dimensions guide for help with this step.
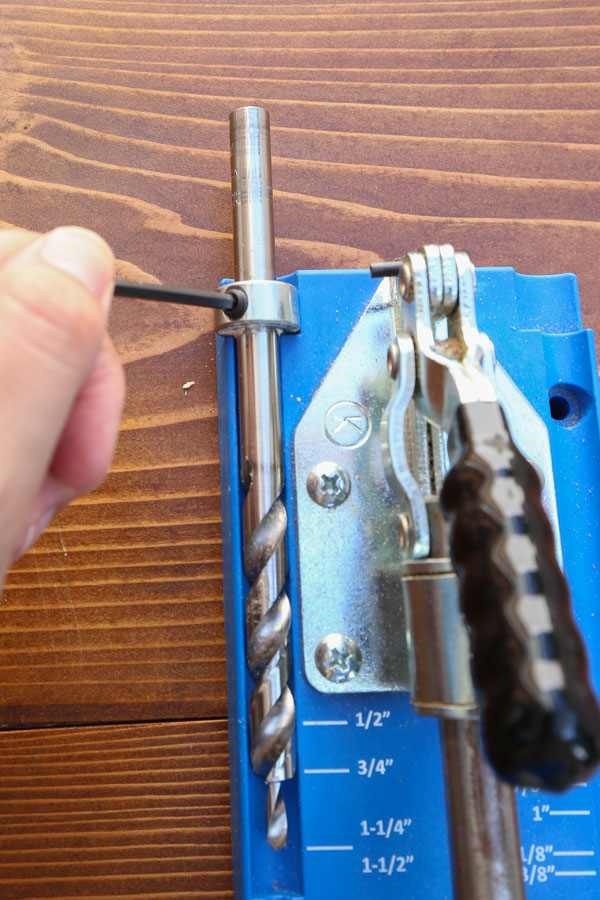
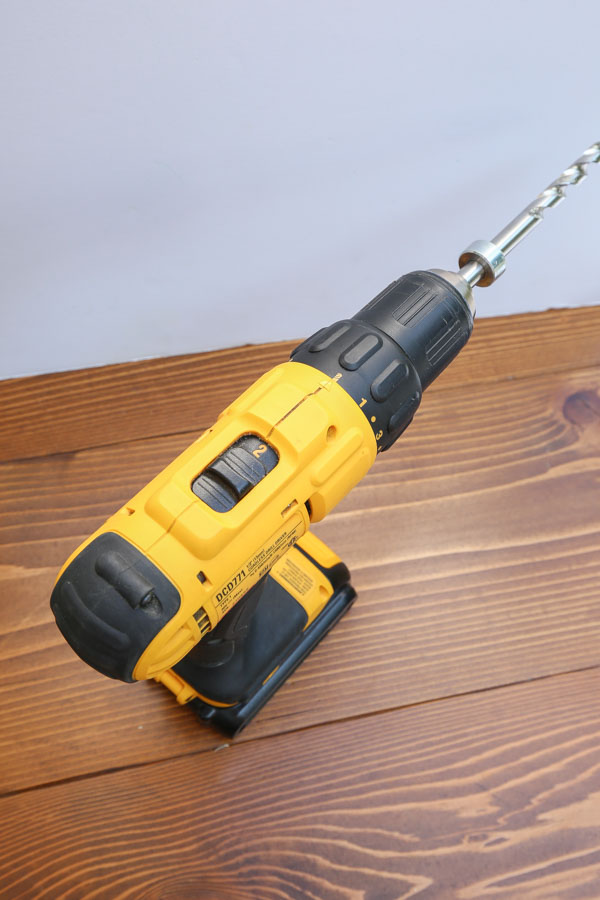
Set the depth collar bit for 3/4″ thick wood. To do this, set the drill bit into the Kreg Jig slot as shown in the below photo. Use the included Allen wrench to adjust the depth collar so that the bottom edge of the thick part of the drill bit is lined up with the 3/4″ line on the Kreg Jig. Don’t line it up with the drill bit tip!
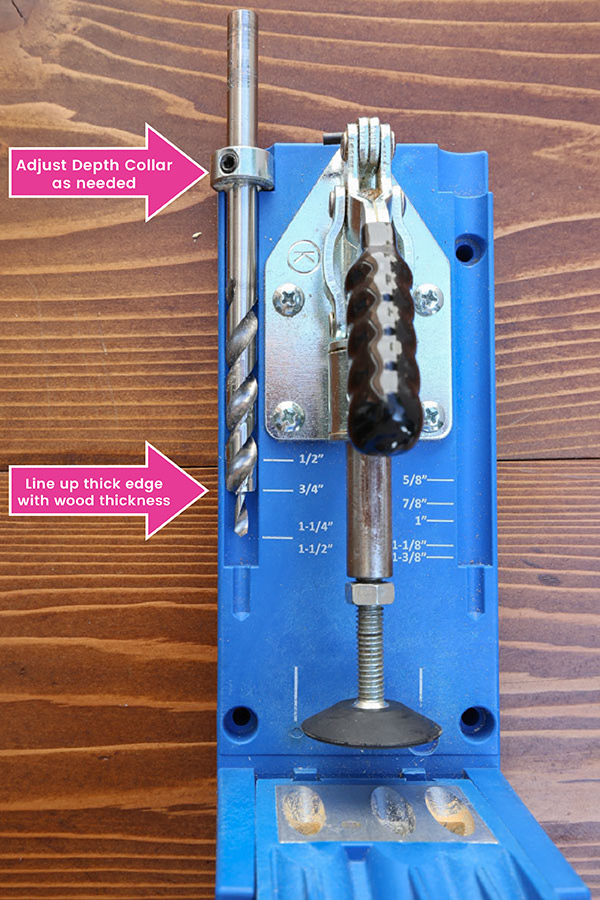
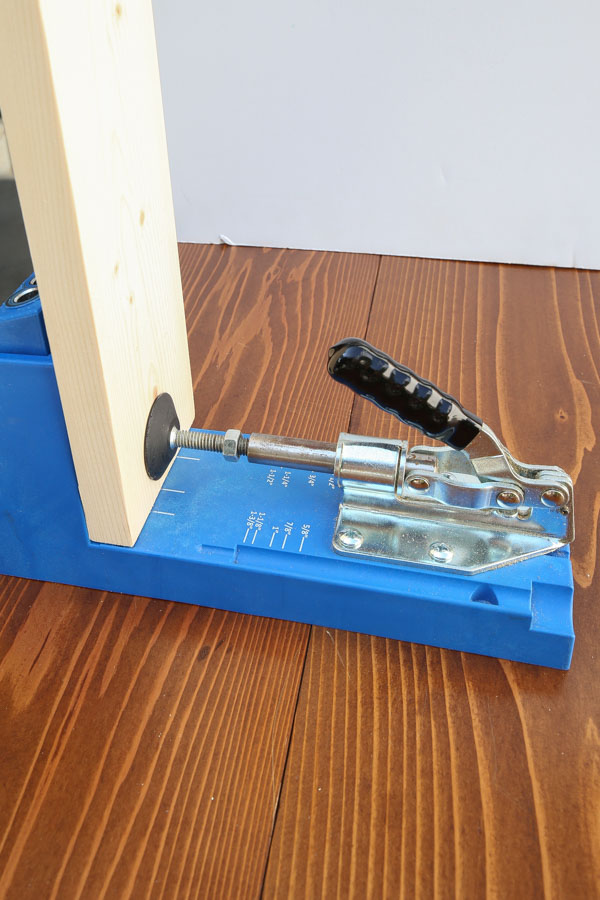
Next, line up the drill guide with the measurement line of your wood thickness. As shown in the below photo I’ve lined the drill guide up with the 3/4″ line. You can adjust the drill guide by turning the gold pin knob to loosen the guide and move it as needed.

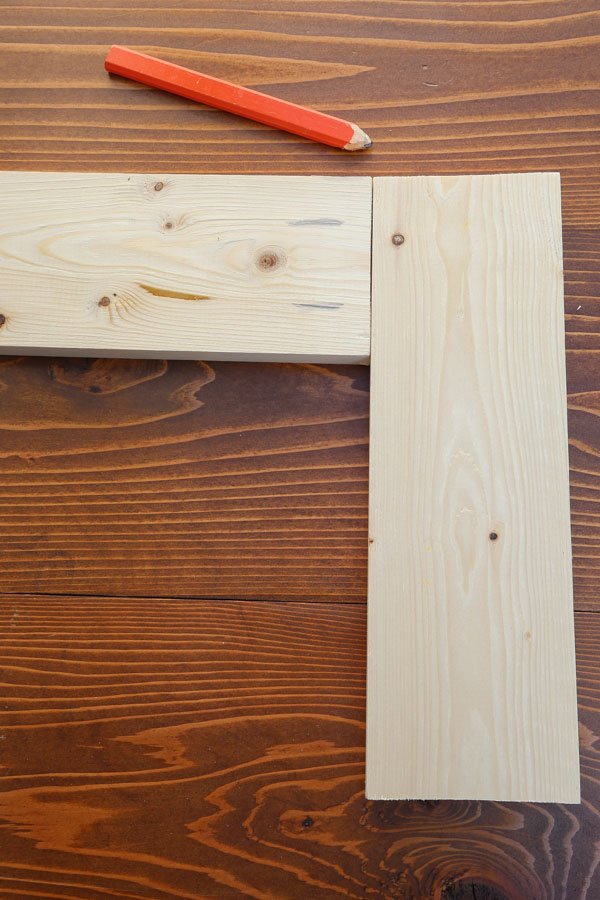
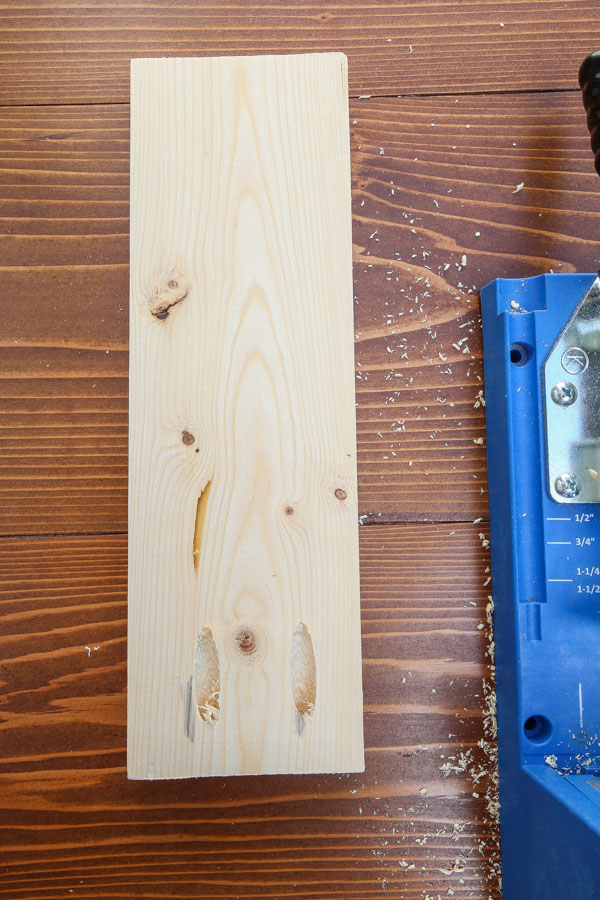
2. Determine Pocket Hole Placement on Wood
Determine where you need to drill your pocket holes on your wood and mark with a pencil if desired to help remember. For this example I am joining two pieces of wood together perpendicularly, so I marked two pocket holes on the back of my wood piece end. Make sure you mark the lines on the side of the wood that you don’t want to show as that’s where the pocket holes will be drilled.
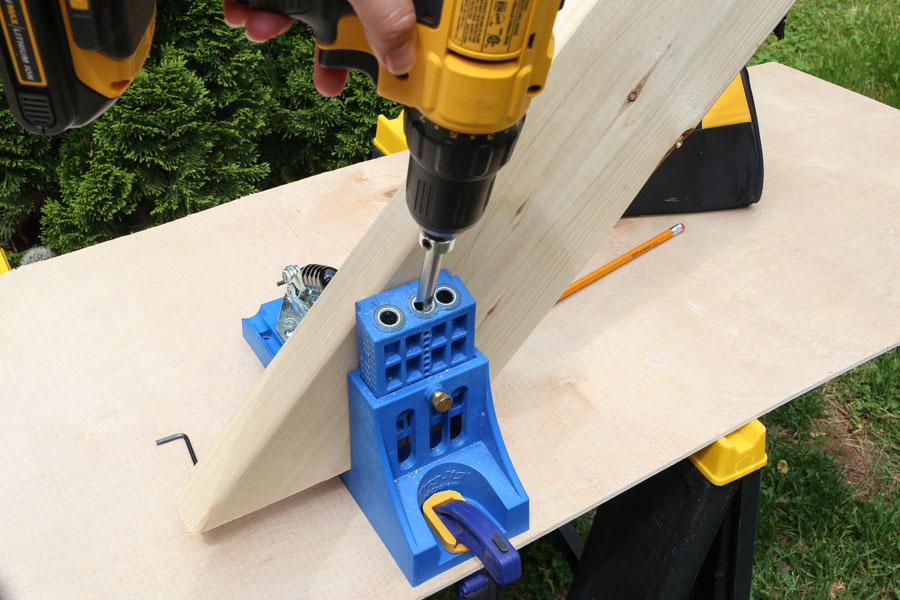
3. Drill Pocket Holes into Wood using the Kreg Jig
Clamp your Kreg Jig to your work surface.
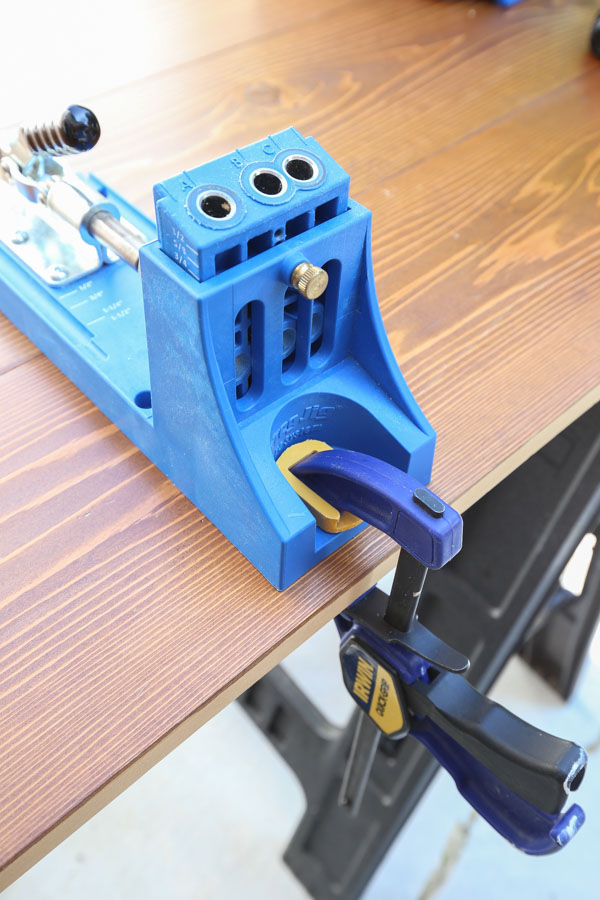
Then, insert your wood into the Kreg Jig and line up the pocket hole pencil marks with the “A” and “C” lines on the Kreg Jig. If you didn’t mark lines, then just line up the wood so it’s centered.
📩 Want to Save This?

Use the clamp on the Kreg Jig to clamp the wood into place. If it’s not secure enough, release the clamp, adjust the lock nut on the clamp to make it tighter, and then clamp it in place again.
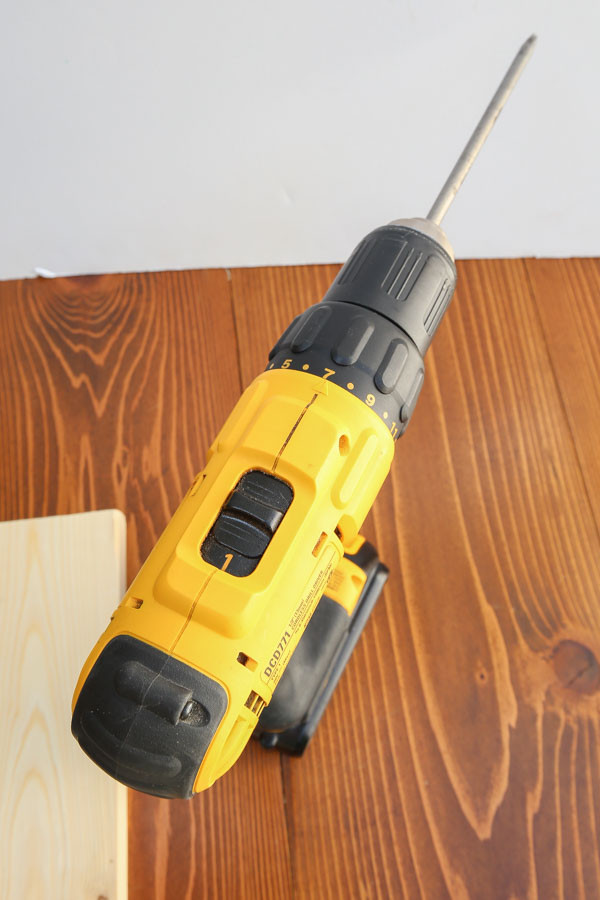
Go ahead and drill the pocket holes! Tip: It helps with drilling if your drill settings are set to drill and a higher power setting (#2 gear on my drill). Also, drill all the way down until the depth collar on the drill bit hits the top of the drill guide.
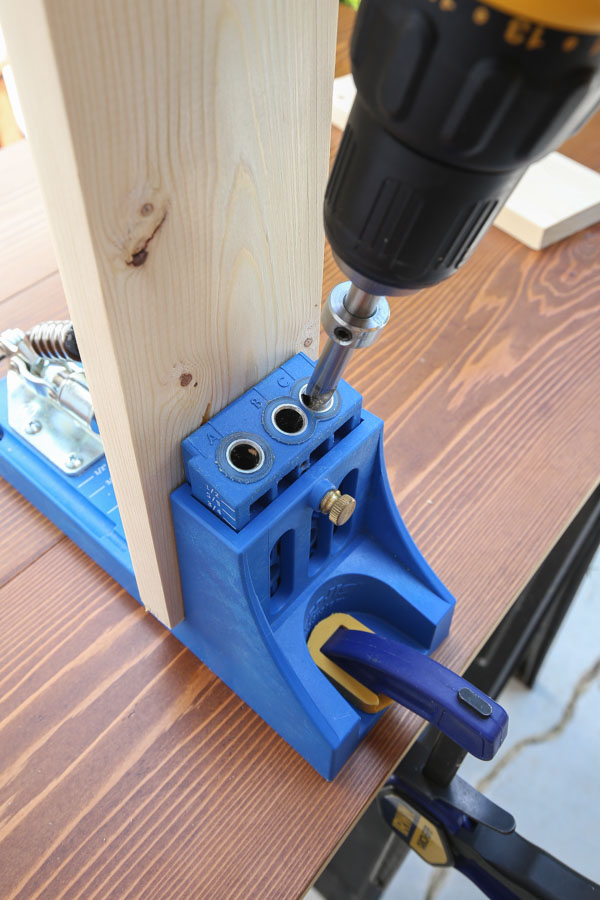
Remove the wood from the Kreg Jig. Now you have two pocket holes!
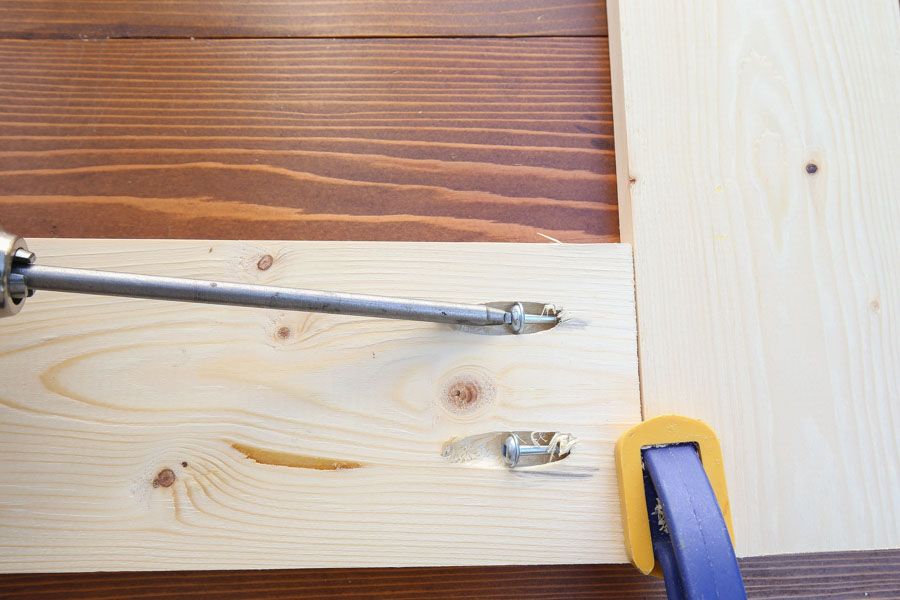
4. Join Wood Together with Kreg Screws
Change your drill bit out to the square tip end drill bit that was included with your Kreg Jig. Adjust your drill settings back to normal (#1 gear setting on my drill) and a medium power.
Then, join your wood together with the appropriate size Kreg screw. For 3/4″ thick wood, 1 1/4″ screws should be used. Here is a Kreg screw chart guide from Kreg Jig showing what size screw should be used with different wood thickness sizes. Also, it helps to clamp your wood down to your work surface when drilling.
And that’s it, you’ve now joined two pieces of wood together!
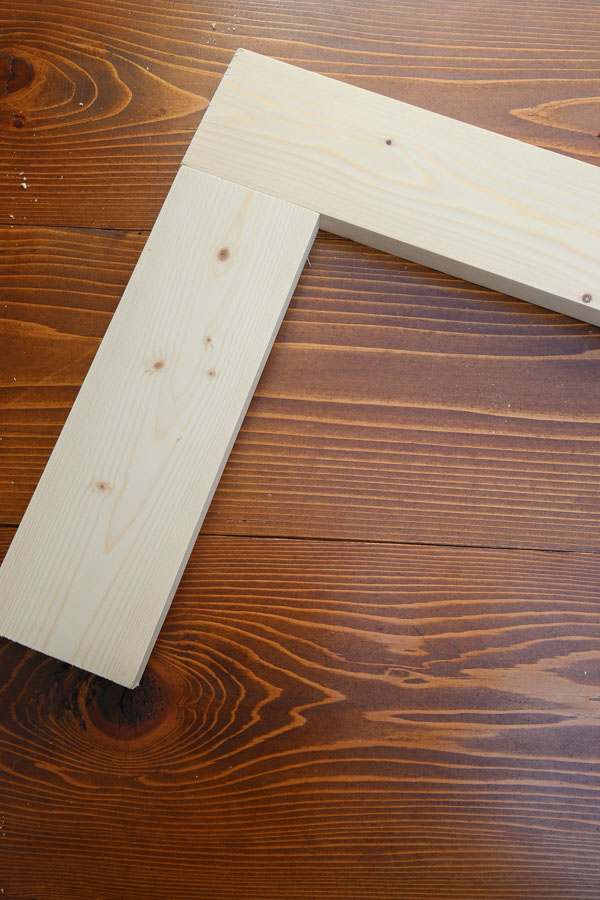
I hope this how to use a Kreg Jig photo and video tutorial has been helpful! Once you get the hang of using a Kreg Jig, there are so many amazing DIY furniture projects you can make! I’ve included some easy projects that use a Kreg Jig in my beginner woodworking projects list!
Check out the other posts in the Intro to Woodworking Series:
- How I learned Woodworking
- Woodworking for Beginners: 6 Easy Tips to Get Started
- Lumber Size Guide with Free Printable
- 5 Essential Woodworking Tools for Beginners
- How to Read a Tape Measure the Easy Way (& Free Printable)
- Beginner Woodworking Projects
Follow along on Instagram and Facebook for my latest projects, fun updates, and sneak peeks!
Joseph C Fleig
Wednesday 16th of July 2025
I am building two of the DIY nightstand builds, for plans that I purchased from you. In step 2 I was able to drill the pocket homes into each end of the 2x13" pieces, but cannot figure of the kreg jig setup to drill the holes that will eventually be used to fasten the top. If I set the bit for 3/4" it only touches the surface of the wood, assuming the 13" piece is laid flat with the existing pocket holes facing up. Can you help me please?
Angela Marie Made
Tuesday 22nd of July 2025
To make this step easier, you can just attach the top with wood glue and a few brad nails!
Doyle
Saturday 24th of September 2022
DO have pocket hole layout for your toy box?
Angela Marie Made
Monday 26th of September 2022
Yes, I have printable build plans available! https://shopangelamariemade.myshopify.com/collections/build-plans/products/diy-toy-box-build-plans
Sara
Thursday 3rd of October 2019
Thanks for so thoughtfully making this guide to the kreg jig, you've helped me identify and correct two problems I've been having on my picture frame starter project. I sure appreciate your helpful post!
Angela Marie Made
Friday 4th of October 2019
You're welcome Sara! So glad to hear it was helpful!
kallie
Wednesday 17th of October 2018
OMG I love this! go girl! I love doing my own things! im making my floating shelf right now! (with your help) but do you think you will go big? like a Pergola? I would LOVE LOVE LOVE to see that!!!!
Angela Marie Made
Thursday 18th of October 2018
Thanks Kallie! That's so exciting you are making the floating shelf! I'd love to build a pergola but I don't have a spot for it right now, hopefully sometime in the future!!