Learn how to install DIY window trim for interiors quickly, easily, and on a budget!
Replacing dated window trim or installing trim if your windows have no trim is a great, easy way to update your space and add instant character.
I have completed several types of interior DIY window trim, including a classic style, DIY craftsman window trim, DIY farmhouse window trim, and window trim between windows.
Today, I want to focus on a very quick and simple trim update, you could even call it minimalist window trim! Although, the style is still classic and similar to my DIY craftsman style window trim from our previous home.
We are completing this trim update on our dining room windows for our dining room makeover that is in progress.
Simple DIY Window Trim
What makes this simple window trim so easy and quick is that you don’t need to replace the window sill and add longer ledges like we did for our craftsman DIY window trim in our past living room.
This eliminates needing to use a jigsaw and the more timely step of cutting out the new window sill. However, you still get that custom, classic style and look with this simple window trim method!
All you need for power tools are a brad nailer (or nail gun) and a miter saw!
Note, this post contains some affiliate links. I may earn a commission if you shop those links (at no cost to you). Thank you for supporting my small business. For more info see my disclosures here.
What kind of wood is used for window trim?
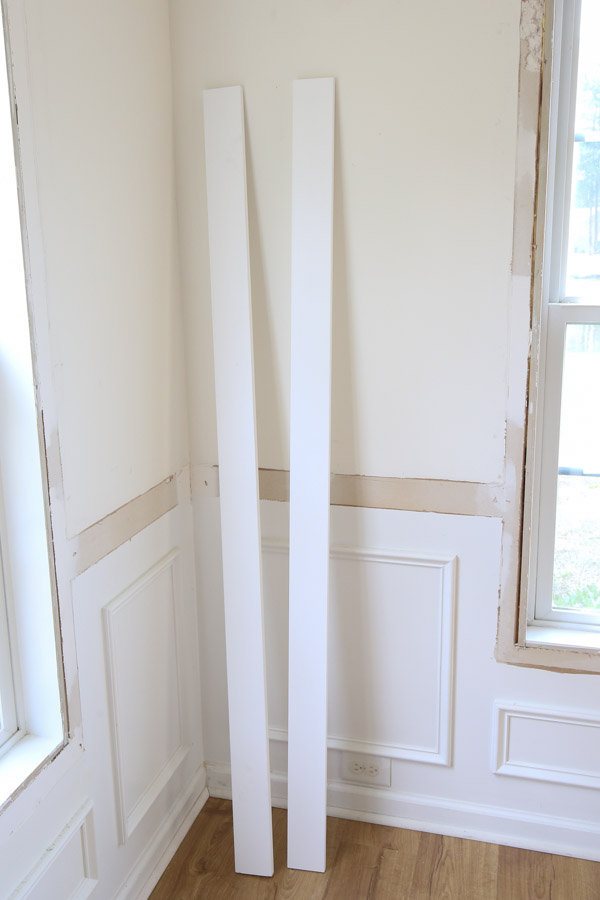
For this simple and quick DIY window trim, you just need 1×4 and 1×2 boards.
I prefer to use these ready to paint primed boards, making this project even faster. These boards are very budget friendly!
However, I have used common pine boards before on both our craftsman DIY window trim and farmhouse style window trim, which are even more affordable. However, they will need to be sanded and primed if you plan to paint the window trim like I did.
You can even use MDF board for more savings, but I prefer to stick with wood!
Some people prefer to use poplar for trim, but poplar is more expensive as it’s a hardwood.
How to Install DIY Window Trim Interior
***The amount of wood you will need depends on the measurements of your window.***
Materials
- 1×4 @ 8ft or 12ft
- 1×2 @ 8ft or 12ft
- 1 1/4″ and 2″ brad nails
- Wood shims (optional)
- Paintable caulk
- Paint
- Wood filler or spackle
- 120 grit sand paper
Tools
- Brad nailer
- Miter saw
- Rubber mallet
- Utility knife
- Pry bar
- Tape Measure
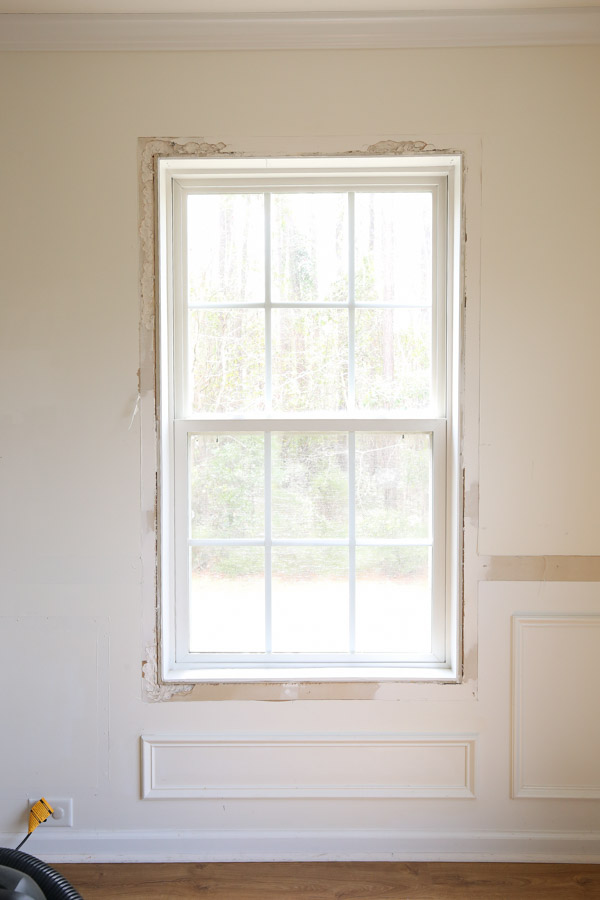
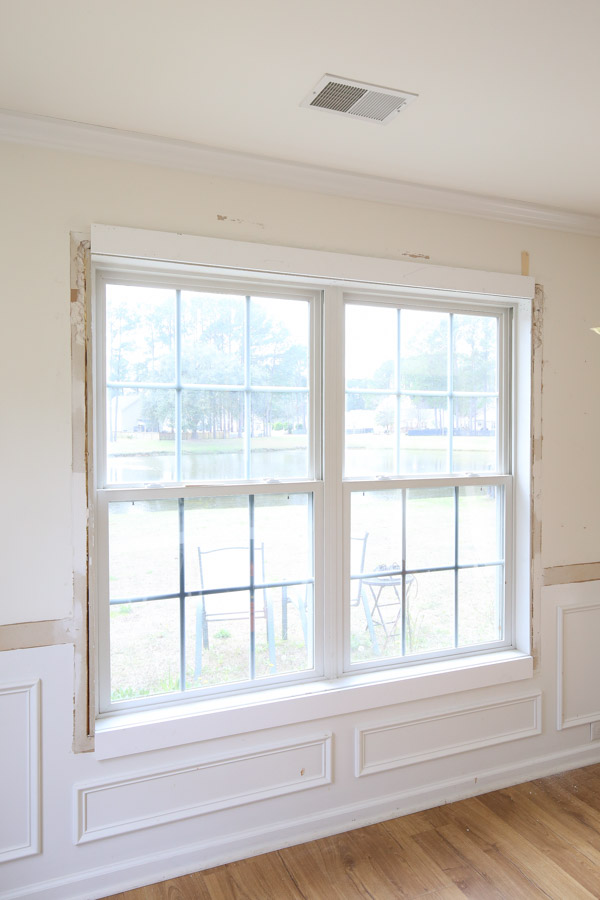
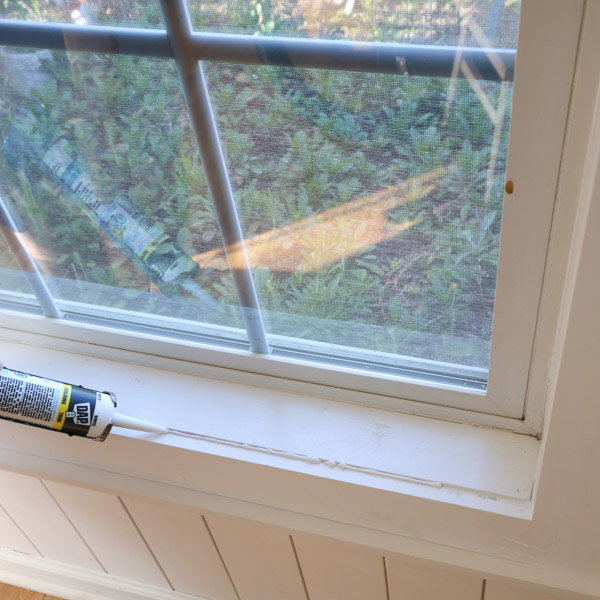
1. Remove the old window trim (if any)
If you have existing window trim, the first step is to remove it. If you don’t have any trim, you can skip this step!
Begin by scoring the caulk line with a utility knife and then use a rubber mallet and pry bar to pry off the trim pieces and any nails.
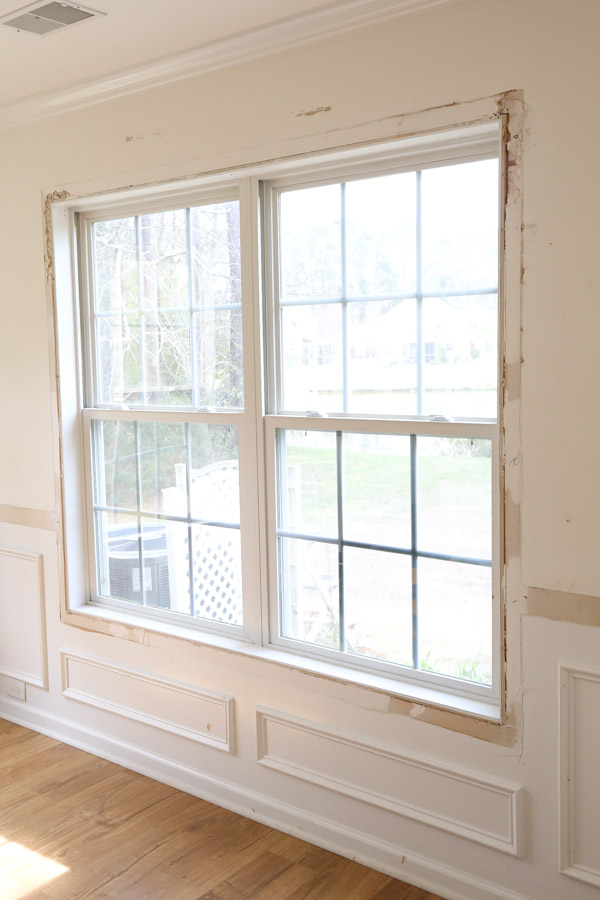
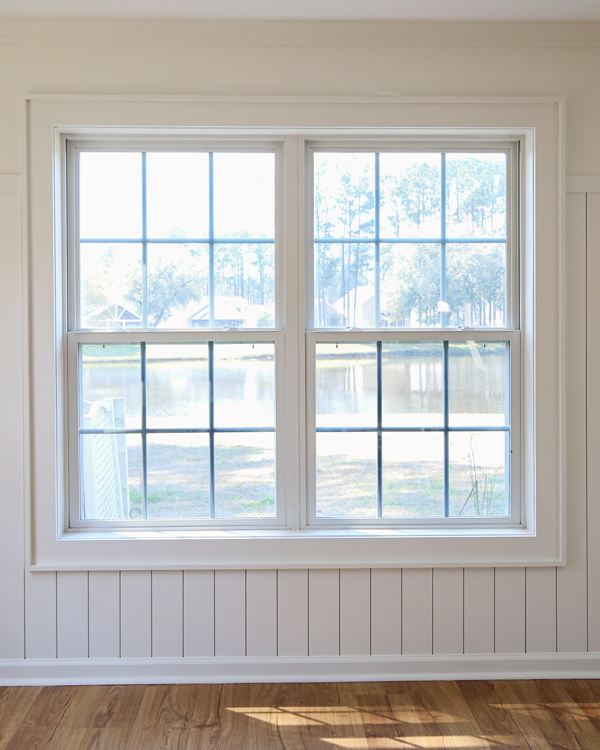
We are also doing this on our other window too in this room!
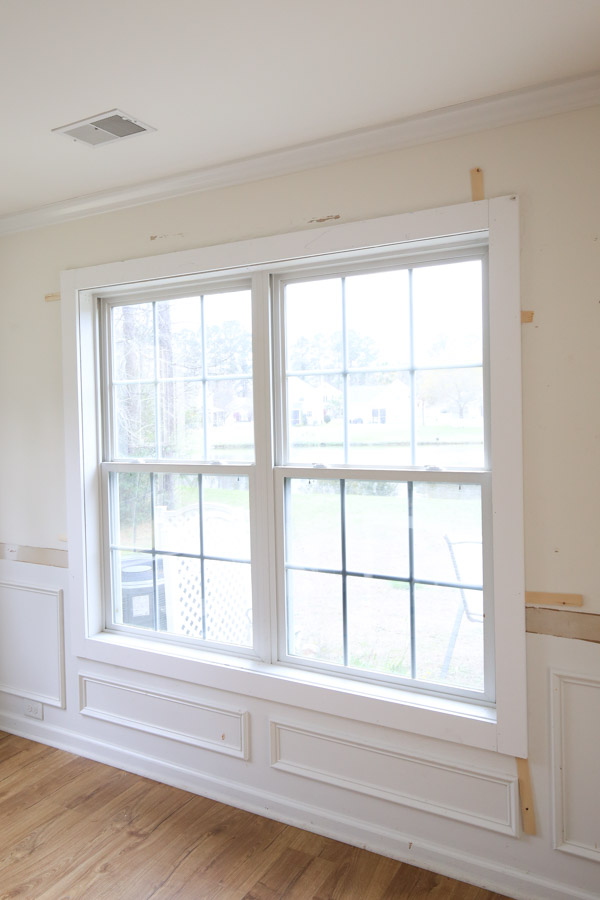
2. Measure, cut to size, and install the top and bottom 1×4 boards
The next step is to measure the width of your window at the top of the window and the bottom of the window. Make sure to measure the exact window box opening width.
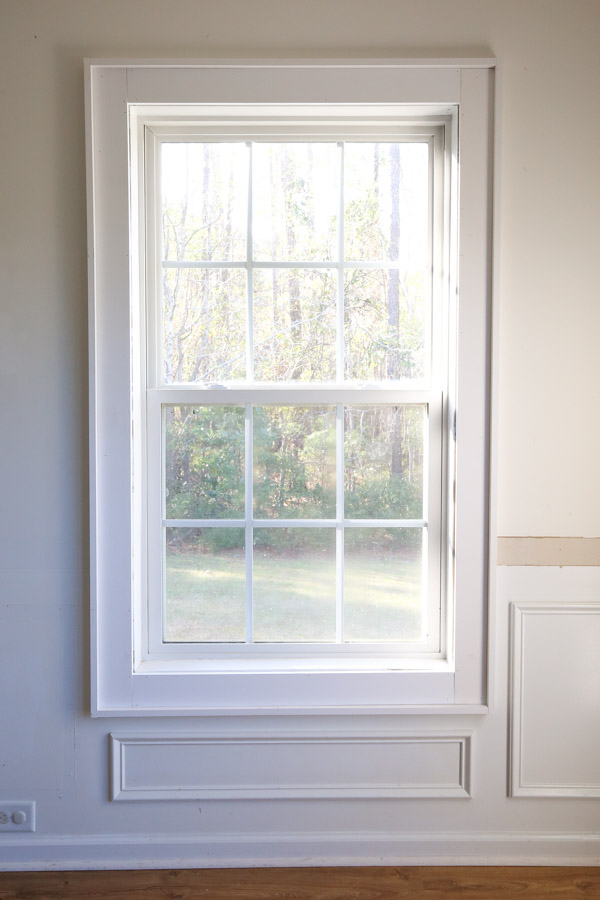
Window Trim Reveal
Once you have this measurement, you can add 1/4″ to this for your top and bottom 1×4 cut measurements. This will allow for an 1/8″ reveal on the left and right sides.
This step is optional, but we chose to do reveal lines as it gives a more professional final look and it gives a little wiggle room if cuts/measurements aren’t perfect.
A reveal basically means there will be about an 1/8 gap between the window box jamb opening and the trim all the way around the window. It will all get painted the same color at the end!
Cut the 1x4s to size and install the top and bottom 1×4 boards for the DIY window trim
Use a miter saw and cut your 1×4 boards to size.
Use 2″ brad nails and a brad nailer and install the top and bottom 1×4 board window trim. Make sure to leave the 1/8″ reveal between the boards and window box opening when installing.
Make sure to nail into the wood window jamb around the window opening for the best security to the wall. You can also add some nails at an angle through the 1×4 boards into the drywall.
📩 Want to Save This?
4. Measure, cut, and install the 1×4 boards to size for the DIY window trim sides
With the top and bottom boards installed, measure the exact height from the top board to the bottom board to determine the 1×4 measurement for the two sides of the DIY window trim. It should be what the height of the window box opening is plus 7″ for the 1×4 width, plus 1/4″ for the reveal.
Then cut the two 1×4 side boards to this size.

Install both the left side board and the right side board with brad nails.
Wood Shims for DIY window trim (optional)
For our past window trim projects, both the craftsman DIY window trim and farmhouse style window trim, we didn’t need to use wood shims.
But, for this window molding project, our wall was very uneven, causing large gaps when installing the 1×4 trim, so we used a few wood shims to even things out!
This is totally optional, but they are very easy to use.
Just place them where needed and make sure to place a brad nail through the 1×4 and the wood shim. Then you can trim them with a utility knife. We actually used our Dremel tool to cut them.
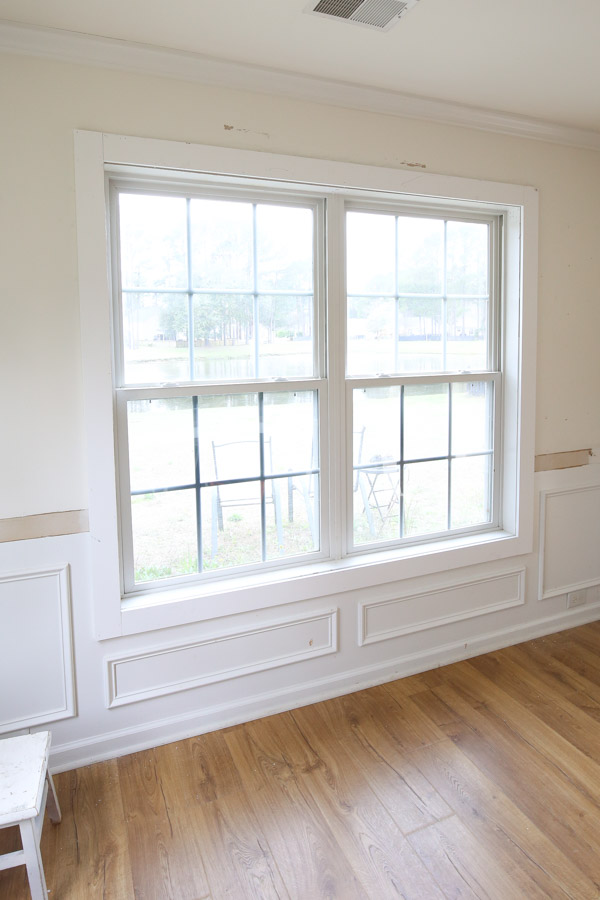
5. Cut and install the 1x2s for the DIY Window Trim
Next, install 1x2s around the 1x4s to finish trimming out the window.
Start with the top and bottom 1×2 boards. Measure and cut the 1×2 boards to size. Then, install them with 1 1/4″ brad nails into the 1x4s.
Then, measure the height for the 1x2s on each side. Cut to size and install the side pieces.
And that’s it for the trim part of this minimalist window trim style.
The 1x2s really give this trim project a finished look!
Here is our other window too!
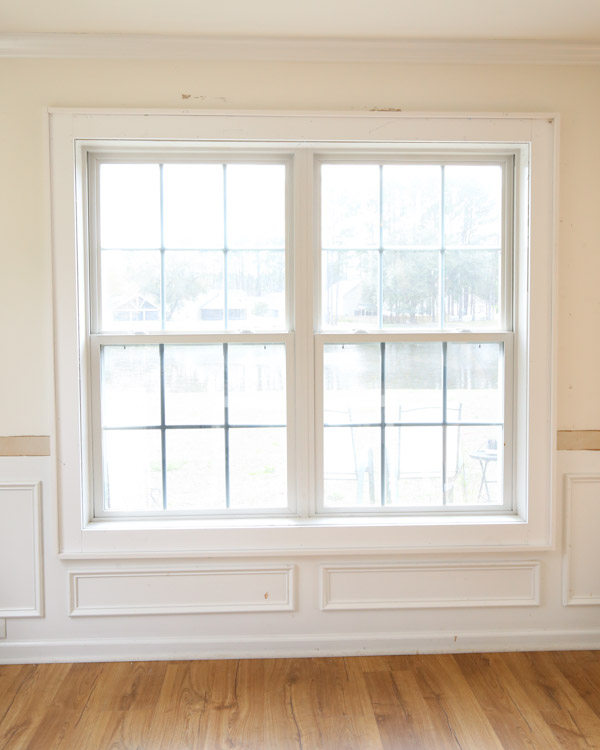
6. Prep for Paint and Paint the DIY Window Trim
Prep for paint by filling in any nail holes with spackle or wood filler. Lightly hand sand them flush with 120 grit sandpaper.
Then, caulk all of the seams and gaps with paintable caulk.
Finish off the DIY window trim with paint!
We are using Swiss Coffee by Benjamin Moore. Usually I like to use satin or semi-gloss for my trim, but to save money we are using the same paint as our shiplap which is eggshell.
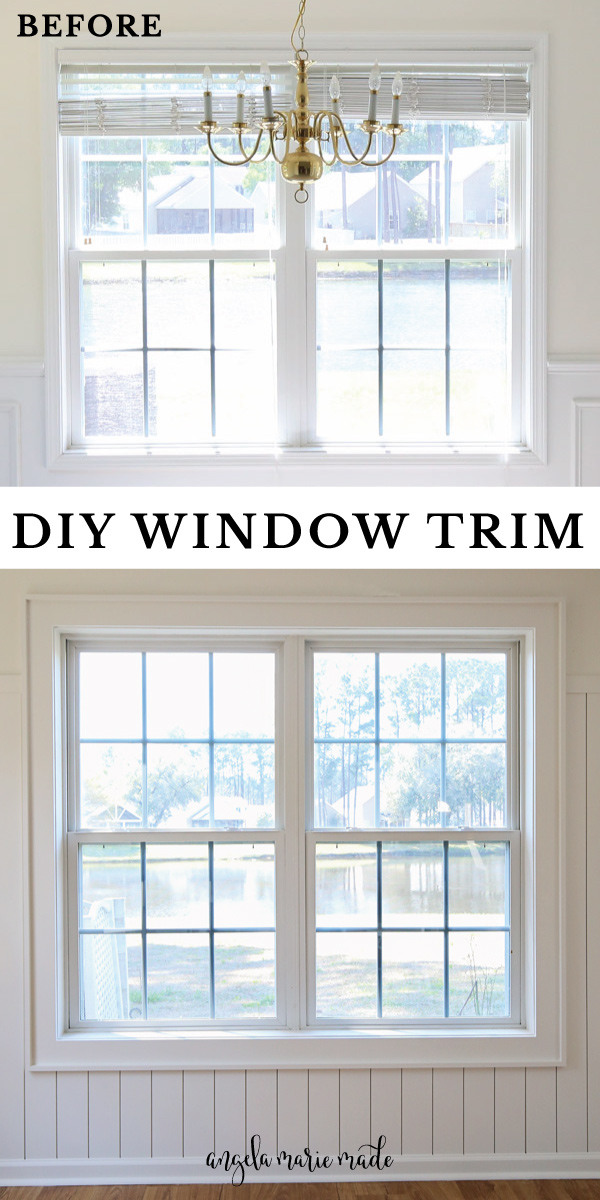
Here is a BEFORE PHOTO and an AFTER photo with a peek of our new shiplap. Remember wallpaper is going along the top!
BEFORE:
AFTER:
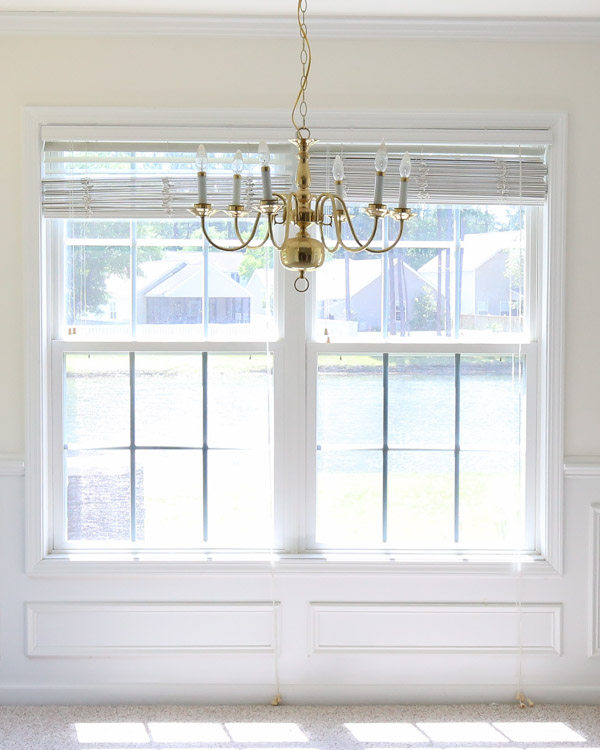
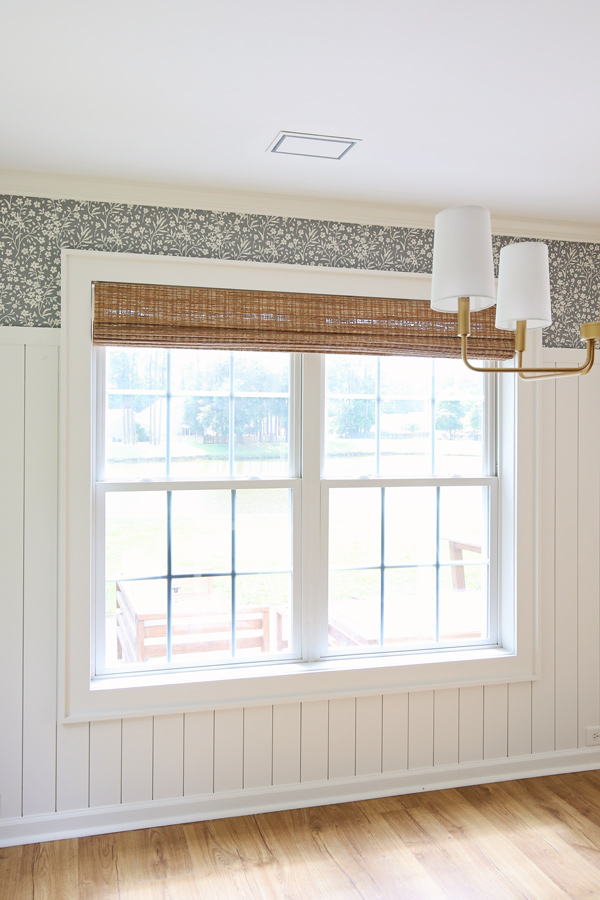
UPDATE! Here is a photo of the window trim with our DIY vertical shiplap, peel and stick wallpaper, and new bamboo window shades installed!
What do you think of this simple, quick, and easy DIY window trim?! It’s one of my favorite interior trim projects to do!
Make sure to check out our other DIY window trim projects for more trim styles including, DIY craftsman window trim, DIY farmhouse window trim, and window trim between windows.
And follow along to see the rest of our dining room makeover transformation!
Follow along for my latest projects and sneak peaks on Instagram, YouTube, and Pinterest!
Jenna W
Friday 7th of November 2025
I love that I found this tutorial! I have been struggling trying to figure out new trim.Im still a bit stuck on what to do with the door trim in these rooms. What does your door trim look like?
Angela Marie Made
Wednesday 12th of November 2025
I'm so glad it was helpful! You could do the same method for door trim. For our door trim, I updated with a wider casing where I had the space. I used this casing from Lowe's: https://shoplowes.me/4gTFzzo
Dayna
Monday 6th of October 2025
Hi! Might be a little late for a question on this post but, did you do the same thing to the door trim for this room? Any suggestions for matching this trim to the baseboards? Thanks!
Angela Marie Made
Wednesday 12th of November 2025
You can do the same method for the door trim! We don't have doors near this window, but in other rooms we have used this casing from Lowe's: https://shoplowes.me/4gTFzzo
Amanda J.
Monday 11th of November 2024
I just wanted to say thank you for posting this tutorial! I have never tackled window trim before and I was able to do 3 windows in my boys new room, all by myself!!! I just absolutely love the style, it was just what we needed.
Angela Marie Made
Tuesday 12th of November 2024
You're welcome! I am so happy to hear that!!
Ann
Wednesday 2nd of October 2024
What do you recommend for baseboard with a window trim look like that?