Adding DIY window trim to windows in a room is one of the most easiest, fastest, and affordable ways to add beautiful character to a room.
I’m super excited to show you how to trim a window with a beautiful, classic style trim!
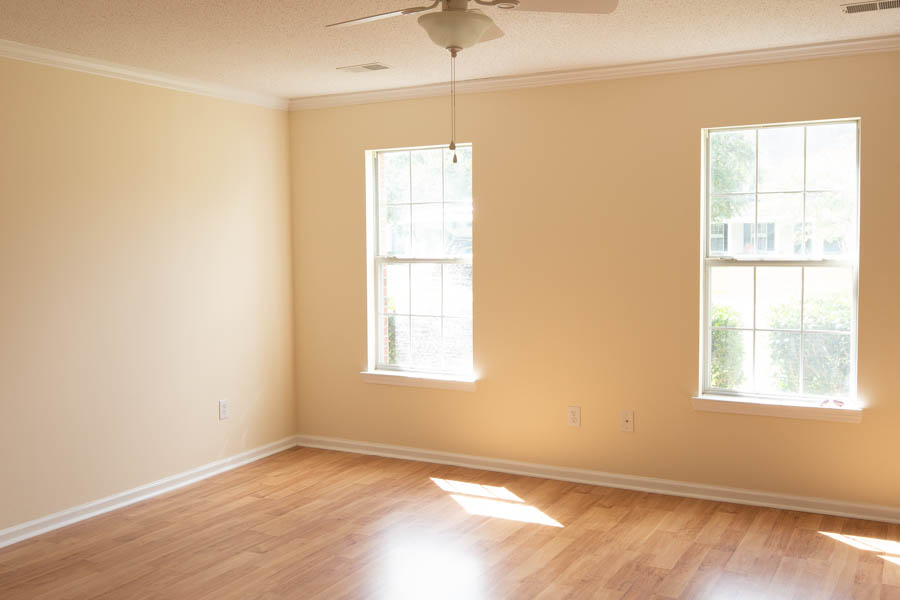
We’ve been working on transforming our living room into a cozy, stylish space that we love. Windows can really be a great architectural focal point in a room, so they are worth updating!

The original builder grade windows in our living room were significantly lacking any kind of wow factor or character:
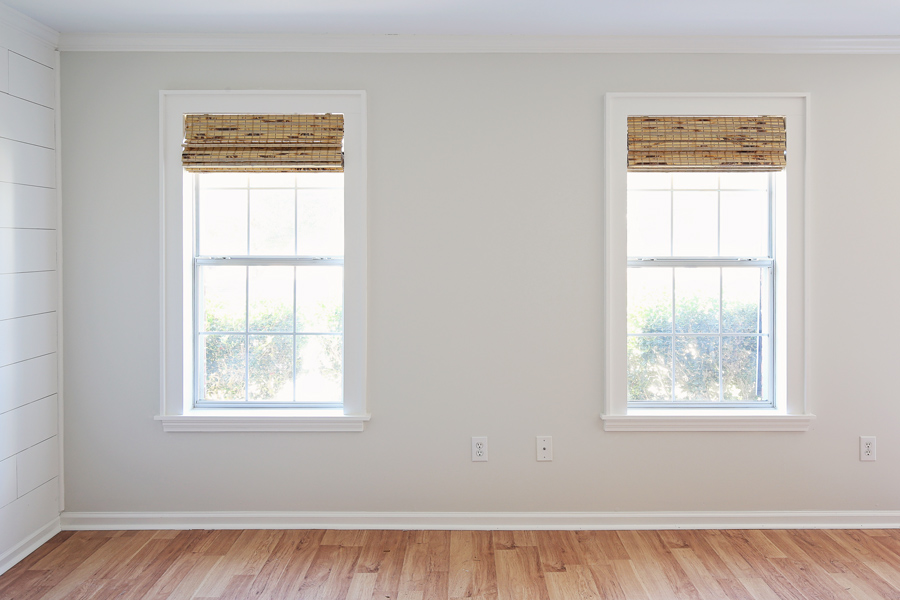
But now, they look awesome!
This isn’t the first time we’ve completed DIY window trim. In our last house, I showed how we updated window trim by removing the old trim and adding a simple farmhouse style window trim. Although, I really like that style, this time around I wanted to do a super timeless, character filled window trim style. And I LOVE it!!!
Another big difference between our window trim in this tutorial and my previous tutorial on installing window trim is that this time around we totally replaced the window sill with a custom cut window sill. Check out the tutorial and video below for details!
Also, two other types of window trim we have installed are DIY window trim between windows which is a great detail to add for two or three windows next to each other, as well as this simple and quick DIY window trim on a budget!
Note, this post contains some affiliate links. For more info see my disclosures here.
DIY Window Trim
Materials:
- (4) 1x4s @ 8ft and (1) 1×4 @ 6ft***
- (4) 1x2s @ 8ft and (1) 1×2 @ 6ft
- (1) 1×6 @ 8ft (for window sills)
- (1) 1×3 @ 8ft (for bottom of window trim)
- (1) stop window molding @ 8ft (for bottom of window trim)
- 2″ brad nails
- Spackle
- Primer
- Paintable Caulk
- Paint (I used Simply White by Benjamin Moore in Semi-Gloss)
Tools:
- Utility Knife
- Wonderbar Prybar
- Hammer
- Miter saw
- Dremel tool or Jig Saw
- Chisel (optional)
- Brad nailer
- Tape Measure
- Paint Brush and Rollers
Note: The bamboo blinds in these photos can be found HERE!
***Note, the amount of wood you will need depends on the measurements of your window. I’ve listed the amount of wood that I used for my two 60″ tall x 31″ wide windows. Make sure to pick straight boards!
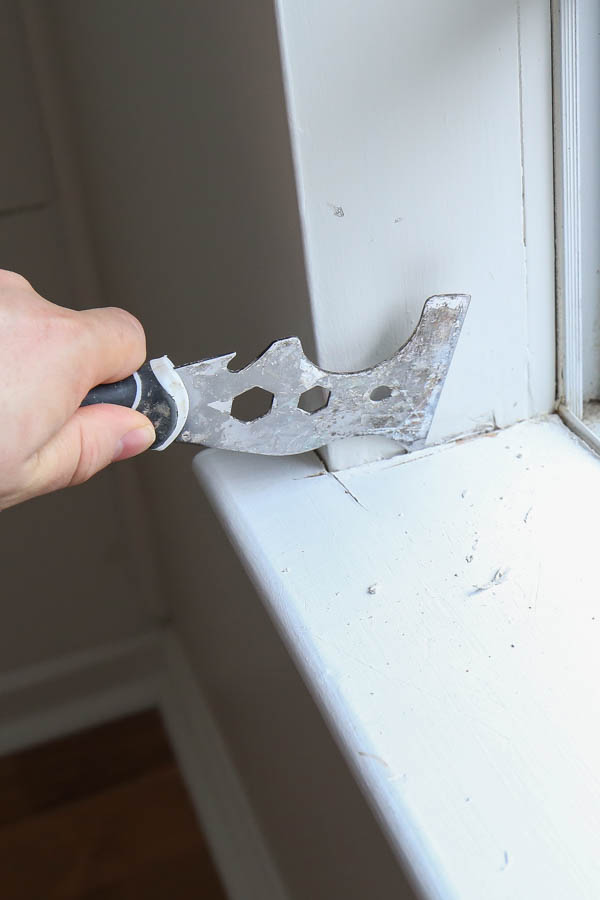
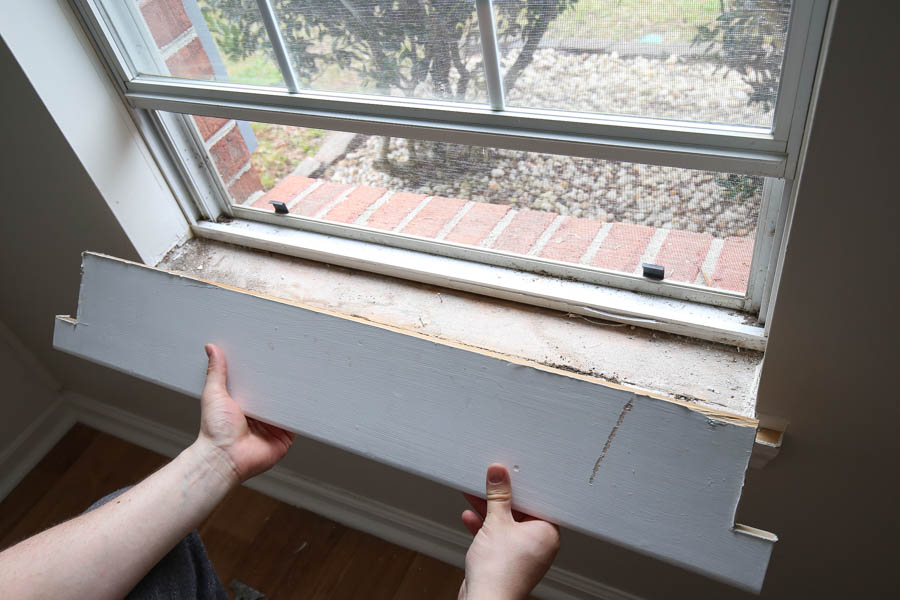
1. Remove old window sill and trim
Since my original window sill was really short on the edges and not wide enough for side window trim, I had to remove it.
Remove the old window sill and trim by first scoring the caulk line edges with a utility knife or similar tool.
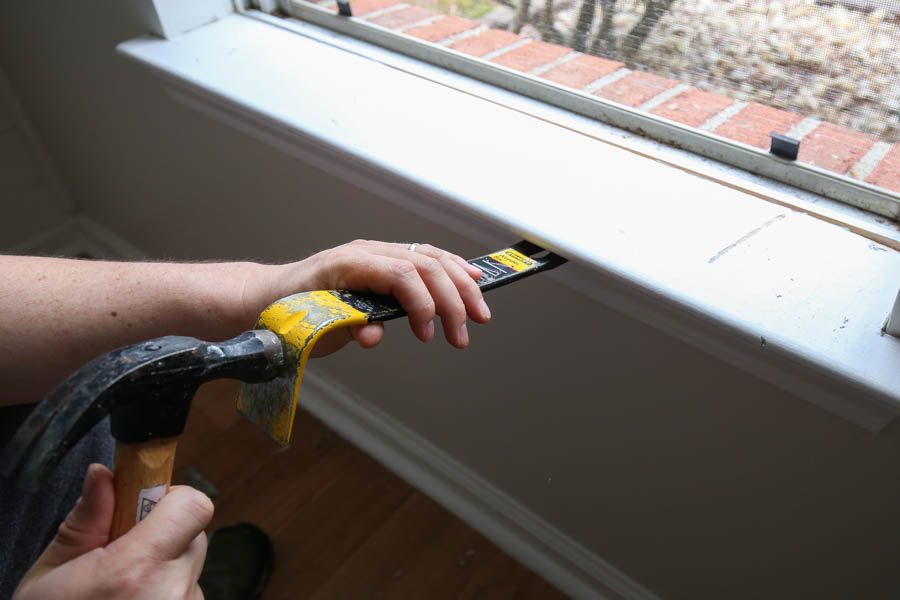
Then, pry it up and off with a prybar and hammer.
If you don’t want to replace your window sill, check out my simple and quick DIY window trim for a similar style that skips this step!
2. Create new window sill
For the new window sill, I used a 1×6 board which was deep enough for my window and extended out about 2 1/4″ past my window wall frame. Make sure to measure your current window sill depth to ensure a 1×6 will fit as well.
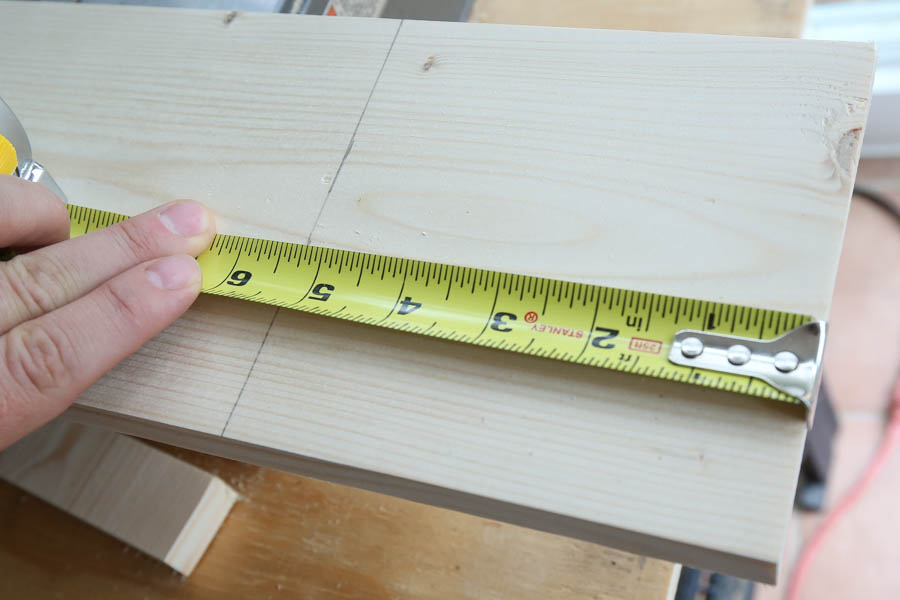
Measure the width of your window opening and add 10 1/2″ as we need 5 1/4″ overhang on each side. Using a miter saw, cut your 1×6 board to size for your new window sill. My window opening measures 31″ so I cut my 1×6 board to 41 1/2″ long.
Next, to create the L shape cut out for the window sill, mark 5 1/4″ in from each side of the board.
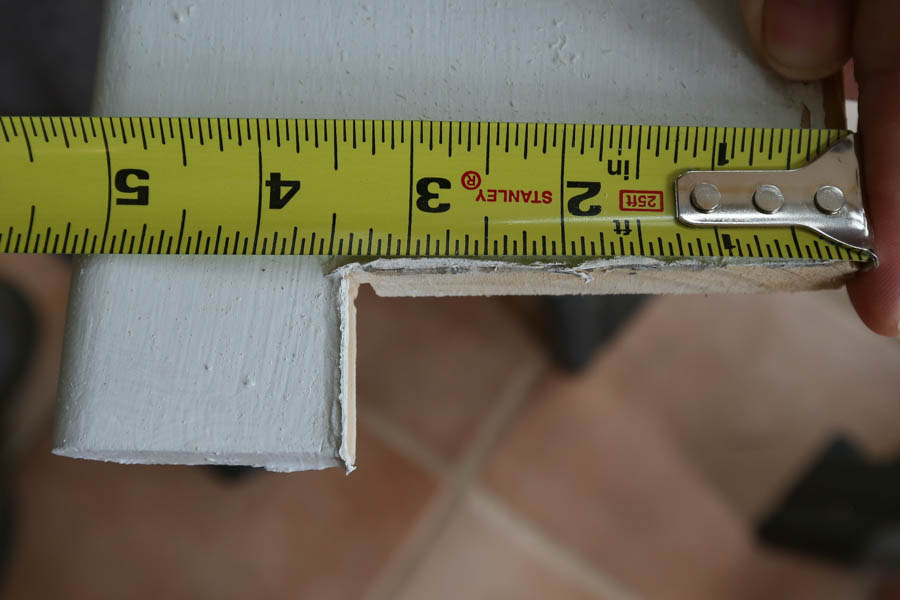
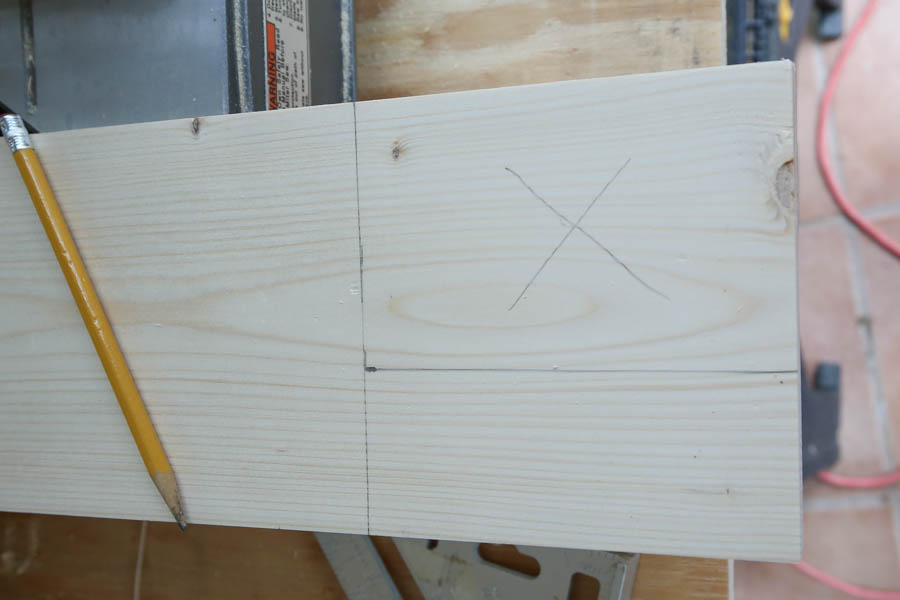
Then, measure the depth of the old window sill cut and mark that measurement perpendicular to the first mark to create the L shape cut out marks. Make sure to measure the depth on each side of the old window sill as it may vary from one side to the other.
📩 Want to Save This?
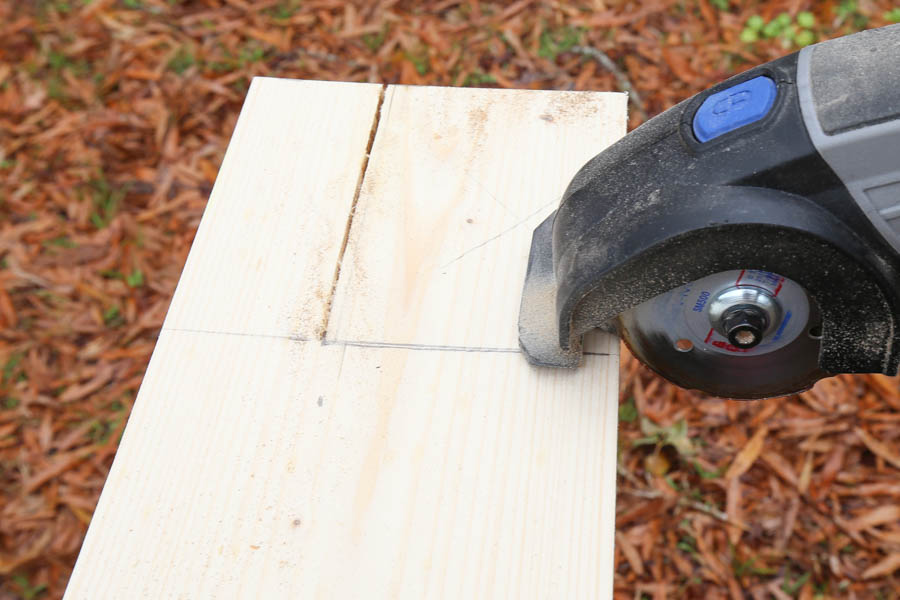
Use a dremel tool or jig saw and cut out the L shape out of the wood to create the two window sill edges.
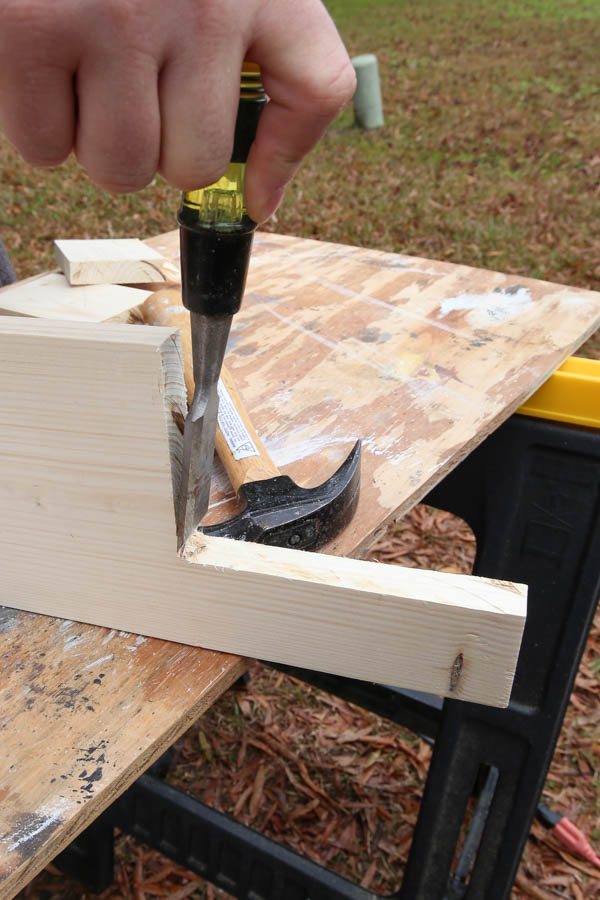
There was still some wood in the corner of our cut out which we used a chisel to remove.
3. Install the new window sill
Put the new window sill in place and make sure it fits. It’s ok if there is a little bit of a gap between the wood and wall as the small gaps will be caulked.

Secure the window sill with 2″ brad nails and a brad nailer.
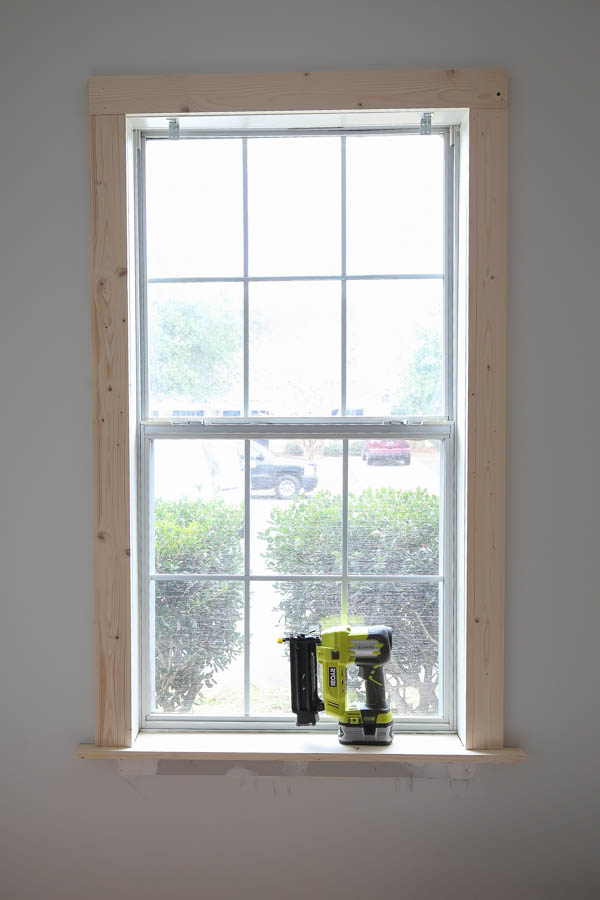
4. Add the 1×4 DIY window trim to the window sides and top
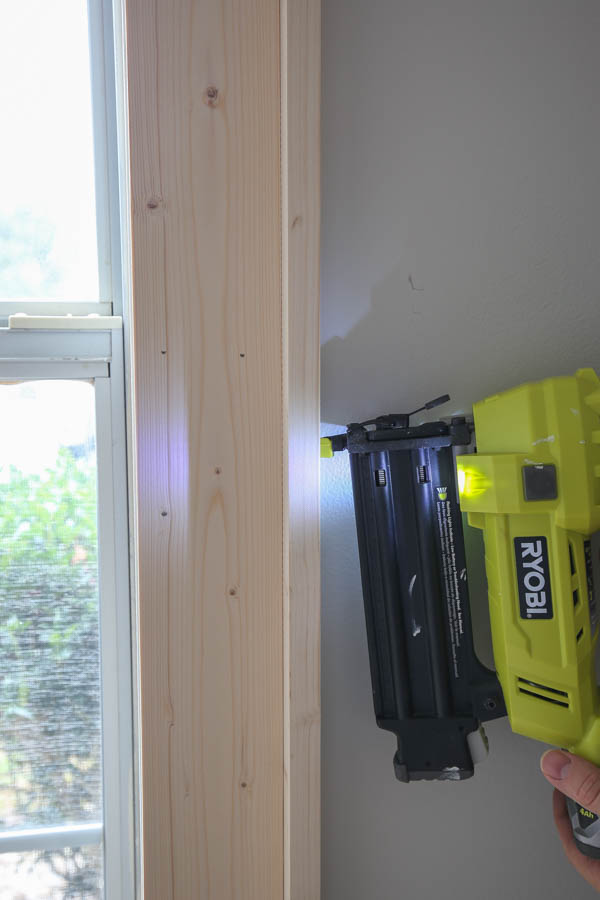
Measure the length of the window frame opening on both sides. Cut the 1x4s to size for these side pieces. Then, install them on the left and right side of the window with brad nails.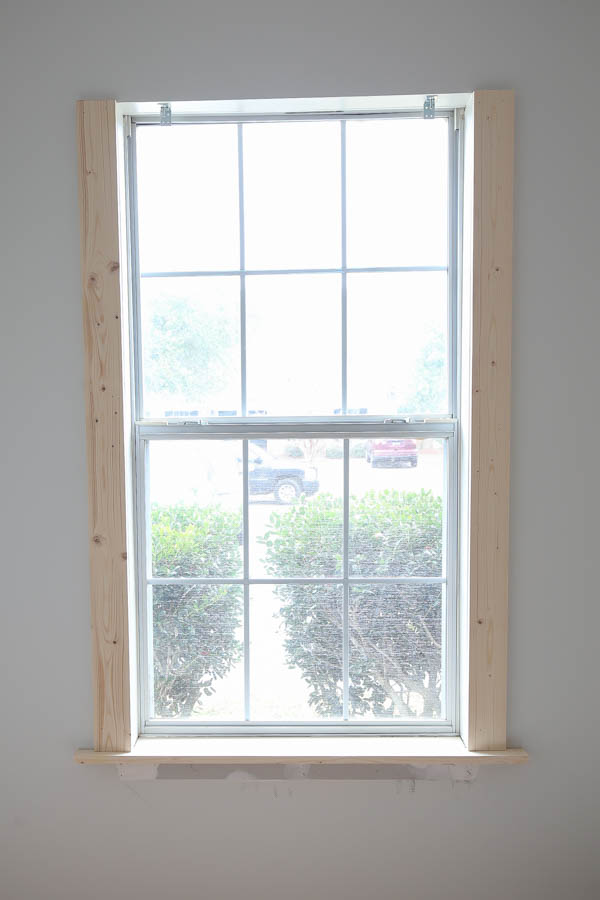
Now measure the distance from the end of the left 1×4 to the end of the right 1×4 and cut another 1×4 piece to this size to create the top window trim. Secure in place with brad nails. Note, we had to use a screw into the stud on the right side of the top board since the wall area was uneven.
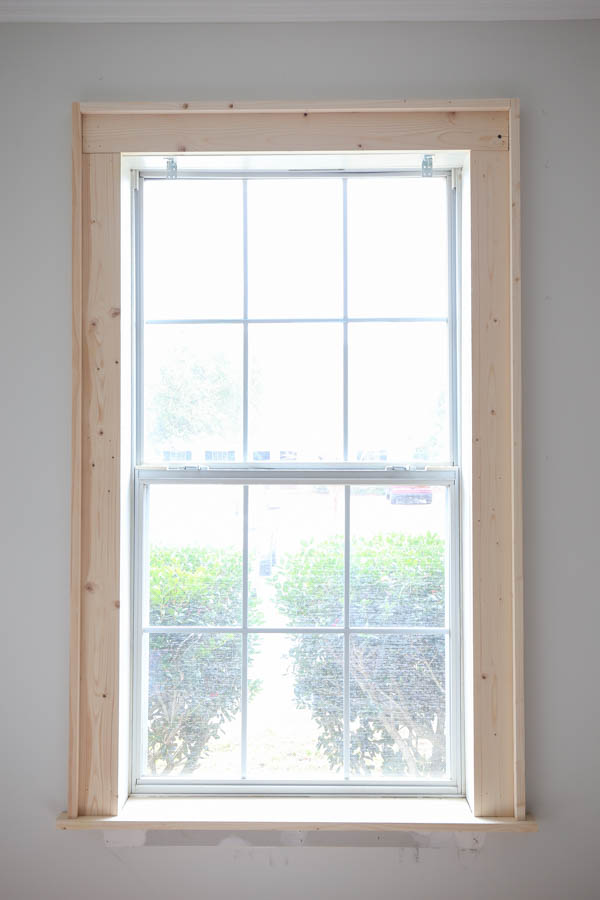
5. Add the 1×2 trim to the window sides and top
Repeat the steps in step 4 above, except make your measurements for around the 1x4s. When installing the 1x2s next to the 1x4s, turn the 1×2 pieces on their sides and secure the brad nails through them into the 1x4s instead of the wall.
This is the same method I used for our simple and quick DIY window trim too, it’s such a classic look!
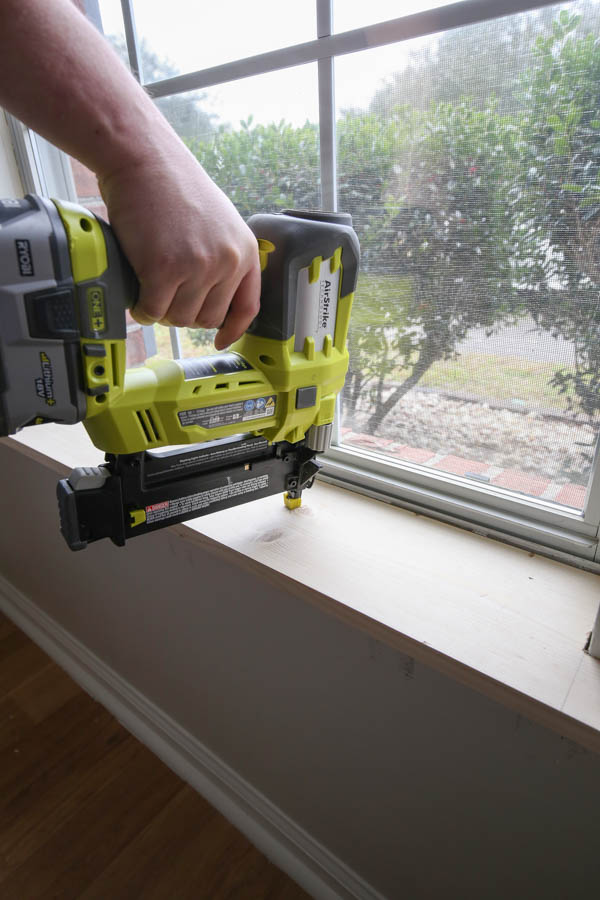
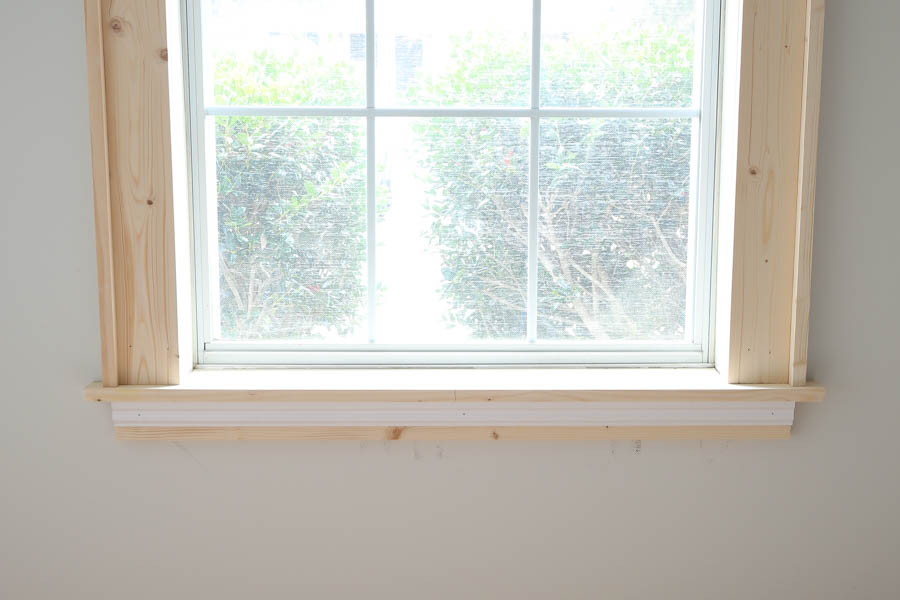
6. Add the base window trim pieces
Measure the distance from the left 1×2 piece edge to the right 1×2 edge. Cut the 1×3 and stop window molding piece to this size. Install the 1×3 first, centered under the window sill, then install the stop window molding piece on top.
Note, we cut our base pieces a little too short as you can see in the photo below, but we did it correctly for our 2nd window.
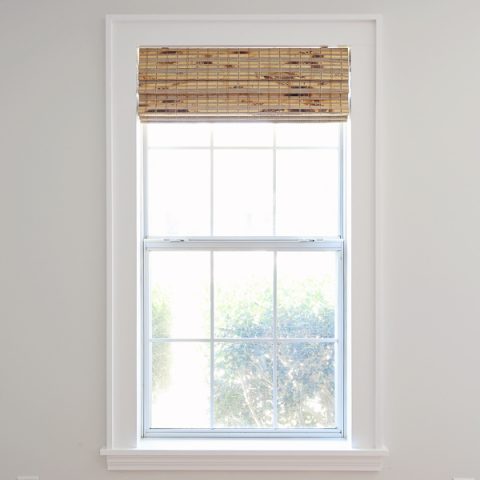
Now the window is fully trimmed out and should look similar to this:

7. Caulk, fill holes, prime, and paint!
Alrighty, last step! Caulk all the gaps and seams. Fill the nail holes (and any wood knot holes) with a lightweight spackle, allow it to dry, then lightly sand those fillings so they are smooth.
These are the same finish steps we used for our other style of DIY window trim and when we added trim between windows on our three window makeover.
Next, prime the wood. Add a second coat of primer over the wood knots. Finally, add 2-3 coats of paint and you are all finished!!!
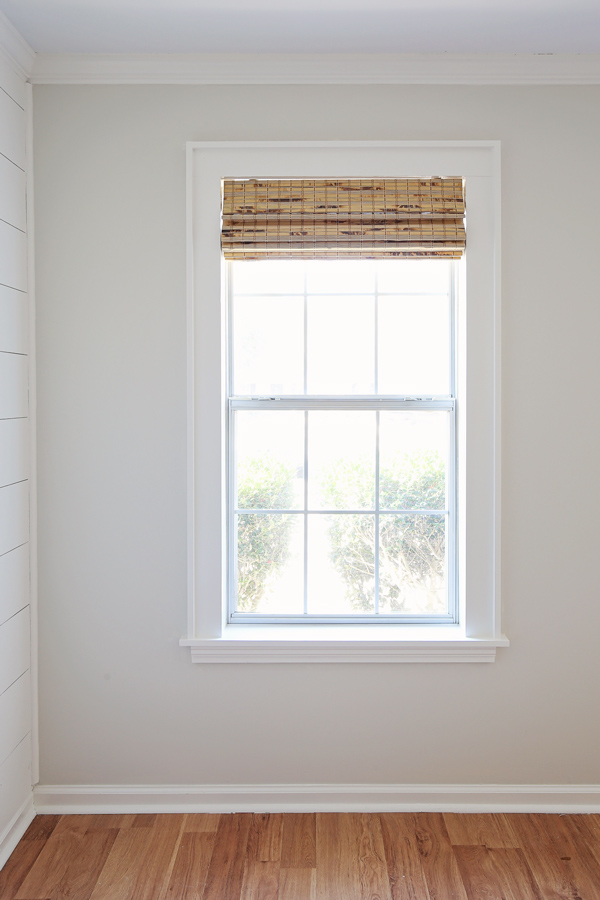
How awesome does this DIY window trim look?! I absolutely love it, it’s so classic and has totally transformed our living room wall, giving the space so much character and coziness! I just sit on the couch and stare at it ha!
I hope this how to trim a window tutorial was easy to follow and helps you with your own window transformation! I’d love to see photos of your project! Feel free to share with me on Instagram and Facebook!
DIY Window Trim
How to trim a window. This DIY window trim is one of the easiest, fastest, and affordable ways to add character to a room. It's perfect for adding craftsman style window trim to your windows
Materials
- 1x4s @ 8ft
- 1x2s @ 8ft
- 1×6 (for window sill)
- 1×3 (for bottom of window trim)
- Stop window molding (for bottom of window trim)
- 2″ brad nails
- Spackle
- Primer
- Paintable Caulk
- Paint
Tools
- Utility Knife
- Prybar
- Hammer
- Miter saw
- Dremel tool or Jig Saw
- Chisel (optional)
- Brad nailer
- Tape Measure
- Paint Brush and Rollers
Instructions
- Remove old window sill and trim using utility knife to score edges, followed by a prybar and hammer.
- Create a new window sill with a 1x6 board cut with a miter saw and with 10.5" more length than the old window sill. Use a Dremel or Jig saw to to cut the window sill edges in L shape using old sill as a guide. Use a chisel to remove extra wood.
- Install the new window sill with 2"brad nails and brad nailer.
- Cut the 1x4s to size and add the 1×4 window trim to the window sides and top using a brad nailer.
- Add the 1x2s to the sides and top of the 1x4 trim pieces with brad nails and a brad nailer. Make sure to turn the 1×2 pieces on their sides and secure the brad nails through them into the 1x4s instead of the wall.
- Add the base window trim under the new window sill using a 1x3 and stop window molding piece cut to size. Secure with brad nails.
- Caulk all seams and gaps around the window trim.
- Fill nail holes in with a light spackle.
- Add one coat of primer and then two coats of paint to window trim.
Notes
*The amount of wood you will need depends on the measurements of your window.
Tom
Tuesday 6th of January 2026
Please disreguard my previous message (delete these if you want), I saw your response fro 2021 in which you explain that it's not truly those dimensions. Amd you provided a link to: https://angelamariemade.com/intro-to-woodworking-lumber-size-guide-free-printable/
Tom
Tuesday 6th of January 2026
You window's look great! For your materials (1x4s, 1x2s, 1×6, 1×3) are they true 1" by 4", 1" by 2", and so on? Or are they smaller dimensions?
Daniel
Monday 21st of February 2022
Hello, Does the 1”x3” board sit flat below the stop window molding? Hard to tell from the pic. Thank you. Daniel
Darcy
Friday 5th of January 2024
@Angela Marie Made, I love your blog. I am struggling with my old home as the previous owner replaced the windows with vinyl windows and I have about 3/4 inch to mount blinds which isn't enough for anything I have researched. I prefer not to do top mount. Would this new trim potentially help with my issue or do you have other ideas?
Angela Marie Made
Wednesday 23rd of February 2022
Yes!
Lucy Middleton
Saturday 2nd of October 2021
Hi! Love this style of window trim! I have two questions, first as I was preparing to do this I went to the store and bought pine wood which as labeled 1x3 but in reality it measures 0.75 x 2.5. Is that normal? Also I have windows that are closer together, there’s a 9 in space between them. Should I treat it as one whole window or two individual window? I got stuck there because idk if I have enough room if I made them individual windows with the window sill at the bottom.
Looking forward to hear back! Lucy
Angela Marie Made
Wednesday 6th of October 2021
Thanks for reaching out!! The wood dimensions are the industry standard, I have a blog post that explains it better here: https://angelamariemade.com/intro-to-woodworking-lumber-size-guide-free-printable/. As for the space issue, you may want to see if you can modify the dimensions so that there is more room in between, I don't think it would look right if you treated it all as one but I could be wrong.
Ian
Friday 14th of August 2020
Hey Angela,
I’m going to be doing this on a few windows this weekend as I love the look! Do you know what color gray the walls are in your pictures? I really like the contrast
Angela Marie Made
Friday 14th of August 2020
Thank you, the walls are painted in Classic Grey by Benjamin Moore.