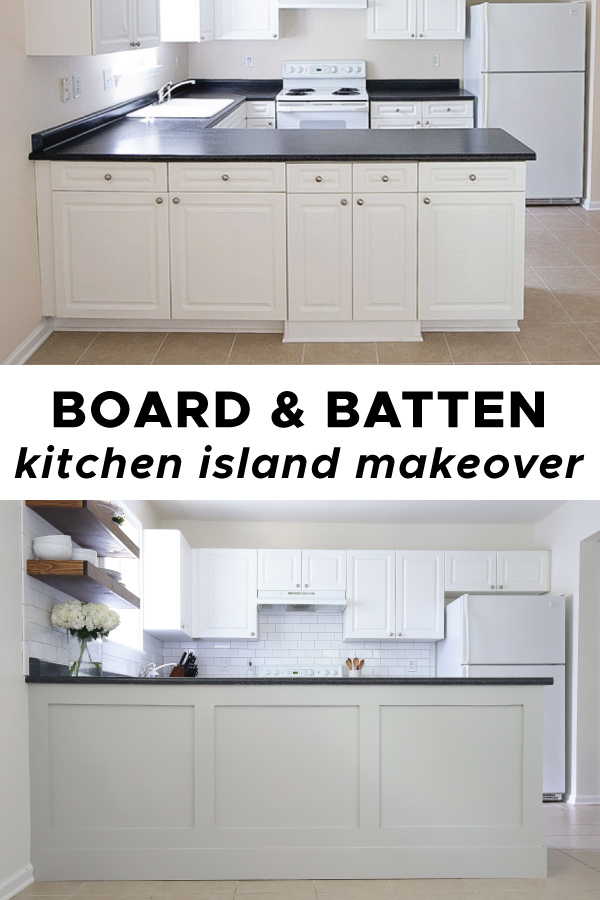
Our DIY board and batten kitchen island makeover is finally finished!
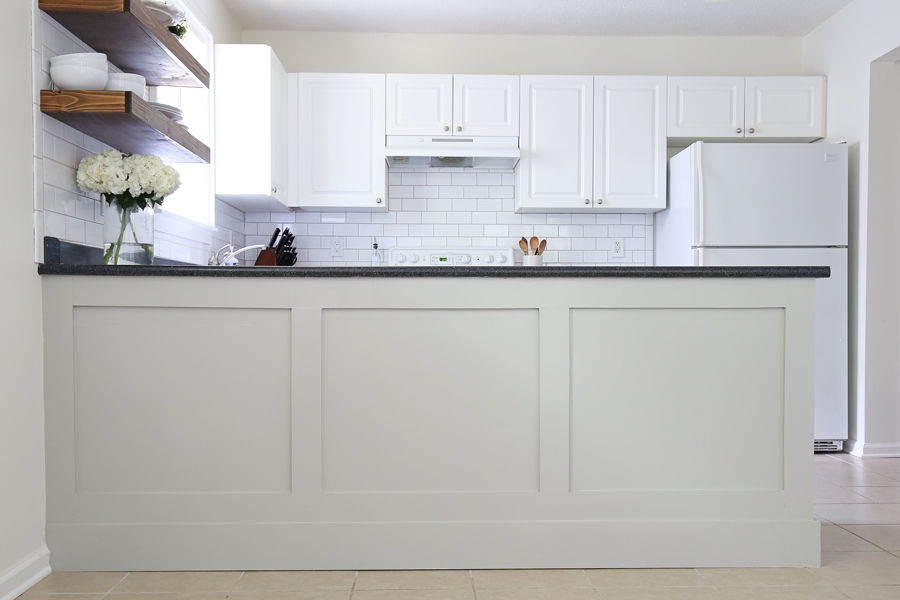
I’m breaking it down step by step how we transformed our outdated kitchen island!
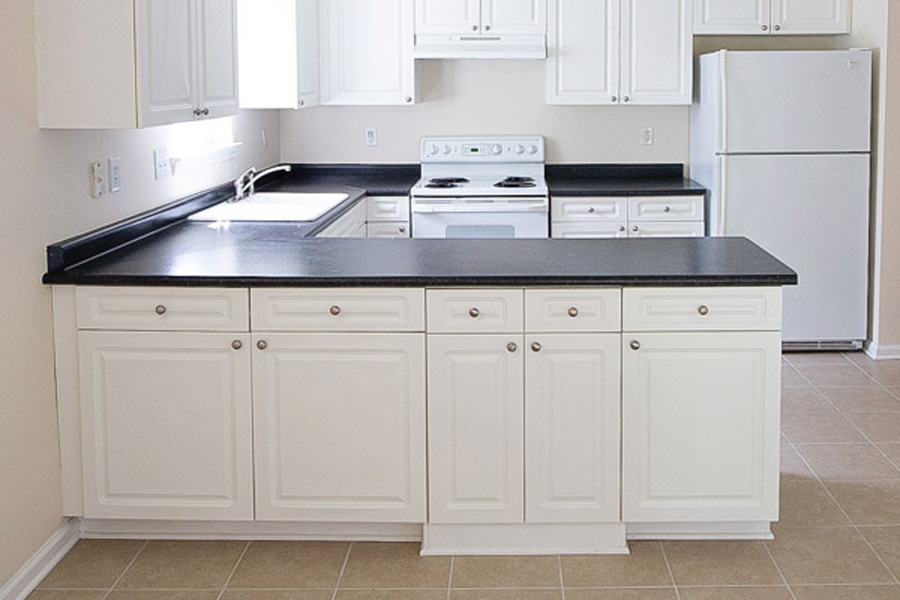
BEFORE PHOTO:
A few months ago, I shared about our budget kitchen makeover plan that we were starting. Well, with all the craziness going on we switched gears and focused on lots of outdoor projects instead. Now we are ready to focus on tackling our kitchen again!
Our kitchen island was what I like to call a mix of overly functional and not functional haha. It had cabinets on both sides which was extra functional, but it just looked funny to me.
And then most of the drawers and the middle cabinets didn’t actually work, so they weren’t functional at all. The whole concept just wasn’t working, so we transformed it and it looks so much better now!
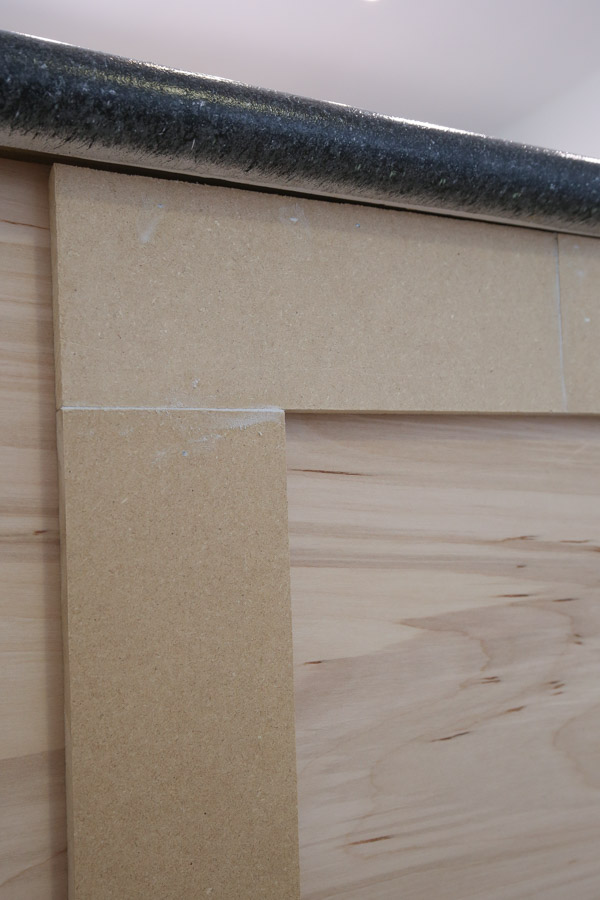
After studying designer kitchen islands on Pinterest that had a board and batten style to them, I knew I wanted to do a double bottom molding at different sizes and depths. And it looked like they all had 1/4″ or 1/2″ board and batten boards, not 3/4″, so I was determined to do the same.
I used 1/2″ MDF cut into strips to get that more professional look and to still keep the project budget friendly. Of course it made the project more complicated than using standard 1x wood (that’s 3/4″) like I did on our DIY easy board and batten wall and DIY board and batten bathroom. I think it was worth the extra effort though!
Note, this post contains some affiliate links. For more info see my disclosures here.
How to install board and batten on a kitchen island:
Materials Needed:
- 1×6 @ 8ft (We used this pre-primed pine board) for the baseboard**
- 1/2″ MDF panels (available in 2×4 ft or 4×8 ft panels)**
- 1/4″ 4 ft x 8 ft plywood
- Scrap 2×4 lumber (if needed)
- 1 1/4″ and 1″brad nails
- Construction adhesive (we used Liquid Nails)
- Paintable Caulk
- Lightweight Spackle
- Paint***
- Paint roller and tray
- Primer
- Painter’s Tape
Tools Needed:
- Miter saw
- Brad nailer
- Circular saw or table saw (optional)
- Level
- Dremel, jigsaw, or wood chisel (optional, only if needed)
- Measuring tape
- Utility Knife
- Prybar and Hammer
**Note: The amount of boards/panels you will need depends on the measurement of your island.
***Note 2: We used the color Mindful Gray by Sherwin Williams in satin and had it matched at our local Benjamin Moore store so we could use their Advance paint line. This is the paint we will be using for painting our kitchen cabinets and it’s great for high traffic areas. It’s what we used for painting our bathroom vanity cabinet.
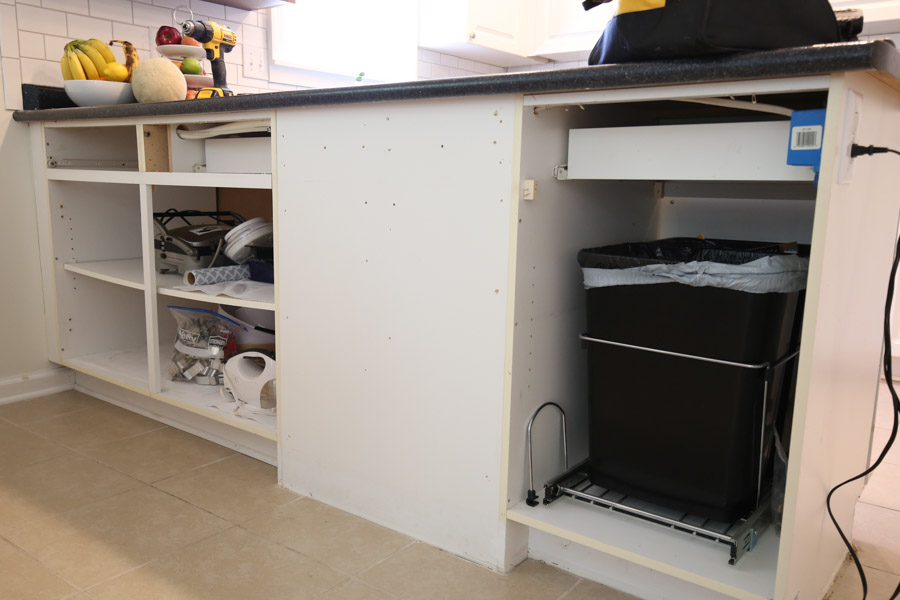
1. Remove existing cabinets or molding from the kitchen island
To remove cabinets, unscrew the hinges from the inside of the cabinets. To remove existing molding, score caulk lines with a utility knife, then use a prybar and hammer to remove them.
Our faux cabinets and drawers were annoying to remove as they were heavily nailed into our island, but I got them off after some hard prybar work!
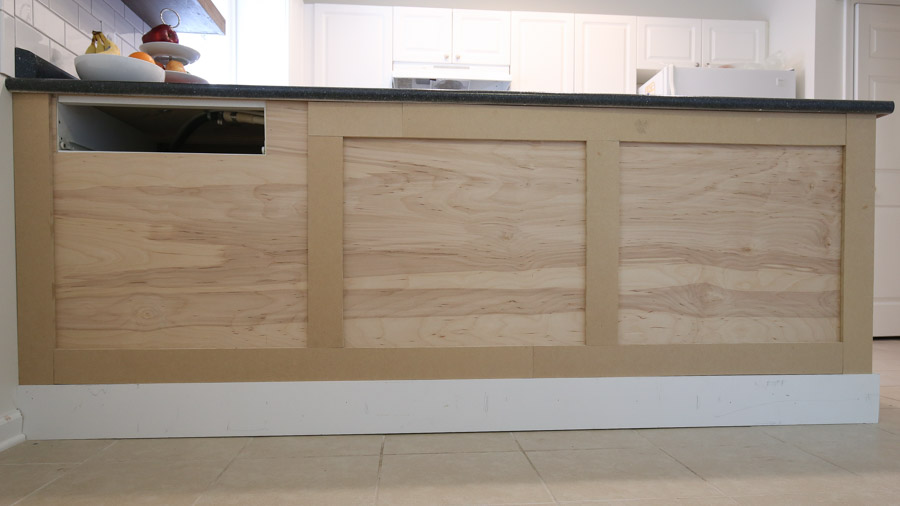
2. Install plywood on kitchen island
Cut the 1/4″ plywood panel to the same length and width as your kitchen island. You can use a circular saw and straight edge guide, or a table saw, or have your home improvement store make the cuts for you.
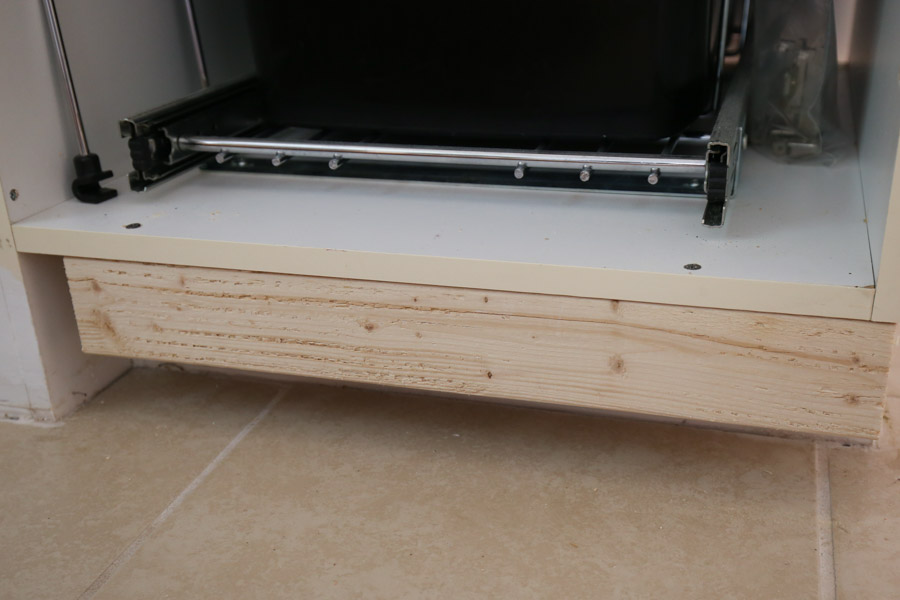
For our island, we needed additional supports to nail our new baseboard and plywood into since the bottom of our island was recessed. We screwed scrap 2x3s into the island in the recessed areas.
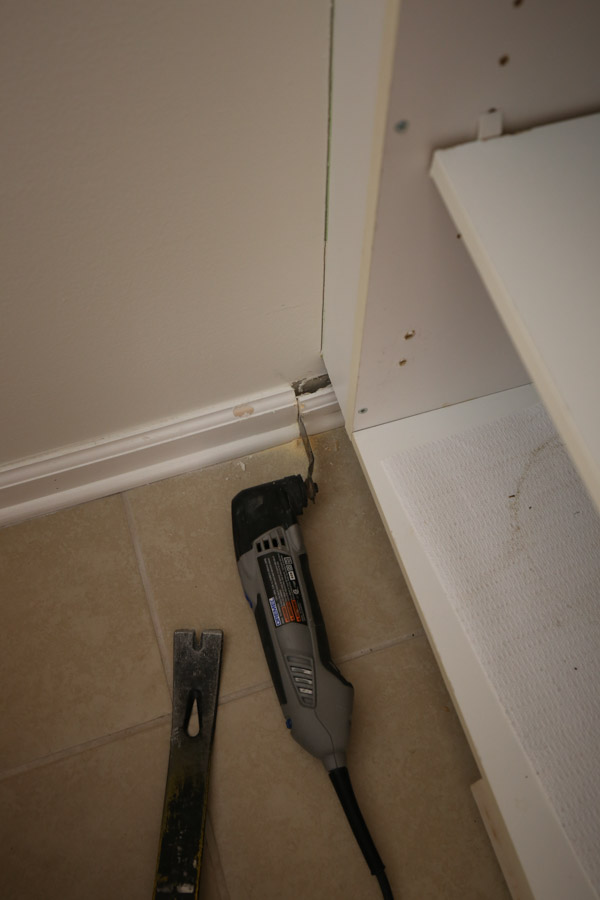
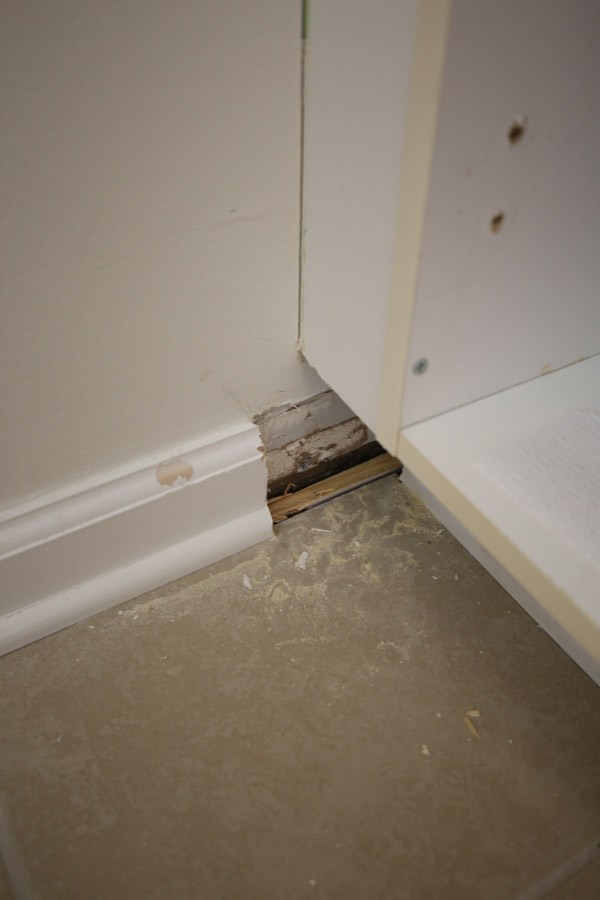
Another prep step we had to complete before adding our plywood, was cut the adjacent floor molding corner by 1″ past the island. We used our Dremel to do this but you can also use a jigsaw or wood chisel.
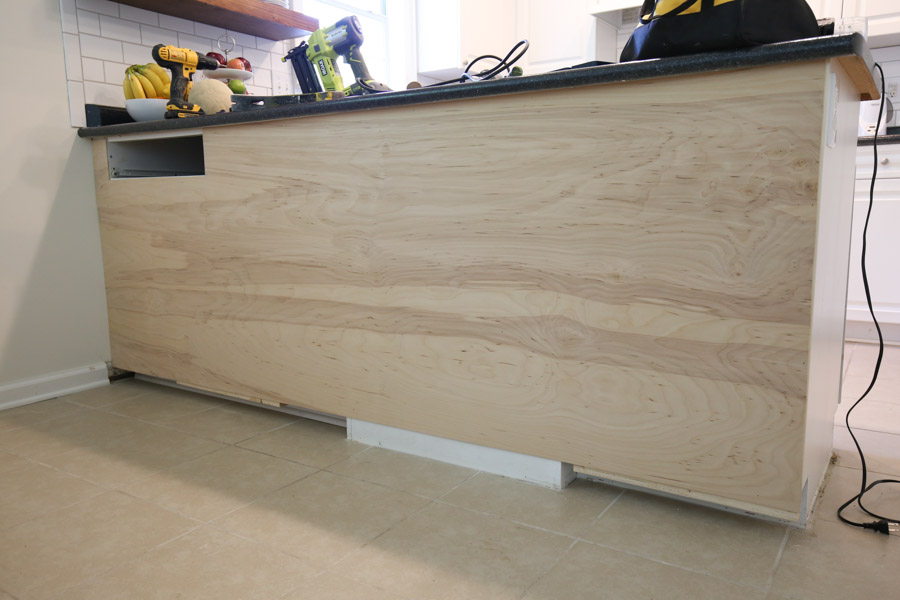
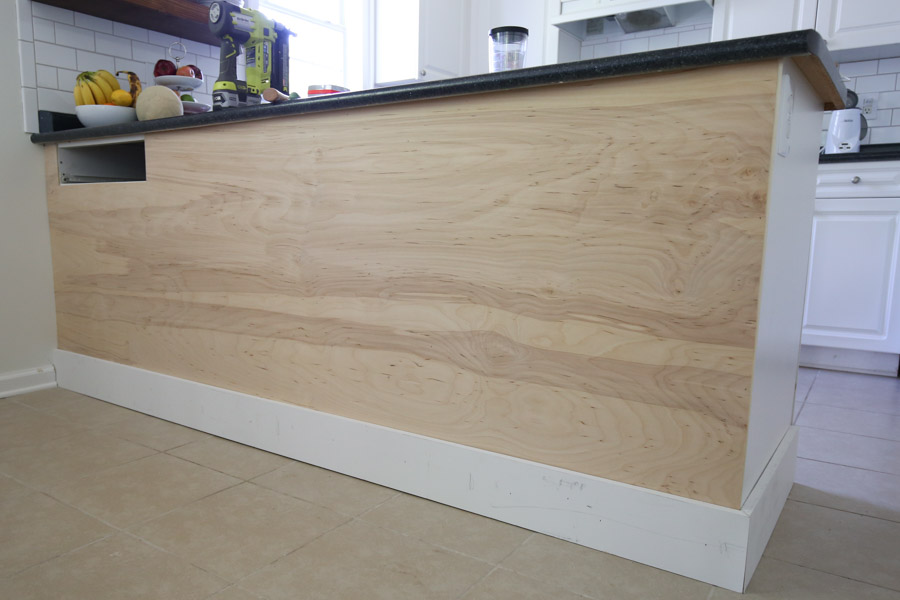
Finally, attach the 1/4″ plywood panel with 1″ brad nails. Make sure to nail into the solid framing parts of the island and the bottom scrap 2×3 wood (if you needed that). You can also used Liquid Nails as well if you need extra support.
Side note, ignore the top left cutout in these photos. Originally, I was going to save one drawer on this side, but I ended up just closing it up!
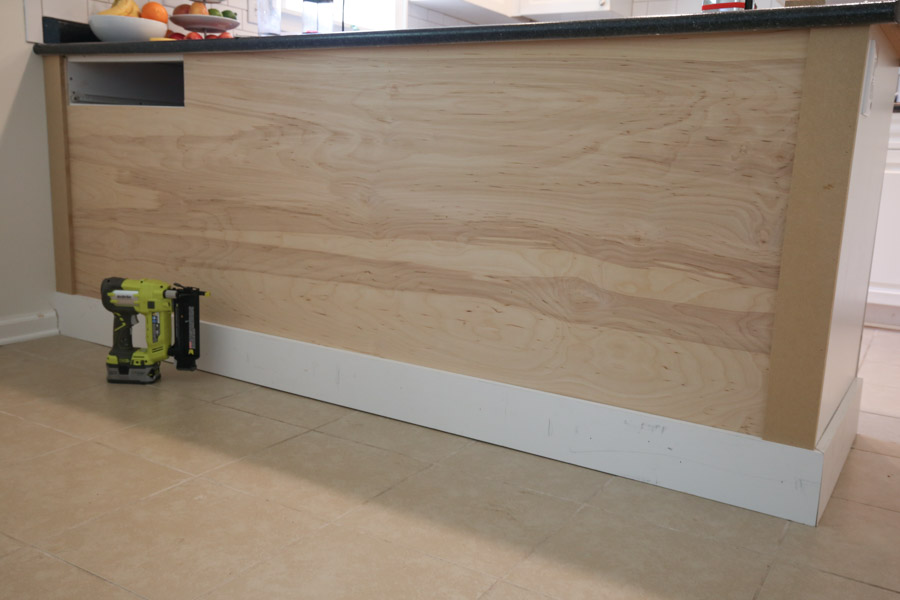
3. Add the new kitchen island baseboard
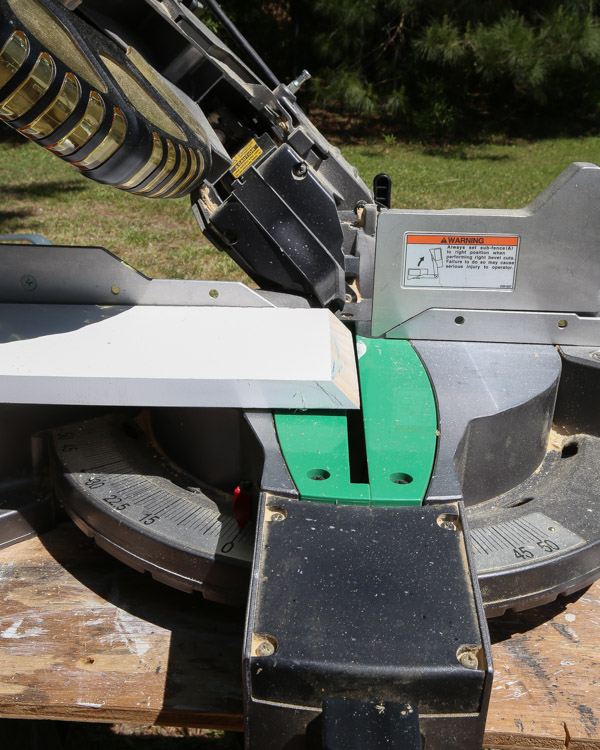
Measure the length of your kitchen island along the bottom and side, then use a miter saw and cut the 1×6 board to this size. Cut the wall end at a standard 90 degree straight cut and cut the island corner side with a 45 degree bevel cut.
You can do the same cuts for the island side baseboard, if you want to stop the baseboard at the side like we did.
Attach the baseboard with 1 1/4″ brad nails. Also, use a level to make sure you are attaching the baseboard level. If there are any larger gaps between the baseboard and floor, you can use shoe molding (or quarter round) to cover these gaps.
📩 Want to Save This?
Also, we decided not to add board and batten on the side of our island because we didn’t want to move our outlet.
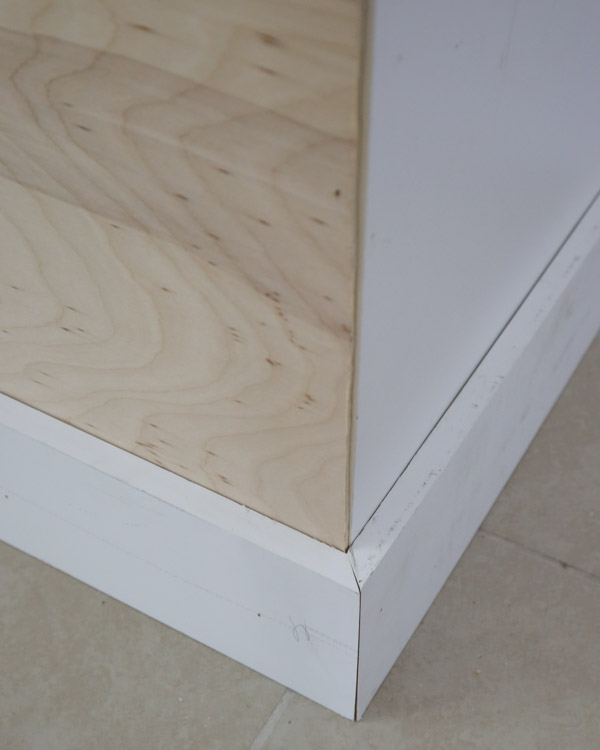
But, we did add the baseboard for a finished look. And we caulked the gap between the island side and 1/4″ plywood for a seamless transition. When we paint our base cabinets we will box off the baseboard end to the bottom of the cabinet on the other side of the island.
4. Install board and battens to kitchen island
Cut the 1/2″ plywood panels into 3.5″ wide strips. You can use a circular saw and straight edge guide, or a table saw, or have your home improvement store make the cuts for you.
I prefer to have my home improvement store make the cuts for MDF panels because it’s super messy to DIY. However, when we bought these boards we were doing curbside pick up and avoiding going into the store. So, we had to buy two, 2×4 ft panels instead of one, 4x8ft panel (so they’d fit in our SUV) and we had to make the cuts ourselves.
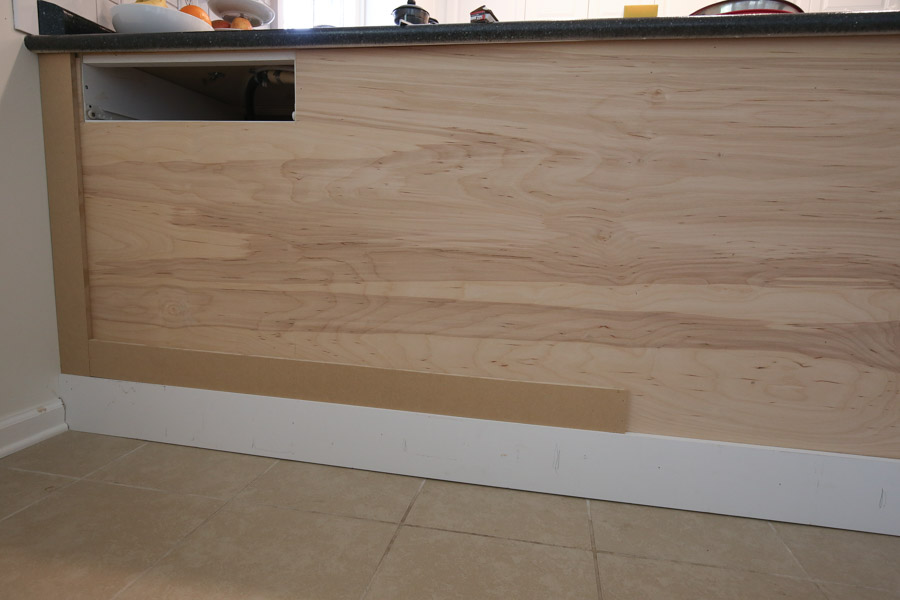
Measure the distance from the baseboard to the top of the kitchen island. Use a miter saw and cut two MDF strips to this size. Attach with brad nails. Use a level as well to ensure you are attaching them level.
If you don’t have solid material to nail into on the island, use Liquid Nails as extra support on the back of the boards.
Next, measure the distance between the side battens and cut boards to size for the top and the bottom, then attach them to the island.
Then, measure, cut, and add the middle battens. To determine the perfect spacing for these middle battens, see my formula in step #4 of my easy DIY board and batten wall post. It works the exact same for this board and batten kitchen island makeover tutorial!
7. Fill holes, caulk, prime, and paint DIY board and batten kitchen island
Fill all nail holes with a lightweight spackle, allow it to dry, then lightly hand sand any excess if needed. I also used spackle on the seams where my batten MDF boards met the top and bottom MDF boards.
Next, caulk all gaps and corners with a paintable caulk.
After caulking, prime the boards and plywood if they aren’t already pre-primed.
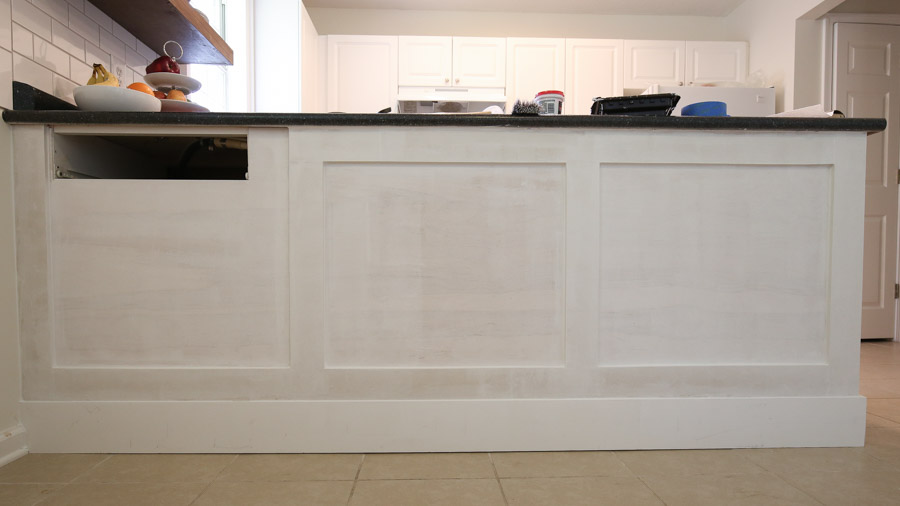
Lastly, paint your kitchen island! As I explained above, we used the Benjamin Moore Advance paint and had it color matched in Mindful Gray by Sherwin Williams, in a satin sheen. The Advance line is great for kitchen cabinets and high traffic areas, so we will be using it for our kitchen cabinets when we paint them.
When it came to picking a paint color, I was really indecisive! As I shared on Instagram, I narrowed it down to three greige paint colors. When I asked which color you all liked best, there were lots of different opinions!
The problem was that our floor tile was blending with the light and middle color, but I didn’t like how the darker gray looked with our black kitchen counter. And we are keeping the flooring and counters, so it was tough to decide!
I ended up going with the middle greige, Mindful Gray, but it has taken me weeks to decide if I want to stick with it or repaint it. I think I’m going to keep it. What do you think of it?! It will also be the same color we paint our lower kitchen cabinets (the uppers will be a fresh white paint color).
I think the transformation of our kitchen island has made a huge difference in our kitchen makeover progress! I can finally start to see my vision coming together!
Want to save for later?! Pin it here:
There are lots of kitchen projects we will be working on next! Including scraping the popcorn ceiling and painting it (not fun), enclosing the space above the upper cabinets, replacing our old range and adding a DIY range hood cover (I’m super excited about this project).
Follow along on Instagram stories for sneak peeks of the kitchen makeover progress!
Katie
Thursday 27th of October 2022
I like how you spaced the squares. Can you tell me how far apart? I read your other post that says up to 20 inches, but they look larger than 20 inches.
Eric
Saturday 14th of May 2022
You only show the back, but I'm struggling with details about the side and front. You mitered the two baseboard pieces along the back and side, but did you leave a butt joint on the front side? Is there a toe kick along the front edge? If so how did you transition the baseboard along the side into the toekick?
Lisa
Sunday 15th of March 2026
@Eric, How do you transition the baseboard along the side into the toekick? That's my question as well! Tricky area!
Jane Vetzikian
Saturday 23rd of May 2020
I would love to see a darker gray on the "island". It would look really great against the black counter top The color palette in the entire room is way too bland. White upper cabs with black counters and darker gray bottom cabs would keep the monochromatic look while being more interesting.
Angela Marie Made
Tuesday 26th of May 2020
I'm hoping it all comes together once all the kitchen makeover projects are finished! I may end up changing the color, but I'm waiting on a few other projects to wrap up before I decide!