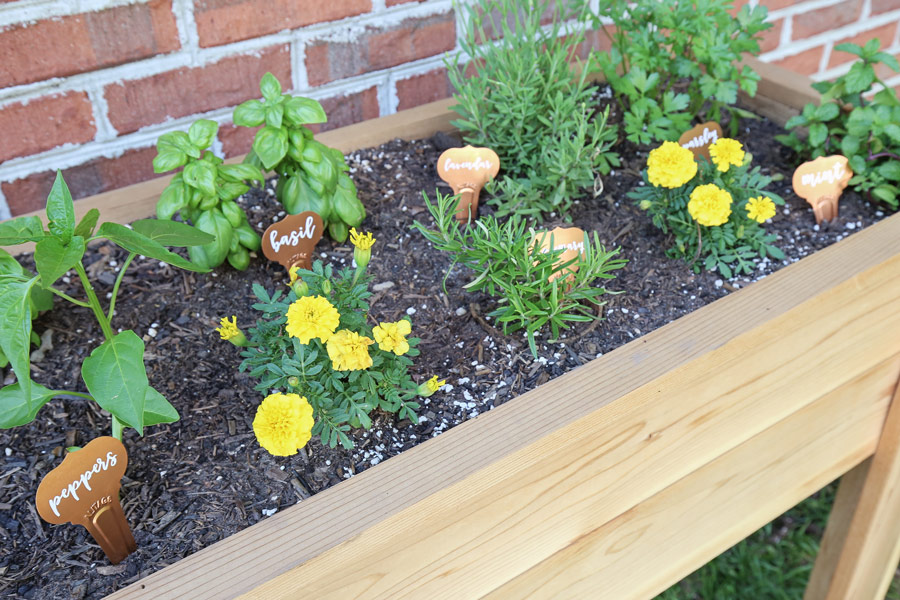
A few weeks ago, we made a DIY raised garden bed and I decided to make cute, DIY garden markers to go with it!
Technically, this tutorial will be on how to make DIY garden labels because I did buy the actual plant markers instead of making them as well.
Note, this post contains some affiliate links. For more information see my disclosures here.
I used these copper plant markers, which unfortunately are not in stock anymore, but here are lots of other cute options!
I made these DIY plant labels with my Cricut and white vinyl. This tutorial is very similar to my tutorial on how to make labels with a Cricut for our pantry labels. And if you have a Silhouette Cameo, check out my DIY pantry labels with a Silhouette Cameo, for a tutorial on how to make labels using a Cameo.
Also, I created a free SVG and JPG file so you can make these same DIY garden labels too! Note, my free file is for common herbs and vegetables!

I used vinyl because it’s waterproof and easily removable, perfect for garden markers! I used Oracal 631 matte vinyl in white since I had it on hand already, but you can also use Oracal 651.
Materials Needed:
- Cricut cutting machine
- Free garden labels SVG file (get the free file here)
- Vinyl (I used Oracal 631 matte vinyl in white)
- Vinyl weeding tool or something with a pin end
- Transfer tape (I use Oratape HT55)
- Vinyl Application Squeegee or old credit card
- Masking tape
- Scissors
- Craft razor blade cutter
- Ruler
- Plant Markers (I used these markers, more cute ones here)
*Note: if you’d like to make more custom labels, besides the ones I’ve included in the free garden labels download, you can get the same font I used here.
How to Make DIY Garden Markers:
Video Tutorial:
Subscribe to my YouTube Channel here!
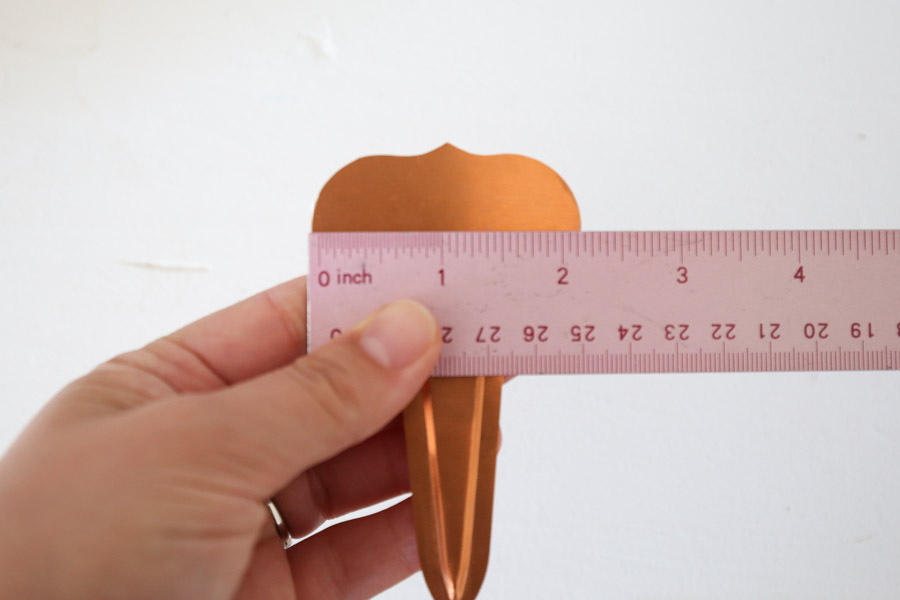
1. Determine the size needed for your garden labels
Use a ruler and measure the width and length of your garden marker surface to determine the max size for your garden labels. Make sure that your label size will be a little bit smaller than the max size available.
2. Open your label design in Cricut Design Space
Either create your own label designs or download my free garden labels SVG file from the free printable library into Cricut Design Space. If you haven’t subscribed yet to the library, just click the button below to get your free SVG file and access!
As I mentioned above, if you want to make even more labels other than the free labels I provided, with the same font that I used, get the custom font here! It’s the same font I used for my pantry labels, but all in lowercase!
Go ahead and open the SVG file in Cricut Design Space. You can see screenshots of this process in my how to make labels with a Cricut tutorial. ***For a full step by step VIDEO tutorial of this process, see my DIY Garden Markers VIDEO tutorial here.
Also, FYI, for some reason the SVG file takes about a minute to load into my Cricut Design Space.
3. Select plant labels needed and change size of labels as needed
To prepare your SVG file for cutting the labels you need, begin by selecting the grouped labels and then click on “Ungroup”. Next, select any labels you don’t need and hit delete.
For the remaining labels you do want to keep, select each one individually and change the size to the custom size you need by entering it in the width and height size boxes along the top toolbar in Cricut Design Space. Make sure when you change the size to select the lock icon to lock the scale in place so that the letters don’t get warped when changing the height/width.
Finally, select all the label items (press Control A on PC or Command A on Mac) and then click “Attach” in the lower right hand corner so that the file will cut the labels exactly how you see them on the screen.
*Again this is the same process as step # 3 in my DIY pantry labels with a Cricut tutorial, which has photos of this step in Cricut Design Space!
4. Send labels to your Cricut and cut vinyl garden labels
Load your Cricut cutting machine with a 12×12 sheet of vinyl on your cutting mat that was included with the Cricut.
📩 Want to Save This?
On your machine make sure the dial is set to “Vinyl”. Note, if your labels are on the smaller size like mine, which were around 1.5″ long, you may need to turn the dial one notch to the left, between paper and vinyl, to reduce the cut force. Because they were so small, the cut was more intricate and it needed less force which I realized after cutting first with it set to just Vinyl.

Finally, click on the green “Make it” button in the top right hand corner in Cricut Design Space. Make sure your Cricut is connected.
Click the flashing go button on your Cricut to start cutting!

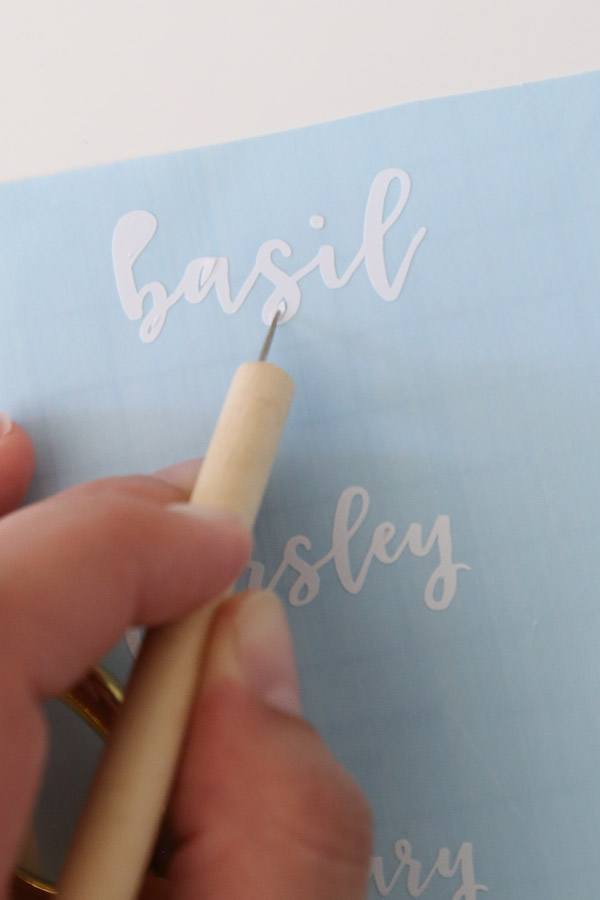
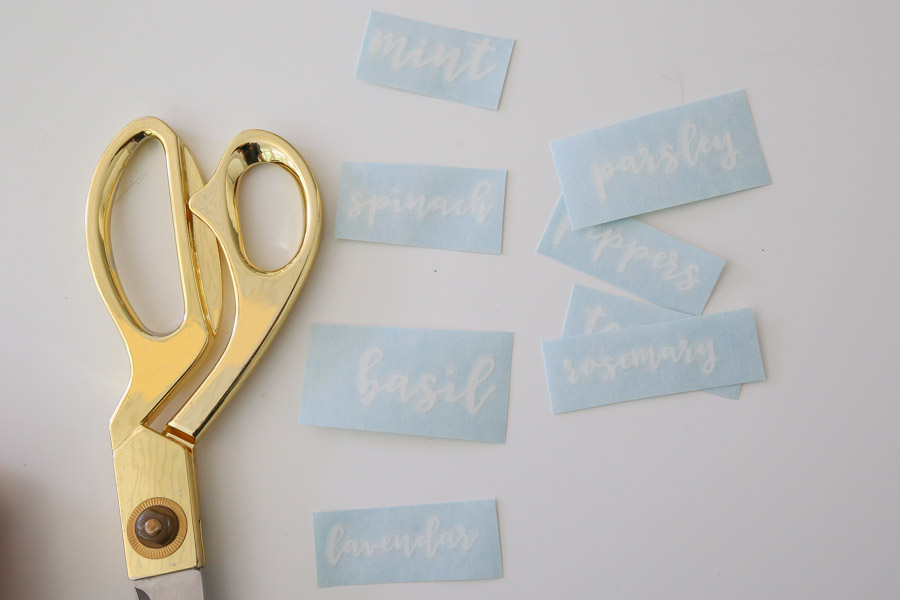
5. Weed the garden label decals
After removing you vinyl sheet from the mat, weed your vinyl with a vinyl weeding tool. You can also use a craft razor blade cutter or scissors to work in a small section at a time if your labels are very small or intricate like mine were here.
Also, because the labels were so small and intricate I had to weed very slowly and be careful to not pull the vinyl up too quickly. And I had to use my weeding tool to hold down some areas while removing the excess vinyl.
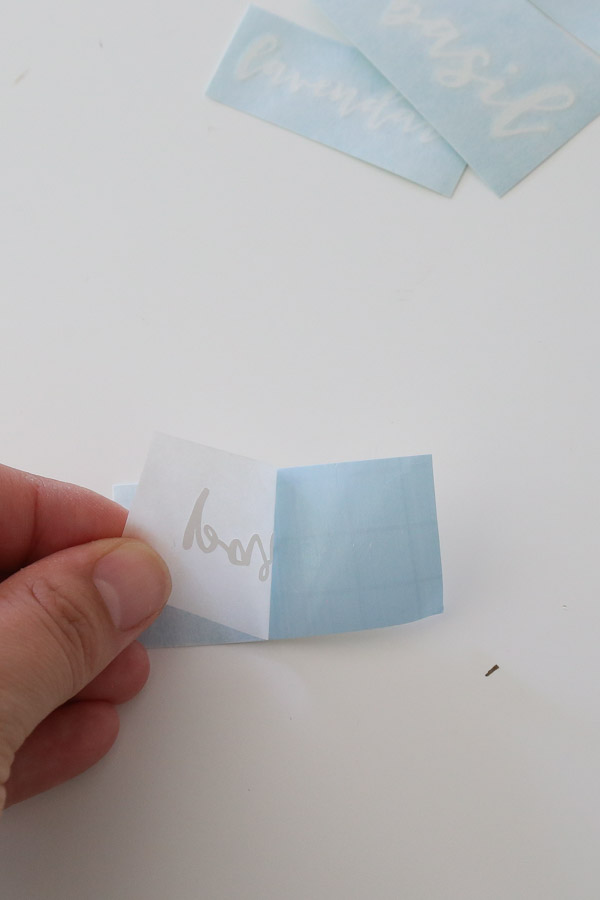
6. Apply transfer tape to the DIY plant labels
For transfer tape, I use Oratape HT55 transfer tape, which is made specifically for Oracal 631 vinyl, but, any other medium to high tack transfer tape should work well.
Use masking tape to secure the corners of your vinyl sheet to your work surface.
The way I prefer to do this without using my transfer tape applicator is to press the end of the transfer tape to my work surface and then slowly roll out the transfer tape over the vinyl sheet and smooth the transfer tape down with a vinyl application squeegee. Again you can see this all in action in my YouTube video tutorial!
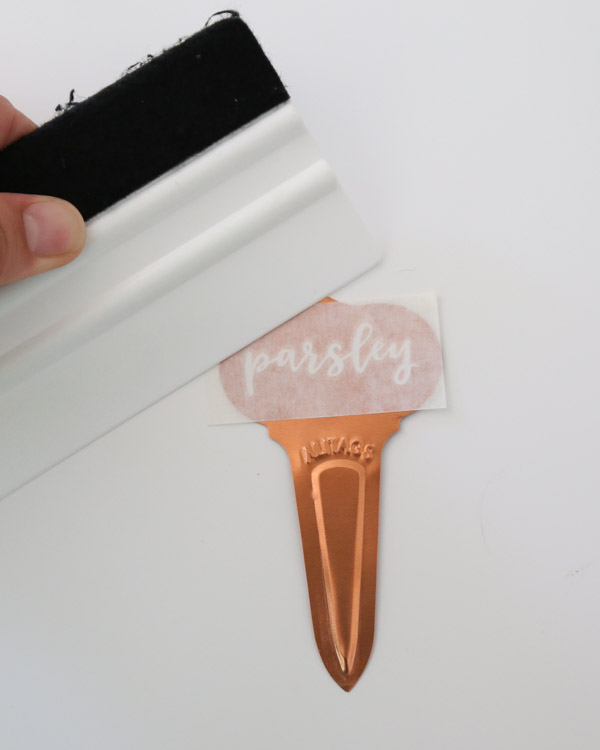
7. Cut the DIY garden labels out and apply to the garden makers
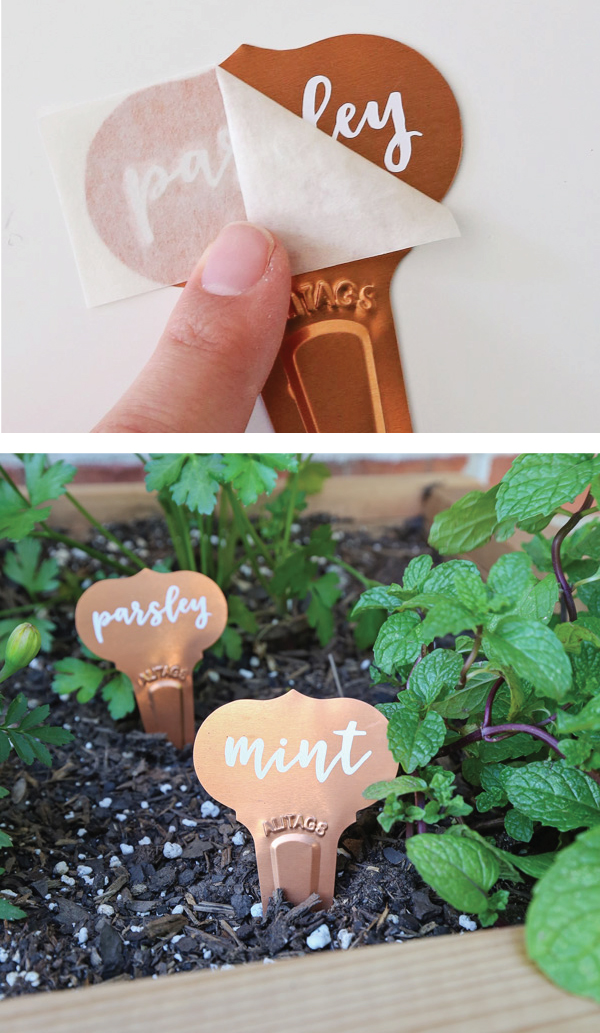
Cut out each garden label with scissors.
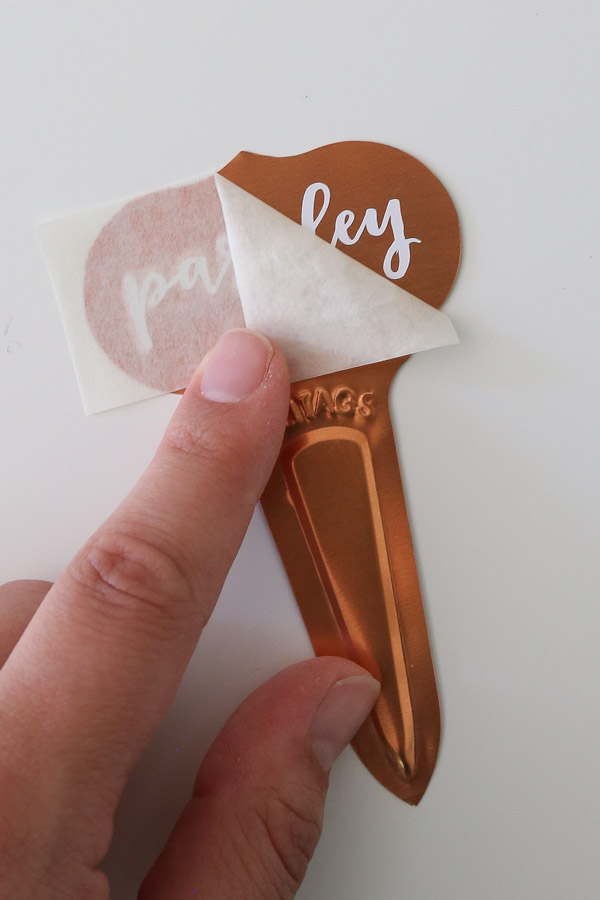
Then, slowly peel back the transfer tape and apply the label to your garden markers. Make sure to rub down with a squeegee to ensure the vinyl is secured to the plant marker.
Finally, slowly peel back the transfer tape at a 45 degree angle to see your completed DIY garden marker!
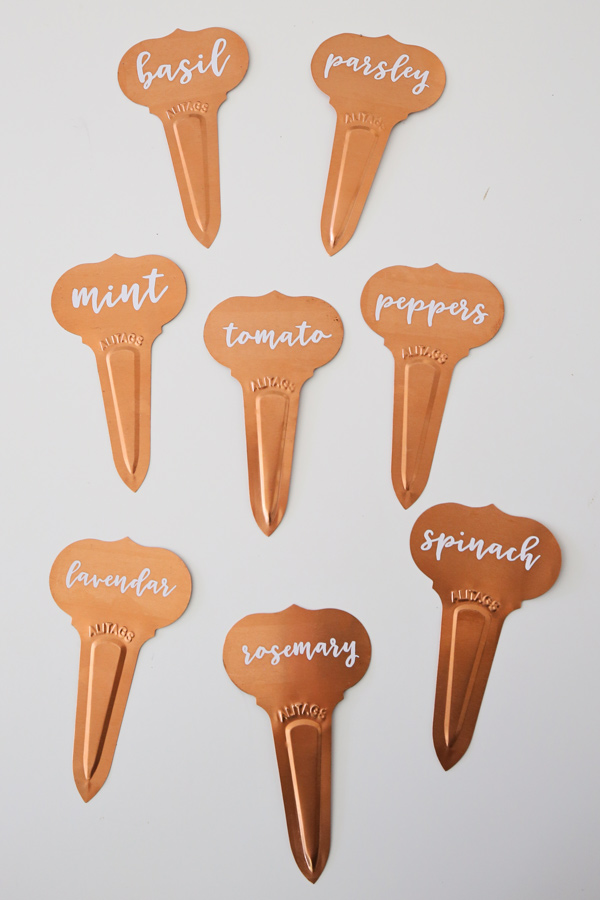
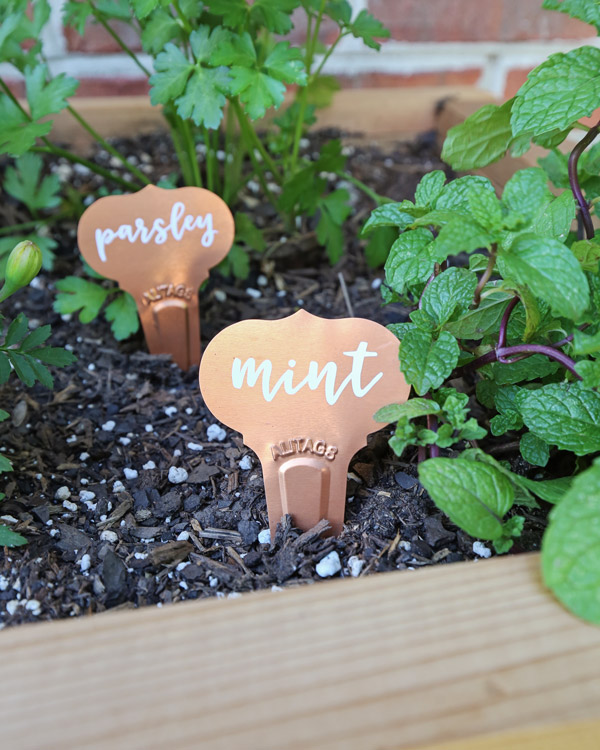
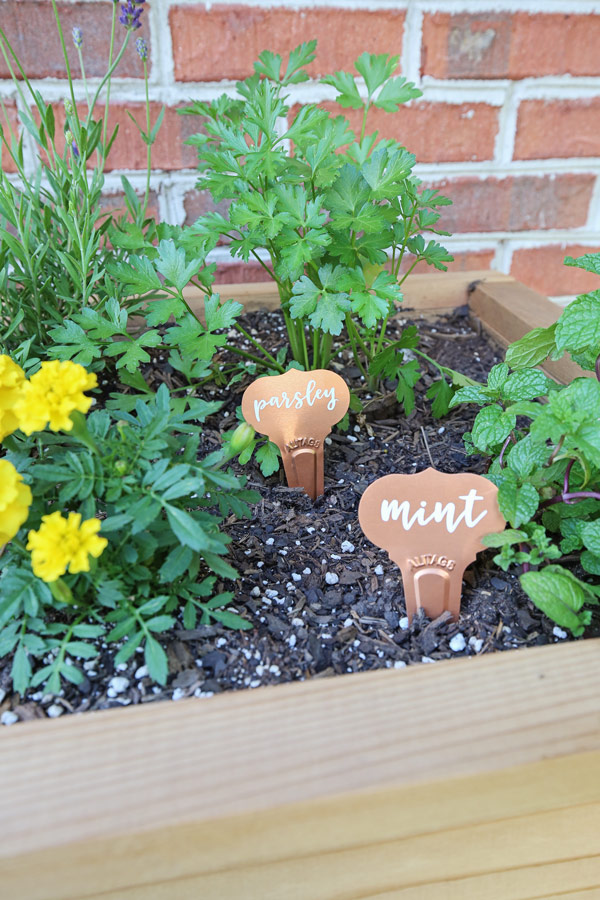
I love how these copper garden markers with the white lettering look in our cedar, DIY raised garden bed with legs! And as our herb plants continue to grow, I won’t get confused or forgetful about which plant is which!
Follow along on Instagram, Facebook, and YouTube for my latest projects!
Want to save for later? Pin it here: