One Room Challenge – Week 2
Earlier this week I shared our last minute change of plans to participate in the One Room Challenge and update our master bathroom! Well its been a crazy busy week of demoing, catching up and completing our first big project for the space: DIY board and batten. We added custom board and batten to all of the bathroom walls and painted the walls!
I loveeeee the result of the DIY board and batten! This project alone has already made a huge impact and makes the space much more high end looking in my opinion. We painted the walls above the board and batten a dark gray and I am actually going to be changing that since it’s just too dark for me (I was trying to be bold haha).
Below is a full tutorial on how we applied this board and batten treatment to our bathroom walls.
Also, if you are looking for an even simpler board and batten style or just a board and batten accent wall, check out my tips in my easy DIY board and batten wall post. And check out my tutorial on how to install floor to ceiling board and batten with crown molding for another option! And I have 5 tips for installing full room DIY board and batten around and entire room here!
Note, this post contains some affiliate links. For more information see my disclosures here.
How to add board and batten:
Materials
- 1x3x8 boards*
- 1x2x8 boards*
- 5 1/4″ Base Molding (or you can reuse your current base molding)
- Cove Molding
- 1 1/4 brad nails
- Construction adhesive (Liquid Nails)
- Wood Screws
- White paintable caulk for molding
- Spackle
Tools
- Drill
- Miter saw
- Brad nailer
- Level
- Dremel tool or jigsaw (if needed)
- Stud finder
*Note, for the 1×3 and 1×2 boards you can either use furring strips, common pine board, or pre-primed boards depending on what your budget allows. We used a mix of furring strips and common pine board to save money. Using all furring strips is the cheapest option (only $2/board), but you will need to spend a lot of extra time and effort prepping the boards for painting since they are extra rough wood. Also, make sure to pick out the straightest boards! Use pre-primed boards if you want to reduce your labor efforts and don’t mind spending more $!
Overall, the total price for our board and batten (not including paint) was less than $75!
Tip: If you do use furring strips, SAND them before attaching to the wall and make sure they are nice and smooth!
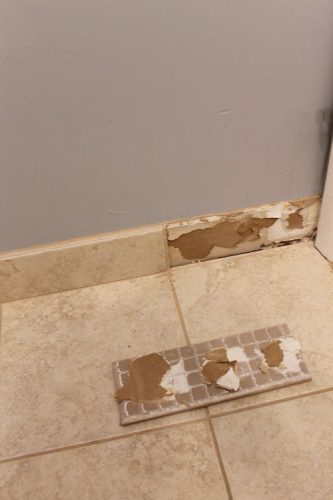
1. Remove baseboard from wall
We actually had a tile baseboard around our bathroom wall from when we had our bathroom flooring replaced, so we removed that with a prybar…it came right off! Be careful when removing your baseboard if you want to reuse it again.
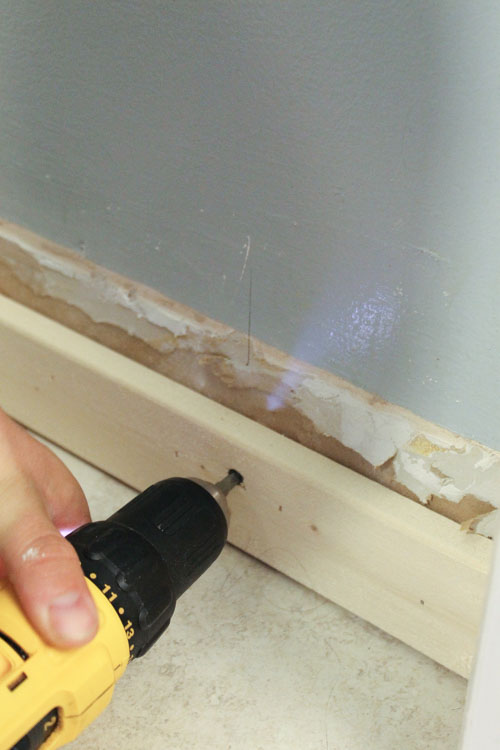
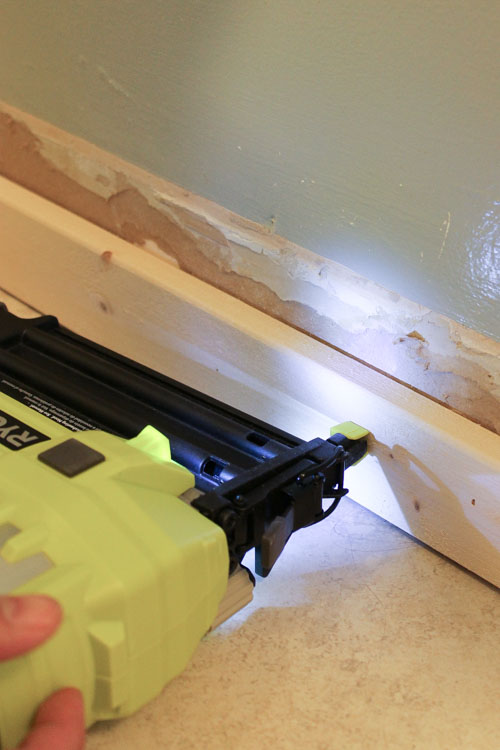
2. Attach 1×3 to wall along the floor
Cut a 1×3 to size with a miter saw and attach to the wall along the floor. We used a stud finder to attach the board to the studs with screws and a drill. Then, we also used some 1 1/4″ brad nails with our brad nailer along the board too. Make sure to sink your screws into the wood so no screws are above the wood surface.
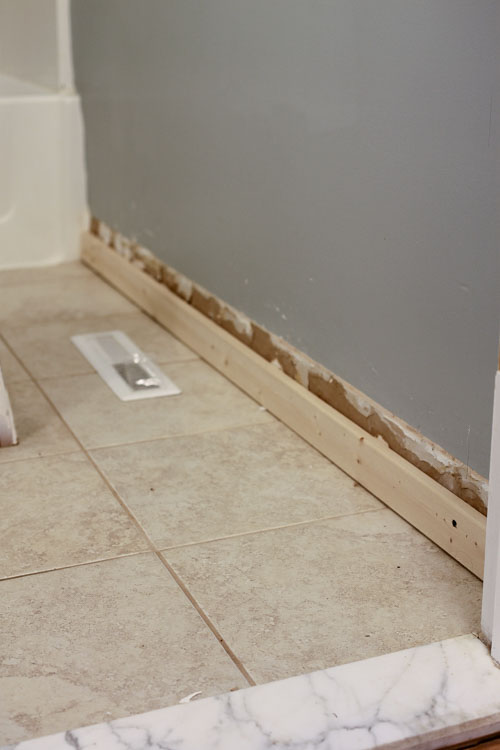
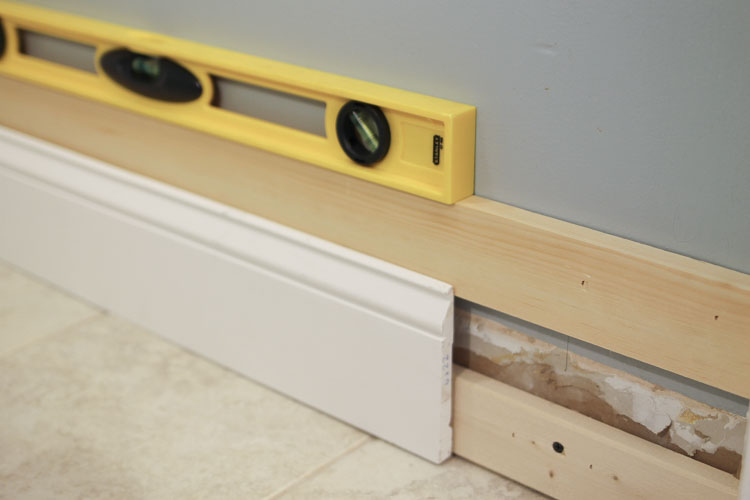
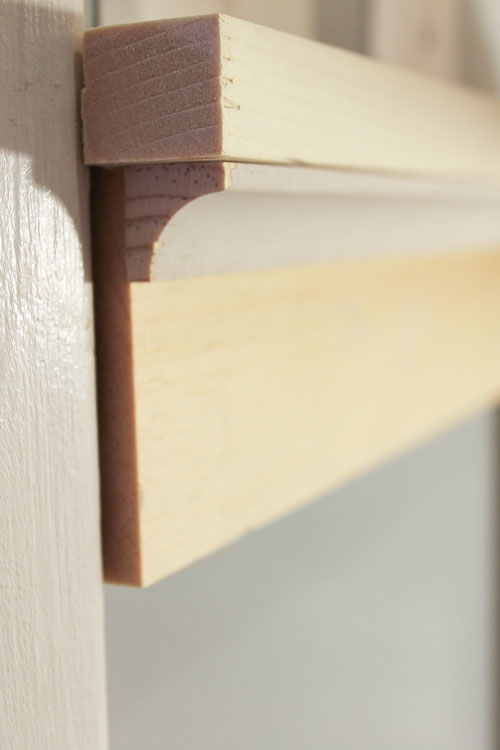
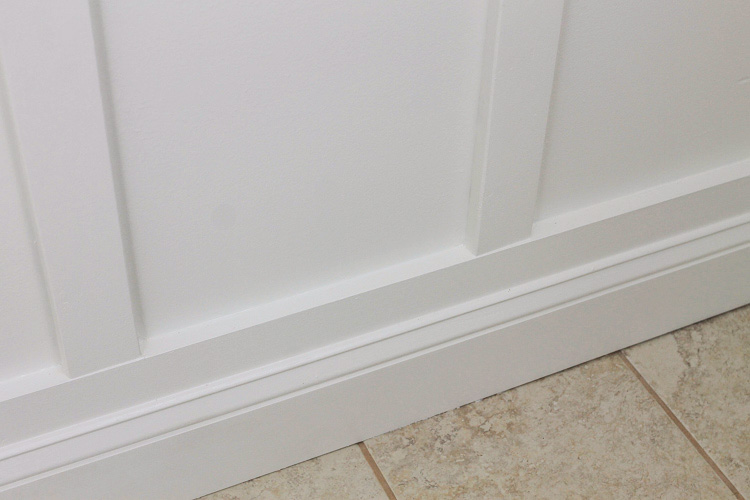
3. Attach a second 1×3 and base moulding
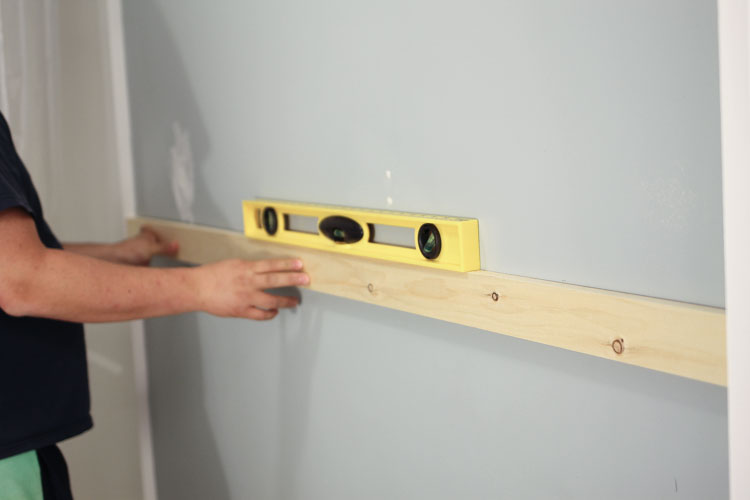
Cut another 1×3 to size and attach to the wall a few inches above the base 1×3. To know exactly where to attach it, hold up your base molding against the two 1x3s (as shown in photo below) and make sure your base molding will cover about 1/4″ of the bottom edge of the second 1×3. Attach the 1×3 to the wall, into the wall studs, with 1 1/4″ brad nails and a brad nailer. Make sure this second board is level before attaching!
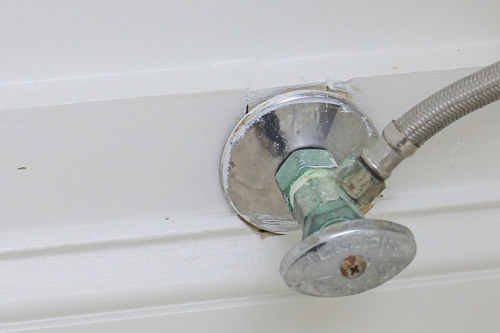
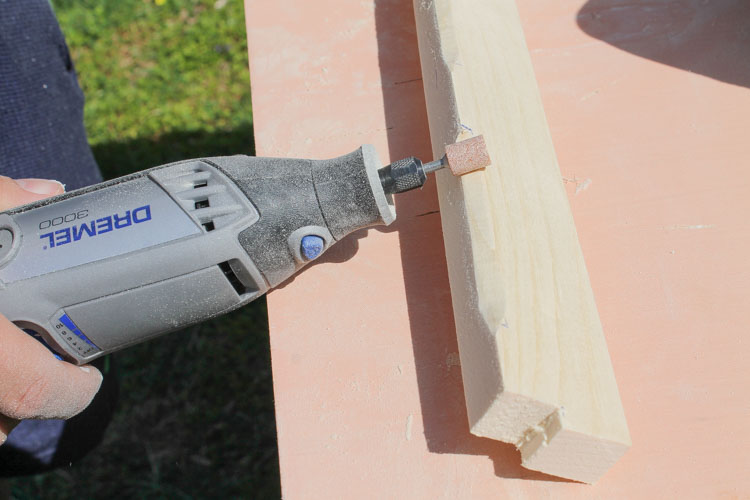
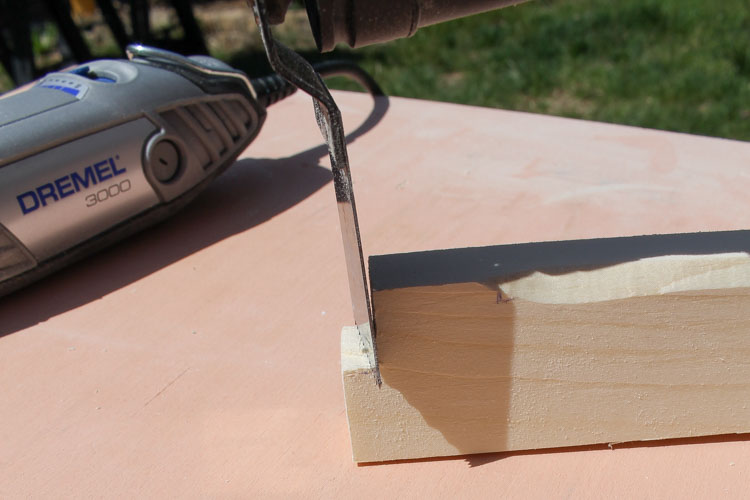
We had a few wall items to work around, like our toilet piping, where we used our Dremel tool to cut a notch out of the board to make everything fit properly.

Finally, cut your base molding to size and attach it to the first 1×3 (along the floor) with brad nails and a brad nailer.
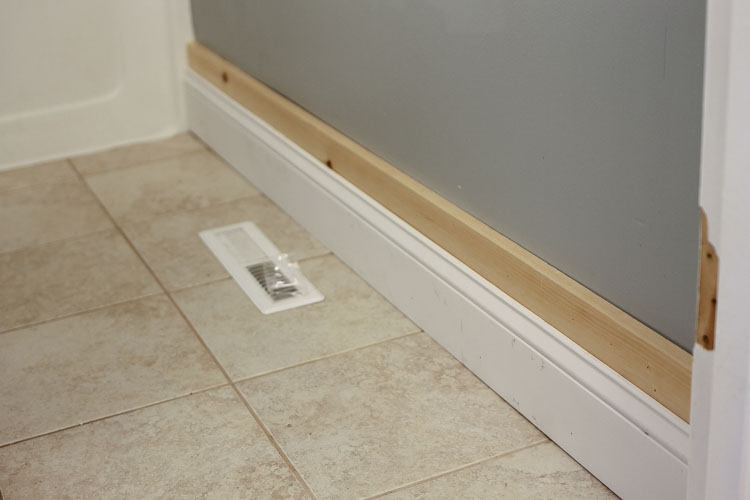
4. Attach a third 1×3 to the middle of the wall
Cut a third 1×3 to size and attach it about halfway up the wall with brad nails and brad nailer. You can also attach it about 3/4 of the way up the wall, but in order to save on material and not have weird cuts around our vanity mirror, we chose to attach it about halfway on our wall. Again make sure you use a level to make sure the board is level when attaching and make sure to put a few nails through the wall studs for extra security.
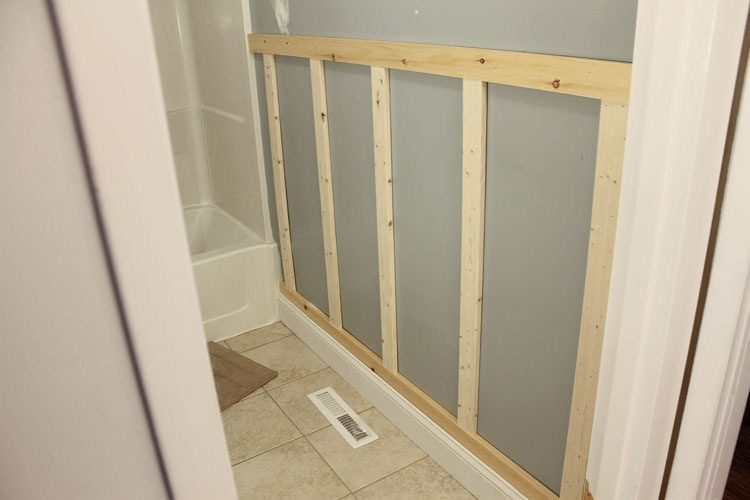
5. Add battens (vertical boards) to wall
Determine how much space you want between each batten (vertical board). We chose to do 12 inches apart for this bathroom.
For a larger room, you may want to do bigger spacing to suit the scale of the room better. For our DIY board and batten wall in our nursery room we did 16.5″ of spacing since it was a much bigger room. And for our floor to ceiling DIY board and batten accent wall in our living room, which was a very large wall, we used 26″ spacing.
Then, mark on the walls where each batten will go and how many you will need. Measure the exact height needed for each batten based on where they will be attached to the wall. Not all walls are perfectly straight and wonky things can happen with measurements being slightly off, so it’s best to measure the height for each one exactly.
Attach with 1 1/4″ brad nails and brad nailer. You can also add some construction adhesive (like Liquid Nails) on the back of each batten for extra security since the nails aren’t going into the wall studs.
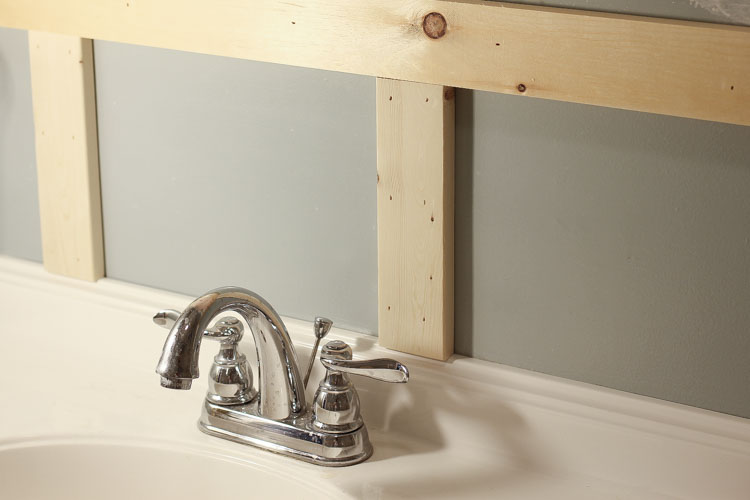
We had to cut some short battens too in order to work around things like the sink… The battens slightly overhang on our sink, but it doesn’t bother me. If you don’t like this you could sand the boards down or cut the bottoms at an angle.
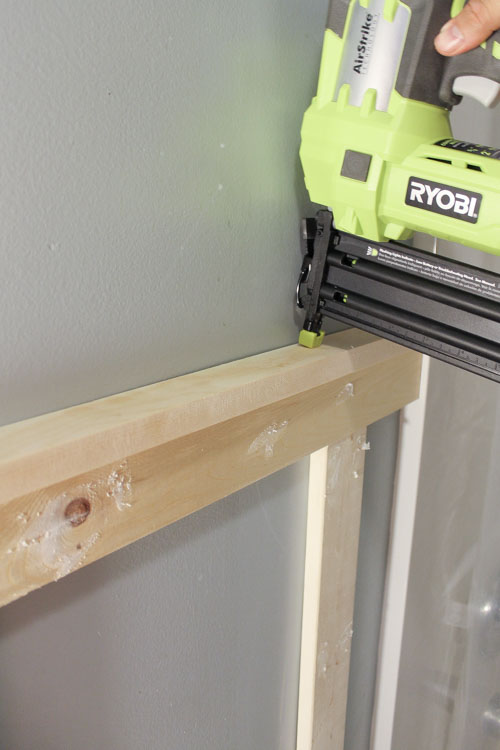
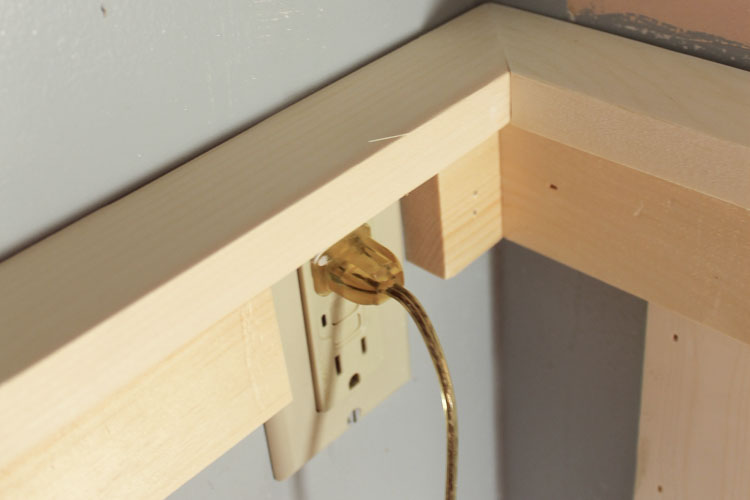
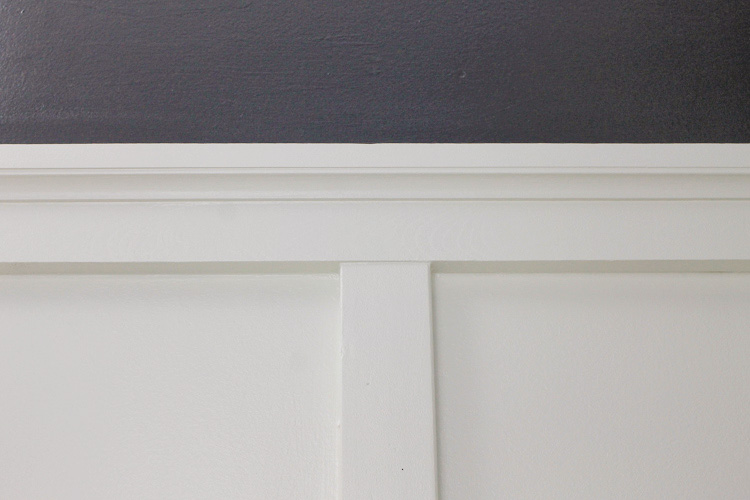
6. Add the 1×2 to create a top ledge
Cut your 1×2 to size and attach to the top 1×3 to create a ledge using 1 1/4″ brad nails and wood glue or construction adhesive.
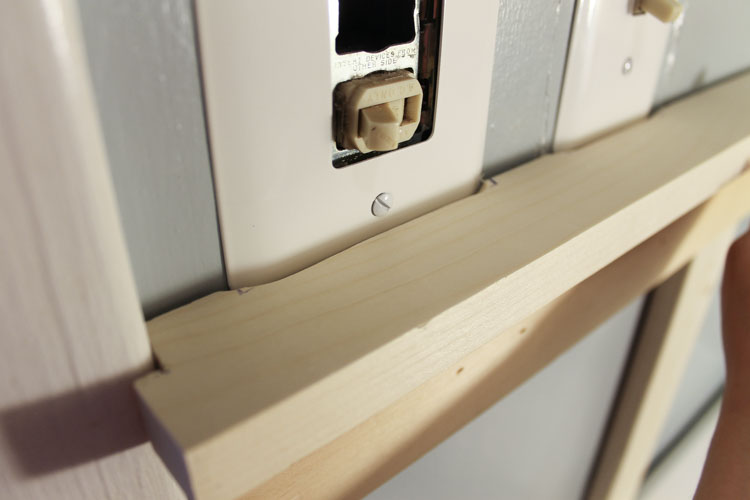
On our wall with the door trim, light switches and electric outlet, we had to get creative with our board placement and notch some areas out to work around the issues. Again our Dremel came to the rescue, love this tool!
7. Add cove moulding
Cut your cove moulding to size and attach under the 1×2 with brad nails.
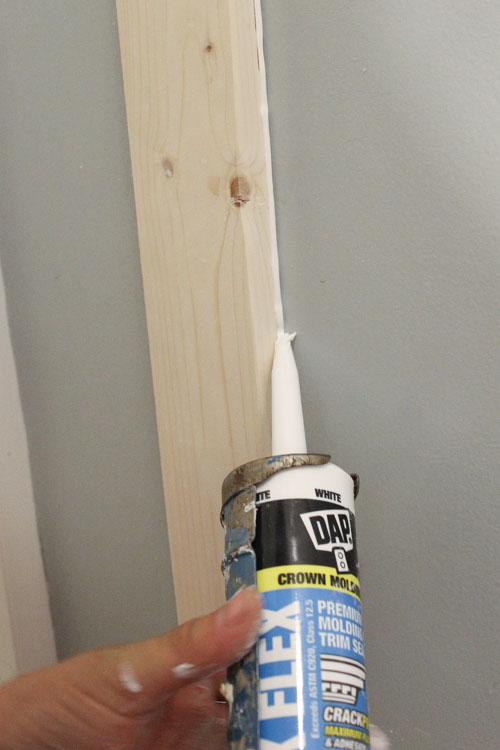
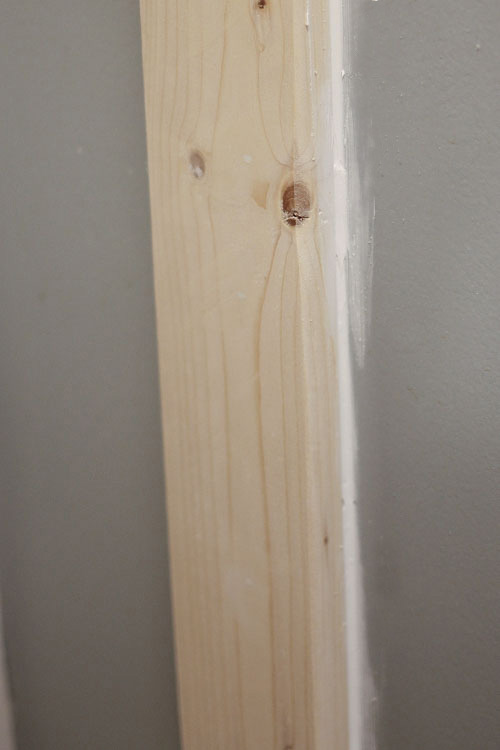
8. Fill holes and caulk
Fill all nail holes and any holes in the wood (more common with furring strips) with spackle. Then, lightly hand sand over the spackle to make sure your surface is smooth. Next, caulk all gaps. Caulking is my least favorite part and not easy for me, but it really helps complete the look.
9. Prime and Paint!
Yay all the prep work and building is complete! Time for the transformation. Prime and paint your DIY board and batten. Make sure to prime any wood knots really well if you have any. We used Alabaster by Sherwin Williams in satin for our board and batten paint color.
📩 Want to Save This?
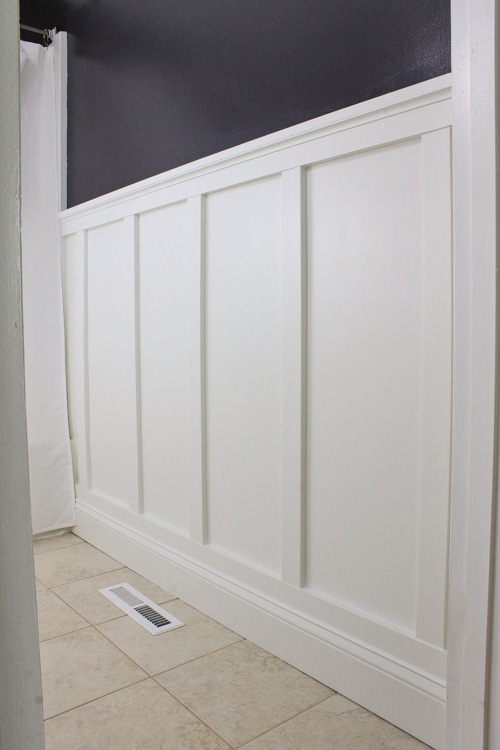
Here is the final result!
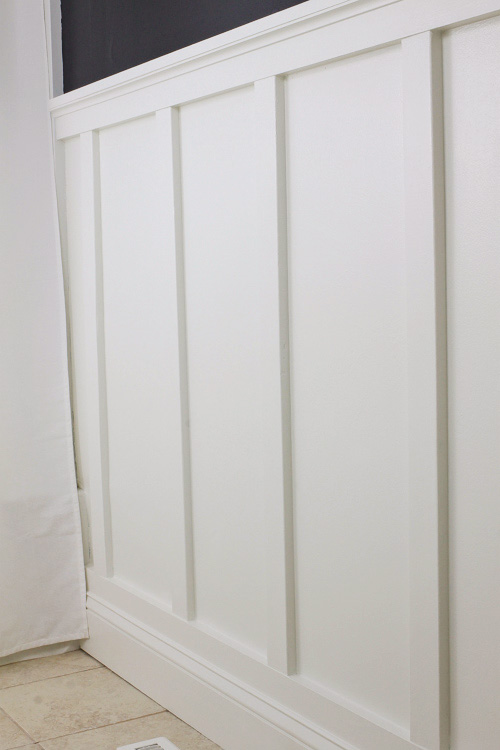
Some features of the board and batten that I think adds an extra wow factor is having the bottom of the board and batten attached to the oversize baseboard moulding and the addition of the extra cove moulding under the top ledge.
What do you think of the board and batten DIY? Have you tried this wall treatment in your home before?
You can see sneak peeks of all my master bathroom projects on my Instagram stories! This weekend we are starting on our next project, the sliding barn door and I seriously can’t wait!!
Follow along on Instagram or Facebook for my latest projects, as well as Pinterest!
You may also be interested in:
Leah
Sunday 4th of August 2024
I love this so much! I noticed that the horizontal molding runs up to the shower tile. Did the horizontal molding look funny next to the tile? (I'm assuming the molding sticks out farther than the tile?). Could you share pictures of that spot or any tips for how to finish it well against the tile for the shower? Thanks!!
Molly
Wednesday 12th of June 2024
I'm curious as to why you decided to use 1x3 instead of the standard 1x4 for the board & batten? And what would be the new calculation between each board...as I initially did my calculations off your post from your other room where you laid out the calculations so clearly. Thanks.
Janet
Wednesday 25th of October 2023
This bathroom wainscotting step-by-step was so helpful! Using your guide, my hubby and I did an accent wall in our downstairs bathroom in 1 week (leisurely retired folks pace ;) and it looks marvelous. Always wanted that look! Next, upstairs bathroom, then an accent wall in our master bedroom. We used PVC moulding and a hardwood piece for the top ledge since it's a small downstairs bathroom that gets a lot of use. Easy to ding the walls. Thanks!
Angela Marie Made
Wednesday 1st of November 2023
Awesome, I love to hear that!!
Stephanie
Thursday 20th of October 2022
Hi Angela! How did you seal the cut ends of the wood by the shower? Did you just rub them with silicone or caulk? I am having trouble understanting how the end caps finish out if that makes sense.
Angela Marie Made
Monday 24th of October 2022
I just filled in the gap from where the wood board stops and meets the shower with caulk! I filled in any other gaps with caulk too, it really helps to complete the look.
Ladonna
Thursday 6th of October 2022
I am wanting to do this in a guest bath. Did you put the board and batten behind the toilet? I also have a small wall between the door and the linen storage. Would you put it there as well? Thanks for such creative ideas and wonderful tutorials!
Angela Marie Made
Monday 10th of October 2022
Yes I did! I would put it there if you're wanting that classic wrap around look rather than an accent wall!