Learn how to install beadboard to a wall in this easy and budget friendly DIY tutorial!
A DIY beadboard wall is one of easiest ways to add character to a wall! I love beadboard, it’s charming, beautiful and classic. It’s one of those wall features that will always be in style.
In our first home we installed DIY beadboard bathroom walls with DIY beadboard wainscoting, where it just goes half way up the wall. It looked gorgeous for our small DIY bathroom makeover on a budget!
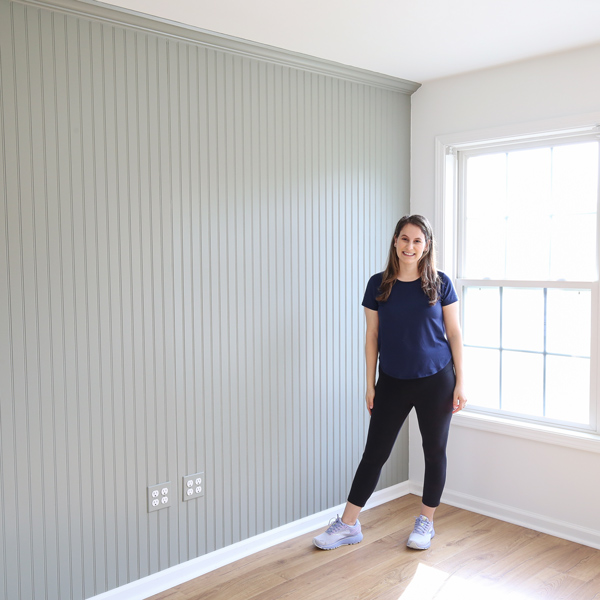
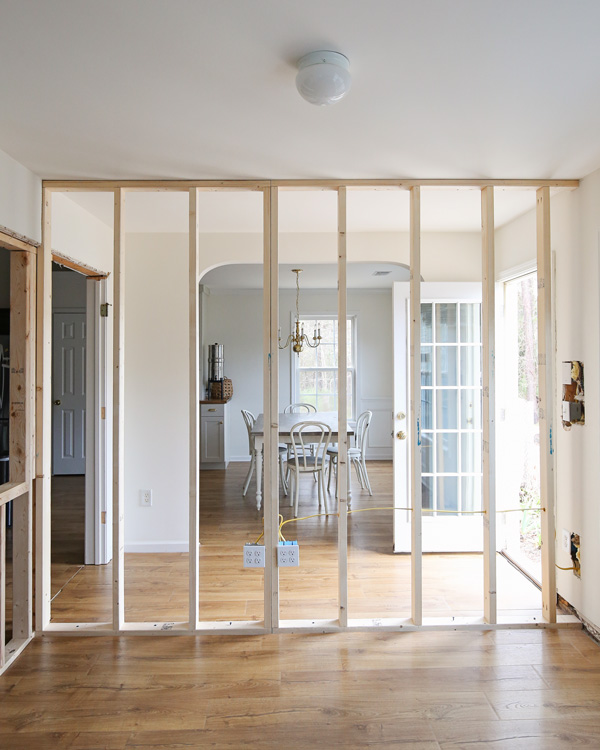
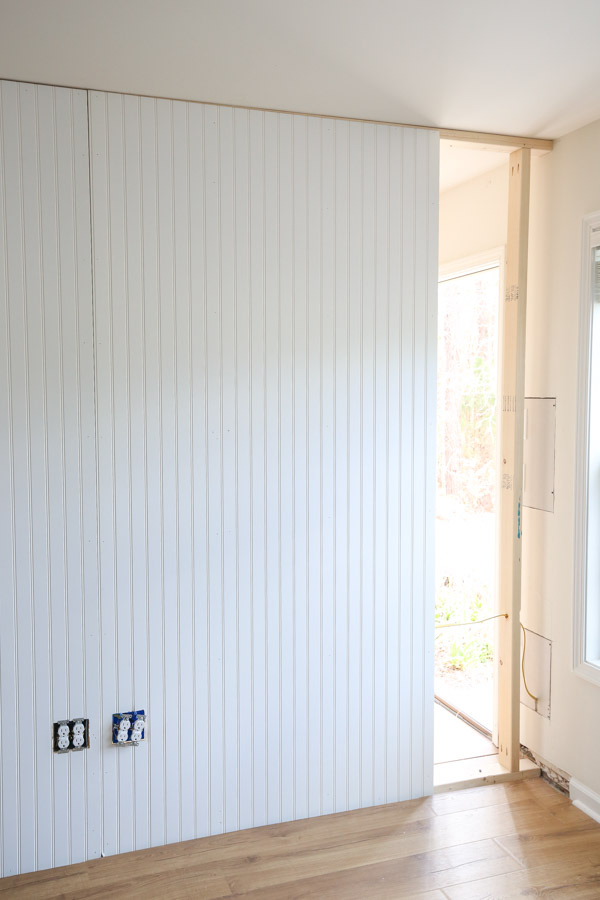
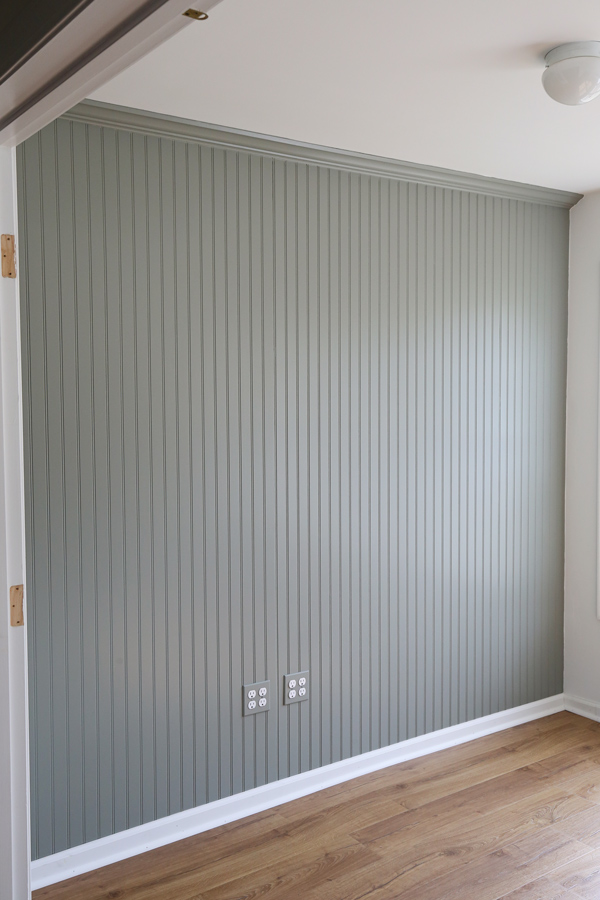
For our current office makeover, we built a new wall and a floor to ceiling beadboard accent wall was the perfect wall treatment for the classic, character look I wanted. And it was the perfect solution to avoid using drywall over the wall studs.
Also, beadboard works great over drywall too or if you need to cover any heavily textured walls or popcorn ceiling. It would look beautiful in a laundry room, dining room, living room, powder room, a small space or large space!
Note, this post contains some affiliate links. For more info see my disclosures here.
Types of Beadboard
Beadboard is available to purchase at the home improvement store in several different sizes, including large 4ft x 8ft wall panels, beadboard planks, and wainscoting panels. There are so many different options!
Most of these are an MDF or HDF material with primed and ready to paint surfaces. But it also comes in unfinished wood panels and wood planks too.
My tutorial below uses the large 4ft x 8ft wall panels from Home Depot but the steps I used can be applied to any type or material of beadboard.
Cost of Beadboard
The cost of beadboard will vary depending on the material and size of the beadboard panel or plank, but it’s a very affordable wall treatment.
The cost of the large 4ft x 8ft wall panels that I used were less than $30 per panel, so only a total of $90 for a 9ft. accent wall.
How to Install Beadboard:
Materials
- Beadboard panels (we used these 4ft x 8ft wall panels)
- Crown molding, trim, or chair molding**
- 1 1/4″ brad nails
- Construction adhesive like Liquid Nails (optional)
- Paintable Caulk
- Lightweight Spackle or Wood Filler
- Paint (if painting)
- Primer (if painting and boards aren’t pre-primed)
Tools
- Miter saw
- Circular Saw or Table saw (optional)
- Brad nailer
- Level
- Dremel, jigsaw, or wood chisel (optional, only if needed)
- Measuring tape
- Stud finder
- Utility blade, prybar and hammer (optional if removing floor molding)
**If you are just doing a DIY beadboard wainscoting with beadboard partially up the wall, you can use chair rail molding or trim. If you are doing beadboard to the ceiling, you can use trim or crown molding at the top (or nothing).
DIY Beadboard Wall Video Tutorial:
Subscribe to my YouTube Channel here!
Check out our how to install beadboard video!
1. Measure the wall width and determine material needed
The first thing to do is measure the wall or walls that you are going to be adding the beadboard too. Determine how many panels or planks of beadboard you will need.
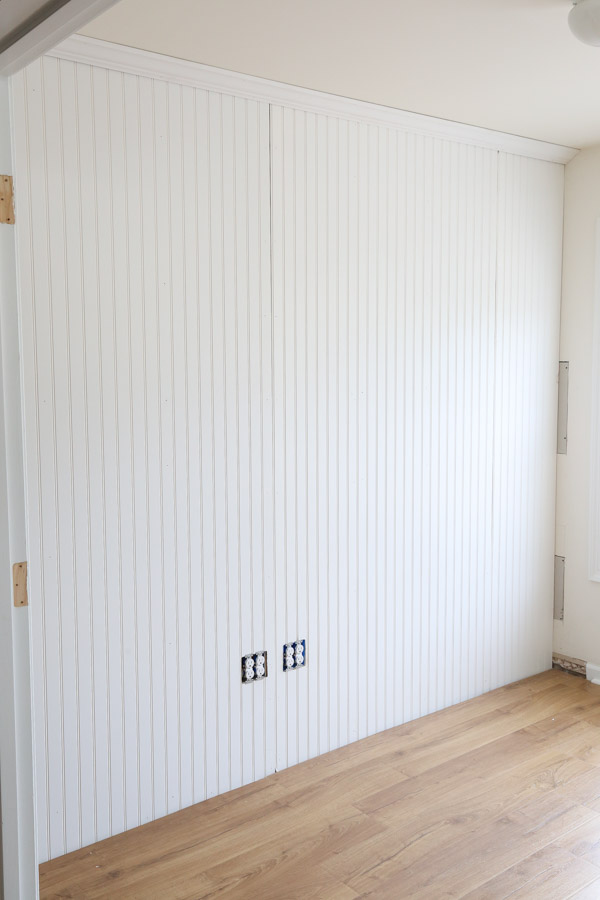
Our wall was about 9 feet so we needed three 4ft x 8ft panels.
2. Prepare the wall for the beadboard and remove molding as needed
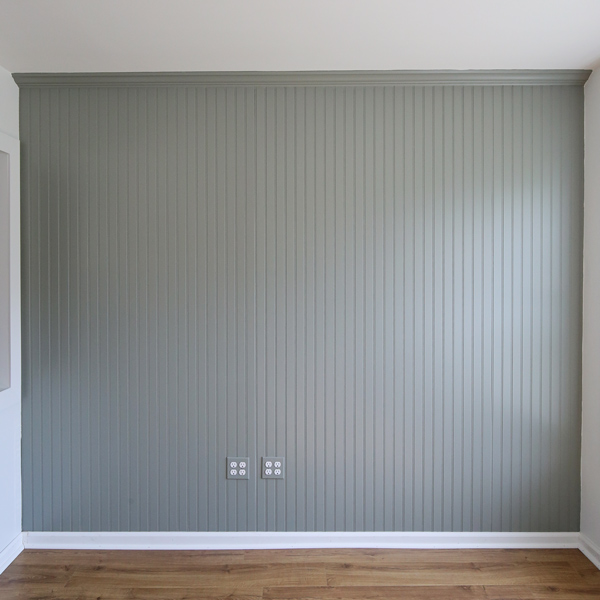
Another benefit about beadboard is that it’s typically very thin, around 1/4″ thick. So, you can get away with leaving your existing floor molding or crown molding up. Then, you can just caulk the gap between the two at the end.
However, if you want a very clean, professional look, it’s best to remove the crown molding (if you have any) and floor molding.
One of my biggest pet peeves with DIY is when a wall panel or accent wall is thicker than the baseboard!
To remove the existing baseboard and crown molding, score the top and corner caulk lines with a utility blade. Then, use a prybar and hammer to remove the baseboard from the wall.
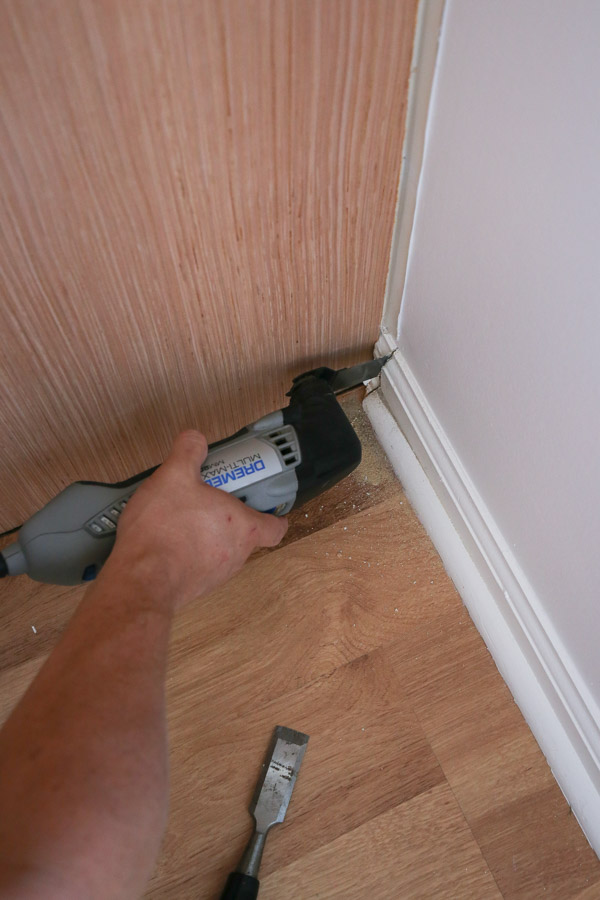
Also, if you are just doing one accent wall, you will need to prepare any adjacent walls just in the corners for the thickness of the beadboard.
Cut the corner trim 1/4″ (or the thickness of the beadboard) to allow the new beadboard panels to fit.
We used our Dremel, but a jig saw or wood chisel and hammer may be used as well. We’ve had to do this anytime we’ve installed a new accent wall, including our floor to ceiling board and batten wall and board and batten half wall.
We actually did this already when we built our wall. But here is a photo from our floor to ceiling board and batten tutorial so you get the idea!
4. Mark the wall studs
Use a stud finder to find and mark the wall studs. They are typically every 16″.
Obviously we could see our wall studs because we just built our wall and didn’t have any drywall up!
3. Cut the beadboard height to size if needed
If needed cut the beadboard panel height to size for the DIY beadboard wall.
Our 8ft tall panels of beadboard were just perfect for our wall and we didn’t have to cut them since our crown and floor molding would cover any small gaps.
So, make sure to take into account your floor and crown molding!
If you do need to cut the panels, use a circular saw and straight edge guide or use a table saw. Or you can have the panels cut to size at your home improvement store where you purchased them.
If using beadboard planks, you can cut them with a miter saw.
Wait to make any width cuts at this point though.
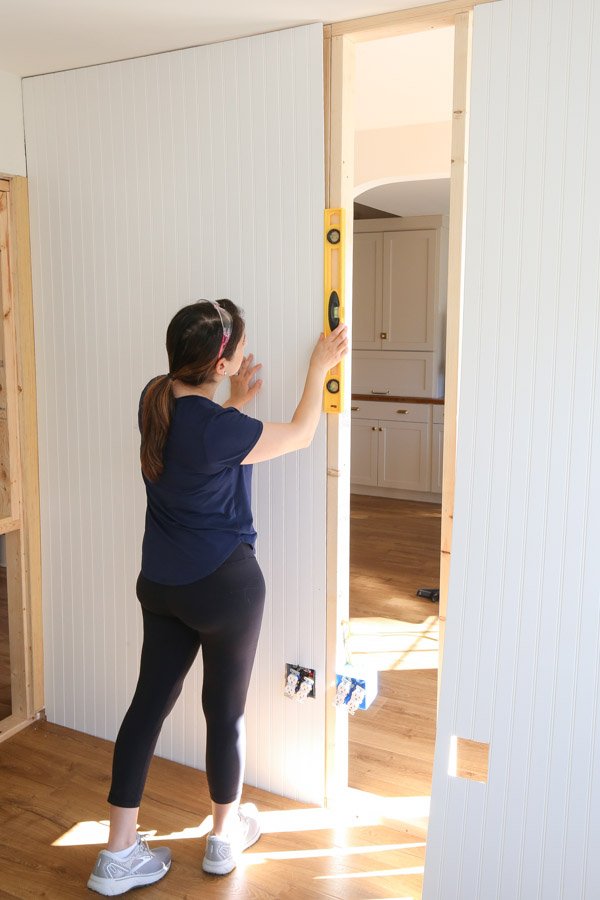
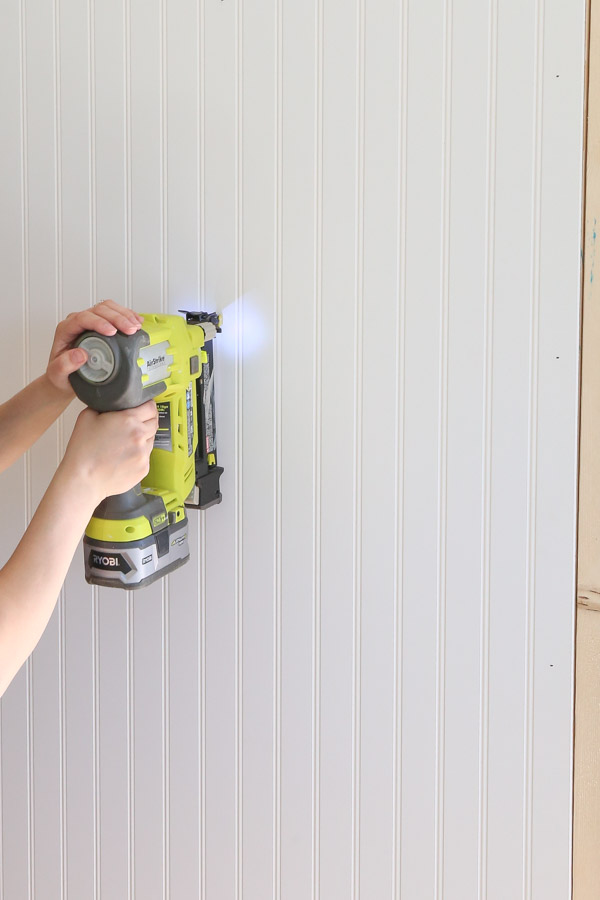
5. Install the beadboard to the wall
Install the first beadboard panel and make sure it is LEVEL!!! You only need to do this for the first panel on the wall.
How to install beadboard paneling over drywall or bare wall studs
If the beadboard panels cover enough wall studs for you to nail into and secure them to the wall studs, then you don’t need to use construction adhesive.
But, if the beadboard panels or planks don’t cover enough wall studs to be securely attached, then use construction adhesive (like Liquid nails) on the back to make sure they are securely attached to the wall.
We had to use Liquid Nails for our DIY beadboard wainscoting over drywall in our DIY beadboard bathroom.
We planned our panels so that they would cover our wall studs evenly and we only had to use nails with no construction adhesive. Plus, you should not use construction adhesive on bare wall studs that do not have drywall!!
We used 1 1/4″ brad nails and a brad nailer. You can see the install in action in our DIY beadboard video!
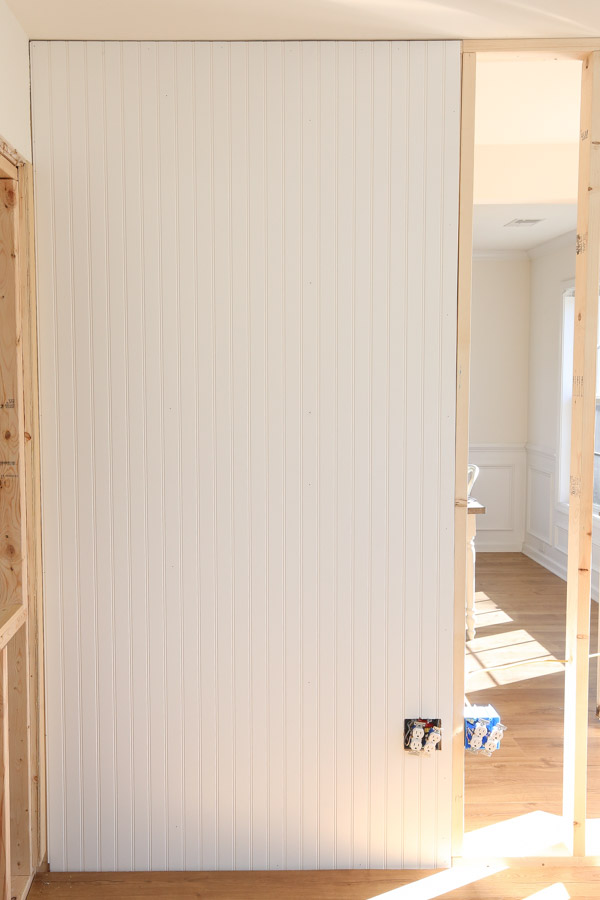
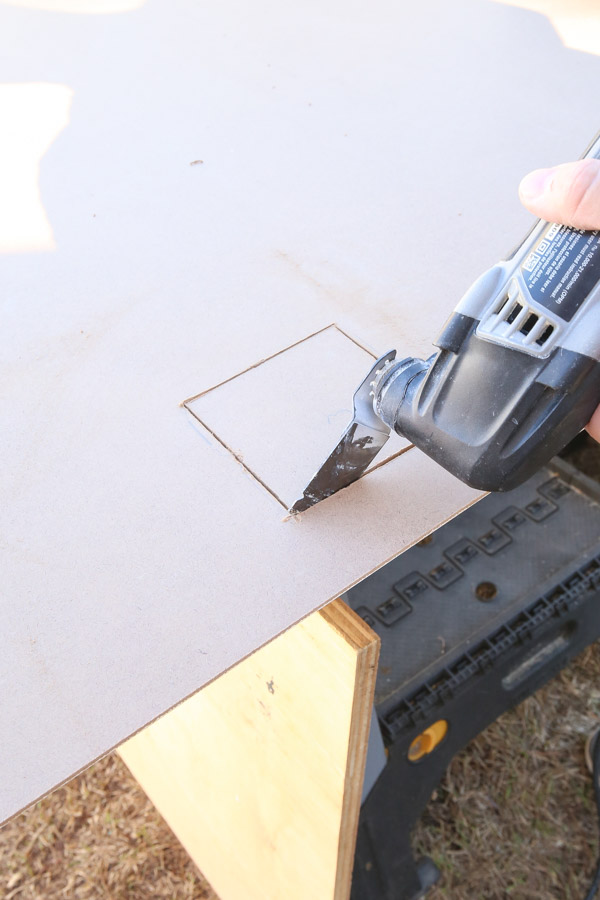
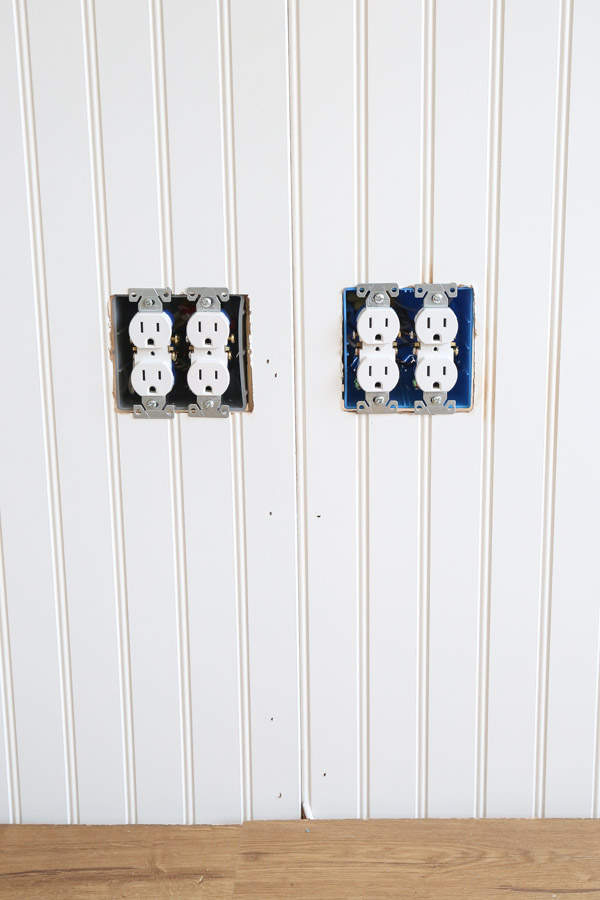
Make special cuts as needed for wall outlets and features
As you go, make any special or custom cuts for wall outlets, light switches, or other wall features.
Our first two beadboard panels needed wall outlet cuts. We measured and marked on the beadboard where the cut opening needed to be made.
📩 Want to Save This?
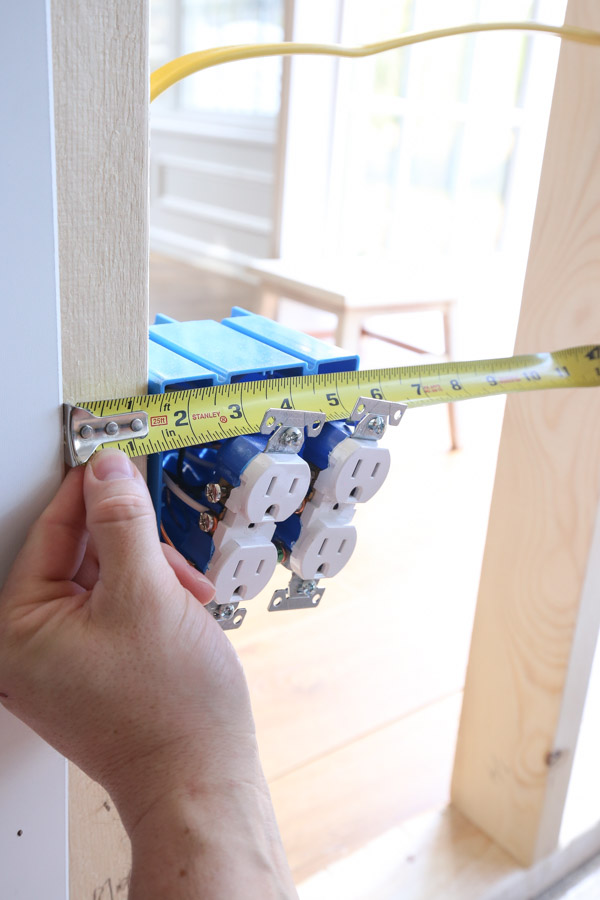
Then, we used our Dremel tool to cut the openings. But a jigsaw could be used too.
See the wall outlet cutting in action in the DIY beadboard video!
Tips: Make sure to turn the power off if you are unscrewing the outlet terminals like we did for a tight fit. Also, If your cuts are a little bit off you can usually buy jumbo size wall plates to help cover the cut more!
For our DIY beadboard wainscoting in our bathroom we also had to make pipe cuts. Check out that tutorial to see how we did that!
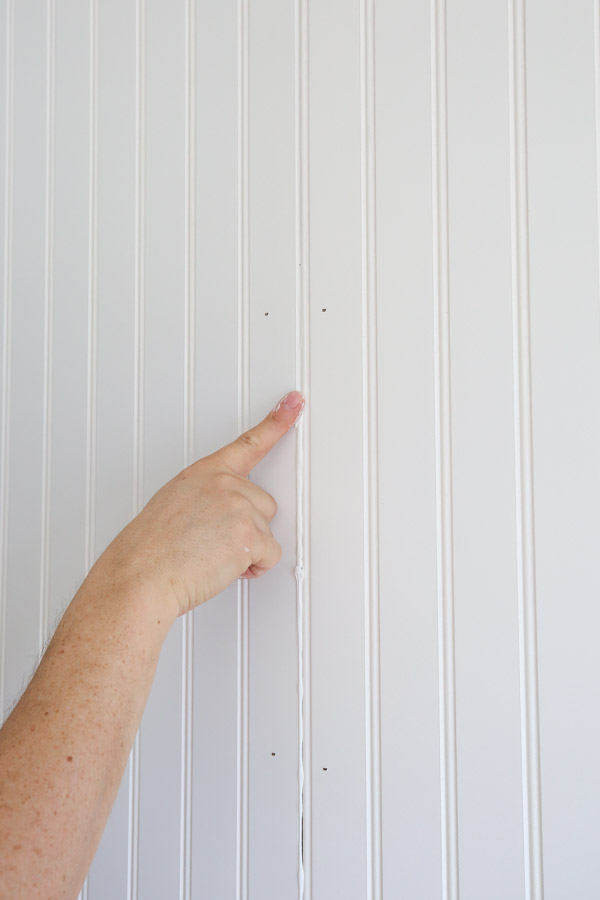
Make sure to line up the beadboard panel edges correctly
We were rushing this project and initially installed our second beadboard panel the wrong way!
Each beadboard panel has a straight edge and groove edge. Make sure to line up the straight edge of your first panel board with a groove edge of the next panel.
Here is a photo of what NOT to do!!
And here is the correct way to install it:

This is really important so that when you go to caulk the seams at the end, you have one seamless look. Also, if you have to cut any boards at the end (like in step #6 below, make sure to cut on a groove part so you can line things up properly at the end.
6. Install the last beadboard panel cut to size to finish the DIY beadboard wall
Once you reach the end of the wall, measure the width from the edge of the last beadboard panel to the wall corner.
Cut the panel using a circular saw and straight edge guide or use a table saw. Also, as noted in step #5, make sure to cut so the edges line up properly!

7. Install the top trim or crown molding
If you are using crown molding or trim pieces along the top, install it into the wall studs with a brad nailer.
We used crown molding for our top trim piece and cut it to size with our miter saw. It was an easy step since no special angled cuts were needed! Then, we installed it with our nail gun.
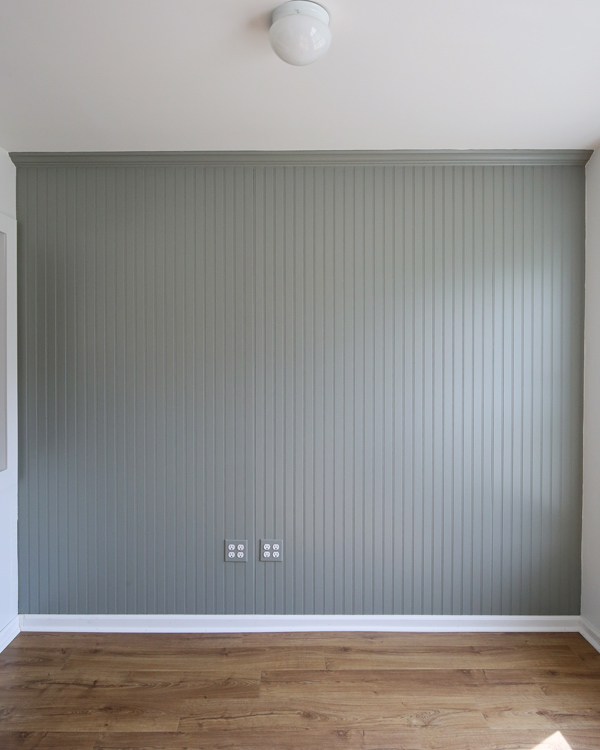
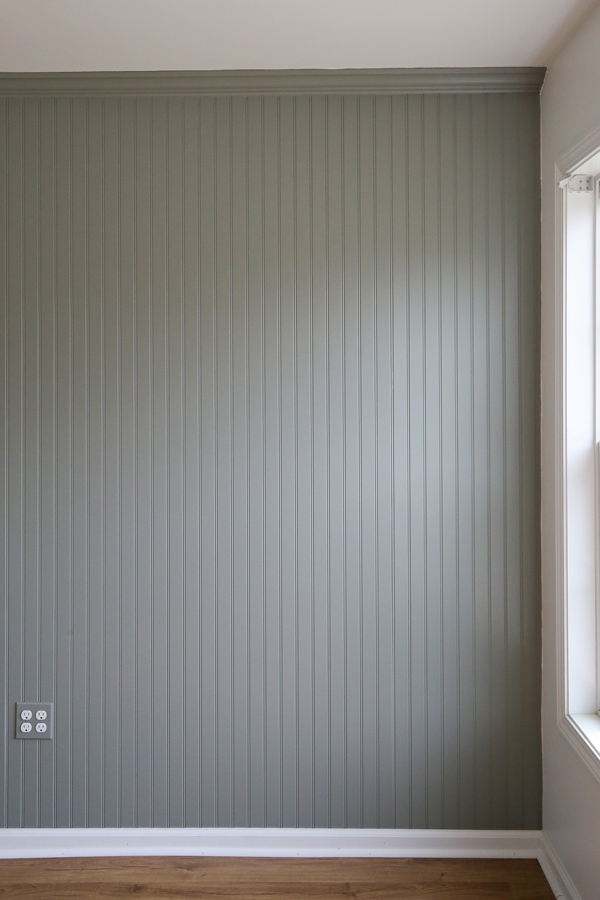
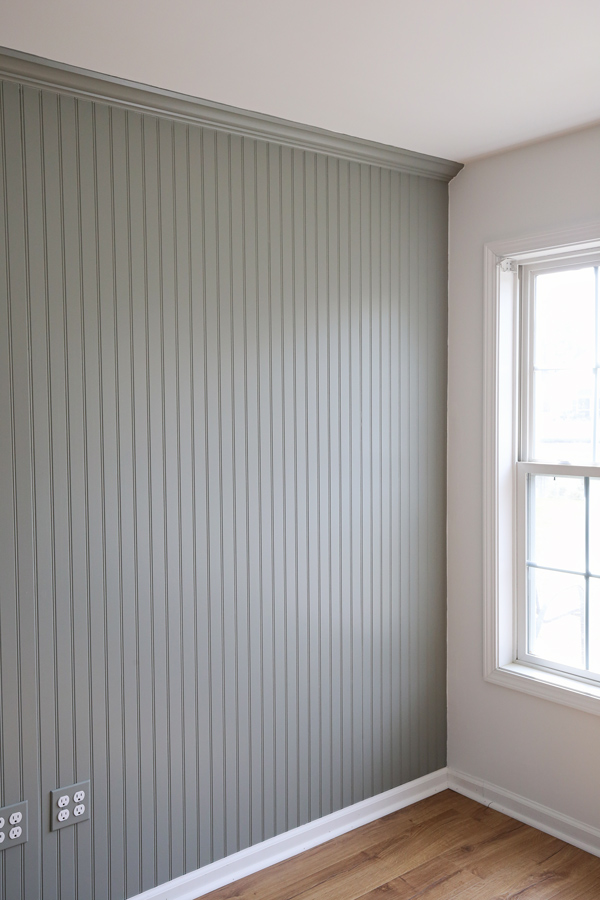
I love how the crown looks on our DIY beadboard wall!
Floor Molding Note:
If your floor molding will be a different color than the crown molding and beadboard, wait to install it until AFTER you paint the beadboard to keep painting easier.
But, if it will be the same colors as the beadboard and crown molding, go ahead and install it before painting with brad nails into the wall studs.
We are painting our floor molding a different color (white), so we held off on installing our molding until after the beadboard and crown molding was painted!
8. Prep for paint
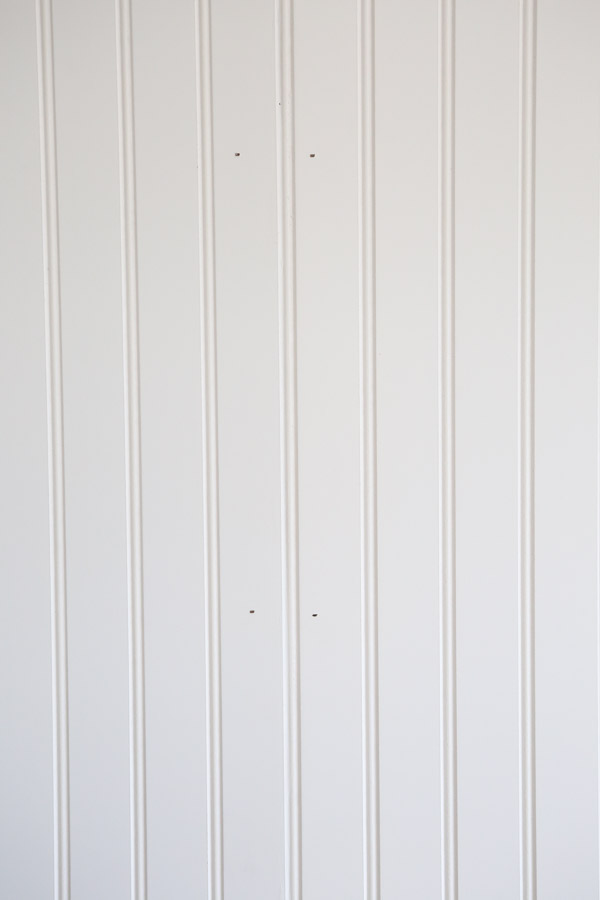
Prep for paint by filling all the nail holes with light spackle or wood filler, allowing to dry, then lightly sand those spots so they are smooth.
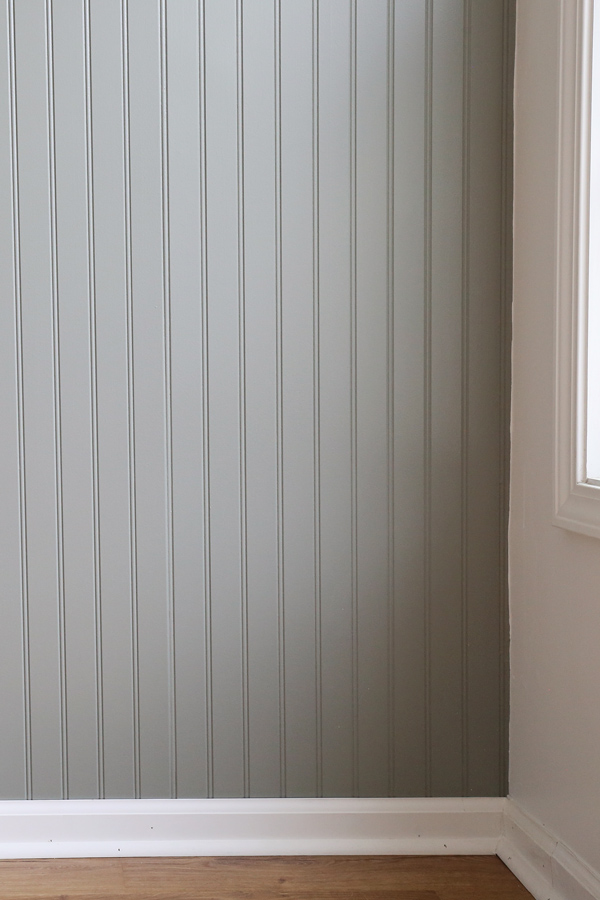
Then, caulk around the moldings, corners, and wherever two pieces of beadboard edges meet each other. Use paintable caulk!
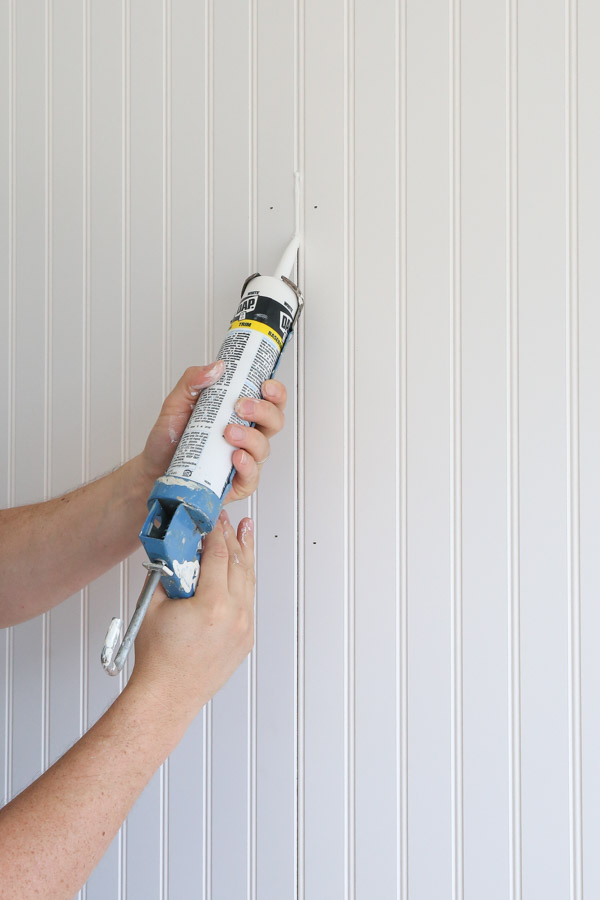
It’s amazing how seamless the beadboard panels all look together after a bead of caulk is applied!
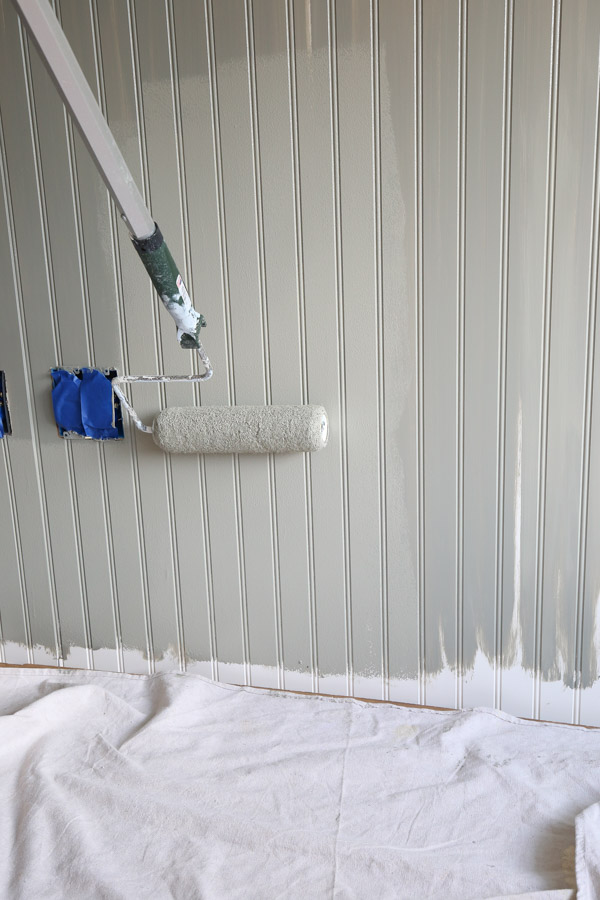
9. Paint the DIY beadboard wall
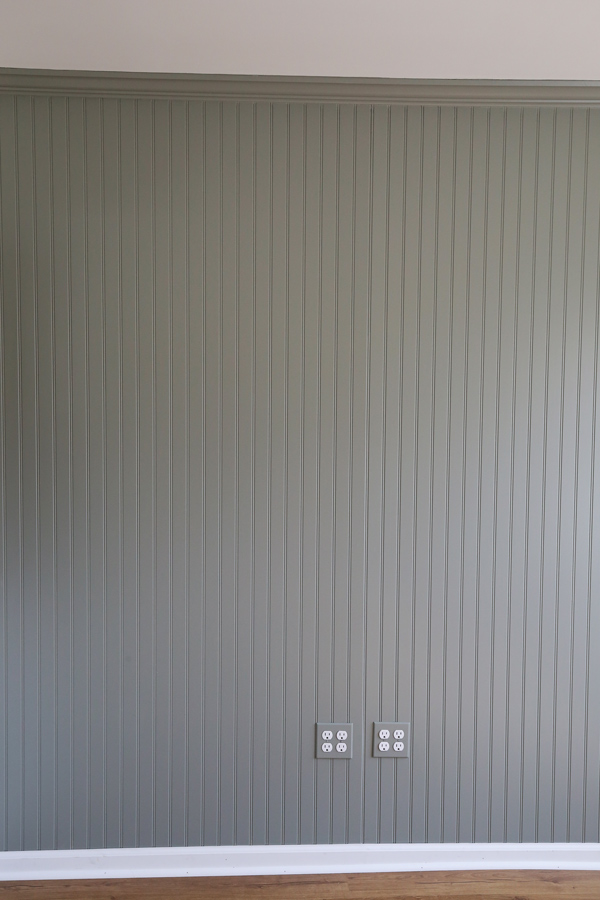
Paint the beadboard! We used Cornwall Slate by Sherwin Williams. It’s a beautiful, gray, green paint color.
The beadboard grooves should be cut in first with a paint brush. This is a bit tedious but worth it for a nice paint job!
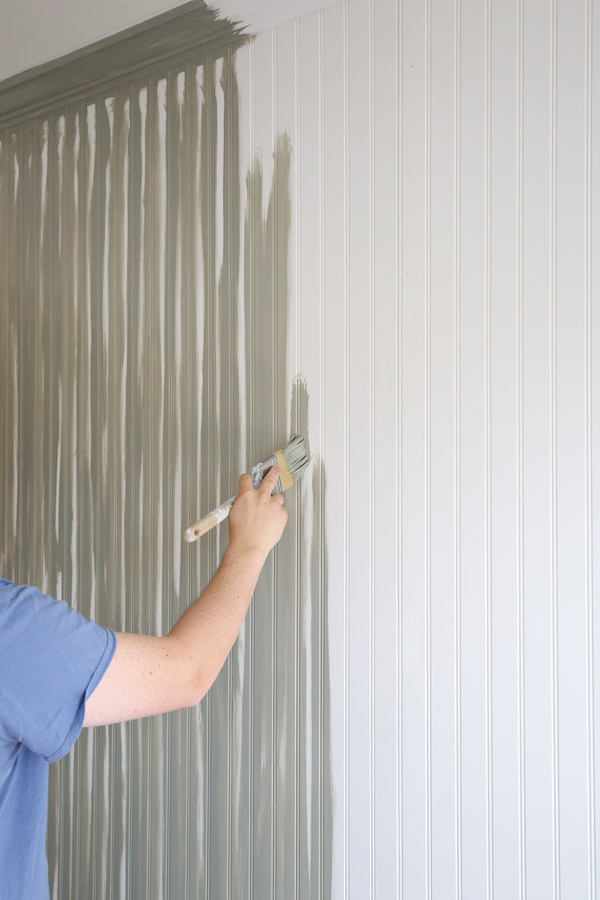
Then, roll the paint on the beadboard with a paint roller!
I love how our DIY beadboard turned out and the color suits it just perfectly! What do you think?!
Frequently Asked Questions
Is beadboard hard to install?
No, beadboard is not hard to install and is one of the easier wall panels to install. You do need to know how to use a brad nailer and a circular saw (unless you get your beadboard cut at the home improvement store).
Should beadboard be nailed or glued?
If the beadboard panels cover enough wall studs for you to nail into and secure them to the wall studs, then you don’t need to use construction adhesive.
But, if they don’t cover enough wall studs or if you are attaching them to a ceiling, glue (construction adhesive) should be used to ensure they are secured to the wall.
How do you make a beadboard wall?
A beadboard wall can be made using either beadboard wall panels or planks found at the home improvement store. They are attached to the wall with brad nails and or construction adhesive. The last step is to fill nail holes, caulk, and paint the beadboard.
Does beadboard go on top or behind baseboard?
Beadboard that is as thin as your baseboard, typically around 1/4″ thick, can be installed on top of baseboard. Then, you can just caulk the gap between the two at the end.
However, if you want a very clean, professional look, it’s best to remove the baseboard and install the beadboard behind it.
Well I hope this DIY beadboard wall and how to install beadboard tutorial was helpful! Make sure to check out our DIY beadboard wainscoting in our bathroom too!
Follow along on Instagram, YouTube,and Pinterest for my latest projects, fun updates, and sneak peeks!
Summer
Wednesday 6th of March 2024
What color is the white wall?
Angela Marie Made
Friday 8th of March 2024
Pure White by Sherwin Williams!
dee
Sunday 28th of January 2024
This looks very nice and I like your paint color too! great job. Thank you for sharing.
Natalie
Wednesday 13th of March 2024
@Angela Marie Made, gorgeous! What is the green paint color called?
Angela Marie Made
Monday 29th of January 2024
Thank you!