Learn how to install a board and batten wall from floor to ceiling and with crown molding!
As part of our living room makeover, I knew I wanted to do a DIY board and batten accent wall that goes from floor to ceiling for a classic and modern look!
This floor to ceiling board and batten with crown molding is actually my third DIY board and batten wall treatment.
Previously, we did a fancy style DIY board and batten bathroom wall and a classic and easy DIY board and batten accent wall as wainscoting, half way up the wall in our son’s nursery. There are just so many fun DIY wall panel styles to use for a room makeover!
Also, check out our full room DIY board and batten where I share 5 tips for installing board and batten around an entire room!
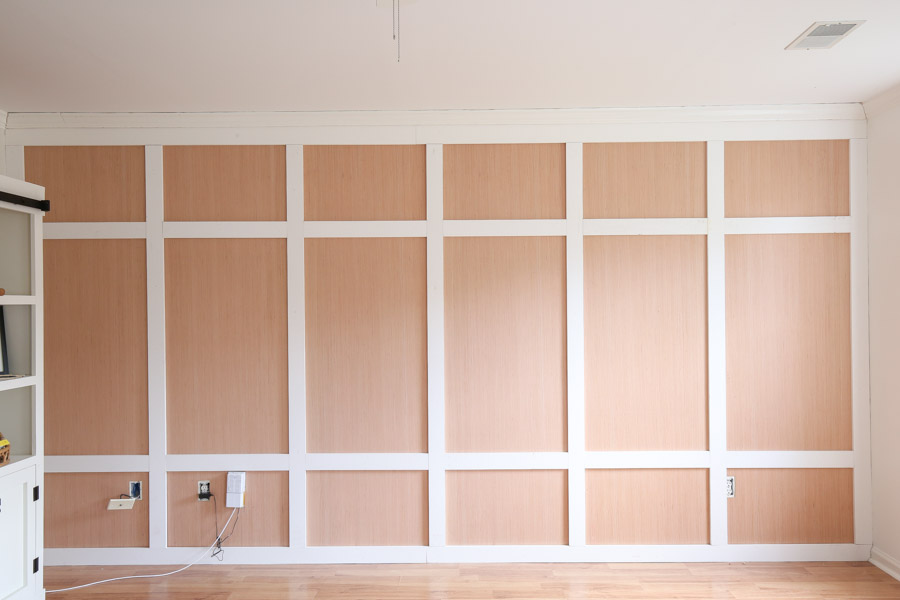
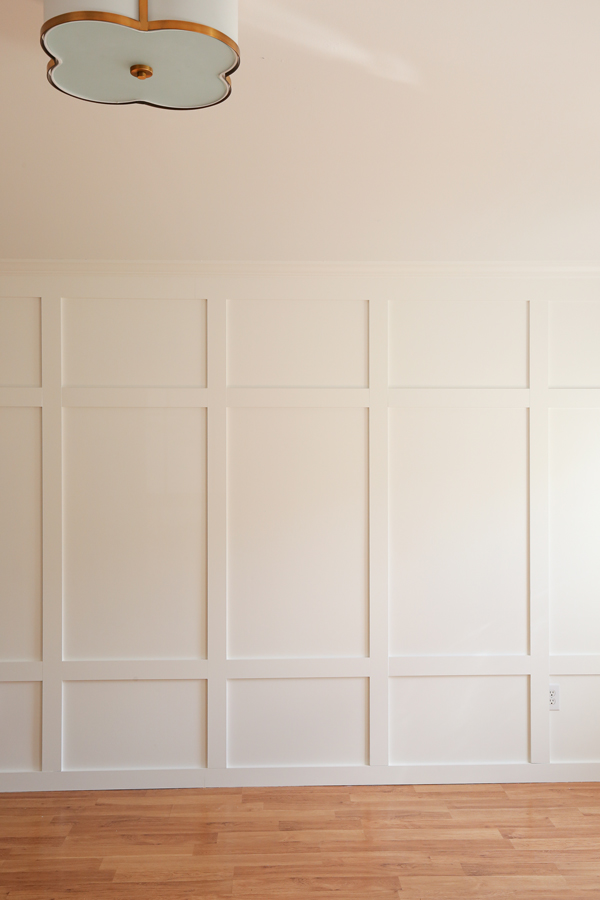
We have a large, long wall in our living room and when we first moved in, we installed DIY faux shiplap on it. As much as I love the shiplap, I was ready for a fresh change.
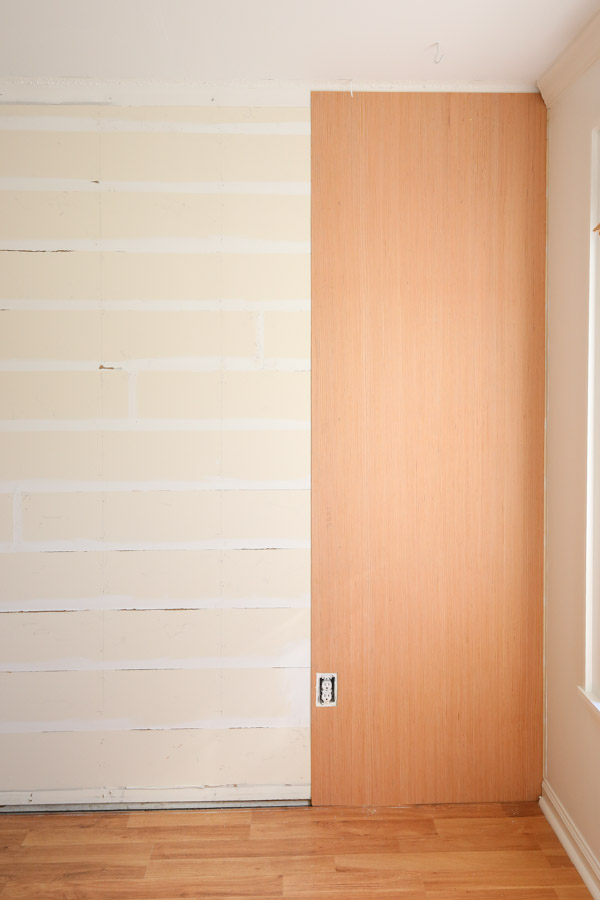
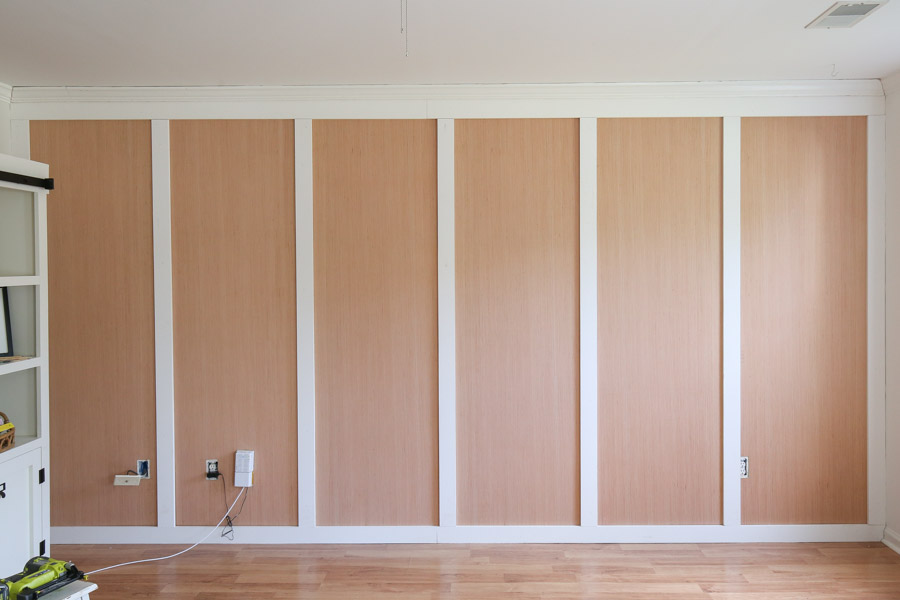
Before starting our board and batten DIY, we had to remove our existing shiplap which caused some unexpected drywall damage. So, we covered it up with 1/4″ plywood sheets (explained in step #2).
Board and Batten on Textured Walls
You can definitely do board and batten on textured walls. If your wall only has a little bit of texture, and it’s not that noticeable unless you get up close, then you don’t have to worry about it.
For example, on our half wall board and batten accent wall, we only had slightly textured walls and did not cover them.
If you have heavily textured walls, an easy solution would be to cover it with either 1/8″ hardboard panels or 1/4″ plywood panels (that are pre-sanded and high quality) like we did in this tutorial (step #2 below).
Panel boards come in 4 foot x 8 foot sizes at the home improvement store and they can cut them to size for you.
Another option for covering wall texture is adding a skim coat, however this is very messy and more involved so that’s why I prefer the panel board option instead!
How much does DIY board and batten cost?
The cost of our DIY board and batten wall, for a full 15 foot wall, was less than $200. That includes the boards, caulk, and paint. We already had the nails, spackle, and wood filler on hand.
For the optional plywood boards to smooth out our wall, it cost an additional $135. There are other options, like hardboard, which would cost even less than this amount.
Note, this post contains some affiliate links. I may earn a commission if you shop those links (at no cost to you). Thank you for supporting my small business. For more info see my disclosures here.
DIY Board and Batten Wall
Materials
- 1×4 @ 8ft, 10ft, or 12ft (We used these pre-primed wood boards)***
- 1×6 @ 8ft, 10ft, or 12ft (optional)
- Crown molding (optional)
- 2″ brad nails
- Construction adhesive (we used Liquid Nails)
- Paintable Caulk
- Lightweight Spackle
- Wood Filler
- Paint (We used Simply White by Benjamin Moore in eggshell)
- Paint roller and tray
- Primer (if boards aren’t pre-primed)
Tools
- Miter saw
- Brad nailer
- Level
- Dremel, jigsaw, or wood chisel (optional, only if needed)
- Measuring tape
- Stud finder
- Utility Knife
- Prybar and Hammer
- Wood shims or wood craft sticks (optional)
***Note, the amount of boards you will need depends on the measurement of your wall(s). Also, I used wood boards but MDF boards are a less expensive alternative. We used MDF boards on our other board and batten accent wall.
DIY Board and Batten Video Tutorial:
Subscribe to my YouTube Channel here!
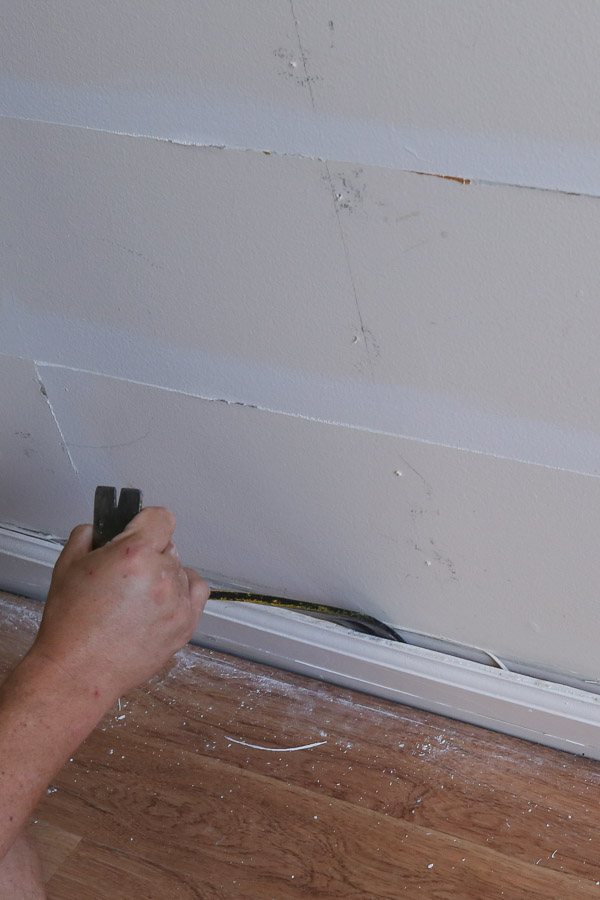
1. Remove existing baseboards and crown molding from the wall
To remove the existing baseboard, score the top and corner caulk lines with a utility knife. Then, use a prybar and hammer to remove the baseboard from the wall.
If you have crown molding, remove it the same way as the baseboard. If you want to reuse your crown molding over the board and batten like we did, carefully remove it to avoid damaging it.
2. Prepare the wall for the the board and batten (optional)
The next step is to optional depending on the condition of your drywall. If you have a wall in good condition or not heavily textured you can skip this step.
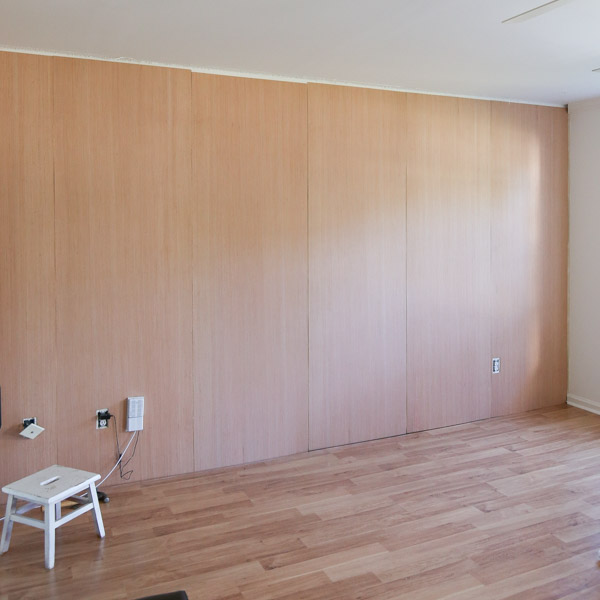
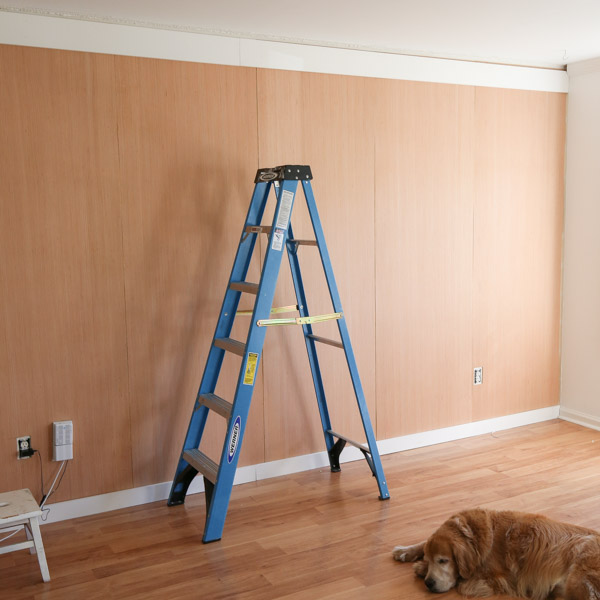
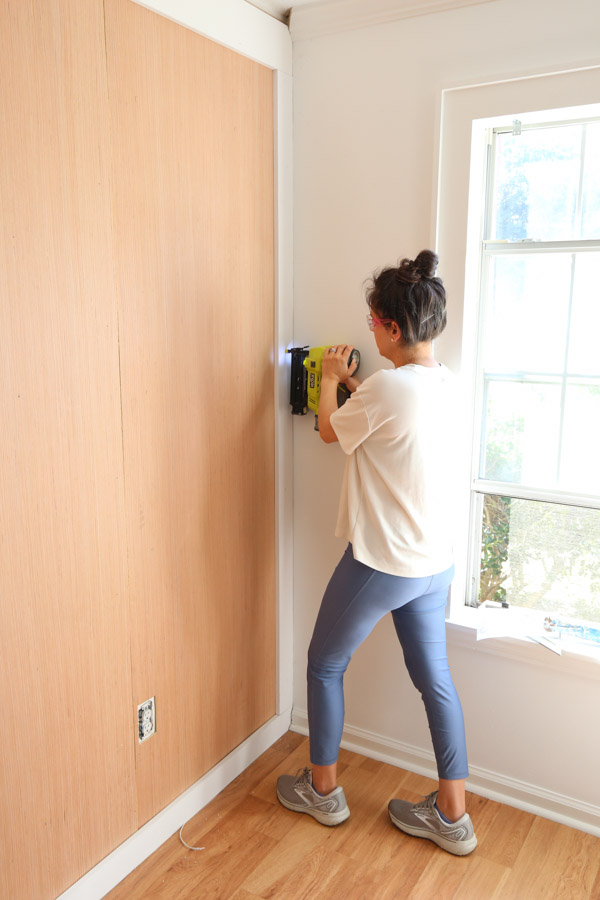
Because our drywall was damaged from the shiplap removal, rather than having to repair it, we decided to install 1/4″ ready to paint plywood with brad nails into our wall studs.
We also used our Dremel tool to cut around the wall outlets.
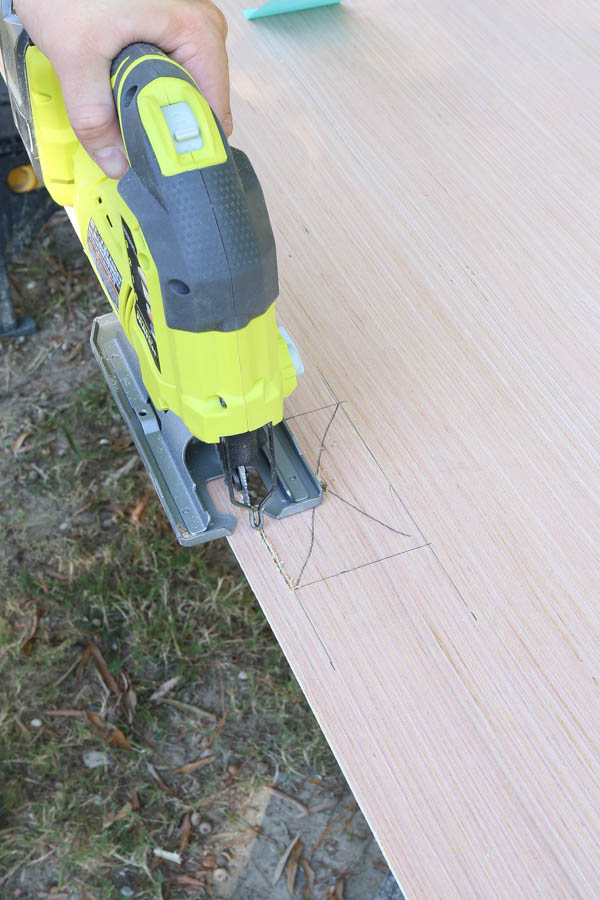
This worked great for easily covering the damaged drywall. It also creates a really smooth wall surface, so if you have heavily textured walls, this is a great option.
Make sure to cut the panels though at the same measurement where your vertical batten board is going so that the board covers the panel board edges. You don’t want a visible line going through your accent wall.
See step #5 for how to determine the batten spacing.
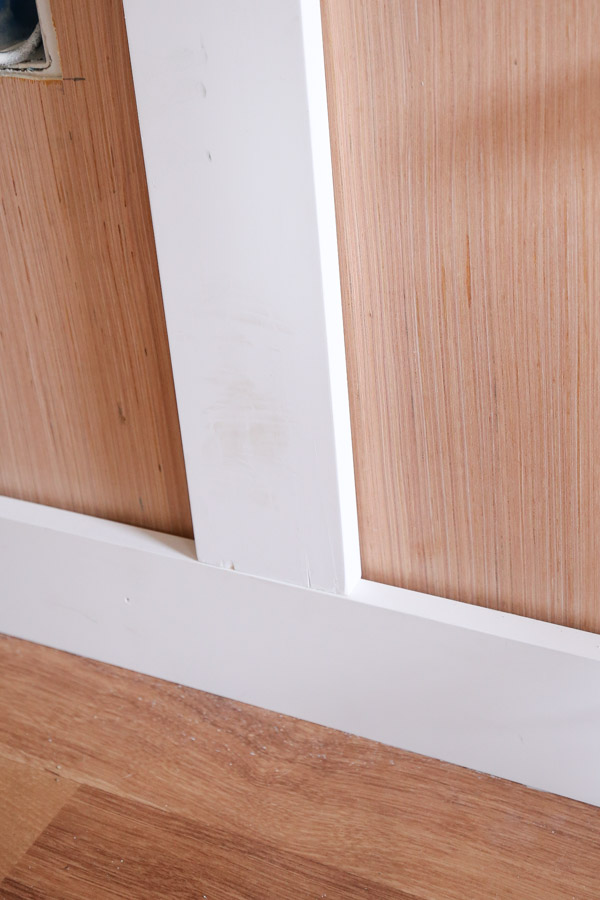
3. Install the new board and batten baseboard
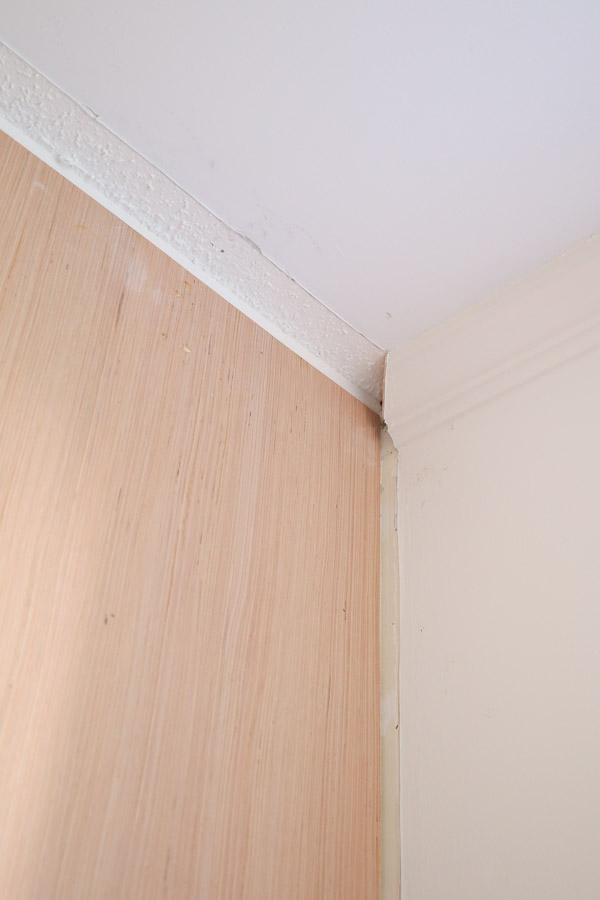
Before installing the new 1×4 baseboard, we cut the wall molding corners 3/4″ (the width of the 1×4) in order to fit the new board. We used our Dremel, but a jig saw or wood chisel and hammer may be used as well.
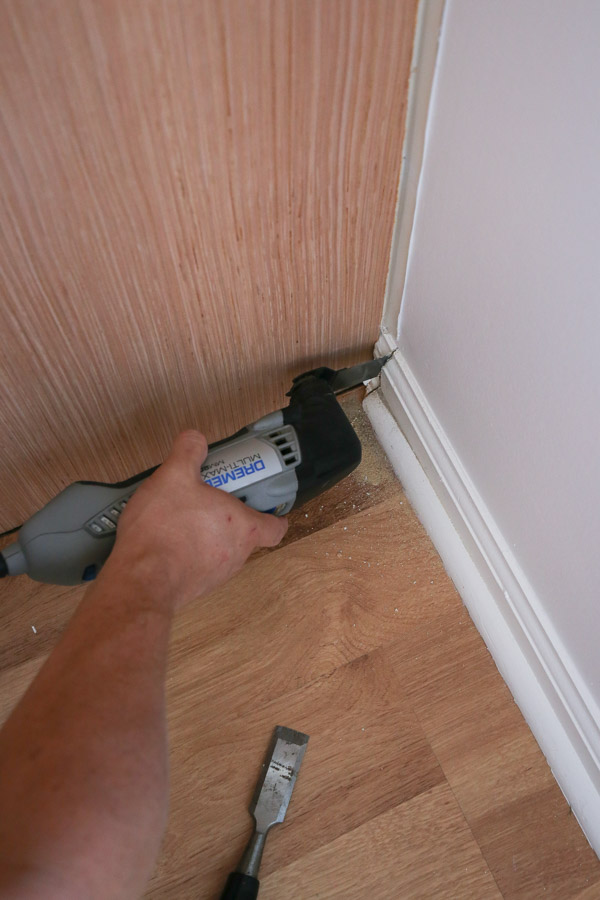
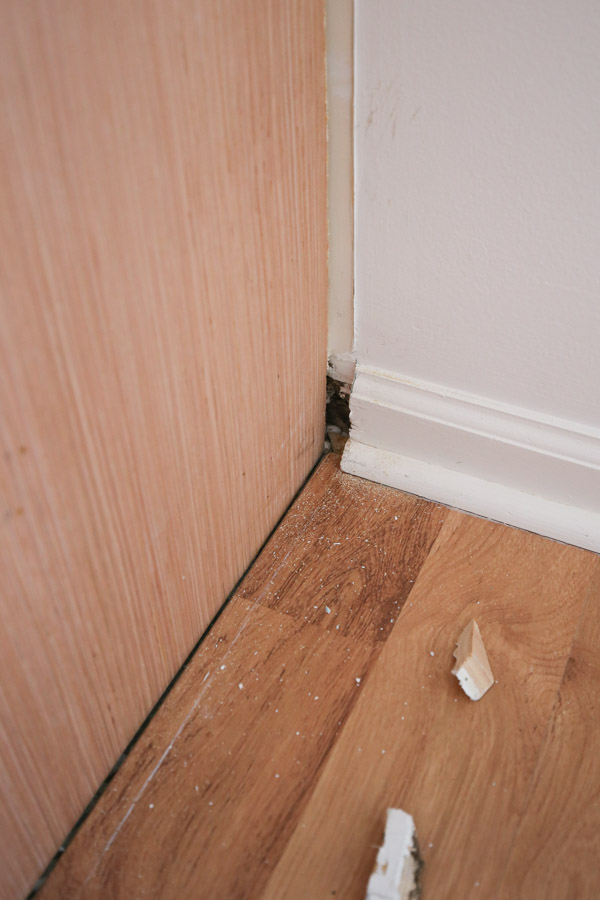
We also had to do this with our crown molding too on the adjacent walls.
Measure the length of your wall and cut the 1×4 to size using a miter saw.
Because our wall was 15 feet long, we had to use two 8 foot boards. We will just fill the cut seam at the end with wood filler.
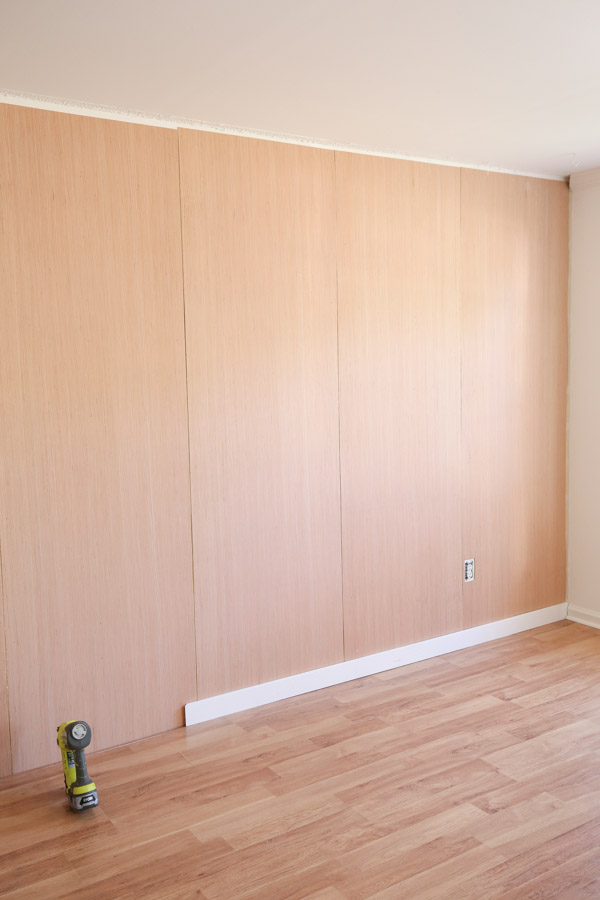
Install the baseboard along the bottom of the wall with a brad nailer and 2″ brad nails going into the wall studs. Use a studfinder to find the wall studs.
Also, use a level to ensure the baseboard is level when installed.
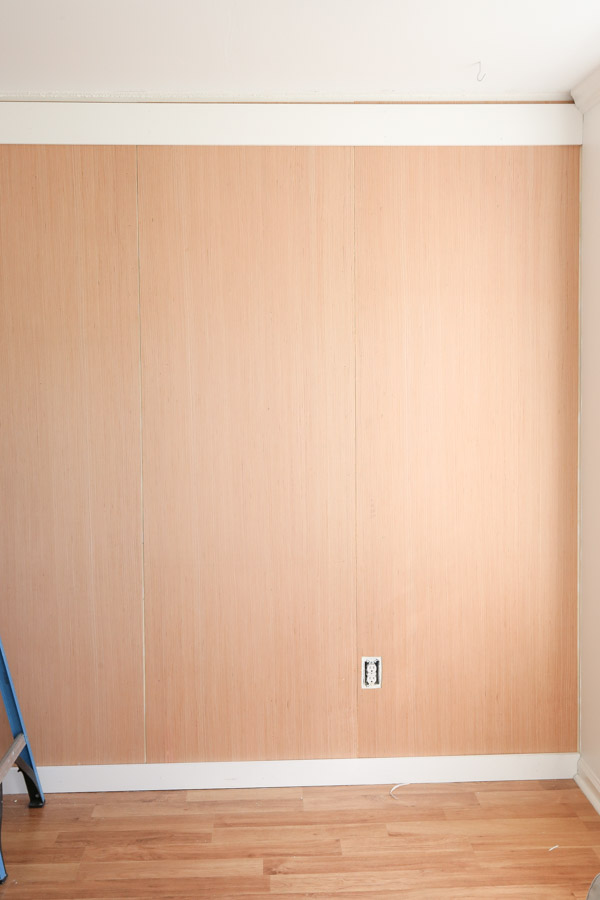
4. Attach the top molding board to the wall for the floor to ceiling board and batten
There are a few options for the top molding board. You can use just another 1×4 or you can take it up a notch and layer crown molding over the board like we did.
Because we are adding our crown molding to the top, we installed a 1×6, 6.5″ down from the ceiling, so that 4″ of the bottom of the 1×6 board would show and we could nail the crown into the top portion of the 1×6.
We used a level again and installed the 1×6 with 2″ nails and a nail gun into the wall studs.
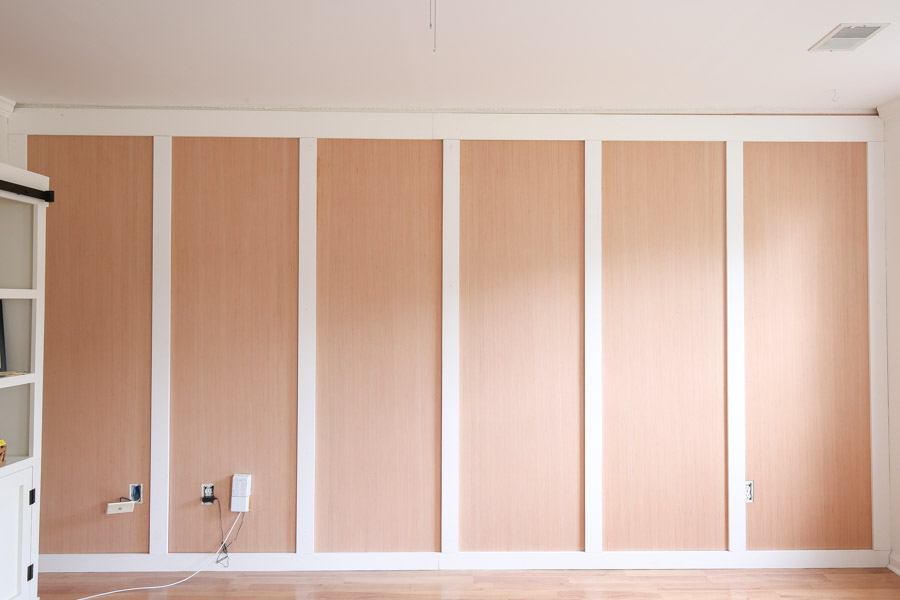
5. Determine batten (vertical board) spacing for the board and batten wall
Determine what you want the spacing to be for your DIY board and batten. Because our wall is so large, 15 feet long, I wanted to do larger spacing.
For reference, for our son’s nursery board and batten accent wall, the wall was 10 feet long and I used 16.5 inch spacing. And for our board and batten bathroom wall, which was a very small room, I used 12 inch spacing.
To determine my exact batten spacing measurement, I used the exact same method that I did in my easy DIY board and batten wall tutorial.
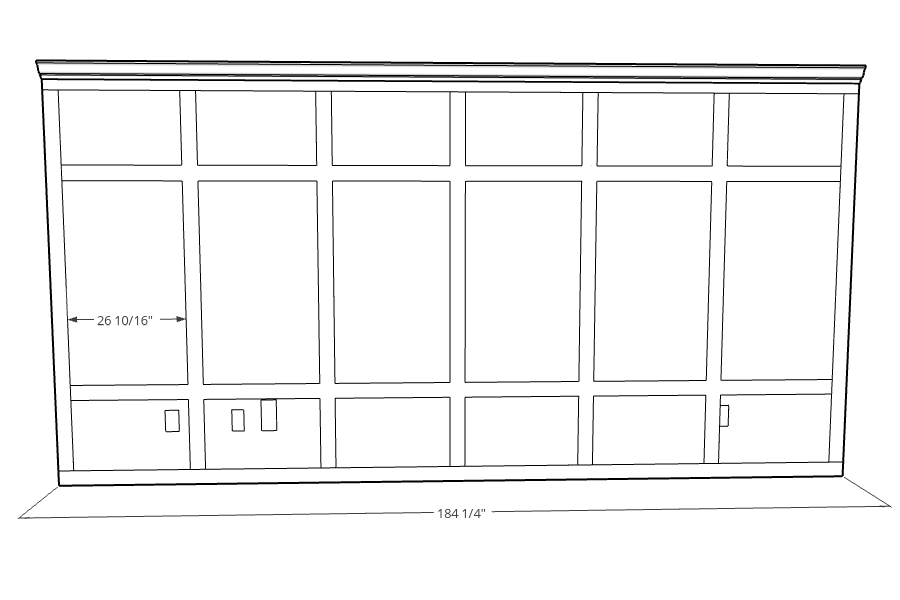
Here is how I figured out my exact batten spacing for this accent wall, using that same method, and having a batten board starting and ending on both corners of the wall:
I knew I wanted around 24-28 inches of spacing between each board so it would like right visually.
So, to figure out the math and see about how many batten boards that would be, I took our total wall length of 184 1/4″ and divided by 25″ (which is between 24″-28″), which equaled roughly 7 boards.
To get the exact spacing, I then did the following math:
- 7 batten boards x 3.5″ (actual width of 1×4 boards) = 24.5″
- 184 1/4″ (length of wall) – 24.5″ = 159 3/4″
- 159 3/4″ / 6 (the # of spaces between 7 boards) = 26.625″ or 26 10/16″ on a tape measure.
It’s not the prettiest, even number but it works perfectly for getting exact spacing.
📩 Want to Save This?
Wall Outlets and Batten Spacing
The other consideration is that we have two wall outlets and a cable box on our wall. This measurement was the only one that worked to avoid almost all three of them and still look right visually.
I will explain soon how we worked around the wall outlet that is in part of the spot where one of our battens goes. Ideally though, you want to pick a spacing combination that avoids intersecting any of the wall outlets.
Alternative ways to do this is try a different number of batten boards and spaces or use 1×6 boards (which measure 5.5″ wide) instead of 1x4s. Or even 1×3 boards (which measure 2.5″ wide) instead of 1x4s for a smaller wall.
6. Attach battens (vertical boards) to the wall
Mark on the wall exactly where your battens need to go based on the spacing you determined in the last step.
Measure the exact height needed for each batten based on where they will be attached to the wall. Because most walls aren’t perfectly straight, the measurements may be slightly different for each.
Cut each 1×4 batten to size using a miter saw.
Use construction adhesive (we used Liquid Nails) and brad nails to attach the battens to the wall, starting with the far right wall corner.
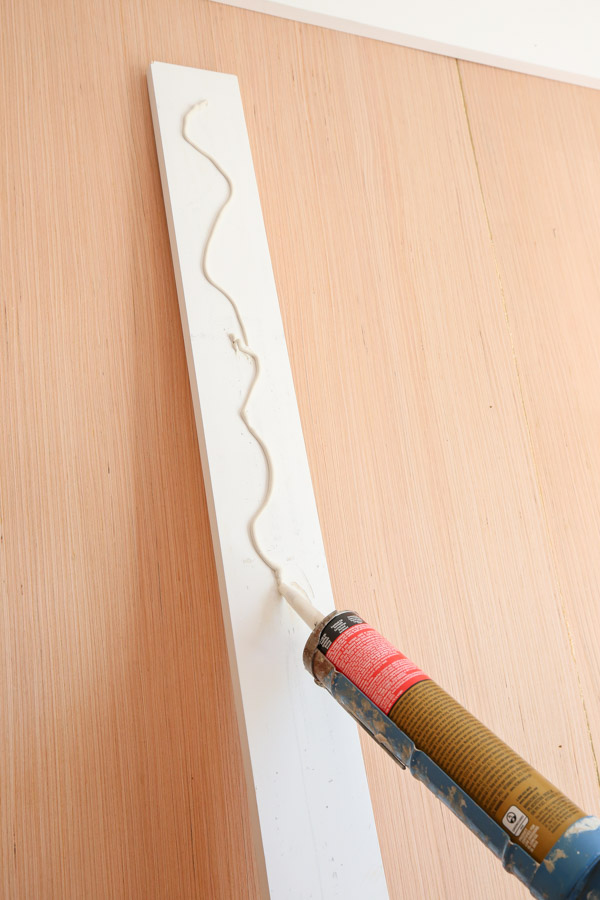
Because these vertical boards are being installed vertically, they are unlikely to go over the wall studs, so that’s why Liquid Nails needs to be used.
For the second batten board, we measured our batten spacing width from the edge of the last 1×4 board and marked where the next batten needed to go.
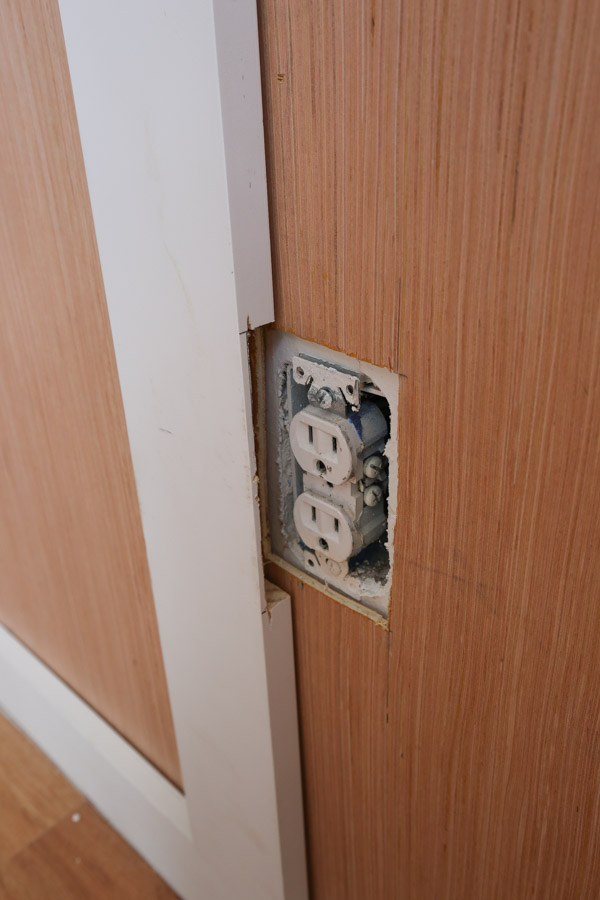
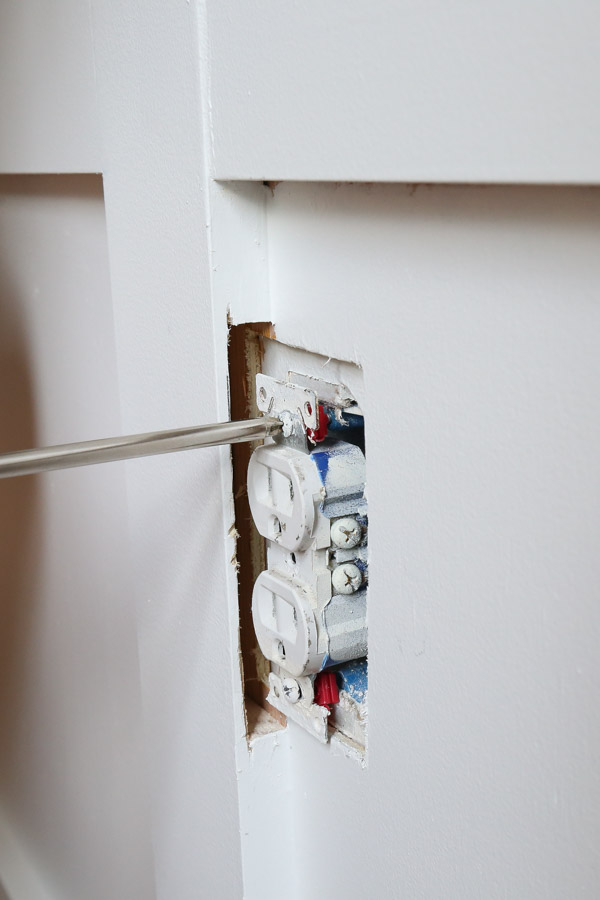
What to do if you have a wall outlet in the way
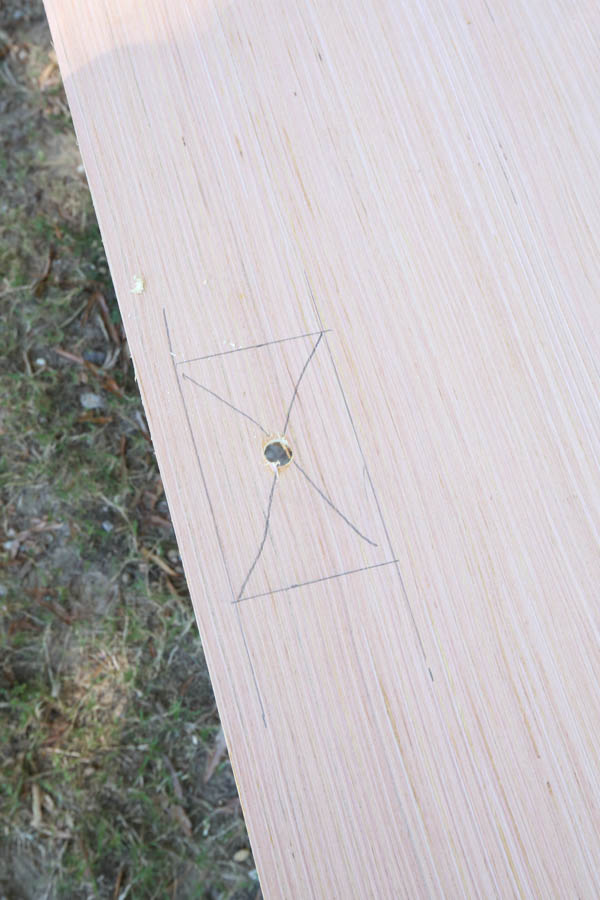
As I said previously, our second batten board, partially crosses over our right wall outlet, but fortunately it only crosses over about 1″ over the outlet cover plate and not the outlet.
In order to still use the outlet and keep the board in the correct place, we marked on the 1×4 board where it crossed over the outlet cover and used our Dremel to notch out the wood at that spot about a 1/2″ deep.
See this in action in our DIY board and batten tutorial VIDEO!
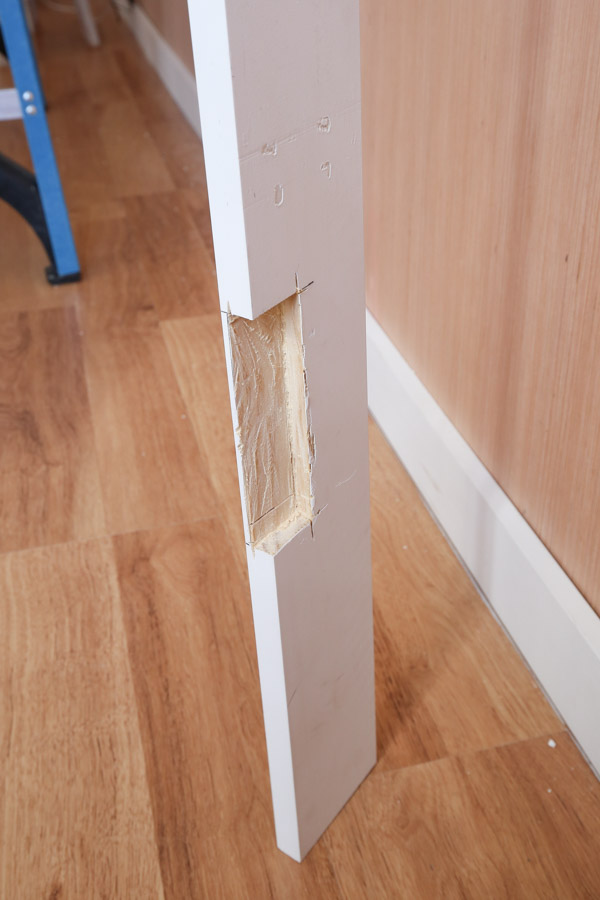
This allowed the board to be installed over the outlet plate leaving enough room to still take it on and off the wall and still use the outlet. And the batten board still looked like a full board in the right spot!
After the outlet challenge, we continued installing the battens.
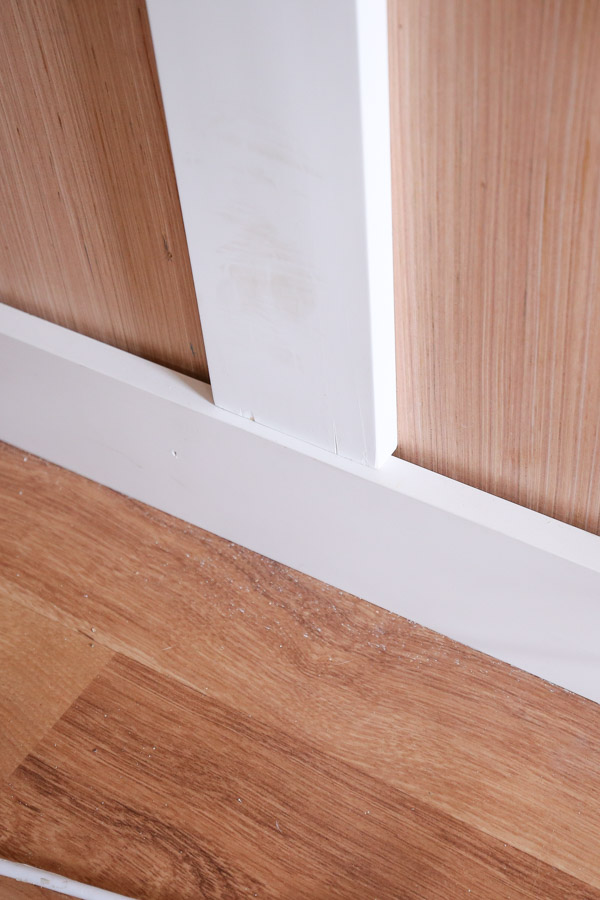
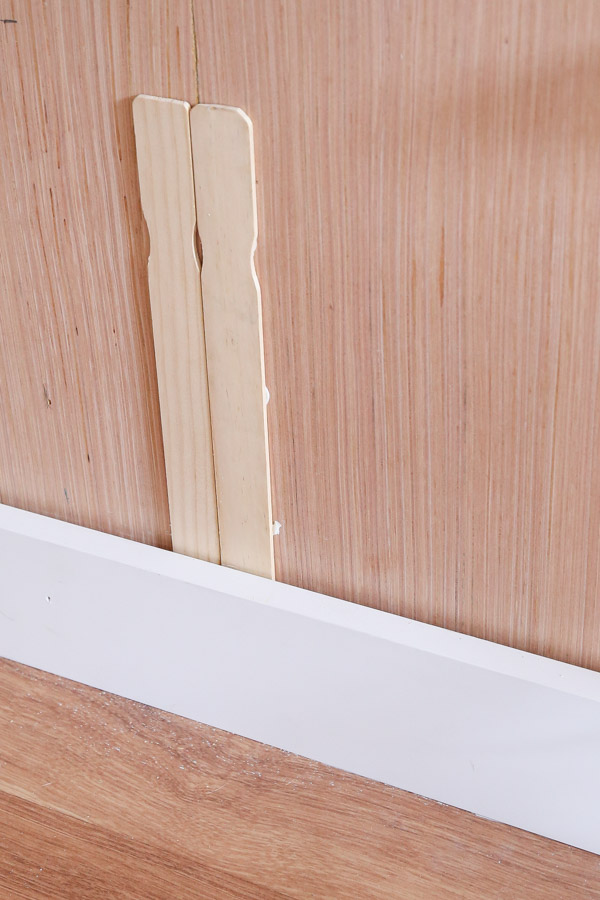
Battens not lining up with baseboard
Another challenge we ran into with a few of the battens is that the wall wasn’t straight everywhere, so our batten board didn’t line up flush with the baseboard edge.
To fix this, we shimmed behind the batten board by applying Liquid Nails on the back of paint sticks which we attached behind the batten board. Popsicle sticks/craft sticks or wood shims can be used as well.
7. Install the crown molding for board and batten with crown molding (optional)
If you are adding crown molding, go ahead an install it over the top board with brad nails.
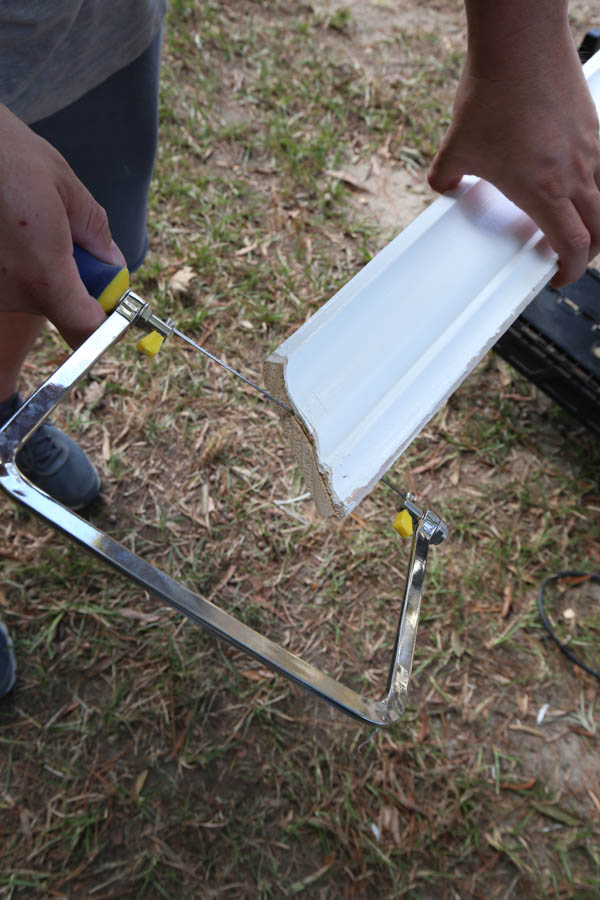
Board and batten with existing crown molding
If you have existing crown molding on the adjacent wall like us, it’s easiest to just cope the ends of the crown molding so it goes right over the adjacent crown molding.
Brandon used an orbital sander and coping saw to cope the ends of our crown molding.
We could have stopped here, but I wanted to add another element to this board and batten full wall to create a rectangle style molding or DIY wood panel wall.
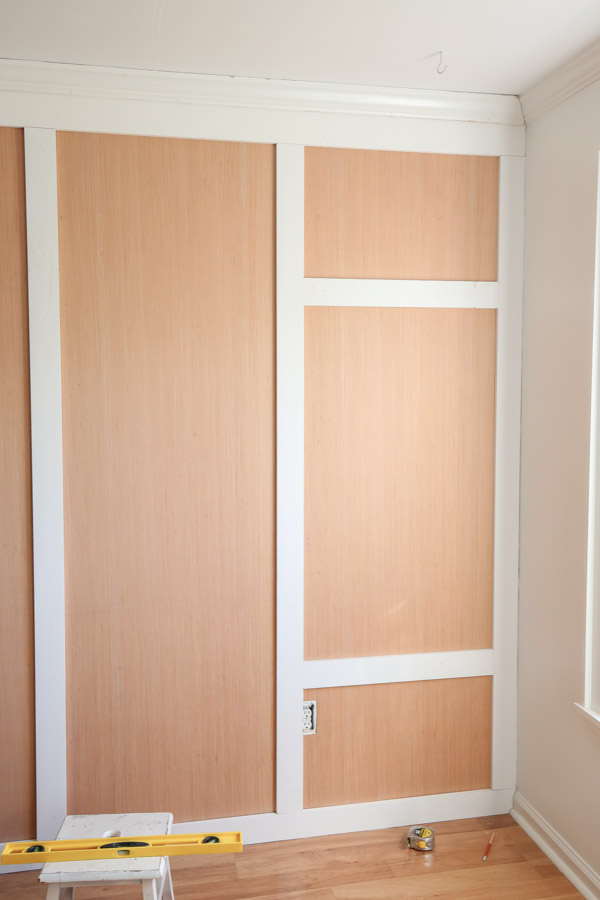
8. Install the horizontal boards
Next, decide on the spacing for the top and bottom horizontal boards which are used to create a rectangular or box style molding. I chose 16.5″ for the spacing in the top box and bottom box.
So, I measured and marked 16.5″ up from the baseboard and then down from the bottom of the top 1×6.
Cut the 1x4s to size for the horizontal boards.

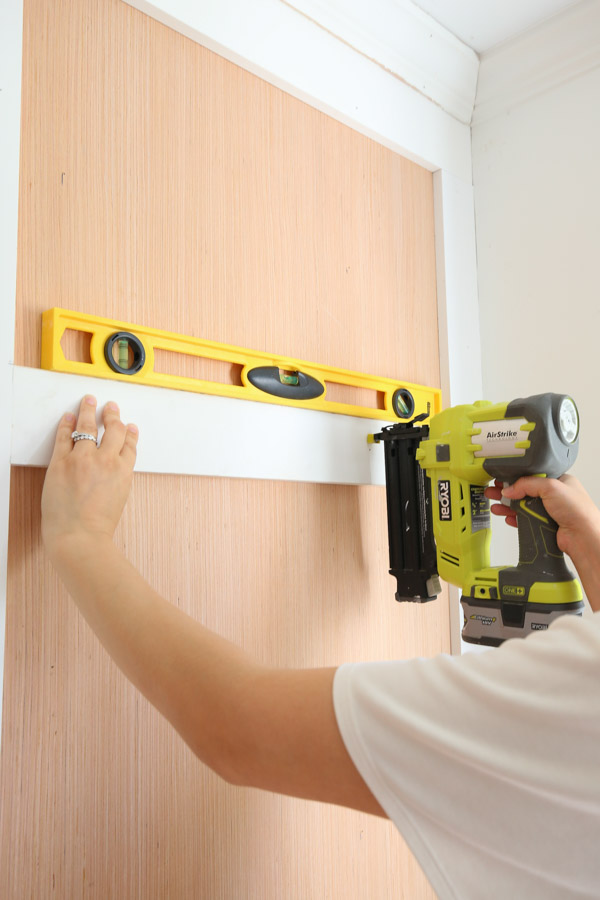
Then, install each 1×4 board at the marks using a level to ensure they are straight. Use 2″ brad nails and nail into the wall stud. If you can’t hit a stud, use Liquid Nails again.
9. Prep for paint: fill holes and caulk
Almost finished!
Fill any large gaps in with wood filler and fill all nail holes with a light spackle and then lightly sand once dry. Lastly, caulk all of the seams with a paintable caulk.
10. Paint the board and batten full wall
Paint your DIY board and batten wall! If you didn’t use pre-primed boards, make sure to prime first. We used Simply White by Benjamin Moore in eggshell for our paint color.
11. Finishing touches for the board and batten accent wall (optional)
Finally, if you had to add plywood to the wall like we did, you can add wall plate spacers to bring the electrical outlets flush with the cover plate.
Then, install the cover plate over the cut plywood for a professional look.
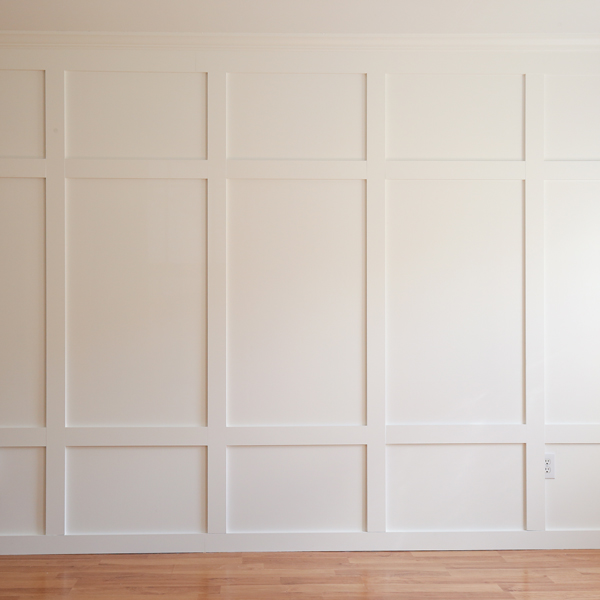
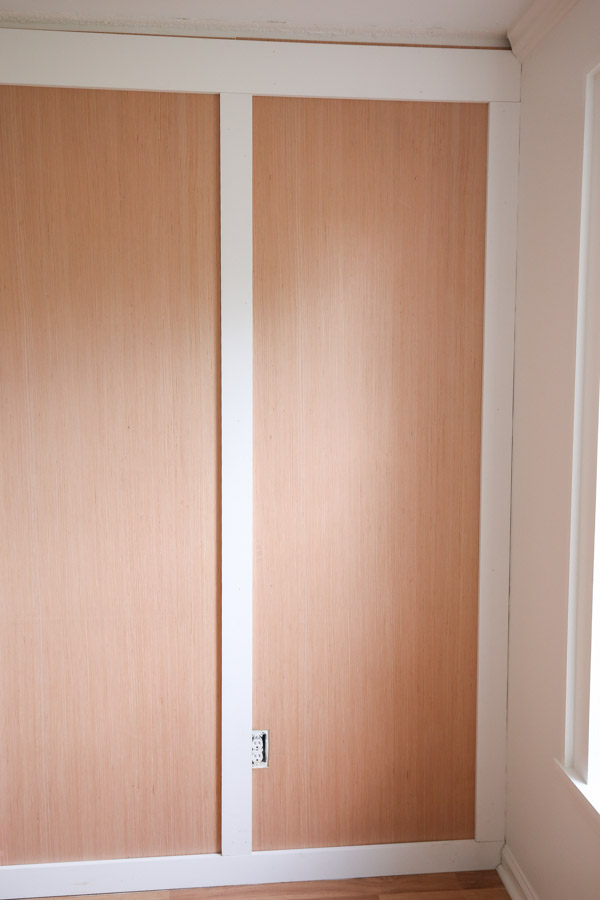
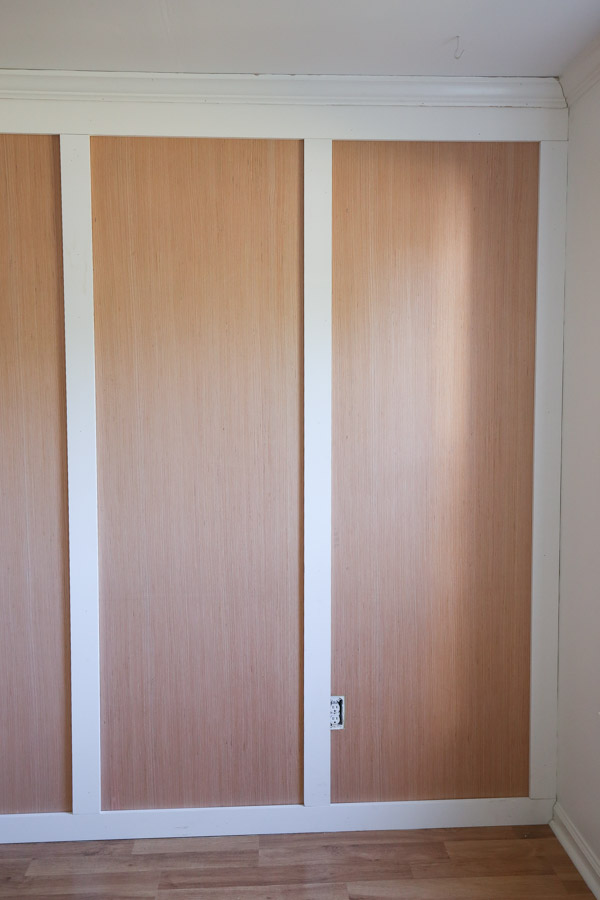
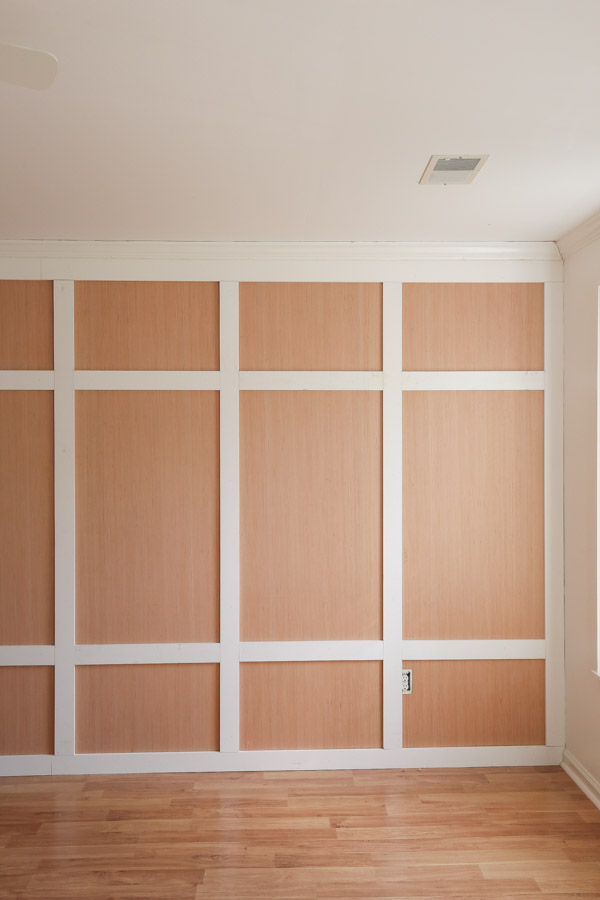
Here is the full completed board and batten wall!
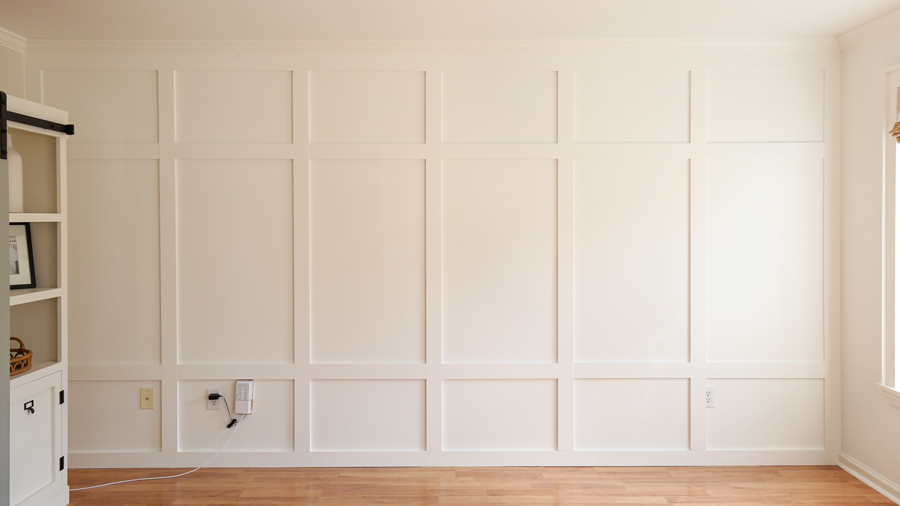
When we complete our living room makeover (very soon), I will hide those cords and the cable box!
White walls are tough to photograph and see the details, but it looks beautiful in person! You can get a better look at it in the DIY board and batten wall video!
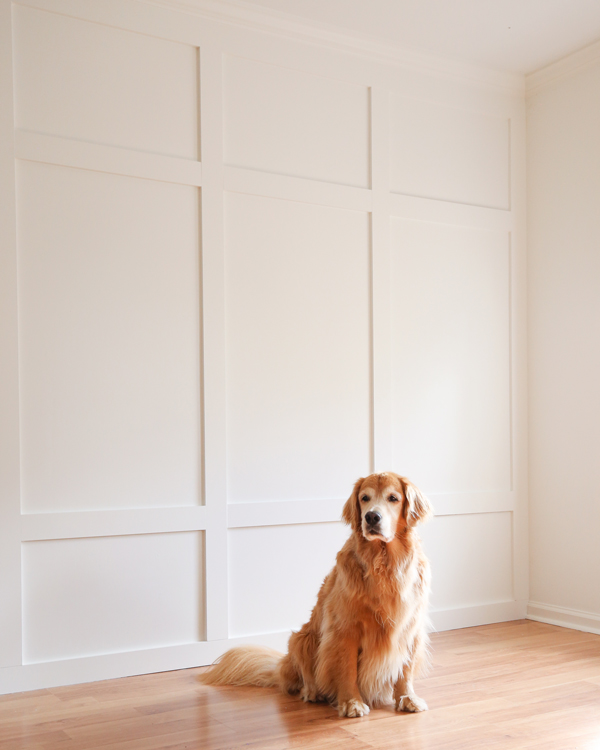
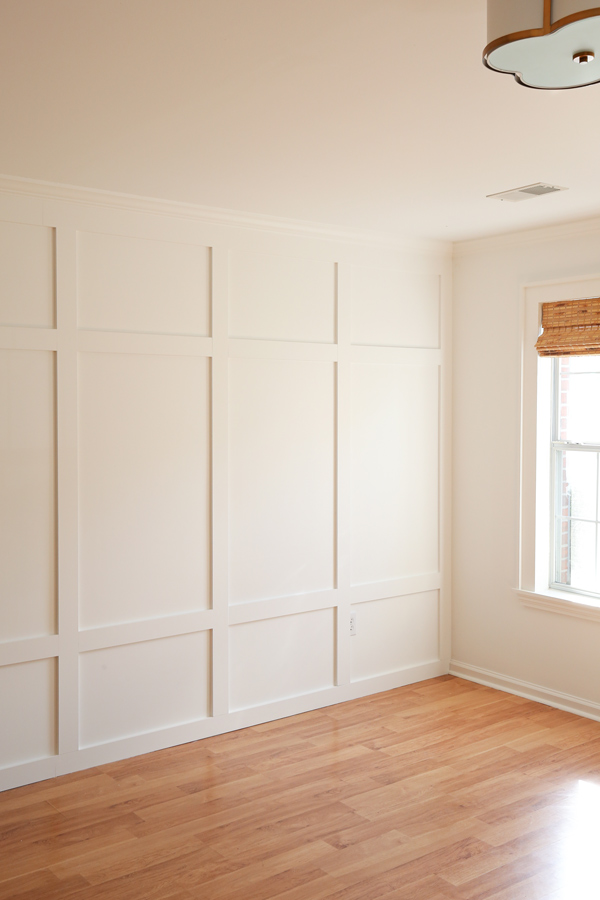
I really love how our board and batten wall turned out! It adds a ton of character, makes the room feel taller, and has a chic yet casual feel! This style board and batten can really go with any type of decor!
Also, make sure to check out our other DIY wall panel ideas too and full room DIY board and batten
If you create a board and batten wall, please share it with me on social media @angelamariemade!
Follow along on Instagram, YouTube, and Pinterest for my latest projects, fun updates, and sneak peeks, including the final living room makeover reveal!
Want to save for later?! Pin it here:
Samantha
Thursday 12th of February 2026
Ironically, this has been the only tutorial I could find that actually uses the "board" in board and batten.
I love what you did here and all of your DIY expertise is much appreciated. We are dealing with heavy textured walls in our new build. If we were applying the panel board to the wall (but only planning for a 1/3 wall board and batten style) would it still work for only applying the panel boards to the half wall then placing the top rail, battens, and new baseboards on top of the panel board leaving the other 1/3 of textured wall to lining paper with wall paper on top. Any tips or suggestions to this approach?
Caroline Waite
Sunday 23rd of April 2023
This is beautiful! My husband just bought me a baby grand piano for my 50th birthday (I am a music teacher) and I am turning my kids playroom into a music room. My kids are now 14, 12, and 10 so don't really use it to play in. I am going to do a board and batten wall but just wanted to know if you paint the rest of the trim in the room the same Simply White as the walls? I have to take out carpet and put in wood laminate flooring and want to paint the trim before putting it back in. Thank you for taking the time to post this project. It is so helpful and makes me think I can totally do this myself!
Angela Marie Made
Monday 24th of April 2023
Yes! We used Simply White in semi gloss on the crown molding and floor molding and eggshell everywhere else.