Learn how to build a custom DIY built in bench on a budget!
Welcome back to part 2 of my entryway makeover! Today I’m going to be sharing how to build and install a DIY built in entryway bench!
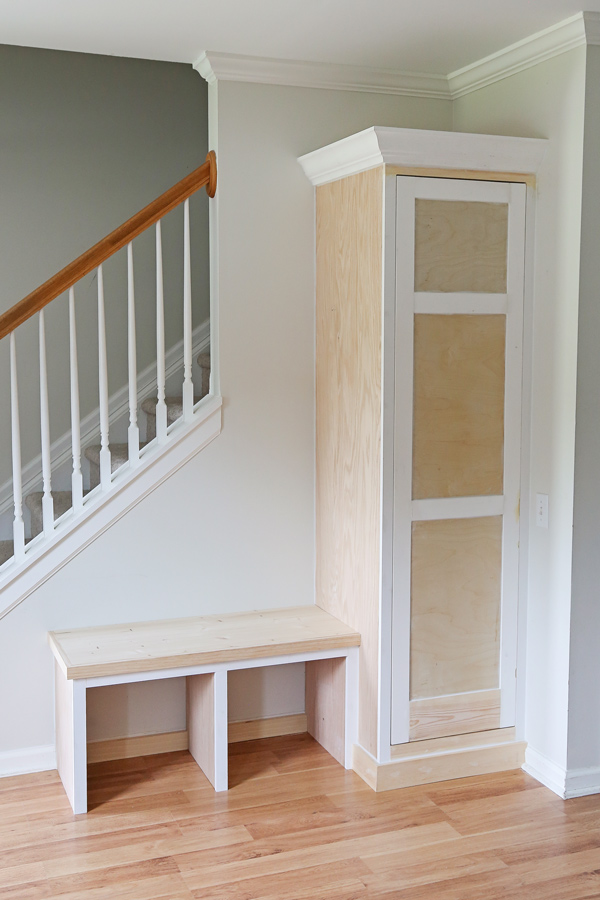
In case you missed part 1 last week of the entryway built in, I shared how Brandon and I built our DIY built in cabinet and door on a budget. And you can see the final entryway makeover reveal here!
For the bench, I used a mix of leftover plywood, premium wood, and scrap wood that I had on hand already, as well as a premium project panel board for the bench top. Below is a full material list.
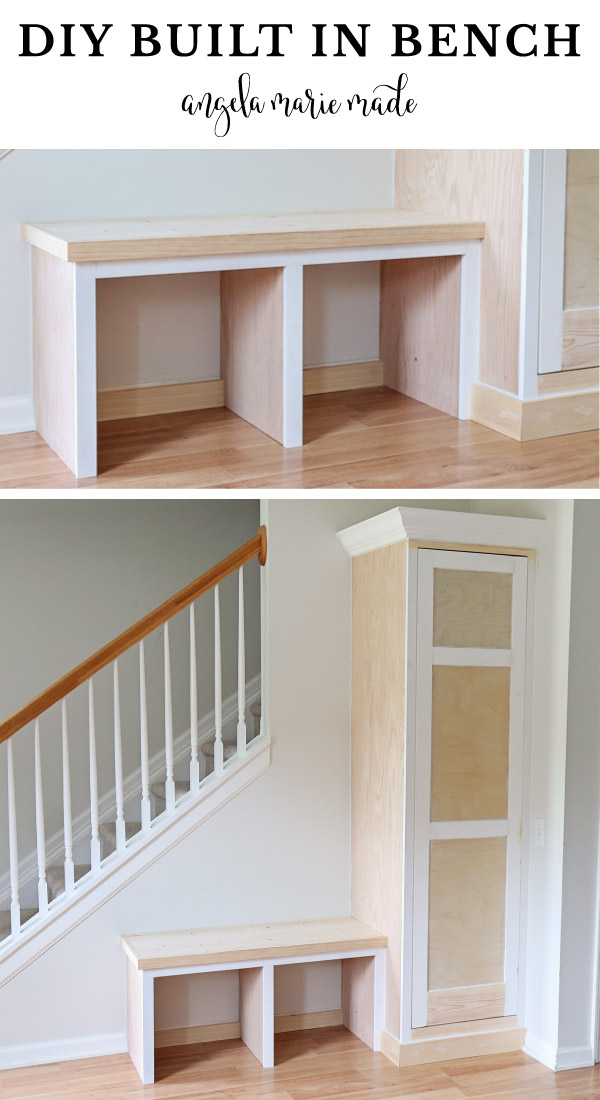
This is the first built in bench I’ve built, but I have built an easy and cheap DIY bench and an entryway DIY hall tree bench, which use to be in this same spot in our entryway!
Note, this post contains some affiliate links. I may earn a commission if you shop those links (at no cost to you). Thank you for supporting my small business. For more info see my disclosures here.
How to Build a DIY Built in Bench
Note: Material quantities will vary based on your actual built in dimensions!
Materials
- 4ft x 8ft @ 3/4″ thick plywood*
- (1) 3/4″ x 24″ x 48″ edge glued panel board or plywood
- 1×3 @ 8ft
- 1×2 @ 8ft
- 1×4 @ 8ft
- 1/4-in x 3-in x 4-ft (I used this board)
- 1 1/4″ and 3″ self tapping screws (or wood screws)
- 1 1/4″ Kreg screws
- Wood Glue
- Primer
- Paint
- Paintable caulk
- Spackle
- 1 1/4″ brad nails
Tools
- Kreg Jig
- Miter saw
- Circular Saw or Table saw (optional)
- Brad Nailer
- Drill
- Clamps
- Prybar
- Utility blade
- Tape Measure
- Stud finder
*I used leftover plywood from our built in cabinet
DIY Built in Bench Video Tutorial:
Subscribe to my YouTube Channel here!
1. Determine the built in bench dimensions
Just like the DIY built in cabinet, the first step is to determine the dimensions of your bench based on your space.
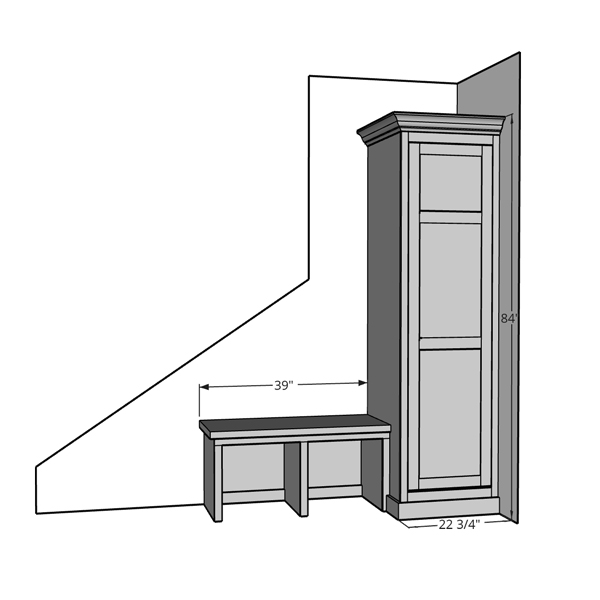
Keep in mind the standard height for a bench is about 18-20″ and the depth can be between 15-20″. Also take into consideration any wall outlets, as well as your basket or bin size for under the bench storage. We had one outlet that we had to work our build around.
2. Remove the baseboard
The next step is to remove the baseboard, which we did already for the DIY built in cabinet in part 1.
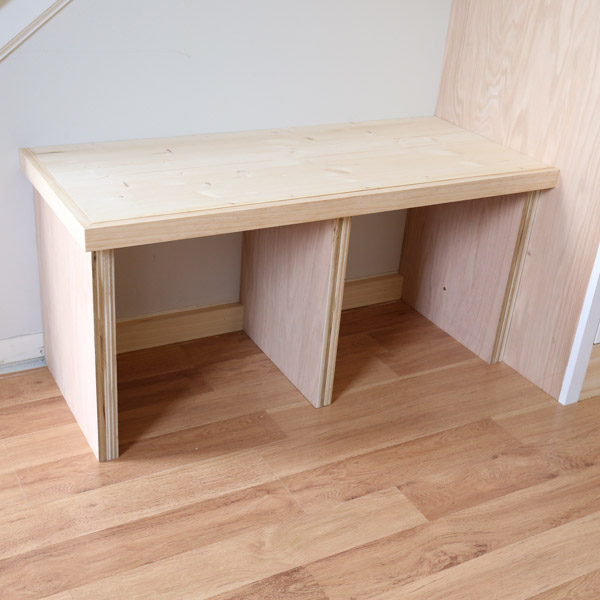
3. Build the frame of the built in entryway bench
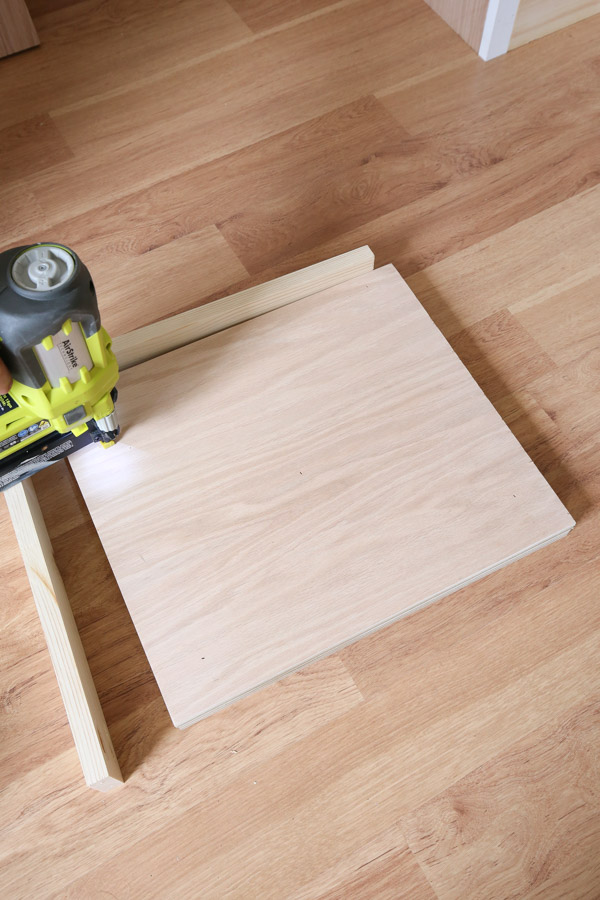
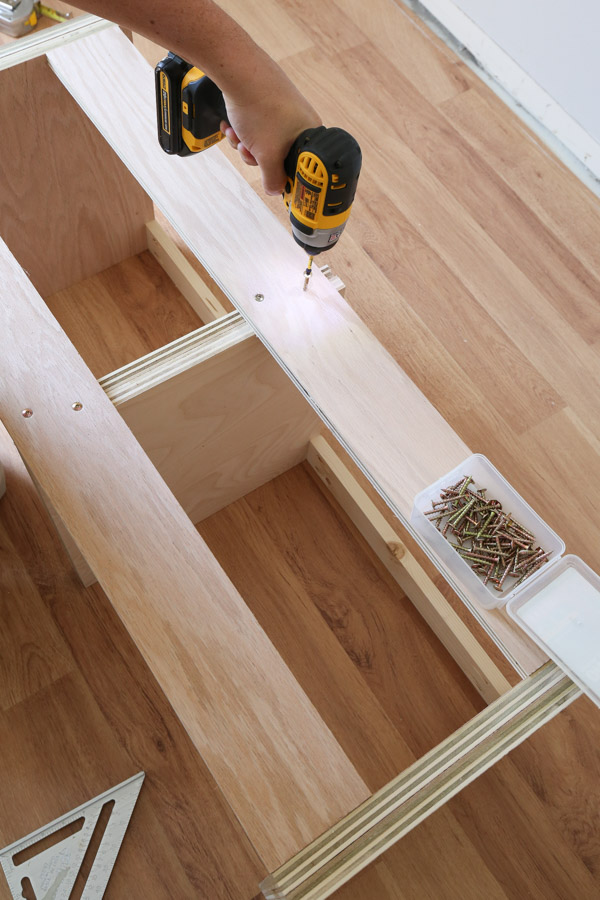
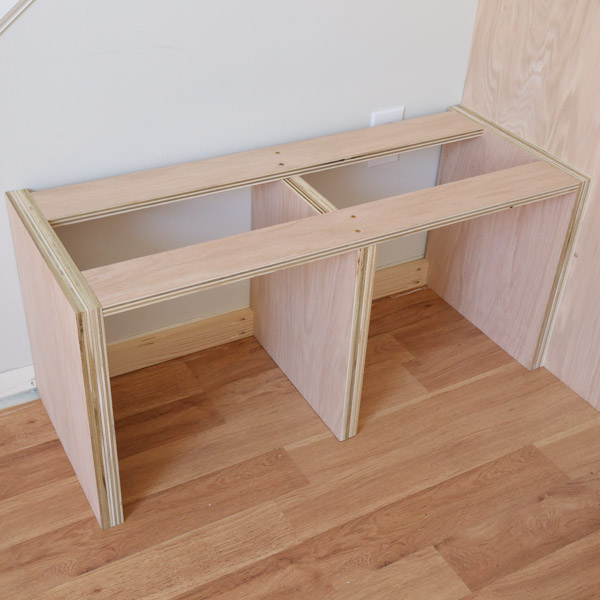
For the frame of the bench, I used 3/4″ thick plywood ripped to size for the sides, middle, and top frame and 1x3s for the back frame. I added pocket holes using my Kreg Jig to the top frame boards and 1x3s.
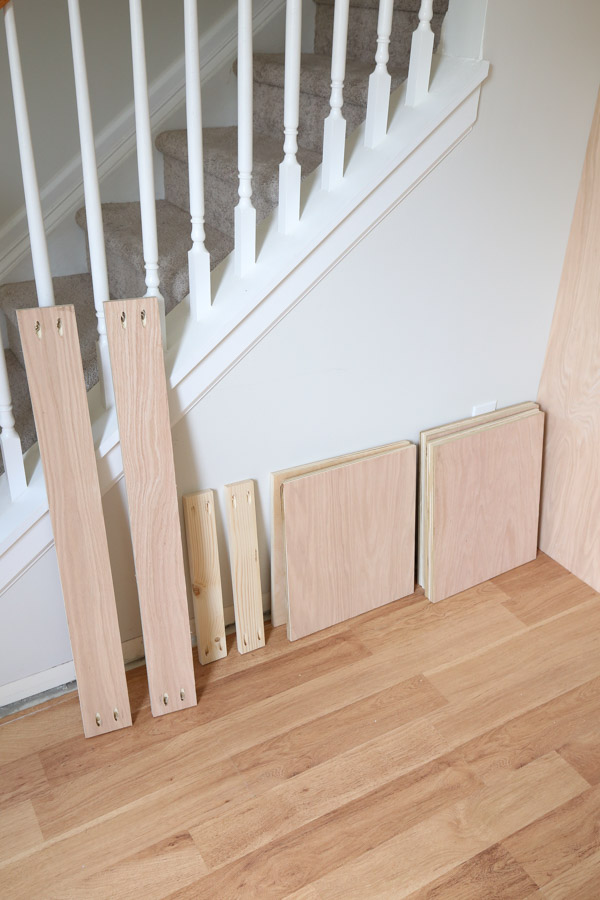
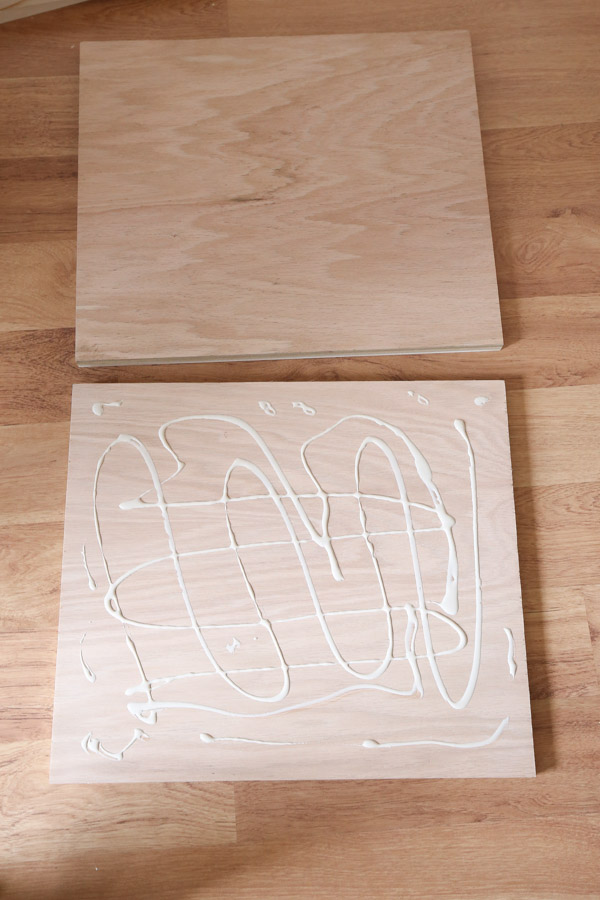
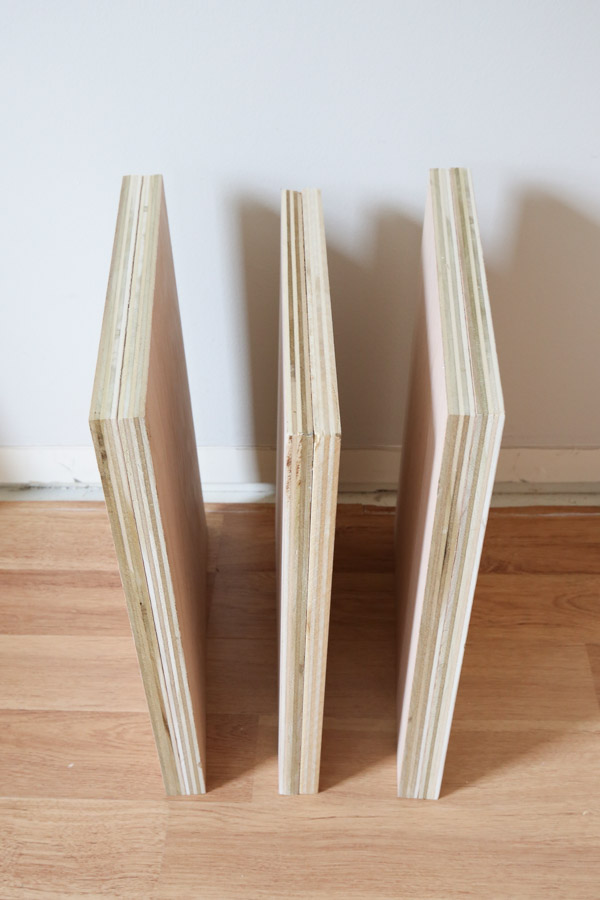
For a higher end look, I used wood glue and 1 1/4″ brad nails to attach two 3/4″ plywood boards together for the two sides and middle frame of the bench.
Using two boards together will create a 1 1/2″ thick frame to attach a 1×2 trim board to it, so the final inside view of the bench trim and frame will all be flush and there won’t be a gap between the two boards. You’ll see what I mean at the end!
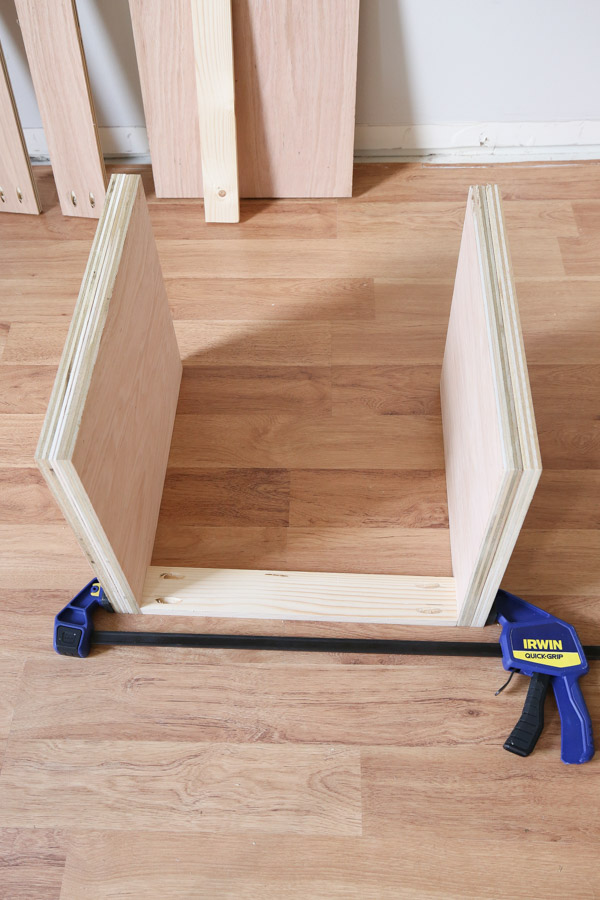
Also, the middle frame boards were 3/4″ shorter than the sides to account for the top frame boards.
You can see all of this in action in the DIY built in bench how to video!
Next, I attached the bench frame sides to the middle frame with the 1×3 boards with pocket holes and 1 1/4″ Kreg screws to form the back frame of the bench.
These 1×3 back frame boards will also be used to attach the bench to the wall.
Because we had to work around our wall outlet, we place the boards along the bottom of the bench, but I would have preferred to place them along the top if I wasn’t working around our outlet. Although they do work as floor molding and cover the edge of our flooring!
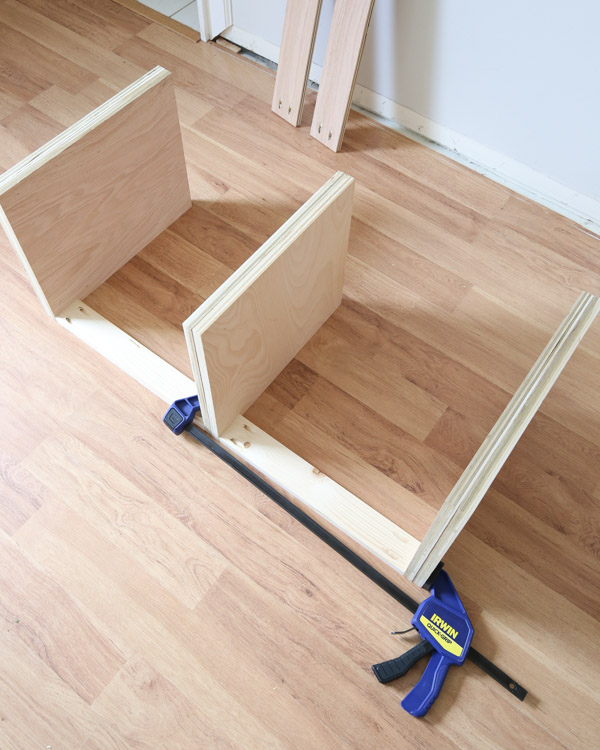
We finished off the bench frame with the top plywood boards along the front of the bench and the back of the bench. I installed them with 1 1/4″ Kreg screws into the sides and 1 1/4″ self tapping screws into the middle board.

I did leave a small gap along the top back board to leave space for the very top of our outlet.
📩 Want to Save This?
4. Attach the built in bench to the wall
Next, I used a stud finder to find our studs and used 3″ screws through the back 1x3s to attach the built in entryway bench frame to the wall studs. We also added one through the side into the cabinet.
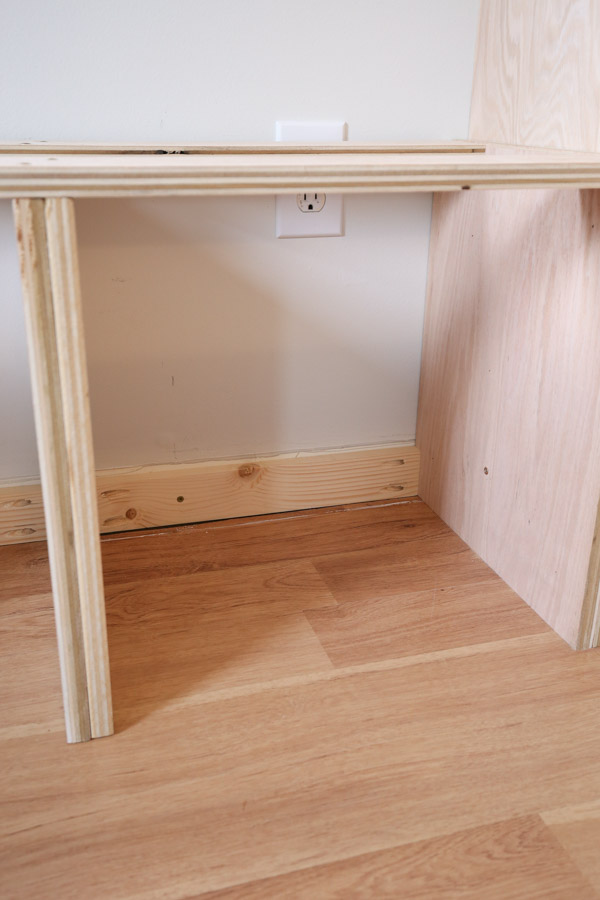
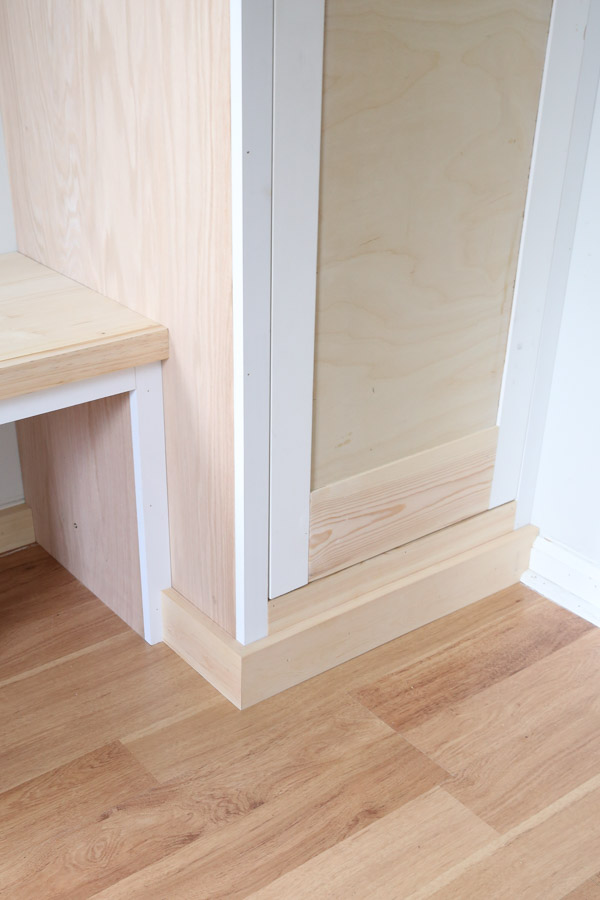
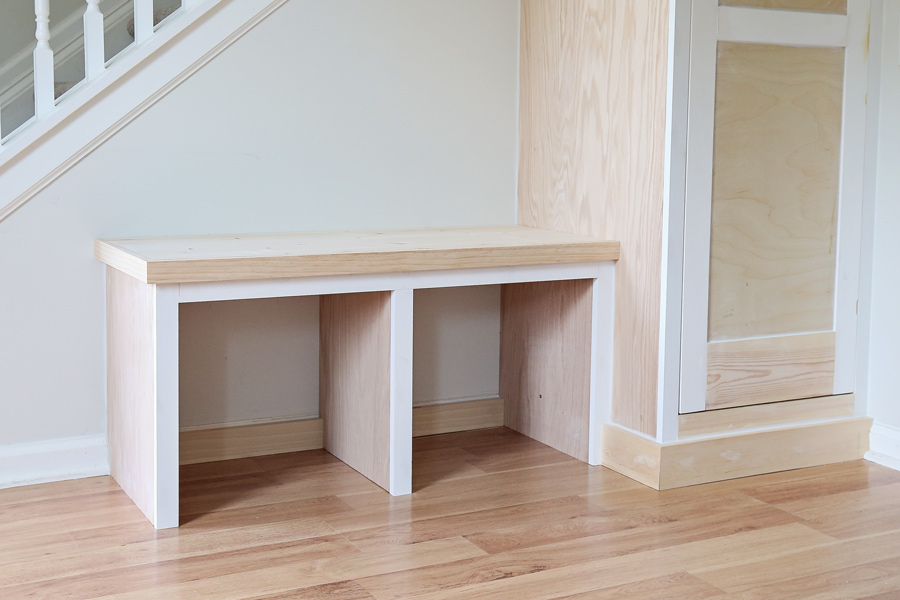
We also added some 1/4″ thick trim to the front of the 1x3s to cover up the pocket holes. I’m going to be painting under the bench all the same color as the built ins so it will be one cohesive look.

5. Build the bench top
Ideally, for the DIY built in bench bench top I would have used premium 1 1/2″ thick wood for the top. But because I wanted to build it on a budget, I had to create the look of a thick wood top for a low cost. I ended up using the same method as my DIY work bench top.
Using wood glue and 1 1/4″ Kreg screws, I attached premium 1x2s to the sides of the project panel board which was cut to size. The 1×2 corner was cut with a 45 degree angle.
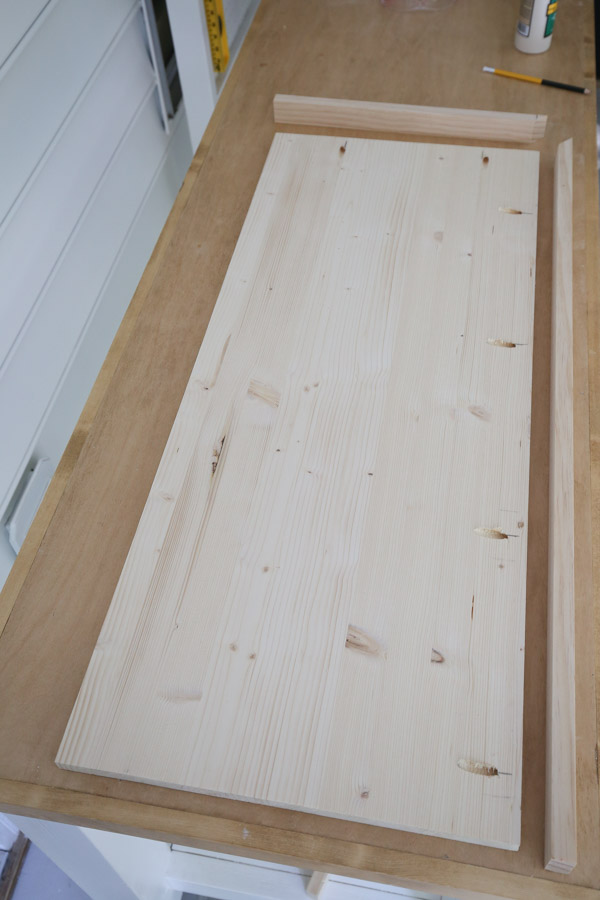
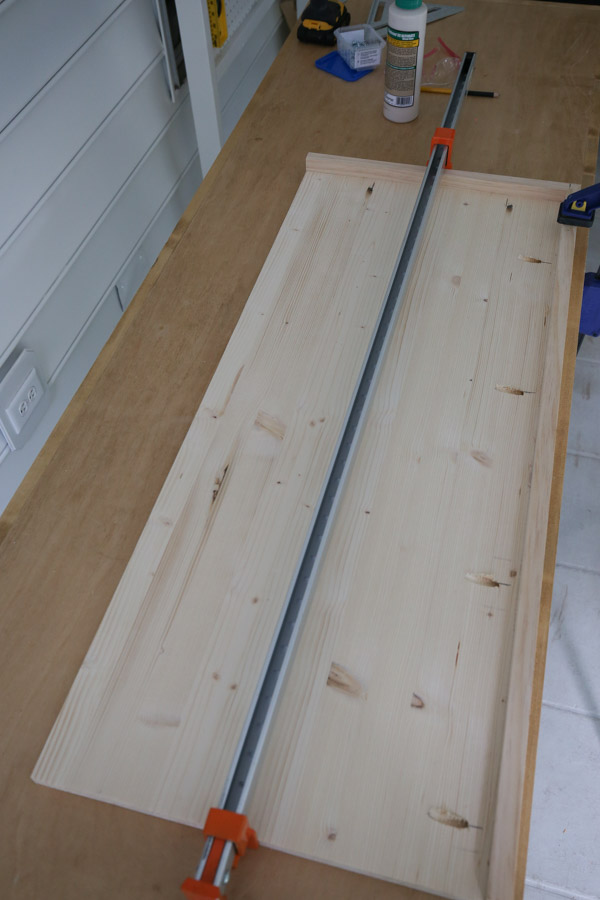
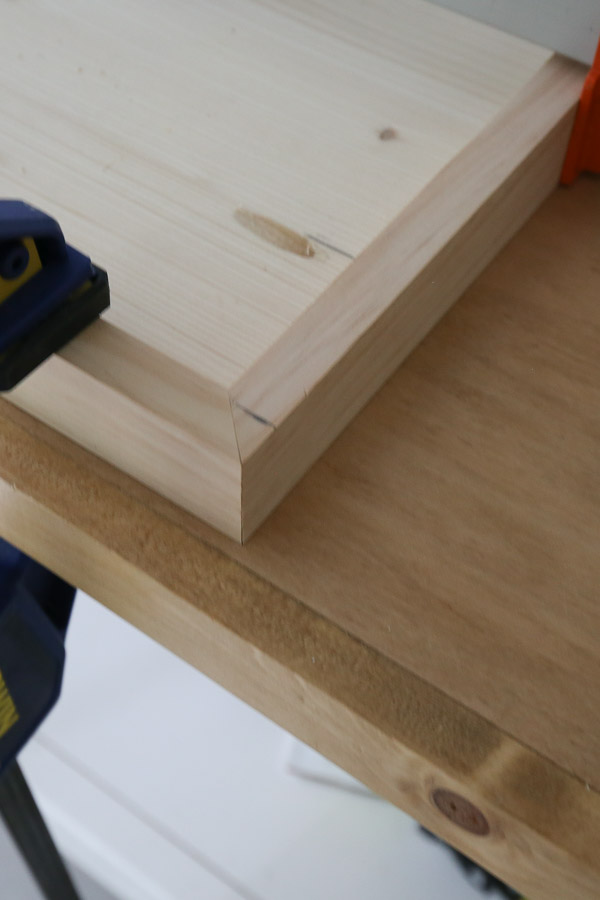
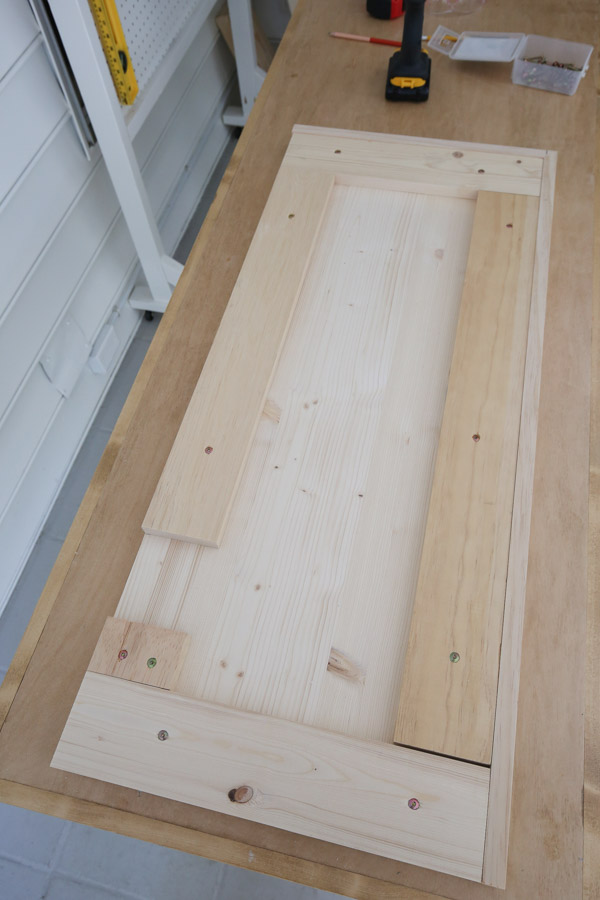
Then, I framed out the bottom of the bench top, inside of the 1x2s, with 1x4s attached with wood glue and 1 1/4″ wood screws countersunk beneath the wood surface. These boards will allow the bench top to sit at the correct height on the bench frame.
The small gap in the 1x4s below is for our wall outlet.
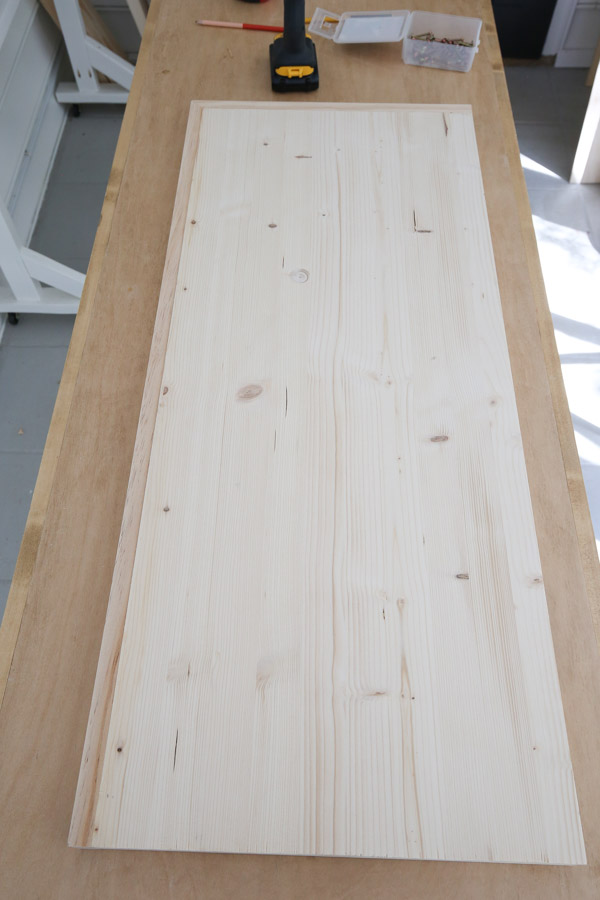
Here is the top view. We will sand down the top edges too where the 1×2 meets the panel board!
NOTE: I didn’t attach the bench top yet to the bench frame because I want to paint the built ins first and stain the bench top!
6. Trim out the frame of the DIY built in bench
I trimmed the bench out with 1x2s cut to size and 1 1/4″ brad nails and wood glue. This finishing touch is always my favorite part of any built in project!

To connect the trim between the built in entryway bench, cabinet, and wall, I attached a 1×4 along the bottom of the floor with a 45 degree mitered corner.
7. Caulk, fill holes, prime, and paint and stain the built in bench
Time for the paint prep work, including caulking, filling nail holes with spackle, wood filler touch ups, and some sanding.
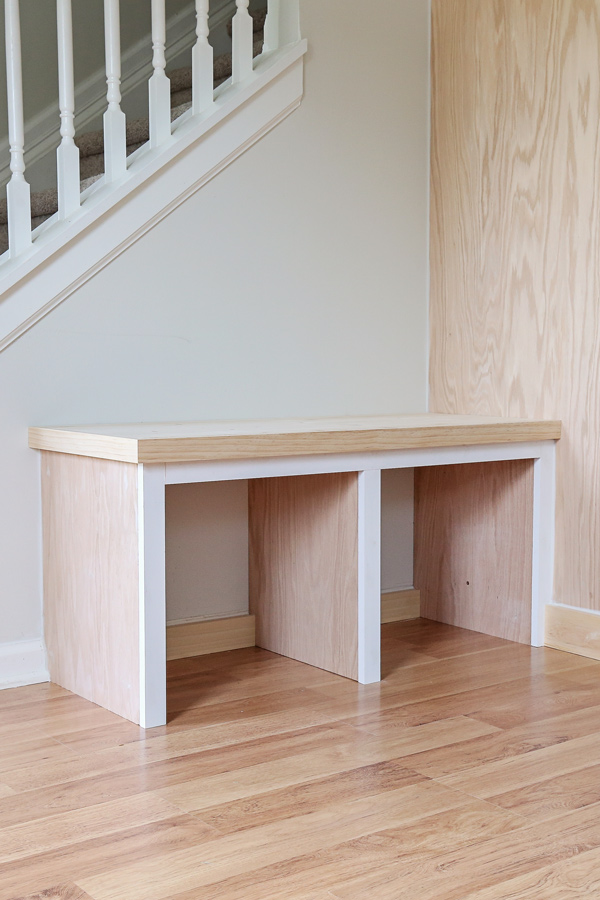
Once all of the paint prep is complete, the entryway built ins can be painted and the bench top can be stained. I will be revealing the final finish soon in part 3 of our entryway makeover!
8. Attach the bench top to the bench frame
The very last step, after all of the staining and painting is finished, is to attach the bench top to the frame. Use 1 1/4″ screws from under the top bench frame into the 1x4s on the underneath side of the bench top.
This built in cabinet and bench have definitely challenged Brandon and I but we love how it’s turning out! I am super excited to pick a paint color for it and finish the rest of the entryway makeover.
What color should I paint it? I want to do a fun, more bold color…. Let me know in the comments below! I’m going to be narrowing down paint color options soon and sharing the test samples on Instagram stories, so make sure to follow along there @angelamariemade!
Update: Don’t forget to check out the full entryway makeover reveal (with these built ins in completed) and see the full cost breakdown of this project!