Learn how to build a custom DIY built in cabinet on a budget for pretty, hidden storage!
We are officially starting our entryway makeover! The first project, part 1 of our entryway makeover, is adding a DIY built in cabinet on a budget!
In part 2, we will add a DIY built in bench next to the cabinet to finish off this entryway built in!
These builts in are perfect for an entryway, mudroom, kitchen, or even a living room or family room!
To keep this project budget friendly, I’m building everything from scratch, which is cheaper than using IKEA cabinets, premade base cabinets, or hiring it out. And it’s also easier to get the exact custom look and size that I want for these built ins.
This is my second time building built ins. The first time was our DIY built in bathroom shelves and cabinet. I love how those built ins turned out, but these entryway built ins are larger and we only have two walls to work with, so it will be a bit more challenging.
Update: I have made more built ins since this project, including our DIY kitchen built ins and DIY built in office cabinets, and our DIY living room built in cabinets and shelves using stock cabinets!
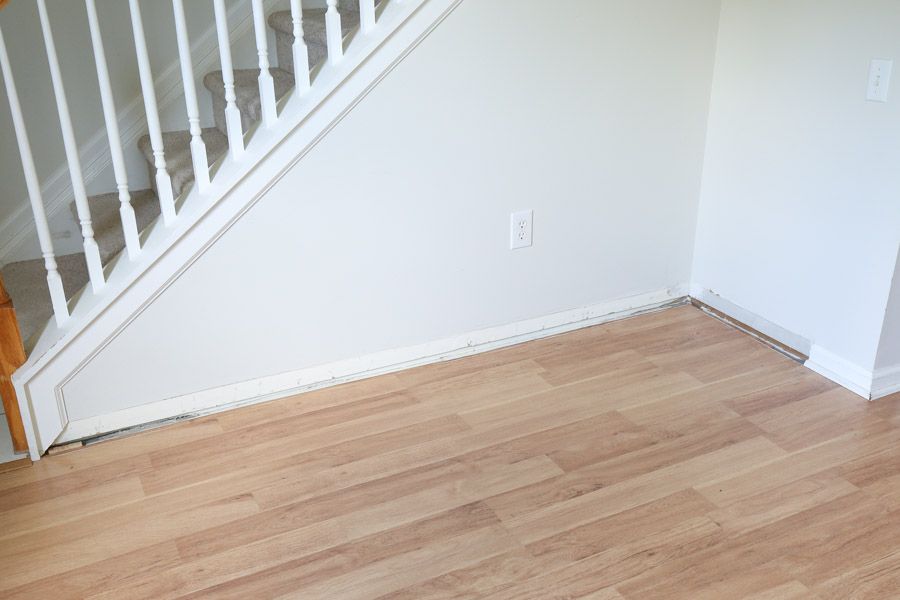
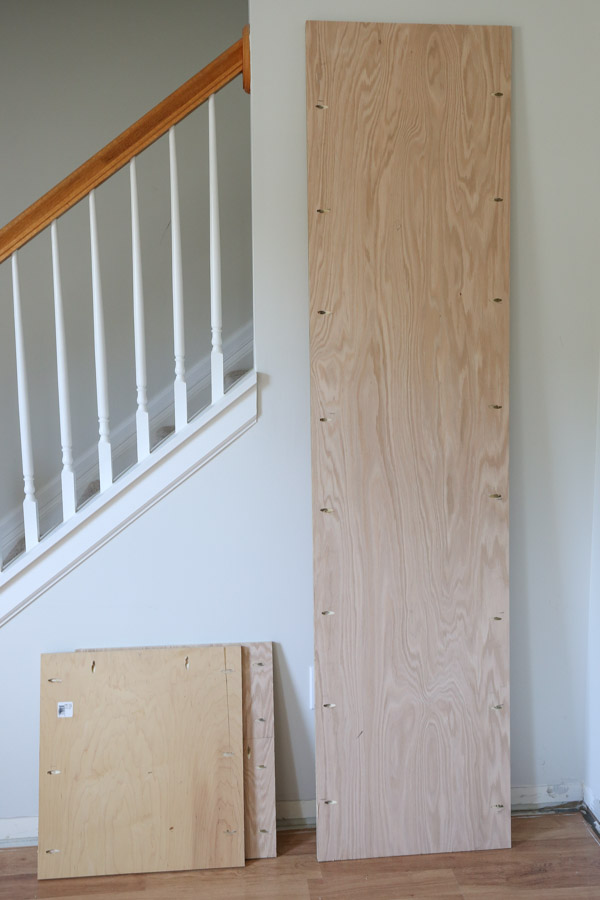
Before we get started, here is a look at the BEFORE of our entryway:
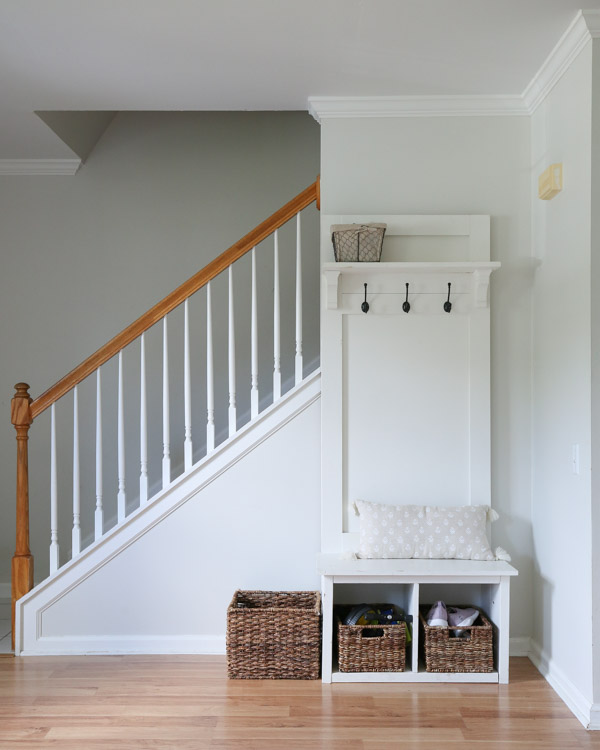
Currently, our entryway just has our DIY hall tree in it, which I love, but it was really built for our old apartment entryway. Also, I really want more storage that’s hidden and a larger bench.
I’m sharing my step by step process for the DIY built in cabinet below, including lessons I learned along the way!
Just like our bathroom DIY built in shelves and cabinet and DIY built in cabinets for our kitchen, the built in measurements can vary based on your actual space. So I won’t be including measurements or exact quantities of supplies, but I will show you how to actually build it!
Note, this post contains some affiliate links. I may earn a commission if you shop those links (at no cost to you). Thank you for supporting my small business. For more info see my disclosures here.
How to Build a Built in Cabinet:
Note: Material quantities will vary based on your actual built in dimensions!
Materials:
- 4ft x 8ft @ 3/4″ thick plywood*
- 4ft x 8ft @ 1/2″ thick plywood*
- 4ft x 8ft @ 1/4″ thick plywood*
- 1×3 @ 8ft (we used pre-primed boards)
- 1×6 @ 6ft
- 1×2 @ 8ft
- 2×4 @ 8ft
- Crown Molding (we used this crown)
- 1/4″ scrap wood or wood shims
- 3/4″ and 1 1/4″ wood screws
- 3″ self tapping screws (or wood screws)
- 1″ and 1 1/4″ and 2 1/2″ Kreg screws
- 1″ and 1 1/4″ and 2″ brad nails
- Wood Glue
- (4) Door hinges for inset doors (I used these hinges)
- (1) Cabinet pull (I will be using this pull)
- (2) Magnetic Door Catches
- Primer
- Paint
- Caulk
- Wood filler or spackle
Tools:
- Kreg Jig
- Miter saw
- Circular Saw or Table saw
- Brad Nailer
- Kreg Concealed Door Hinge Jig (optional)
- Drill
- Self Centering drill bit (optional, for hinges)
- Clamps
- Prybar
- Utility blade
- Tape Measure
- Stud finder
- Dremel tool (optional)
*I prefer to use this formaldehyde free plywood that is also pre-sanded!
DIY Built in Cabinet & Door Video Tutorial:
Subscribe to my YouTube Channel here!
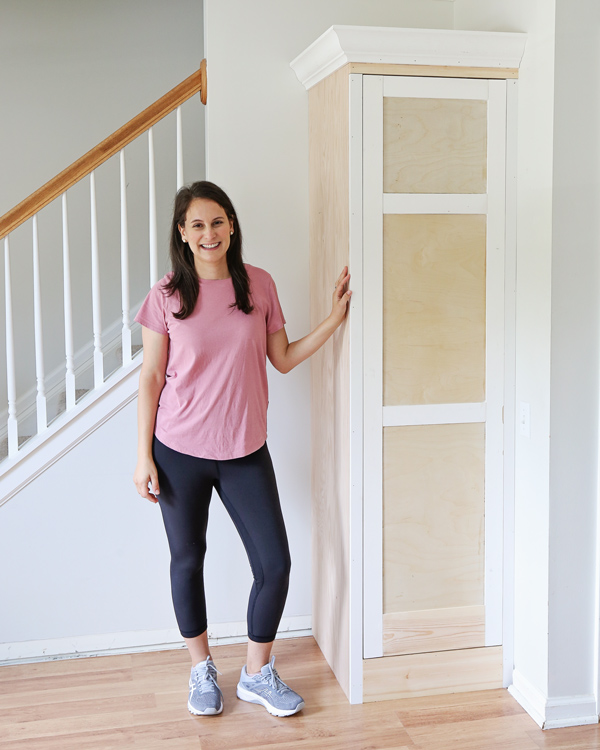
1. Determine the built in cabinet dimensions
Measure the wall space your using for your built in to determine your built in dimensions and how much material you will need.
To start, I just started sketching out what I was envisioning on paper. Then, I determined the measurements I needed for the built in cabinet and built in bench.
After sketching things out, Brandon mocked up everything for me in SketchUp.
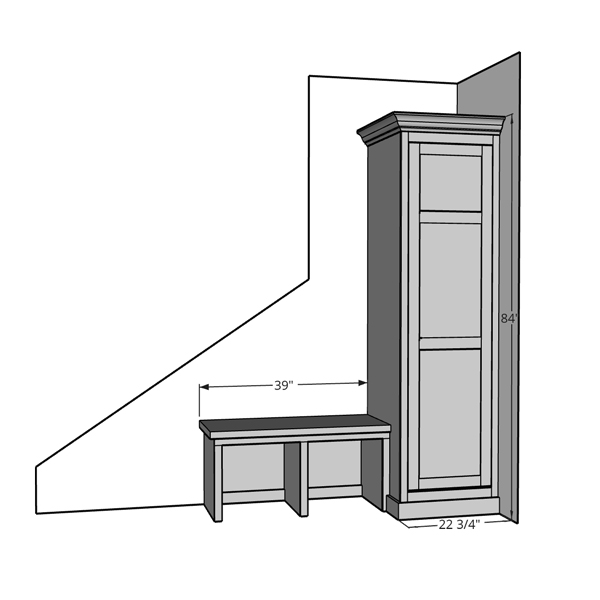
The two issues I had to work around was our doorbell and current crown molding. I decided to just do the cabinet 84” tall and avoid removing our crown molding since I want to add larger crown to the top of the built in cabinet.
Alternatively, if you don’t already have crown molding, you can make the built in cabinet the full height of the wall, up to the ceiling.
For the doorbell, I am just going to enclose it within the cabinet because I think it’s ugly and takes up valuable wall space!
2. Remove the baseboard
Since we are only doing the built in on the one wall and corner, I used our Dremel tool to cut the baseboard where the built in cabinet molding would start.
To remove the existing baseboard, score the top and corner caulk lines with a utility blade. Then, use a prybar and hammer to remove the baseboard from the wall.
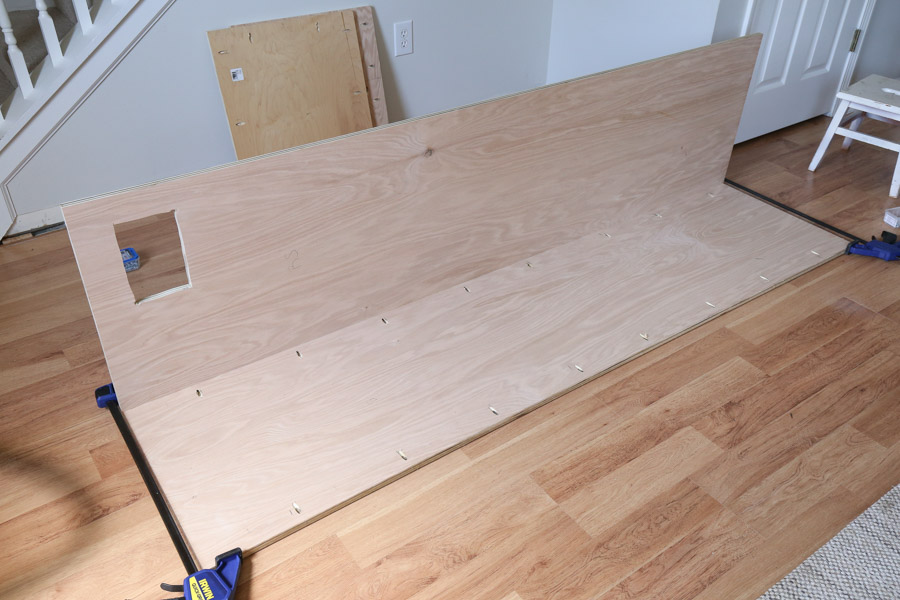
3. Build the frame of the built in cabinet base
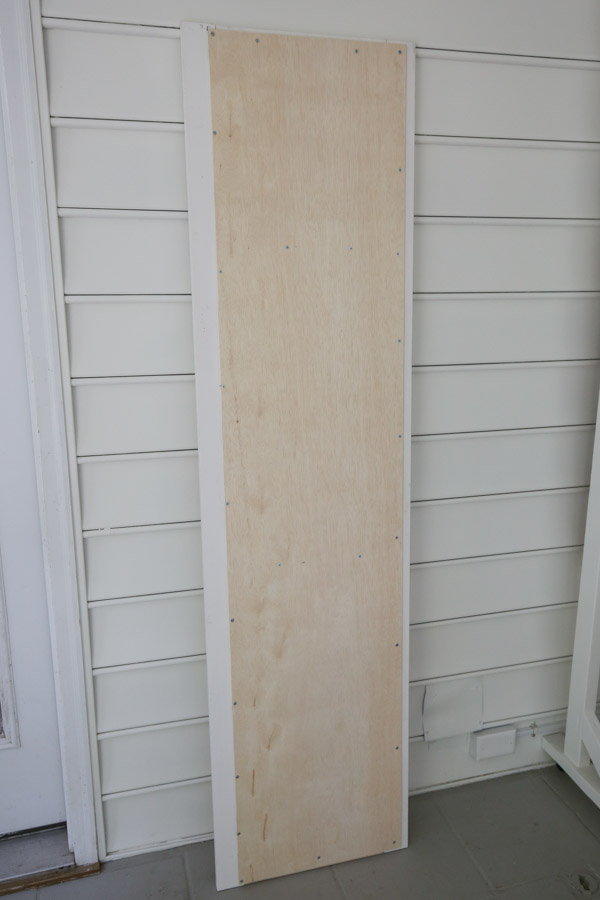
We had our 3/4″ thick plywood ripped to size for the cabinet frame at our local home improvement store, Home Depot. We also had some scrap plywood we cut to size with our circular saw and straight edge as well.
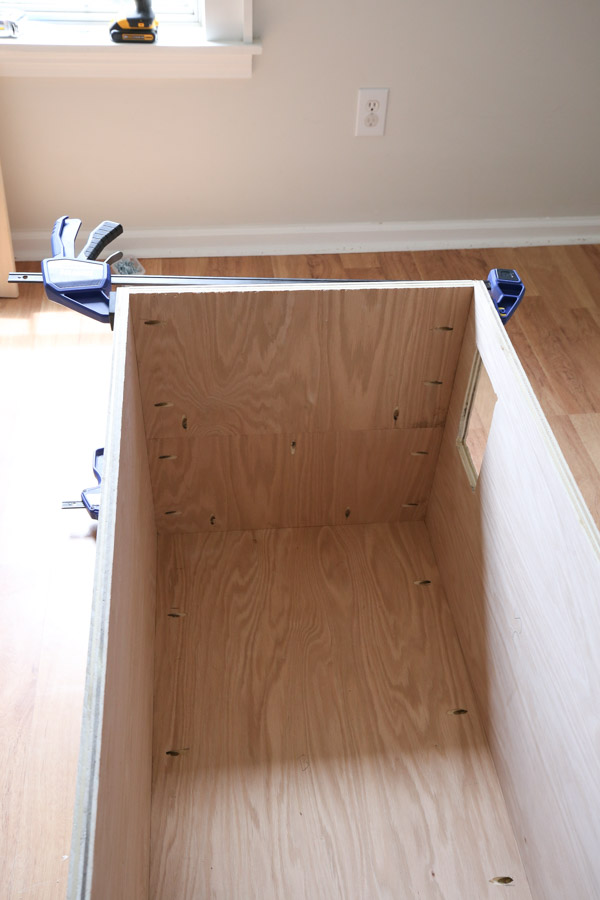
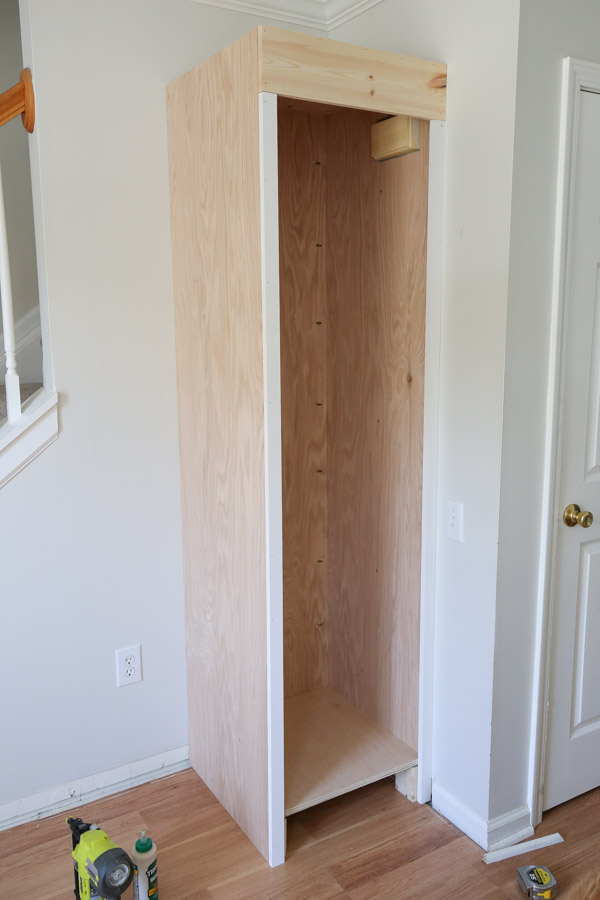
Then, I measured the opening needed for our doorbell and Brandon used a drill and jigsaw to cut out the doorbell opening on the corner wall plywood board. It was a perfect fit!
Next, I marked where to drill pocket holes, about every 8-10 inches along the back plywood frame board and on the top and bottom cabinet frame boards.
I used my Kreg Jig to drill the pocket holes making sure it was set for 3/4″ thick wood.
Tip: See my how to use a Kreg Jig post for an easy, step by step tutorial and video tutorial on how to use the Kreg Jig!
To attach the cabinet frame together, I found it easiest to just lay the back cabinet board down on the floor, clamp the first side frame to it, and then screw together with 1 1/4″ Kreg screws.
You can see all of this in action in the built in cabinet video tutorial here!
I repeated this process for the opposite side frame board.
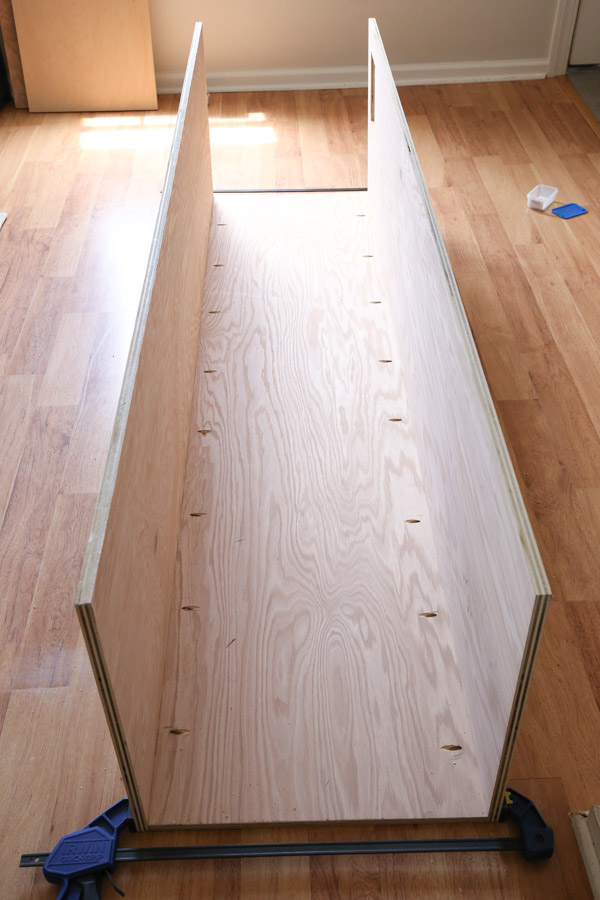
After the cabinet frame side panels were attached, I attached the top and bottom boards with Kreg screws to stabilize the cabinet frame.
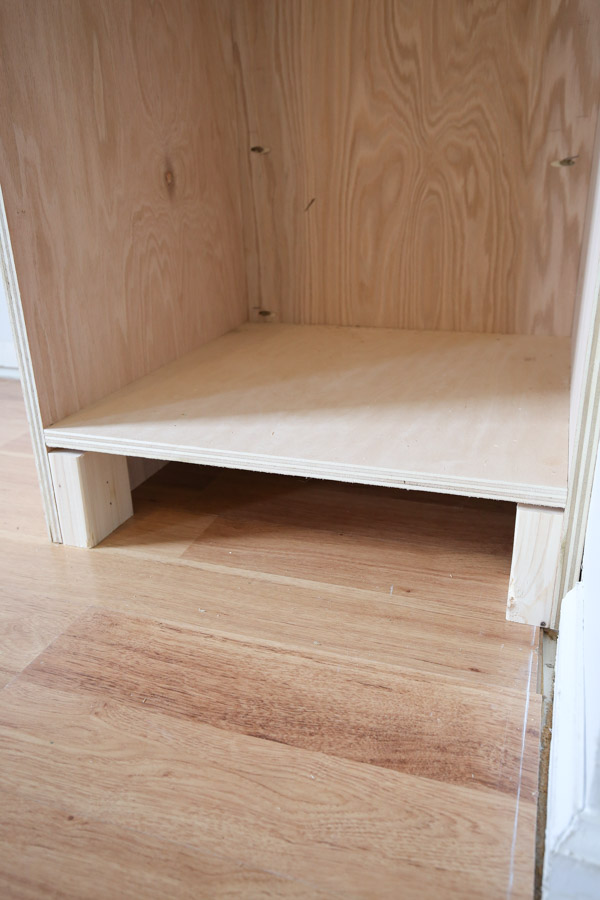
I attached the bottom shelf board 5 1/2″ up from the bottom of the back panel board. This board creates the bottom of the cabinet, which will align with the 1×6 trim board that will go along the bottom.
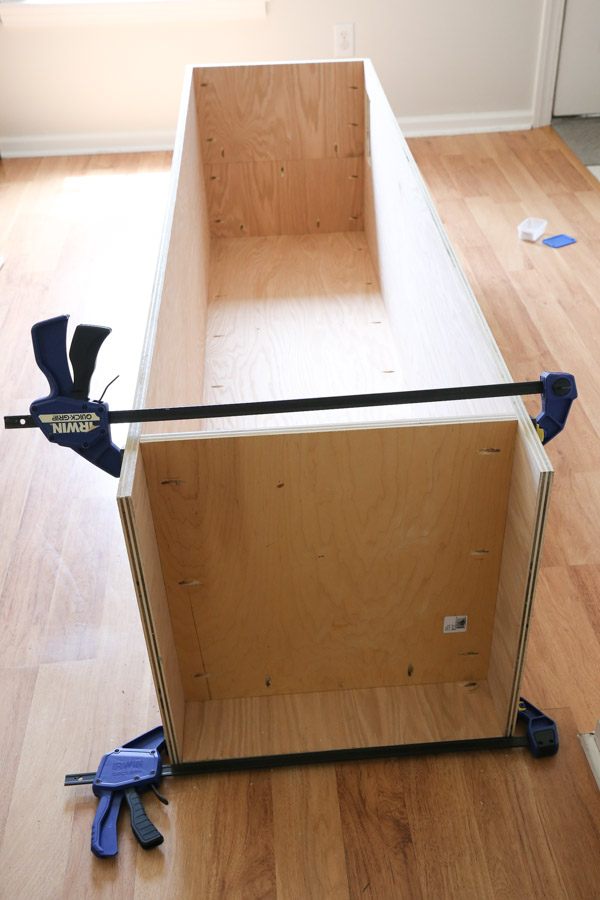
I considered adding a middle shelf board for more stabilization but it was sturdy enough without it and I want my shelves to be adjustable so I decided not to do a middle shelf with Kreg pocket hole screws attached to the side pieces.
The cabinet frame fit perfectly in the wall corner!
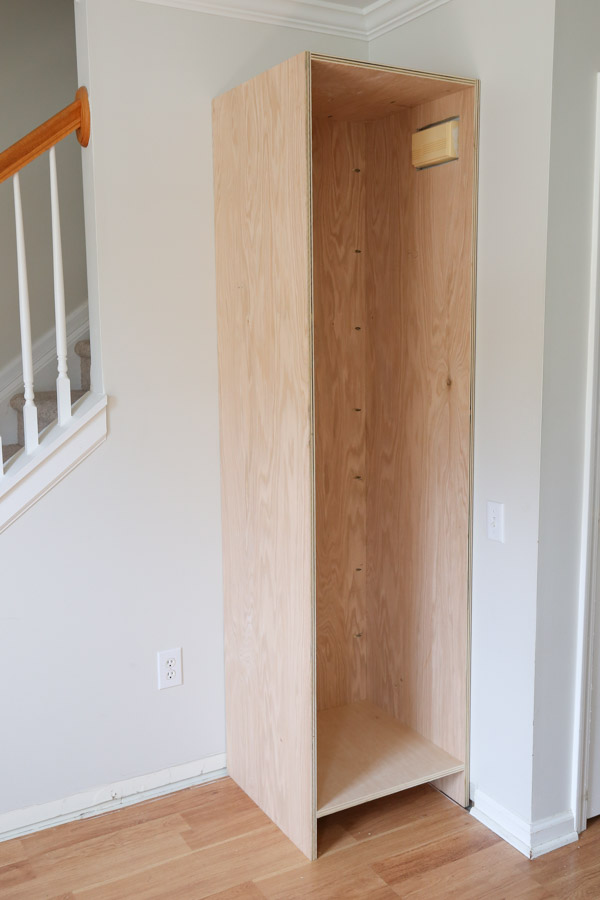
4. Attach the built in cabinet frame to the wall
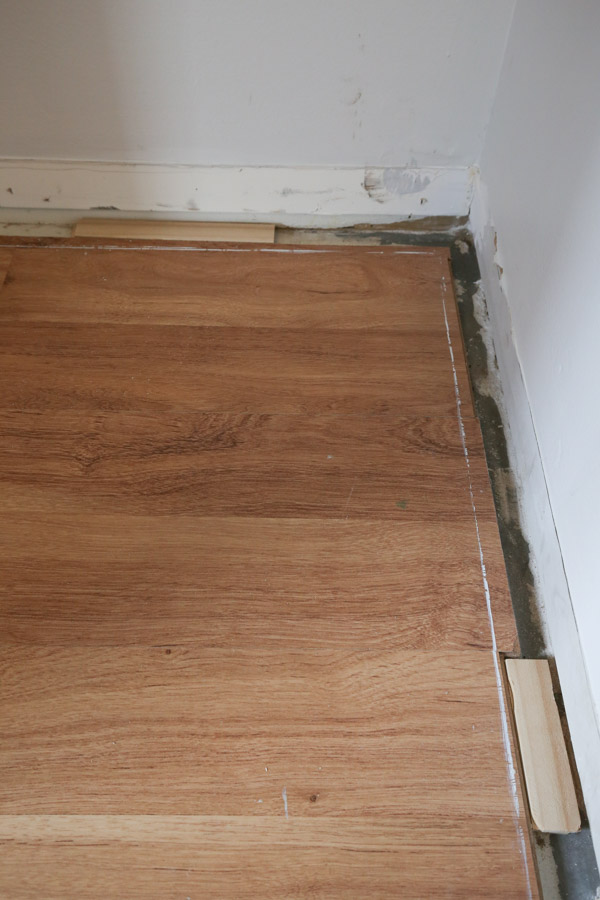
Before attaching our cabinet frame to the wall, we added some paint sticks glued together with wood glue on the sub-floor where our laminate flooring didn’t reach to make sure our cabinet frame was sitting across a level surface.
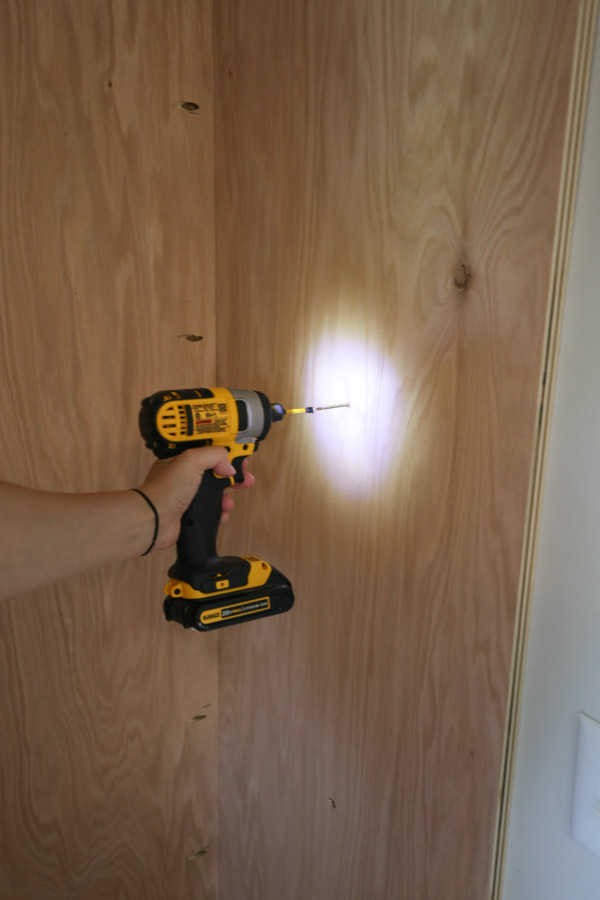
Next, I used a studfinder to find our studs and then measured and marked on our cabinet where to drill through into the wall studs. I used 3″ self tapping screws and our impact driver to attach the cabinet frame to the wall studs.
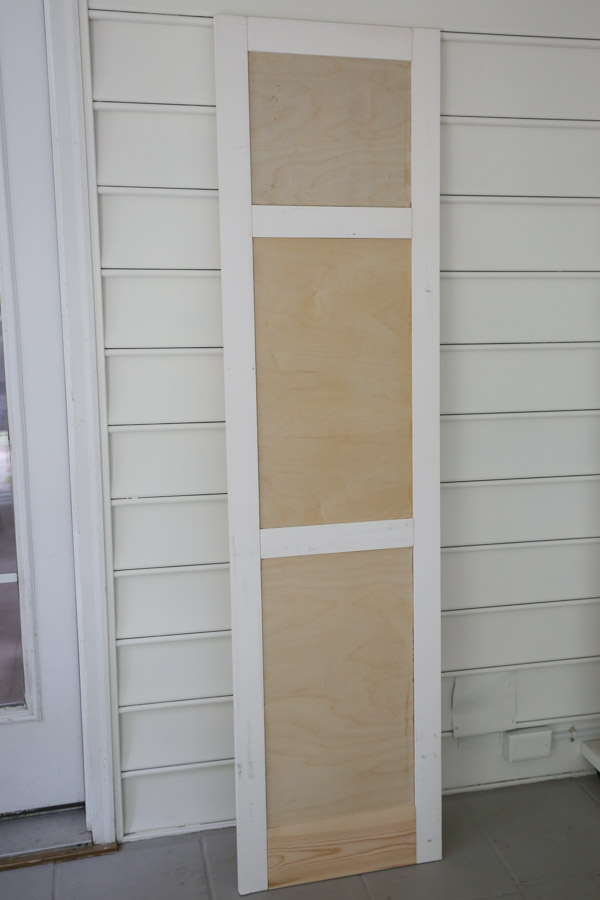
5. Trim out the frame of the DIY built in cabinet
After attaching the built in frame to the wall, I trimmed it out, starting with a 1×6 at the top using wood glue and 1 1/4″ brad nails.
Then, I added some scrap 2×4 blocks to the side frames, under the bottom shelf, using wood glue and 2″ brad nails. These blocks are going to give me more stability for attaching my bottom trim.
I cut two 1x2s to size and attached them for the side trim. Then, I finished the bottom off with another 1×6 board.

📩 Want to Save This?
If I were to do this again, I would have done the 1×2 trim all the way up the sides, with the top 1×6 board in between them like I did with the bottom 1×6 board, for a more seamless look on the sides. This way is shown in the SketchUp graphic in step #1. It’s ok though, I can fill all of the seams/small gaps in with caulk or wood filler.
Also, if I did this again I would build the face frame separately with pocket holes first, then attach with brad nails and wood glue to the frame, just like I did with our DIY wall cabinet and DIY garage cabinets.
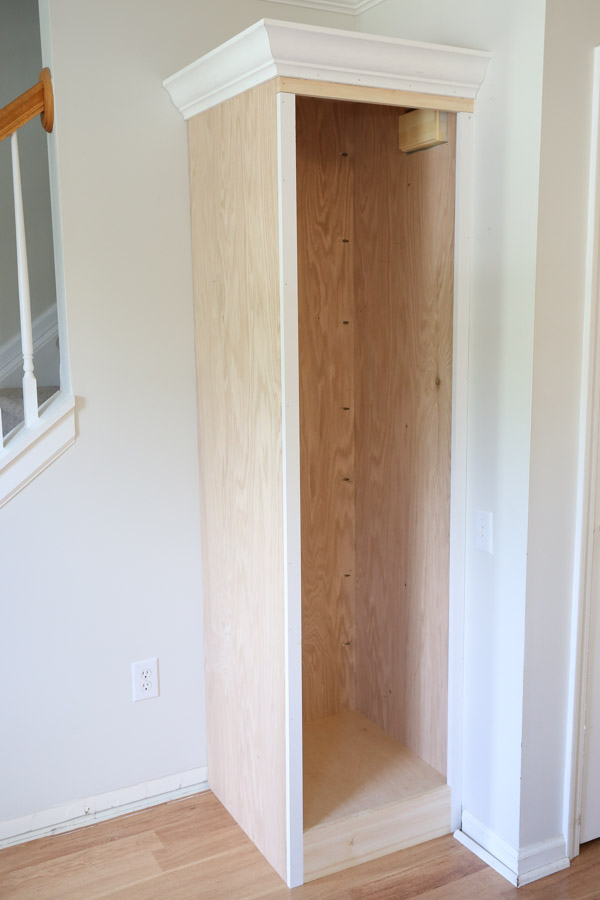
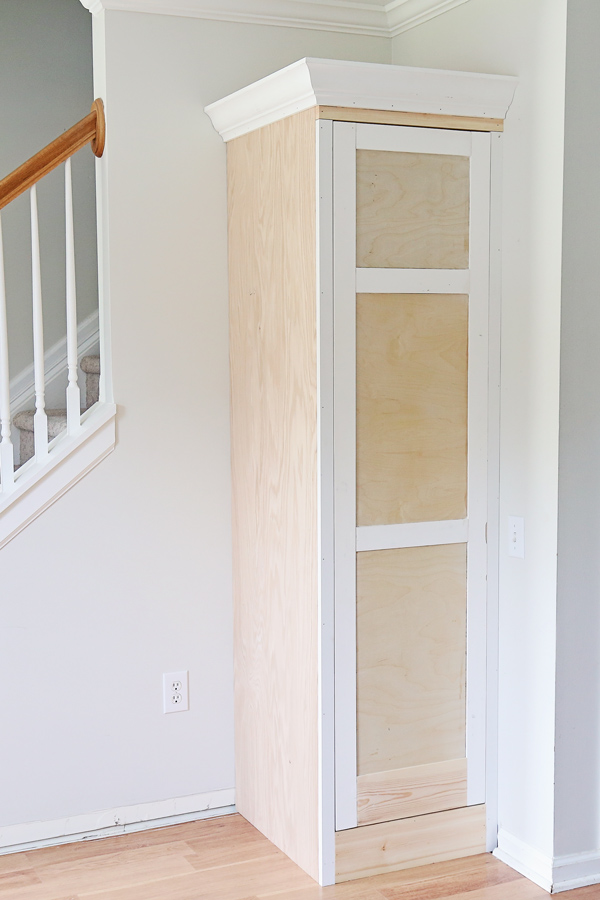
6. Add crown molding
The last trim step is to add crown molding to the top of the built in cabinet.
I used the classic, no compound, mitered cut method for cutting our crown molding outside corner, which is where the crown is turned upside down on the miter saw fence. This works best with wood crown molding rather than MDF crown (trust me lol).
It’s the same method I used for the crown molding when enclosing the space above our kitchen cabinets and our DIY wall cabinet. As I described in those tutorials, this cutting guide from Dewalt is super helpful and explains how to do it.
For inside corners, like on our DIY office built in cabinets and DIY living room built in cabinets and shelves, we used coping for the crown molding.
Another alternative to crown molding that’s easier is adding a 1×4 board with mitered ends. We used this more simple trim method for our DIY built in cabinets for our kitchen.
I installed the crown with wood glue on the corners and 1″ brad nails. Brandon helped hold it in place so it was installed exactly how we wanted it.
7. Build the built in cabinet door
The last build step is the built in door. I wanted to do an inset door for a high end look. We used the same build method as our DIY bathroom vanity doors. But, check out my 3 DIY cabinet door construction techniques to see other ways to make cabinet doors!
Two Door Options: Purchased or DIY Cabinet Doors
Before I get into how we built the door, I do want to mention that you can actually order a premade custom door online to keep this project more simple if you prefer.
With such a large door, we made a few mistakes which we were able to fix but it would have been easier to just order a premade door ready to go. However, it would have cost us about $200+ more than building it from scratch!
We ordered premade doors for our DIY built in cabinets for our kitchen. It’s a quick and easy alternative to building a door!
But here’s how we built it if you want to DIY it!
To start, I measured the exact height and width opening of the cabinet for the door and subtracted a 1/4″ from those dimensions to get my door size, as you want to have an 1/8″ gap all around the door (or a 1/16″ gap if you prefer smaller gaps).
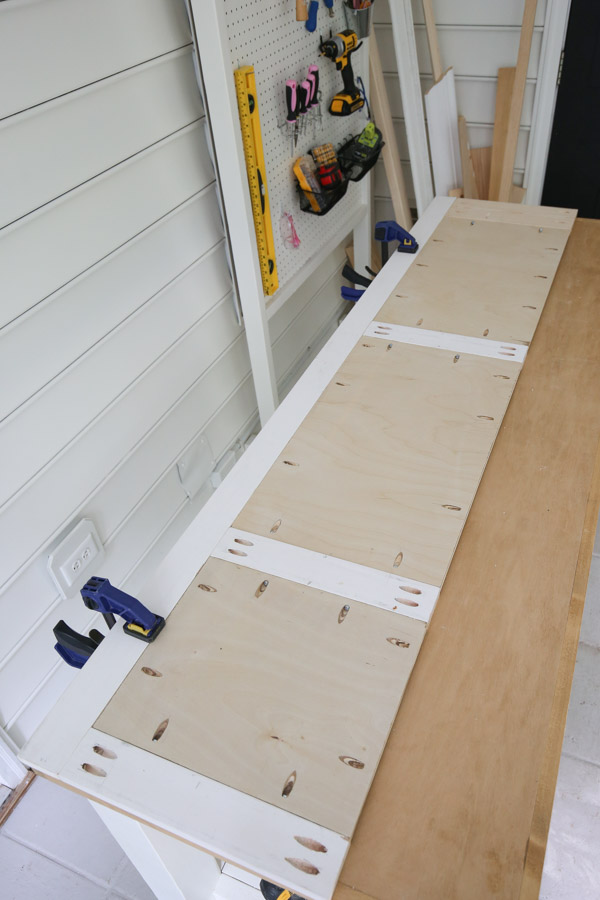
Construct the two doors using 1/2″ plywood framed out with 1x3s and a 1×6 on the bottom of the door.
We cut the boards for the the face frame of our door first, clamped them together (but did not attach them together yet), and then we determined our 1/2″ plywood cuts.
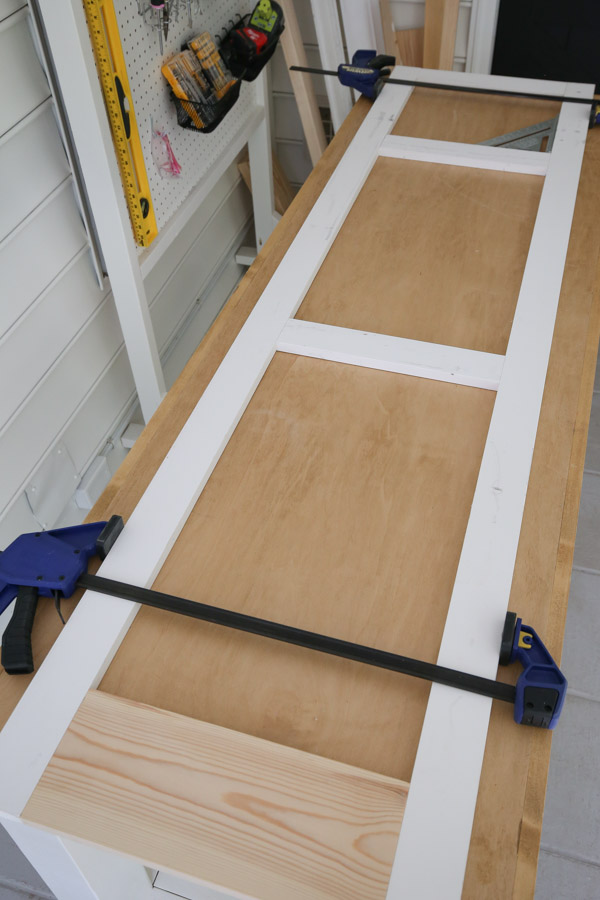
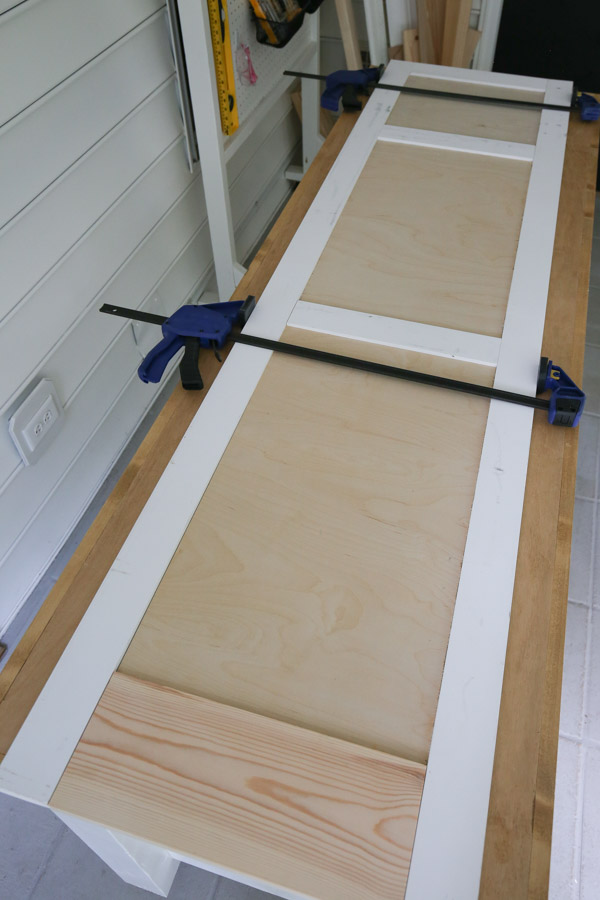
For the door design, I created two equal sections of the same size and one smaller sized section. I wanted the door handle to be about 36″ up from the ground like most standard door knob heights.
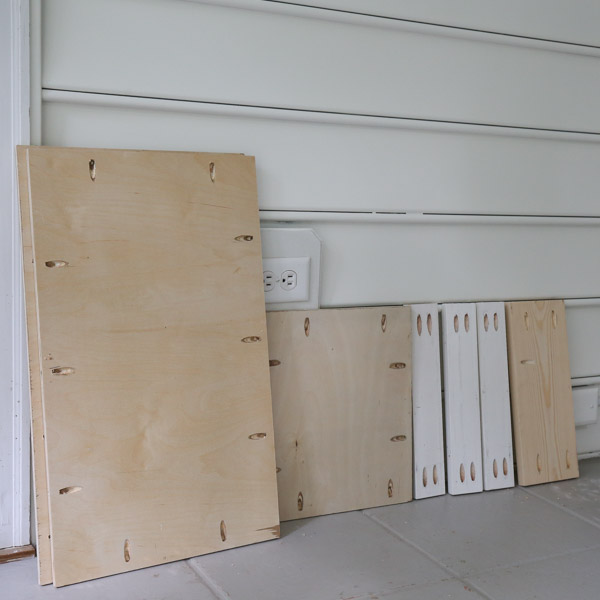
Brandon added pocket holes along all of the plywood sides and on the center door frame boards.
Make sure to adjust your Kreg Jig settings for 1/2″ thick wood on the plywood and 3/4″ thick wood on the 1x3s and 1×6!
Don’t forget, you can see all of this DIY built in cabinet and door construction in the how-to VIDEO!
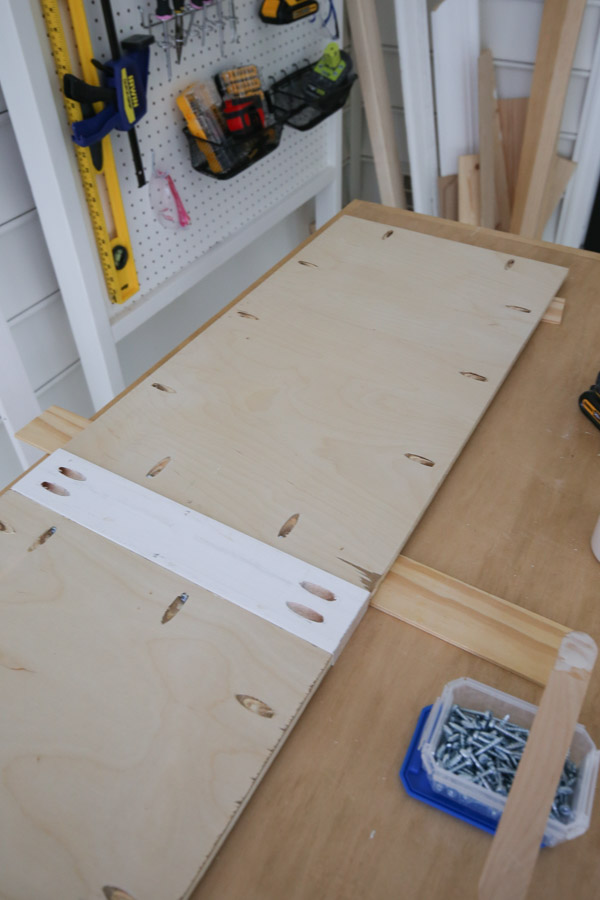
Then, I attached them all together, one section at a time, starting with the center door frame boards, followed by the longer side door frame boards.
We used lots of wood glue and 1″ Kreg screws on the 1/2″ plywood and 1 1/4″ Kreg screws on the door frame boards. This is a large door, so using extra pocket holes and wood glue was essential!
Also, we used 1/4″ thick scrap wood under the plywood to ensure the back of the plywood was flush with the door frame boards while attaching them together. So, there will be a 1/4″ inset on the front plywood next to the door frame.
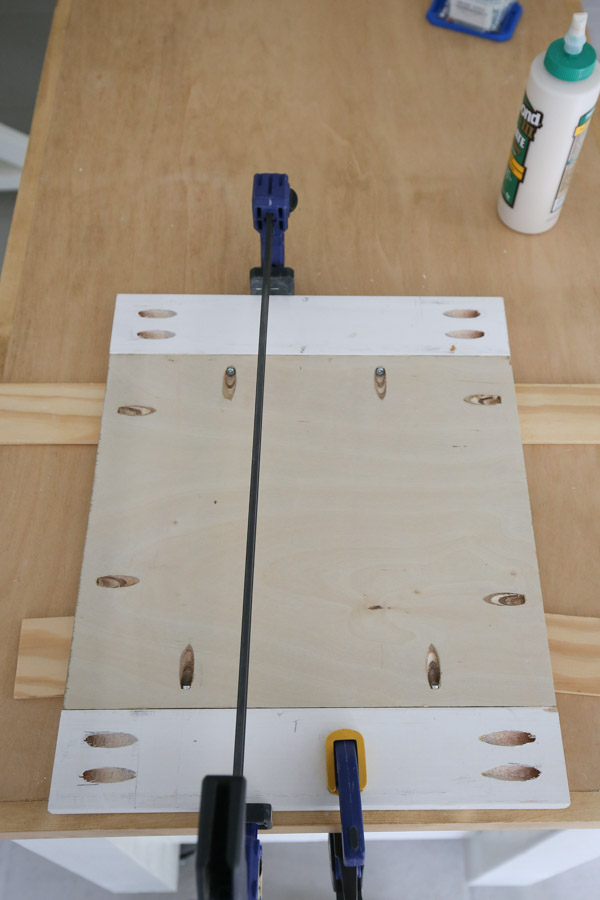
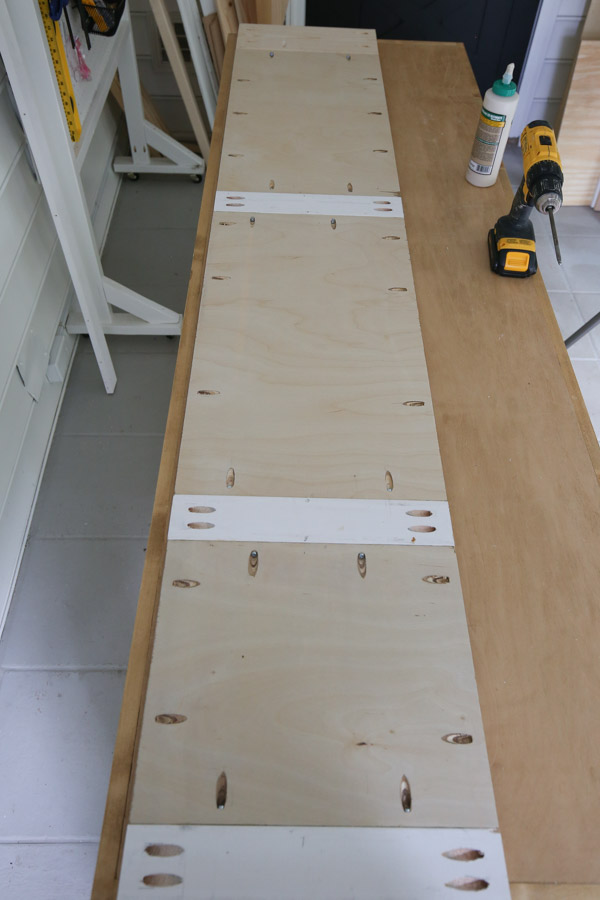
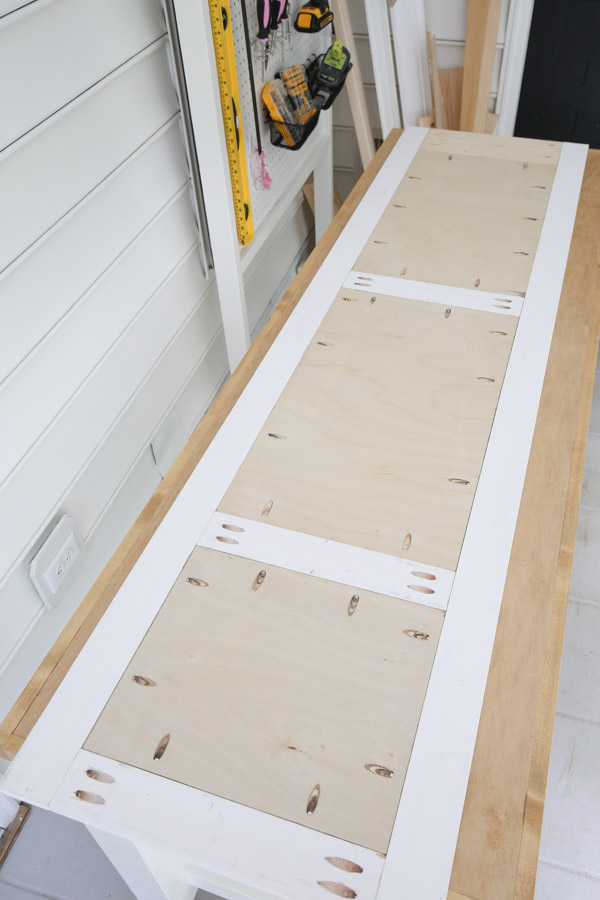
Also, to add more stability to the door we added a 1/4” sheet of plywood cut to size with 3/4″ screws into the door frame and wood glue to the back of the door, leaving a 2” gap for the door hinges.
Here is the back and front view of the constructed DIY built in cabinet door:
Note, if you would like an easier option for building this door, you could just attach some 1/4″ plywood only to the back of the door frame like we did for our easy DIY garage cabinets. The door isn’t as professional looking from the front, but it’s an easier and lighter option!
Make sure to check out my 3 DIY cabinet door construction techniques where I discuss 3 ways to make cabinet doors, from beginner to professional!
8. Install the DIY cabinet door
We installed our door using the same method and inset European hinges as our DIY bathroom vanity and our DIY wall cabinet and door, so check out those posts and videos for more details on door installation.
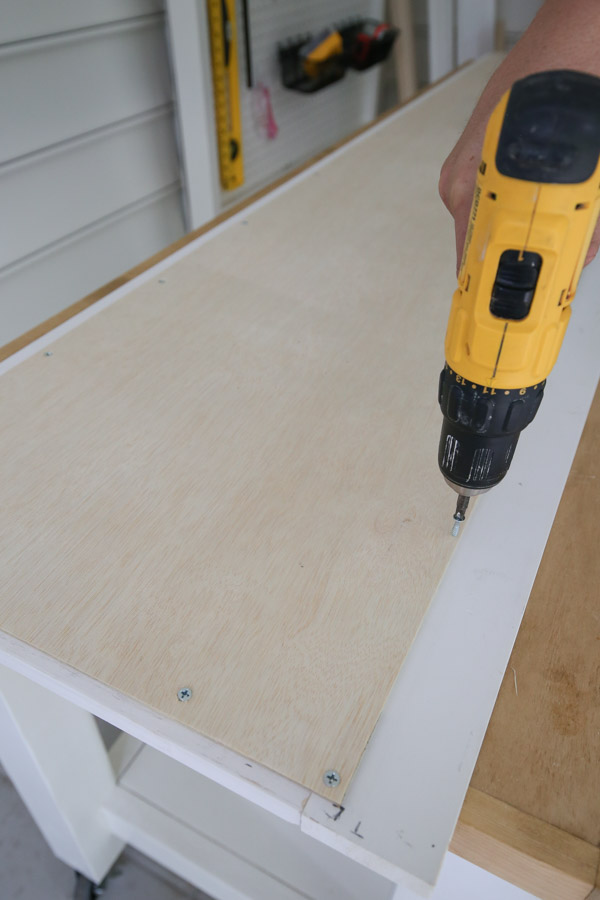
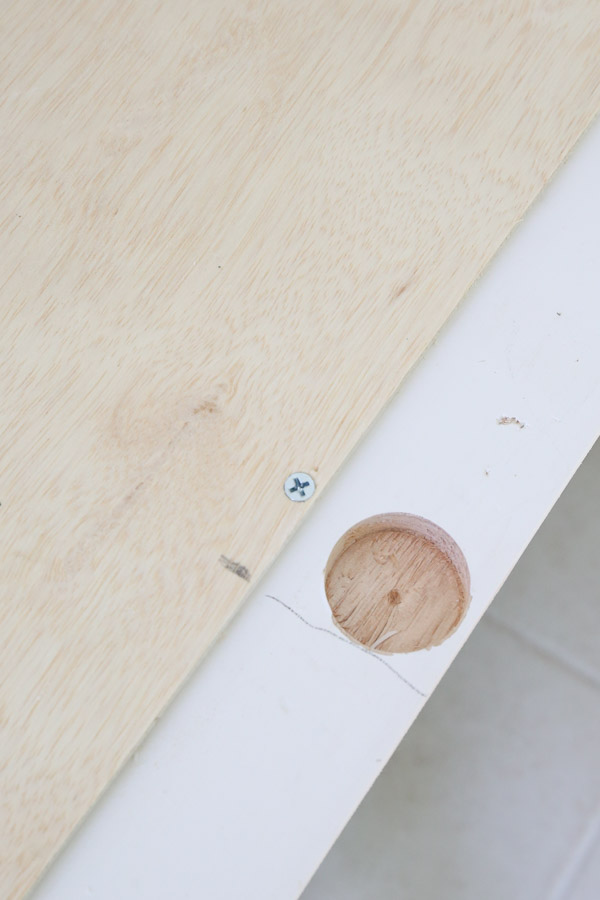
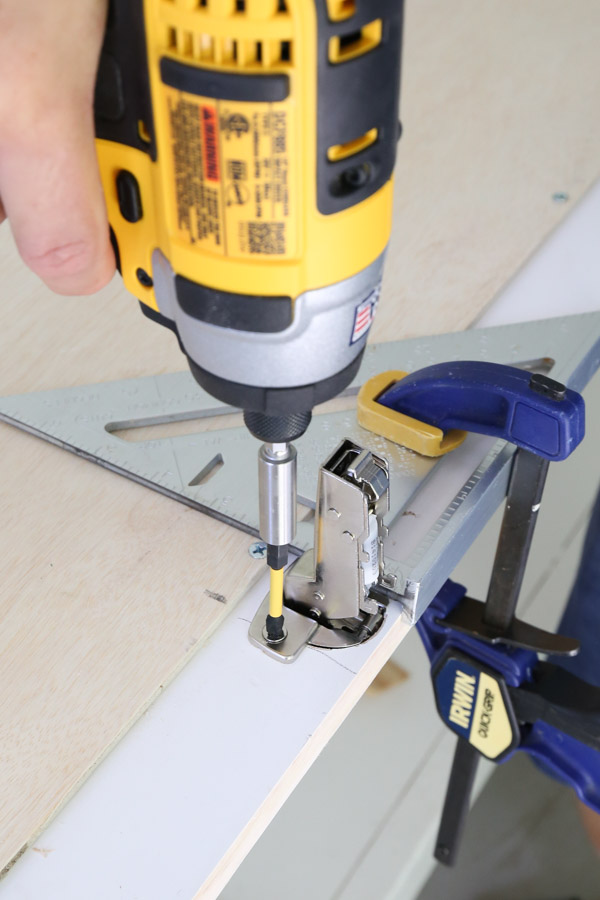
We attached the doors to the cabinet with inset, frameless European door hinges. We used the Kreg Concealed Door Hinge Jig to get the perfect holes for our hinges.

We attached a 1×3 on the inside of the door with 1 1/4″ wood screws to provide a flush surface with our cabinet frame for attaching the door hinges and make the door frame “frameless”.
This is because we used frameless, inset hinges, instead of face frame, inset hinges since the frameless hinges are less expensive and easier to find.
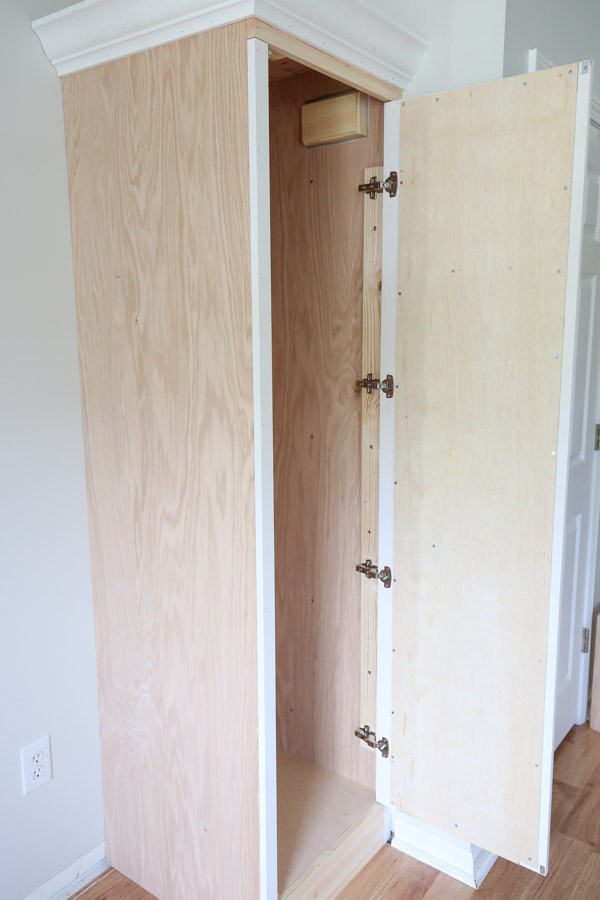
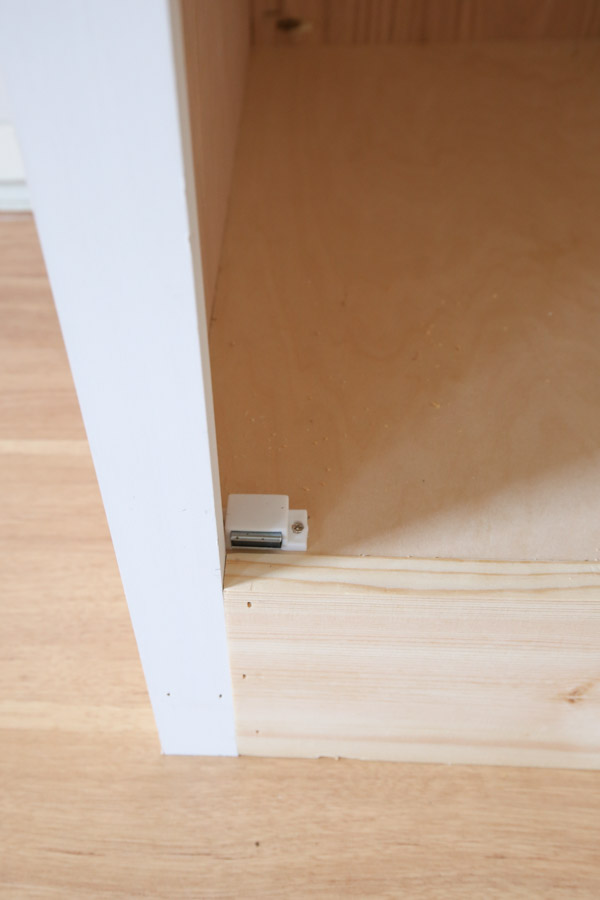
To prevent our door from going inwards, which happens with these inset hinges, we installed two magnetic door catches.
Finally, we adjusted the hinges so that we had even door gaps all around. I incorrectly cut the width of our door boards, 1/8″ too long and didn’t realize it until the end…which caused our gaps to be really small on the door sides, but we made it work! As the saying goes, measure twice and cut once lol!
9. Caulk, fill holes, prime, and paint built in cabinet
The last step is to caulk, fill the nail holes with spackle, and prime and paint the built in.
But because we are adding a DIY built in bench for part 2 of our entryway makeover, we are going to wait on this step! I will also add custom cabinet shelves in part 3 of the entryway makeover reveal and budget breakdown!
Make sure to follow along on Instagram and YouTube for part 2 next week. I can’t wait to finish the built in bench and add the final trim to both the cabinet and the bench.
I know there were a lot of steps in this DIY built in cabinet tutorial! I hope it’s helpful in showing how to build a custom built in for your own space! Let me know if you’re thinking of building something similar and if you do build one as well!!
Feel free to ask questions below or over in our Woodworking for the Home facebook group, where you can also share photos of your build too!
Update: Check out the full entryway makeover reveal (with these built ins in completed) and see the full cost breakdown of this project!
Want to save for later?! Pin it here:

Catherine
Monday 26th of July 2021
I love this and can't wait to see the finished product!!