
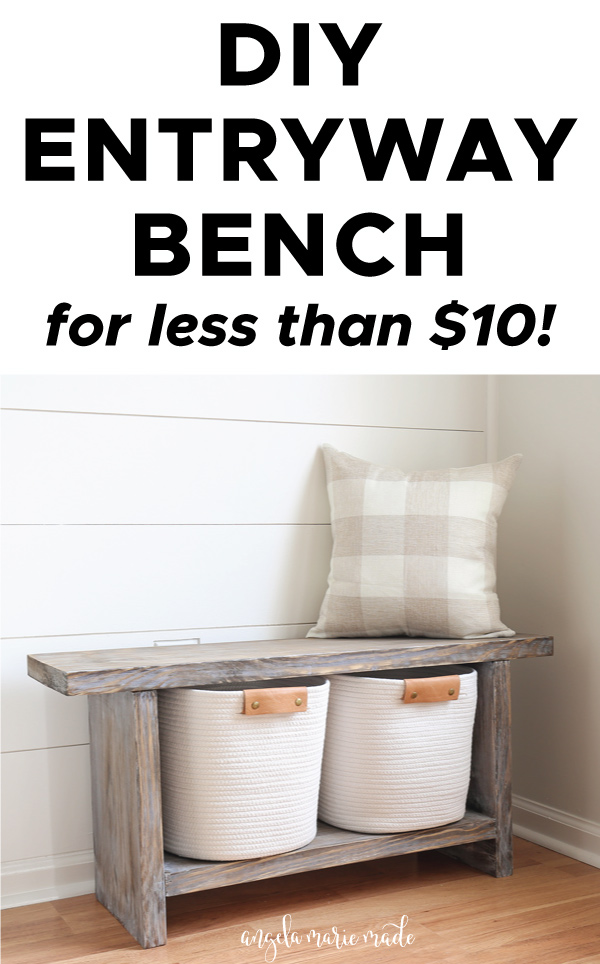
This week I built my first project of the year, an easy DIY entryway bench! I only used one board that cost less than $10 to build this DIY wood bench! It's a really quick and easy project if you need to add some extra storage and seating by your entryway.

The final dimensions of this DIY bench are about 37" long x 11" wide x 18" tall, perfect for a small nook or wall, but you can easily adjust it for different size spaces.
Also, if you are interested in other entryway bench options, check out my DIY built in bench and my DIY hall tree!
Note, this post contains some affiliate links. For more info see my disclosures here.
How to Build a DIY Entryway Bench:
Materials:
- (1) 2×12 @ 8ft
- 2 ½″ Kreg screws
- Paint or Stain (I applied a weathered gray finish)
Tools:
- Miter saw or Circular Saw (optional)
- Kreg Jig
- Drill
- Kreg right angle clamp (optional)
- Tape Measure
I finished off my bench with these cute baskets and throw pillow.
Subscribe to my YouTube Channel here!
1. Cut wood to size
Use a miter saw or table saw to cut your wood to size. Or have your home improvement store make the cuts, which is what I did to save time. Also, make sure you use very straight lumber for this project!

Make the first two cuts at 16 ½" long (for the bench sides). Next, make the third cut at 26" long (for the bench shelf).
After the first three cuts, there will be about 37" of wood left for your bench top. So, no leftover scrap wood to worry about, yay!

2. Add pocket holes to the DIY entryway bench
Use a Kreg Jig and add two pocket holes to the top side of the 16 ½" bench sides. Then, add 2 pocket holes to each end of the 26" bench shelf piece.
Tip: See my how to use a Kreg Jig post for an easy, step by step tutorial and video tutorial on how to use the Kreg Jig!

3. Attach bench sides to bench shelf
Note: Ok so here's where I had mom brain on this really simple project. It would be easier to first attach the bench sides to the the bench top (step #4 below) and then attach the bench shelf. When you attach the shelf first like I did, you need to use smaller Kreg drill bits or a smaller drill to screw in the Kreg screws because a standard size drill and Kreg drill bit doesn't fit easily between the shelf and bench top. So, if you don't have a smaller drill or smaller drill bits with a square tip, then attach the bench top first (step #4), then do this step to attach the bench shelf.
📩 Want to Save This?
Measure and mark 3" up from the bottom of each 16 ½" bench side piece. Then, attach the 26" bench shelf board at these marks with a drill and 2 ½″ Kreg screws. I used my Kreg right angle clamp to help with this step.

4. Attach DIY bench top to bench sides
Center the bench bottom on top of the bench top as shown in the photo below. There should be about 4" of overhang on each side of the bench sides.

Using a drill and 2 ½″ Kreg screws, attach the DIY entryway bench top to the bench sides. Note, this is the part where I had to use my smaller Kreg drill bits (see note above in step #3).

Flip your bench over and your DIY wood bench is complete!!!

5. Paint or stain the DIY wood bench
Make sure your bench is sanded well, then either paint, stain, or apply a weathered wood finish to it. I chose to apply a weathered wood gray finish to mine to make it more rustic!
I finished off my easy DIY entryway bench with these cute baskets and throw pillow.

What do you think? Could you use a small bench with some extra storage? Also, I have other entryway bench and storage builds, this DIY hall tree and DIY built in bench, if you other options!
Well that's a wrap on my first project of the year and my first project back from maternity leave! Follow along for my latest projects and sneak peaks on Instagram and Pinterest!
Want to save for later? Pin it here:


Can this be done with 2x6s as well?
Sure! You will just need to add some extra Kreg holes to connect the 2x6s together to create the same width.
What if i cant make the jig inserts? what do you suggest?
This project can be done without using a kreg jig, using 3" wood screws and wood glue instead. The placement of the screw holes would be different, you would need to drill from the top of the bench going into the sides and from the outside of the sides going into the bottom shelf. I would also recommend counter sinking the screws and using wood filler to hide where the screws are.
At the 1:01 mark in the video for the 1st set of Kreg Jig holes, what is the measurement needed for each side of the wood? i.e. where would I make the holes at in the top and bottom of each required wood piece? 3" in on each side?
Yes, 3" in would work for drilling the kreg holes.
@Angela Marie Made,
I want to make a bench that’s 25 inches long and 18 inches height what would be the shelf measurements? Thanks
14" which is the difference of my measurements of 37" - 26" = 11" and for your width of 25"-11" is 14" wide. The side pieces will be the same as mine at 16" and it will be 18" tall because the top shelf is 1.5" thick.
Hi! What wood do you recommend using for this?
I recommend using pine for this project.
Hi, I am looking for the building plans to make this bench but i can't seem to find it. Where can I buy them?
Unfortunately, I do not have plans for this project yet.
Would I need to add additional support if I wanted to make this bench 6ft long? Also, would using a 1x12 instead of a 2x12 be okay?
Yes, I would add additional supports for a 6ft long bench and it should be fine to use a 1x12 but you would need to make sure that you used different settings for the kreg jig and make sure that you can kreg 3/4" thick wood into 1-1/2" thick. I think you can but I have not tried.
I have liked everything you have shared thus far. Thank You! Mike
Much appreciated!!!
I really love this bench. I love the color. I love the way you explained it. Just to the point. Thanks
So glad you love it!! Thank you! 🙂