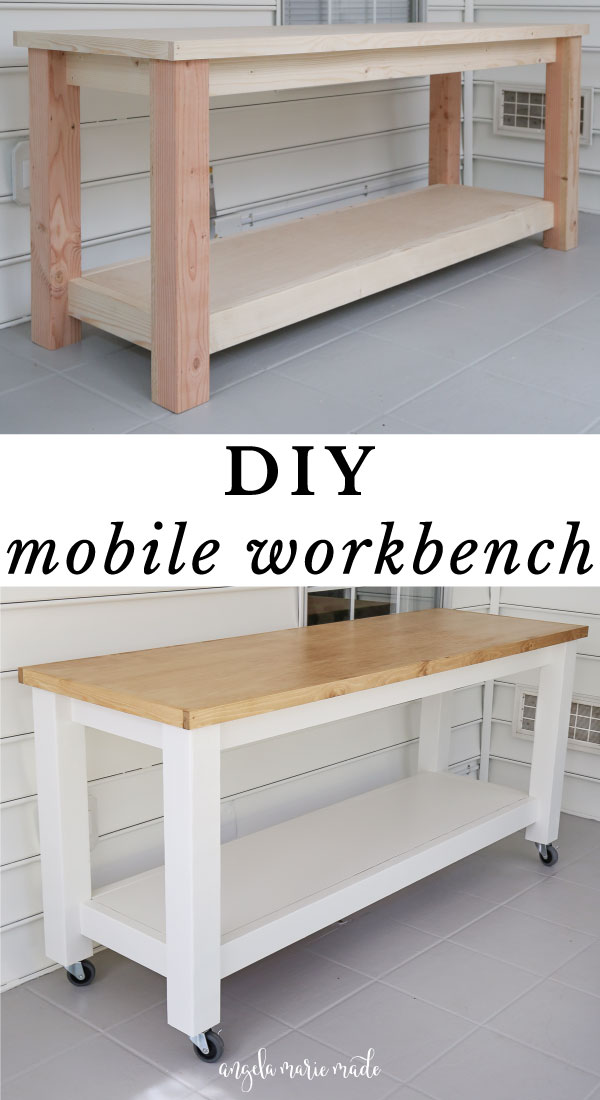
Learn how to build a cute and functional DIY mobile workbench that’s budget friendly too!
I’m so excited to share about our new DIY workbench! As I shared in our how to paint vinyl siding post, we’ve been turning our back porch into a cute workshop!
Well every workshop needs a workbench to make woodworking easier!
Because of the limited space, we needed to create a DIY rolling workbench that could work for a small workshop, but still be large enough for projects!
Further, I didn’t want a totally unfinished, rough looking workbench, even though I know they get beat up from woodworking over time. So, I came up with both a pretty and functional DIY workbench on wheels!
And even better, I designed this DIY mobile workbench to be budget friendly too! It costs me $185 for the lumber and caster wheels (which surprisingly are not cheap for heavy duty ones).
Note, I did use premium plywood and caster wheels (linked below) so it could be built even cheaper.
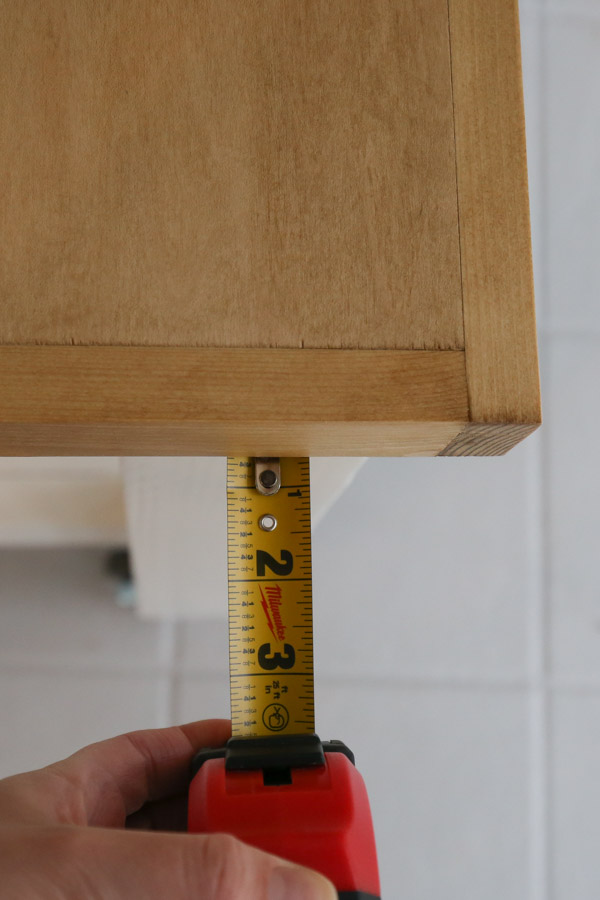
I also designed this workbench so that there is a 2 3/4″ top over hang in front of the aprons for easy clamping when working!
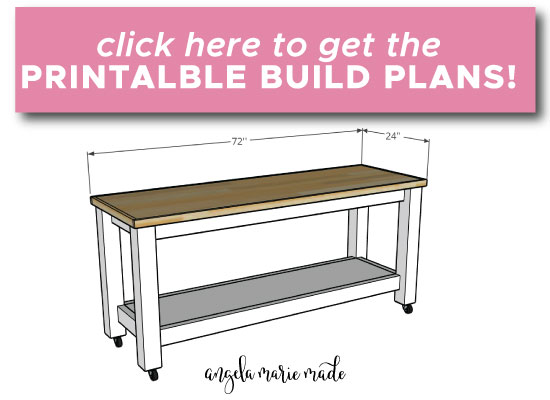
You can get the printable DIY workbench plans for easy building below too!
Also, as many of you have pointed out, this could also be used as a DIY kitchen island on wheels too!
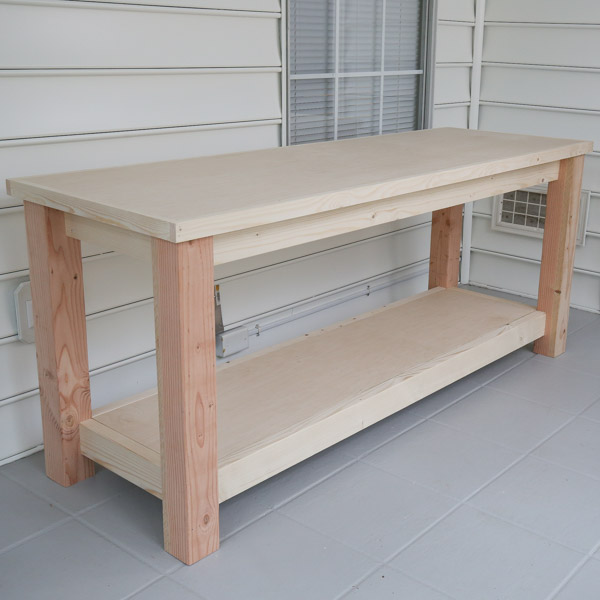
FINAL DIMENSIONS OF WORKBENCH: 72″ long x 24″ wide x 34″ tall*
*You can adjust the height of this workbench by using different casters or adjusting your 4×4 cuts if you prefer a taller or shorter work surface.
Note, this post contains some affiliate links. I may earn a commission if you shop those links (at no cost to you). Thank you for supporting my small business. For more info see my disclosures here.
How to Build a DIY Mobile Workbench:
Materials
- (1) 4ft x 8ft plywood @ 3/4″ thick*
- (2) 4×4 @ 8ft (untreated)
- (2) 1×2 @ 8ft
- (2) 1×4 @ 8ft
- (4) 2×4 @ 8ft
- (2) 2×2 @ 8ft (furring boards)
- 1 1/4″ wood screws or self tapping screws
- 2 1/2″ wood screws or self tapping screws
- 1 1/4″ brad nails
- 1 1/4″ and 2 1/2″ Kreg screws
- 1/2″ thick wood shims or paint sticks or scrap wood
- Wood Glue
- Paint & Primer or wood stain (optional)
- Polyurethane (optional)
- Spackle or stainable wood filler (optional)
- (4) Caster Wheels (we used two with brakes and two without)
Tools
- Kreg Jig
- Miter saw
- Circular Saw or Table Saw
- Brad nailer
- Drill
- Clamps
- Kreg right angle clamp (optional)
- Tape Measure
*I used this formaldehyde free plywood that was also pre-sanded
Video Tutorial:
Subscribe to my YouTube Channel here!
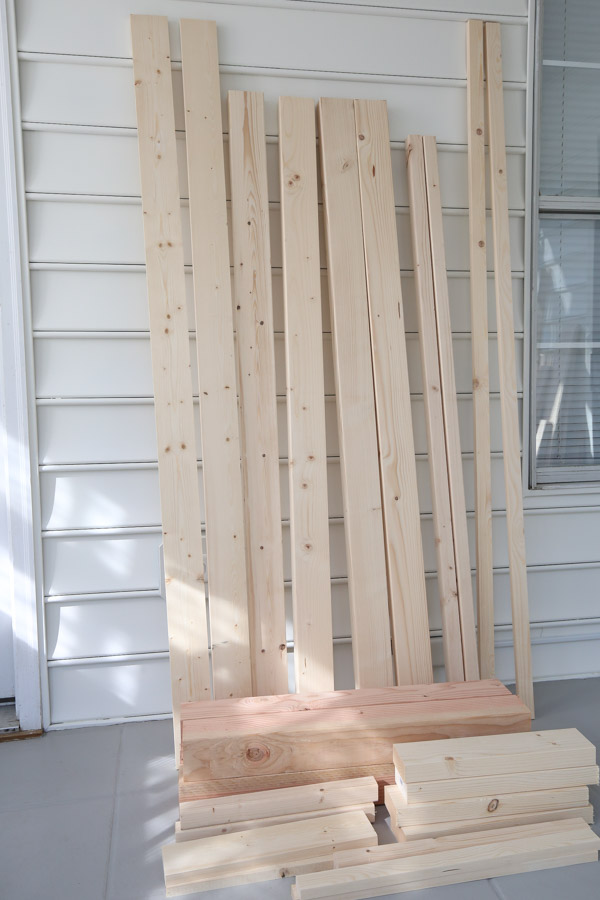
1. Make initial lumber cuts for the workbench
Click here for the printable DIY workbench plans which include the cut list and step by step building steps with easy to follow diagrams!
Begin by making the initial lumber cuts.
Use a table saw or circular saw and straight edge guide to make the plywood cuts.
Make the following cut from the 4ft x 8ft plywood:
- (1) piece @ 22 1/2″ x 70 1/2″ (for workbench top)
Use a miter saw and make the following cuts from the 2×2s:
- (2) 2×2 @ 15 1/2″ (for lower shelf supports)
- (2) 2×2 @ 60″ (for lower shelf supports)
Make the following cuts from the 1×2s:
Tip: Make one 72″ cut and one 22 1/2″ cut from one 1×2 @ 8ft board and repeat for the second 8ft board
- (2) 1×2 @ 22 1/2″ (for workbench top trim)
- (2) 1×2 @ 72″ (for workbench top trim)
Make the following cuts from the 1×4s:
Tip: Make one 70 1/2″ cut and one 15 1/2″ cut from one 1×4 @ 8ft board and repeat for the second 8ft board
- (2) 1×4 @ 15 1/2″ (for under workbench top)
- (2) 1×4 @ 70 1/2″ (for under workbench top)
Make the following cuts from the 2×4s:
- (4) 2×4 @ 63 1/2″ (for the front & back frames)
- (5) 2×4 @ 15 1/2″ (for side frames & middle support)
Make the following cuts from the 4×4s:
- (4) 4×4 @ 29″ (for workbench legs)***
***Note, adjust these cuts if you want a higher/lower workbench height. The total height of this workbench is 34″ tall: 29″ (4×4 legs) + 3.5″ caster wheels + 1.5″ top.
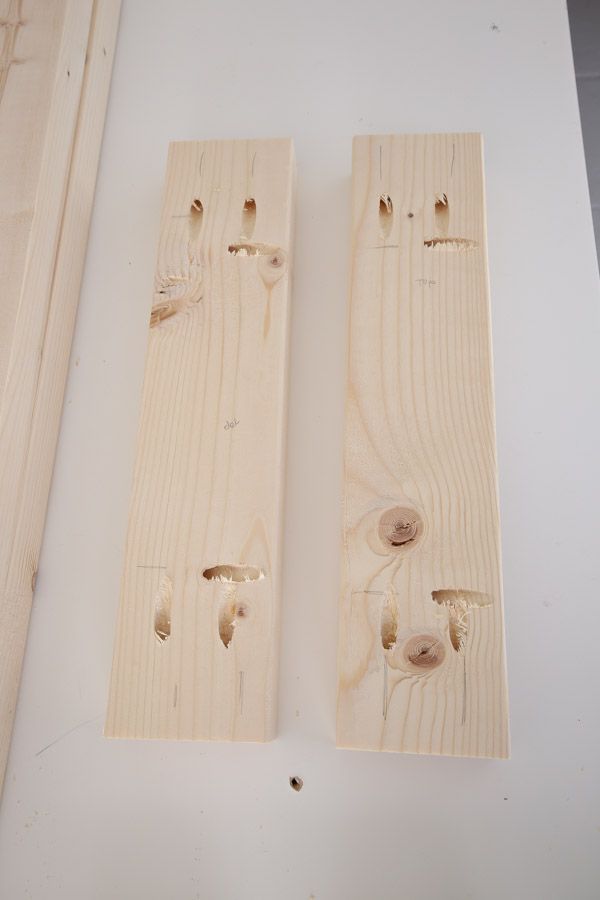
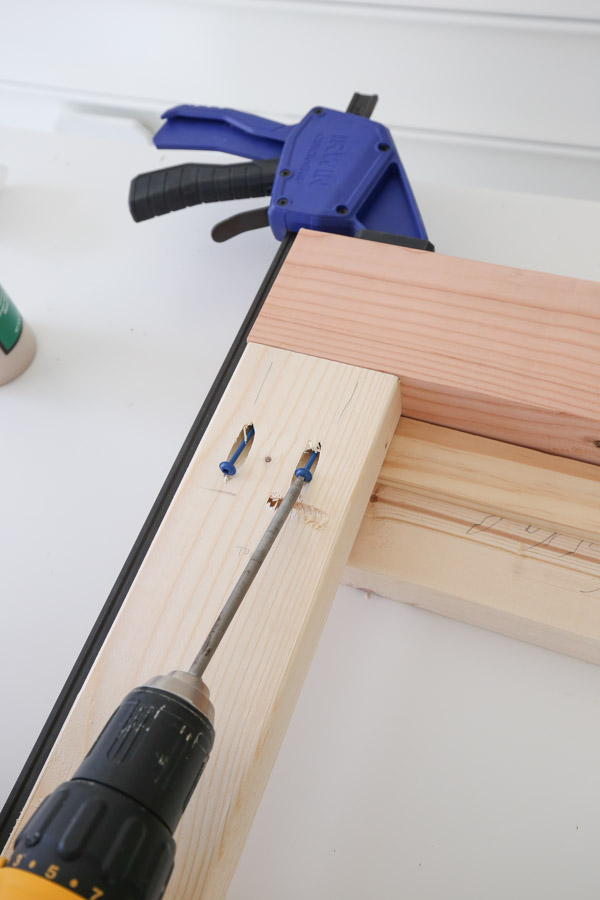
2. Add pocket holes to boards
Make sure the Kreg Jig is set for 1 1/2″ thick wood.
Add pocket holes on each end of all of the nine 2×4 boards.
For three of the 2×4s @ 63 1/2″, add two more pocket holes along one side of the boards as shown below.
And for two of the 2×4s @ 15 1/2″, add two pocket holes along one side of the boards as well. These holes are for attaching our workbench top to the bottom frame.

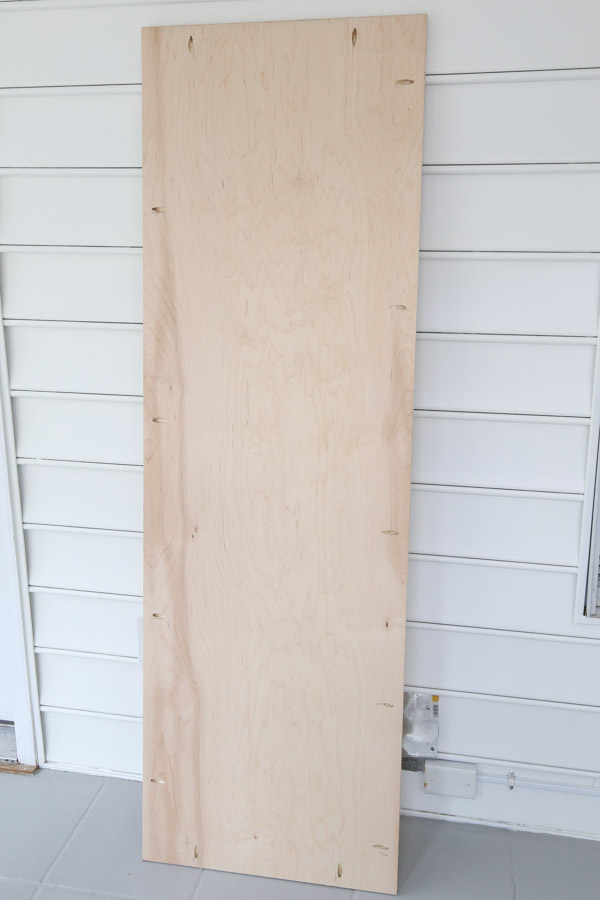
Next, add pocket holes to the larger plywood board (22 1/2″ x 70 1/2″) for the workbench top.
Make sure the Kreg Jig is set for 3/4″ thick wood for the plywood.
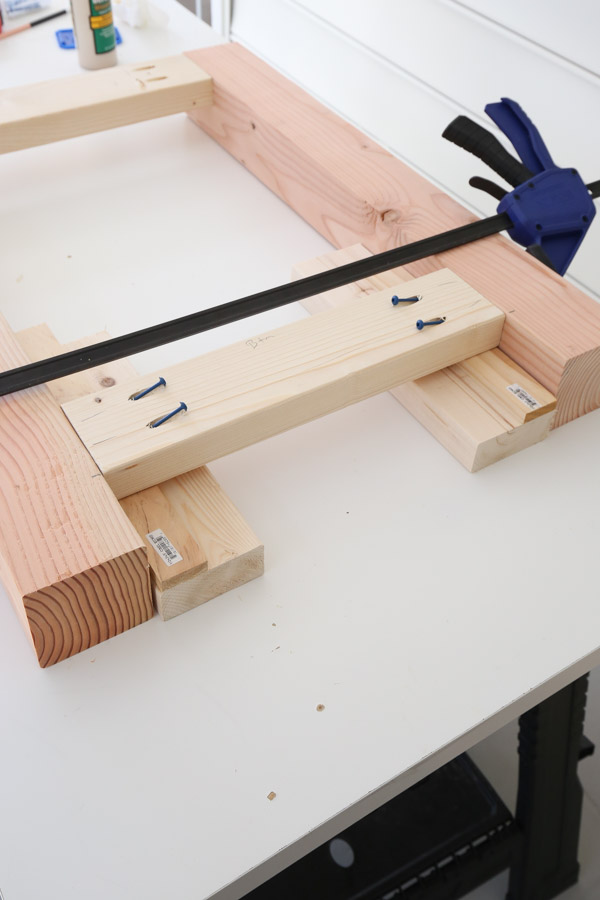
3. Assemble the side frames of the DIY workbench
Attach two of the 4×4 legs together with one of the 2×4s @ 15 1/2″ at the top of the 4x4s boards to form the top of the side frame.
Make sure the top edge pocket holes are facing up on the 15 1/2″ board.
Use clamps and some scrap 2×4 wood and 1/2″ thick wood or wood shims placed under both sides of the 2×4 for easy attaching.
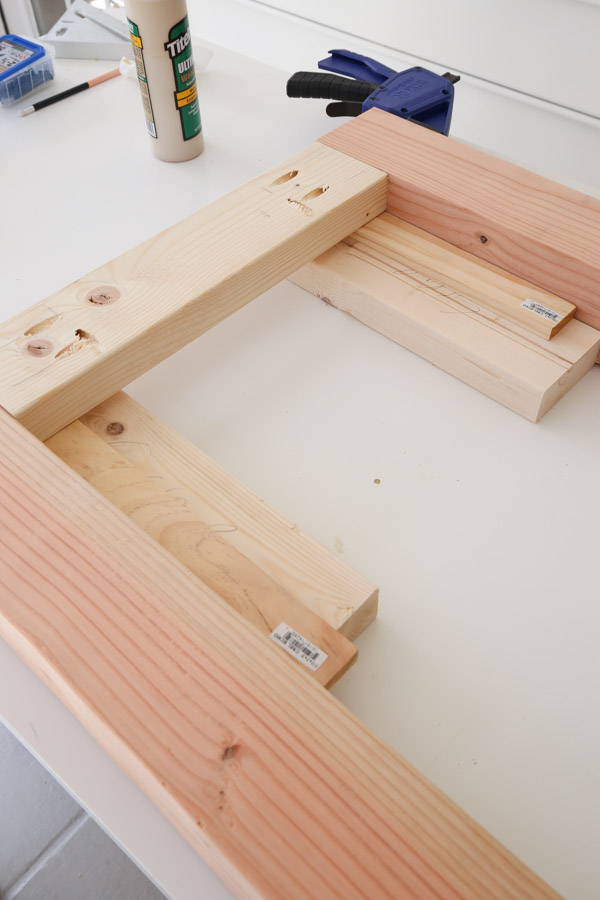
Use wood glue and 2 1/2″ Kreg screws to attach the boards together.
Then, mark 3″ up from the bottom of the 4x4s.
Place another 2×4 @ 15 1/2″ at these marks and attach the same way as the top 2×4.
📩 Want to Save This?
Next, add one of the 2x2s @ 15 1/2″ on top of the bottom 2×4, 3/4″ down from the edge. Attach with wood glue and 2 1/2″ wood screws and clamps to help. This is to create a shelf support for the 3/4″ thick lower plywood shelf.

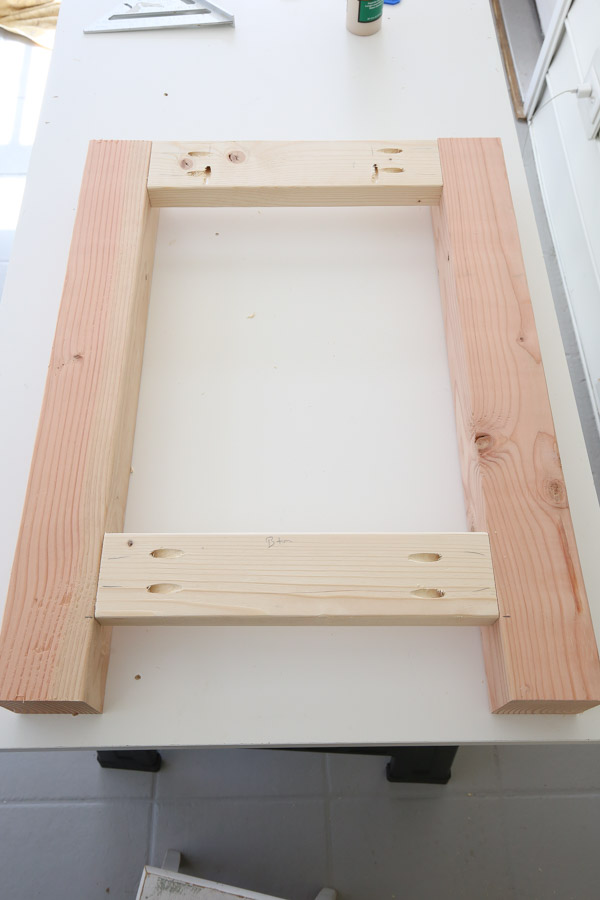
Repeat the above steps again to create the second side frame.
4. Assemble the back and front of the DIY mobile workbench to the side frames
Attach the two sides frames together and create the back of the workbench by attaching one 2×4 @ 63 1/2″ on the bottom lined up with the side 2x4s, 3″ up from the 4×4 bottoms.
Attach with wood glue and 2 1/2″ Kreg screws. You can see all of this in action in our DIY workbench video tutorial!
Note: We made a mistake and attached the 2×4 with the pocket holes along the top edge on the bottom when it should be for the top back frame (whoops)! So make sure not to do that!
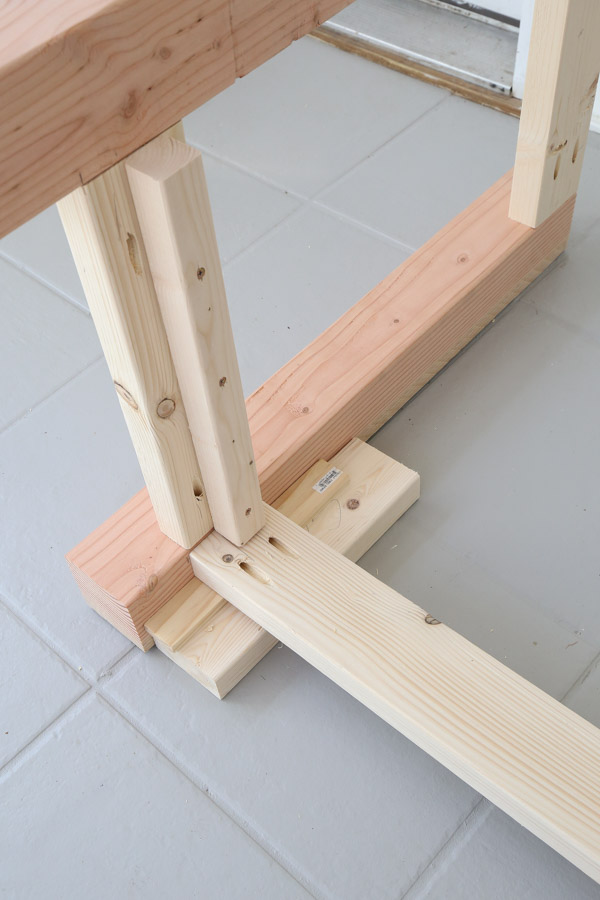
Add one of the 2x2s @ 60″ on top of the bottom 2×4, 3/4″ down from the edge again. Attach with wood glue and 2 1/2″ wood screws.
We intentionally made this 2×2 back board shelf support shorter to easily fit it between the side frames.
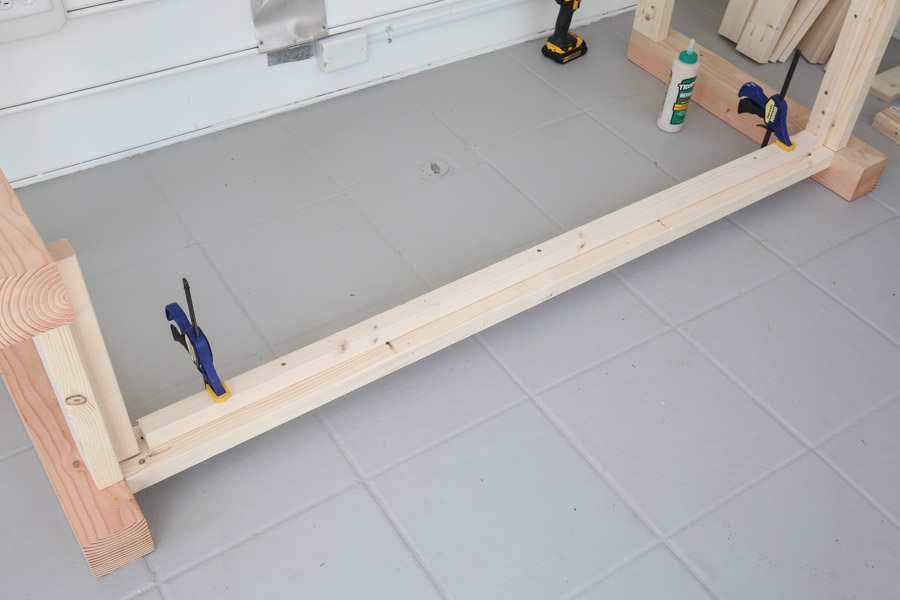
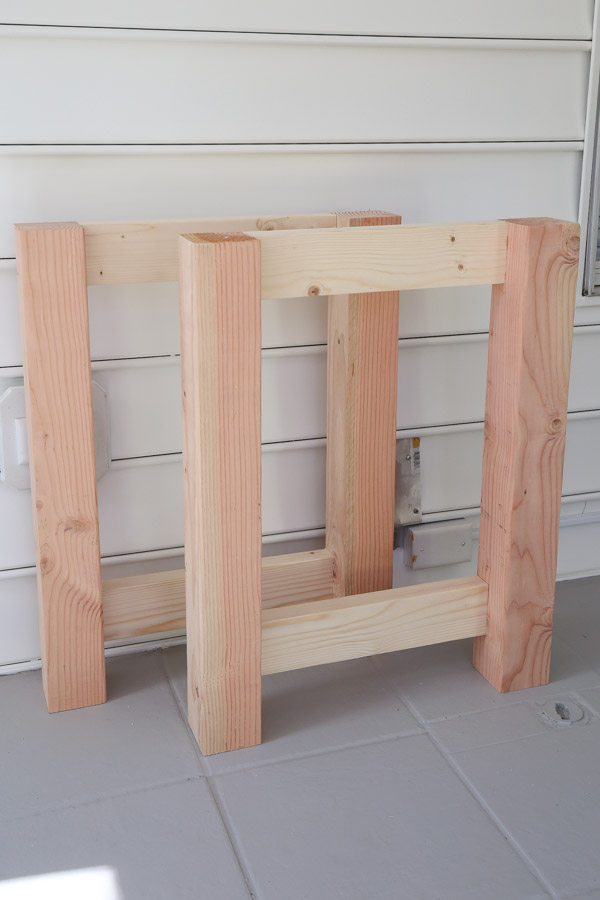
Next, attach the top 2×4 board (the one with the two pocket holes along one edge) to the side frames. Make sure the pocket holes along the edge are facing upwards!
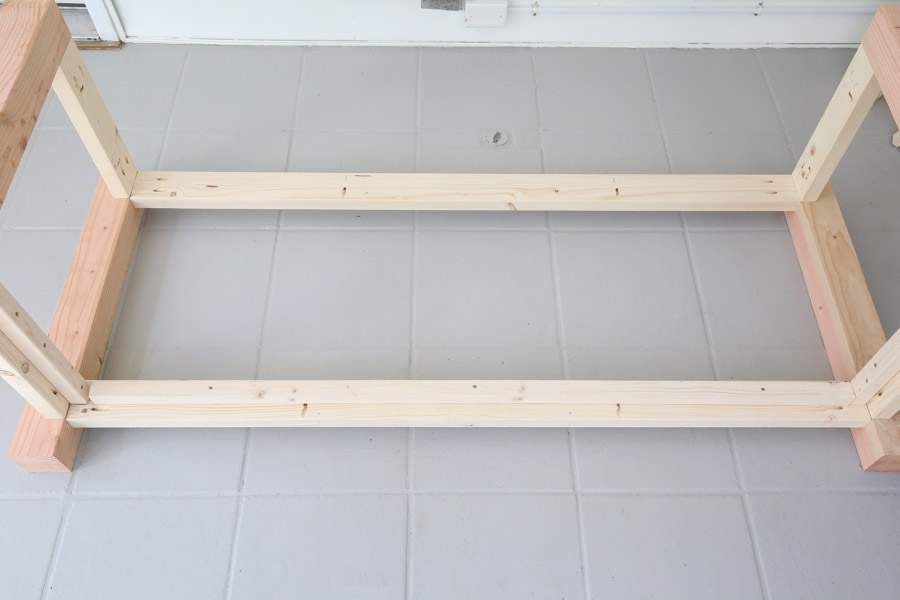
Flip the workbench frame over and repeat the above steps again to create the front side of the workbench frame.
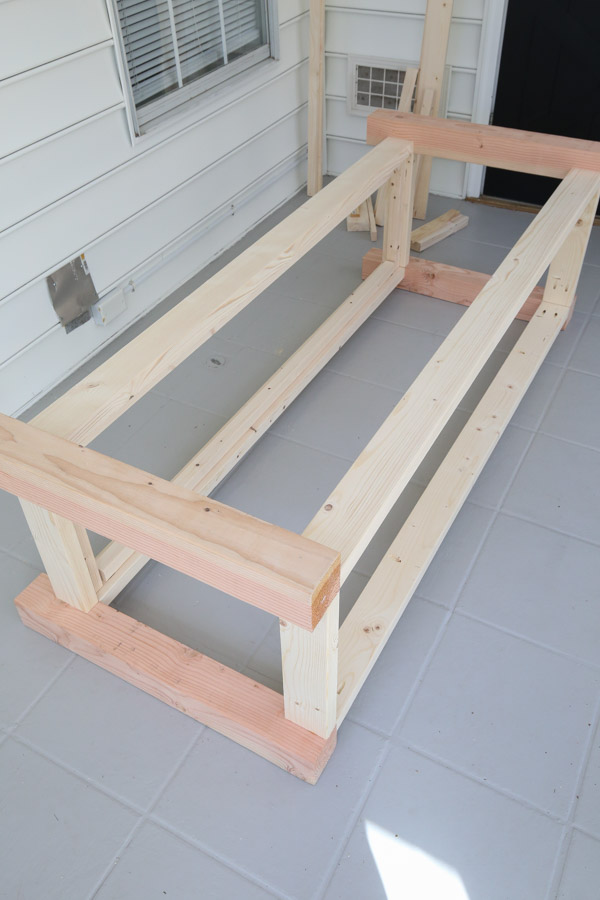
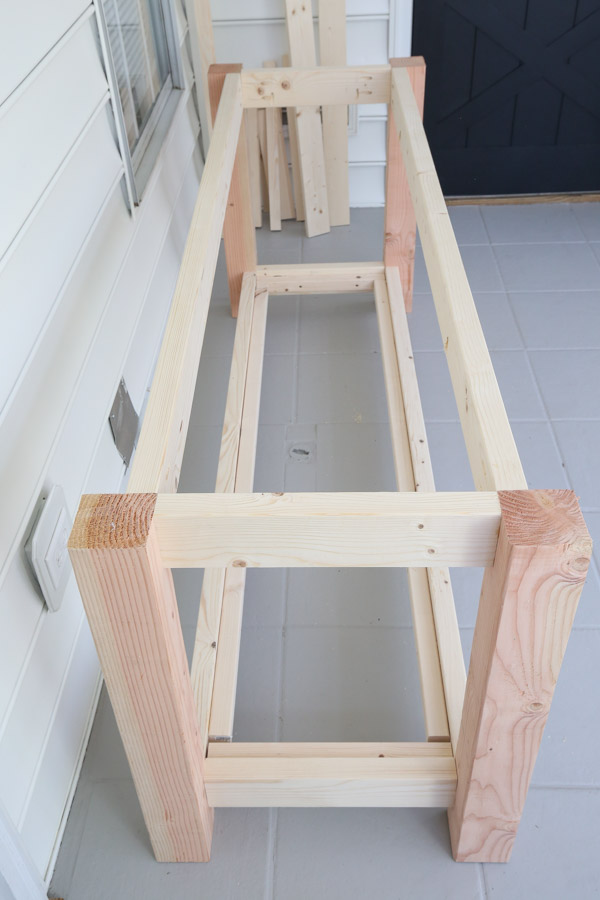
5. Attach the top middle support board to the workbench frame
Mark the middle point (31 3/4″) on the top of the front and back 2×4 frames. Attach the last 2×4 board at 15 1/2″ with Kreg screws at this middle point to create a middle support.

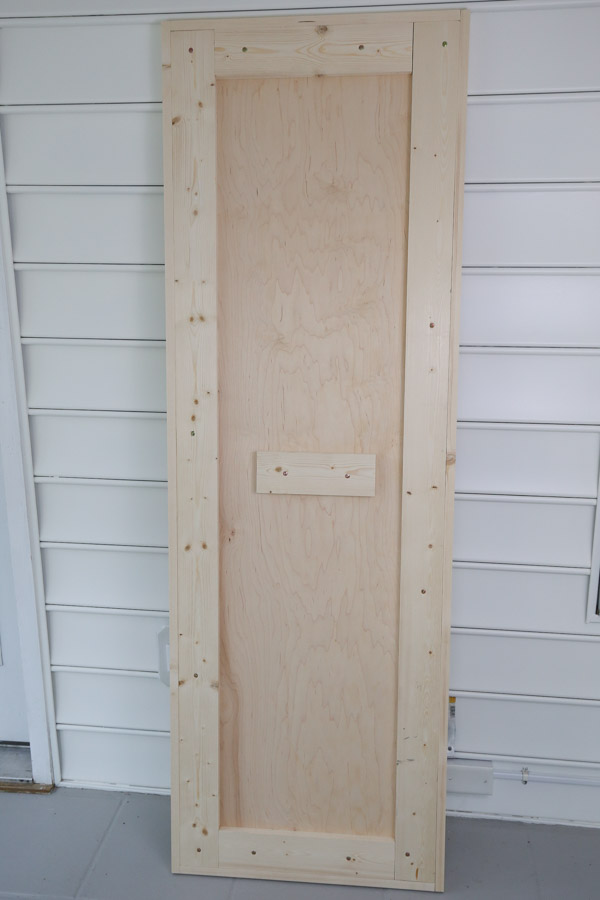
6. Attach the lower shelf to the workbench frame
Measure the opening between the lower 2×4 frame for the lower shelf of the DIY mobile workbench.
Cut the remaining plywood to this size. Note, the shelf measurement should be 15 1/2″ x 63 1/2″ but we are working with framing lumber, so it might be slightly different!
Place the plywood shelf board on top of the 2×2 supports in between the lower 2×4 frame to create the workbench shelf. Attach it to the 2x2s with wood glue and 1 1/4″ brad nails.

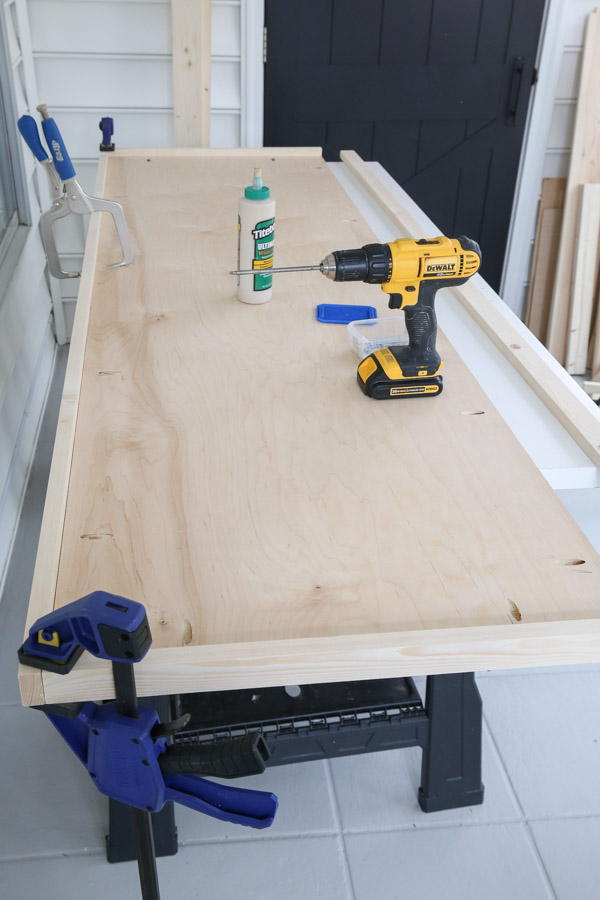
7. Build the workbench top
Attach the 1x2s to the sides of the plywood with wood glue and 1 1/4″ Kreg screws. We used our Kreg right angle clamp and regular clamps to help.

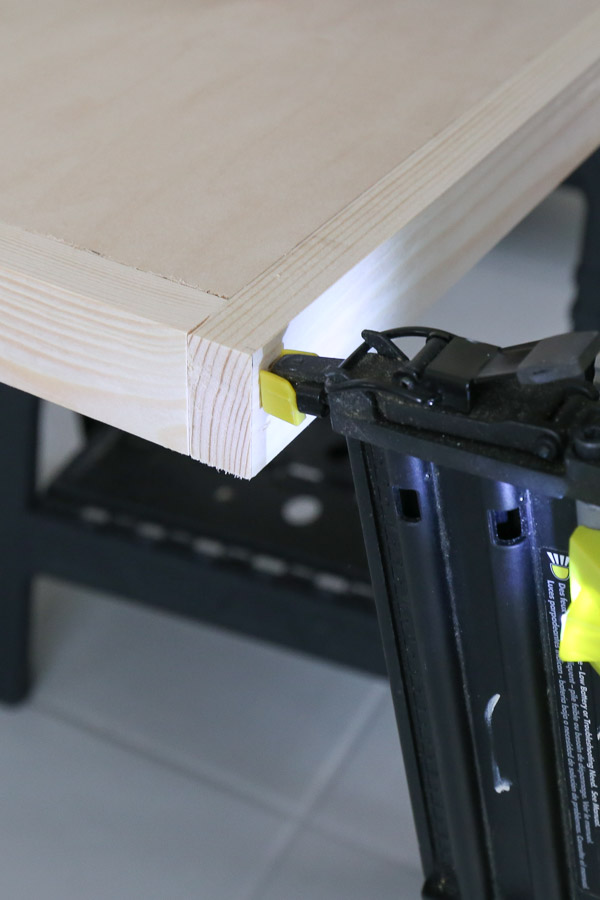
After attaching with the Kreg screws, we added a few 1 1/4″ brad nails through the 1×2 ends to ensure they were lined up evenly.
Next, attach the two longer 1x4s along the front and back edges of the larger plywood panel board with wood glue and 1 1/4″ wood screws countersunk a little bit beneath the wood surface.
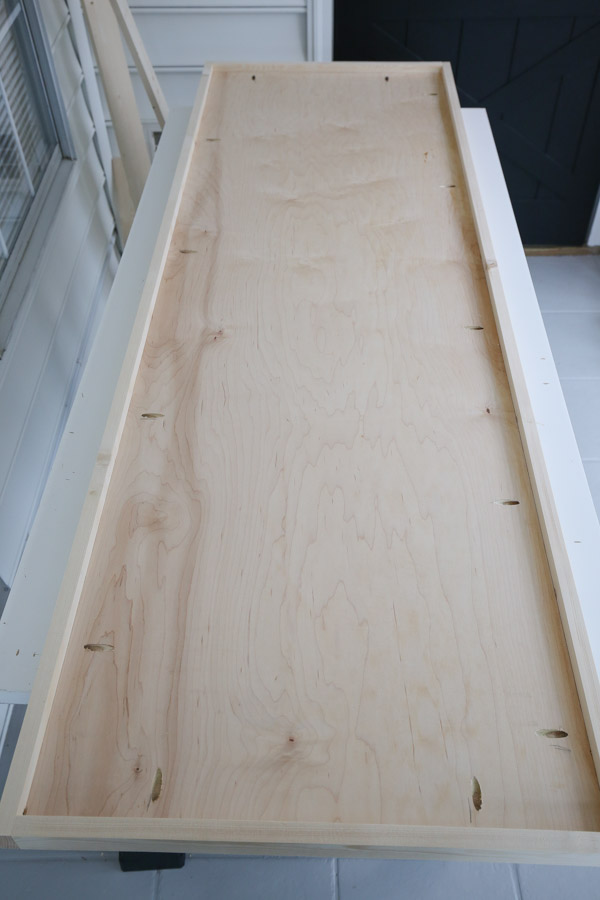
Then, add the two shorter 1x4s on the ends to finish framing out the inside of the 1x2s.
Also, there should be a 10″ scrap board leftover from the 1×4 cuts. Attach it in the middle of the workbench top (which is 3ft from the edge).
This board will sit on top of the middle frame support board. I didn’t want to buy a whole new board for this part, so the 10″ board works!
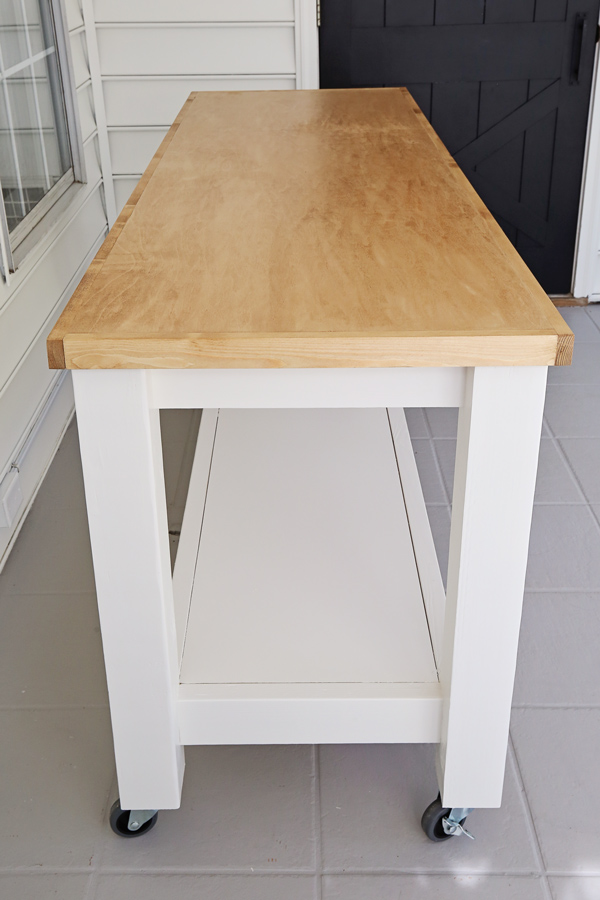
Ideally, I would have used a 1 1/2″ thick butcher block top for this workbench. But because I wanted to build it on a budget, I had to create the look of a thick butcher block top for a low cost, so that’s why I framed it out this way.
Flip the top over and your DIY rolling workbench build is complete! You might need to sand the top edges of the workbench some so the 1x2s and plywood are perfectly even where they meet.
8. Stain or paint the DIY workbench (optional)
At this point you can leave your workbench unfinished or stain or paint it.
We chose to paint our workbench frame white and stain the top with one coat of stain. I used this stain color. Also, we primed the frame first before painting.
We finished the top with two coats of water based polyurethane.
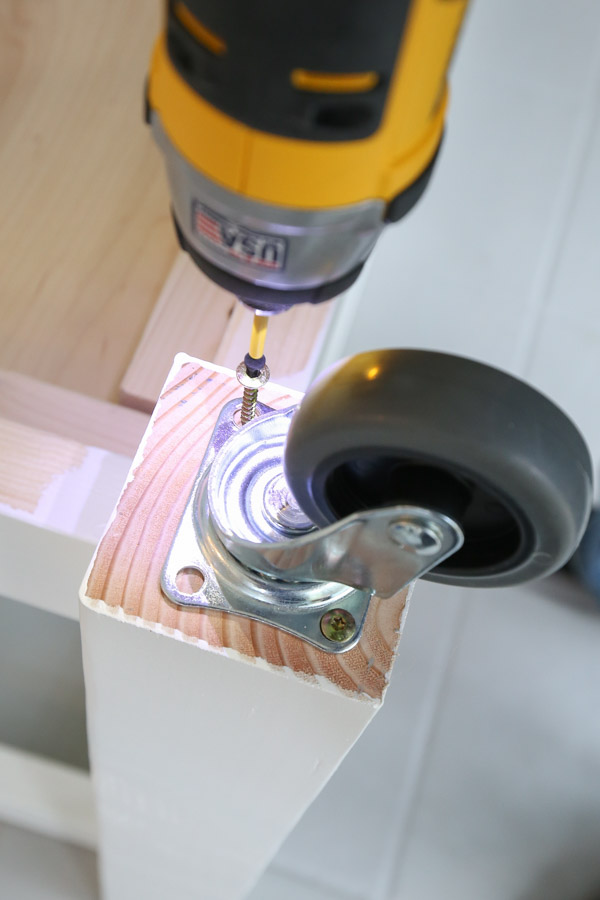
9. Attach the caster wheels to the workbench
Attach heavy duty caster wheels to the 4x4s with wood screws. We used self tapping wood screws for this part for easy installation and no pre-drilling!
We used two casters with brakes and two without brakes.
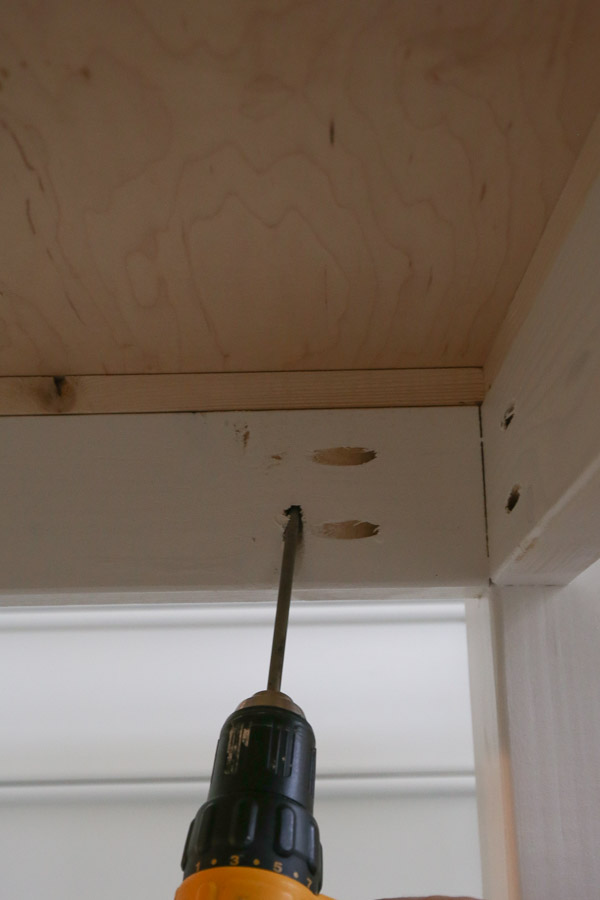
10. Attach the top to the DIY workbench frame
Place the top on the workbench frame so there is a 3/4″ overhang on the 4x4s from the sides and the front and back. Attach the top to the frame with 2 1/2″ Kreg screws into the pocket holes along the top edges of the 2x4s.
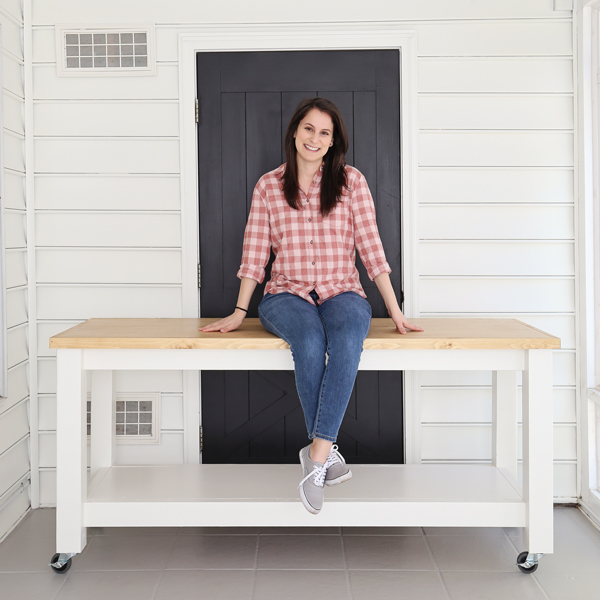
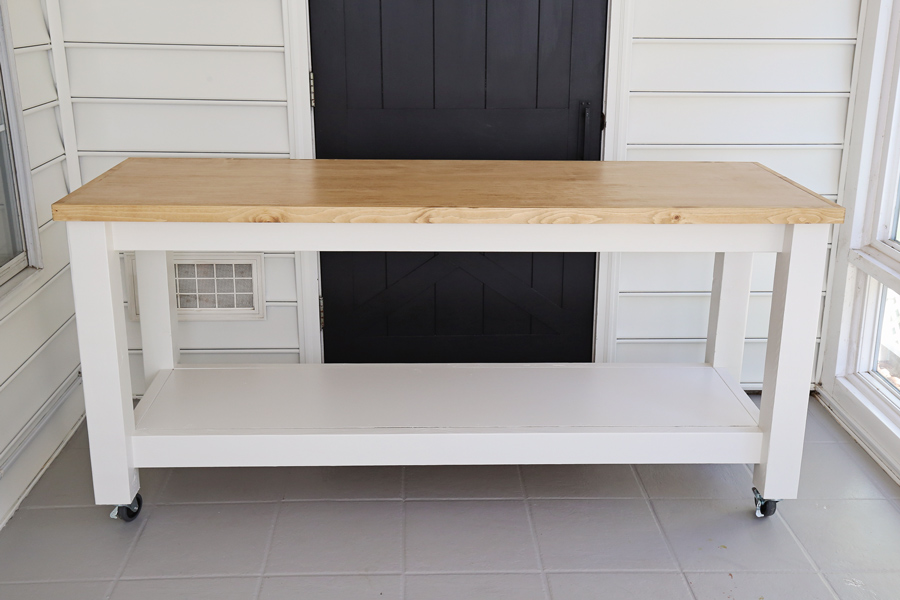
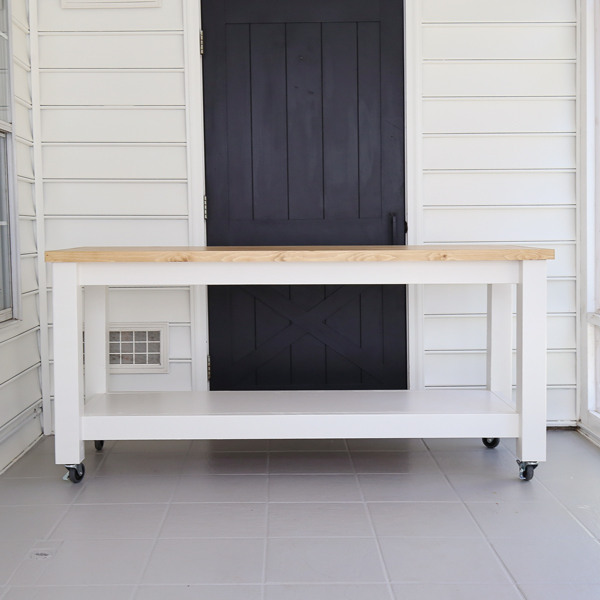
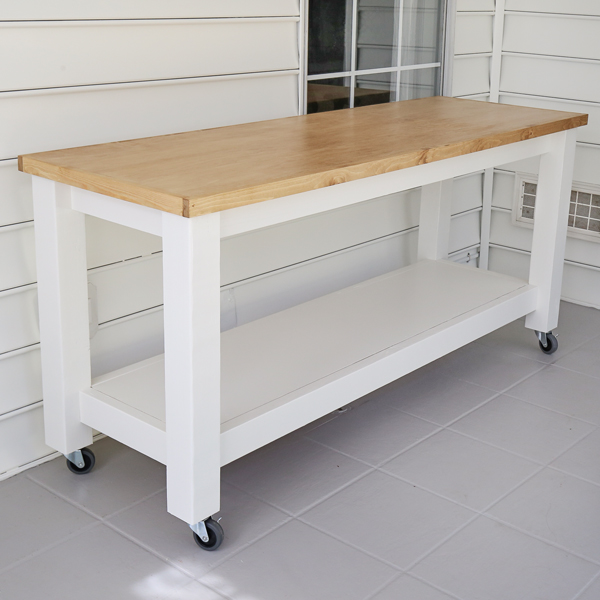
Our DIY mobile workbench turned out even better than I could have imagined and I love it! I think it’s the cutest DIY workbench on wheels I’ve ever seen!
Don’t forget to get the printable DIY workbench plans!

Make sure to join our Woodworking for the Home Facebook group and share this project there if you make it! Or tag me on social media @angelamariemade or #angelamariemade!
Follow along for my latest projects and sneak peaks on Instagram, YouTube, TikTok, and Facebook!
I’ll be revealing the final workshop makeover next week, so stay tuned!
Tristan Tucker
Saturday 7th of December 2024
Are you still making content because this is great stuff?! Thank you for your ideas and detailed plans. My workbench came out better than I expected.
Angela Marie Made
Thursday 9th of January 2025
Yes, I usually post on my blog once a week but I share lots of content daily on my Instagram! https://www.instagram.com/angelamariemade/
Ed
Wednesday 28th of June 2023
Purchased this plan looks great! I would have reduced the pocket hole size a little less than 3/4 A few of my screws peaked through the top.Added plantable casters instead of locking.Over all great plan!
Kristen
Friday 23rd of September 2022
Hi Angela - Question regarding the 4x4's. Did you use true 4x4's or are they 3.5 x 3.5.
Thanks!
Angela Marie Made
Monday 26th of September 2022
Yes, the nominal size is 4x4 inches but the actual size is 3.5x3.5 inches! Here is a blog post with more info: https://angelamariemade.com/intro-to-woodworking-lumber-size-guide-free-printable/
Jessica
Saturday 27th of February 2021
We have been having problems with building in the garage, then the wood shrinking when it comes inside, which completely ruins the whole piece. Any tips?
Angela Marie Made
Monday 1st of March 2021
I haven't had this happen to me to the point where it affects the end result of the project, and I do all of my builds outside even in the summers in South Carolina. With that being said I understand this is a real issue you are facing. If possible try a different source for your lumber, maybe a smaller local lumber yard. Wood will shrink and expand more if it has a greater moisture content and the big stores like Lowe's and HD usually have more issues with this. Also, taking more time to select wood and even let it cure for a couple days to adjust to your specific climate may help as well.