Learn how to transform a standard door into a faux barn door!
We’ve been fixing up our back porch and I wanted to give our shed door a DIY door makeover and make it look like a real barn door!
I’m calling this a DIY faux barn door because the door is just a regular door that we made look like a barn door but it doesn’t actually slide like a real barn door does.
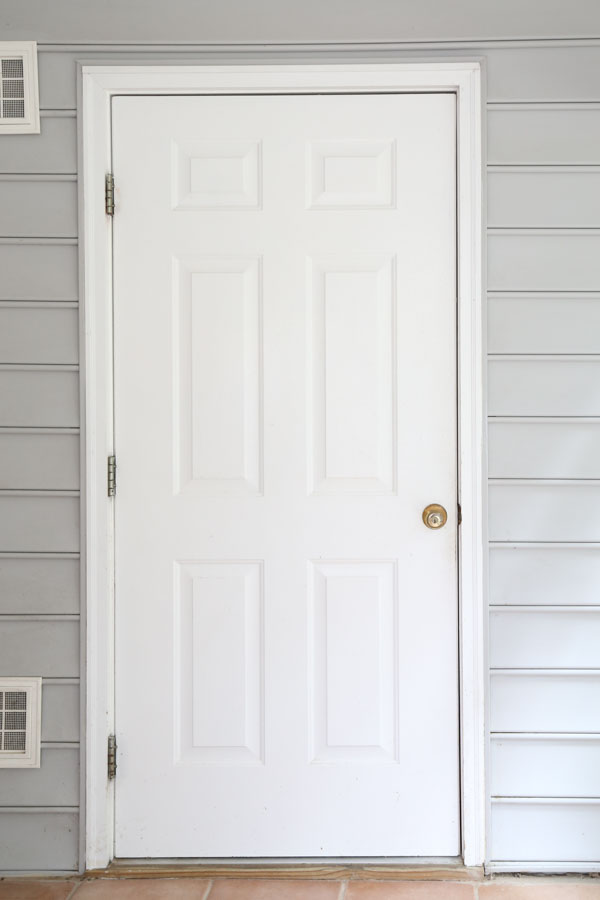
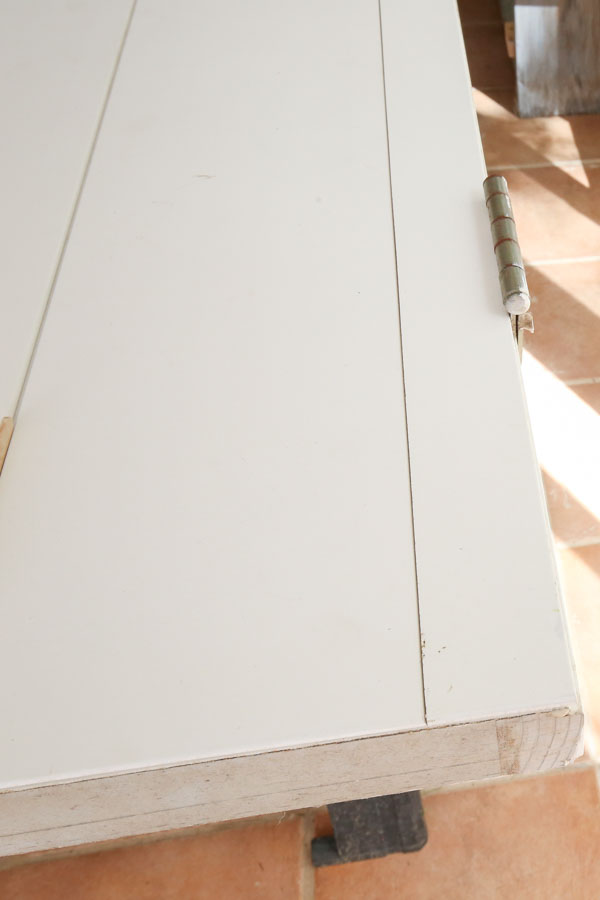
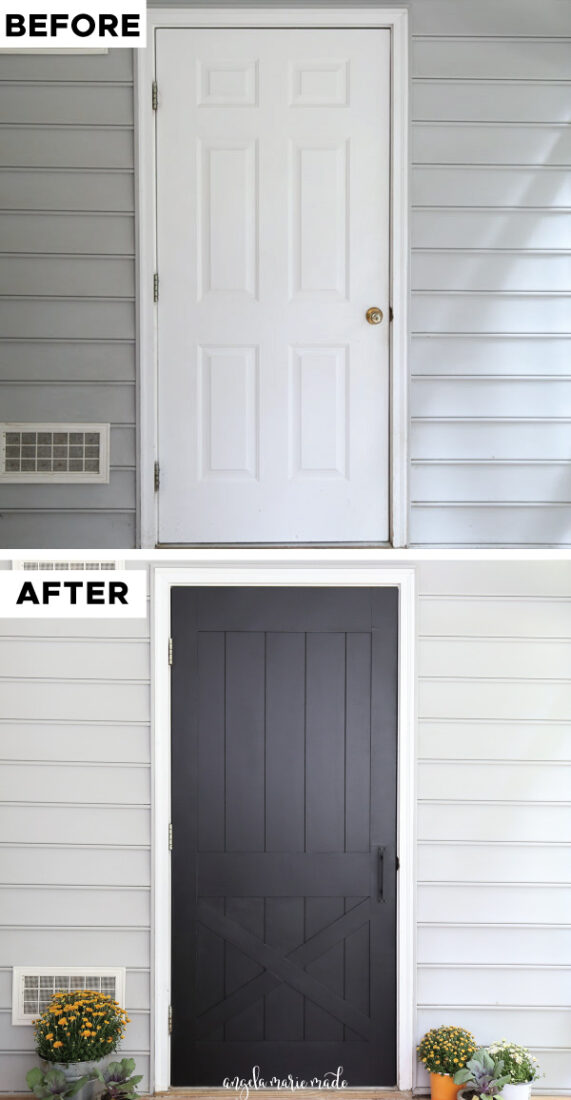
Here is a look at the door before we transformed it:
Note, this post contains some affiliate links. I may earn a commission if you shop those links (at no cost to you). Thank you for supporting my small business. For more info see my disclosures here.
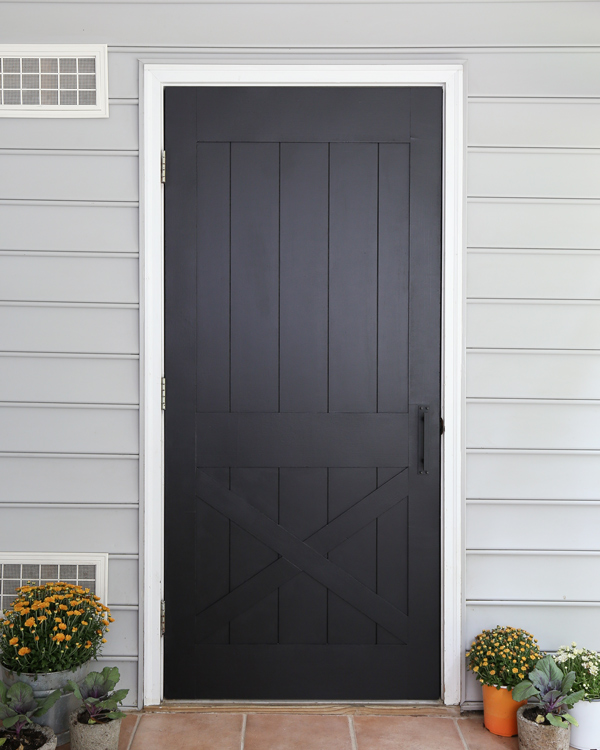
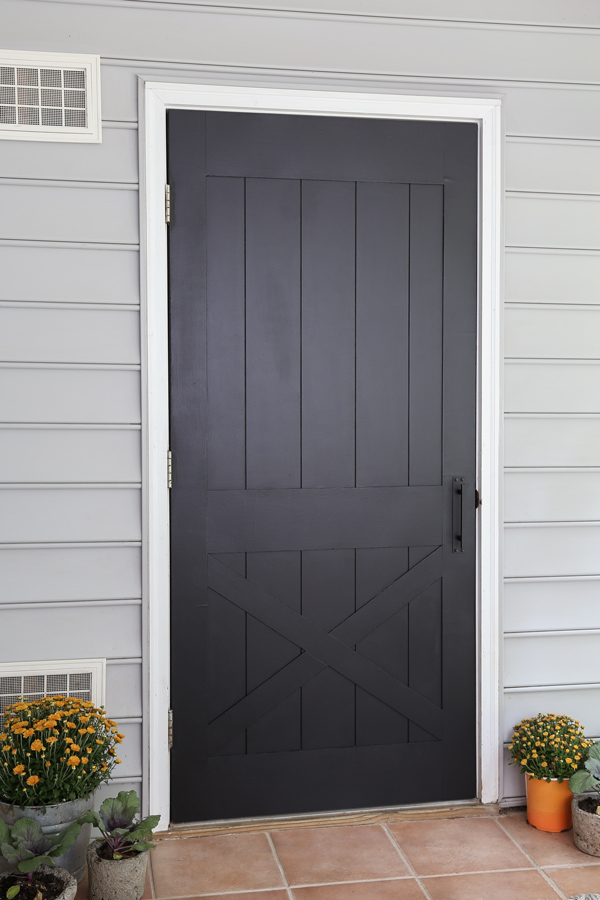
I’m totally loving how it turned out! It’s now the focal point of the room!
As much as I love building DIY barn doors, I am happy when I can upcycle an old door to make it look like a barn door and save money too!
This transformation cost us about $100, including our cute new barn door handle (similar here)! If we would have bought a door new like this, it would have cost several hundred dollars.
Note: before starting this project make sure to read my section about the side of the door at the bottom of this post!
Materials Needed:
- (1) 8ft x 4ft @ 1/4″ thick plywood
- Thin shiplap boards (we used 2 boxes of these planks)
- Craft sticks/Popsicle sticks
- Construction Adhesive
- Barn door handle – similar here
- Paint
- 1″ and 1 1/4″ brad nails
- Light spackle
Tools Needed:
- Miter saw
- Drill
- Brad nailer
- Clamps
- Tape Measure
- Table Saw or Circular Saw
*Note, materials listed are enough to update one door at 79″ tall x 36″ wide. Modify material amount and cuts as needed for your door size.*
Video Tutorial:
Subscribe to my YouTube Channel here!
1. Remove door and hinges from door frame
First remove your door with the hinges from the door frame. It’s easiest to do the work with the door on top of a pair of sawhorses, a work table, or on the floor.
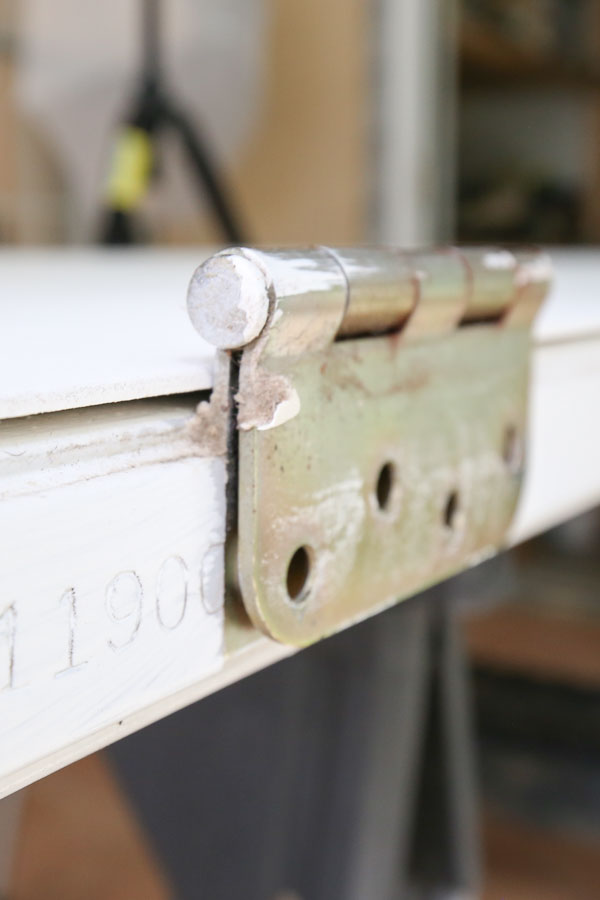
We kept the hinges on the door too so that we could work around them with our shiplap boards.
Remove the door knob too.
2. Lay out shiplap boards and rip any boards as needed
Lay out 5 shiplap boards and center them on the door. We used craft sticks to ensure the shiplap board gaps were equally spaced.
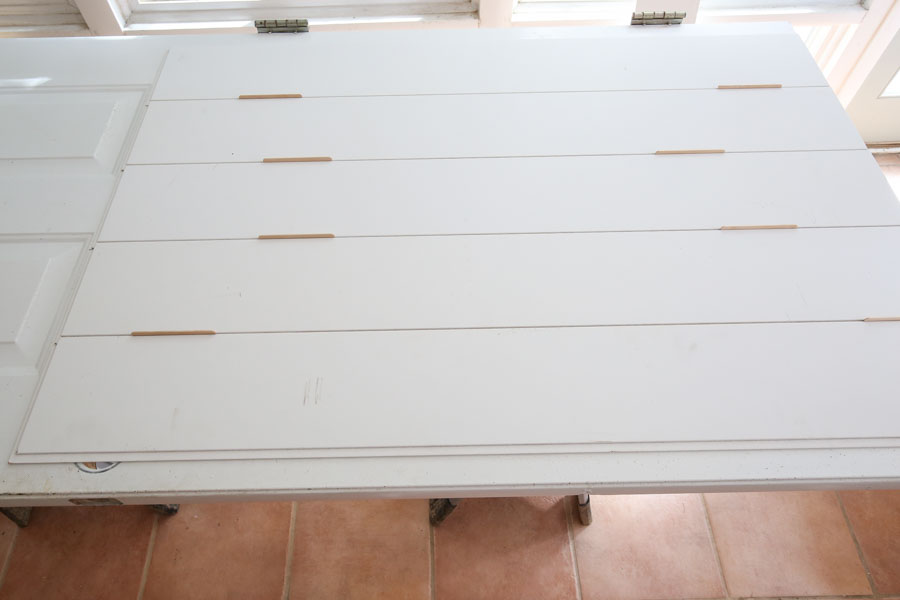
For the door hinge side, we measured the remaining space that needed a shiplap board. We ripped (cut) a shiplap board to this size with our circular saw and straight edge guide to fit a board in the remaining space.
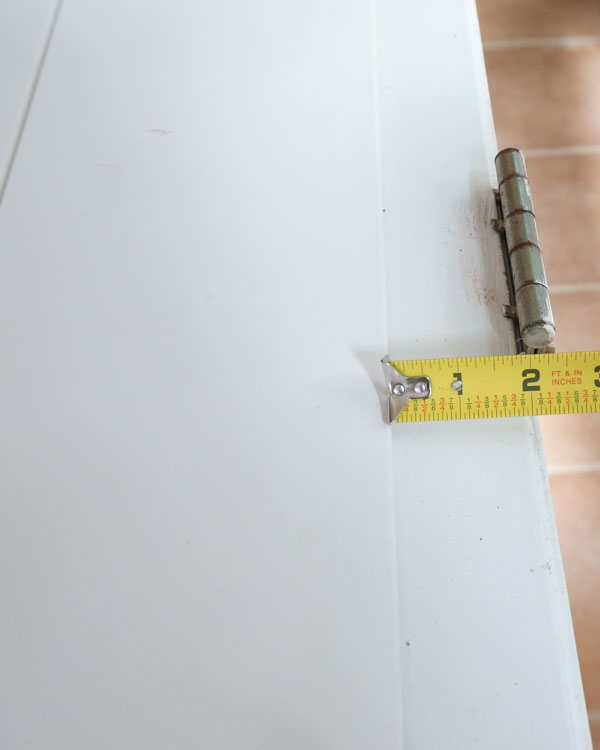
We made sure to keep the side that had the shiplap overhang edge since this fit perfectly over our door hinge hardware edges.
For the doorknob side, we ripped a 1″ piece of plywood to size for this space. We wanted this side of our door to have a clean edge with no gaps showing and the plywood worked great for this. Further, it will be covered by the door trim so it didn’t have to look perfect. See a photo of this piece being attached in step # 3 and in the faux barn door video tutorial too!
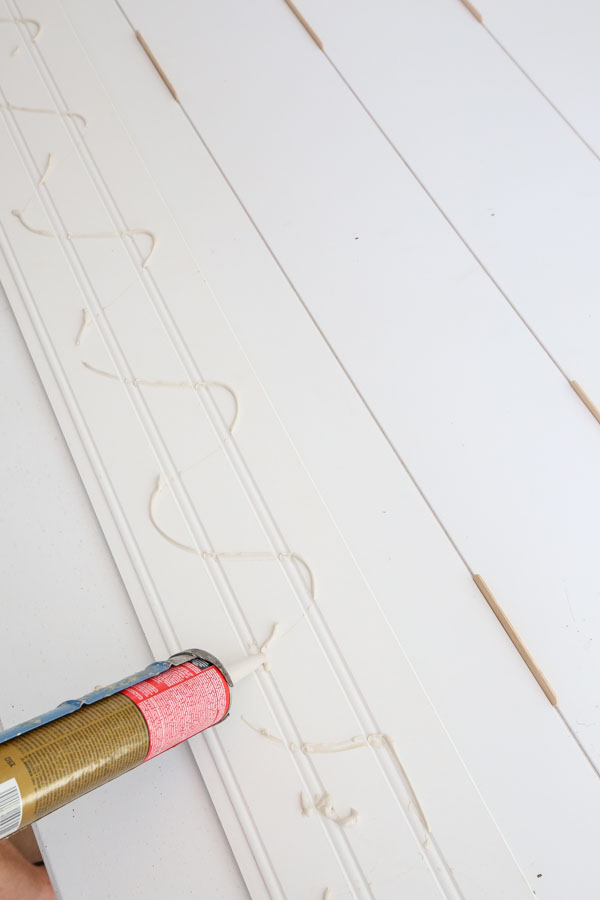
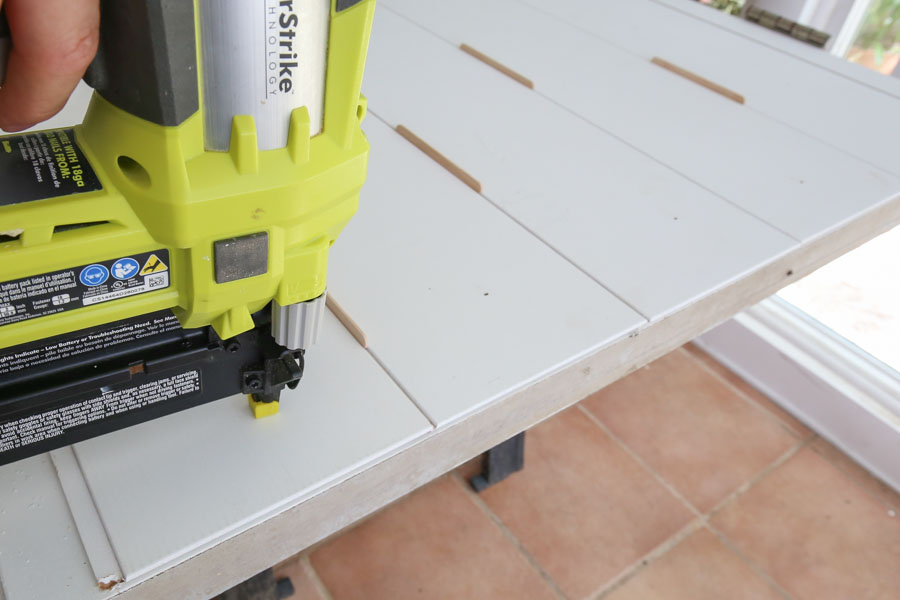
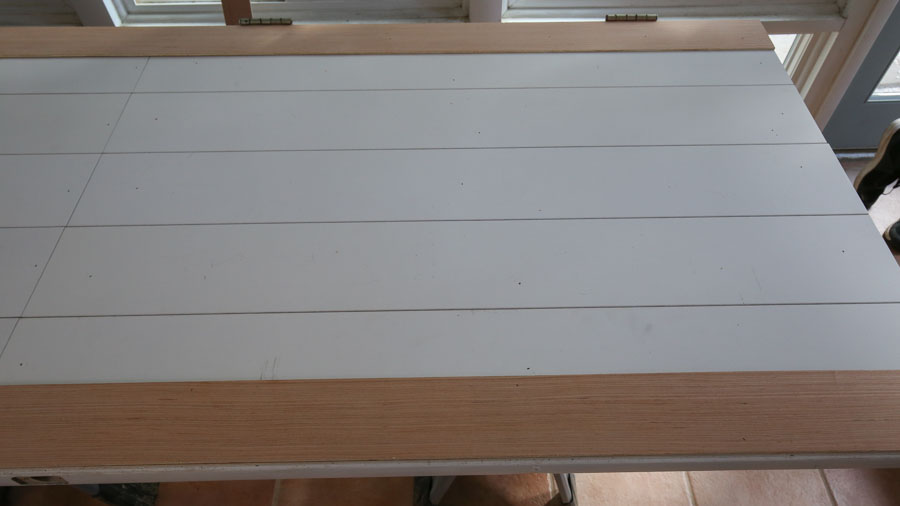
3. Attach vertical shiplap boards to door
Attach the vertical shiplap boards one at a time with construction adhesive and 1″ brad nails and a brad nailer. Use craft sticks or something similar in thickness to ensure that the gaps are equally spaced between each board.
After we attached the shiplap boards we added our small 1″ plywood board (from step #2) along the right edge of the door. ***Make sure to attach this piece with EXTRA adhesive and nails as it will be where the door handle attaches too.
4. Rip and cut plywood to size for DIY barn door trim
Use a table saw or circular saw and straight edge guide and rip (cut) the following trim boards:
- 1 board @ 7″ x 8ft
- 1 board @ 3″ x 8ft
- 2 boards @ 4″ x 8ft
Then, measure your door height and cut two of the 4″ boards to this height using a miter saw. Lay out the 4″ boards on the side edges of the door for the side trim.
Next, measure the distance between the 4″ side trim boards and cut three 7″ boards to this size.
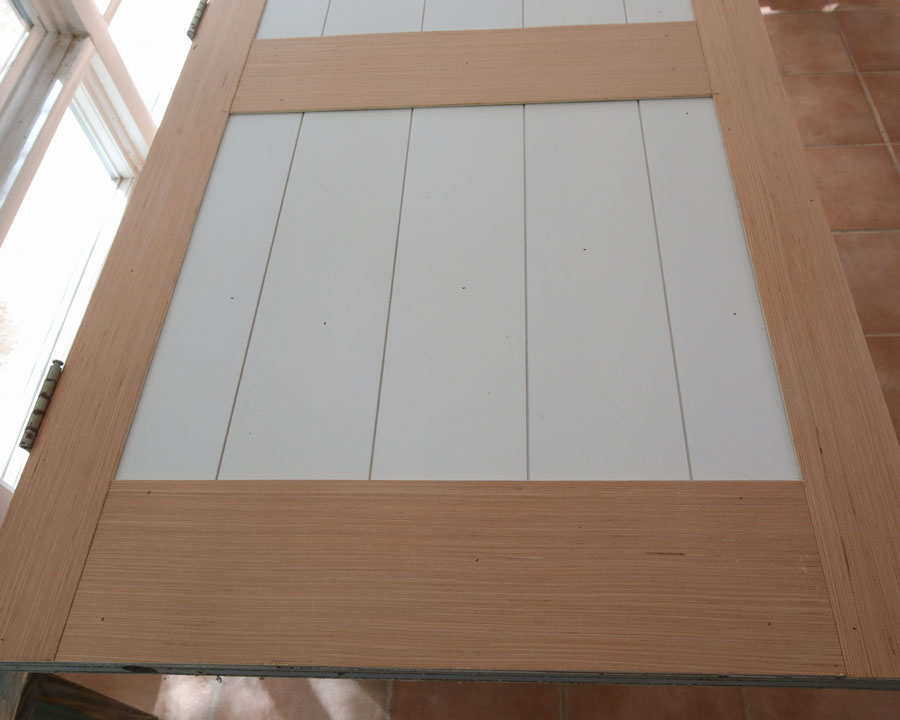
5. Attach trim boards to frame out the DIY faux barn door
First, attach the 4″ side trim boards to the door. Use construction adhesive and 1 1/4″ brad nails to attach the trim to the door.
Then, attach the three 7″ boards. Attach one board at the top and one board at the bottom of the door.
For the third 7″ board, I attached it 23″ up from the bottom board.
📩 Want to Save This?
Now it’s time to add the X trim board on the bottom part of the door using the 3″ trim board.
To get the angle and length cut perfect for these X pieces, I began by holding the first board up exactly where I wanted it in the bottom right corner and top left corner.
Then, I used a scrap piece of wood as a straight edge and marked with a pencil the angle I needed to cut in the bottom right corner.
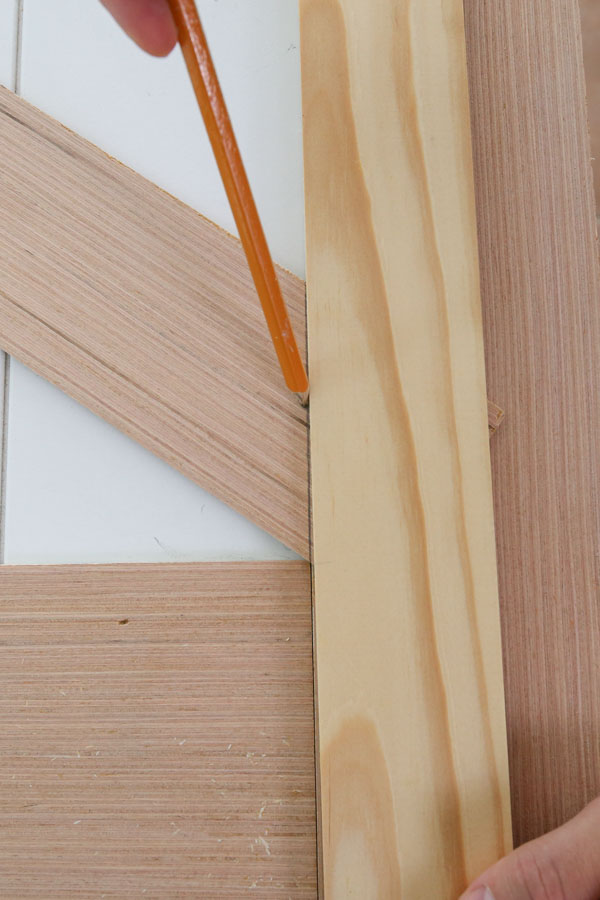
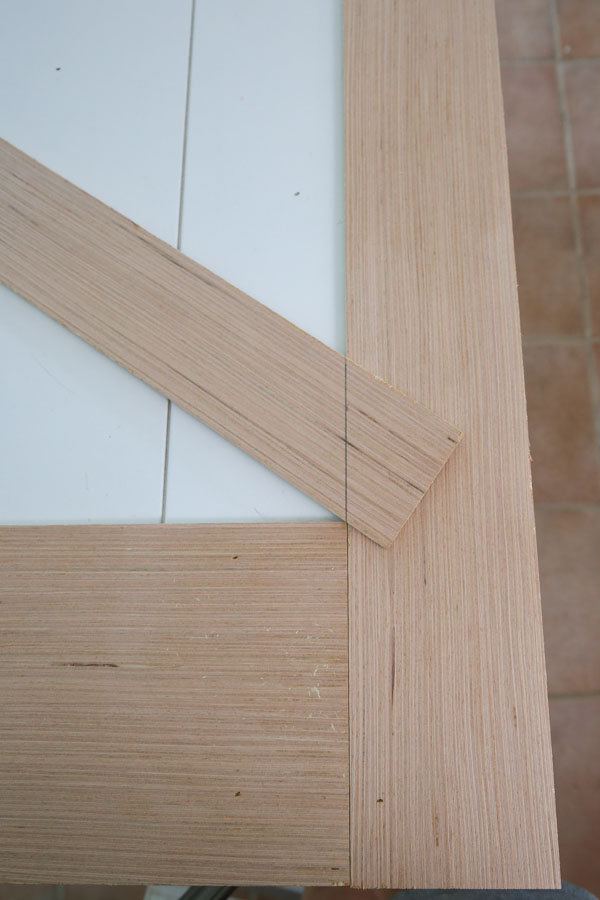
Use a miter saw and make the first corner cut. After cutting, line the board back up on the door and mark the second angle cut for the top left corner. Mark the angle with a pencil again and cut to size.
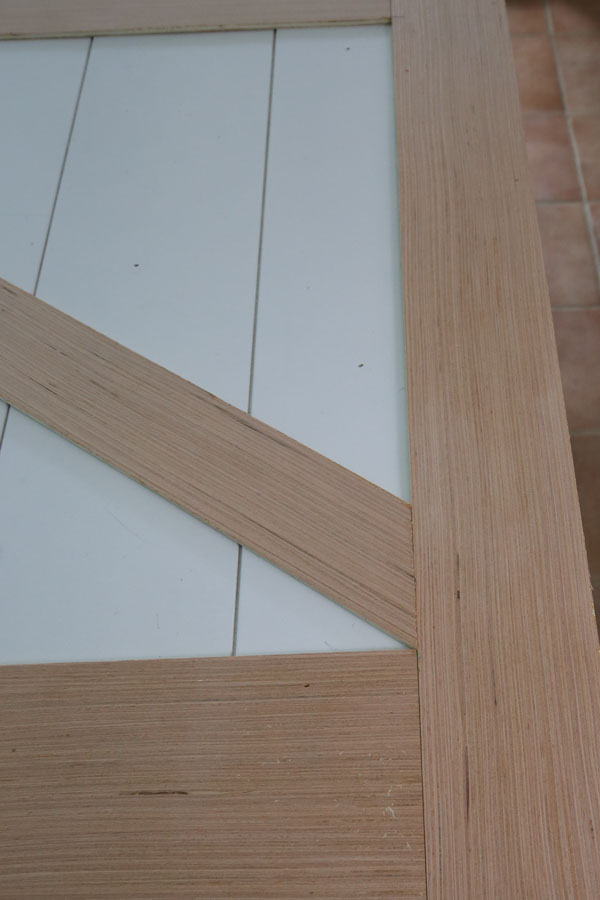
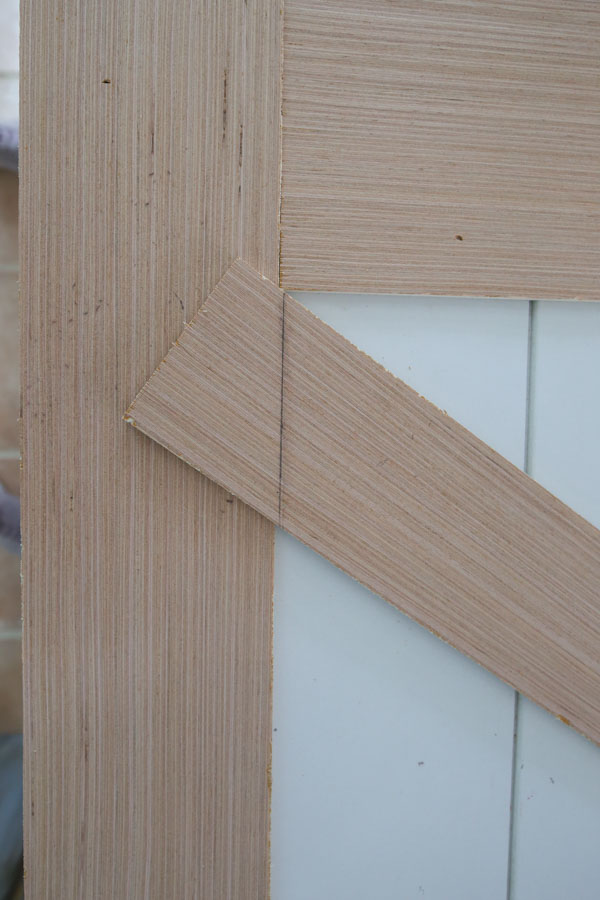
Repeat these steps for the second X board, except these will be two smaller pieces.

Now your door is all trimmed out!
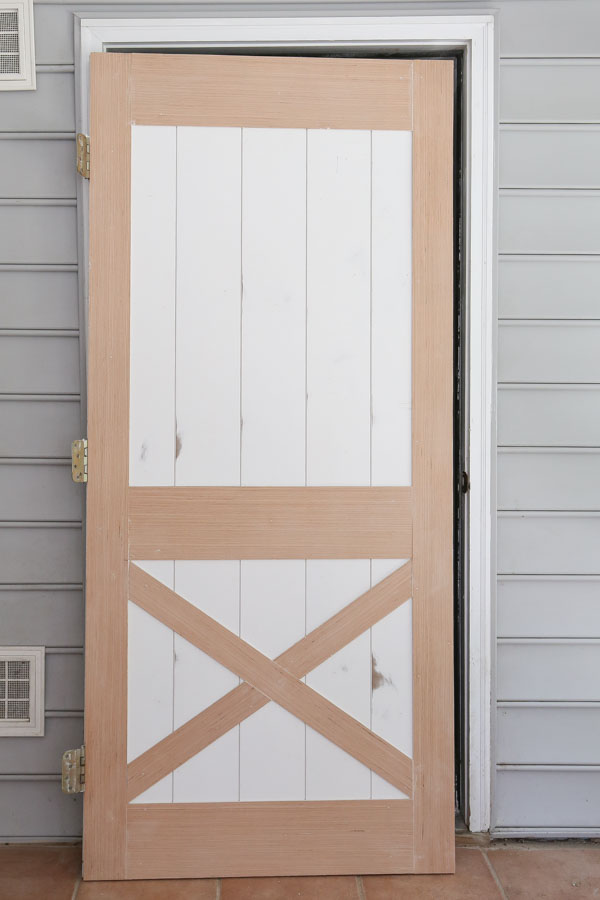
6. Paint the faux barn door
Fill all nail holes and any small gaps between the trim boards with spackle and lightly sand where needed.
The shiplap and plywood boards I used did not need primer since they were bought paint ready. If your boards are not paint ready, make sure to prime them.
I painted my door with two coats of Tricorn Black by Sherwin Williams. First, I cut in any gaps, corners, or hard to reach areas with a paint brush.
Then, I used a small paint roller to roll the rest of the door. Again you can see all of this in the barn door video tutorial here!
Note, it’s easier to paint the shiplap gaps as the boards are installed as explained in my how to paint shiplap tutorial. But, I painted after the install with this project since the install was more involved. Next time though, I would paint during the install.
7. Install barn door handle and hang door back on the door frame
After the paint dried, we hung our door back up on the door frame. Finally, we installed our new barn door handle (similar here)!

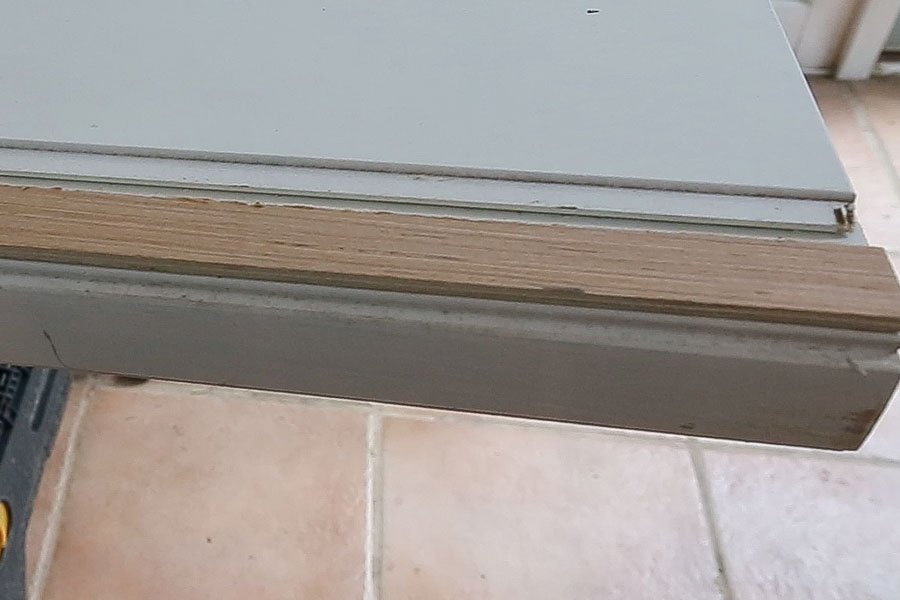
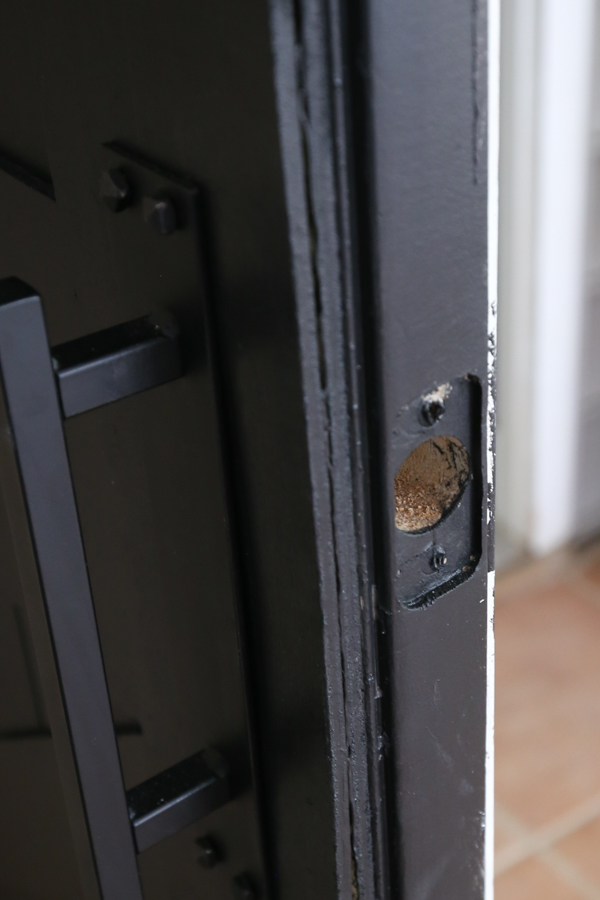
The Sides of the Door
Update: I’ve had some questions about what the side looks like where the old door handle use to be and about the door jamb. Below is a photo!
The door still closes the same, it just works like a dummy handle, so we pull and push it instead of turning a knob.
A regular door knob can be attached again if you prefer, it just needs to be a door knob that has adjustable depth options. The new trim added a 1/2″ thickness to the door from the front!
Further, we did not have any issues with the door not closing or hitting our door jamb because we only did the new trim on the outside, door hinge side of the door.
BUT if you want to do this on BOTH sides or on the side of your door that sits against the door jamb (non hinge side), you will most likely need to move your door jamb out 1/2″ to account for the new door thickness. When we transformed our flat doors to paneled doors in our small guest bathroom makeover, we had to do this!
I’m in love with our faux barn door makeover and I often just like to sit and stare at it haha. Do you have an old door that could use a makeover like this? Let me know in the comments below!
Follow along for my latest projects and sneak peaks on Instagram, YouTube, and Pinterest!
Want to save for later?! Pin it here:
Beth
Thursday 1st of January 2026
I LOVE IT!!! My only issue currently is having help with power tools as I don’t currently have any at all! I am wanting to do this to my bedroom door, as it was my Father’s room prior to his passing. The door is in HORRIBLE shape as he had a puppy who somehow “chewed” and LITERALLY put a rather hole through the bottom of the door🤦🏼♀️ It is currently covered by cardboard my Dad stapled to the door!🤯 This is JUST the DIY I was needing as there is no enough ‘space’ on either side for the SLIDING BARN DOOR!
Nick
Wednesday 8th of May 2024
What was the original door made of? Fiberglass or wood door?
Angela Marie Made
Friday 10th of May 2024
It was a wood door!
Jessica
Sunday 13th of March 2022
Could you do faux shiplap using thin plywood instead of the shiplap boards? Thanks so much!
Angela Marie Made
Wednesday 23rd of March 2022
Yes you can, just make sure to keep them spaced evenly!
Lisa Pham
Friday 5th of March 2021
Hello i love this can i see what the other side of your door looks like? We have a door that leads to garage. Thanks
Angela Marie Made
Monday 8th of March 2021
Thank you, I don't have a photo of the other side but it is pretty much the same as the before photo.
Claudia Martin
Saturday 26th of September 2020
I love this project. It's simple and easy. The handle is super cute with it, but how do you lock the door now? I understand a lock (possibily a bolt lock?) on the inside, but what about the outside lock if I needed to get in that way?
Angela Marie Made
Sunday 27th of September 2020
Thank you! The door no longer locks, we removed the old door knob and it now just opens with a push or pull.