Learn how to build a simple and easy DIY wood desk for $45! This desk is a great beginner woodworking project!
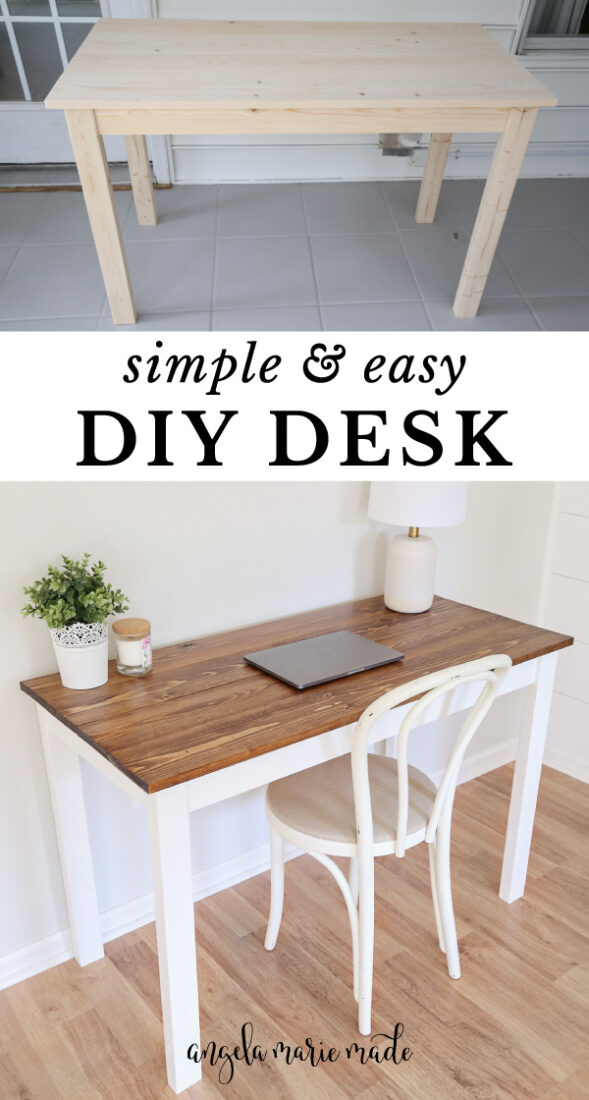
We needed to build a quick and easy desk to replace a fold up table that Brandon has been using for his desk!
I originally had grand plans to make a cute corner desk with storage and all, but we ran out of time and just needed to create a simple, DIY wood computer desk, nothing fancy!
Further, the cost of wood has really increased, so we wanted to make it as budget friendly as possible!
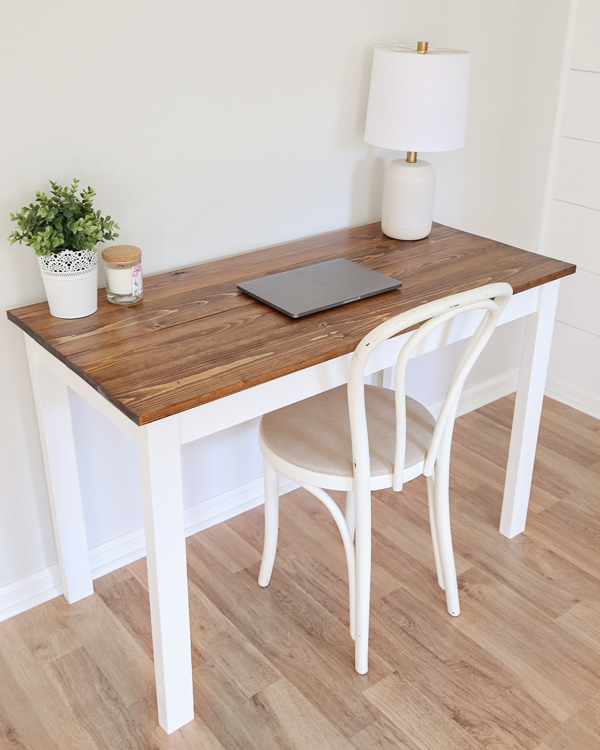
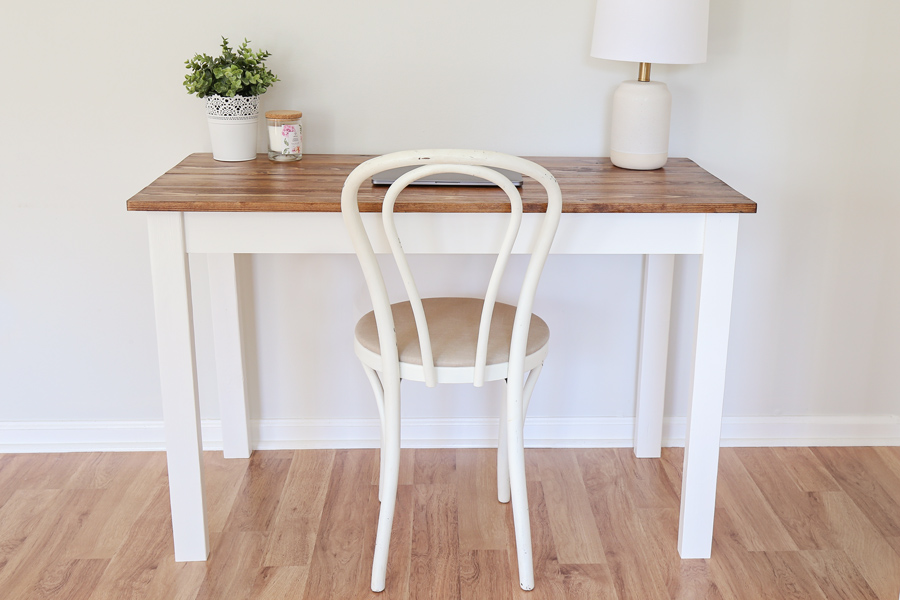
We came up with this simple, cute desk with a rustic look that costs about $45 in lumber! It’s a great beginner woodworking project and introduces how to use pocket holes if you’ve never used them before.
If you’re interested in other style desks, check out my modern easy DIY computer desk and if you want more storage, this DIY Makeup Vanity is a great option for a desk with drawers!
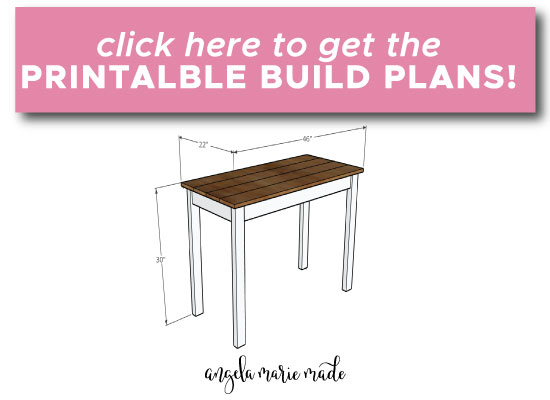
Also, get the printable DIY computer desk plans here for this build!
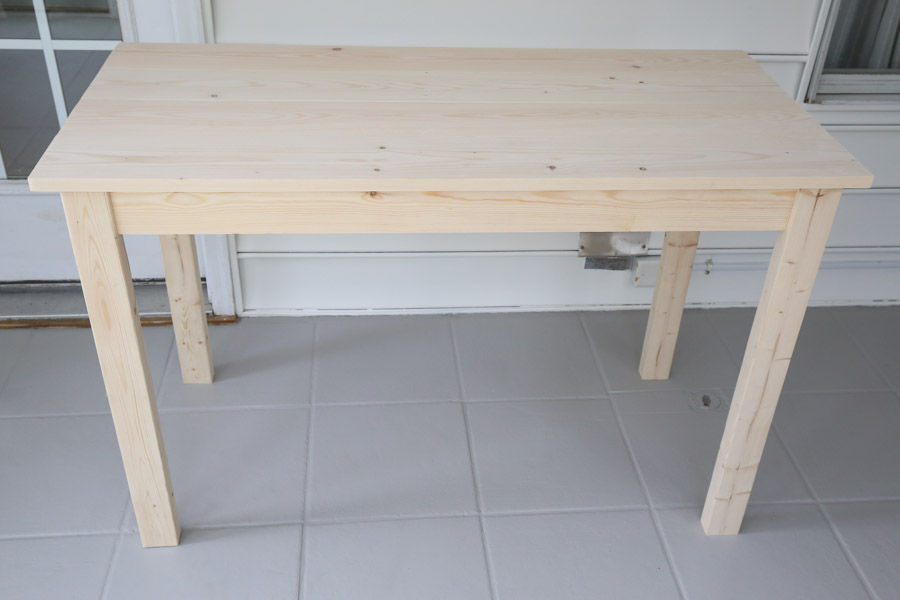
FINAL DIMENSIONS OF DESK: 46″ long x 22″ wide x 30″ tall
Note, this post contains some affiliate links. I may earn a commission if you shop those links (at no cost to you). Thank you for supporting my small business. For more info see my disclosures here.
How to Build a Simple DIY Desk:
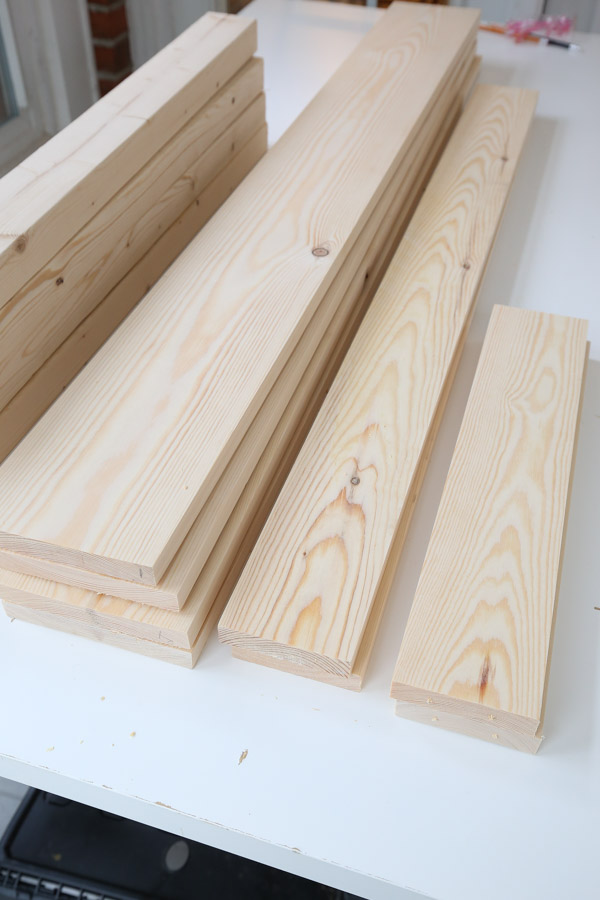
Materials:
- (2) 2×3 @ 8ft
- (2) 1×6 @ 8ft
- (2) 1×4 @ 8ft
- 1 1/4″ Kreg screws
- Wood glue
- (2) 1/2″ wood shims or wood paint stirring sticks or scrap wood
- Light spackle (optional, if painting)
- Stain or Paint
Tools:
- Kreg Jig
- Miter saw
- Drill
- Clamps
- Kreg right angle clamp (optional)
- Tape Measure
DIY Desk Video Tutorial:
Subscribe to my YouTube Channel here!
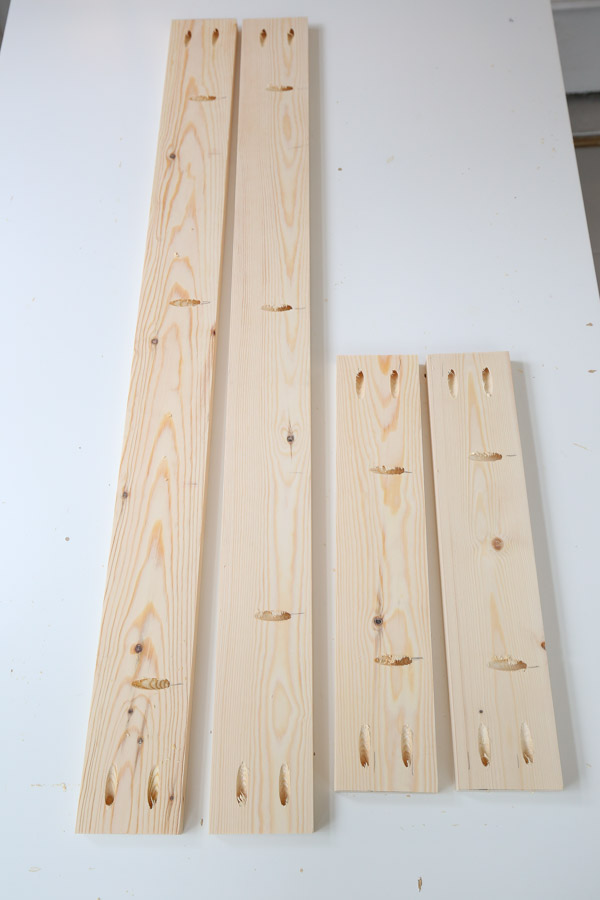
1. Make initial lumber cuts for the desk
Use a miter saw and make the following cuts from the 1×4s:
- (2) 1×4 @ 39″ (desk aprons)
- (2) 1×4 @ 17″ (desk aprons)
Make the following cuts from the 1×6s:
- (4) 1×6 @ 46″ (desk top)
Make the following cuts from the 2×3s:
- (4) 2×3 @ 29 1/4″ (desk legs)
2. Add pocket holes to the 1x4s
Use a Kreg Jig and add pocket holes to each end of the 1x4s and along one side of the 1x4s as shown here.
Tip: See my how to use a Kreg Jig post for an easy, step by step tutorial and video tutorial on how to use the Kreg Jig!
3. Add pocket holes to the 1x6s for the desk top
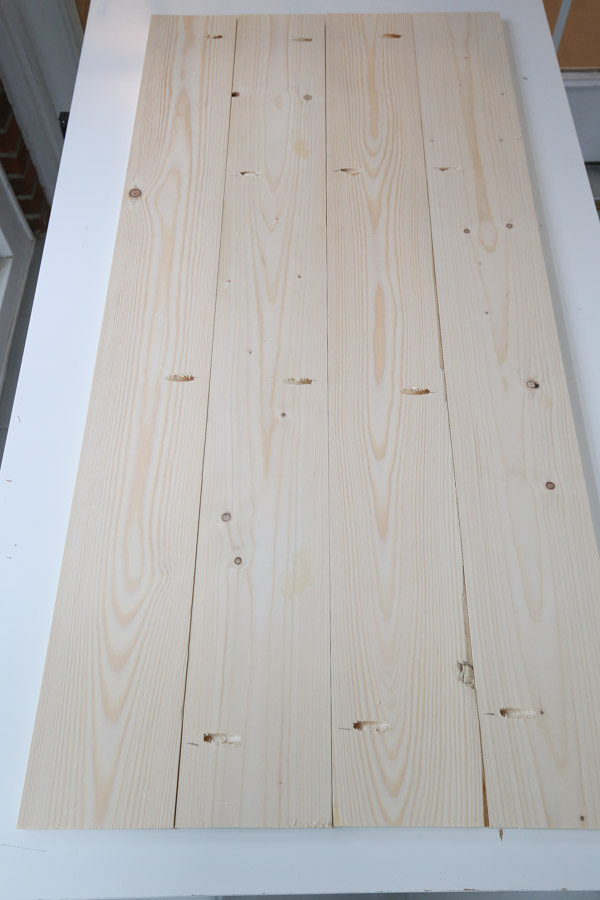
To determine where you need to drill pocket holes on the 1x6s for the desk top, lay out the four 1x6s @ 46″ next to each other.
Then, mark where your pocket holes should go by starting at one end and alternating the marks on each board.
It’s best to space them 8″ – 12″ apart. Also, make sure to stay a few inches in from the sides.
On the sides of the 1x6s, use a pencil and number each board #1-4 so you can remember the order of the board tops.
After labeling the order of the boards, add pocket holes to the four 1x6s where you made the marks for the holes. You can see this all in action in the DIY wood desk video here!
This method is the same method we used for our DIY farm table and DIY farmhouse coffee table tops.
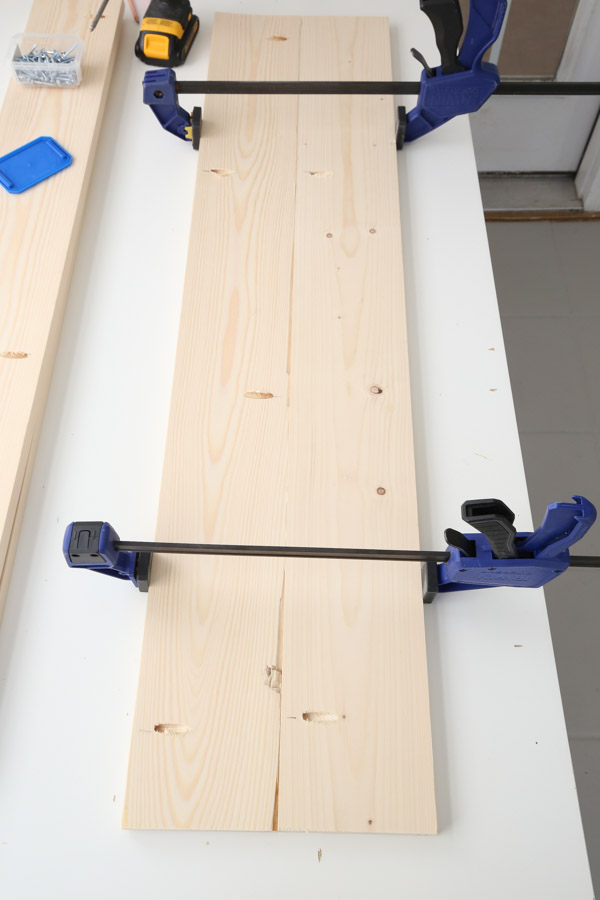
4. Build the top of the desk with the 1x6s
Attach the four 1x6s together with some wood glue and 1 1/4″ Kreg screws. It’s best to attach one board together at a time and use clamps.
Wipe away any excess wood glue with a damp paper towel.
📩 Want to Save This?

5. Build the desk frame
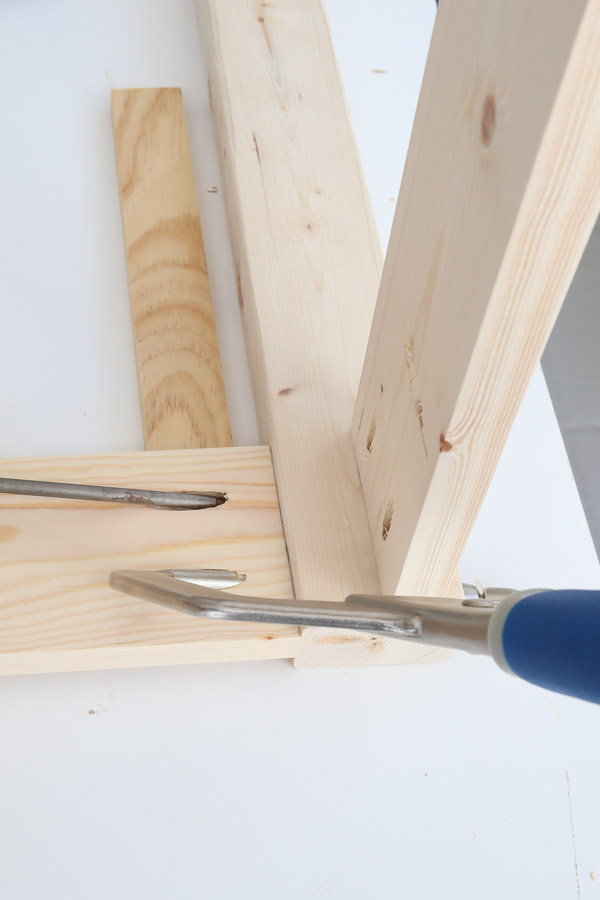
Place one of the 17″ 1×4 desk aprons between two of the 2x3s at 29 1/4″ for one side of the desk.
For the side frames of the desk, we want our 1×4 desk apron to be inset 1/2″ from the desk legs edge, so use 1/2″ wood shims or scrap wood under the 1×4 desk apron.
Make sure the 2x3s are on their sides so the widest part of them is facing the desk apron as shown here.
Attach the 1×4 to the 2×3 legs with 1 1/4″ Kreg screws. We used our Kreg right angle clamp to help with this part but you can use regular clamps to help as well.
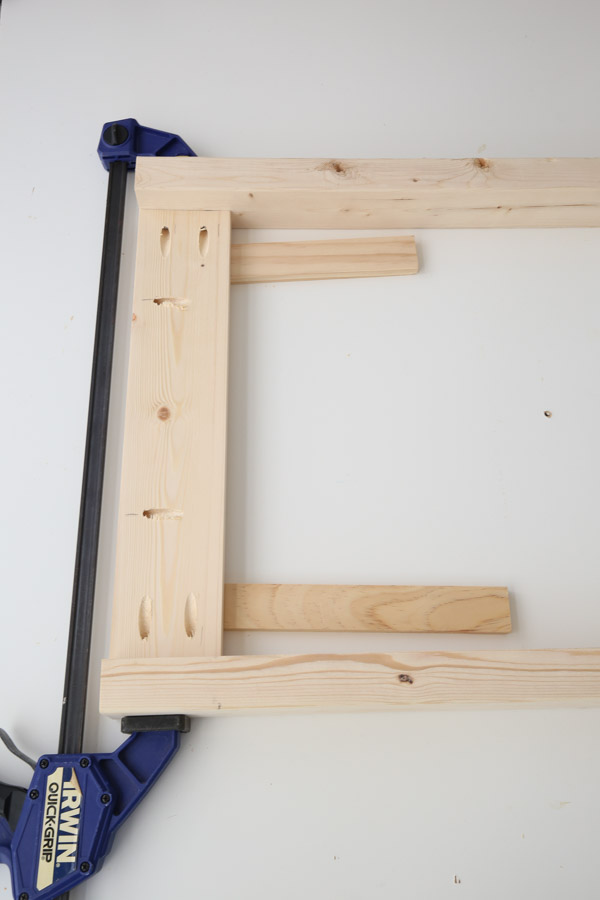
Repeat the above steps to build the second desk frame side.
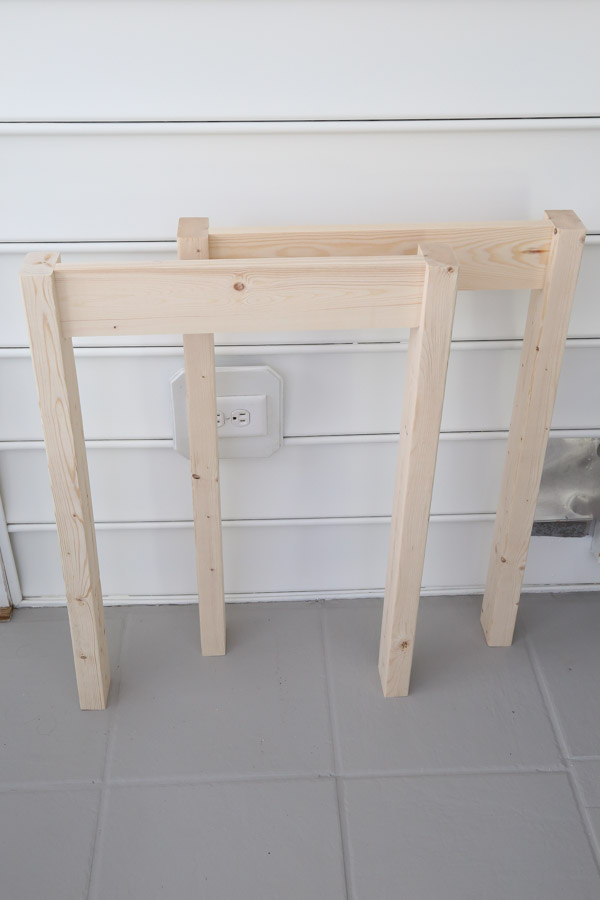
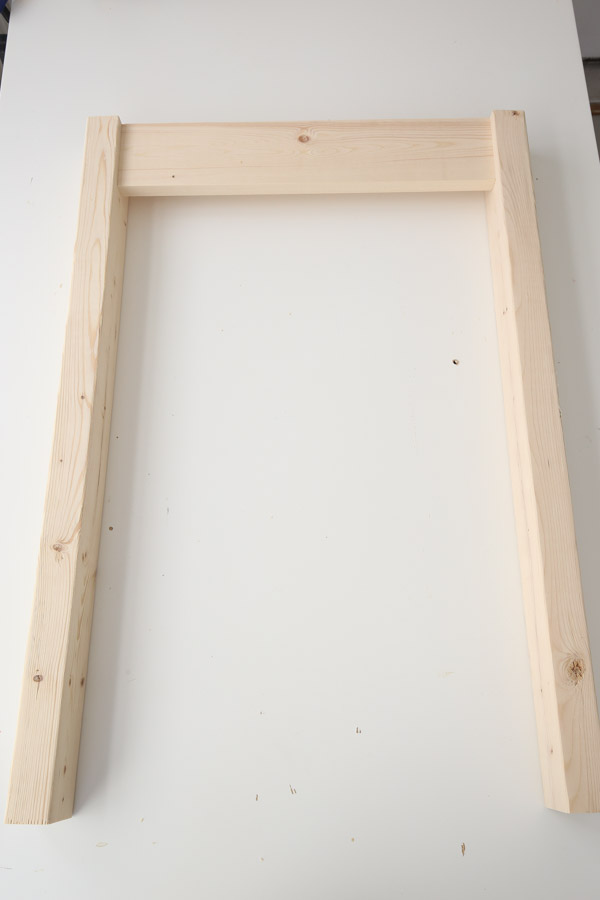
Next, place one of the long 1x4s at 39″ between the two desk side frames to create the back frame of the desk. Use 1/2″ wood shims again and attach with Kreg screws to the side frame boards.
Make sure the pockets holes along the edge are facing upwards as these will be used to attach the desk top.
Flip the desk frame over carefully and attach the front desk apron (the other 1×4 @ 39″) the same way.
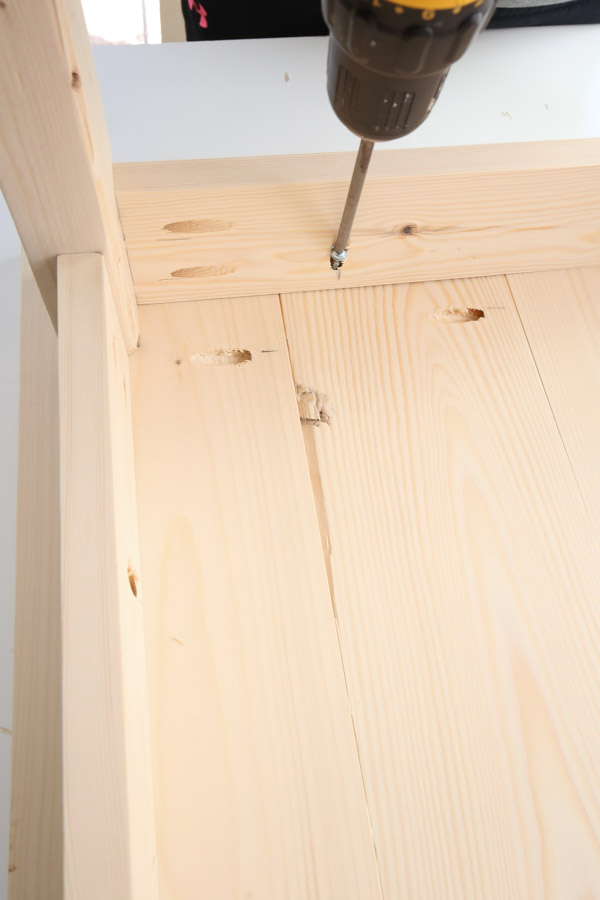
6. Attach the desk top to the desk frame
Place the desk frame upside down on top of the bottom of the desk top.
Mark 1″ in from the desk top corners and line the desk frame legs up with these marks. First attach the front of the desk in place using 1 1/4″ Kreg screws into the 1×4 desk aprons.

Then, line up the back of the desk with the 1″ corner marks and attach the back of the desk frame into the desk top the same way.
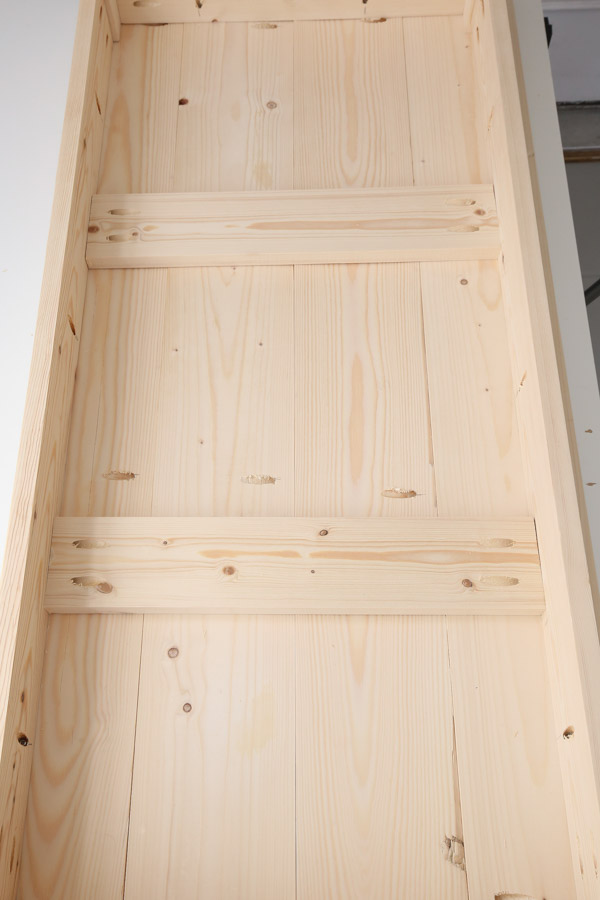
7. Add the desk top supports
Lastly, measure the distance from the front and back desk aprons and cut two 1x4s to this size to create two desk top supports.
Add pocket holes to each side of these boards and attach them to the front and back desk aprons with 1 1/4″ Kreg screws.
And that’s it! A super easy and simple desk build!
8. Stain or paint the desk
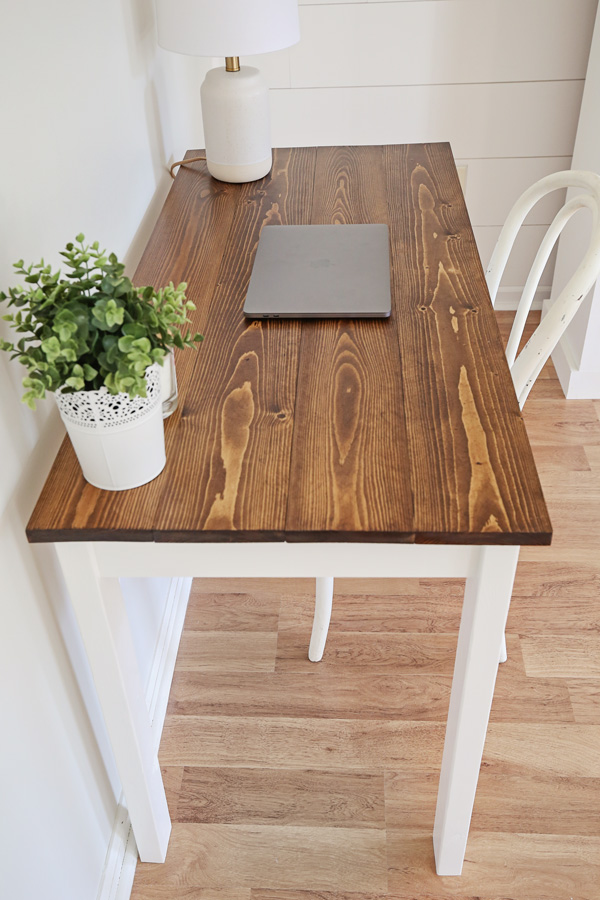
The last step is to stain or paint the desk. We chose to paint the desk frame white dove by Benjamin Moore and stain the top Provincial. See my how to stain wood post for a tutorial and video on how we stained this desk top with a beautiful wood finish!
We used the same look and staining technique on our modern and easy DIY computer desk too!
If painting, you can use spackle to fill in any knot holes before painting for a smoother finish.
What do you think of this simple and easy DIY wood desk? Don’t forget to get the printable DIY computer desk plans!
Make sure to join our Woodworking for the Home Facebook group and share this project there if you make it! Or tag me on social media @angelamariemade or #angelamariemade!
Follow along for my latest projects and sneak peaks on Instagram, YouTube, and Pinterest!