Over the weekend we went for a park walk and all of the azaleas were blooming, which inspired me to create a DIY spring wood sign!
I thought about making a hello spring sign, but I already have a free, hello spring printable with that quote and I wanted something that could be used through the summer. So, I decided on the quote “fresh cut flowers” instead!

I’m sharing a free printable file and SVG file below of the quote, so you can make the same wood sign stencil with your Cricut like me as I show below. Or you can make a vinyl stencil with a Silhouette Cameo. If you don’t have a cutting machine, the pencil transfer method for sign making works great too for an easy design transfer onto wood.
If you want to skip the sign making, feel free to just print the design instead on cardstock and frame it for some instant spring decor. Easy peasy!

How to Make a DIY Spring Wood Sign:
Materials:
- Fresh Cut Flowers Free SVG file (get the free file here)
- (1) 1×10 or plywood
- Rope or Ribbon
- Vinyl (I used Oracal 631 matte vinyl)
- Vinyl weeding tool or something with a pin end
- Transfer tape (I use Oratape HT55)
- Vinyl Application Squeegee or old credit card
- Masking tape or Painter’s tape
- Craft razor blade cutter
- Paint for the the sign background
- Paint for the lettering or spray paint
Tools:
- Cricut cutting machine (or other cutting machine)
- Miter Saw (or have your home improvement store make the cuts)
- Scissors
- Tape Measure
- Drill
Video on How to Make a Spring Wood Sign:
Subscribe to my YouTube Channel here!
1. Cut the wood sign board to size
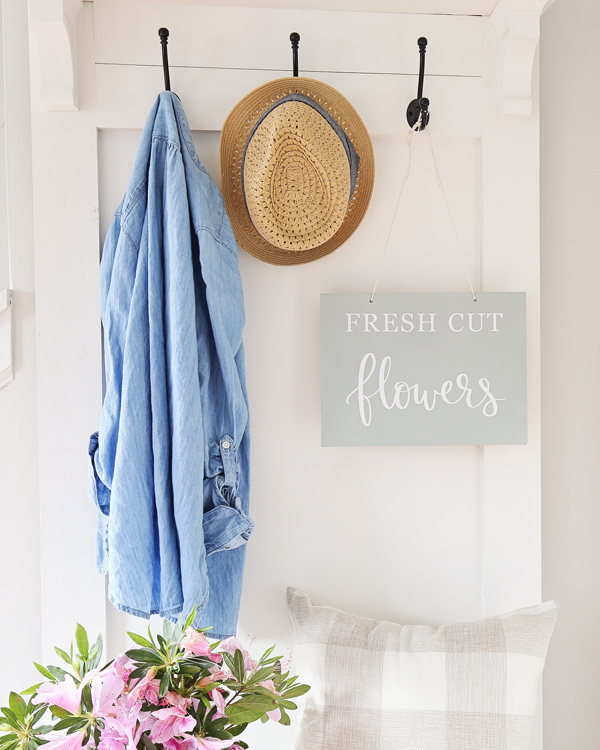
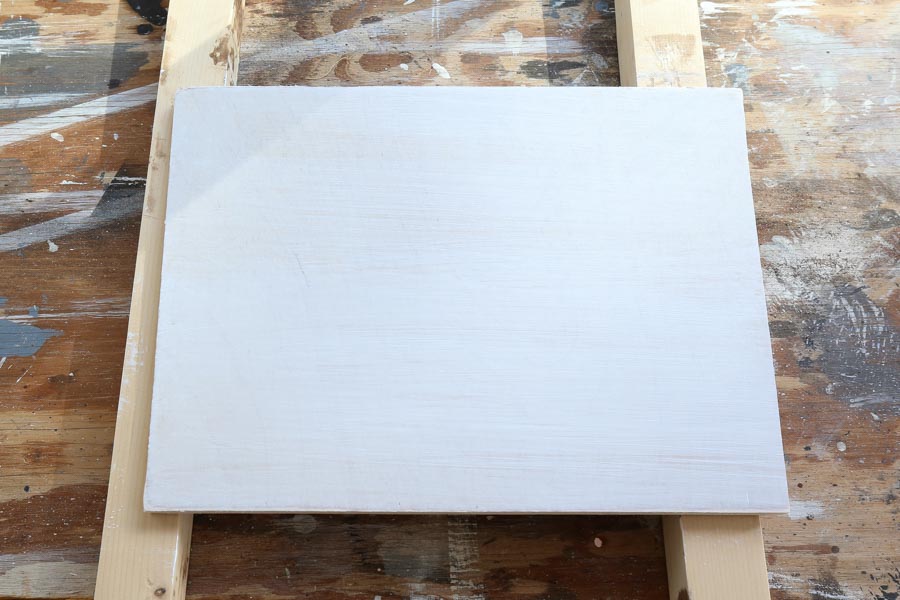
As much as I love making large, DIY wooden signs with sayings, I made this sign backing smaller, 9 inches x 12 inches to easily display it by a vase of fresh spring flowers! I used some scrap 1/2″ thick plywood that I cut to size.
You can also use 3/4″ thick plywood or a 1×10 cut to 12 inches wide. Have your home improvement store make the cuts for you. Or use a miter saw or table saw to make the cuts.
Make sure the plywood or wood is sanded well. My plywood was pre-sanded already which saved me a step! See my how to sand wood tutorial for sanding tips!
2. Paint the wood sign base color
Prime the wood board first, then add two coats of paint, and let it dry. For tips on priming and painting, see how to paint DIY wood signs. I used a paint brush for applying the primer since it’s so little and I didn’t want to use a whole roller just for the primer.
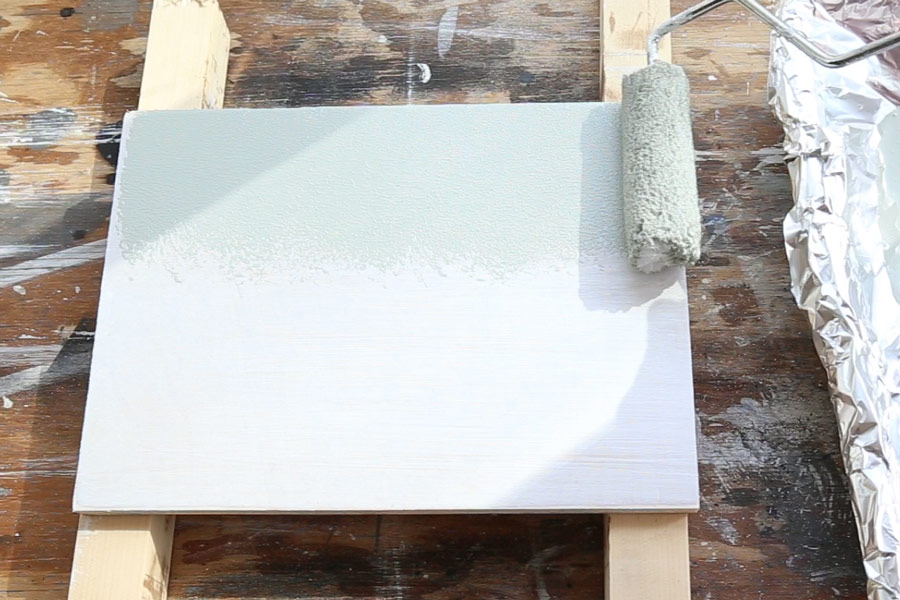
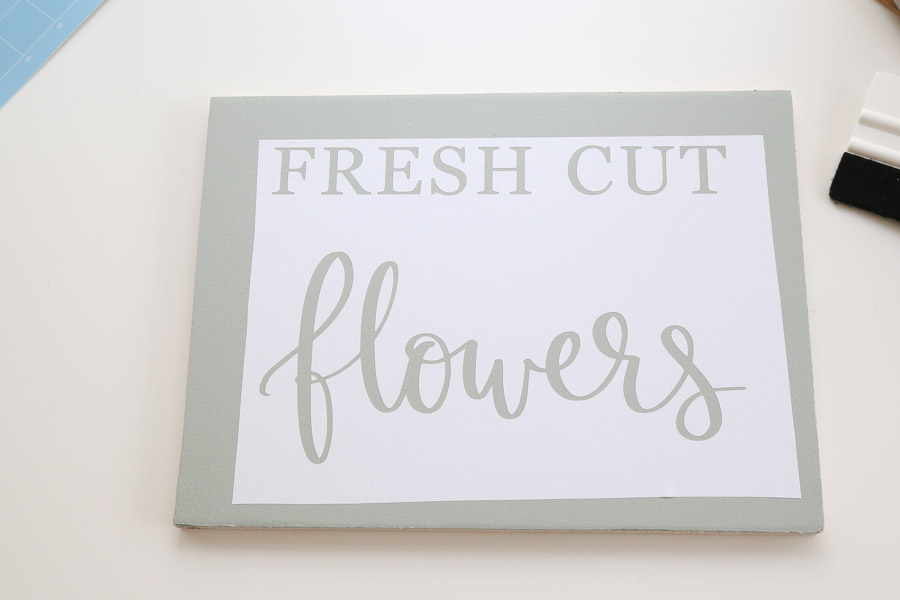
To make this sign more spring-y, I painted the background a fun minty color! The paint color is one of my favorites, Oyster Bay by Sherwin Williams.
3. Apply spring design vinyl stencil to the wood sign
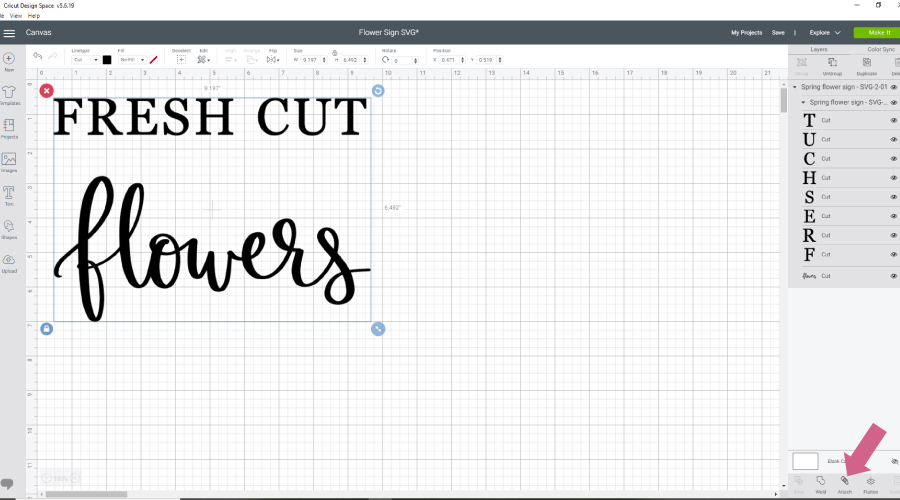
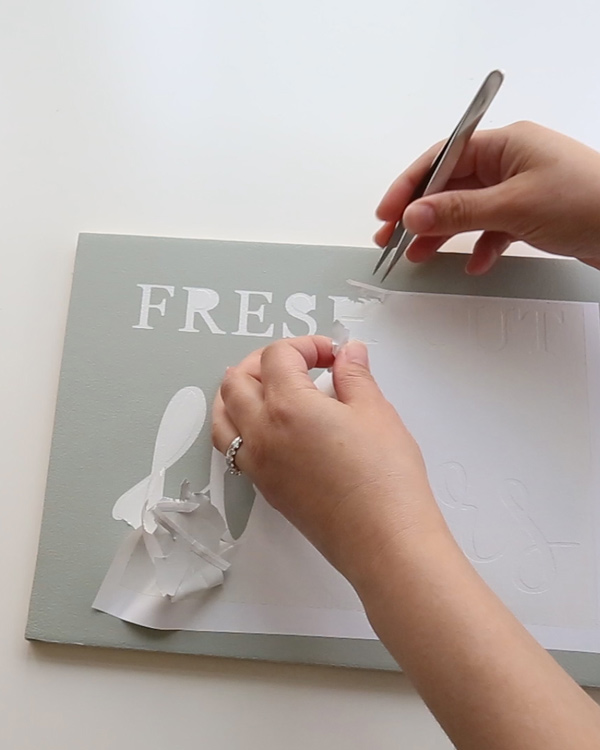
To apply the “Fresh Cut Flowers” spring design that’s available in the free printable library, I used my Cricut to create a wood sign stencil of the design.
You can also use a Silhouette Cameo, see how to make a vinyl stencil with a Cameo. Or if you don’t have a cutting machine, you can use the pencil tracing method.
Check out my video to see a step by step of how I prepared the SVG file in Cricut Design Studio. After opening the SVG file in Cricut Design Studio, click on “attach” the image in the bottom right. Then, “Make it” to send to your Cricut to print. Make sure it’s set to vinyl!
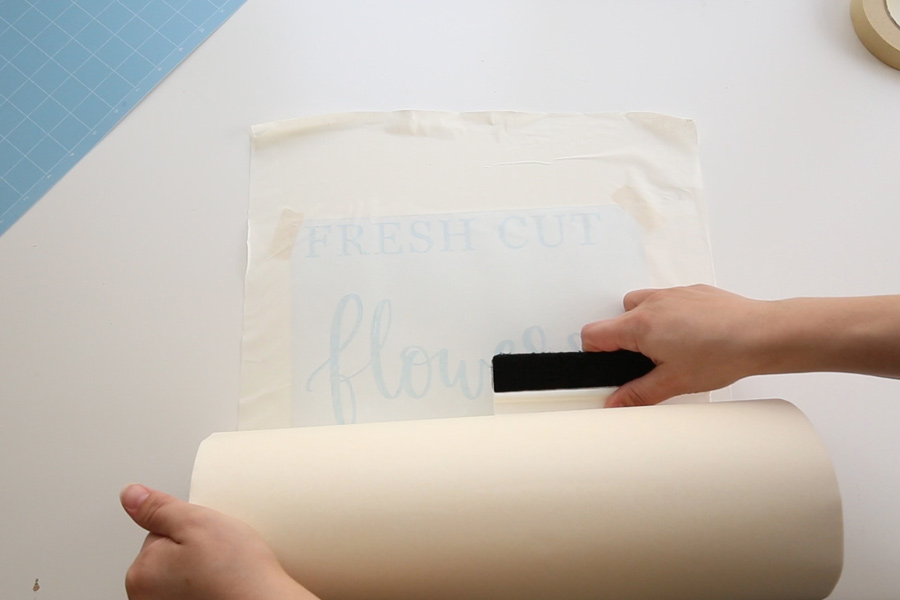
After printing the design out as a vinyl stencil, on Oracal 631 vinyl, I applied it to the sign using the same steps that I did in this how to make a vinyl stencil tutorial. You can also see these steps in my video tutorial too!
📩 Want to Save This?
First, I weeded the vinyl. Make sure to remove the lettering part and leave the surrounding vinyl, to make a vinyl stencil.
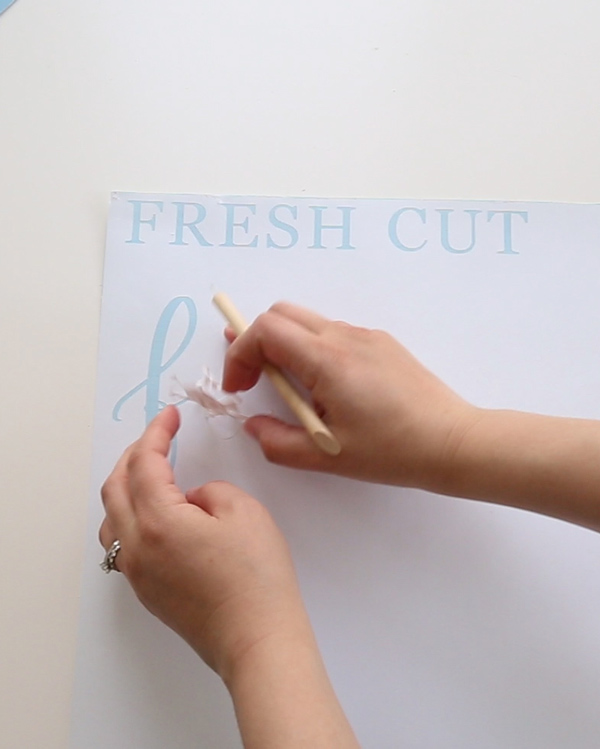
Then, apply transfer tape and apply it to the sign. For applying the transfer tape, I skipped using my tape roller and just taped it to my work surface and smoothed it out over the vinyl stencil with a squeegee.
4. Apply paint over vinyl stencil to transfer design
After my vinyl stencil was applied to my backboard, I taped the edges off with painter’s tape to protect the non-covered parts of the sign.
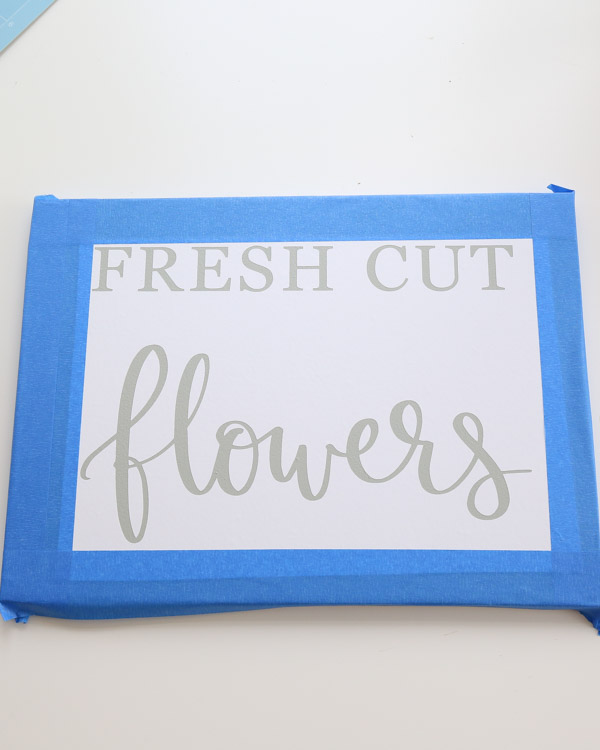
Then, I rolled one coat of the same background paint over the stencil (shown in the video tutorial here). This helps to avoid bleed-through.
Finally, I applied a few, light coats of white spray paint. You can also use paint too. Again, check out the how to paint wood signs post for more painting details!
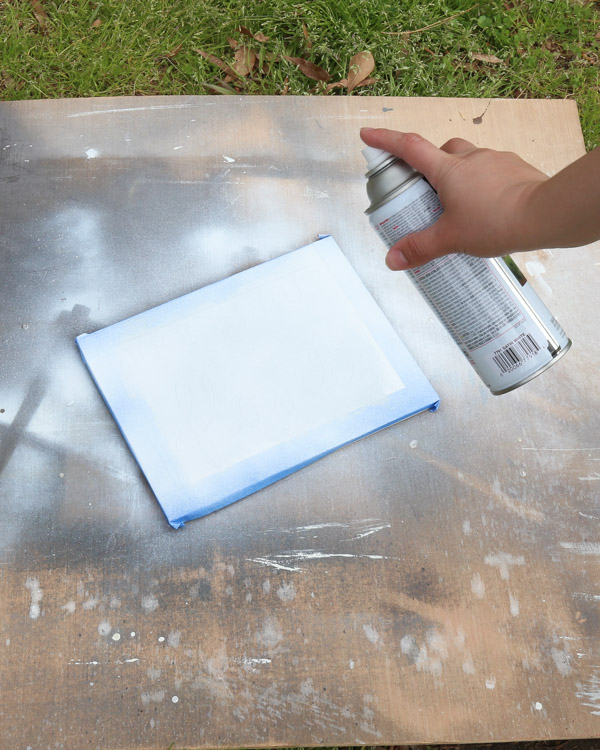
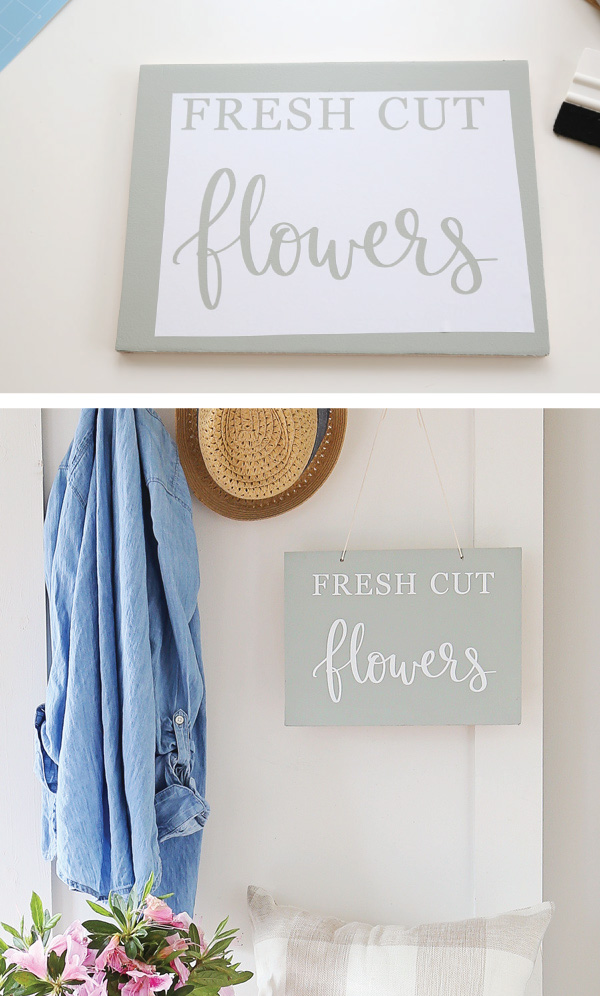
Once the spray paint has dried, remove the vinyl stencil and painter’s tape to reveal your transferred design!
5. Drill holes and add rope to wood sign
Originally, I had planned to frame this sign with 1x2s. However, I decided last minute to just drill holes and add some thin rope to keep it a simple sign that I could hang up on our DIY hall tree.
It would make the most sense to drill the holes before painting, either way works though!

That’s a wrap on this DIY spring wood sign! I’m excited to display it in our kitchen once we are done renovating it….that’s our next project!


If you make this sign, please share it with me on social media @angelamariemade or #angelamariemade!
Follow along on my latest projects and sneak peaks on Instagram, YouTube, and Pinterest!
Want to Save for Later? Pin it Here:
Wayne
Thursday 5th of January 2023
Can any of these files be used with a cnc machine to cut into a piece of wood.
Angela Marie Made
Thursday 12th of January 2023
I have not used a cnc machine before so I am not sure!