Learn how to build easy and cheap DIY wood Christmas trees that can be used outdoors or indoors for charming Christmas decor!
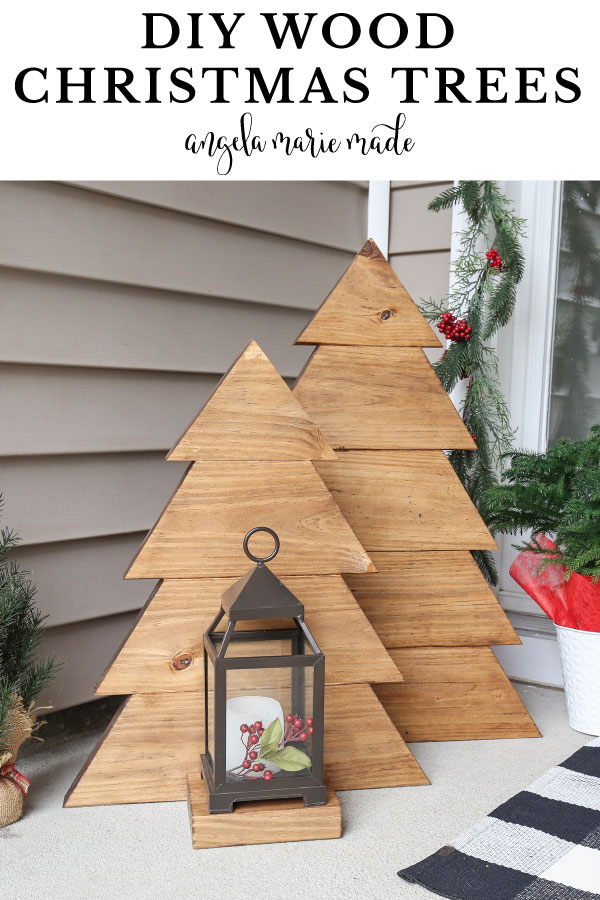
This year I wanted to make DIY wooden Christmas trees as part of our front porch Christmas decorations for the holiday season.
I love the look and Christmas tree shape of our small DIY wood Christmas trees so much that I was inspired to make a larger version that could be used outdoors for outdoor decoration. But they can be used indoors too!
This is a really quick and easy project!
How do you make a wood Christmas Tree?
There are many different ways to make a wood Christmas tree. One of the easiest and cheapest ways is to use framing lumber like I do in my tutorial. Also, with my method, only three power tools are needed, a miter saw, drill, and a brad nailer.
It’s all about getting the angle cuts correct, which I explain how to do in my below tutorial!
Type of Wood and Cost
I used 2×6 untreated framing lumber for my wood trees since they are larger and can be used outdoors. The framing lumber is heavier duty and very cheap to use.
The two size trees can be made from just two 2×6 at 8ft boards that currently costs just $16 total at my local home improvement store!
Scrap wood or pallet wood may be used if you prefer or want a more rustic tree or rustic look. But make sure they are the same actual width of a 2×6 which is 5.5″ wide in order for the angled cut measurements to work correctly.
See my lumber size guide for more info on nominal vs. actual lumber sizes.
Size of the DIY wood Christmas trees
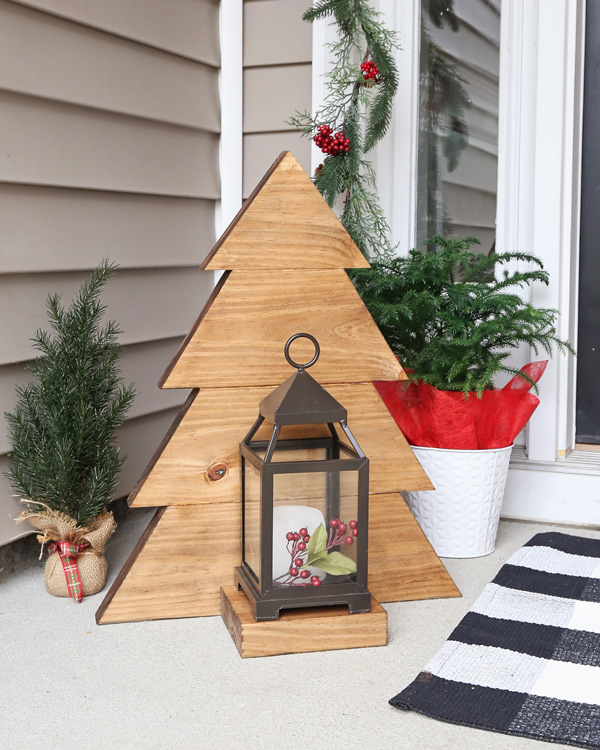
The full tutorial below will explain how to make a 22″ tall x 18″ wide wood tree and a 27.5″ tall x 21″ wide wood tree.
The same steps apply for both size trees, except for the taller tree (step #7) a few of the measurements are adjusted and one more board cut is needed.
How to make a 2×4 Christmas tree or small wooden Christmas Trees
If you want to make a smaller wooden tree you can use a 2×4 or 1×4 board instead and follow my small DIY wood Christmas tree tutorial.
This smaller DIY Christmas tree version works great for small spaces, for indoor decor, or for displaying small holiday decor or mason jar decor.
Note, this post contains some affiliate links. For more info see my disclosures here.
How to Make DIY Wooden Christmas Trees
Note, the lumber quantity listed below is enough to make two wooden Christmas trees at the 22″ and 27.5″ tall sizes
Materials
- (2) 2×6 @ 8ft – use untreated lumber
- 1×2 (or 1×3) @ 8ft
- Waterproof Wood Glue
- 2″ brad nails
- Wood Stain or paint (I used this stain)**
- 1 1/4″ wood screws
Tools
- Miter saw
- Drill
- Brad nailer
- Clamps ( 24″ clamp for shorter tree and 36″ or 48″ clamp for taller tree)
- Sandpaper or Orbital Palm Sander
**If the wood Christmas trees are going to be outdoors in an uncovered area, make sure to use an exterior stain, paint, or sealant.
Video Tutorial:
Subscribe to my YouTube Channel here!
See a short video tutorial of this DIY Wood Christmas Tree here!
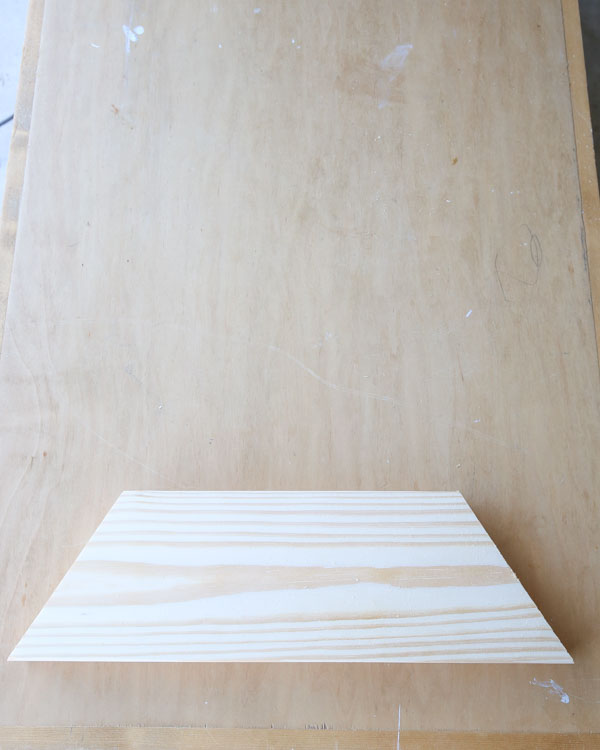
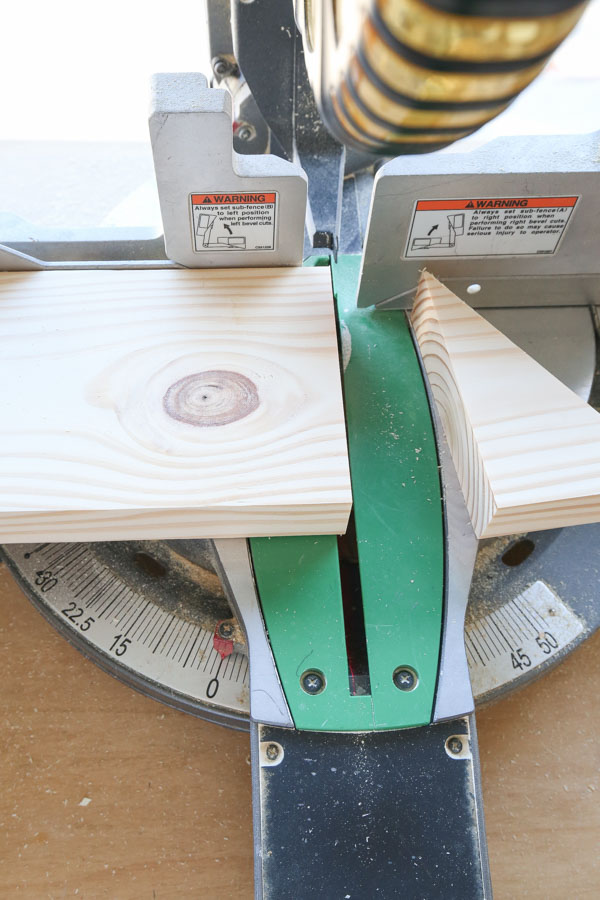
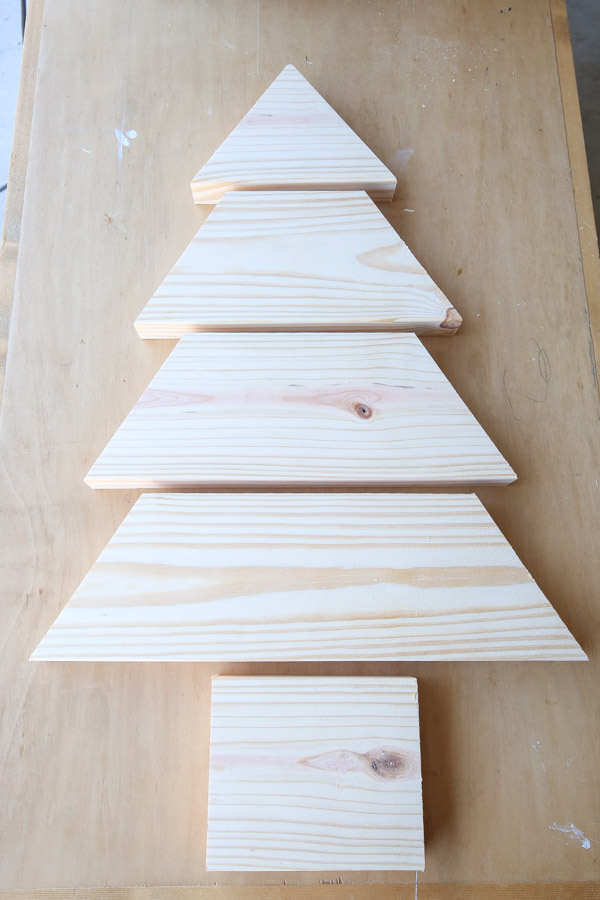
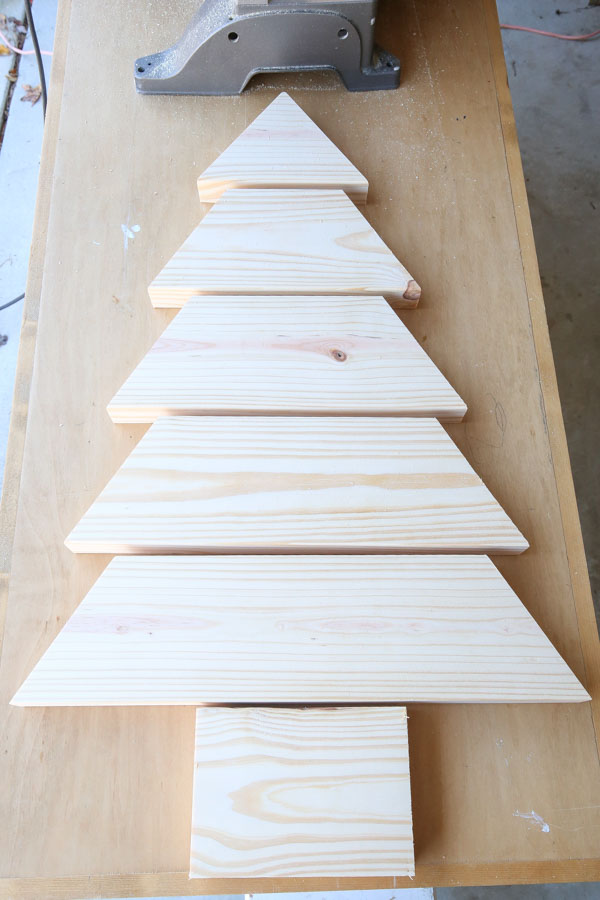
1. Cut the largest base board of the DIY Wooden Christmas Tree
Using a miter saw, cut one end of the 2×6 at a 31.6 degree angle.
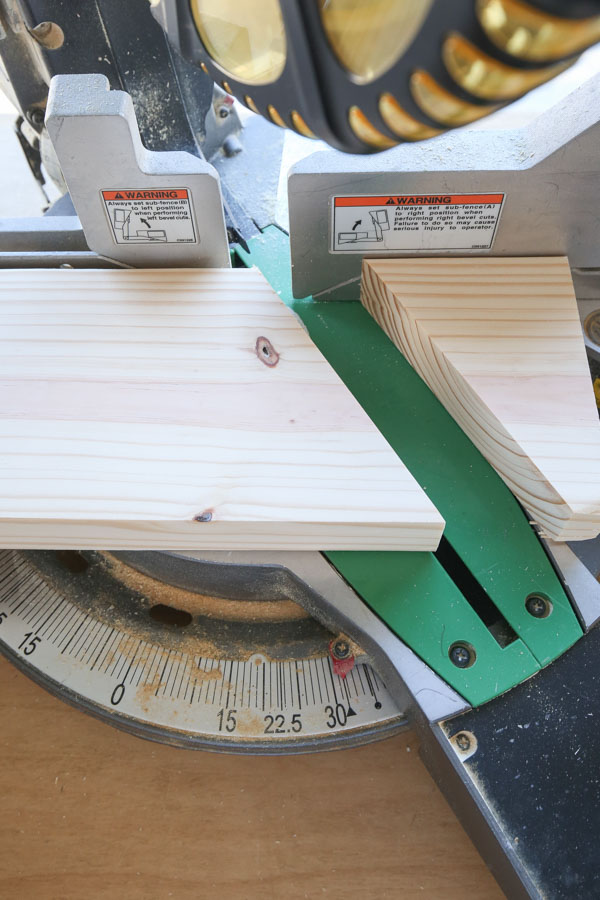
Measure 18″ from the longest point of the angled end and mark with a pencil.
Adjust your miter saw so it cuts an angle on the opposite, left side. Cut a 31.6 degree angle at the 18″ mark (make sure the longest point of this angle is at the 18″ mark).
2. Cut the angled boards for the middle of the wood Christmas tree
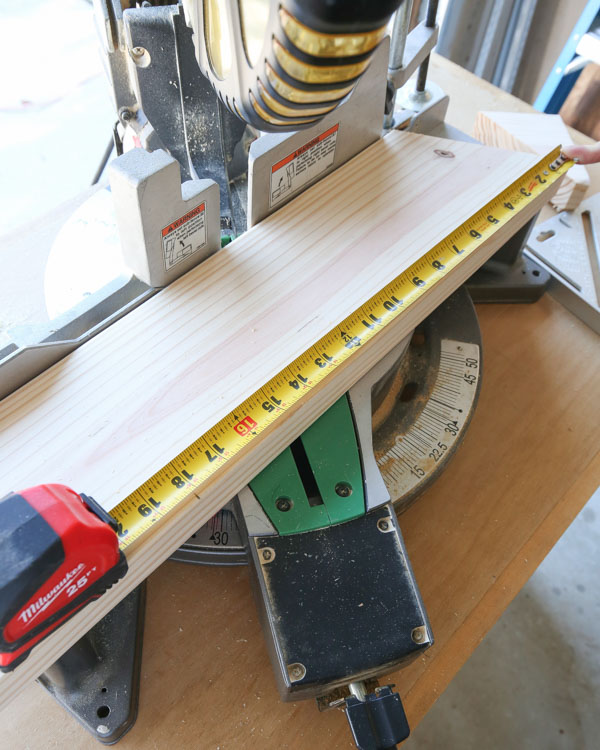
For the second smaller board of the DIY Wood Christmas tree, measure 15″ from the longest point of the angled end of the remaining 2×6 and mark with a pencil.
Swing your miter saw back to the other side to cut an angled end on the pencil mark. Cut a 31.6 degree cut at the 15″ mark (make sure the longest point of this angle is at the 15″ mark).
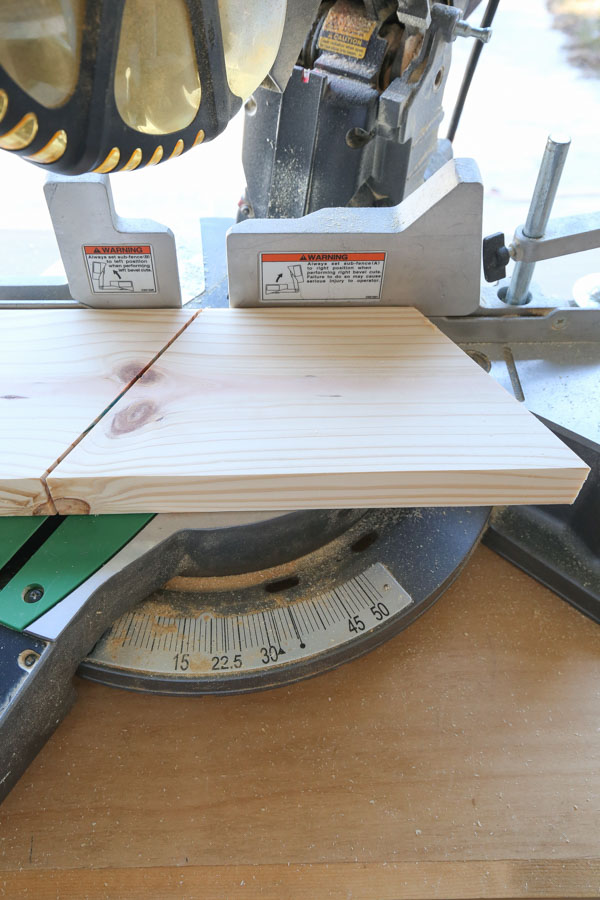
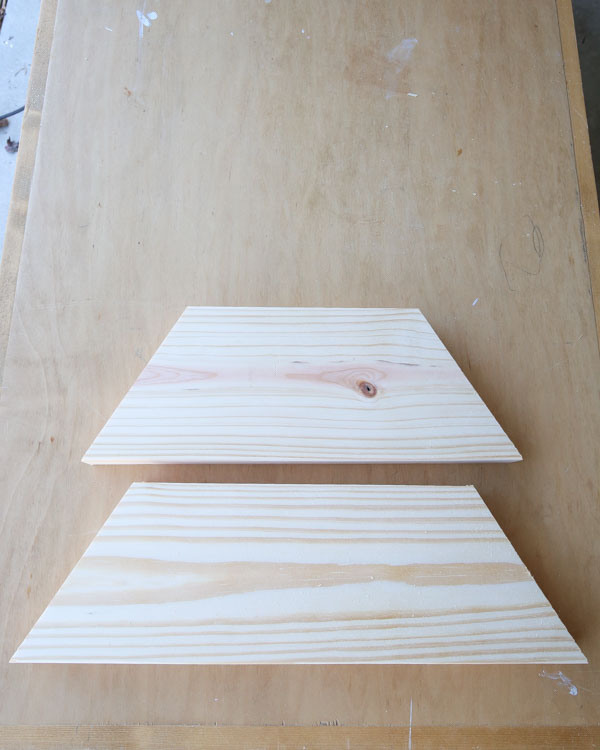
Repeat the above steps again for the third, smaller board, except use a 12″ measurement.

3. Cut the top point of the DIY wood Christmas tree
Just like with our small DIY wooden Christmas trees, the angle needs to be changed for the top point of the tree.
To make the top piece of the tree, the angle of the miter saw needs to be changed to 36 degrees.
Cut a 36 degree angle off of the 2×6 end.
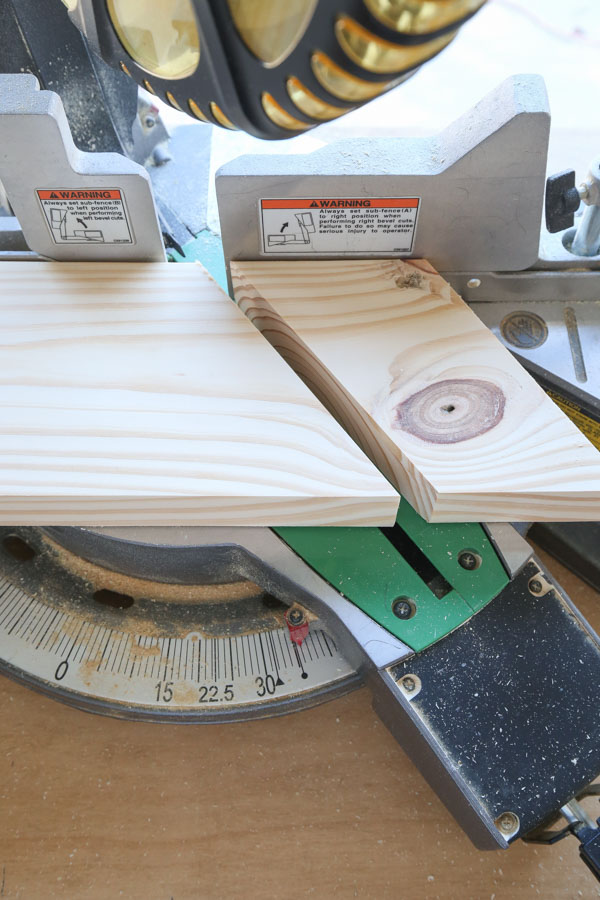
Measure 8″ from the longest point of the angled end of the 2×6 and mark with a pencil. Cut a 36 degree angle at the 8″ mark to make the top board of the Christmas tree.
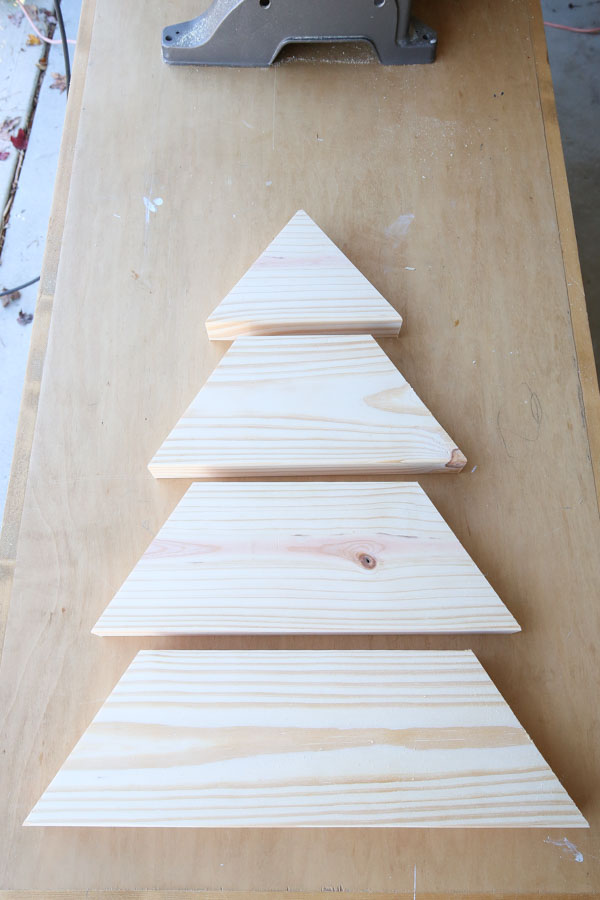
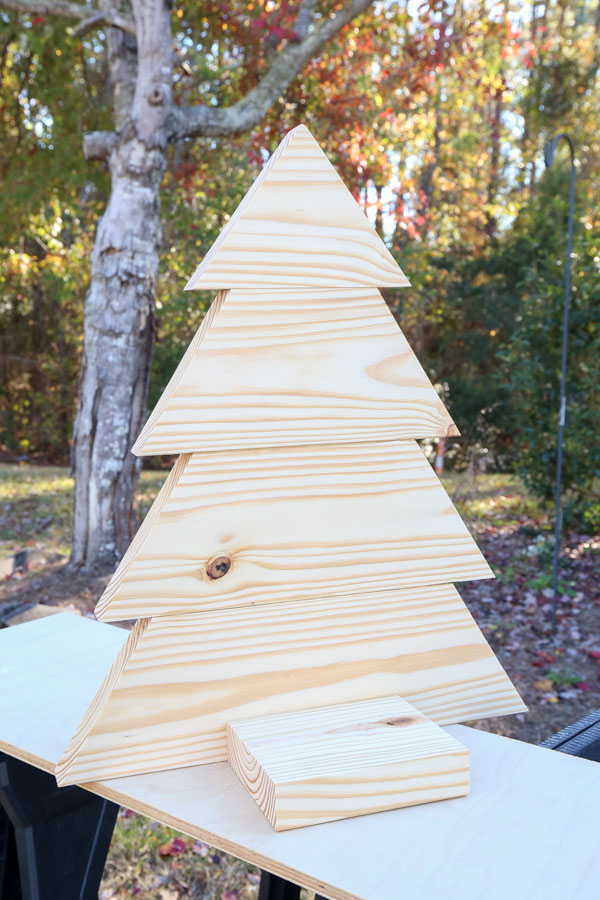
4. Cut the rectangle tree holder base
Cut a 6.5″ wide board from the 2×6 using a straight line, 0 degree cut. Note, you can make this board a little wider if needed for your decor!
📩 Want to Save This?
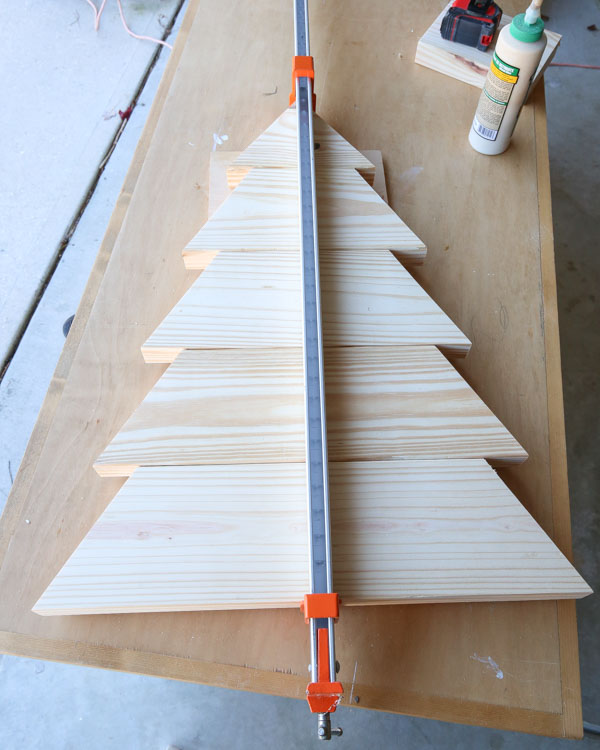
5. Assemble the DIY wood Christmas tree together
Mark the center of each of the cut wood boards to indicate where to line the boards up for assembly.
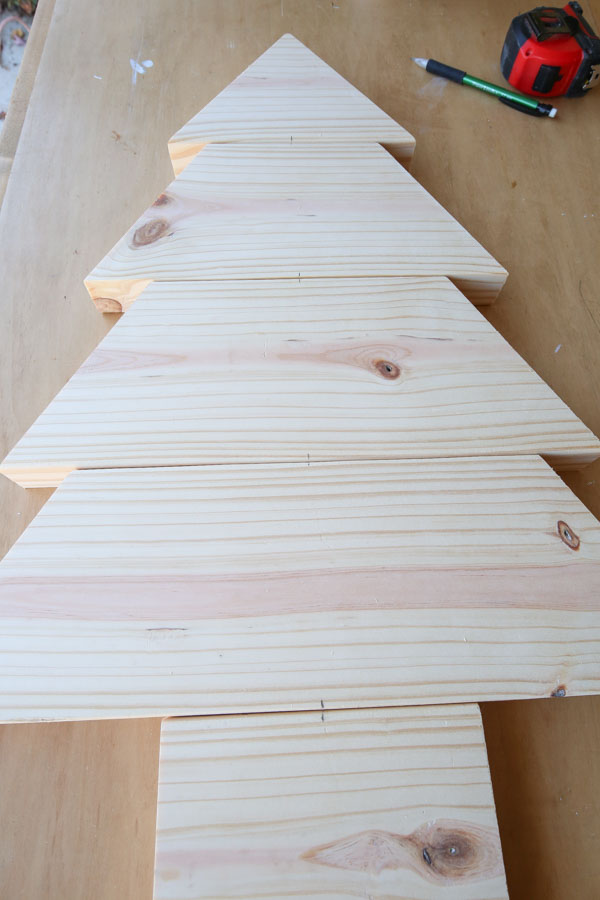
Apply a generous amount of waterproof wood glue to the top of the base and middle angled boards.

Then, align the boards up with the center marks and clamp together.
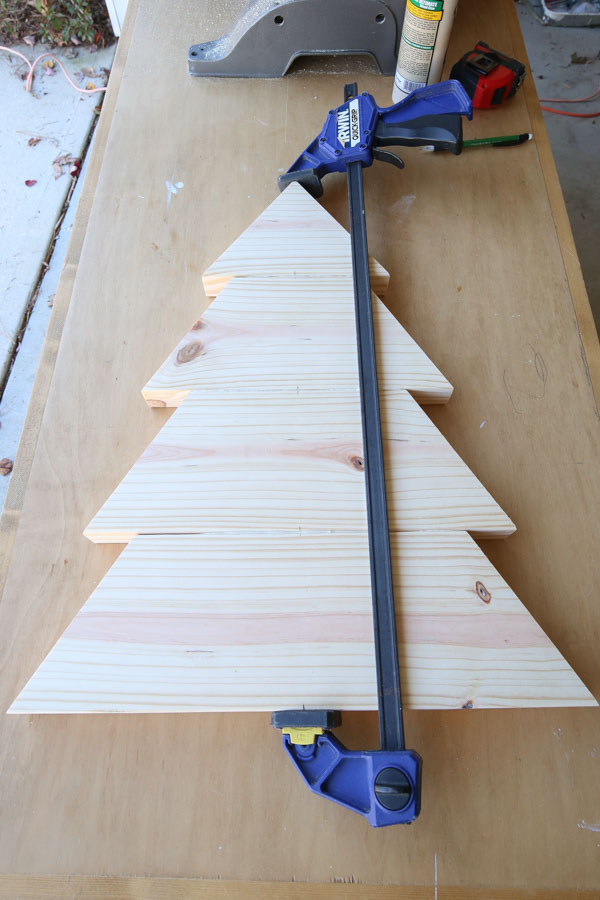
Note, you will have excess wood glue coming out between the boards which is expected. Wipe away what you can with a damp cloth and then the rest will be sanded off once dry.
Also, we put a scrap plywood board under our tree while it was drying to avoid wood glue drying on our work surface.
Allow the glue to dry for one hour.
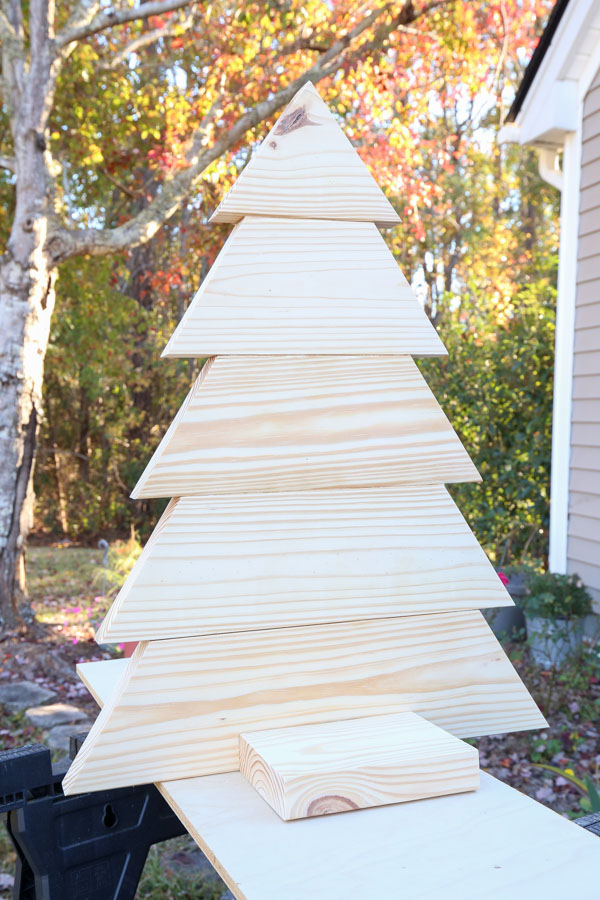
Attach the wood base holder to the wooden Christmas tree
Once the top part of the wood Christmas tree is assembled and the glue has dried, attach the base rectangle board centered on the base of the largest angled board.
Attach together with wood glue, a nail gun, and 2″ brad nails. Use a clamp to help!

6. Add support board on back side
About a month after I built these, I noticed they started to lean a little bit. So, I would add additional support by attaching a 1×2 or 1×3 cut to 17″ centered on the side you want to be the back side.
Attach with wood glue and 1 1/4″ wood screws.
7. Sand the excess wood glue off of the wood
Once all of the wood glue has dried, sand any excess off with an orbital palm sander or sanding block or just some sandpaper.
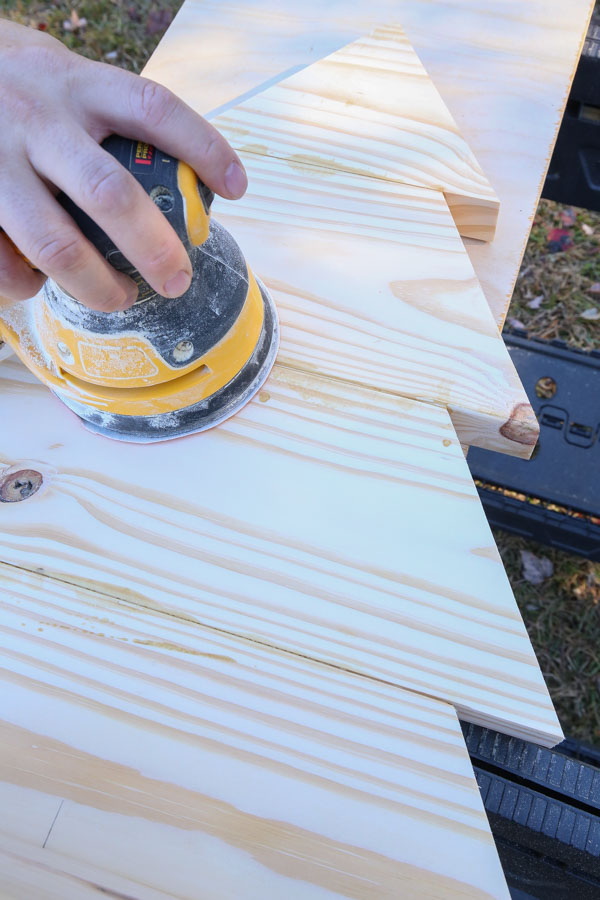
And that’s it for the build of the wooden Christmas tree! It looks adorable even before adding a finish!
8. Make the larger matching wood Christmas tree (optional)
Make a second larger DIY wood Christmas tree using the same above steps. In addition, add one more larger base angled board cut at 21″ (from long point to long point) with 31.6 degree cuts again.
Also, cut the 2×6 board for the rectangle base holder at 7.5″.
We used our 48″ clamp to clamp together with the wood glue. But a 36″ clamp will work too.
This will create a taller wooden Christmas tree that is 27.5″ tall.
Finally, add additional support by attaching a 1×2 or 1×3 cut to 23″ centered on the side you want to be the back side. Attach with wood glue and 1 1/4″ wood screws.
8. Stain, paint, or seal the large DIY wood Christmas trees
Stain, paint, or seal the DIY wood Christmas trees. Use an exterior finish if you will be using them outside.
I used this stain for my stain color which is an interior stain but I am keeping them on my covered porch. I do plan to add a polyurethane soon. It’s the same color I used for our DIY wood Christmas tree mason jar sconce!
If you need tips on how to stain wood for the best finish results, check out my how to stain wood post here.
I think using a white paint or other stain colors on them would be super cute too!
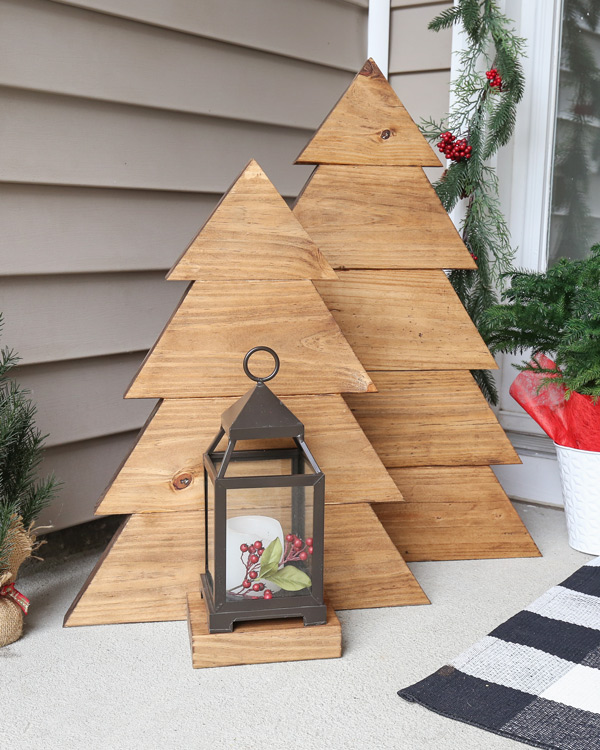
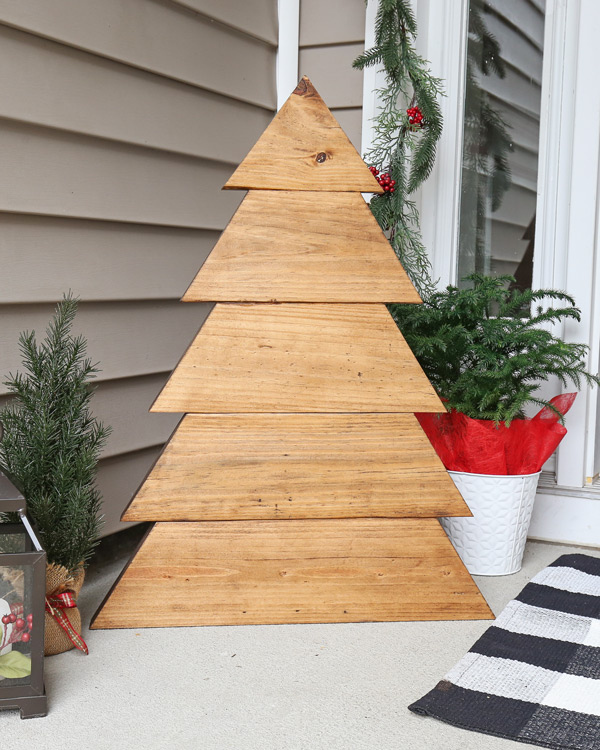
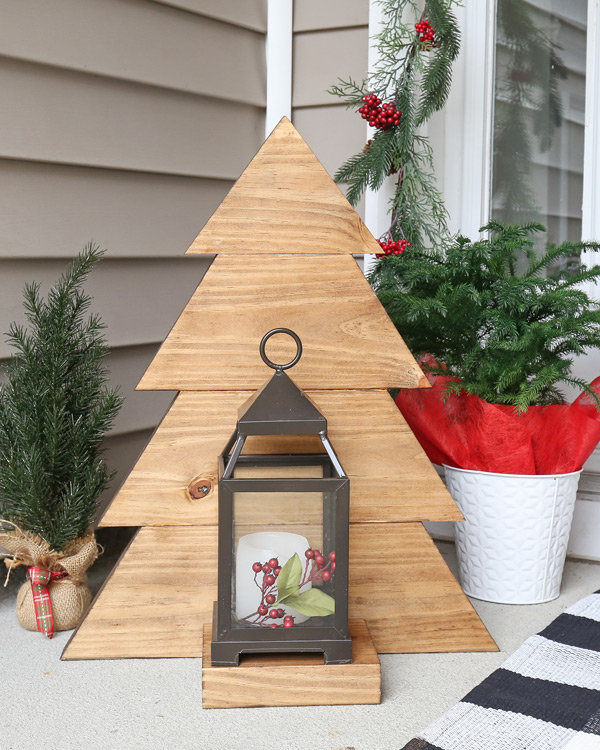
Here is our taller wood tree!
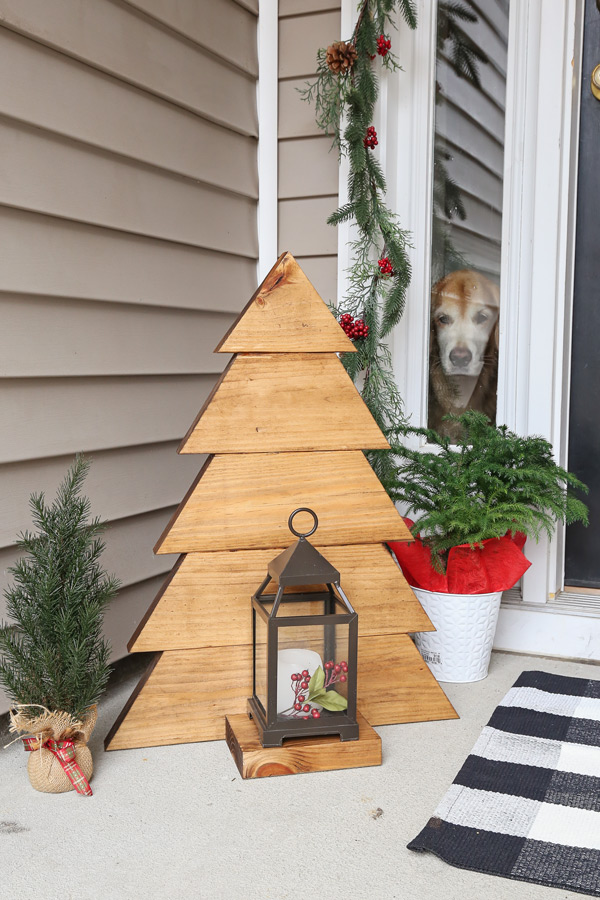
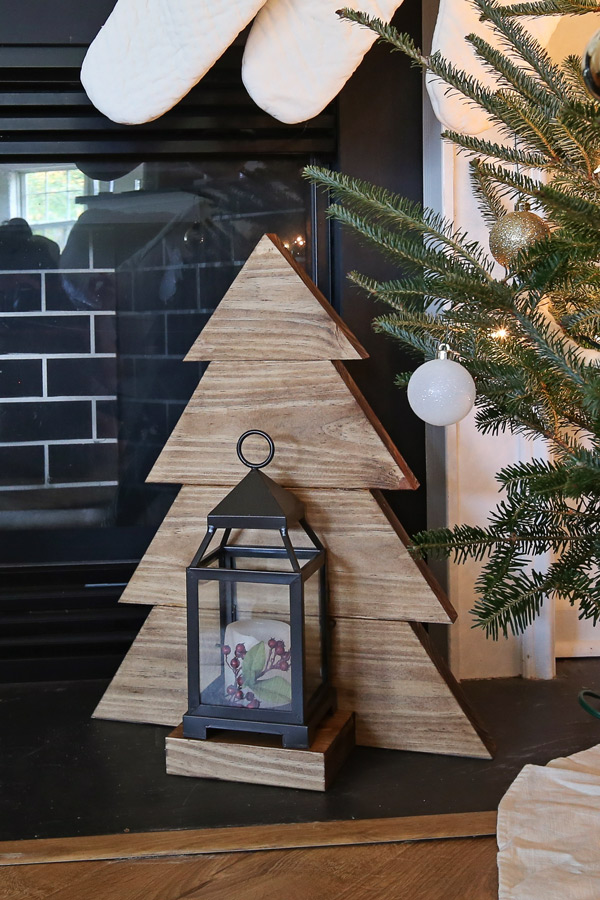
How adorable are these DIY wood Christmas trees?! They are a great way to display holiday decor too like our small glass lantern with holiday berries and a flameless candle. You could also do a lantern or jar with pine cones or Christmas ornaments.
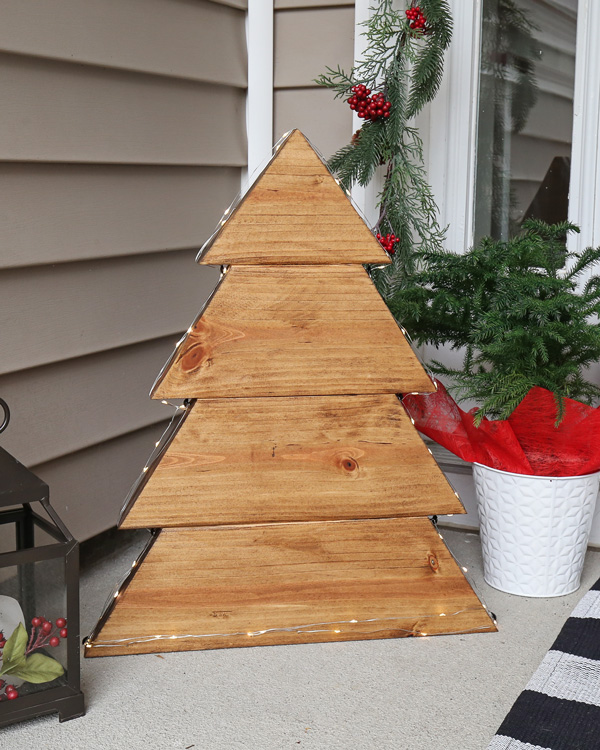
I also added some twinkle string lights along the side of our shorter DIY wooden Christmas tree (using some tacks) for fun!
They look beautiful outdoors on a front porch, but they also look great inside. I love them next to our fireplace too!
They make for classic Christmas decor or even farmhouse style! And would be perfect for DIY Christmas gifts too!
The best part about this simple wooden Christmas tree is that there are so many display options, I can’t decide what way I like best. How and where would you display yours?!
I’d love to see your version of this DIY wood Christmas tree! Please share it with me on social media @angelamariemade or #angelamariemade! *You can also share your build in our Woodworking for the Home facebook group, be sure to join!
Follow along for my latest projects and sneak peaks on Instagram, YouTube, and Pinterest!