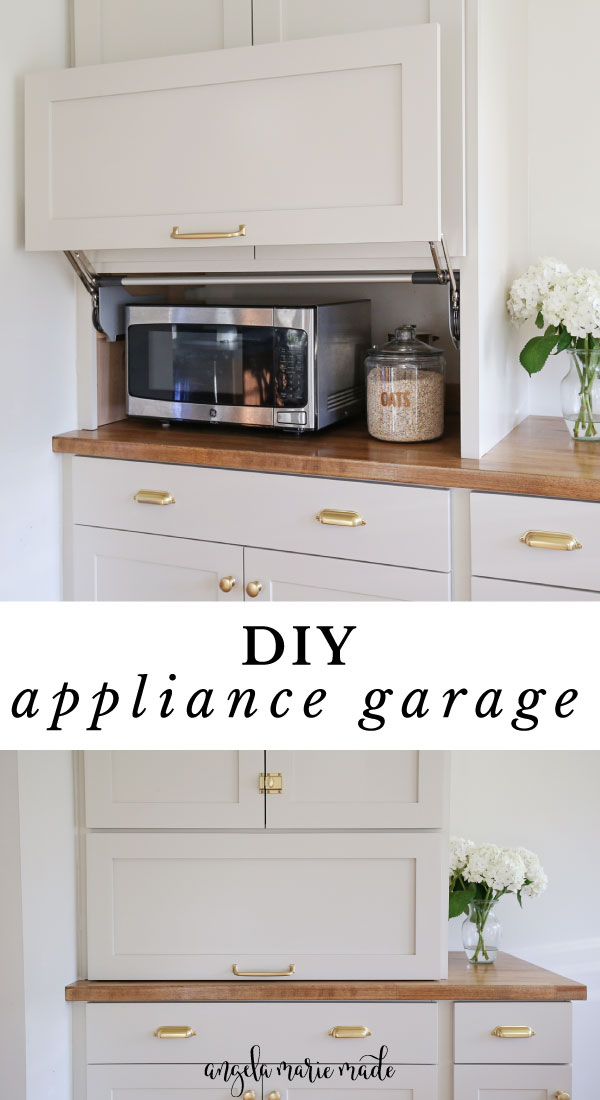
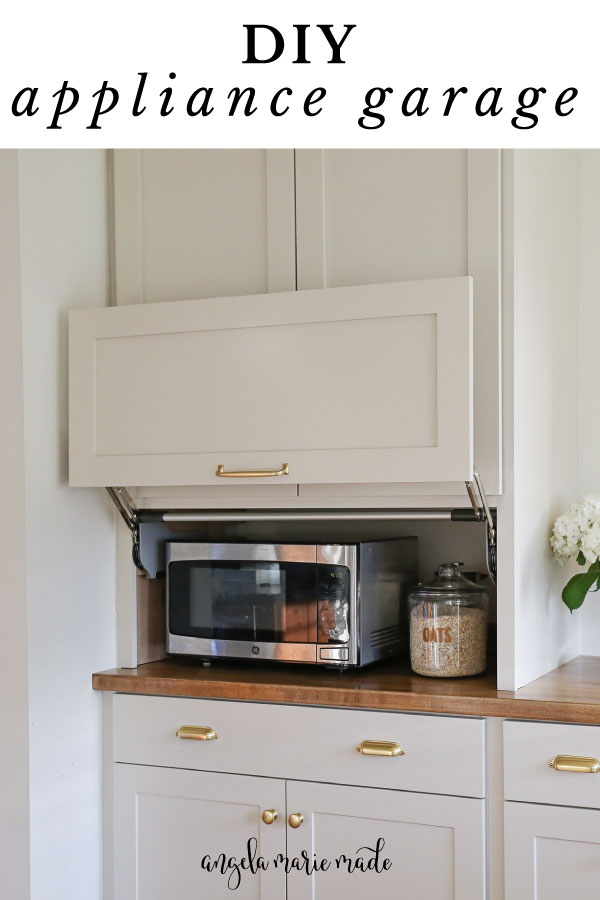
Learn how to build a kitchen appliance garage cabinet and how to hide a microwave or other countertop clutter!
I knew I had to include a kitchen appliance garage DIY to hide our microwave, small appliances, and some other countertop clutter while planning our DIY built in cabinets for the kitchen.
I first discovered appliance garage cabinets on Pinterest and I’ve wanted one ever since! Although they are a very custom feature in a kitchen, it doesn’t mean you can’t have one. I’m going to show you step by step how to build and install one!
But first let’s talk about what an appliance garage actually is and the different types of hinges for it.
What is an appliance garage?
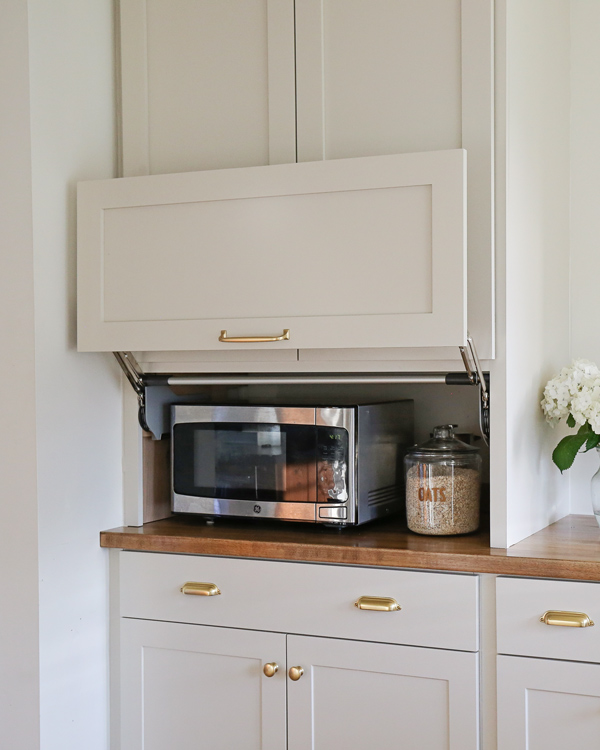
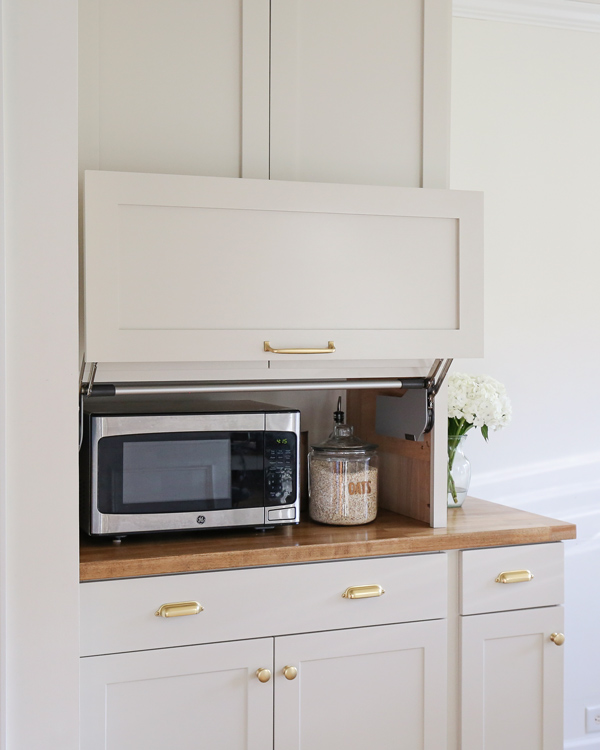
If you’ve never heard of an appliance garage, it’s a type of kitchen cabinet, where the door opens up and down like an actual garage door or pull down-door. Although there are some styles that have two cabinet doors that open from the side and go back like tuck-in doors.
Have you ever wondered, how can I hide my appliances on my counter? An appliance garage is a great solution for hiding small appliances because it’s wide open and a great size to store countertop appliances.
An appliance garage cabinet typically sits on top of a counter or it can be installed on the wall, as part of upper cabinets, or in a corner space as part of a corner cabinet. So, it’s easily accessible for everyday items or small appliances that you need to grab quickly but don’t want to be out in the open causing clutter.
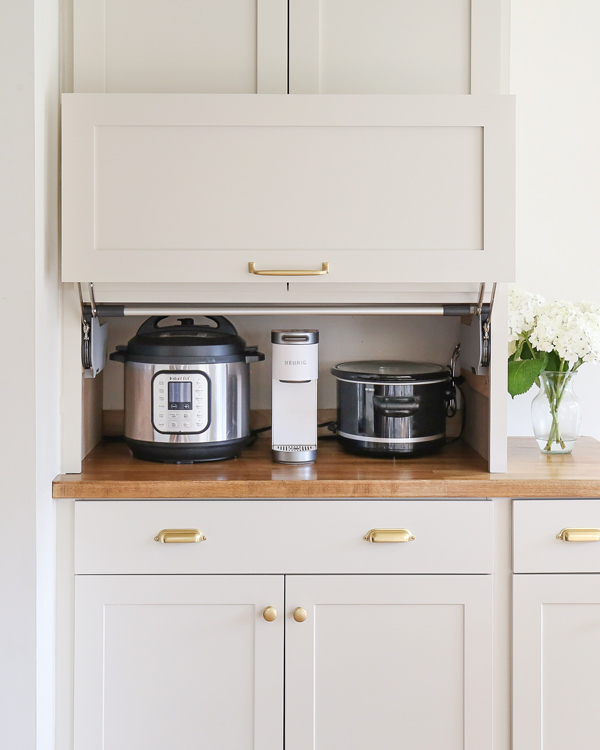
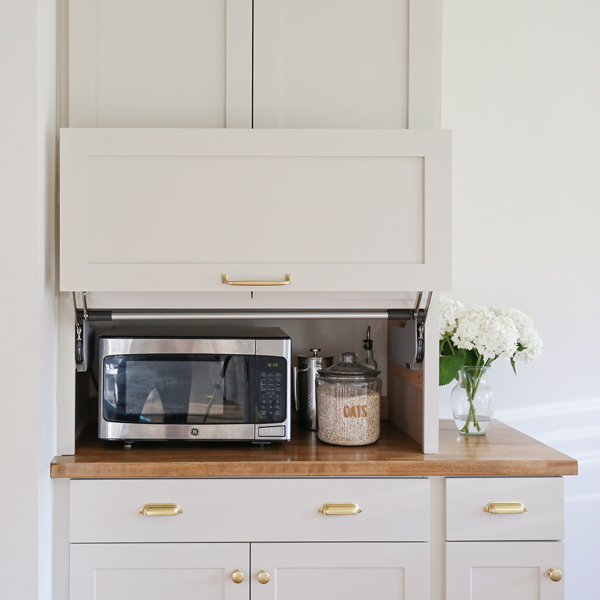
It’s also a great way for how to hide a microwave, Instant Pot, stand mixer, coffee maker, food processor, and any other small kitchen appliances that may not be pretty to look at but need easy access daily for many kitchens!
Appliance garages are great for providing kitchen organization in both small kitchens and large kitchens.
Note, this post contains some affiliate links. For more info see my disclosures here.
Appliance Garage Hinges
The key to creating an appliance garage cabinet is having the right hinges. There are a few different hinges available on the market.
I think it’s important to really have a quality hinge that functions well for a DIY appliance garage that you will likely be using multiple times a day if it’s hiding a microwave or other often used items.
For that reason, I bought the most affordable, high quality hinge that I could find. The hinge I bought is from the Blum AVENTOS HL lift systems. Blum is known for having high quality hinges.
This Blum hinge can be used on cabinets with a cabinet height range of 11-13/16″ to 22-13/16″ tall and a cabinet width range up to 72″ wide.
The installation instructions for the lift system hinges provided by Blum explain exactly which parts you need. Here are the Blum parts we ordered for our DIY appliance garage:
- Cabinet Lift Mechanism Set – Part # 20L2300.N5 (different models available based on cabinet door weight)
- Hinge Cover Set – Part # 20L8020.NA
- Arm Assembly – Part # BA20L3800.06 (different models available based on cabinet height)
- Wood Mounting Plate Set – Part # 20S4200
- Stabilizer Rod – Part # 20Q1061UA
Not all of the parts were available/in stock from the same place, so I had to order from two other online stores including Build with Ferguson and Cabinet Parts.
The total cost of hinge parts plus shipping that I paid was less than $250.
Other appliance garage hinge options
In case you are curious, here are a few other appliance garage hinge options I found in my research that operate in an up and down lift motion.
On the lower cost end, there was this budget friendly hinge. The reviews are mixed though and it didn’t look like it functioned as smoothly as the Blum hinge.
A higher cost option is this hinge that I discovered from this appliance garage by Chris Loves Julia that’s very awesome. It’s very expensive though, but looks very high quality and high end!
How to Build a Kitchen Appliance Garage DIY
Materials
- Cabinet with door (see step #1)
- Appliance garage hinges and related parts noted above
Tools
- Dremel saw and metal cutting blade (or other metal cutting tool)
- Drill
- 3/16″ drill bit
- Combination square (optional)
- Phillips-head screw driver
- Pencil
- Measuring tape
DIY Appliance Garage Video Tutorial:
Subscribe to my YouTube Channel here!
Get all of the appliance garage details and see the installation in action in the DIY appliance garage VIDEO here!
1. Build (or buy) a cabinet and door and install the cabinet on the wall
The very first step of a kitchen appliance garage DIY is to build (or buy) a cabinet and door and install the cabinet on the wall.
I have a step by step tutorial for how we built our appliance garage cabinet as part of our countertop cabinet (which sits on top of our butcher block countertop) in my DIY built in cabinets tutorial.
I did order the custom size door premade online for the appliance garage door, but you can also build a door like we did for our DIY wall cabinet and door.

Ready to go cabinet and door options for an appliance garage DIY
Another option is to buy a premade cabinet and door, also known as a stock cabinet. Something like these shaker cabinets which come in different heights and widths. Although, they would need a one panel door to be built or ordered.
Other ready to go kitchen cabinets that would work are IKEA cabinets or a combination of IKEA Sektion cabinetry, which has both the cabinet and matching door ready to go. Perfect for an IKEA hack!
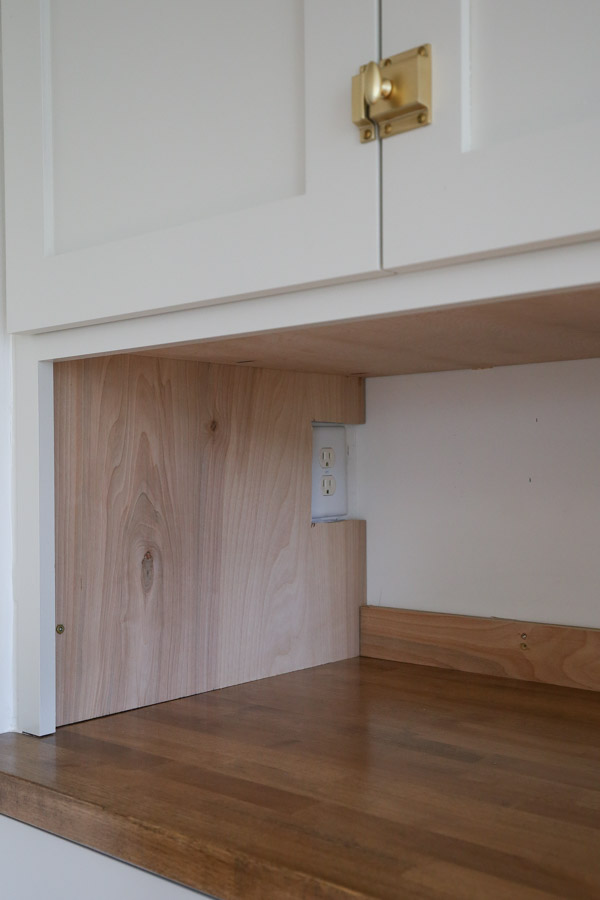
Electrical Outlet Access
An important feature of an appliance garage is the ability to hide appliances which need access to power or a wall outlet. So make sure you have one if you want this feature!
We had a wall outlet in the corner on the wall where we were installing our cabinets. But, we did actually end up having to move it because the hinges needed to be installed where our outlet was located. You can see more details on how we did this in our built in cabinets tutorial for our kitchen!
2. Make the appliance garage cabinet frameless if needed
If your cabinet has a face frame like ours, then it needs to be made “frameless”. If your cabinet is a frameless style cabinet already, you can skip this step!
We’ve had to do this before for cabinet hinges, including the door installation for our built in cabinet for our entryway and our DIY wall cabinet and door.
You can see this in action in the appliance garage video, but you just need to install a piece of 3/4″ thick wood to make the face frame and inside of the cabinet flush with each other.
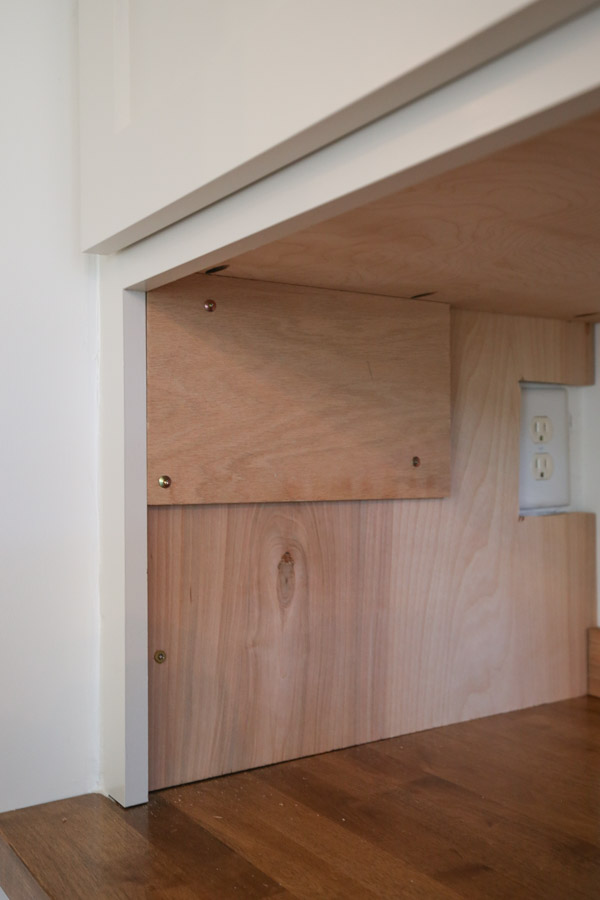
This piece of wood is where the appliance garage hinges will be installed, so make sure to place it in the top left and right corners inside of the cabinet. And make sure the screws are countersunk or the screw heads are out of the way of where the hinge will be installed.
Also, make sure the piece of wood is at least 7″ tall x 11″ long.
3. Mark and drill the pin hole locations for the hinges
Steps 3 – 9 are in accordance with the Blum hinge directions but I have broken them out and explained them in more detail along with photos and a video tutorial too!
First, mark and drill the pin hole locations for the hinges on the inside of the cabinet so the hinge is installed in the correct position.
📩 Want to Save This?
We marked ours according to the directions that we converted from millimeters to inches using Google metric converter.
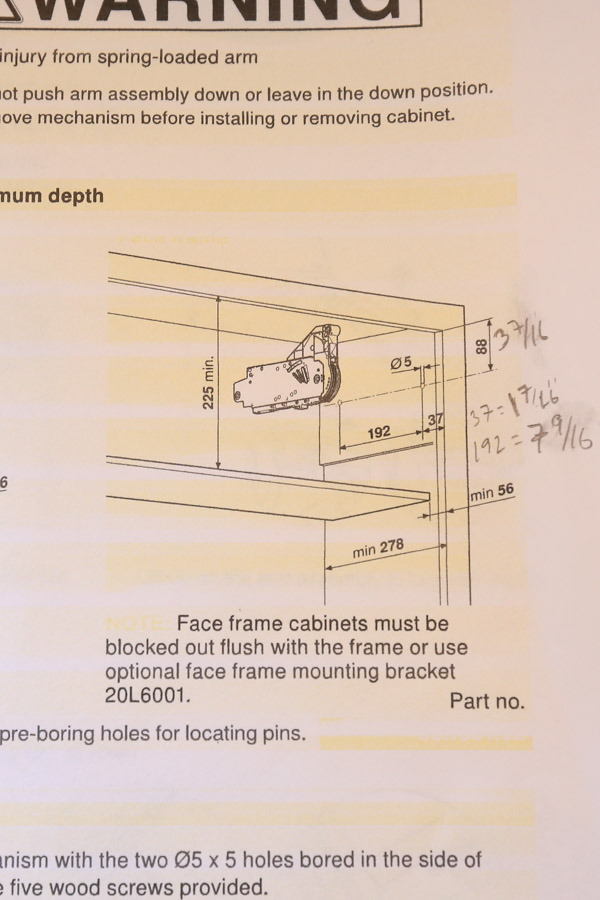
We used our combination square to help with this step.
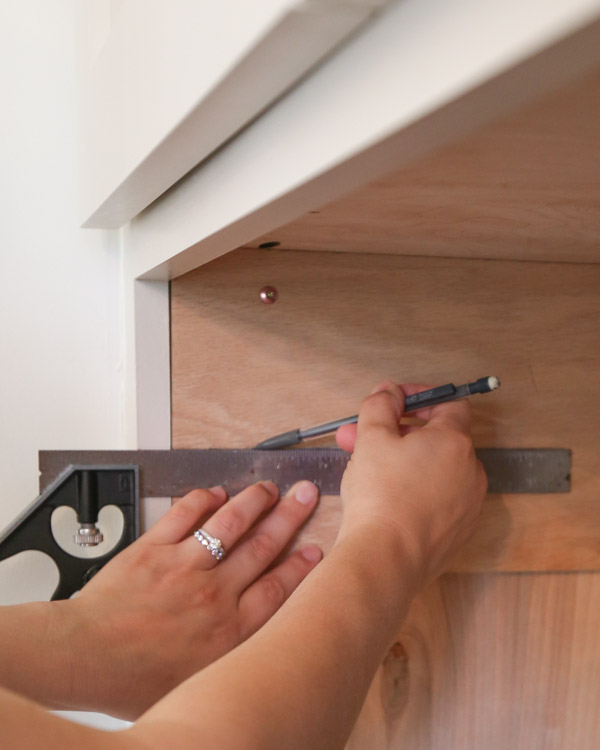
Use a 3/16″ drill bit to drill the holes about an 1/8″ deep. Note, the symbol Ø5 in the directions stands for a 3/16″ drill bit.
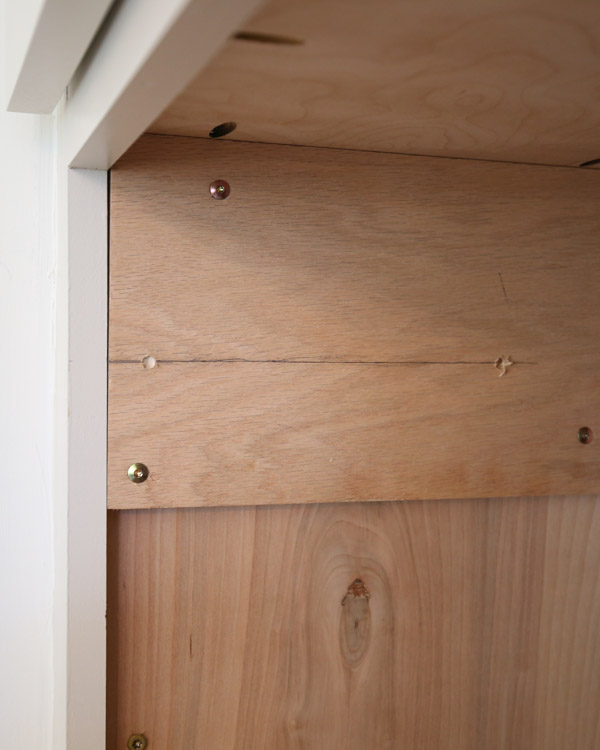
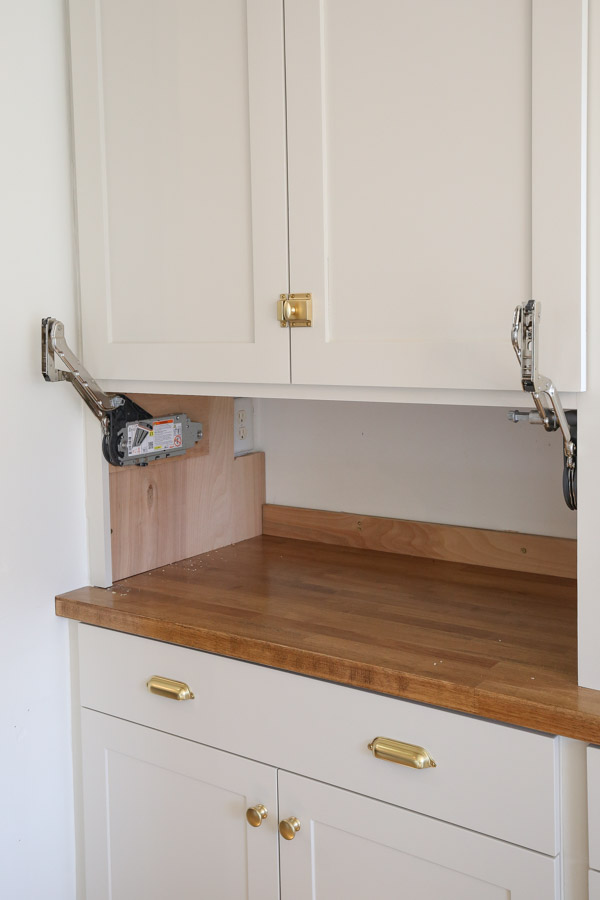
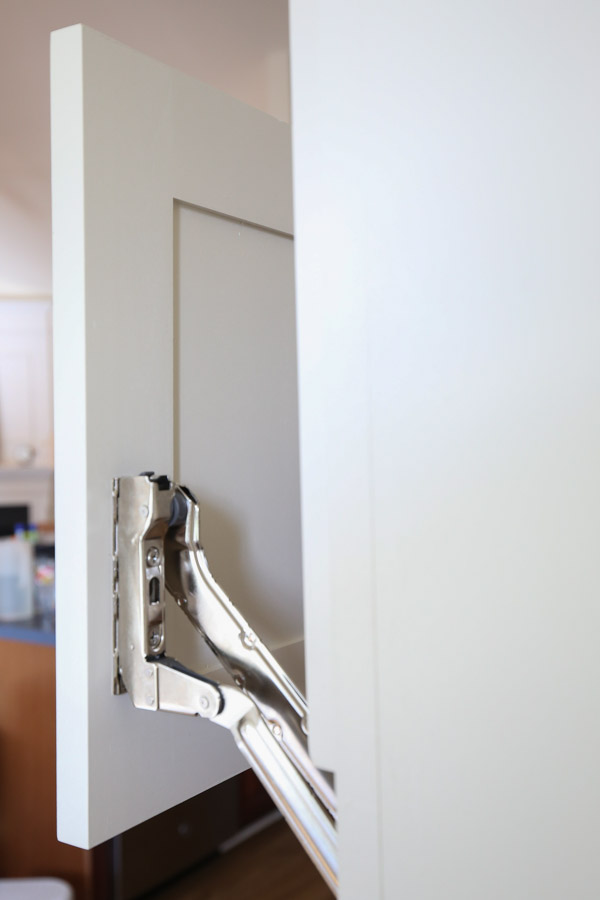
4. Attach the hinges to the appliance garage cabinet
Align the two pins on the hinges with the drilled holes. Then, screw the hinge in place in the cabinet with the included screws.
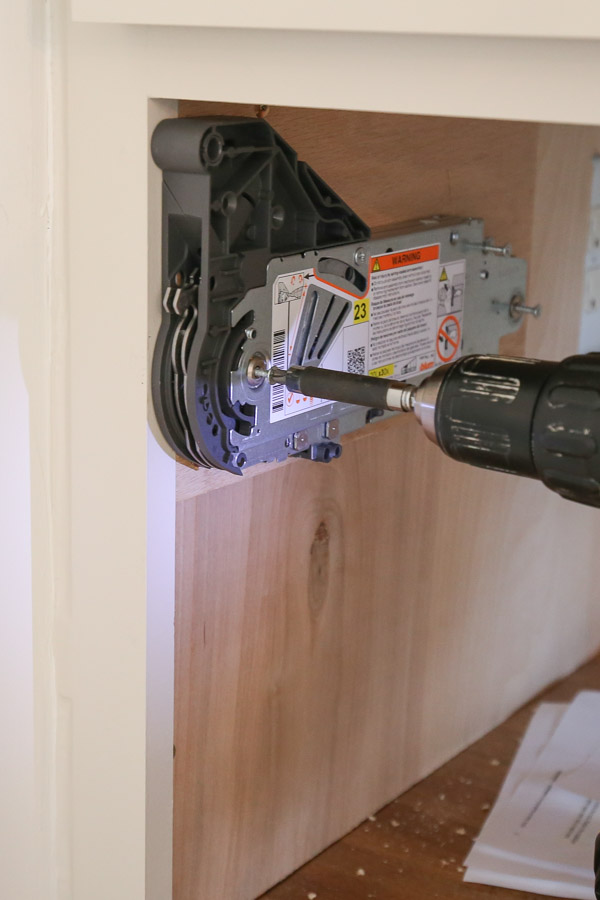
The front edge of the hinge will be aligned with the top corner edge of the cabinet once installed.
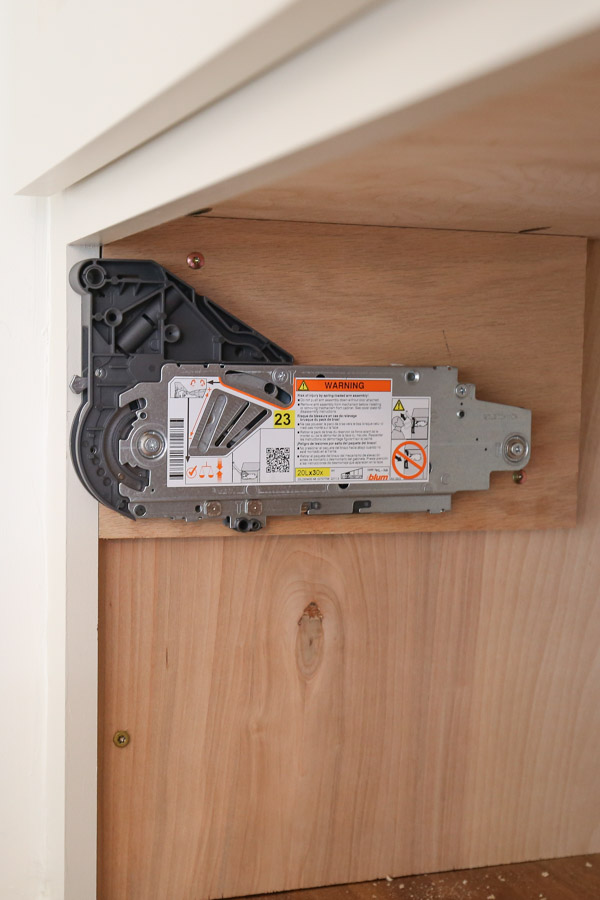
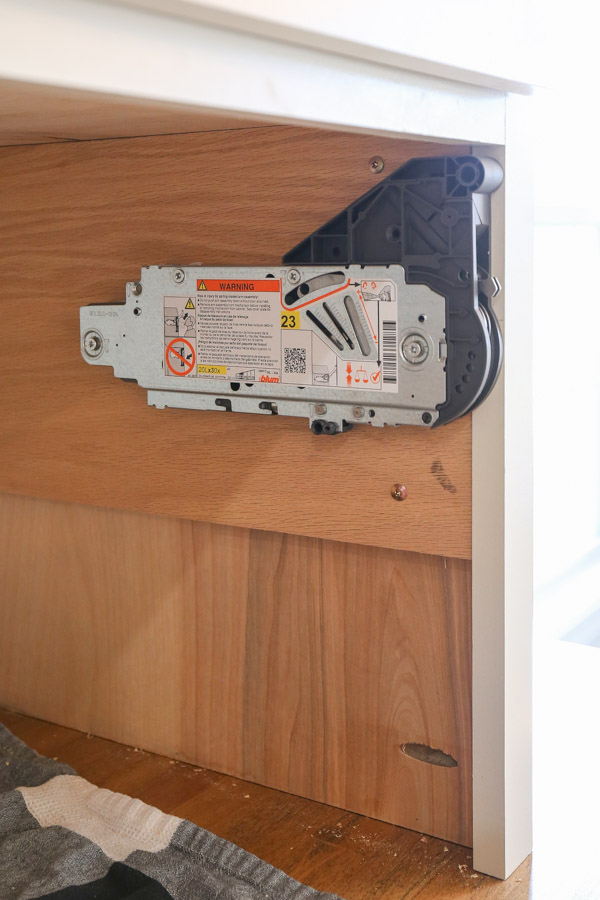
And on the other side:
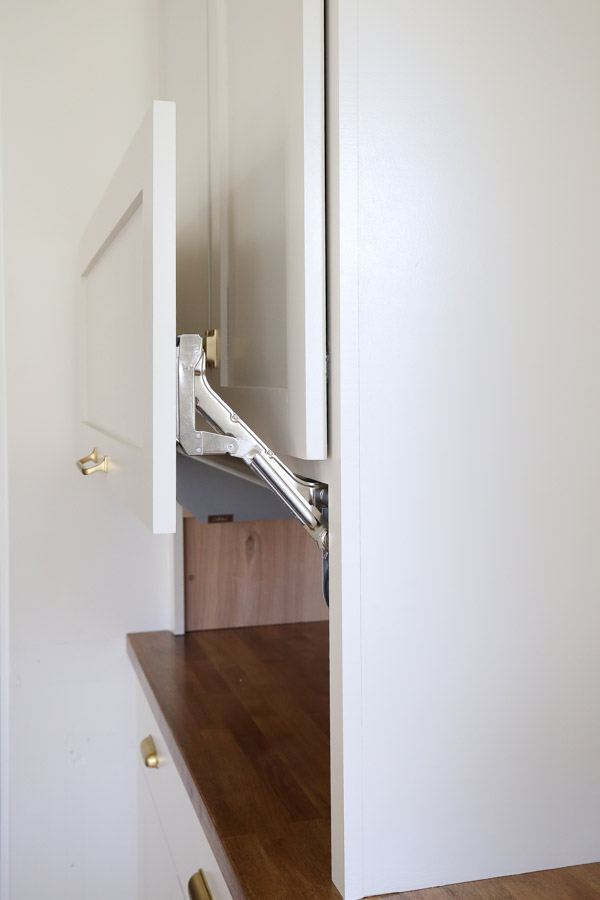
5. Attach the arm assembly
Once the hinges are installed on both sides, the arm assemblies can be attached. They just snap in place when you push them up and in towards the hinge. See how this works in the appliance garage video!
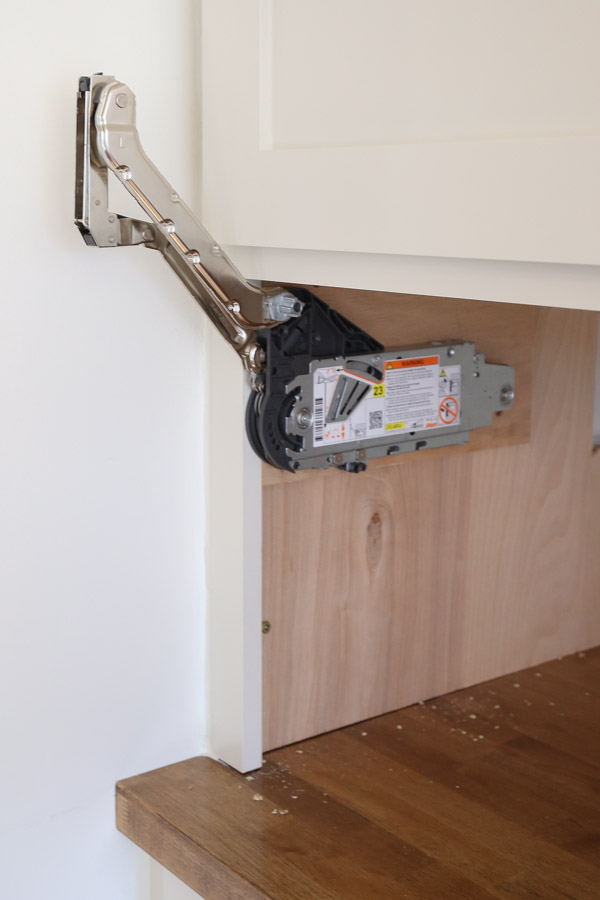
According to the directions, once the arms are installed you don’t want to push down on them to avoid injury.
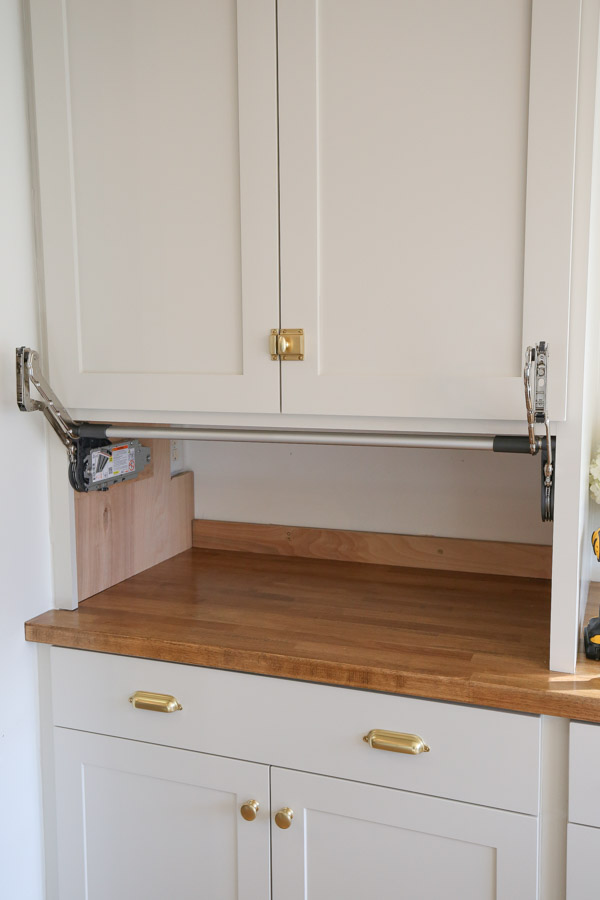
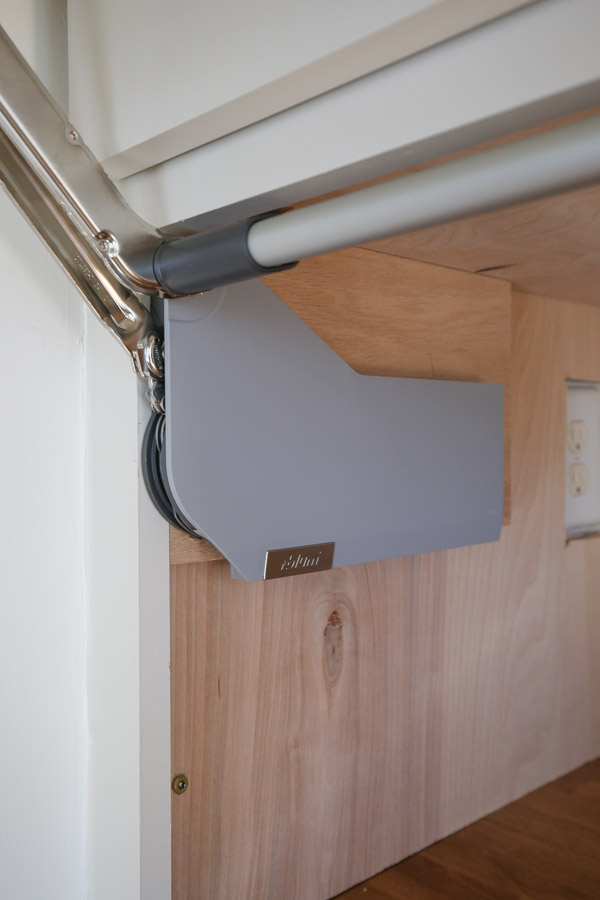
6. Attach the stabilizer rod
The next step is to attach the stabilizer rod but first it needs to be cut to size according to the directions which state it should be the interior cabinet opening minus 5 1/16″.
Brandon used our Dremel saw fit with a special blade that can cut metal and aluminum to cut the rod.
Then he put it in place on the arms and covered the ends with the cover caps.
7. Attach the mounting plates
To attach the door, mounting plates need to be installed on it first.
Again we followed the instructions template for the arm model we have to determine where to mount the plates on each side of the back of our door.
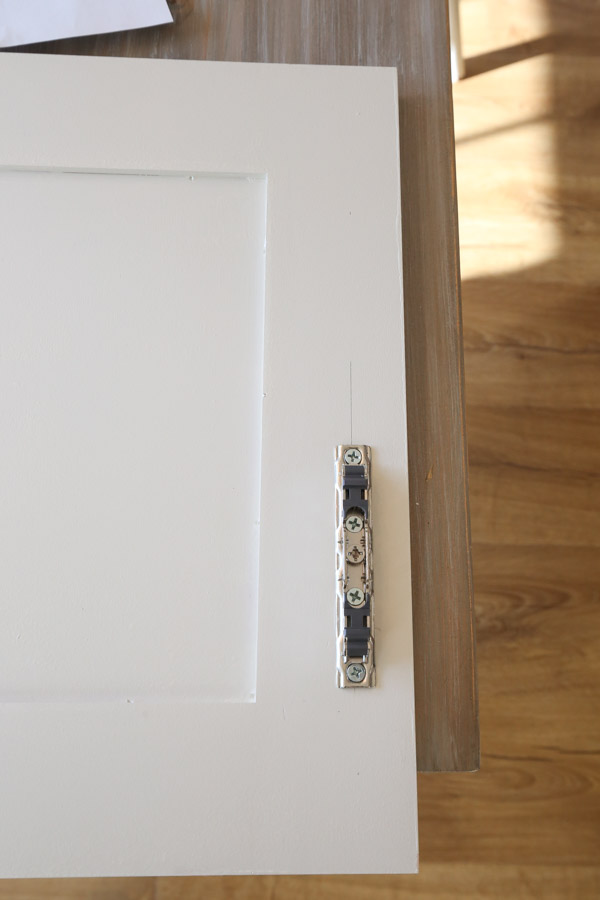
We just used some ¾” screws we had on hand for this step because there were no screws that came with the plates.
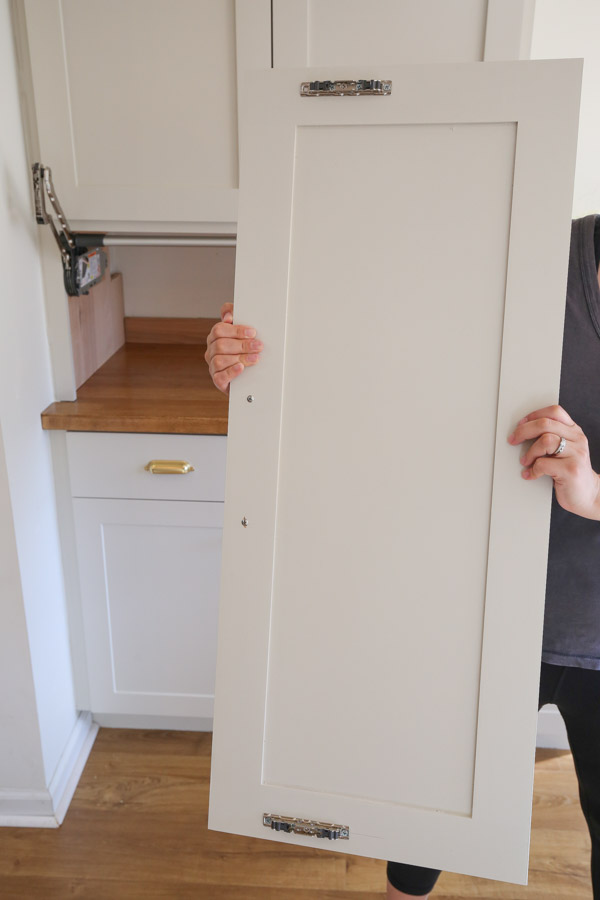
8. Attach the cabinet door to the kitchen appliance garage DIY
Finally, the door can be attached by clipping the plates onto the arm assemblies.
Our door lined up really well at first, but we did have to adjust it some.
One of the nice features of these hinges is that they are adjustable! You can adjust the door left/right, up/down, and in/out. You can also adjust the tension for opening/closing it!
Note about the arm assembly and cabinet door
After installing the door, the first thing we noticed was that our door didn’t go all the way up above the cabinet, it sat a few inches below the top of it.
This is annoying because it makes it harder to access everything.
I did buy the right arm assembly model according to the directions, but our cabinet height is right below the max height of 15 ¾” for this arm assembly model.
So, I decided to buy the next size up to replace it. I replaced part # BA20L3500.06 with part # BA20L3800.06.
Thankfully, the directions also tell you how to remove everything!
After installing the new longer arm assembly, our appliance garage functions great and the height of the door is just right!

9. Attach the covers over the hinges
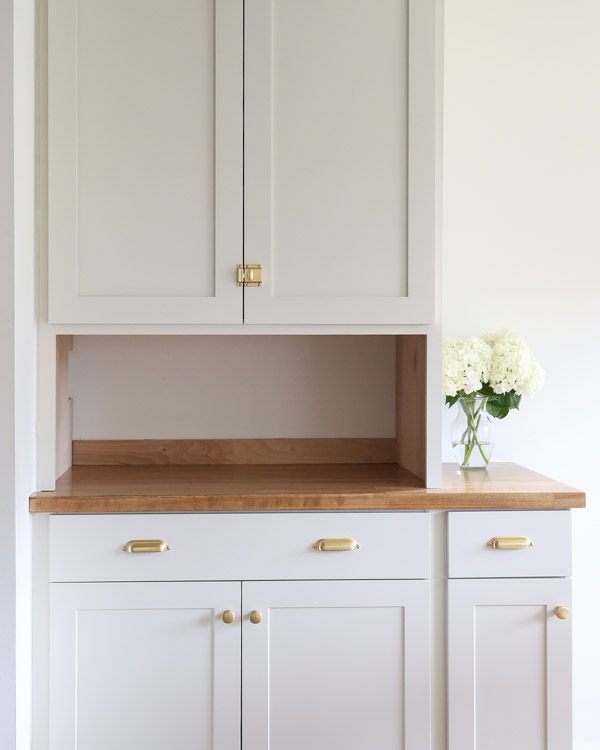
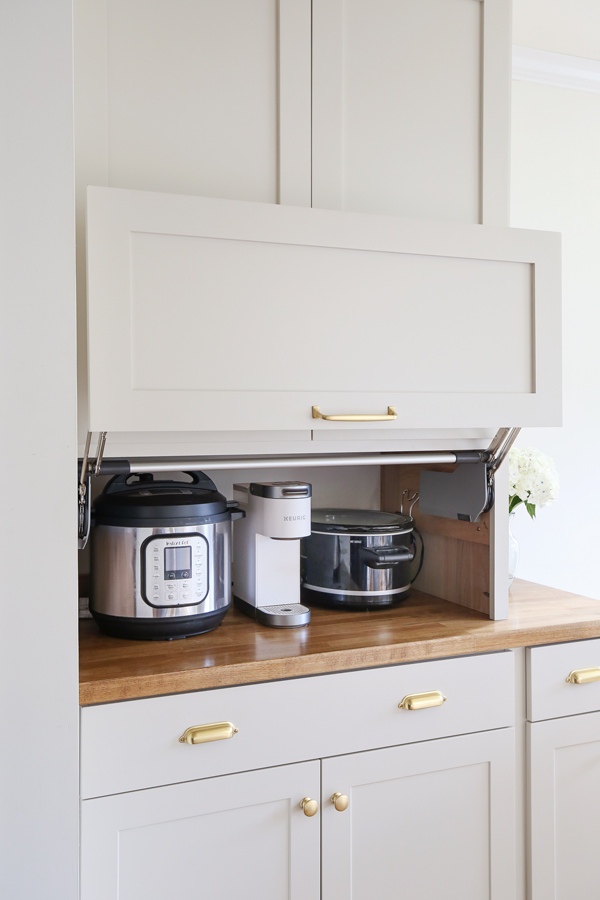
The very last step is to attach the cover plates on the hinges, they just snap into place, and provide a clean, finished look.
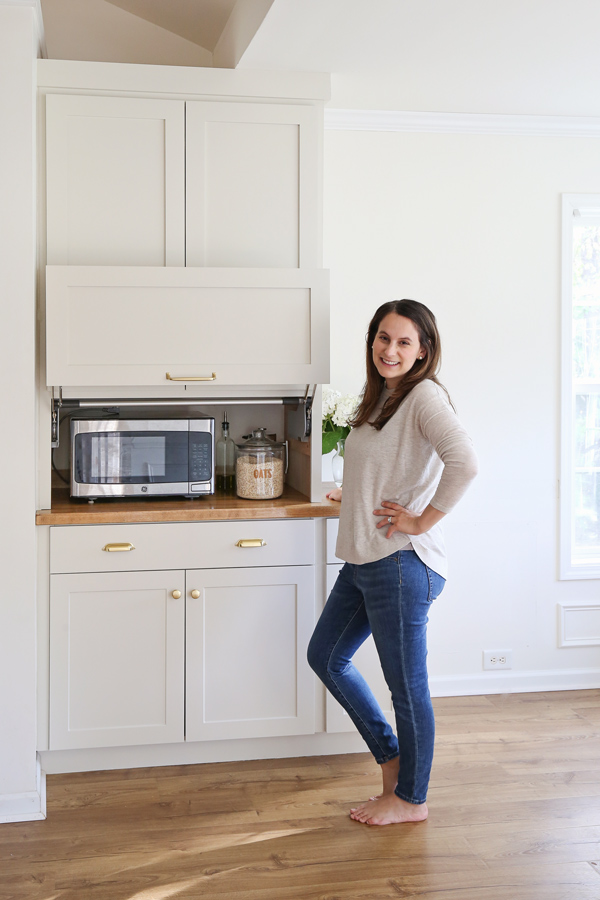
I totally love our new countertop appliance garage! It’s fun and super easy and smooth to use. You can see how smoothly it opens and closes in the appliance garage video!
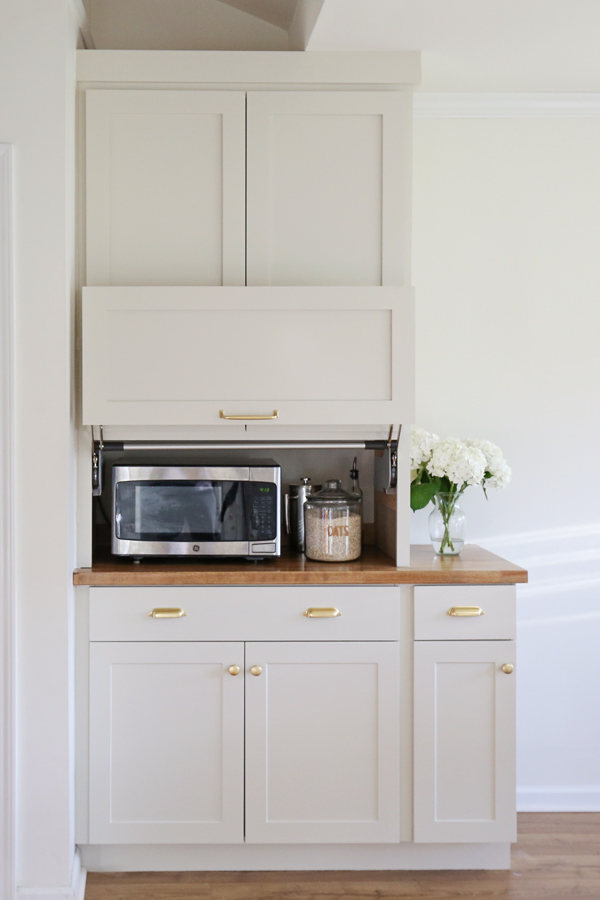
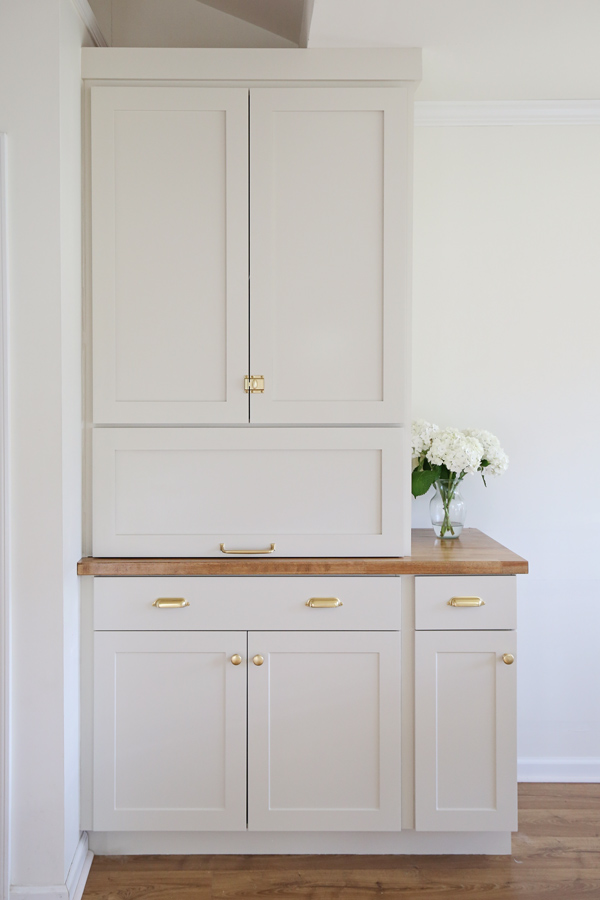
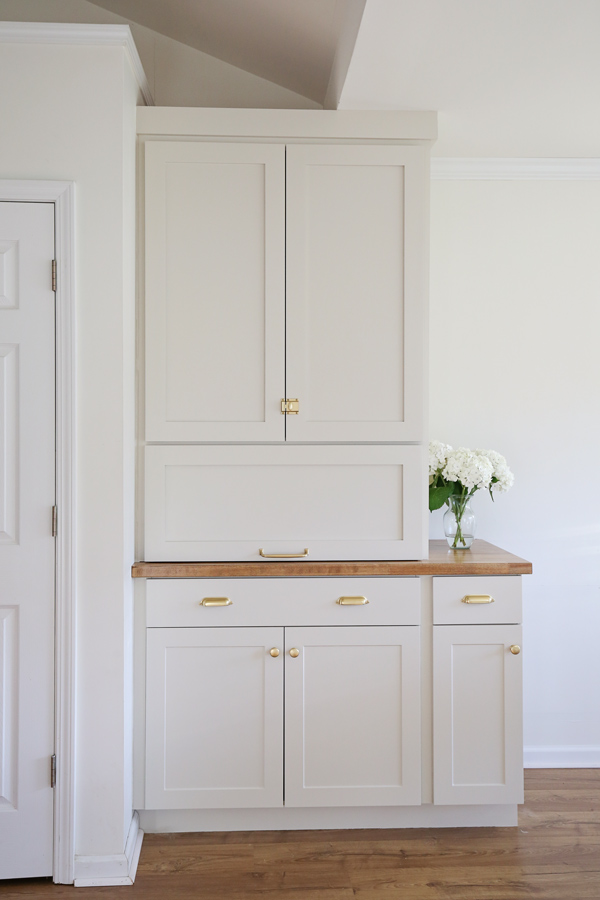
It slow closes too and is perfect for daily use. It looks very sharp and pretty when closed:
I love having our microwave and countertop clutter hidden in our appliance garage cabinet. It’s super satisfying.
I tried it out with some other small appliances too!
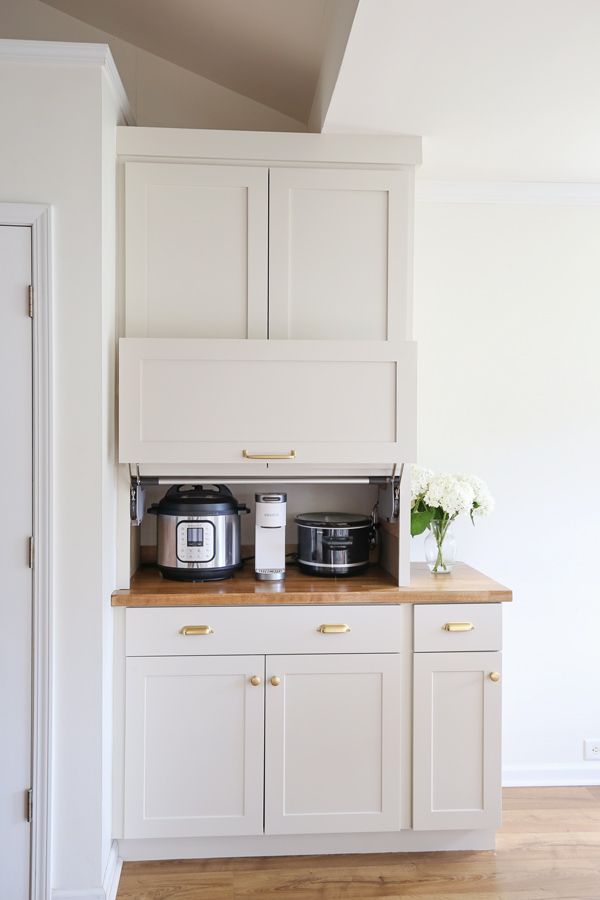
I think it’s the best way and best kitchen idea ever for hiding the microwave and not having it sit out on our kitchen counters! I may even add our toaster oven in here too to keep hidden!
This kitchen appliance garage DIY completes our DIY built in cabinets for the kitchen. We still have the rest of the kitchen to makeover in the near future, so make sure to follow along so you don’t miss it along with all of our other new house projects!
Follow along on Instagram and YouTube!
Save on Pinterest:
Emily
Friday 5th of September 2025
Hi! The Blum hinge part you have linked is no longer available, do you have a recommendation for a different one with similar quality?
Angela Marie Made
Wednesday 17th of September 2025
I would try a Google shopping search to see if you can find it at another retailer!
Sara
Sunday 31st of December 2023
This is great! How far out does the top portion sit beyond the stationary cabinets? Trying to do something similar but the hinge sticks so far out I cannot access the "garage" very easily. Would love to know! Thank you.
Katherine
Sunday 29th of October 2023
Thanks so much for this blog! Soo helpful!! Could you let me know if this system could work with inset cabinet doors? Do I need to build the wooden blocks even more inward to create a fake frame for the door to to sit on (instead of flush with the face frame)? Any thoughts appreciated thanks!
Angela Marie Made
Wednesday 1st of November 2023
Yes it should work for inset doors too!
Sam
Thursday 14th of September 2023
In Canada you need to have the door connected to a switch so that the outlet powers off when the door is shut to avoid potential fire hazzards. Check the Code where you live in case you need to change it.
peggy
Saturday 10th of June 2023
Where did you order the custom made cabinet door from?