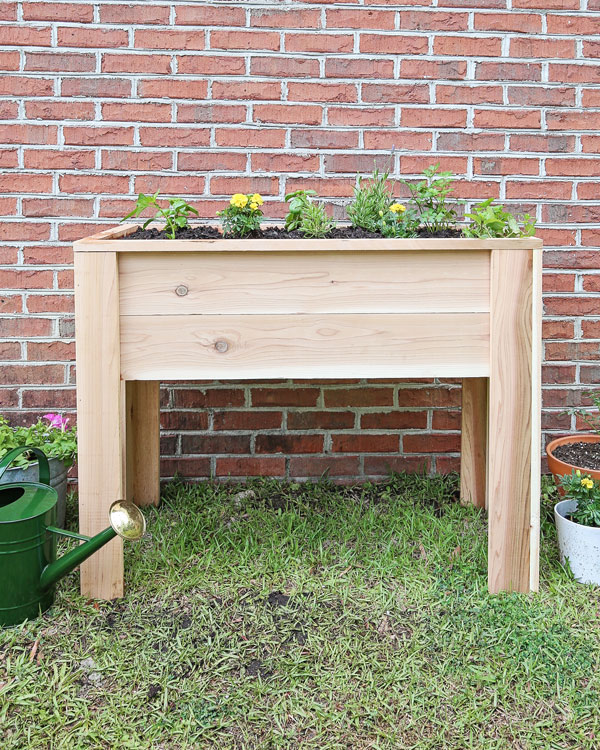
I’m excited to share with you how to build a raised garden bed with legs! This DIY raised garden bed is a really fun and easy project that takes just a few hours to build!
The options are endless for what you can plant in the garden bed as well.
It seems like everyone is getting out in the sunshine and doing some gardening these days. I was inspired by these raised garden beds by Julia and Thomas of Gal Meets Glam which they filled with lots of vegetables, herbs, flowers, and dahlia tubers.
We don’t have the best set up in our yard for large garden beds, so I decided to make a cute, smaller size, DIY raised garden bed with legs.
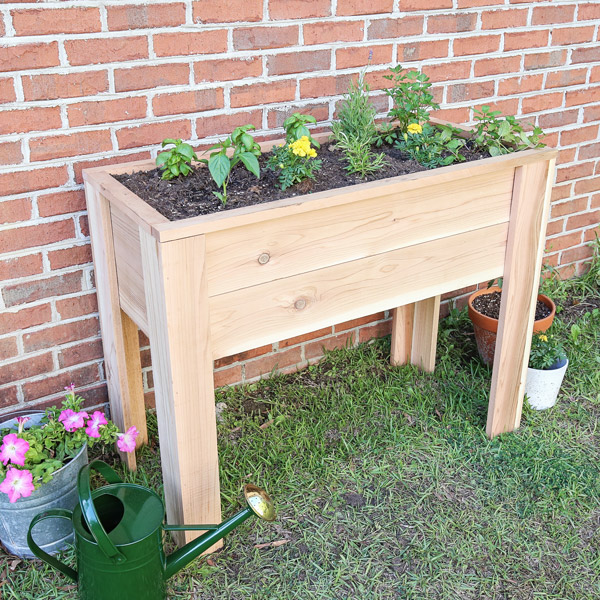
Also, we decided on an elevated garden bed so we don’t have to bend over and we can move it around if needed. It’s a great idea for small outdoor spaces or patios too, any small space!
A few years ago, I built my DIY vertical planter stand which was great for planting flowers and herbs off the ground, but this elevated garden bed provides more space for many planting options!
Type of wood to use for raised garden beds:
We used cedar wood to build the raised garden bed. It’s a bit more expensive, but cedar is naturally weather resistant and will last several more years compared to less expensive wood like pine.
And it doesn’t have to be treated wood. It’s best to use untreated wood especially if you will have any vegetables or herbs in it.
The total cost of this build was about $125 in lumber using the cedar.
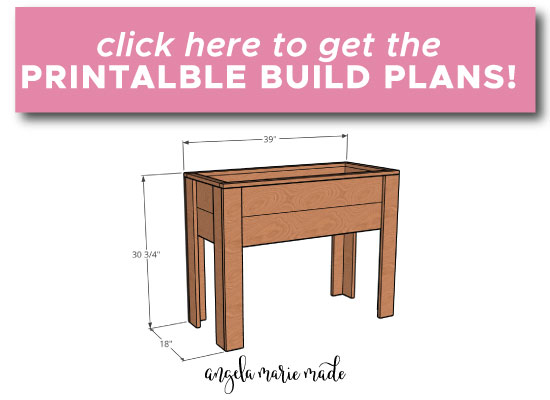
DIY Raised Garden Bed Plans
To make the build process even easier, make sure to get the printable DIY waist high raised garden bed plans which include the cut list and step by step building steps with easy to follow diagrams!
Note, this post contains some affiliate links. For more info see my disclosures here.
DIY Woodworking Made Simple

Want to learn how to DIY and use power tools, but don’t know how to get started? Check out our digital course DIY Woodworking Made Simple to help get you started in significantly less time and frustration than trying to figure it out by yourself!
How to Build a Raised Garden Bed with Legs:
Materials
- (4) 1×6 @ 8ft cedar
- (3) 1×4 @ 8ft cedar
- (2) 1×2 @ 8ft cedar
- 1 1/4″ Self tapping deck screws
- 1 1/4″ Brad nails
- Wood Glue (waterproof)
- Weed barrier
Tools
- Miter saw
- Drill
- Brad nailer
- Clamps
- Tape Measure
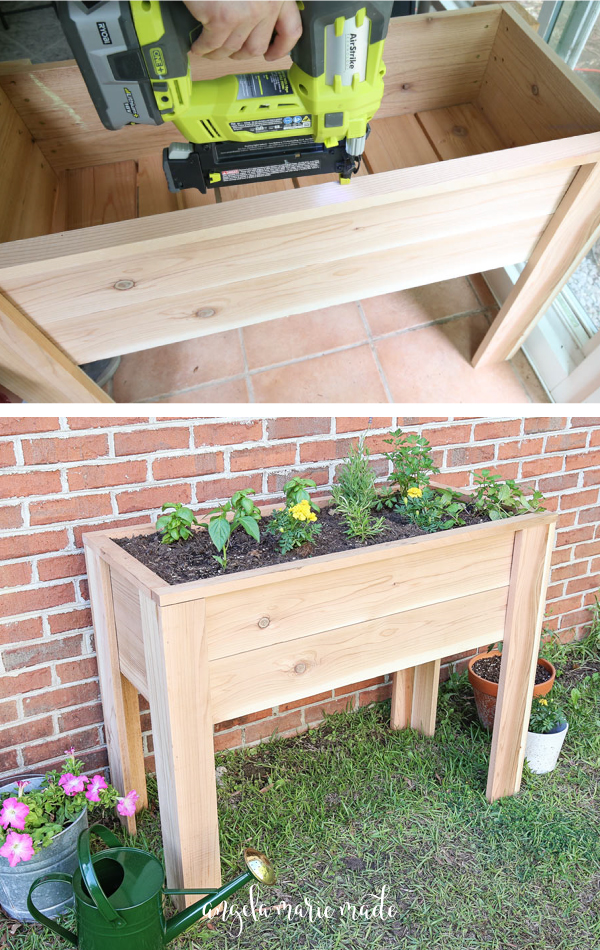
The final size of this planter is 30 3/4″ tall x 18″ wide x 39″ long and 8 1/4″ deep.
Check out the video tutorial here:
Subscribe to my YouTube Channel here!
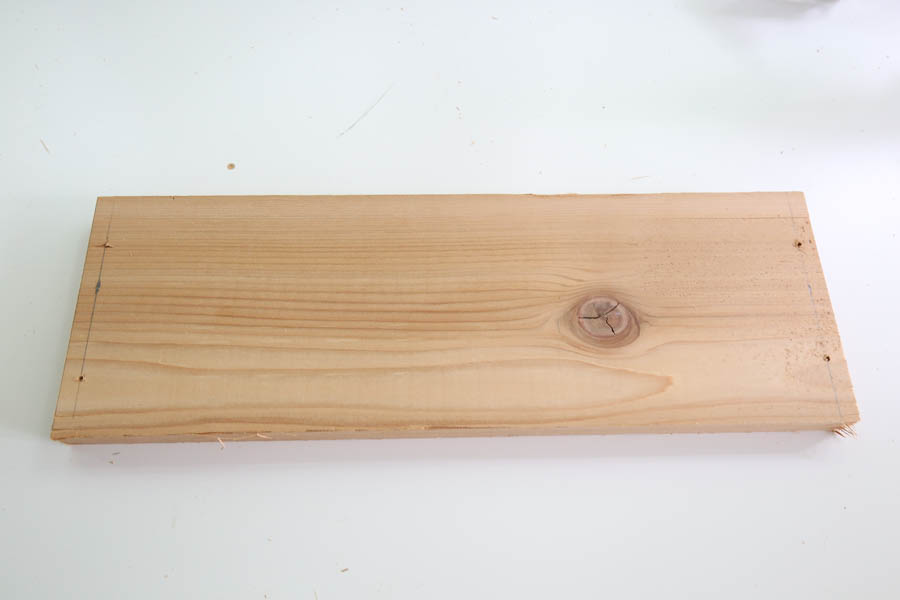
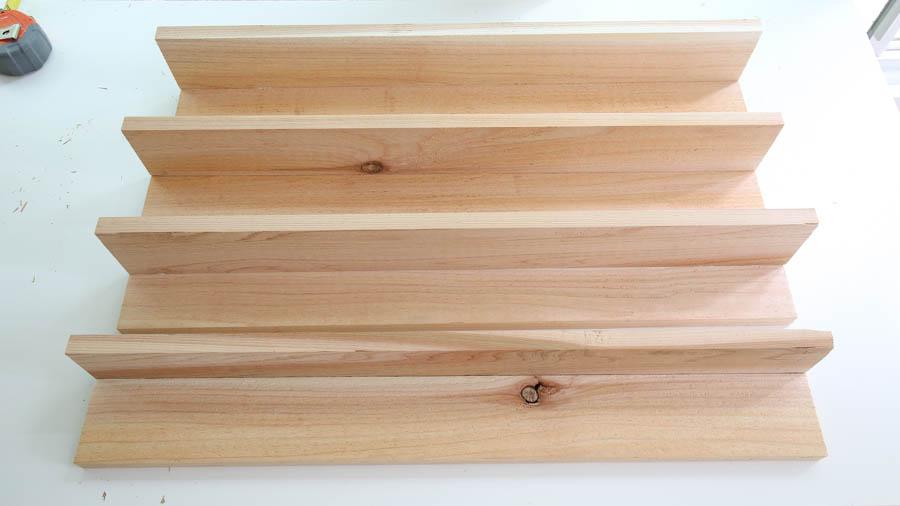
1. Make initial lumber cuts
Click here for the printable DIY raised garden bed plans including the cut list and building steps!
Use a miter saw and make the following lumber cuts from the 1×6 cedar wood:
- 4 pieces @ 36″
- 4 pieces @ 16 1/2″
Make the following lumber cuts from the 1×4 cedar wood:
- 8 pieces @ 30″
And make the following lumber cuts from the 1x2s:
- 2 pieces @ 34 1/4″
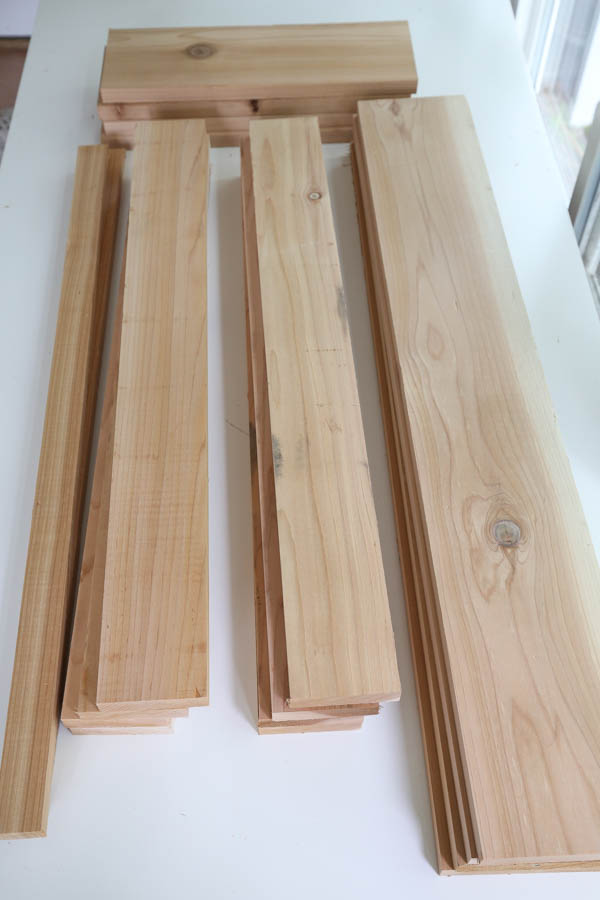
Note, before we started cutting our lumber, we sanded the wood. For tips on easy sanding, check out my how to sand wood guide!
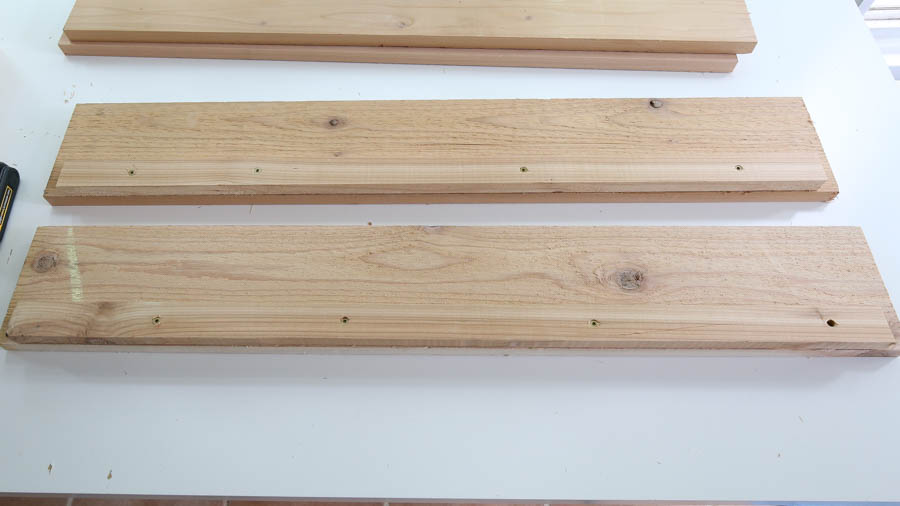
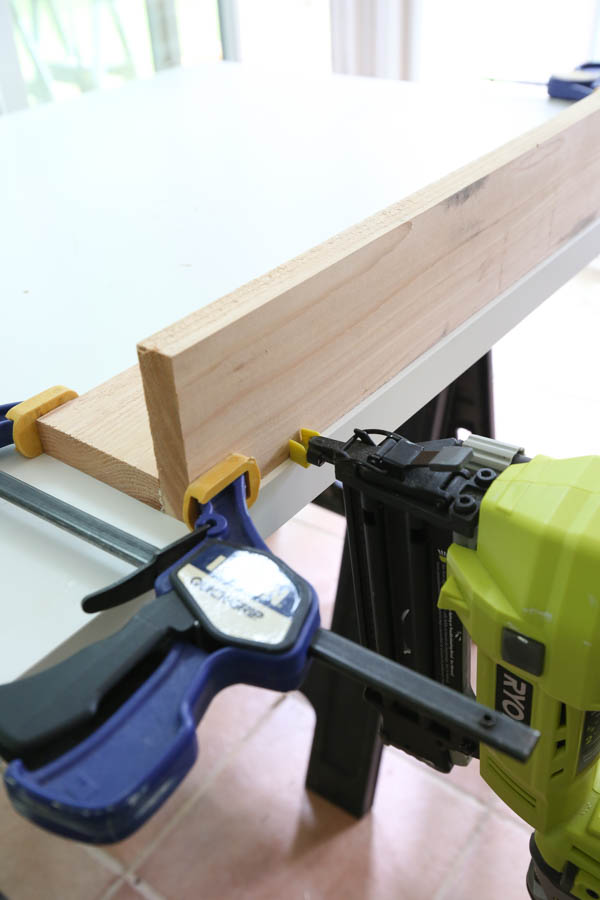
2. Attach the 1×2 boards to the bottom of two 1x6s to create a ledge
Attach one of the 34 1/4″ 1×2 boards to the bottom edge of one of the 36″ boards. Make sure it’s centered and use 1 1/4″ self tapping deck screws to attach it. Note, initially I used 4 screws for attaching, but after taking this photo I ended up adding 2 more for a total of 6 screws for maximum support.
Repeat this step on one of the other 36″ 1×6 boards.
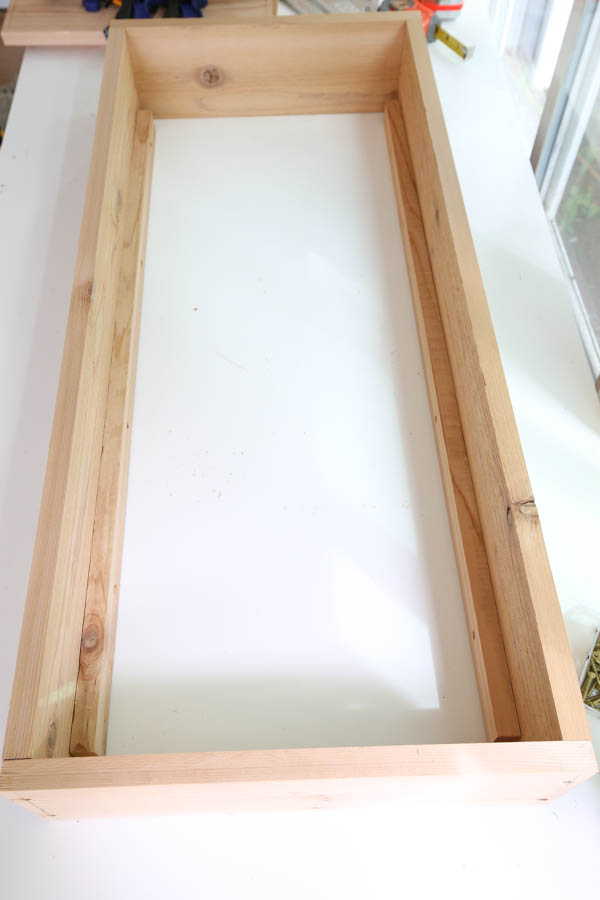
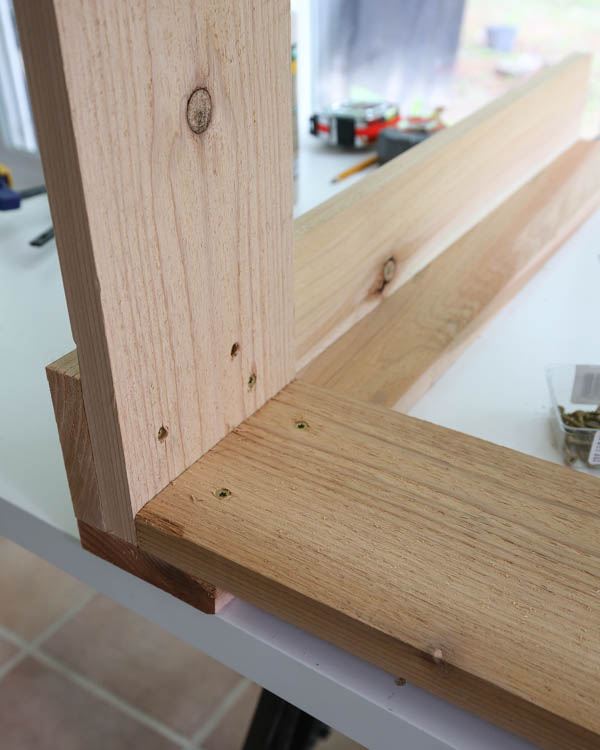
3. Assemble raised planter boxes
Mark 3/8″ in from both edges of the 16 1/2″ 1×6 boards. Then pre-dill two pilot holes on each of those marks. Although, the self tapping screws don’t require pre-drilling, we used pilot holes for this step so that we drilled a more precise and straight hole since we were drilling through the edge of the other board.
Attach one of the 16 1/2″ 1×6 boards perpendicular on the end of one of the 36″ boards with the 1×2 ledge, using 1 1/4″ deck screws through the pre-drilled pilot holes. Tip, drill the screw in gently since cedar wood is very soft and you don’t want the wood to split when drilling.

Repeat the above step on the opposite side using the other 36″ 1×6 boards with a ledge. Make sure the 1×2 ledges are both on the bottom sides of the planter box.
📩 Want to Save This?
Next, repeat the above steps to create a second planter box, except for this box, no 1×2 ledges are needed. Now your raised planter bed box frame is complete!
Alternatively, for joining these boxes, you could use a Kreg Jig and pocket holes. I originally was going to join them that way but decided to keep this build super simple with standard tools like a drill and nailer!
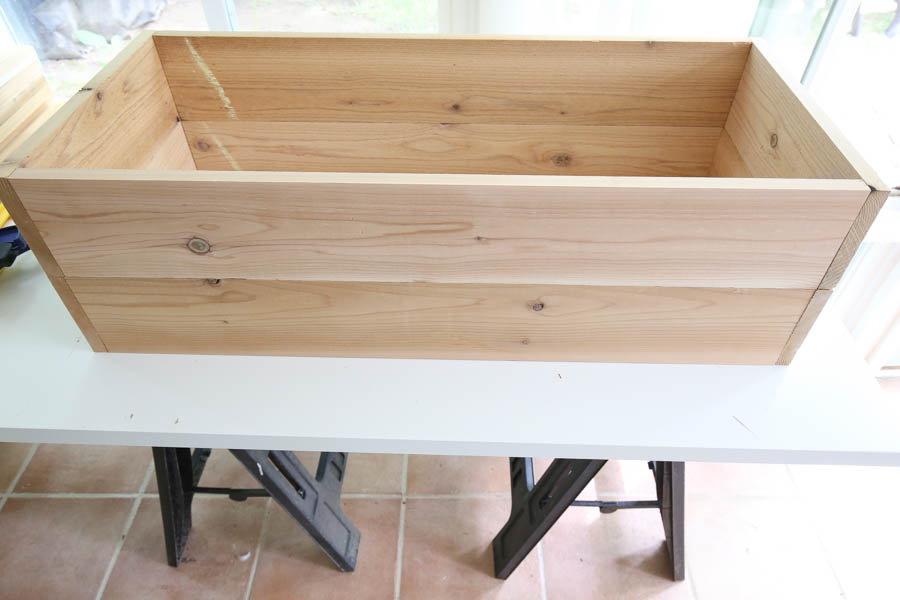
4. Attach wood legs to DIY raised garden bed
Attach one of the 30″ 1×4 pieces to another 30″ 1×4 board with a generous amount of wood glue and 1 1/4″ brad nails along the long edge to create one of the raised garden bed legs.
Repeat this step for the other three legs.
Attach the top planter box, the one without the ledges, to the top of two of the wood legs. Use 2-3 deck screws on each side of the leg. I attached my screws from the inside corner of the planter box so no screw holes would show from the outside.
Stack the bottom planter box under the top planter box and attach with screws to the wood legs. Make sure the ledge side is on the bottom of the planter box.
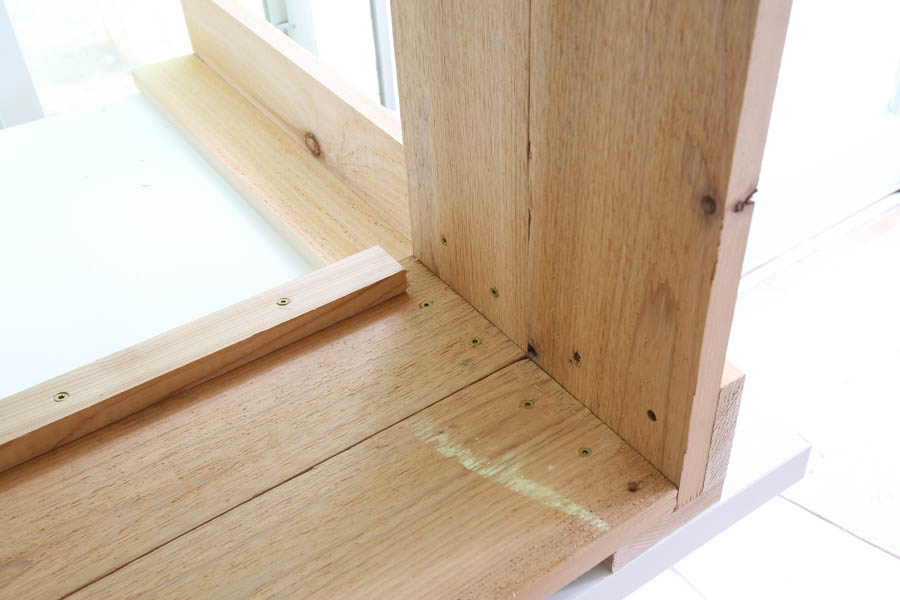
Flip the planter box over and repeat these steps on the opposite side with the remaining two wood legs.
You can see all of this in action in the how to build a raised garden bed with legs VIDEO!!
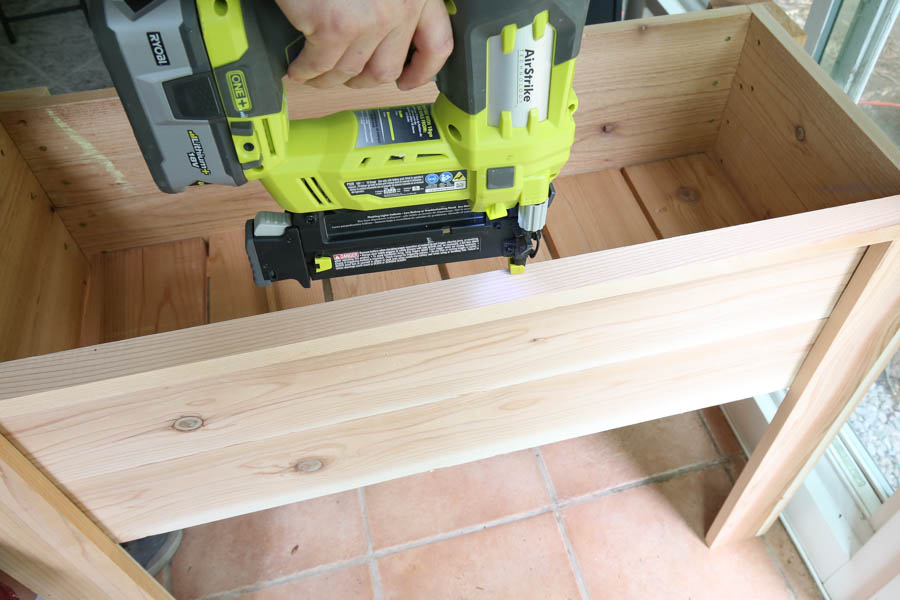
5. Add bottom wood slats & top trim to DIY raised planter box on legs
Measure the inside width of your planter box. Cut six 1x6s to this size less 1/4″. Then lay those 6 board slats out on top of the 1×2 ledge, spaced out about 3/4″ to create the bottom of your raised planter bed. Secure each board in place with 1 or 2 brad nails on each side into the 1×2 ledge.
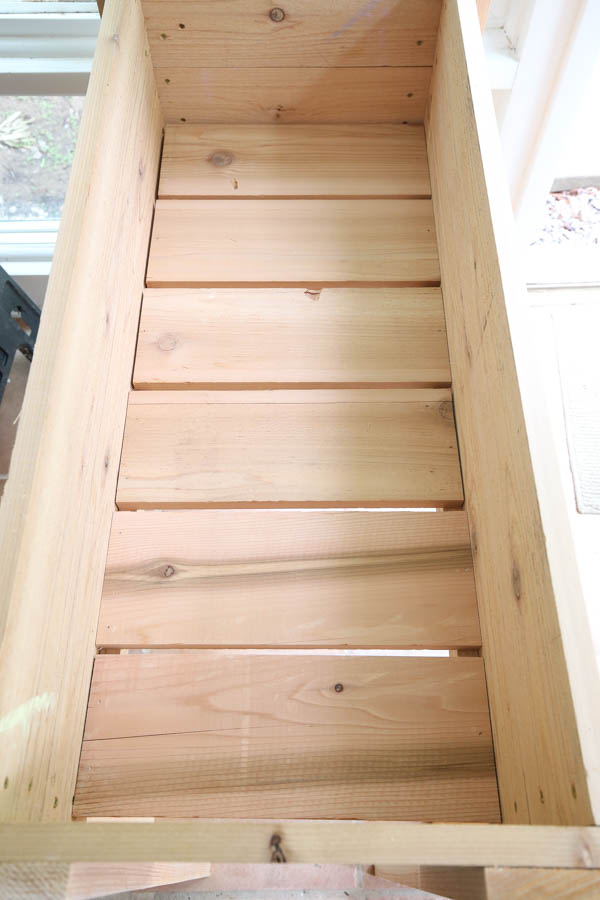
Finish off the top of the raised garden bed with the remaining 1×2 boards cut to size to trim out the top edges. Attach the trim with brad nails.
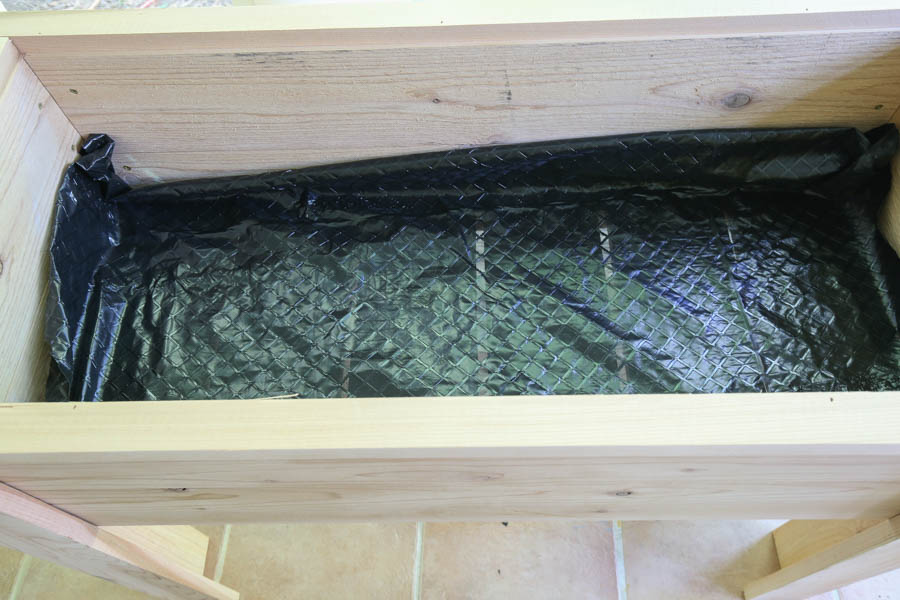
6. Prepare DIY raised garden bed with legs for planting and start planting!
Lay some weed barrier in the bottom of the planter to prevent the dirt from coming out of the slats. Then, fill the planter box with soil specifically suited for raised garden beds.
Finally, start planting fresh herbs and flowers!!
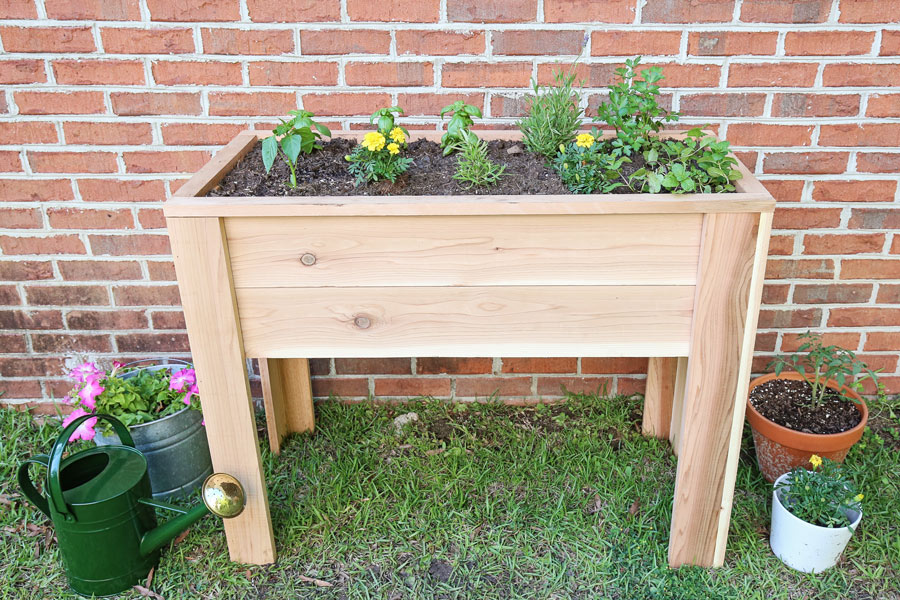
We love how our raised garden bed turned out! It has been so fun planting in it and picking fresh herbs for our daily cooking right from our backyard!
We planted lavender, lots of basil, red pepper, mint, rosemary, parsley, and marigolds which I heard is a great companion flower for a herb garden.
Frequently Asked Questions
What do you put on the bottom of a raised garden bed with legs?
Place slatted cedar boards with landscape fabric, garden fabric, or weed barrier on the bottom of a raised garden bed with legs to help with drainage of excess water and to prevent the soil from coming out.
How much does it cost to build a raised garden bed with legs?
The cost of a DIY raised garden bed with legs will vary based on the type of wood that is used to build it. The total cost of our raised garden bed with legs was about $125 in lumber using cedar from the home improvement store.
You can look into better pricing on cedar at your local lumber store. Or you can build the DIY project with pine wood which would be less expensive, but it won’t be as weather resistant as cedar.
Should I drill holes in the bottom of my raised garden bed?
If you use wooden boards for bottom slats on the bottom of the raised garden bed (like this tutorial uses), you do not need to drill holes or drainage holes in the bottom of your elevated raised bed.
***
I hope this tutorial on how to build a raised garden bed on legs has been helpful! What would you plant in your garden bed? Flower beds or a vegetable garden? I’d love to hear!
Don’t forget to check out the waist high raised garden bed plans and the video on how to build a raised garden bed with legs
I’m made some coordinating DIY plant markers to go in our elevated planter box!
Follow along on my latest projects and sneak peaks on Instagram, YouTube, and Facebook!
Want to save for later?! Pin it here:
BruceB
Sunday 28th of June 2026
Thanks for the great plans. Will the legs and support be strong enough if I make the width 3 ft instead of 18 inches ?
Angela Marie Made
Thursday 2nd of July 2026
You should add a support board in the middle if you're making it 3ft long!
rick reynolds
Sunday 25th of September 2022
how do you attach the boxes together
Angela Marie Made
Monday 26th of September 2022
I attached them together with screws and a brad nailer! You can see it better in the video tutorial: https://youtu.be/fnxDDa_8bBs
Bob & Rob
Wednesday 23rd of February 2022
We made the legs 36” to fit better under the front window. With extra space below we installed a shelf about 6” off the ground using 2 1x6” boards separated by about an inch, to accommodate a watering can, etc. also, a couple hooks to hang a tool or two.
Angela Marie Made
Monday 28th of February 2022
That's a great idea thanks for sharing!
michael cutler
Wednesday 30th of June 2021
Thank you for the helpful hints. I took your design and modified it with a shelf below the garden area. It provided additional support and made it more useful. Also modified the size - went 4 feet wide, 28 inches deep. These modifications were easy to adjust from your design. looks great, build solid and ready to go
Angela Marie Made
Wednesday 30th of June 2021
That is great to hear. I always love when I hear about people like you that take my plans and customize them for their own. Thank you!
Karen Stobbe
Saturday 24th of April 2021
Thank you for the great step by step plans. My Mom always taught me to put some gravel at the bottom of pots for drainage. Do you recommend that or just use the fabric?
Angela Marie Made
Monday 26th of April 2021
Thank you, I put gravel in my pots for planting too!! but since this is a larger area I decided to just go with the fabric and it has worked well.